Overview
In this quick and easy guide, i will show you how to find the pieces of the staffs and how to upgrade them.Important: If you see the words of the guide are disordered, please update this steam page pressing F5 or with the mouse.
Introduction
Hi im S1RuX and i want explain hmm that this guide is useful if you want to see a guide with more quickly for the new people of black ops 3 or just because you need see the images with the codes for upgrade the staffs.
1 How to FIND all the pieces of the staffs:
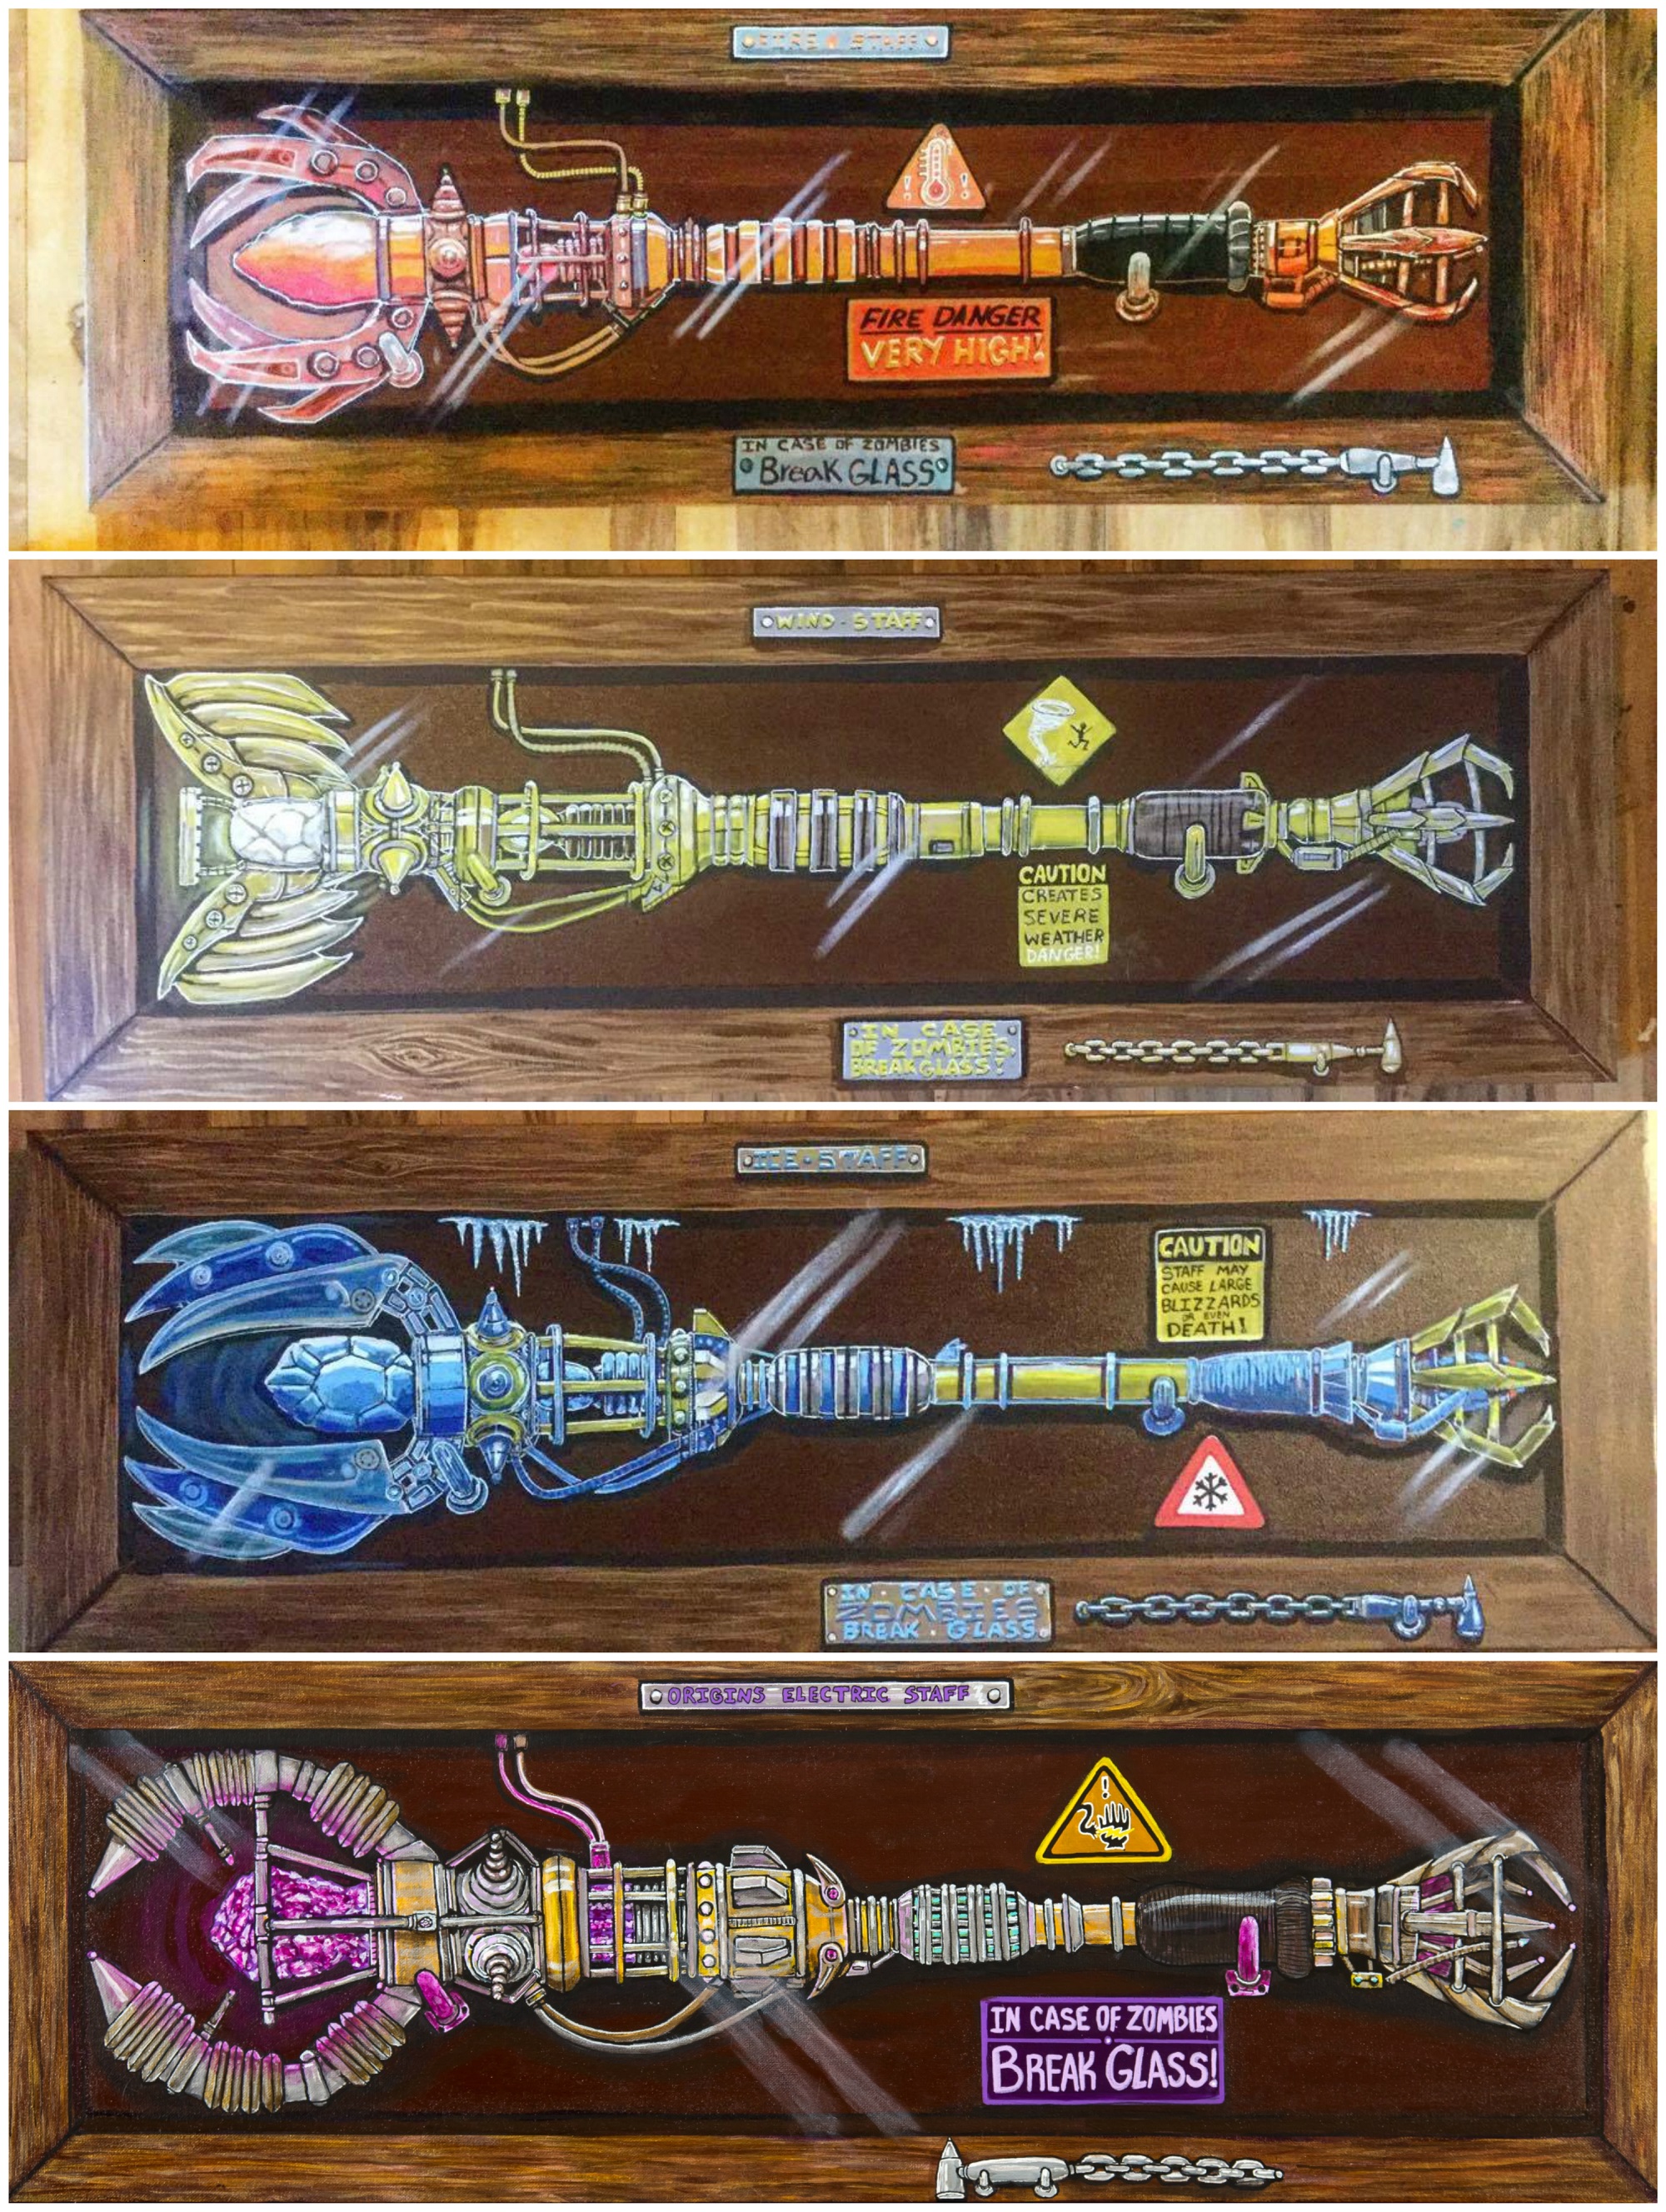
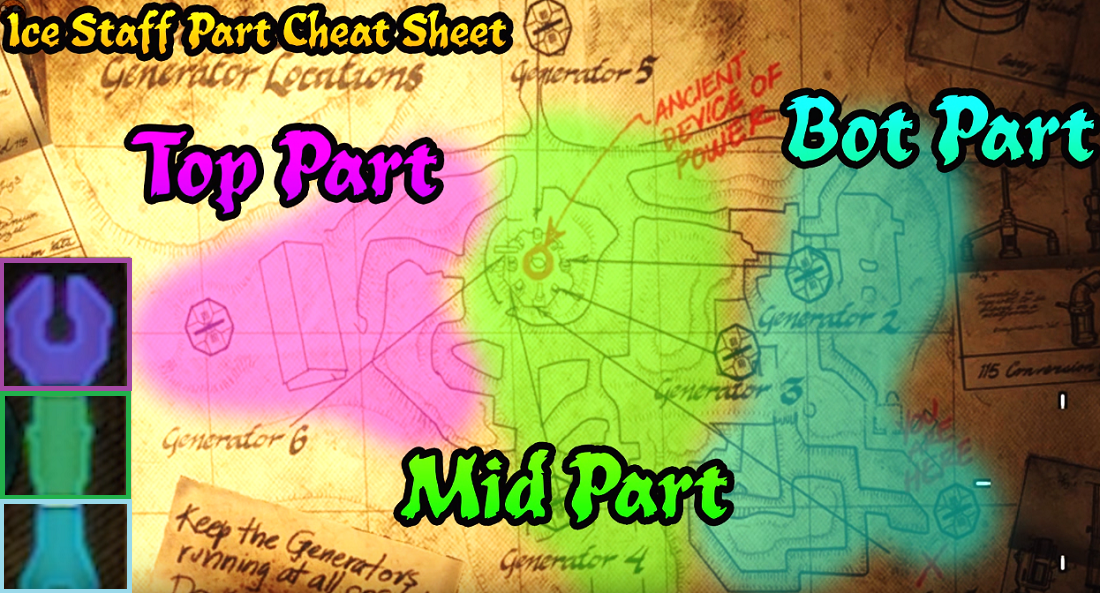
Staff of Ice (Blue)
the Tank Station either on the desk:
the shelf near the Mystery Box:

or the shelf near the rear entrance:

The only way to find the pieces of the staff is to dig using the shovel when the map is snowing, each piece can appear in a random dig in each part of the map:
Example:
Bot part:


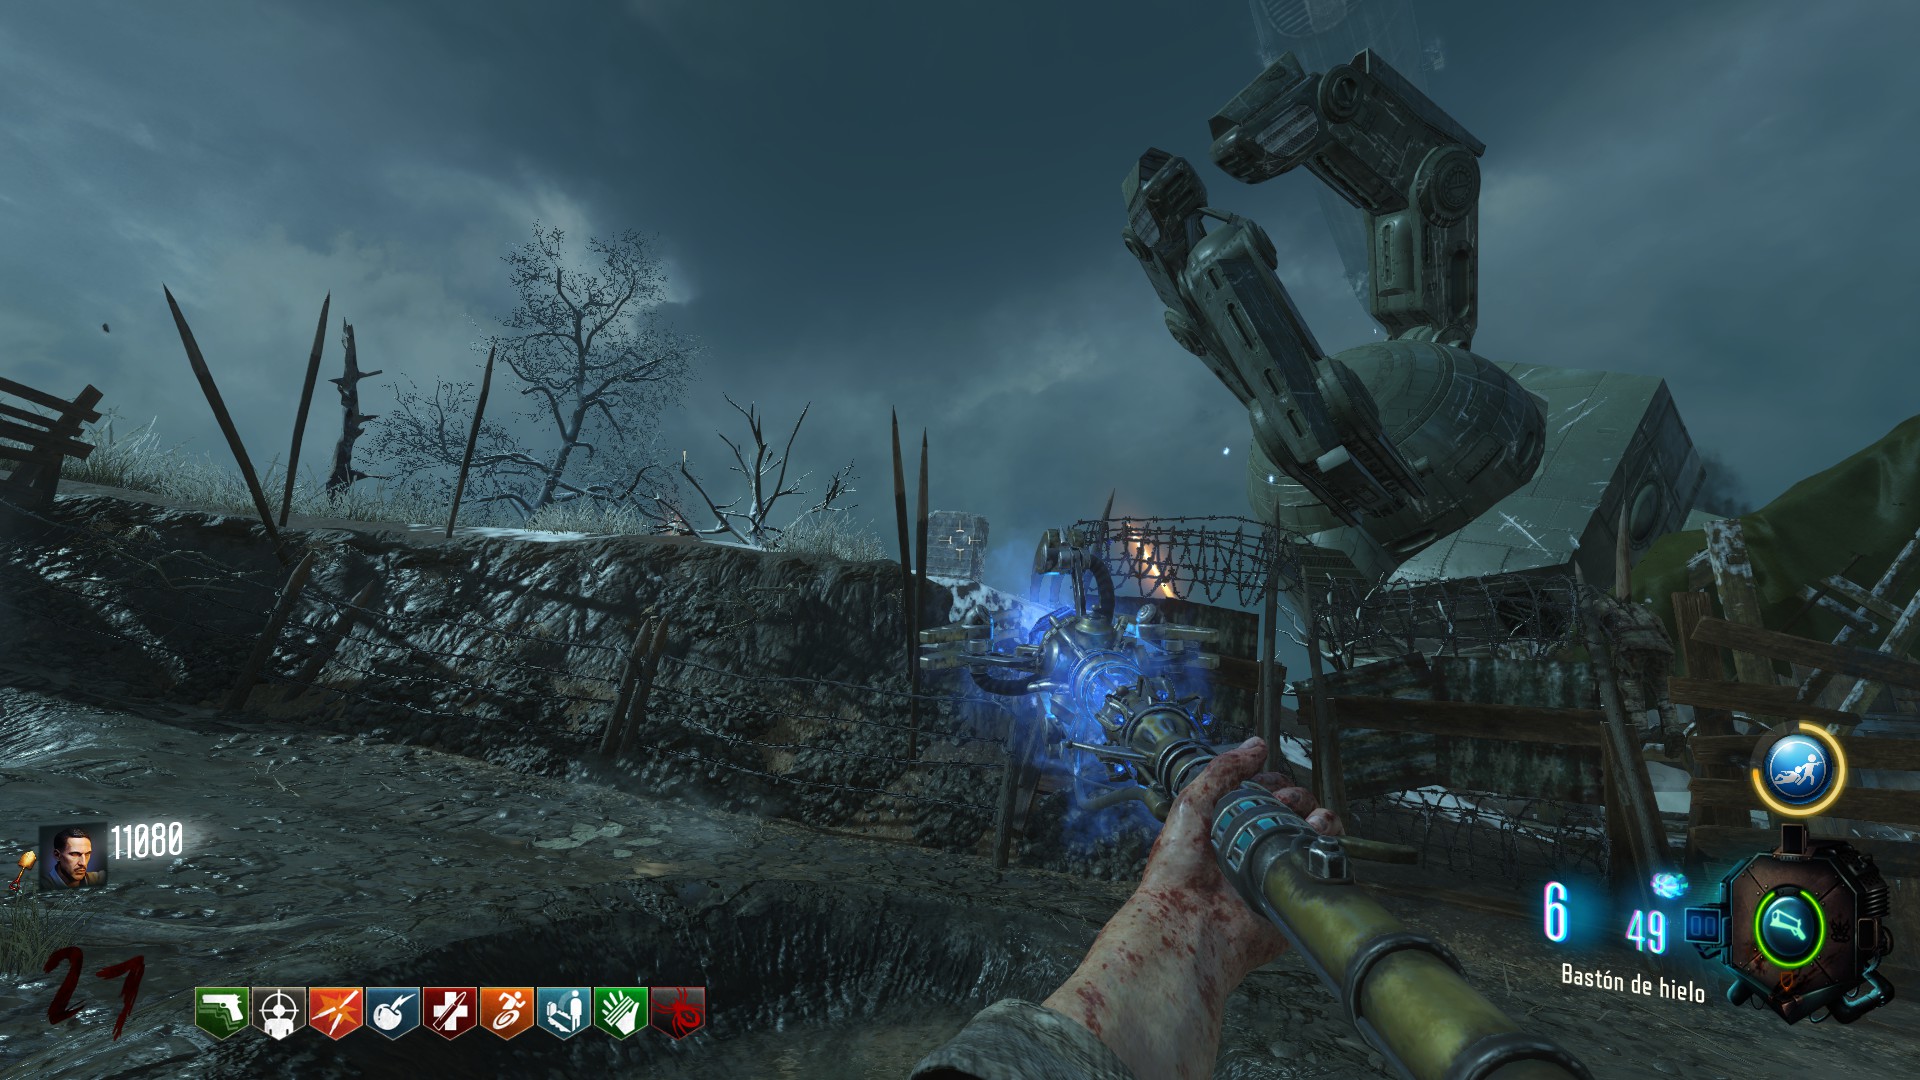
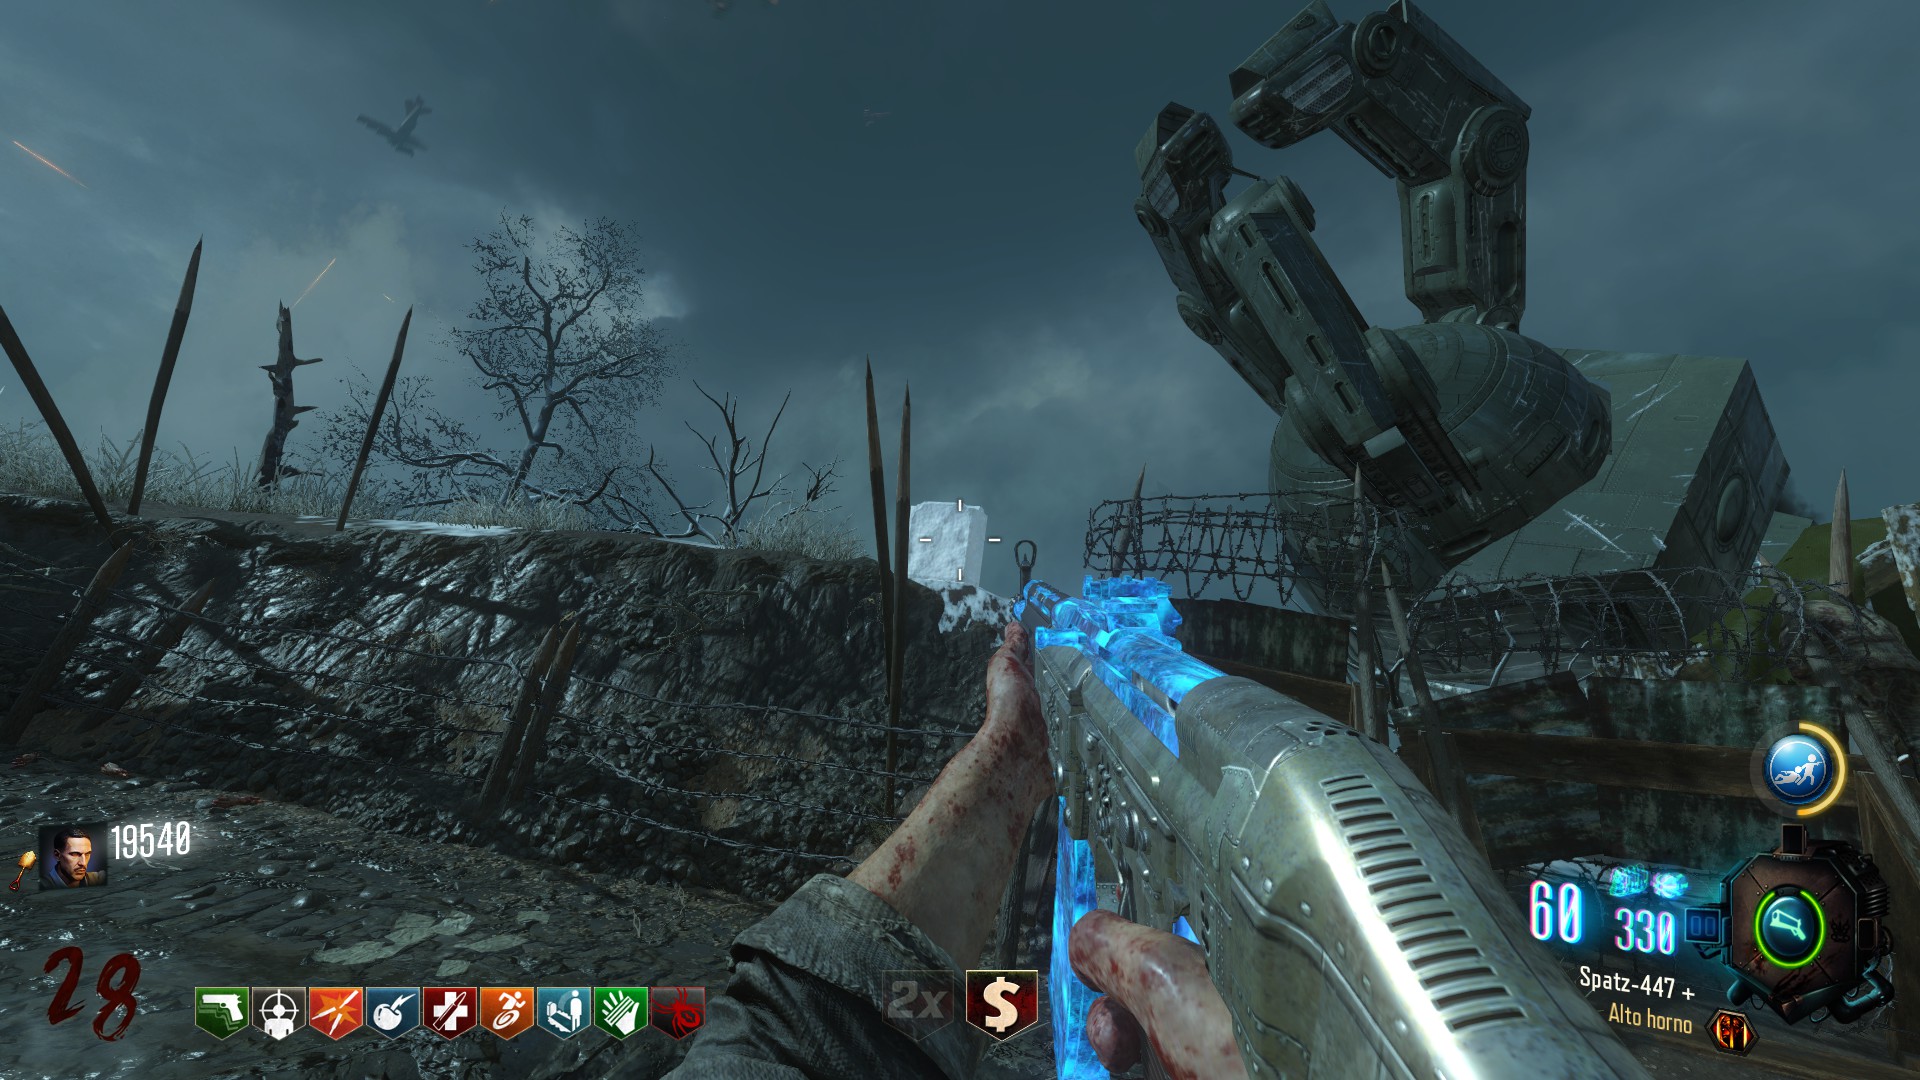
The entrance to the portal is in front of the generator 6:
Take this gem:


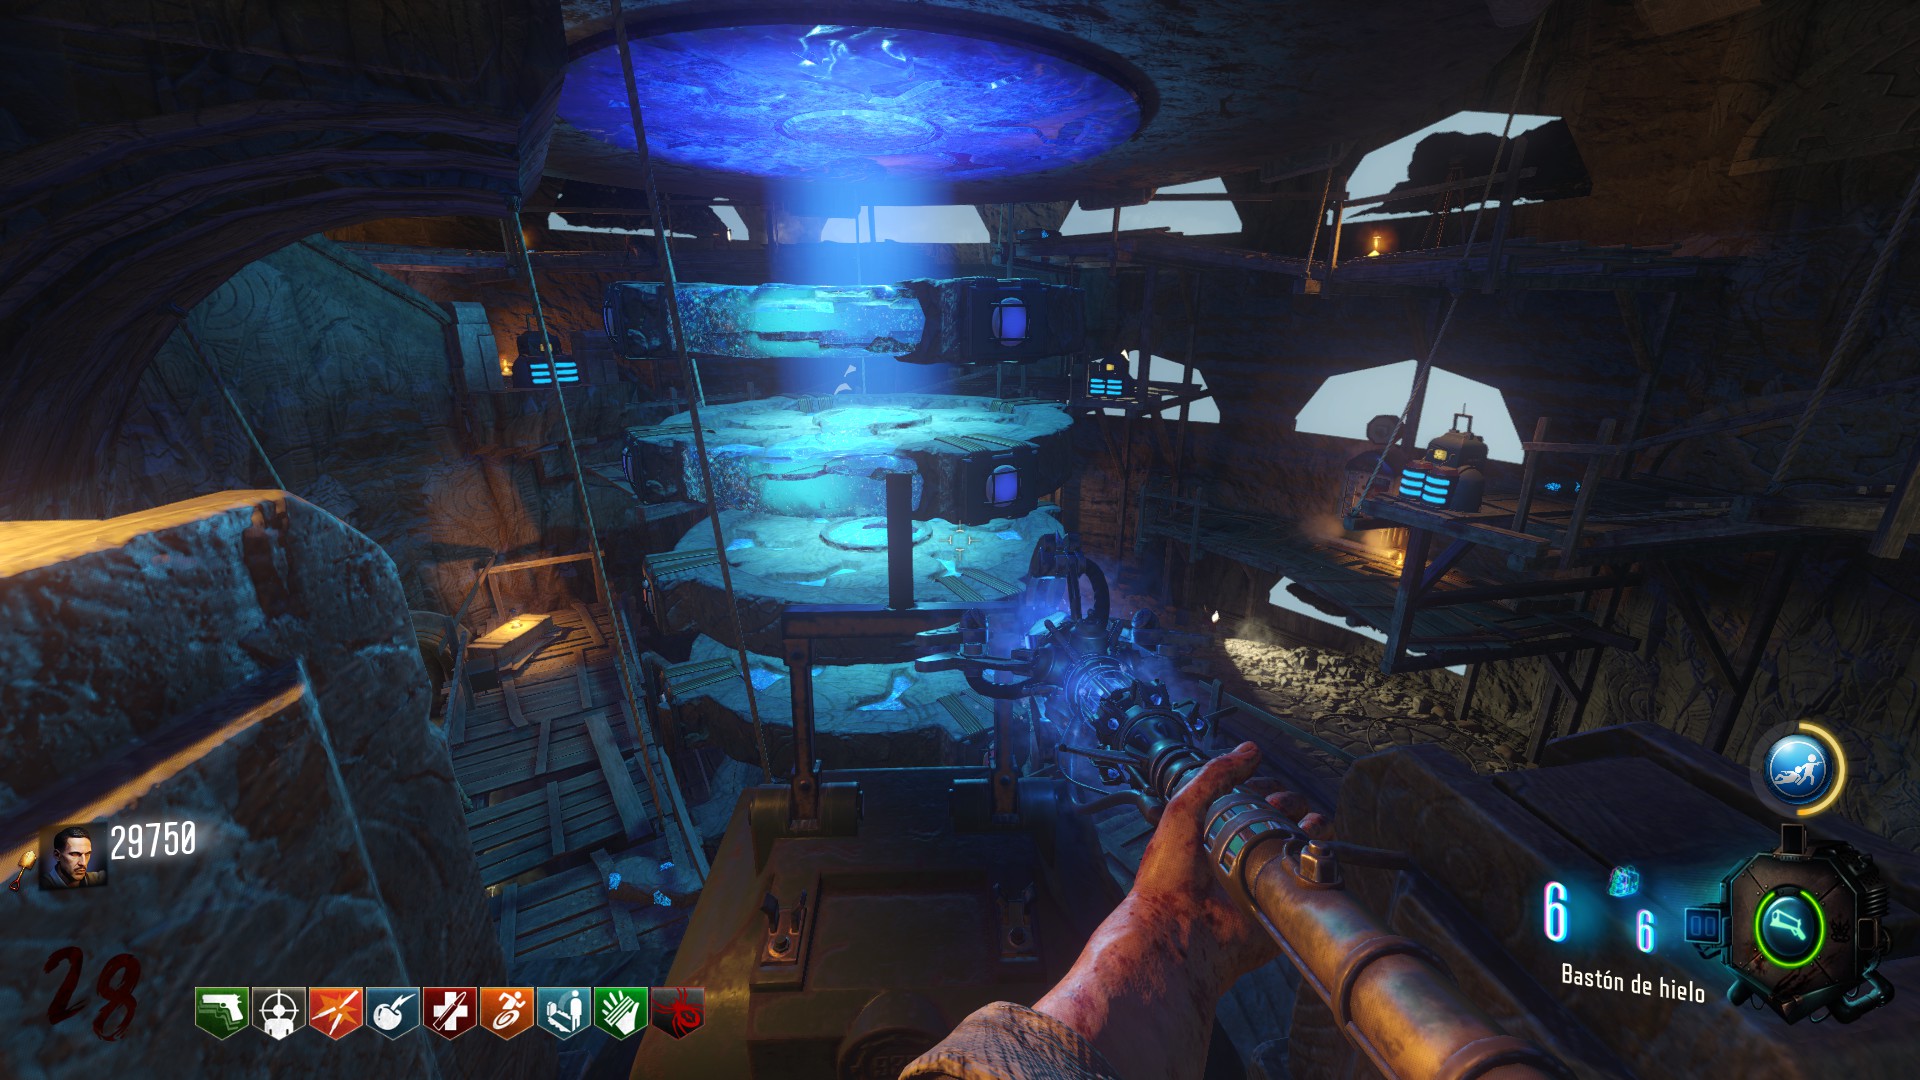
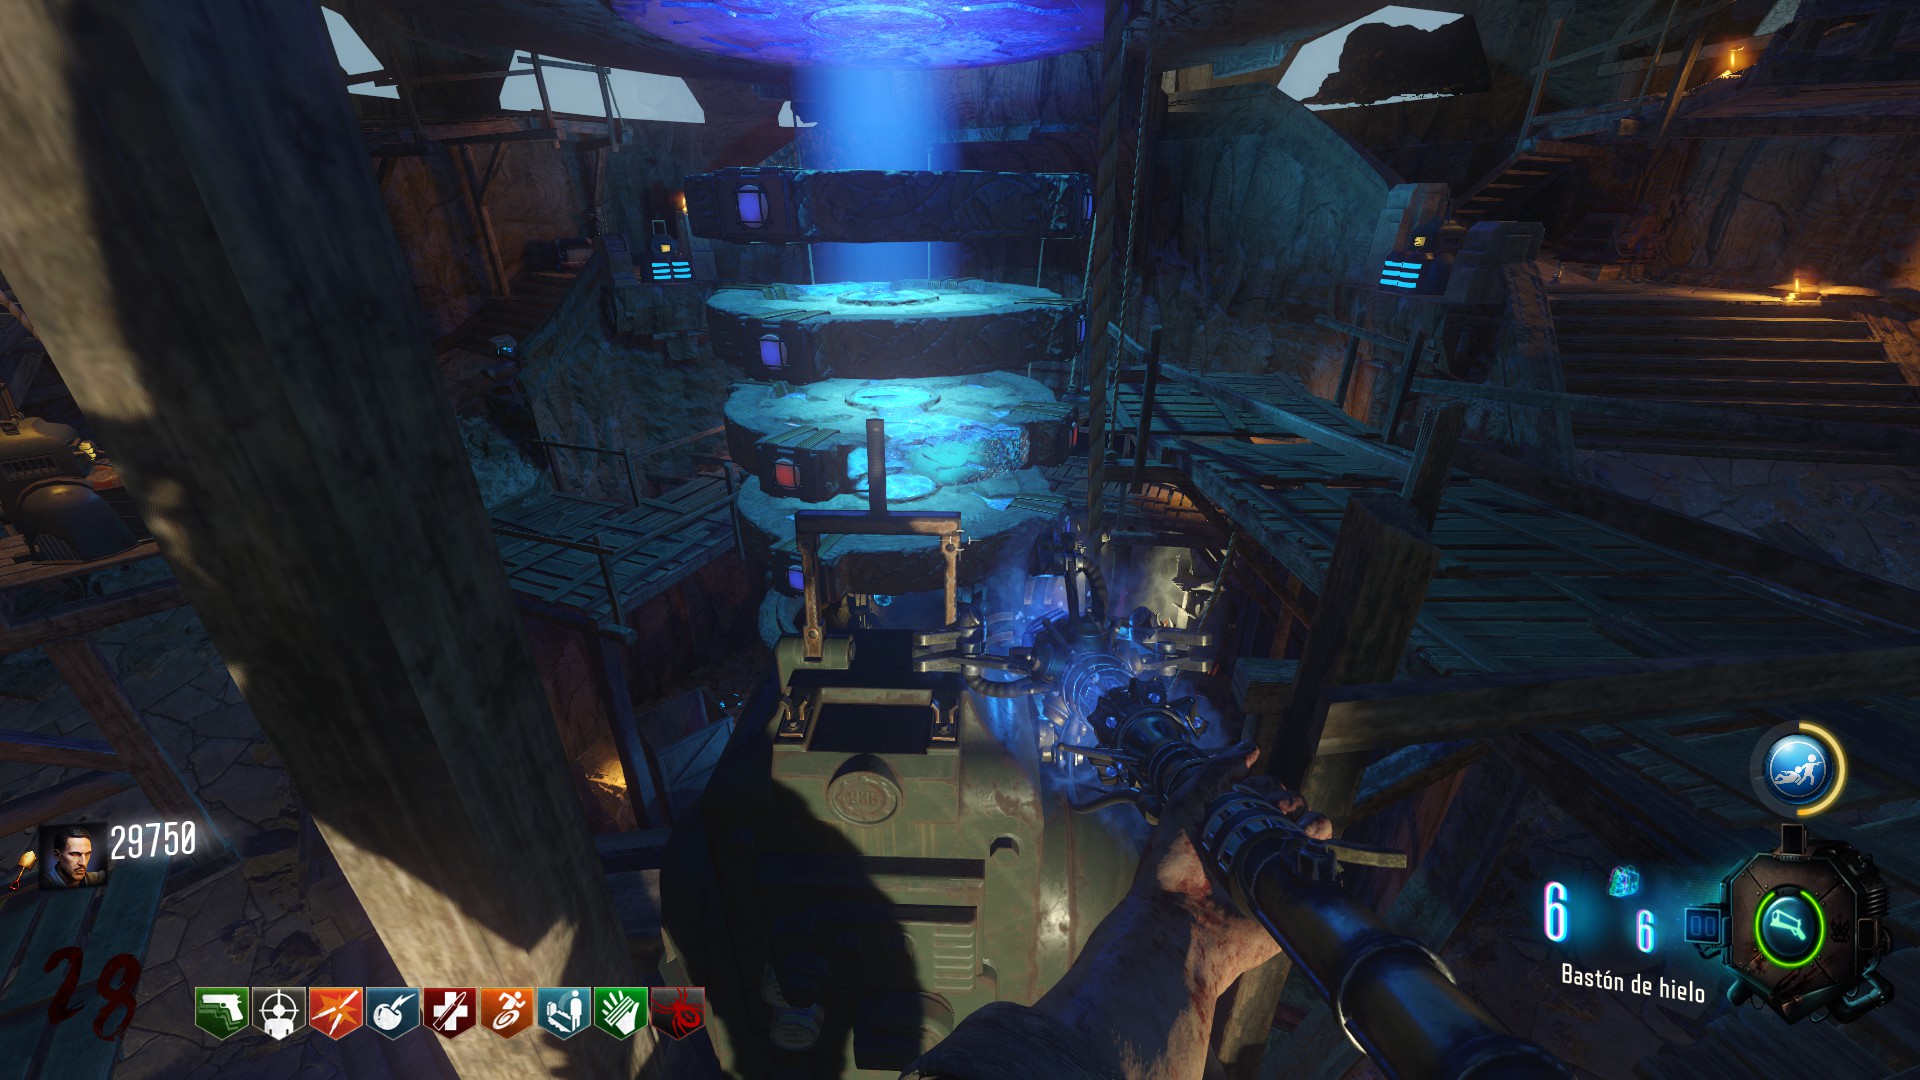
Built the staff in the excavation:


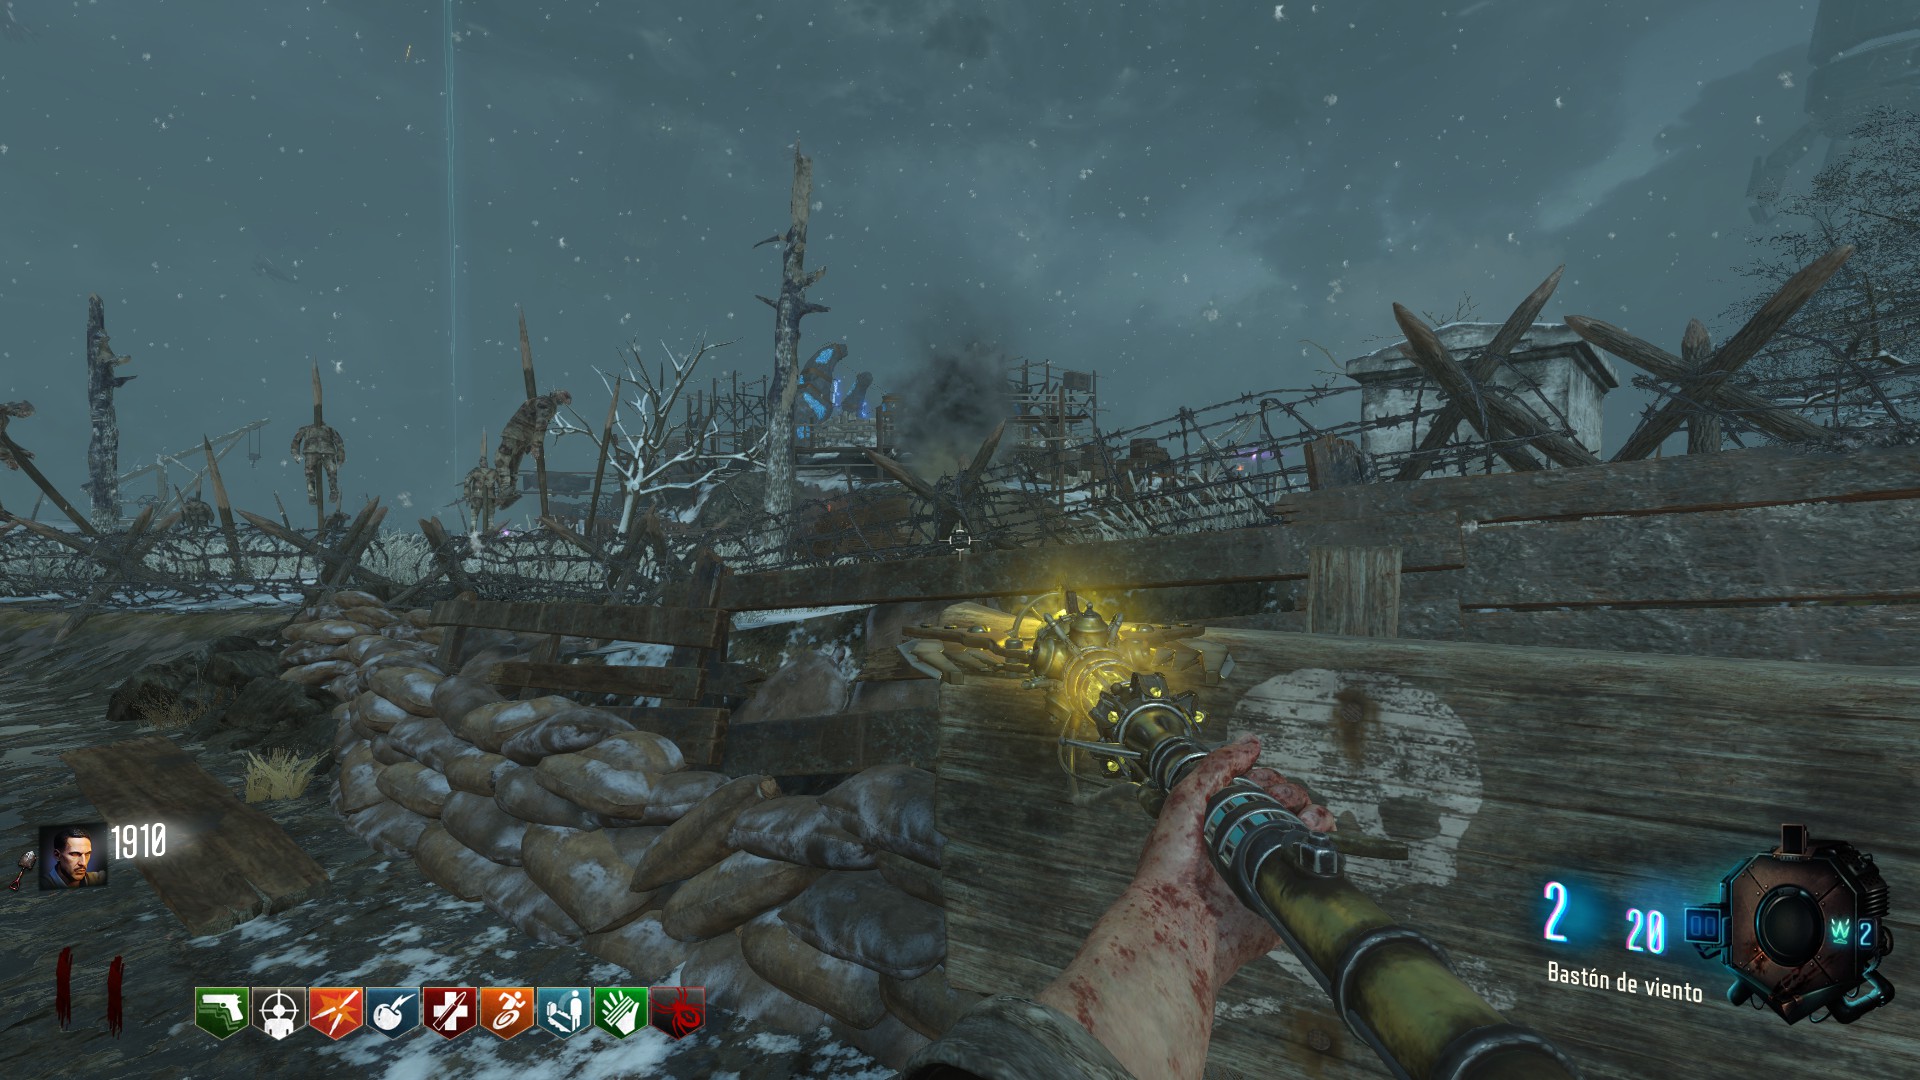
Staff of Wind (Yellow)
Near generator 5, near stamin-Up:
In this corner, near of the gen5 and the entrance to the lightning tunnel:
In the lighting tunnel entrance:

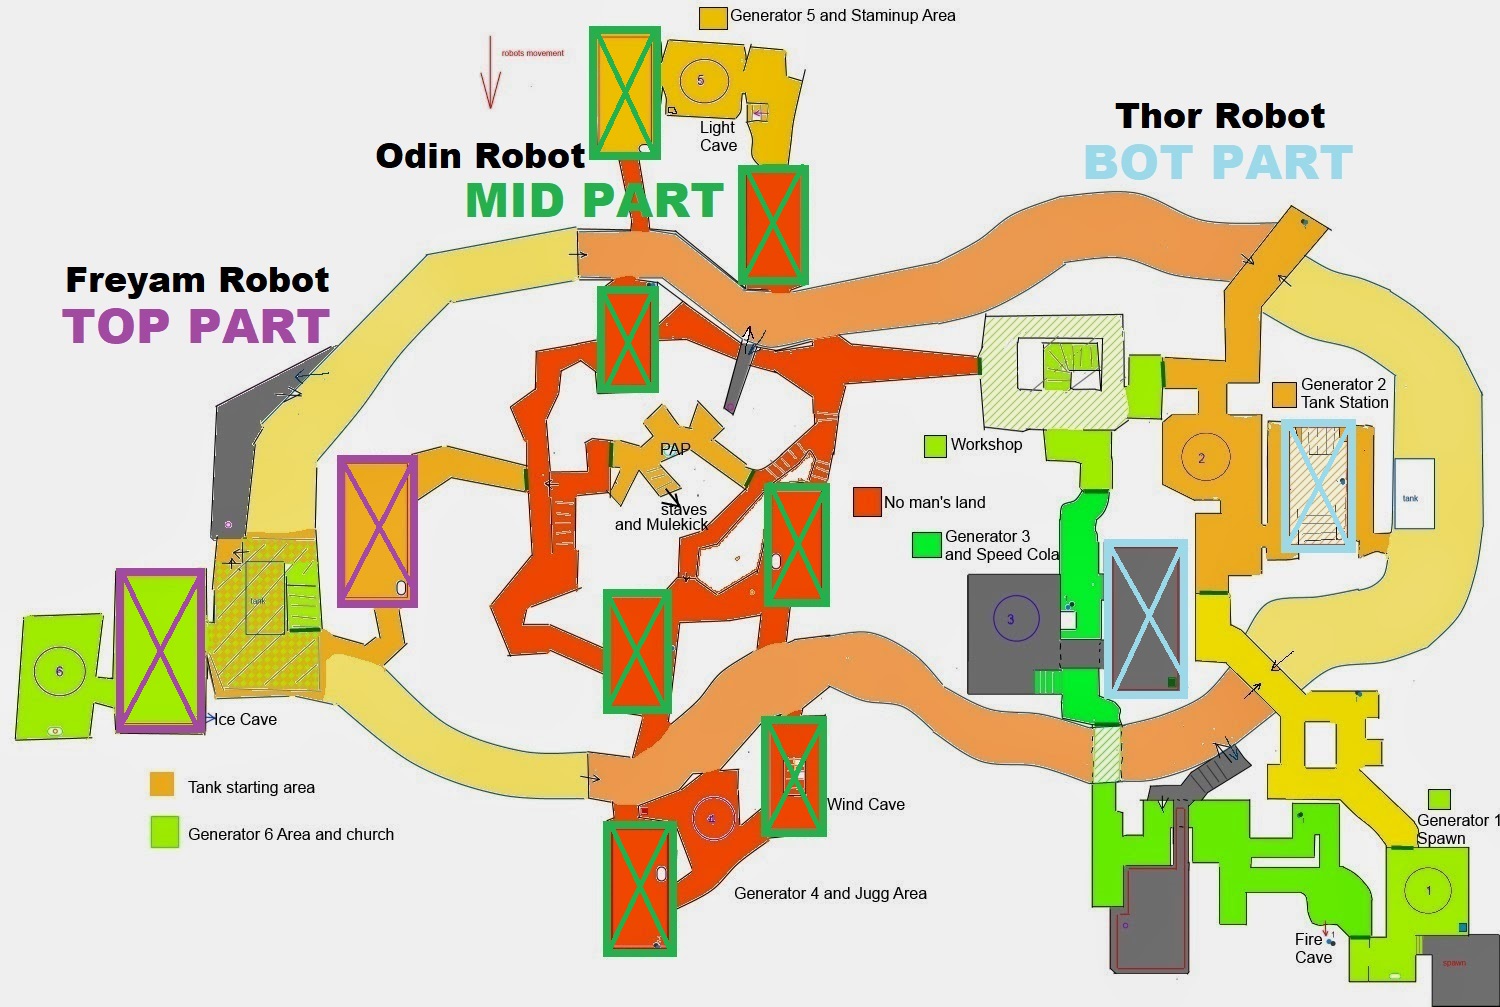
The pieces will be inside of 3 robots so..
All the locations will are in the footprint of the giant in 3 parts of the map:
Example:
Bot part:
Up of the tank station:
Or near gen 3 where’s the speed cola:
the piece:


Mid part:
This robot will walk in the middle of the map:
the piece:


Top part:
Near the church on the outside:
or near generator 6:
the piece:


The portal is near the generator 4:
Take the gem:
Built the staff in the excavation:


Staff of Fire (Red)
Between the tank and staircase:
Within the burning pews of the church:
Near generator #6 and the challenge chest:


Obtain the piece by opening the challenge chest near generator 6:
Shoot the orange plane to receive another piece:
And instantly will drop here:
Dropped by Panzer Soldat (in the round 8 will appear the first panzer):


The entrance to the Portal is near the generator 1 (spawn):
Take the gem:
Built the staff in the excavation:


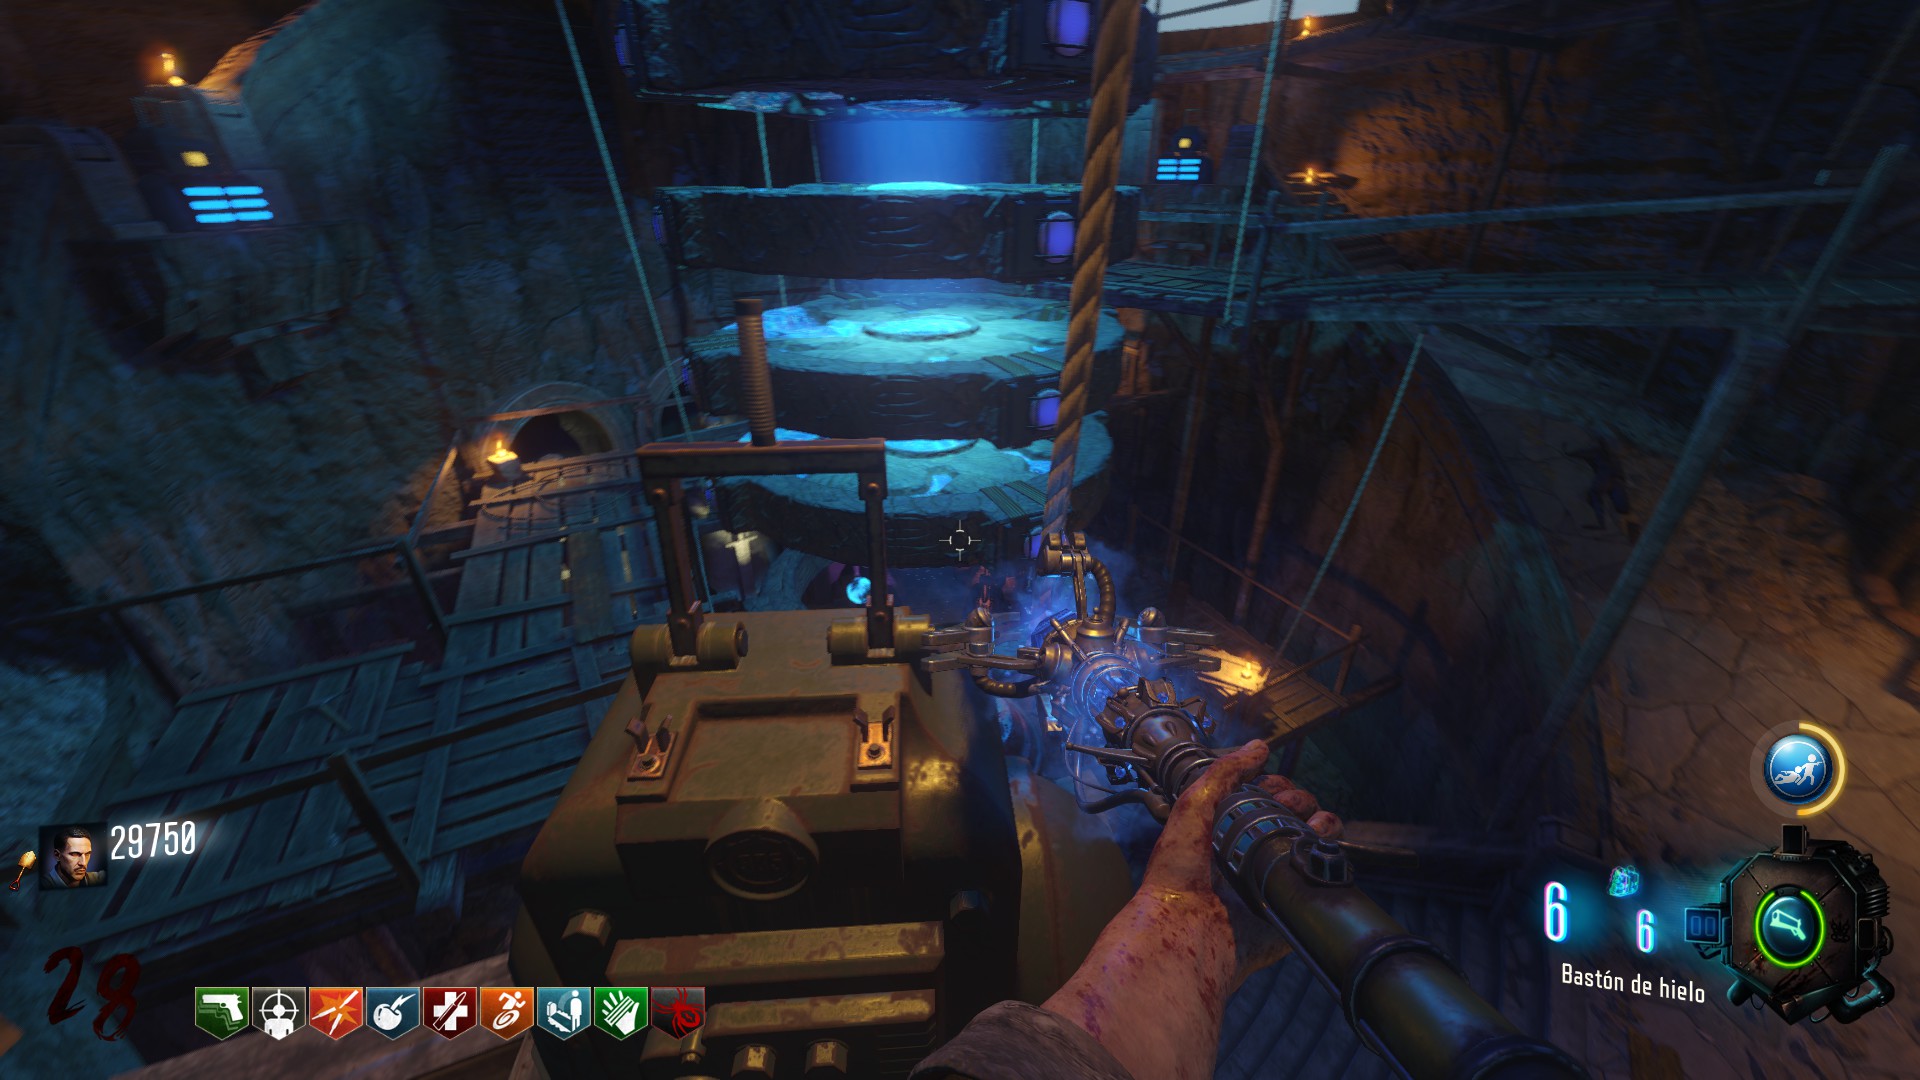
Staff of Lightning (Purple)
In this table, inside the generator 4:
Out in front of the generator 4:
In the background of the wind entrance near generator 4:


For take these 3 pieces you need go with the tank:

After passing the generator 4 with the tank, soon you will see this on the right:
1


Now the tank will be stopped near the tank station in the mud road a few seconds:
Going with the tank, soon in the excavation you will see a small bridge to the left:

1


For take the third piece if you want do this in only one trip, you need come back fast to the tank after you take the second piece only if you have Stamin-Up(this is a little bit difficult) if you cant no problem but you have to make another trip for go directly to the third piece (if you are playing with people, you can go with 2 guys on the tank for do this):


Going with the tank on the mud road, just before arriving under church, soon you will see a short way up on the right:
1 JUMP there:
2


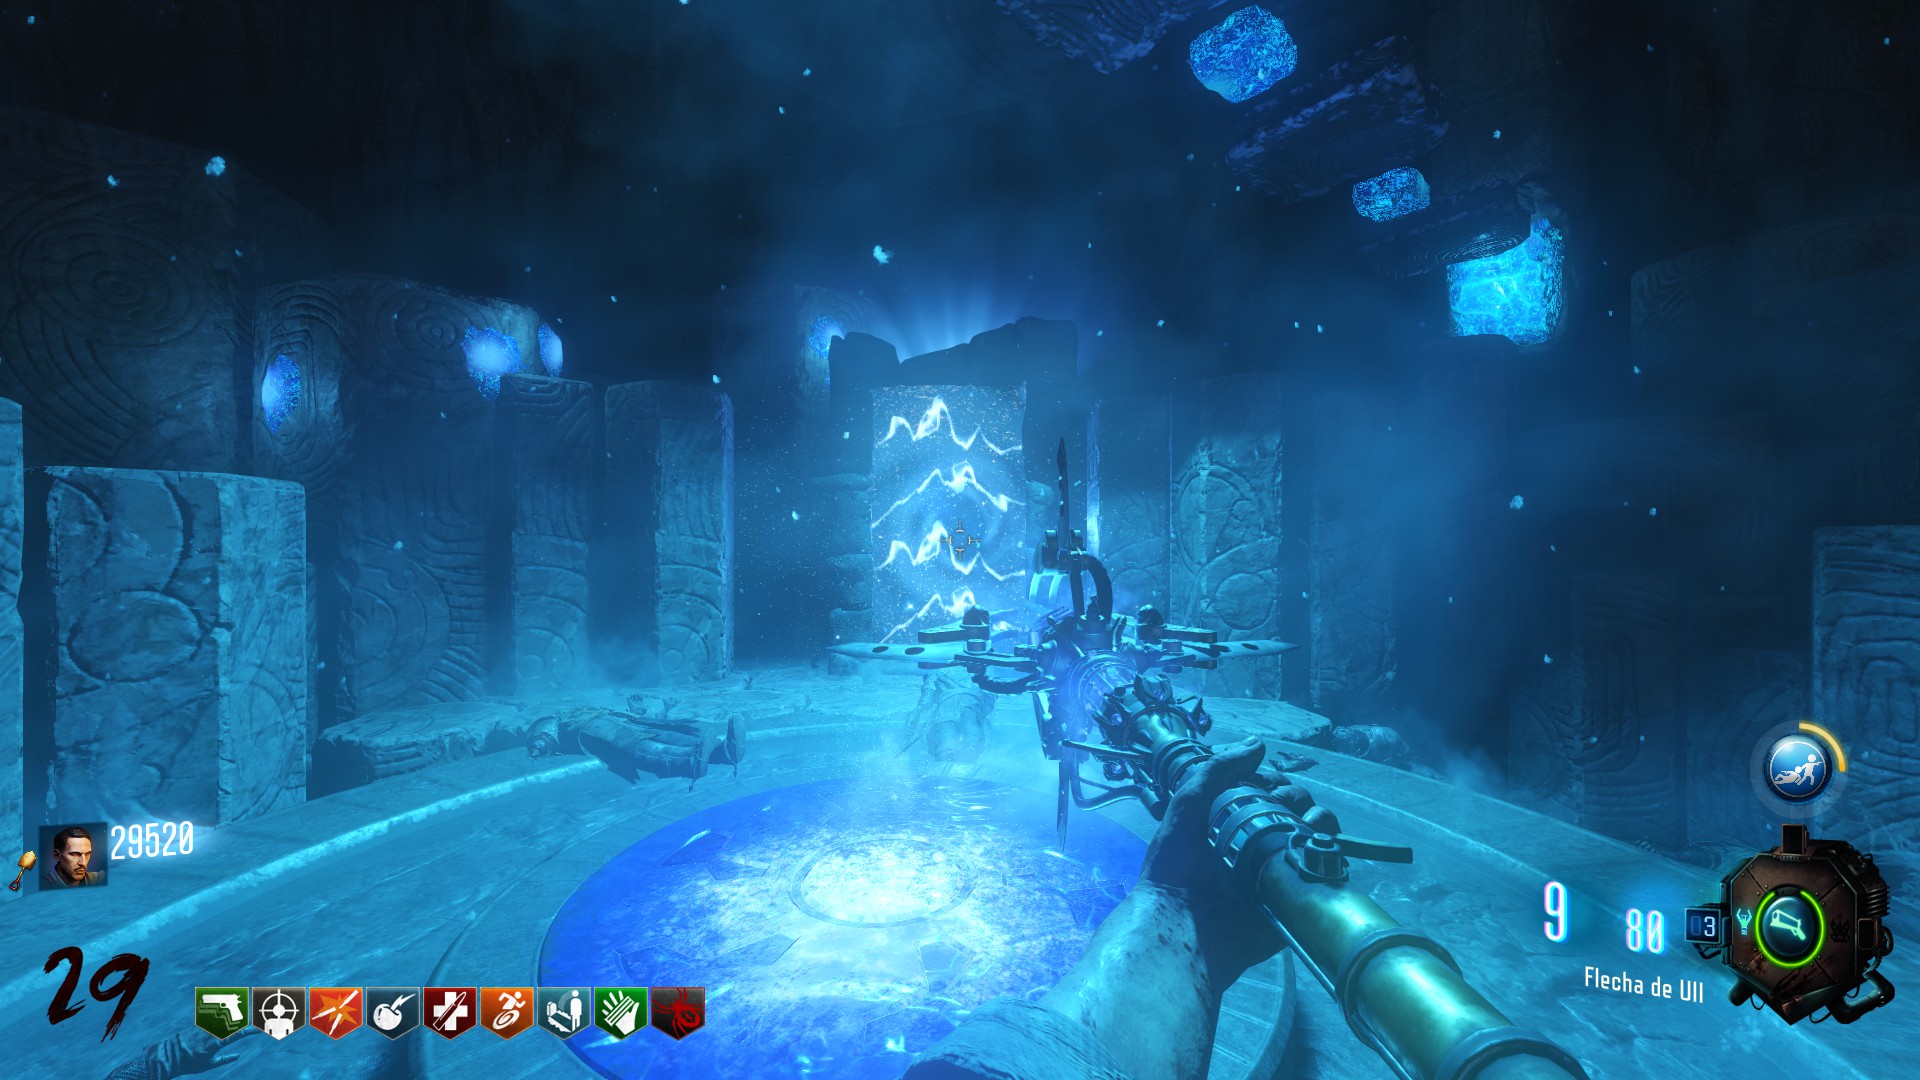
The entrance to the portal is near the generator 5:
Take this gem:
Built the staff in the excavation:


2 How to UPGRADE all the staffs:

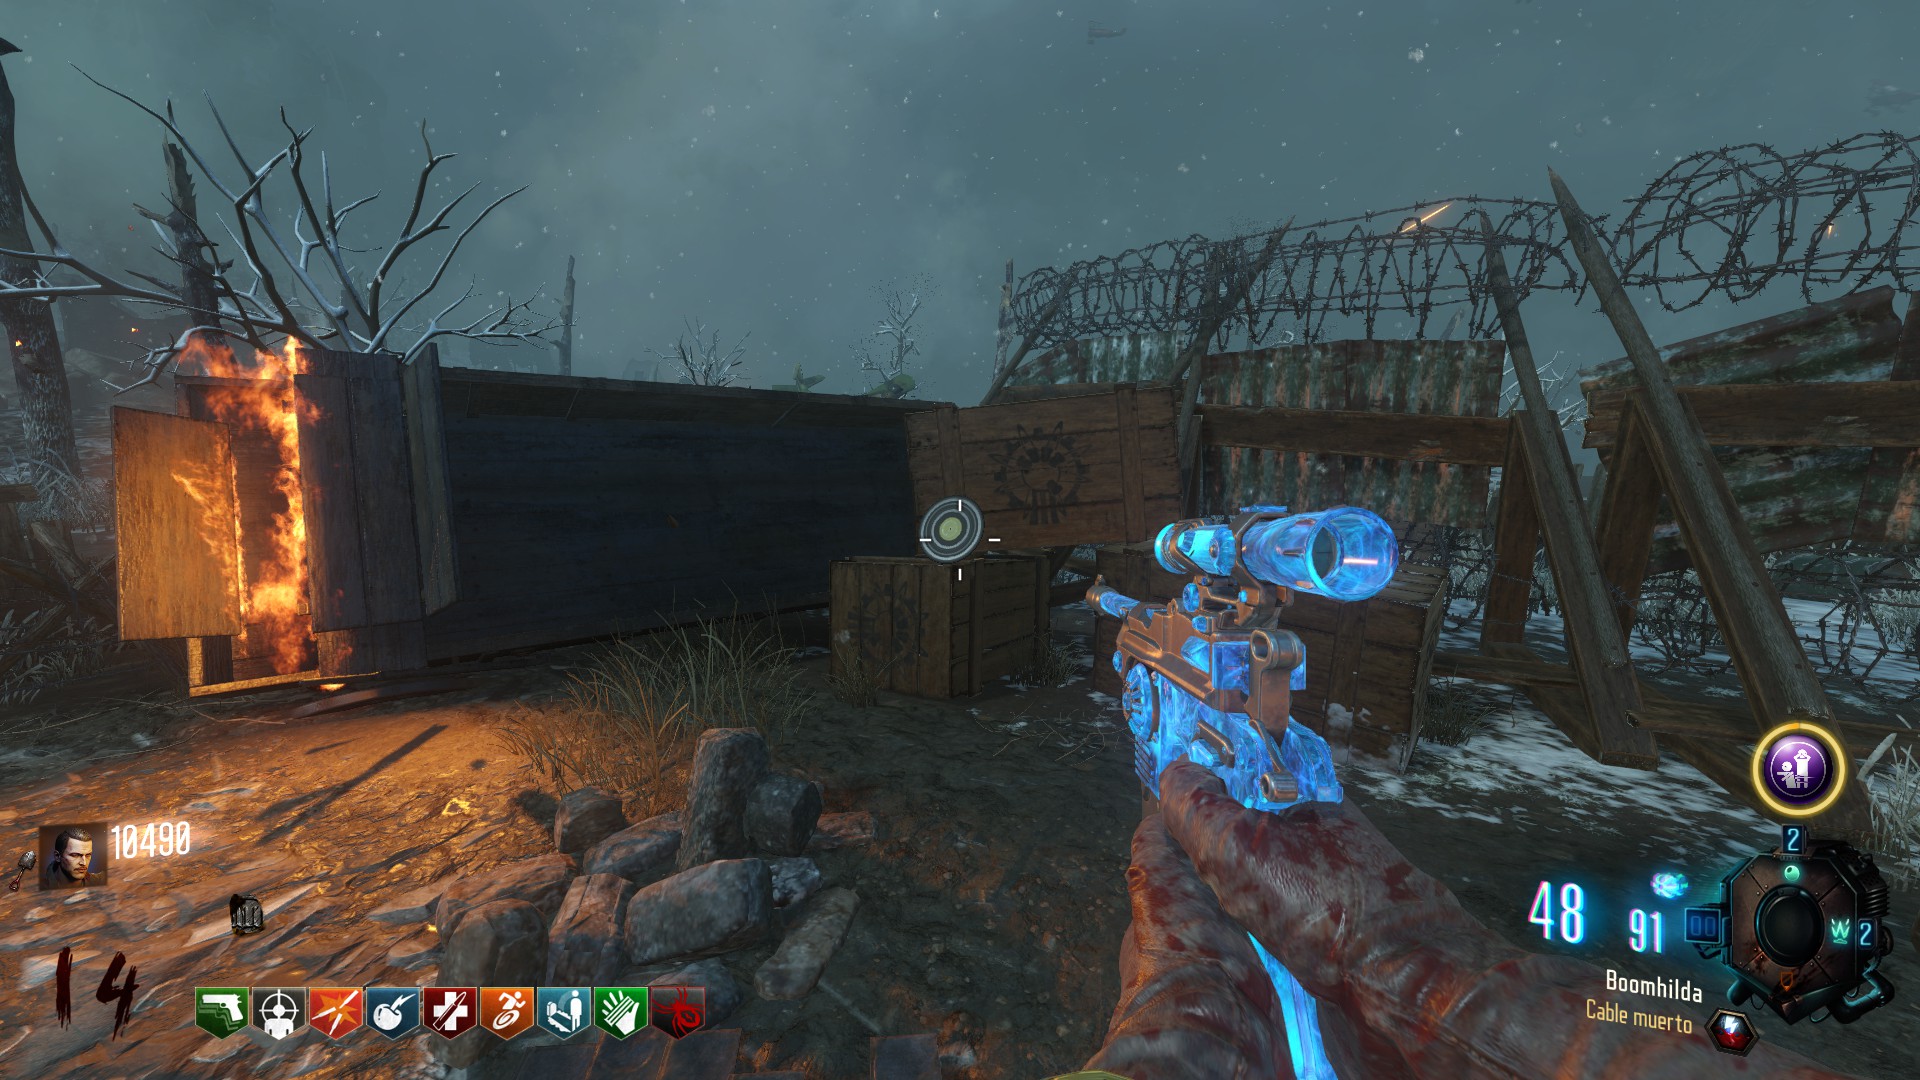
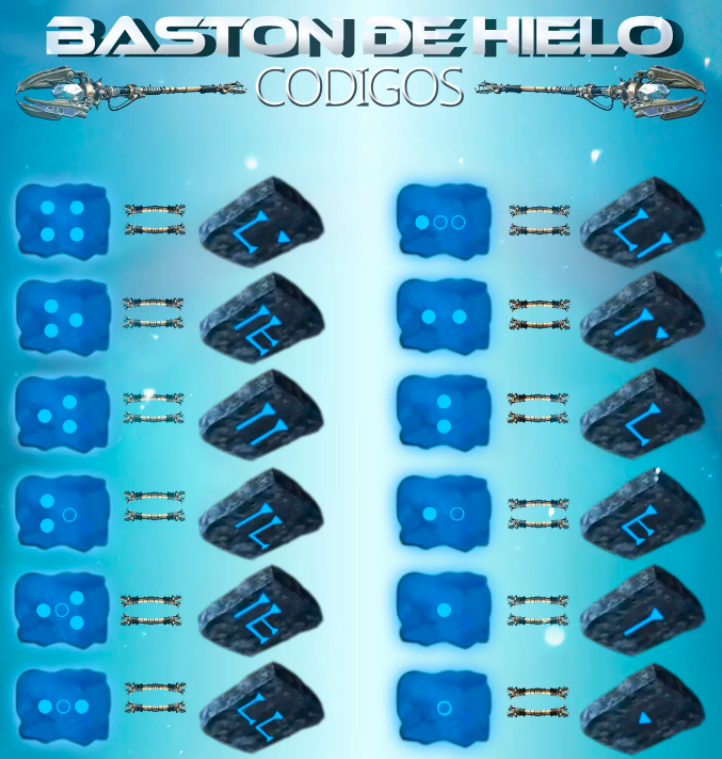
Upgrade the staff of Ice (Blue)
Go to the crazy place, and if you look up and in your right, you must shot up to the blocks with lines that correspond to the dots of the ice block of your right:
Codes:

In the map will appear 3 tombstones, first you will shot with the ice staff and then destroying with a gun that uses bullets:
1 In the giant footprint near generator 4:


2 In the giant footprint, Outside the excavation:


3 Behind the tank station on the mud path:
Once you shoot to these tombstones, you will hear a completion sound.
Now you need to head to the dig site and flip the switches around the place, until that those lights of the rings be in blue:
Once it lines up, shoot the ball that is below with the ice staff:


Go to the crazy place, put the ice staff in the pedestal and get 20 zombies kills around it:

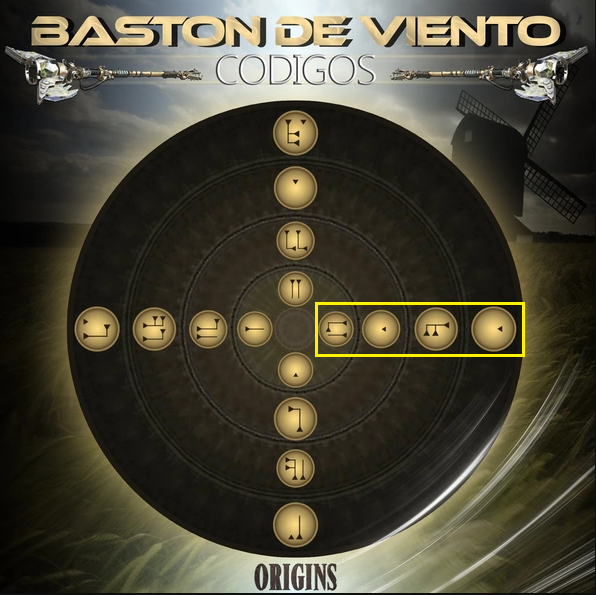
Upgrade the Staff of Wind (Yellow)
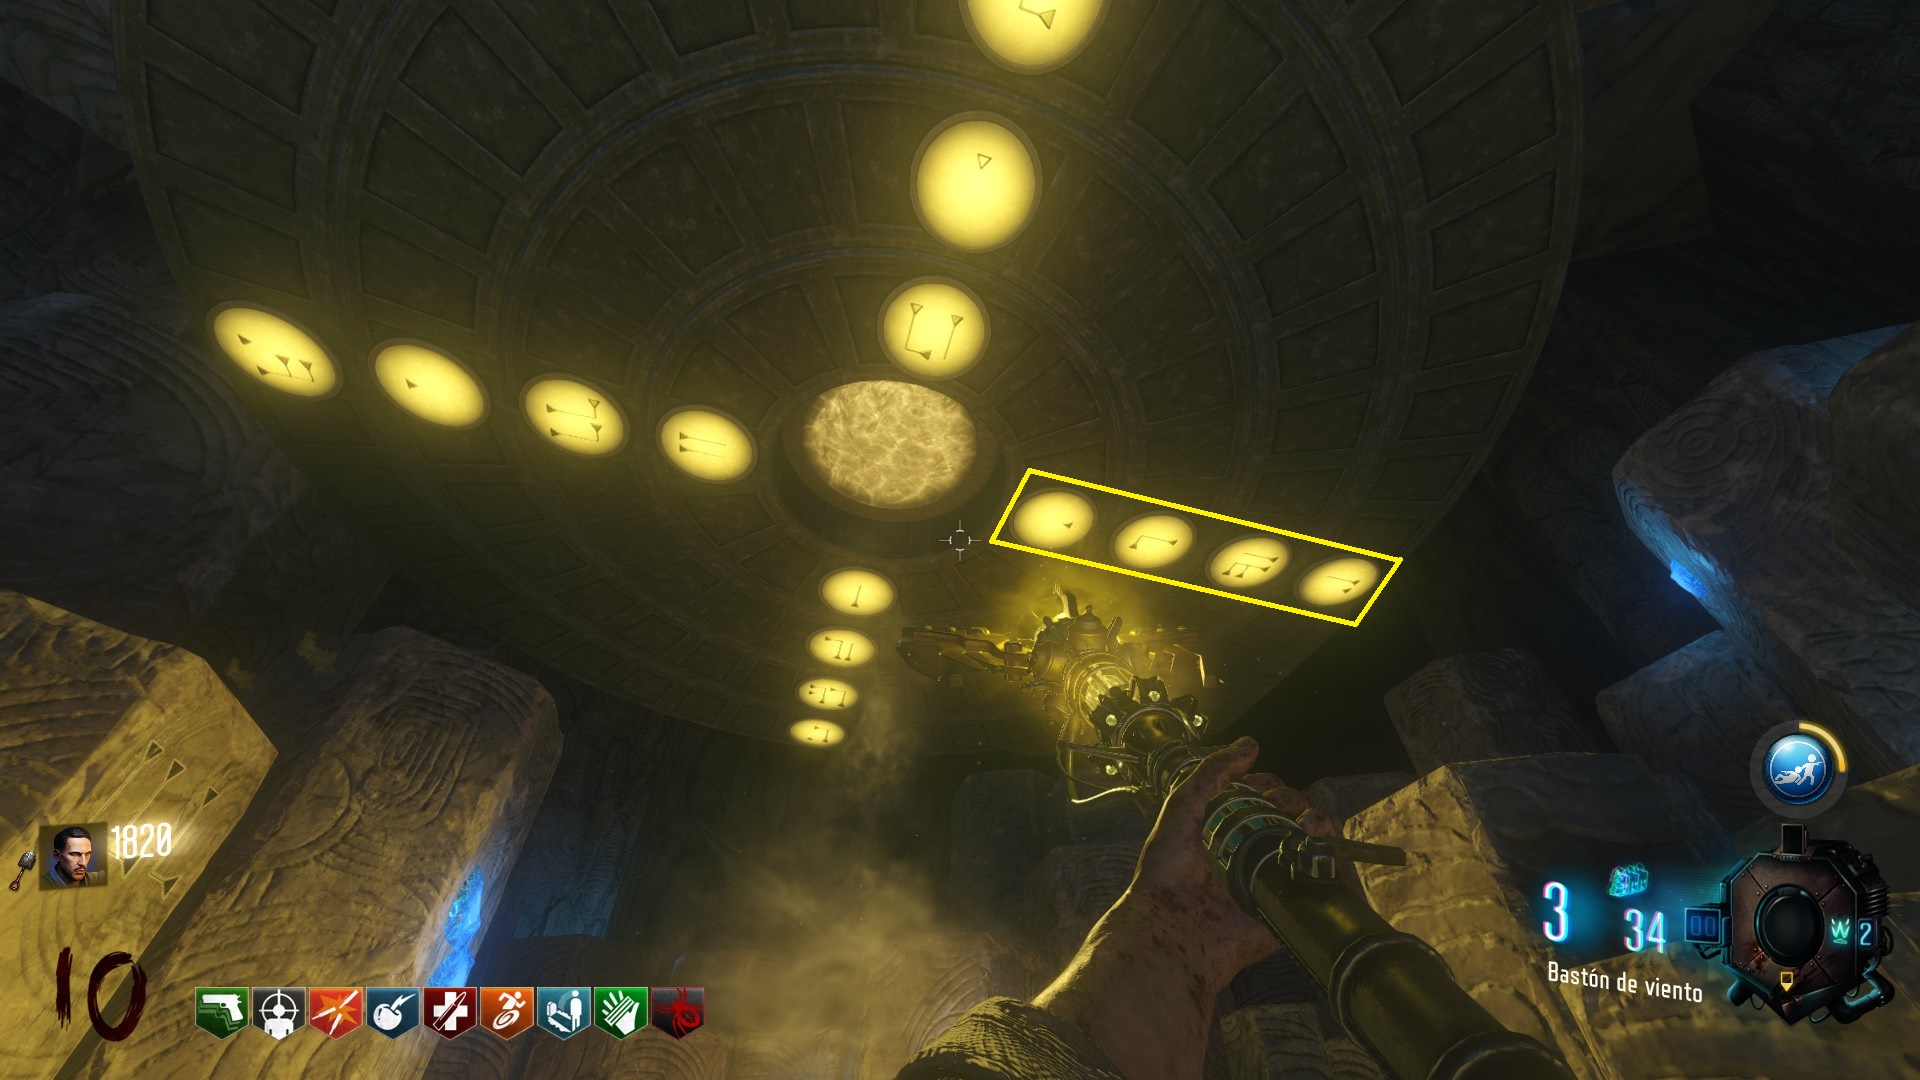
Go to the crazy place, look up and..:
And shoots those symbols like in this order, codes:
In the map will appear 3 balls with smoke, you shoot them with the wind staff like in this way:
1 Next to generator 4:
2 Near the tanks returning on a mud trail:
And here is the ball with smoke:
3 Near generator 5, next to Stamin Up:
Once you shoot to these balls with smoke, you will hear a completion sound.


Now you need to head to the dig site and flip the switches around the place, until that those lights of the rings be in yellow:
Once it lines up, shoot the ball that is below with the wind staff:


Go to the crazy place, put the wind staff in the pedestal and get 20 zombies kills around it:


Upgrade the Staff of Fire (Red)
Go to the crazy place:
You have to stay here around the fireplaces and kill 30 – 40 zombies, staying on the metal floor and fill the cubes until that the 4 cubes are in red with fire:
once all of them have been lit this step is been completed and you will hear a completion sound.

Go into the church:
These symbols correspond to numbers:
Codes:


Under the church, there are torches:
6


9

5


Each symbol that you have illuminated into the church correspond with the number of the torch, then you need shoot the torches with the fire staff from left to right And you need to shoot them quickly:
Example:
So if you have looked my image in my game i have illuminated the symbols 11 9 6 4(blood) so i will shoot to the torches:
11

6


Once you shoot to these torches, you will hear a completion sound.
Now you need to head to the dig site and flip the switches around the place, until that those lights of the rings be in red:


Once it lines up, shoot the ball that is below with the wind staff:
Go to the crazy place, put the fire staff in the pedestal and get 20 zombies kills around it:


Upgrade the Staff of Lightning (Purple)
Go to the crazy place and here you will shoot in 3 different combinations:
Codes:


Once you put the 3 combinations, you will hear a completion sound.
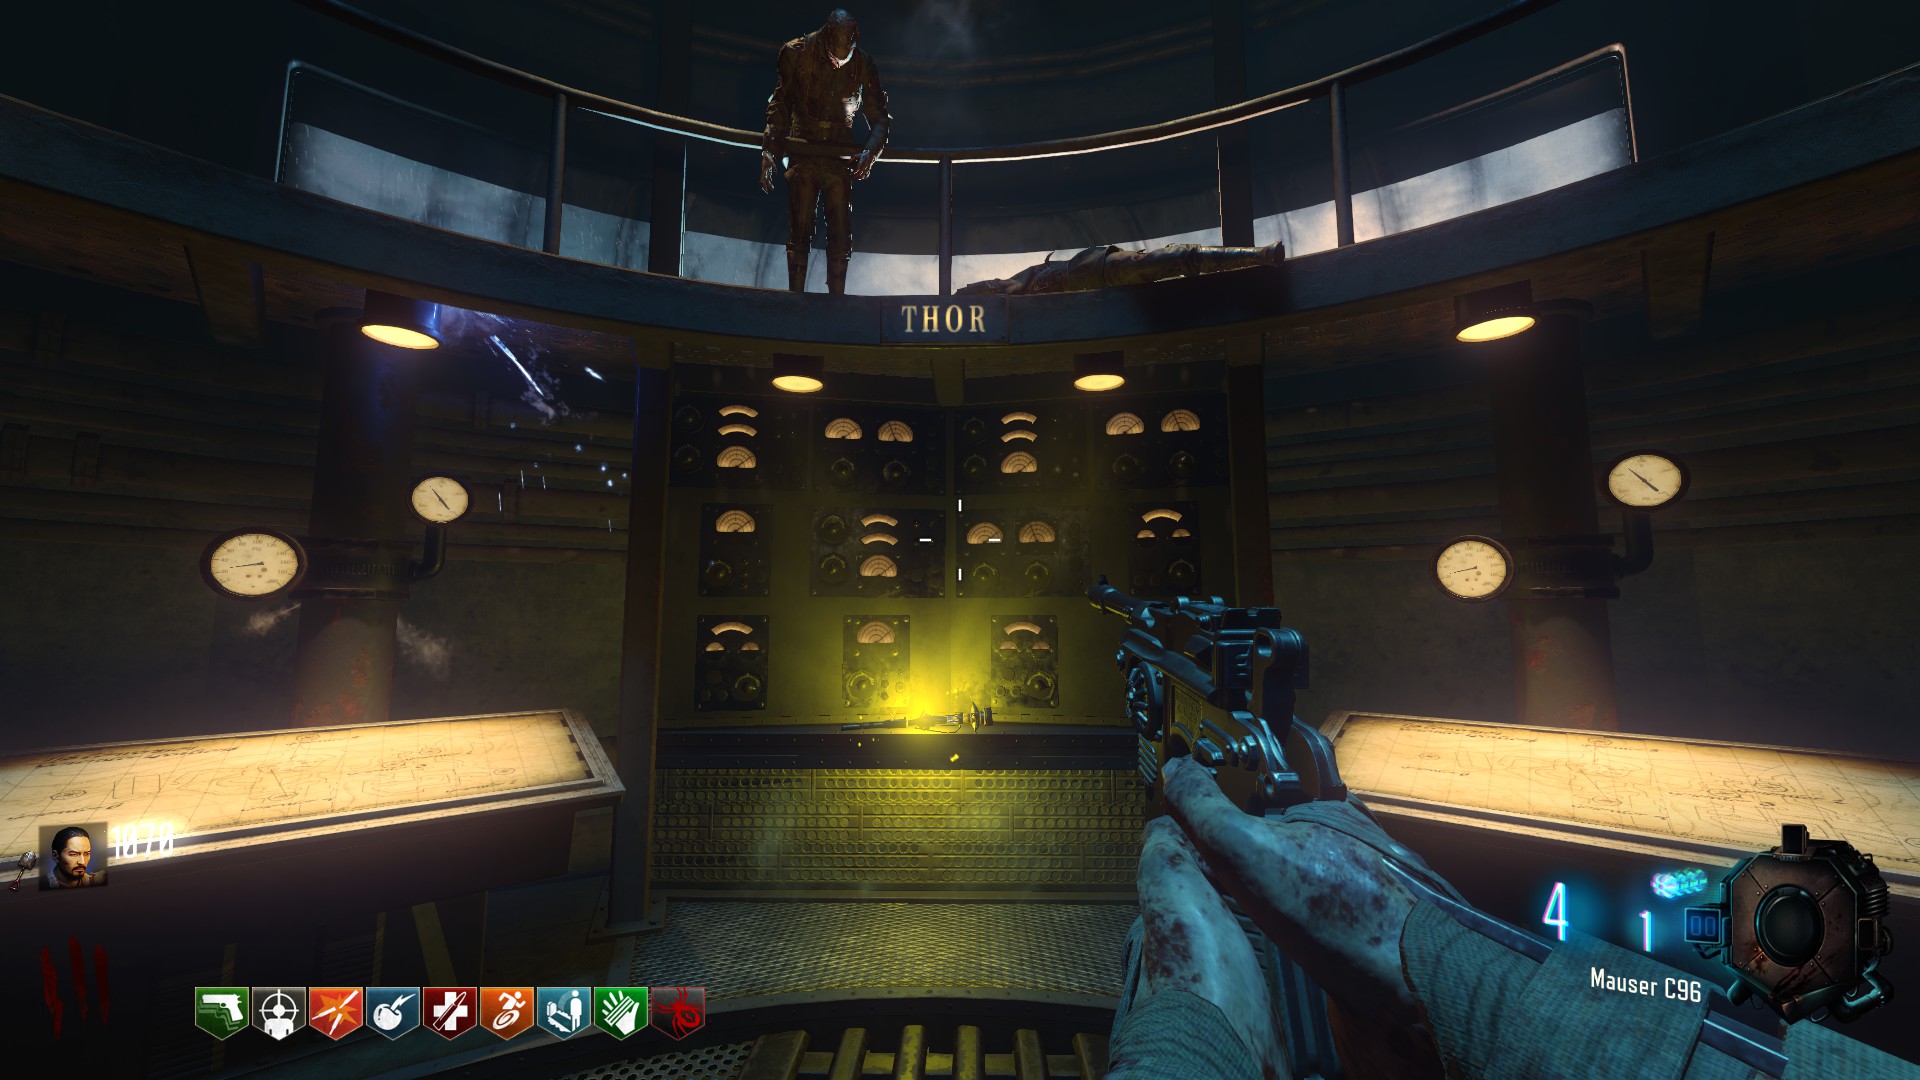
On the map there are 7 electric panels and you need to spin the 7 dials until they do not spark anymore, do not matter the order but you need put the dials like in these images:

Now you need to head to the dig site and flip the switches around the place, until that those lights of the rings be in purple:
Once it lines up, shoot the ball that is below with the lightning staff:


Go to the crazy place, put the lightning staff in the pedestal and get 20 zombies kills around it:


GRATEFULNESS
GRATEFULNESS
W0W this Splash Art is amazing!