![General Guide for the whole game [WIP] for My Summer Car](https://steamsolo.com/wp-content/uploads/2021/07/general-guide-for-the-whole-game-wip-my-summer-car.jpg)
Overview
THIS GUIDE IS IN PROGRESS. IF SOMETHING IS NOT IN IT, I WILL PROBABLY ADD IT LATER.This guide is for people who have just started playing My Summer Car, or people who want to know more about it. I will cover How each car drives, what to do and what not to do, how to survive, and some other crap. Enjoy!
Main Menu
Click on the new game button, and set up your character.

- Put in your first and last names
- Turn permadeath OFF (unless you have lots of experience with NOT DYING)
- Click continue
Opening Cutscene
The opening cutscene starts in the backseat of a Datsun Satsuma 100A and shows the character being brought into the world by their mother. As the song plays, the camera zooms out and some yellow text appears on the screen saying:
“SUOMI FINLAND 1976
[player name] was born”
After the intro, the game jumps to 1995 making the character about 18 or 19 years old.
First things to do in a new save
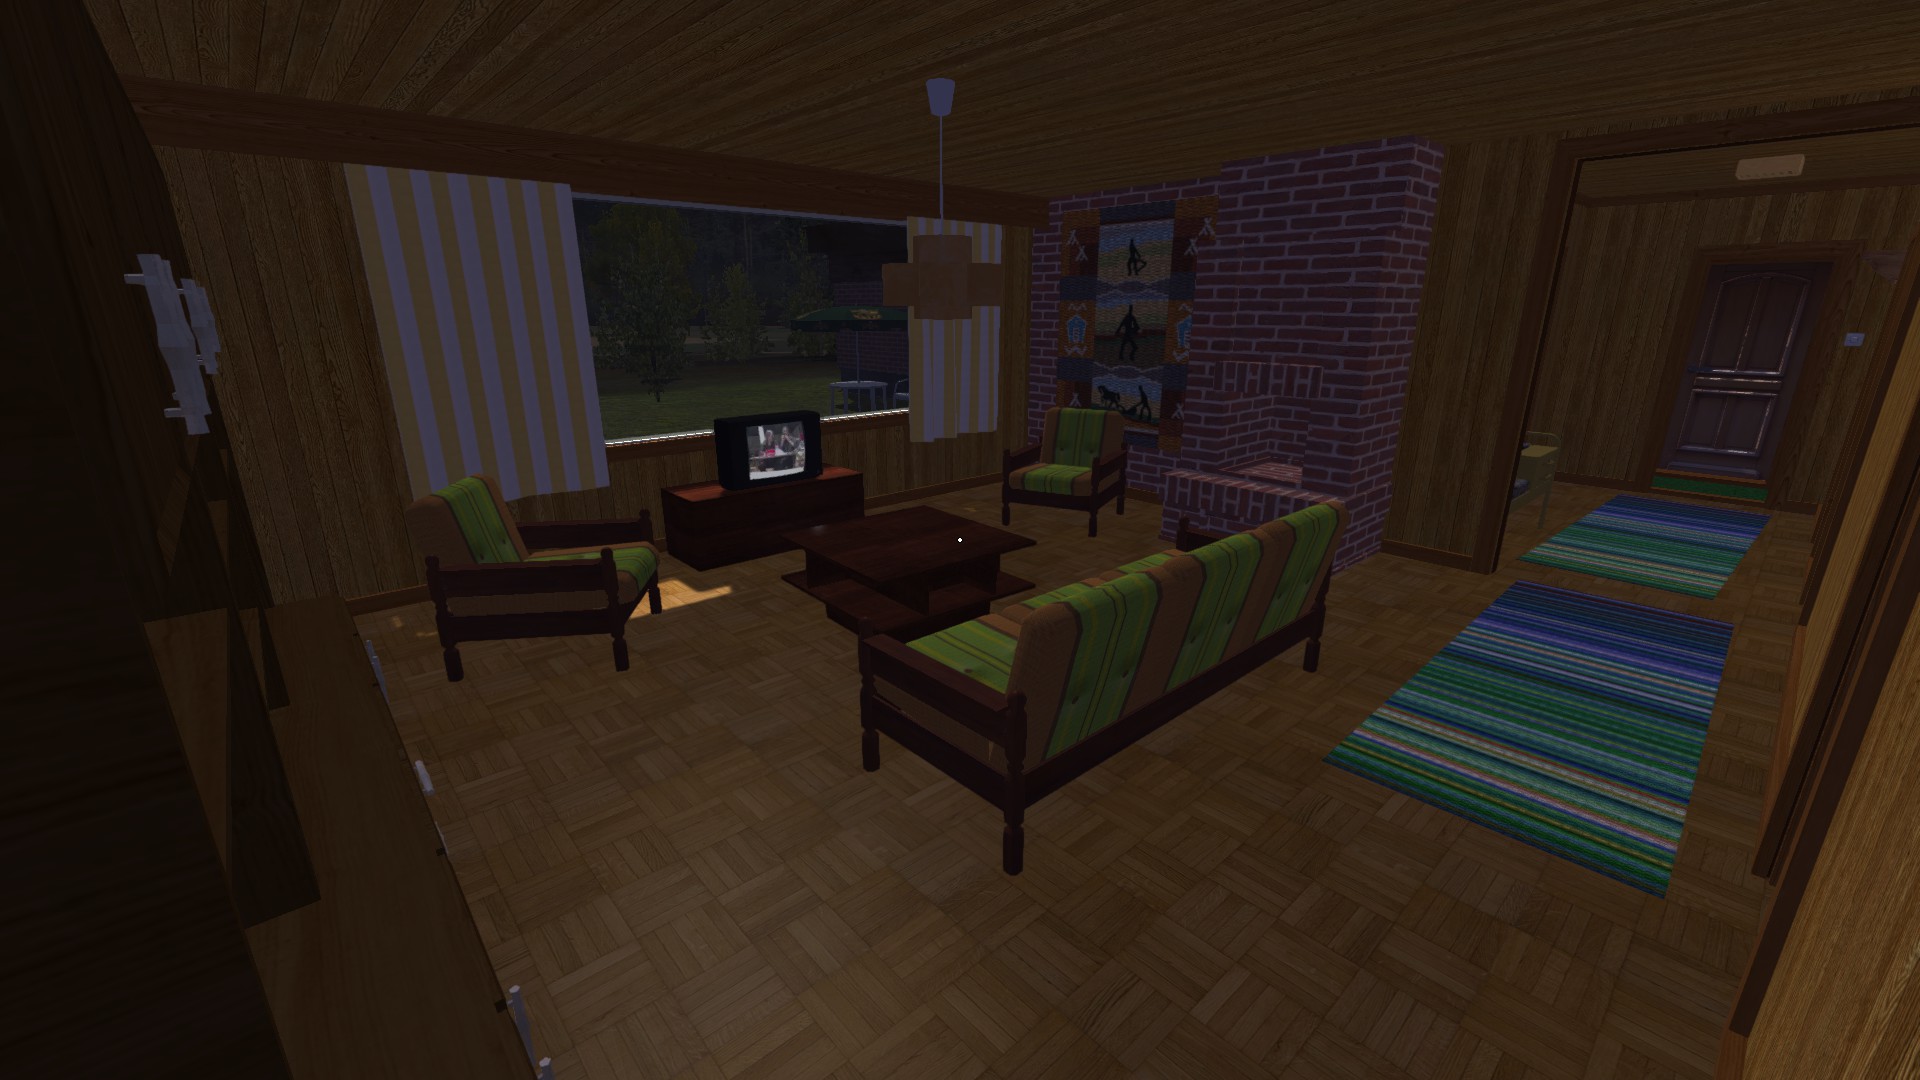
When you first start up your save, you will be standing in your house living room.
“Don’t be lazy. Fix your dad’s old car. Uncle’s blue van can be loaned. Don’t drink alcohol! We’ll come back when we get bored. Yours, Mom and Dad.
If you actually translate (or find on the MSC wiki) what the note says, here it is:
“Don’t slack if someone orders firewood to be delivered. Fix your dad’s old car or we’ll take it to the scrapyard because it has been filling up the garage for years now. Your dad says if you repair the car and make it pass the inspection, you can keep it. You can borrow your uncle’s van if you need to go run some errands.
If you visit the cottage, make sure the sauna stove and fireplace are put out.
Don’t get drunk and remember to clean up if you make a mess!
We will return to Finland when Tenerife gets boring!
Best wishes mom and dad”
Please note that:
- When you drink the beer your screen will wobble and eventually distort.
- Sausages will fully restore your hunger but can only be eaten once if they are still in the pack.
- You can drop the pack of sausages on your stove, or the grill found under your table in the garage to open the pack and get four sausages.
If you go out your front door, to your left is your garage. This is where all your car parts are sitting, and the car body is sitting the driveway. Around the side of the house is a mini-bike, commonly referred to as “the Jonnez”.
In order to really go to the shop now you need to go next door to your uncle’s house and “borrow” his van. See section “Getting vehicles from Uncle” for how to do that. Do not return the van to Uncle if it is filled with fuel oil, or he will call you and say that you can get a huge fine for that, and that he well sell the poop truck! (an essential part of making money in the game!)
Or you can just cheat and give yourself the keys through MSCeditor.
In my opinion the van is the best vehicle in the game because;
- it is the easiest to drive and start
- it is indestructible
- it can hold all of your crap
but some things that are not good about the van are:
- around 90 – 100 kmh the van will start doing the “death wobble” where the van will start violently swaying side to side and becomes horribly unstable and easy to crash. (at this speed you will die with seatbelts or not) The van and the Ferndale are the only vehicles where this will happen.
Good things to know
This section is just some generally good things to know. This section will be updated when I have read more changelogs.
– If you are riding the Jonnez (the mini bike), or your car’s windshield is broken, you have to wear the crash helmet (added in the same update) or else you might get a bumblebee in your eye and die!
– There is a vendor who sells used engine parts in the schoolyard (Rally Parc Ferme area) that opens during the weekend, this can be very useful during the rally!
– If you have a hangover, the best solution is to just keep on drinking.
– The Sausage & Fries from the pub is super food that helps the player with positive weight control.
– As of the 29th of May, 2020, you no longer need rally tires to do the rally, you just need racing slicks’nt.
How to survive
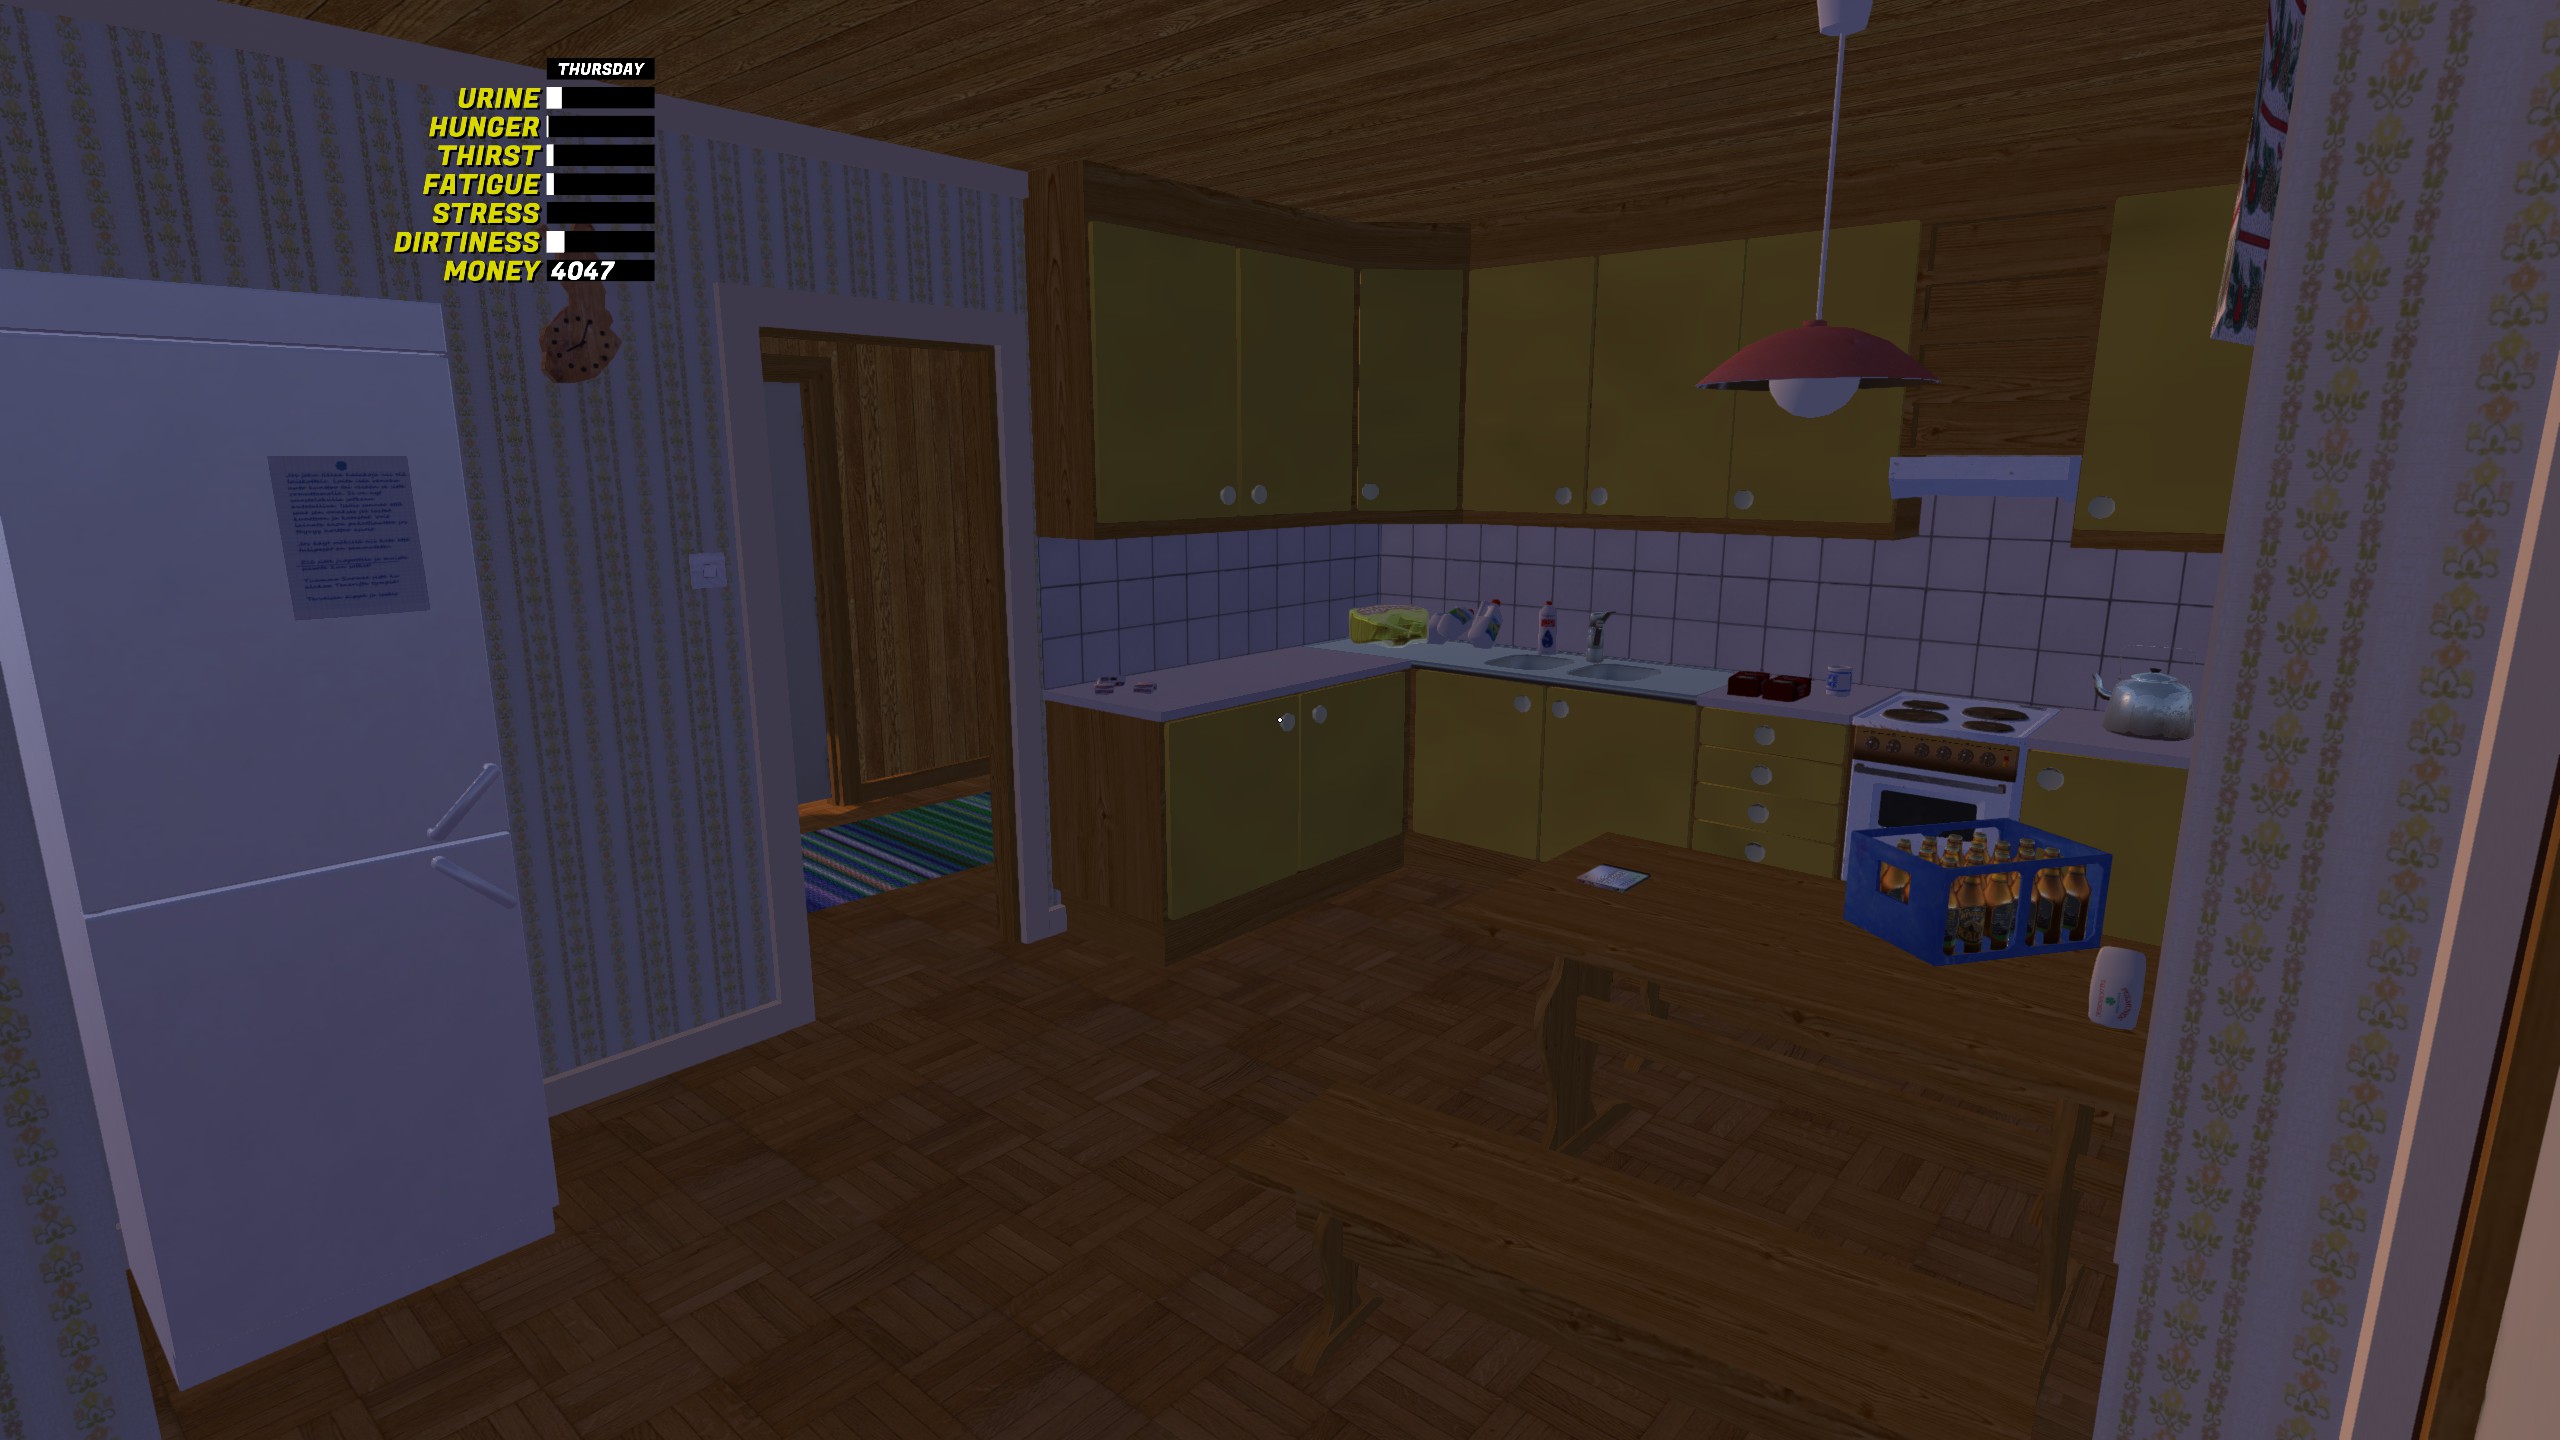
Your need bars are in the top left corner of the screen, (they can be hidden with F2) and you need to pay attention to *most* of them. In this section I will cover each one of them and how to tend to them.
You can urinate anywhere in this game. You can urinate by pressing (default key is P). Don’t let the bar get full or… or… whatever I think you can imagine.
Hunger is one of the needs that needs a specific item type to lower. You can eat any food item with the interact key. (default F) Most food items will cover all of your hunger, but single unpackaged sausages will only cover about a quarter of the full meter. (and there is four in a package so just pressing interact (default F) on the whole package will cover all of your hunger.
Thirst needs a specific item type to lower. You can drink any drink item with the interact key. (Default F) No drink item will cover a full meter of thirst in one chug. But one full case of beer will lower your thirst multiple times at the cost of making your screen all wobbly and distorted after 4 – 5 bottles.
Fatigue is one of the two needs that you cannot die from. When your fatigue meter is full, you will sporratically fall asleep for a few seconds. You need to shake your mouse to wake back up. As the time that your fatigue has been full gets longer, you will fall asleep more often, and you will need to shake your mouse more to wake up. This can be especially dangerous when driving, as you can lose control of your car and crash, most often leading to death.
Stress is a need that needs to be monitored CONSTANTLY. Stress can me lowered by swearing (defauly key is N) but this basically does nothing. When your stress meter goes red, your character will automatically swear. Your stress can be lowered by drinking alcoholic drinks, and smoking. Smoking is the most effective, and smoking too much can cause the player to be addicted, making the player’s stress go up quicker. You can get an achievement in permadeath mode for being very much addicted yes.
(DISCLAIMER: I DO NOT CONDONE SMOKING IN REAL LIFE)
Dirtiness is one of the two needs that you cannot die from. Although dirtiness does LITERALLY NOTHING TO YOU. All that happens is you hear more fly sounds. Dirtiness can be lowered by swimming in the lake, by sitting in a sauna, or showering.
Please note that;
- If you pee on the shopkeeper, (Teimo) he will tell you to p*ss off
- You can pee upwards to take care of *most* of your thirst but not all.
- Once a need bar goes red, do something about it QUICKLY
- A need bar going red means it is at 100%, and you will die at 200% (thanks to user Spee-Dee for telling me that!)
Going out for more supplies
To get to town you will need the boat, which is down by the docks at the lake in front of the house. The boat has just enough fuel to get to the town, but not back. You should bring the Jonnez moped around the side of the house and put in in the boat. This will cause the boat to be slower and pull to a certain direction, and this can be balanced out with other items, but it is difficult. I also recommended to bring the crash helmet, because riding without it can result in the player being hit in the eye with a bee and dying, but in this case we are going at low speeds, and if you do die you will respawn very close at the church in town.
To actually drive the boat, you need to get on the back seat next to the outboard motor and press (default key ENTER) to enter driving mode. To start the boat you grab the starter cable by holding left click on it and yanking it by moving the camera. It should take about 1-3 yanks to start. To switch the gears of the boat you need to left click or right click on the little gear selector on the motor. You should see that the little character in the corner changes as you fiddle with the lever.
To get to town from the boat, go to the top left of the map from your dock. You should pass the island cottage and then be able to see the church tower, which you can use as a way point. If you want, you can pick up the kilju bucket from the cottage and put it in the boat. Once you get to the town docks, use the moped to go up to the store and buy all of your crap. If you put something on that little tray on the back of the moped, it will stay there unless you get some serious air. it might take a while to ferry everything back to the boat, so be patient.
To drive the moped, lean left with [default key Q], find the fuel tap and left click. Then lean right and left click on the kickstarter. After about 1-4 clicks, the moped should start up. If you tip the moped, hold down the gas so it won’t stall.
Here is your shopping list.
Things you absolutely need
- Alternator belt
- Spark Plug Box
- Two Headlight Bulbs
- Oil
- Coolant
- Brake Fluid
- 2-Stroke fuel
- some sausages
Reccomended to get
- A battery or two
- 2 – 3 extra oil filters.
- 1 or 2 cases of beer
You can also get whatever you want here, but you start off with 3000 markka, so be careful not to spend too much.
To get home, follow the same route back.
The Police
Yeah, it’s a … and it’s .
The Police often like to nest on these certain spots on the highway shown here:
By the wheat fields near the grain processing plant.
Between the Peräjärvi and Rykipohja turnoffs.
On the stretch of the highway between Rykipohja and the dirt road.
There is a 50% chance of the Police spawning (at any location) on the weekend (Friday through Sunday), and a 10% chance of the Police spawning (at any location) during the week, (Monday through Thursday).
Also, the checkpoint will not move in the same game session. If there is no checkpoint at a location now, there will not be a checkpoint there for the rest of the session and you can speed through there all you want.
In my experience, the most common checkpoint spawn is Between the Peräjärvi and Rykipohja turnoffs. (The little valley right before the Peräjärvi turnoff).
When you come across a police checkpoint, stop and do the breathalyzer test, (it is possible to do through the window of the car), and wait a second. If he reaches behind him and pulls out a piece of paper, that means that you have received a fine. You can either pay now by clicking on the button, or press ESC (escape) to exit the fine menu and it will appear on the kitchen counter. Only if you don’t have enough money to pay the fine, should you opt out of paying immediately. The game will give you about one in-game week to gather enough money to pay the fine, and then the police will come to arrest you. You can pay an unpaid fine on the counter by clicking on it.
The way the fine amount is determined is through your “player net income” which you can find in MSCeditor under “player”. So basically, (just like in real Finland), the more money you make, the bigger your fines will be. but if you have a lot of money and then suddenly don’t the fines will still be big right after. (sometimes).
Also even if your net income resembles the amount of money you have, being fined for a lot of things at once can make it so you can’t afford it.
As of the 29th of May, 2020 update, I’ve had to add this section because there are now a lot more things you can get arrested for. These are:
– Running over a roaming NPC is manslaughter and results in a 10 day jail sentence if caught.
– Running over a rally spectator is manslaughter, unless you are racing the rally.
– Dipping out of the highway stop when you receive a fine and evading the cops will result in a 3 day jail sentence if caught.
– Intentionally crashing with a killable AI driver will result in a 5 day jail sentence if caught.
– Leaving day fines unpaid for an extended period of time will result in a one day sentence for every three fines (minimum 3 days). The maximum sentence is 999 days.
When you commit a crime, the next time you sleep in a bed police officers will show up at your house, and Teimo’s shop and will arrest you if you step near them. This can easily be avoided by hopping on the Jonnez and driving through them, as they don’t have collision. They cannot arrest you on the Jonnez for some reason and you will be able to access your house and Teimo’s just fine.
Building your Satsuma
Nope. Not typing out all the parts in their specific order. Here is another steam guide, (not made by me) that really helped me build my satsuma.
[link]all credit to the user “rostamike” who made the satsuma building guide
Repairing / Upgrading your Satsuma
Taking your car to Fleetari, (the repair man) is pretty simple. He can be found in the village Loppe.
 His shop is open Monday – Friday and from 0800 – 1600 game time. He offers multiple services such as but not limited to;
- Repairing your car’s bodywork.
- Fitting tires onto new rims. (rims have to be put in his office to be registered)
- Steering alignment
- Suspension alignment
If the repair job requires your Satsuma to be at the shop (ie. bodywork), Fleetari will lend you his muscle car (the Ferndale). This thing is horribly slippery on dirt roads so be careful driving it home.
If you do not return Fleetari’s car to him, after a while he will call you and say,
“It’s Fleetari here! You moron, bring back my car or I make sure your sh*t bucket car doesn’t see another day!”
If you don’t do anything about it, he will call you three more times, then he will dump your Satsuma into the swamp to the east of Loppe the next time the player sleeps in a bed. In the last place the Satsuma was left before it was stolen, there will be a note that reads;
“HAISTA PITKA P*SKA”
Which translates to, “Smell a long sh*t”

The catalog is in your garage on the table. It is a way to mail-order parts for your Satsuma. You click on the catalog to open it, then use the arrows on the bottom to turn the pages. Once you’re done crossing stuff out and exit the catalog, an envelope will appear in front of you on the table.
This needs to be taken to the shop (which I will be referring to as “Teimo’s Shop” or “Teimo’s”) and put in the yellow post box next to the door. After at least an In – game week, you will get a call from Teimo that your parts have arrived, and a post order cheque will appear on Teimo’s counter. Pay that and your order will appear on the stairs by the side of the shop.

Take out the old one, put in the new. If you ordered new suspension, you will need to get it aligned at Fleetari’s.

Making Money [out of date]
Money is an essential part of My Summer Car, (duh). The currency used in the game is the old Finnish Markka, and the conversion is about 3.89 2002 Finnish markka to 1 2020 Canadian dollar.
Jobs are pretty much the only way to earn money in My Summer Car. Apart from the rally, (which will be covered later) and gift money for Christmas.
The two paid jobs in the game are firewood delivery, and sewage pumping. You can get another job, such as the “dump some sh*t in front of the Lindell inspection shop I’ll give you 10 bottles of booze” job from Fleetari.
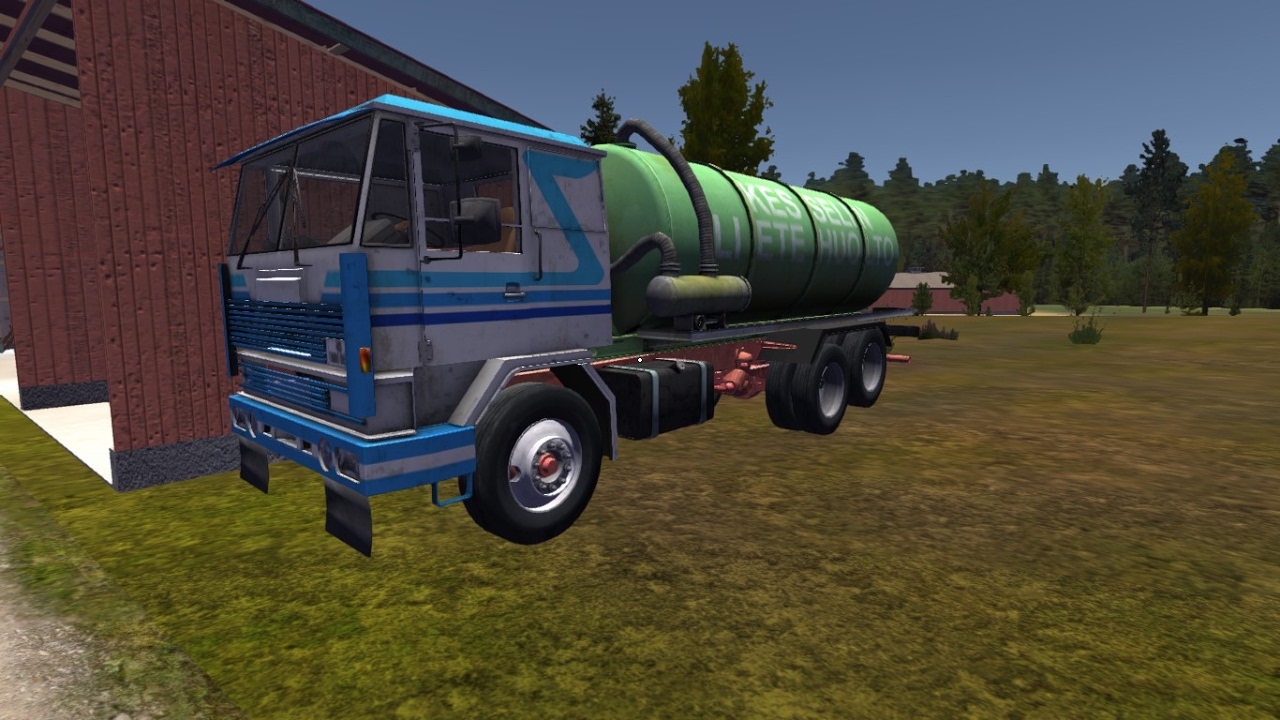
Sewage pumping is where you… well… pump sewage.
You need the poop truck, which is (the Gifu) and when you get the call, the dart will appear on your map. Go there, pump their sewage and get paid. Be wary that the poop truck has low and high range and they can be switched between with (default key R). You need to borrow the Gifu from Uncle, which is… annoying. You can only get a call for a poop job if either Uncle is home, or Uncle has lost his licence. Once you have borrowed it from Uncle, the Gifu will spawn at the waste processing plant in the town, (which i will be referring to as “Perajarvi” frow now on mostly)
To pump sewage, you go around to the back of the truck, and pick up the hose. Then take the cover off of the sewage well (and DON’T fall in). Make sure the hose is down most of the way, make sure the truck engine is running, flick on the dashboard switch for the “Hydraulic Pump” and wait for it to be empty. Then when the well is empty, collect up the hose and get your money.
It should be about 1200 markka.
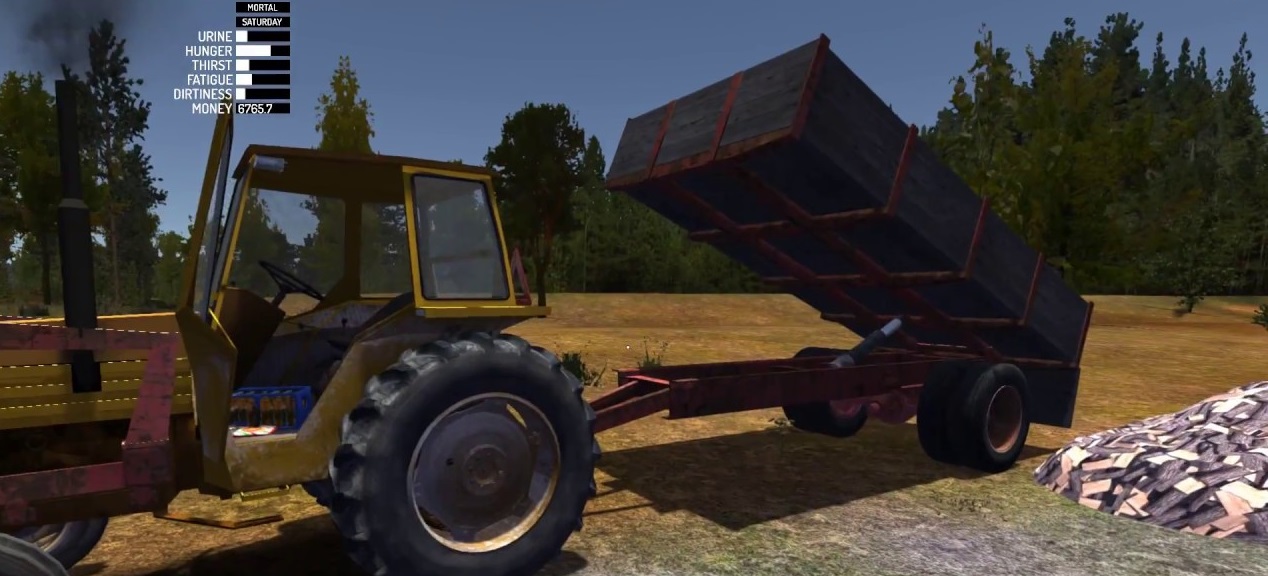
Firewood Delivery is very straightforward but takes a long time. When you get the call, go over to a little barn down by the first driveway after your house, and you’ll see a tractor (called the “Kekmet”), and a trailer which can be hooked up to the Kekmet. There is also a wood chopping station. To chop wood, you pick up the axe and equip it with (default key F). Then right click while aiming at the log. Then left click on the wood pile to restock your chopper. (If the chopper block is not restocking, it might be because there are wood pieces on the block.) Put the cut logs into the trailer until it fills up completely. You will know that its filled when the pile of wood texture doesn’t advance any higher, but it will still accept wood. (this will take a while). Then back the tractor into the trailer. It will hopefully connect and you can be on your way. There is only one house that orders firewood and you can get there by:
1. Left at the intersection just after the train tracks.
2. Left again at the 4-way intersection.
3. He is he second house on the right.
The tractor has low and high range and they can be switched between with (default key R) Also its slow as fu-
To dump the firewood out of the trailer, open the rear gate by clicking on it, then to your left right next to the seat there should be a lever labelled “Rear Hydraulics” left click on that and put the tractor into neutral. Then put the hand throttle to max. The trailer will start to dump out the firewood. If it doesn’t go up, you might need to try and push it up by getting underneath it, looking up and pressing (default key J) to get your pushing arms out. Once you have done all of that you right click on the rear hydraulics button twice and rev the engine again. The trailer should start going back down. Once you have done that go out an collect your money. It should be around 3200 markka.
Ventti can be played with the Ventti pig at his cabin on the lake. You might want to bring a bed there so you can skip to when his Ventti station is open. Also save if you can just in case you make a mistake. You can access his shack by leaving Perajarvi (the main town) on the dirt road by the brown school building and the church. You take the first right that you see on that road, and that is his driveway. Once you get there, depending on what time it is he might not be there. If you brought a bed you can sleep until he is there. Ventti is a Finnish version of Blackjack, but isn’t exactly the same as Blackjack. Below is a chart on wether to hit or stand depending on how much the Ventti pig bets.
Once you get high enough in the amount of markka you are betting, you will eventually bet your cars. Be really careful here because if you lose you will lose the Satsuma and not be able to get it back with out reloading a save or going through your game files with MSCeditor or some other program. If you win the car bet you will get his car, an old wagon with a wasp infestation. This car is known to the community by the “Ruscko,” or the “Pig’s Car.” (See “Ruscko” under section “Ranking Each Car” for more details on this car).
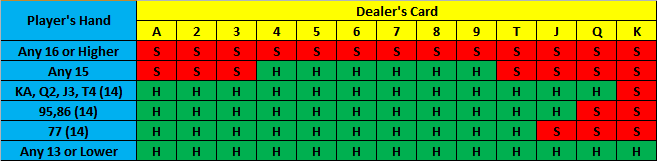
After you win the car bet, you will get into betting HOUSES (this is why I told you to save) If you LOSE this bet then no more house for you. So probably use that chart up there but take a look at the fandom wiki page for Ventti by clicking here[my-summer-car.fandom.com] so you know what all the card values are.
Kilju is a homemade sugar wine, that can be brewed in My Summer Car. You can make money off of it by selling it to Jokke, (commonly referred to as “Drunkman”).
Brewing kilju is relatively easy, you just need patience. To brew kilju, go to the island cottage with the boat (see section “Going out for more supplies” for some directions), and bring back the kilju bucket. Then, you need to get some juice bottles, sugar, and yeast. Then, you need to fill up the bucket by removing the lid (just like you would a car part), and take the bucket to the shower and turn on the tap there. Put the bucket underneath the running tap to fill it up with water.
Once the bucket is completely full, turn off the tap and now is the time to add your ingredients. You need to drop six bags of sugar, and one packet of yeast into the bucket.
Then, you put the bucket lid back on the bucket, again just like you would a car part, and wait for the kilju to ferment.
Use the time while the kilju is fermenting to drink all of your juice, as the empty juice bottles are what you are going to put the kilju in. Pay attention to your needs as you do this, because juice actually makes you thirstier, and fills up your urine need faster than water or beer. (I think)
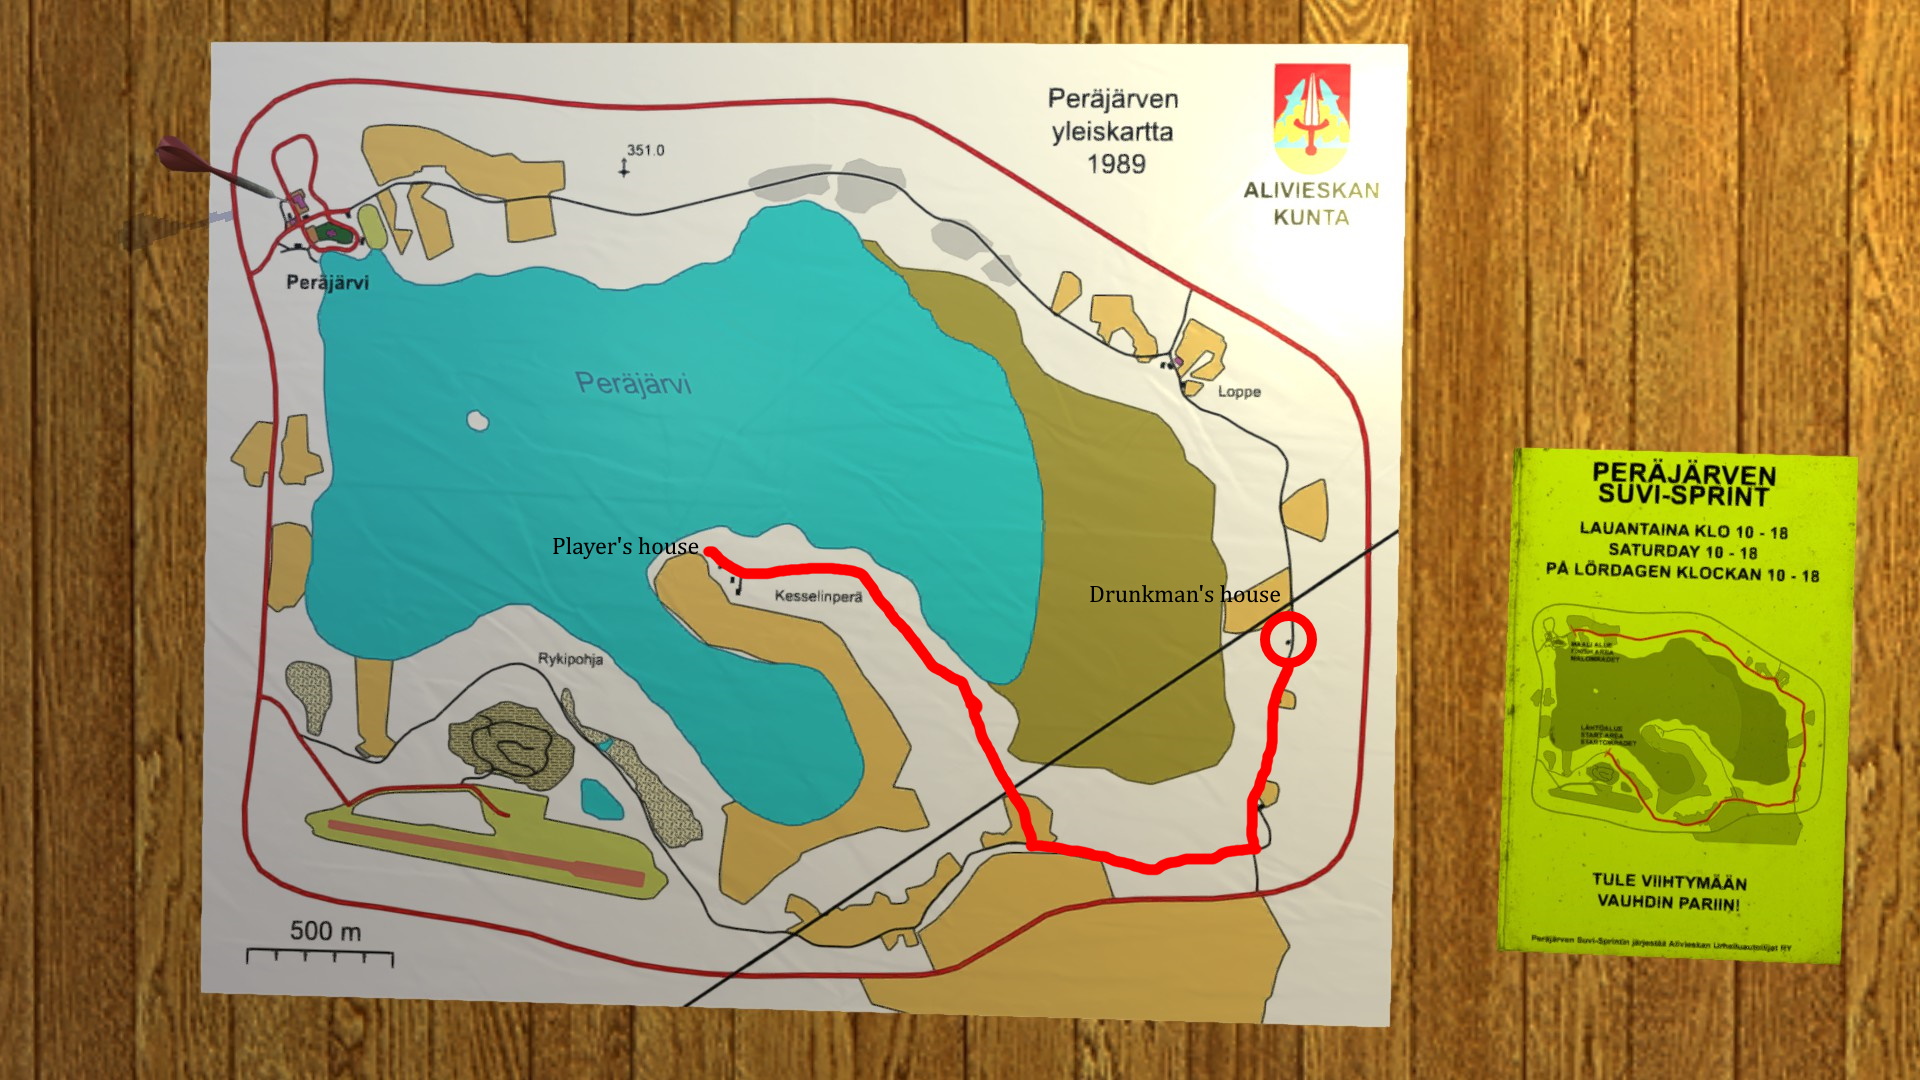
Drunkman’s house is located on the map here:
Pro Tips:
– The kilju should be done in about two and a half hours (real life time)
– Don’t take the lid off the kilju bucket for too long while it is fermenting or vinegar will form and that is no bueno.
– While the kilju is fermenting, bubbles will come out the top of the bucket. When this bubbling stops, the kilju is done.
A farmer calling himself Tohvakka will call you up, and ask you to transport his tractor with a top speed of about 5 km/h back to his farm. Be careful, as the cars on the freeway will ram you and put you off course.
Getting vehicles from Uncle
So to get the van to appear in Uncle’s driveway, you need to have at least one of these parts on the Satsuma: the driver’s seat, the engine block, or the left trail arm. Once you install one of those parts, a timer will count down from anywhere between 30-90 minutes, it’s different every save file. Once that timer has finished, the van will spawn in Uncle’s driveway. If it is the first time that you are borrowing the van, knock on Uncle’s door, and when he opens it take the van keys. If it is not your first time on this save file borrowing the van, don’t knock on the door just get in the van and drive. You will already have the keys. After a certain amount of time after the player has first borrowed the van (about 50 minutes or so), Uncle will lose his licence and give you the van and Gifu (poop truck) keys permanently. From this point on Uncle can be found sitting outside his house smoking. There is a beer case on the table in front of them which is just free beer.
Rally (Peräjärvi Suvi-Sprint)
The Peräjärvi Suvi-Sprint (Peräjärvi Summer-Sprint) is a rally consisting of two stages. To participate, show up at Fleetari’s tent by the School, (a big brown building down the road from Teimo’s) on Saturday from 8:00 to 18:00. There are some requirements that you need to have filled before you are able to register;
– The roll cage is installed in the Satsuma
– The racing seats and harness are installed in the Satsuma
– You are wearing the racing helmet while registering (it can be taken off after registration for better visibility)
– The Satsuma does not have racing slicks installed.
– You are not drunk (you can get drunk after registration if you’d like)
– 500 mk for the registration fee.
How to get all of the things listed above;
– The roll cage can be installed by Fleetari for 5500 mk
– The racing seats can be bought from the catalog for 5095 mk, and are installed just like the normal seats with four 9mm bolts.
– The racing harness can be bought from the catalog for 645 mk, and are installed onto the driver’s side of the roll cage just behind the racing seats with four 8mm bolts.
– The racing helmet can be found in your bedroom and is put on with (default key F), you can take it off by looking down and pressing (default key F) again.
– To not get drunk you must not drink beer, kilju, booze, or vodka.
– 500 mk can be gained by doing any of the jobs listed in [Making Money].
The first stage runs from the registration tent along the dirt roads to the strawberry field near the dump at Rykipohya, while the second stage is the first stage in reverse.
After the first stage, head along the highway by going straight after finishing the stage, and rejoin the paved road and then turn right on the highway and head back to Peräjärvi.
Park your car in the school parking lot, (the parc ferme area), and wait for Sunday to register at the tent for the second stage. Use the same route you used to get to Peräjärvi last night to get to the second stage tent, as it is at the finish line for the first stage. The second stage is the same as the first, but in reverse.
Pro tips;
– Use a wheel if you can, but don’t use a controller, because the controller support sucks.
– Practice the track throughout the game week leading up to Saturday to get a feel for the track.
– Remove the helmet after registration for better visibility
– Weight reduction! Remove un-needed body panels and interior parts to get the Satsuma lighter and therefore a bit faster, (I’ll have to check if this actually works, but it makes my feel better about my Satsuma).
– Save before starting the rally on Saturday, and once your car is in the parc ferme area at the end of the first stage.
– Bring food and drink with you, and the rear seat so you can sleep in the parc ferme area and avoid having to go home with another vehicle and possibly missing registration time for the second stage.
– Get the shortest gear ratio from Fleetari’s, (4.625), as it improves acceleration, and only use fourth gear on the straights. You won’t need to worry about top speed.
– The rally tires can be fitted to wheels by Fleetari for 3200 mk, either leave your wheels in his office or leave the Satsuma in his garage with the wheels you’d like to fit them on. They are not required anymore, but they add grip on the dirt roads.
– The wiki says to practice drifting, but I never got good at it so I can’t really give you any tips on it.
Ranking Each Car
There are 8 drivable cars in My Summer Car. In this section I will give them each a score from 0 – 40. This is totally not just a ripoff DougScore. The safety rating is from the speed where you die in a crash. (with STOCK seatbelts ON.)
The Satsuma is the car you build in the game.
- Handling – 7
- Speed – 8
- Safety – 5
- Practicality – 5 (can sleep on the rear seat, but if you crash the car parts all fly off)
Satsuma gets a score of 27/40.
The Gifu is the poop truck.
- Handling – 3
- Speed – 4
- Safety – 9 (is immune to all traffic crashes)
- Practicality – 4 (has a bed in the back)
Gifu gets a score of 20/40.
The Hayosiko is the blue van that can be borrowed from Uncle.
- Handling – 6
- Speed – 6
- Safety – 3 (death wobble)
- Practicality – 10 (can hold the sofa, half the Satsuma parts, a bunch of beer, the Satsuma rear seat, a bunch of empty Kilju bottles, and the Jonnez (mini bike) all in the back.)
Hayosiko gets a score of 23/40.
The Jonnez is the small mini-bike known as the “death bike” or the “f*ckboi bike”.
- Handling – 3 (flips onto its side half the time)
- Speed – 4 (tops out around 80kph)
- Safety – 2 (have to wear a crash helmet now)
- Practicality – 3 (has a little tray on the back that can hold some stuff)
The Jonnez gets a score of 10/40.
The Kekmet is the tractor/forklift.
Handling – 4
Speed – 1
Safety – 6 (you’re almost never going fast enough to have a crash)
Practicality 6 – (you can flip the Gifu with it which is normally almost impossible by hand, and tow the trailer.)
The Kekmet gets a score of 17/40.
The Ferndale is Fleetari’s muscle car that he will lend to you while the Satsuma is in the shop.
Handling – 2
Speed – 5
Safety – 1 (it also has the death wobble, (thanks to user garfield[FIM] for telling me that!) It happens over around 110 mph in the Ferndale)
Practicality – 7 (really big trunk that if you’re careful you can fit the Jonnez in, automatic transmission, and large back seat for more BEER!)
The Ferndale gets a score of 20/40
The Ruscko is a car that can be won by playing ventti (see “Making Money” for more info) with the ventti pig. but be careful betting for it, you will lose the Satsuma. Or you can just break into his shed and steal it with the screwdriver. But be careful before driving it you have to get rid of a wasp’s nest in the passenger side of the car, either by blasting it with the fire extinguisher, or submerging it in the lake for 15-20 seconds.
Handling – 3
Speed – 4
Safety – 2
Practicality – 10 (there is a built-in bed in the back, huge wagon trunk with no back seats for lots of cargo, and a roof rack which is the perfect width for more BEER!
The Ruscko gets a score of 19/40
A combine harvester owned by a farmer named Tohvakka.
Handling – 8 (rear wheel steering at low speeds).
Speed – 1 (tops out at 11 kmh).
Safety – 5 (you’ll never be going fast enough to have a fatal crash, but beware of AI drivers rear-ending you on the highway).
Practicality – 2 (can’t hold much and is very slow and complicated to start).
Coming soon/changelog
– Finishing the section on making money
– Section on getting your car inspected
– Section on common mistakes when building/upgrading the satsuma
– Smaller section on the ski hill
All changes since December 31st, 2020.
[12.31.2020]
– Added changelog.
– Finished section on Kilju.
– Added section on the Rally.
– Added the Arvo-Algotson combine harvester to [Ranking Each Car].
[01.10.2021]
– Fixed mistakes in the Rally section.
02.10.2021
– Fixed mistakes in the Ranking Each Vehicle section.
– Added section on the combine harvester delivery.