Overview
Just a guide for Commando, an indispensable perk in KF2.
Part 1: The Role of the commando
1) A trash killer responsible for the crowd control.
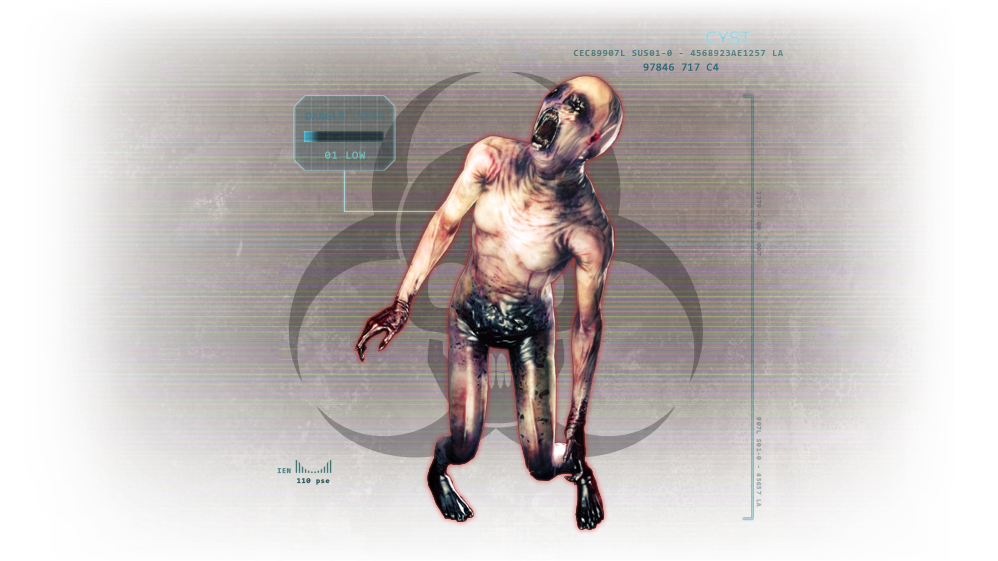
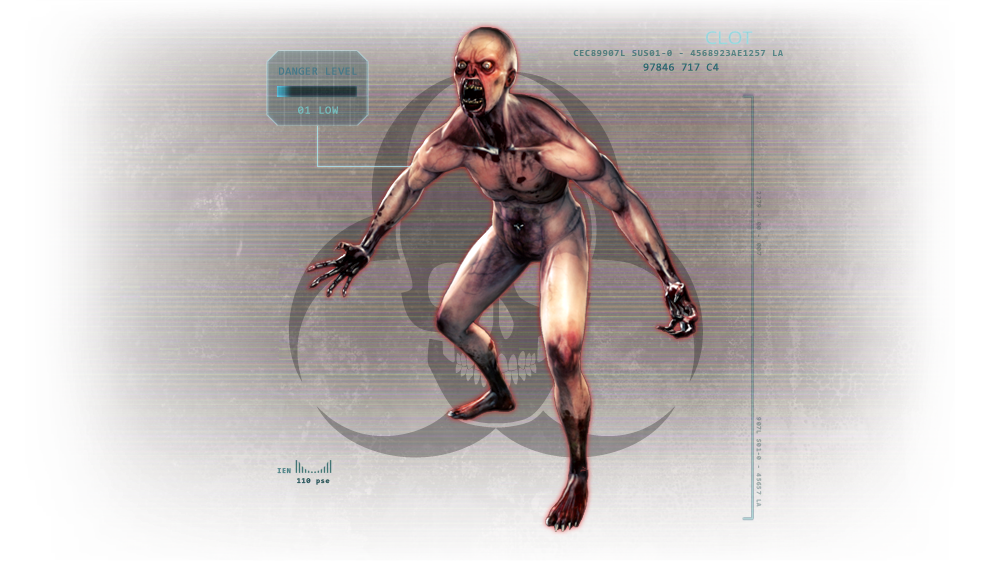
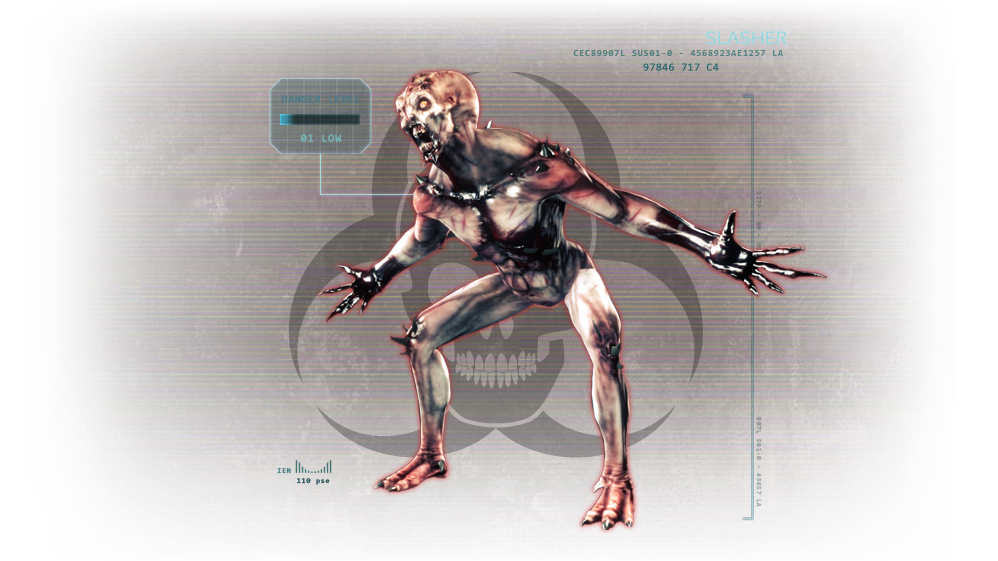
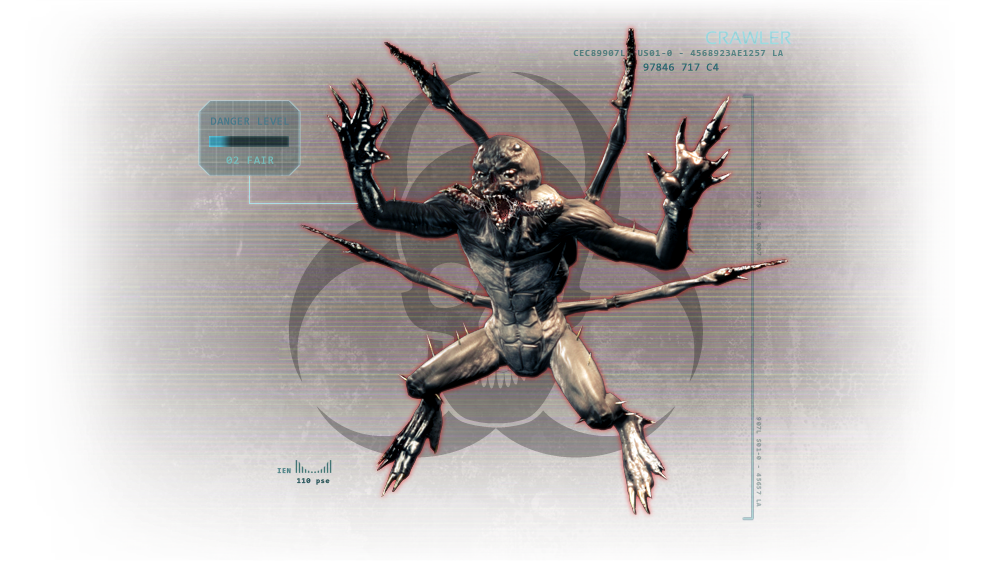
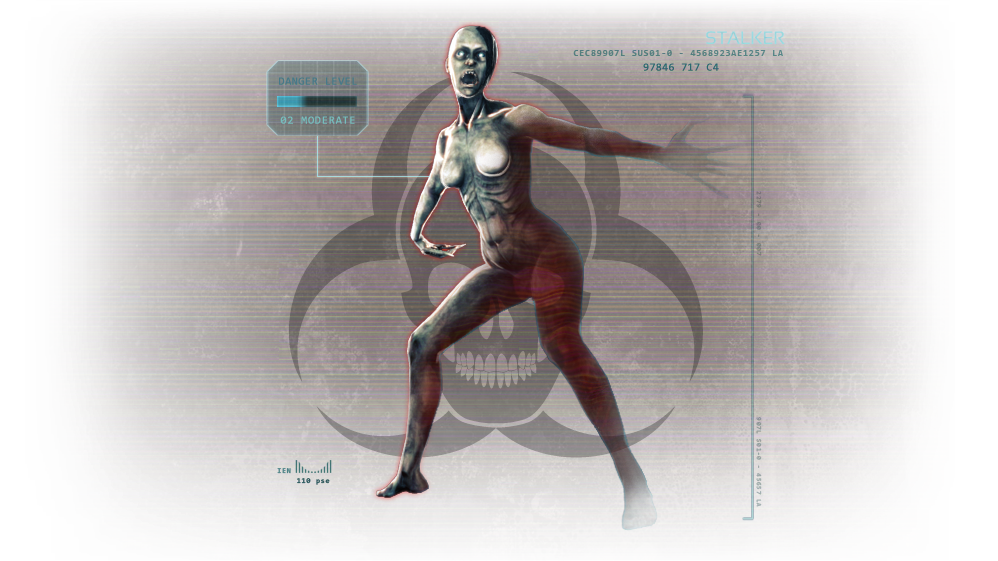
Trash Zeds include: Cyst, Alpha Clot, Slasher, Crawler, Stalker and Gorefast.

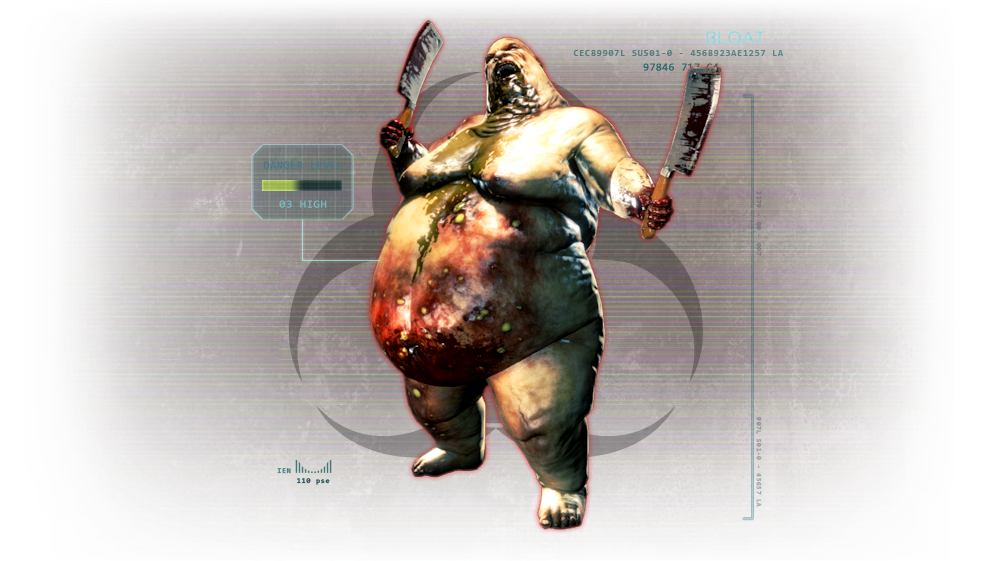
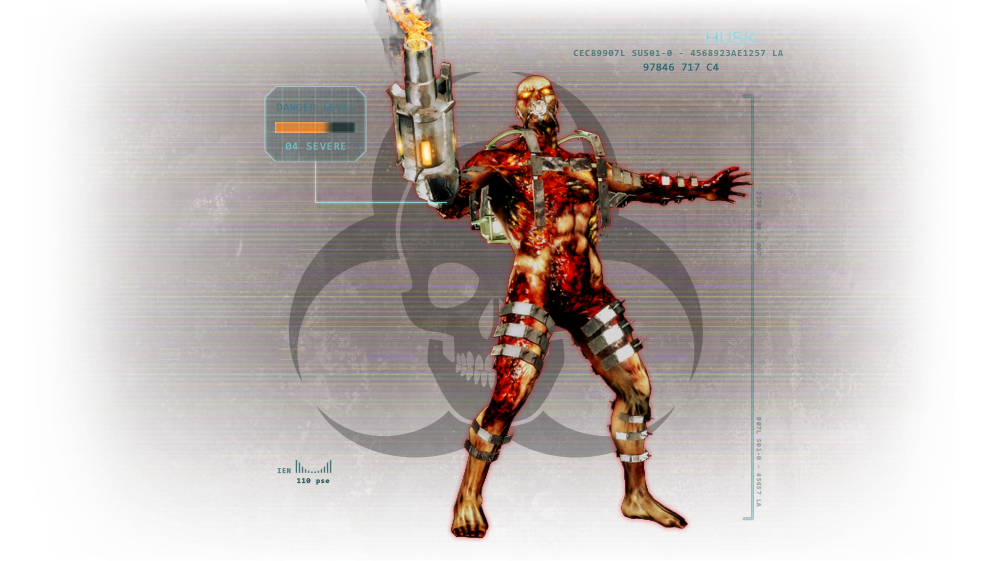
2) Eliminate MEDIUM Zeds if possible although some might need couple shots to be eliminated OR decapitated. Medium Zeds include: Rioter, Gorefiend, Siren, Bloat, Husk and E.D.A.R.


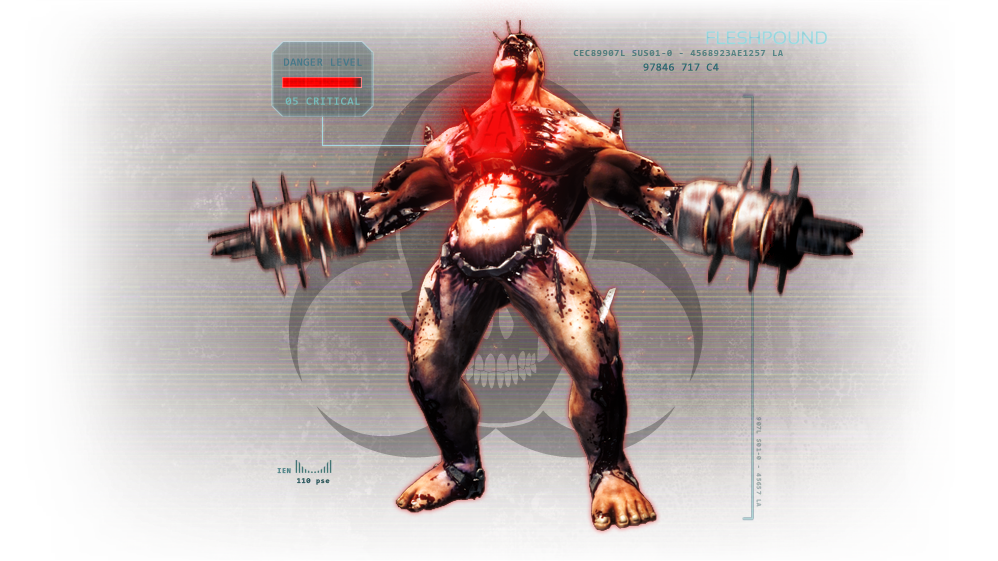
3) If ESSENTIAL (e.g. No Big Zed Hunter present like Gunslinger or sharpshooter, take down Big Zeds like scrakes (SC), fleshpounds (FP) and Quarter Pounds (QP) using high tier weapons such as the HM-TECH 401, SCAR-H or FN FAL


4) EXTEND ZED TIME (ZT) IN A PROPER MANNER!!!!!!
EXTEND ZED TIME (ZT) IN A PROPER MANNER!!!!!!
EXTEND ZED TIME (ZT) IN A PROPER MANNER!!!!!!
(Extremely important and defines the necessity of Commando on high-difficulty gameplay such as Suicidal, Hell on Earth and even Controlled Difficulty)
5) Memorise the number of shots/bullets (of your commonly used arsenal) required to eliminate the Zed in order to guarantee an ZT extension
I mean this takes time but probably takes less if you are free to check-out my list provided on part 4
6) Laning: The commando is preferred to stay with a precision-based perk who is a BIG-Zed Hunter (Gunslinger or sharpshooter), laning with support or SWAT should be avoided. Never consider laning with chaotic/AOE perk such as Firebug, demo and berzerker)
Part 2: Skill choice
Level 5: High Capacity Mag allows:
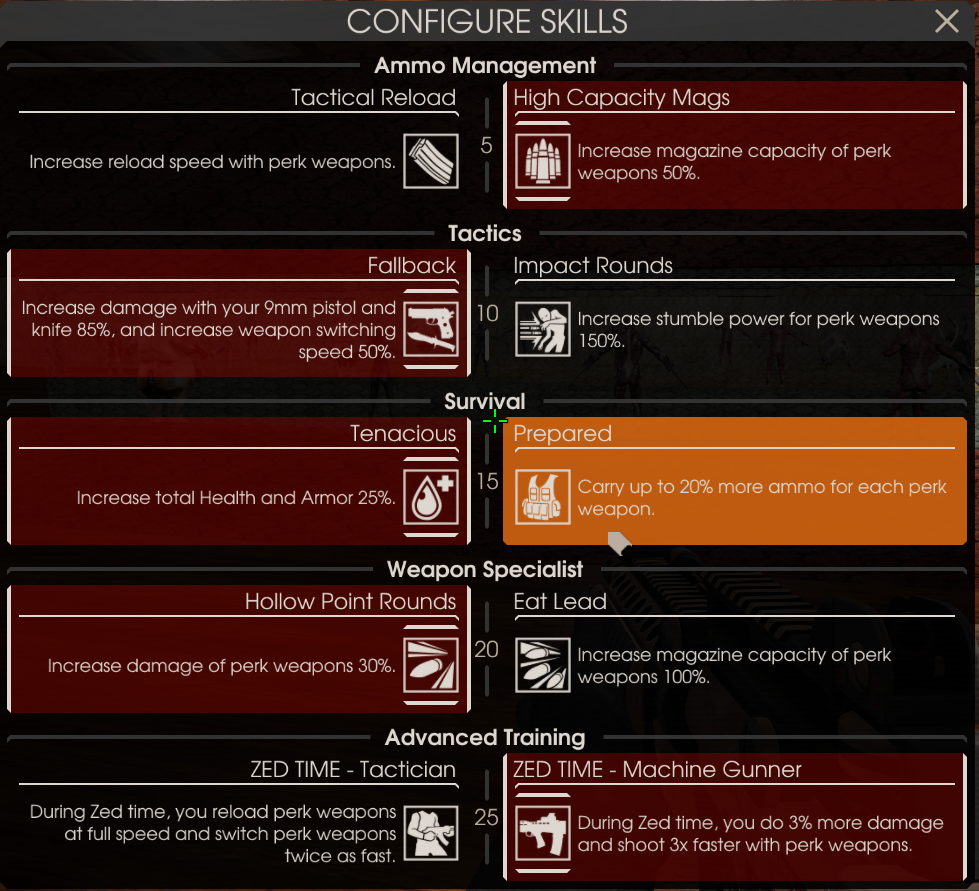
1) More ammo reserve to kill zeds and hence refresh Zed Time (ZT).
2) Provide a greater margin of error in the course of a big-zed (SC/QP/FP) take-down.
Here I used a FP take-down as an example, 20 head-shots is required for a decapitation on a FP (6-player, Hell On Earth difficulty). If you select tactical reload, it gives you NO room for errors. In other words, you need to spend a whole magazine and every bullet must be a head-shot in addition to perform the reloading.
Contrary to tactical reload, high Cap Mag offers extra 10 bullets in your magazine and hence a there is a much greater margin of error in taking-down FPs. Moreover, if zed time is triggered after your take-down, you will possess sufficient bullets in your magazine for zed time refreshes.
3) The effectiveness of Tactical Reload can be countered by a trick called reload cancelling
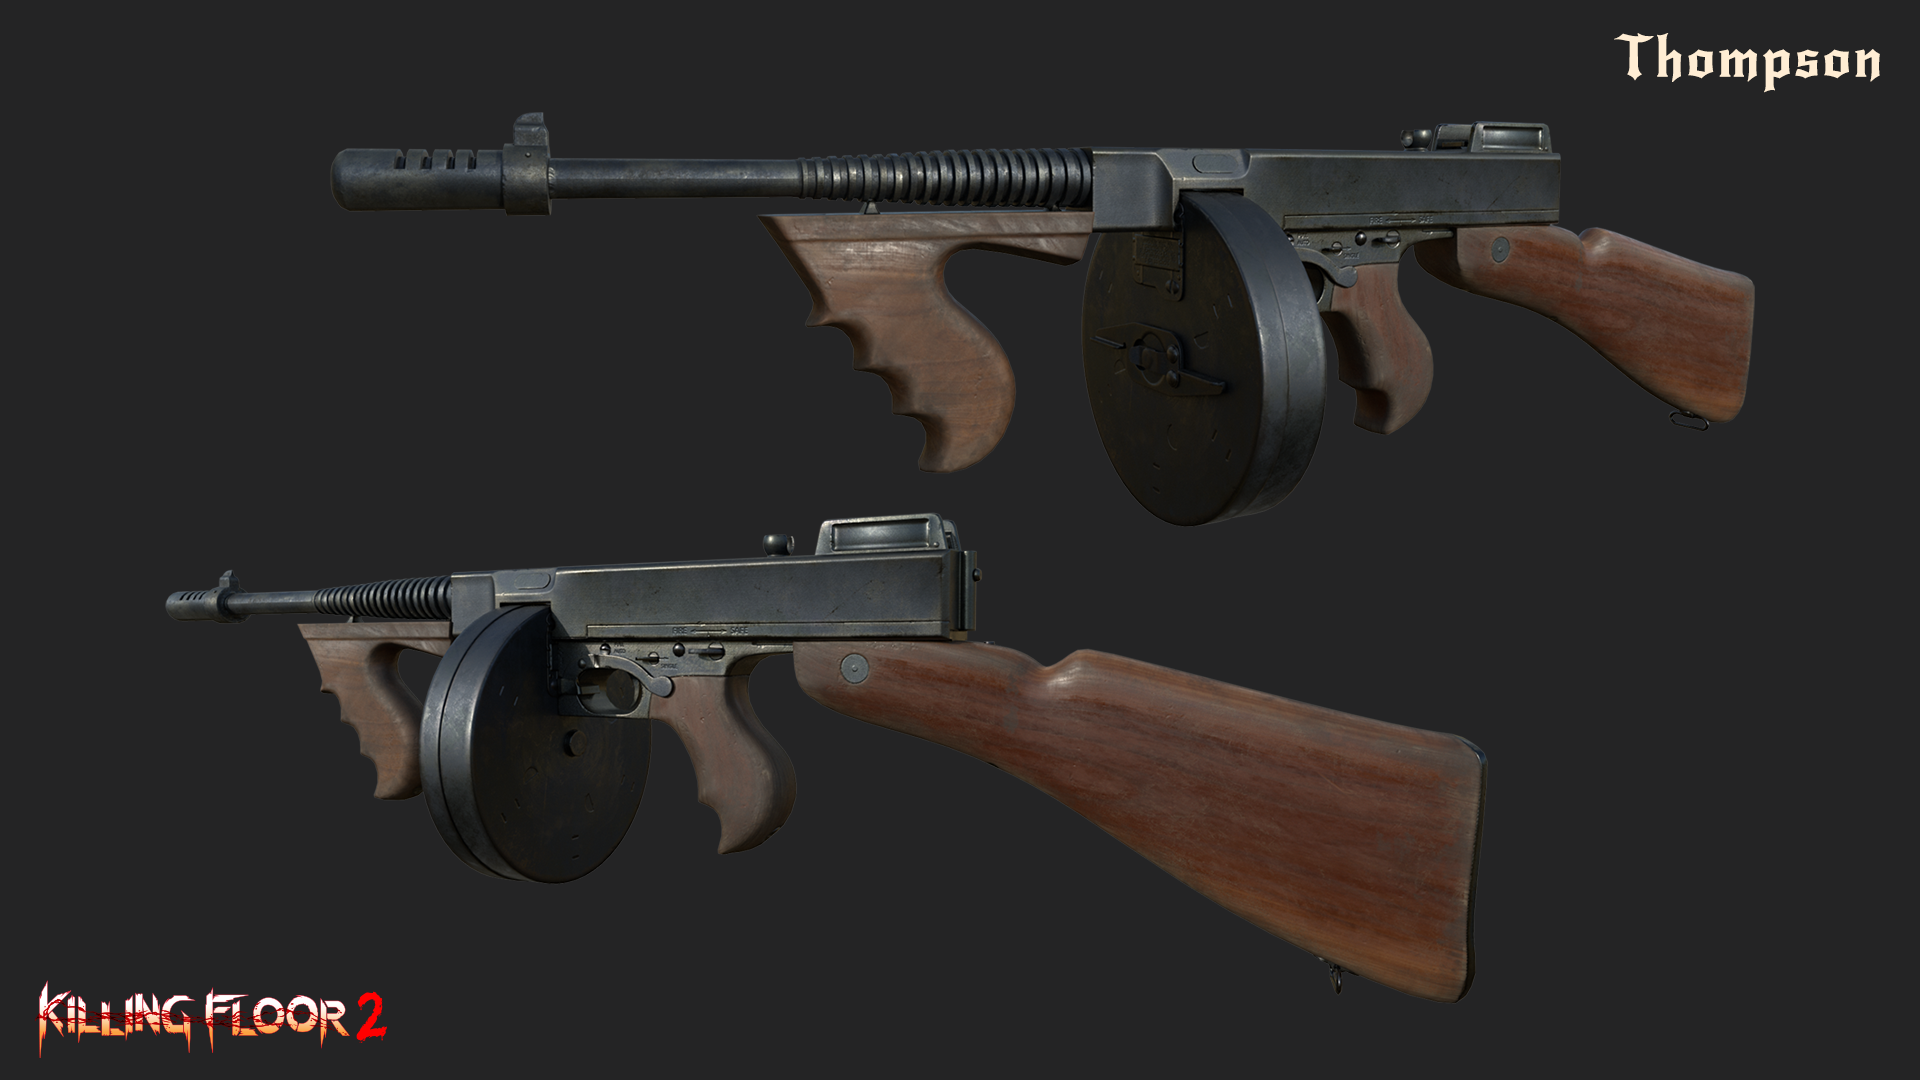
How to reload cancel: Applicable to all mag-fed guns such as the AR15, Tommy Gun, HM-TECH 401 and FN FAL
Method 1: Observe the reload animation, when the mag is about to be put into the gun, press V (key for bashing in default) followed by pressing Mouse 1 (Shoot). The interval between pressing the 2 keys should be almost instantaneous.
Method 2: Observe the Ammo HUD at the bottom right corner

When the number of bullets changed from 26 to 30 (for example), immediately press V (key for bashing in default) followed by pressing Mouse 1 (Shoot).
1. Method 1 is relatively risky buy allows you to focus on Zeds
2. Method 2 is safer but it shifts your focus to the bottom right HUD instead of the Zeds in front of you.
3. Dry reload with reload cancelling slightly faster, an exception is the Tommy Gun
Level 10: Fallback allows you to switch weapons 50% faster, which includes the speed to draw the medical syringe to heal yourself or teammates, which can save you/teammates in a pinch.
Also, if you run out of ammo in one AR during ZT and you need to refresh zed time by killing trash zeds, the extra 50% weapon swap speed allows you to draw another AR on time to kill the Zed and guarantee a ZT refresh.
Impact Rounds can lead to pre-mature stumble of big zeds if you want to take them down on your OWN. Stumbling=missing shots (Not only those from you, but also those from your teammates)
Level 15: Tenacious allows to survive longer due to extra 25% of health and armour, while prepared increase maximum ammo that you can possess. Actually, you can enjoy both sides of your skills by operating a trick named over-capping (OC)
Level 20: Hollow Point Rounds (HPR) is far superior to the Eat Lead counter parts.
Extra 30% damage means less number of shots required to kill a Zed, less ammo means less dosh needed to buy ammo and easier to guarantee an ZT extension. Because 1 shot (no matter it is body shot or head shot) is the most viable tactic to extend ZT, either you hit or you miss. More than 1 shot to kill a zed increases uncertainty , like missing the first shot or the second one .
Nevertheless, “OC” can be applied to both skills but the Eat lead perk is only applicable to the first mag of your AR(s).
Over-Capping can be segregated into 2 scenarios:
Situation 1: You need to get the Bullpup/Tommy gun as a transitional arsenal
To sum the clip up:
1) When a wave is about to end (i.e. a few zeds left), open the menu by pressing Esc, configure skills by switching from Tenacious (Level 15) and HPR (Level 20) to Prepared and Eat Lead respectively
2) After the wave ends, get to the trader and get the guns you want
The main reason to switch skills before purchasing guns at the trader is because you can get additional ammo when you buy the gun
Here is use the HM-TECH 401 as an instance, you can get 40 additional ammo if you switched your skills before getting to trader, which can save you a pile for a grenade or several armour points.
3) Buy ammo or scavenge ammo through ammo boxes distributed throughout the map
4) Reload AR(s)
5) Throw it onto the ground (DON’T get spotted by teammates as some may steal them and sell it, try to do it at some corners but close enough to the trader.)
6) Switch the Prepared and Eat Lead BACK TO THE Tenacious and HPR
7) Acquire gun(s) and heal yourself back to 125 HP
NOTE: Avoid getting ammo from support or pick up any ammo boxes after you have performed steps 1-7. Otherwise, ALL OF YOUR HARD WORKS, GONE!
Situation 2: When you have completed your load-out
To sum the clip up:
1) When a wave is about to end (i.e. a few zeds left), open the menu by pressing Esc, configure skills by switching from Tenacious (Level 15) and HPR (Level 20) to Prepared and Eat Lead respectively
2-1) After the wave ends, get to the trader and fill up your ammo OR
2-2) Scavenge ammo through ammo boxes distributed throughout the map
3) Buy ammo and kevlar
4) Reload AR(s)
5) Throw it onto the ground (DON’T get spotted by teammates as some may steal them and sell it, try to do it at some corners but close enough to the trader.)
6) Switch the Prepared and Eat Lead BACK TO THE Tenacious and HPR
7) Acquire gun(s) and heal yourself back to 125Hp
8) Use 60 dosh to purchase the remaining 25 points of armour
NOTE 1: Avoid getting ammo from support or pick up any ammo boxes after you have performed steps 1-8. Otherwise, ALL OF YOUR HARD WORKS, GONE!
NOTE 2: Thanks to Eat Lead (level 20), it brings you 2 major benefits:
1) It doubles your magazine size in the first mag, which allows you to take down 2 (even 3) big zeds within a single magazine WITHOUT reloading.
2) It scales up you ammo gained from ammo boxes and this explains why it is worth spending some time to find some ammo boxes around the map during trader time.
Level 25: Machine Gunner: Shooting faster during Zed-Time permits easier ZT extension and even Big Zed termination (provided that if they are close enough). Sometimes you may be able to get a clean kill on a big zed with the skill and hence another 3 seconds of ZT.
Part 3: Loadouts
Assumption: 6 players, HoE difficulty, Level 25 commando
Wave 1: AR-15 for trash zeds and 9mm for bloat if possible


• The AR-15 can efficiently kill trash zeds in which basic enemies like cysts, slashers,clots and gorefasts can be killed with a single head-shot.
• Despite I suggest to use the single-fire mode of the AR-15 to conserve ammo, a major utility for the burst-fire mode (3-round burst) is that it can kill gorefiends efficiently assuming you hit all 3 shots to its head, particularly during zed time.
•With Fallback(level 10), your 9mm can deap a bloat in 3 head-shots.
Wave 2:
Scenario ONE: If you are confident with your aim, keep utilizing the AR-15. Things will be much easier if a Support (assuming the perk chose the skill called Resupply Pack) is present in your team as you can acquire hundred rounds of AR-15 and 25 points of armour each wave. Consequently, it is possible that you dont even need to buy ammo or kevlar on early waves.
Scenario TWO: Sell the AR-15 and buy Bullpup or Tommy Gun (650 dosh) since the full-auto mode offer more utility than the AR-15. For example, full-auto mode allows you to kill a gorefiend even before it uses its blades to protect his head. Again, life will be much easier if a Support presents in your team.

If over-capped: 75/324=399
If over-capped: 75/350=425
Note: Both guns have similar ammo pool, Tommy Gun has greater magazine size but significant bullet spread. On the contrary, L85A2 has lower recoil but lower magazine size. So, it all comes down to whether you can control the recoil of the Tommy Gun or just go for the safer option, which is the SA80.
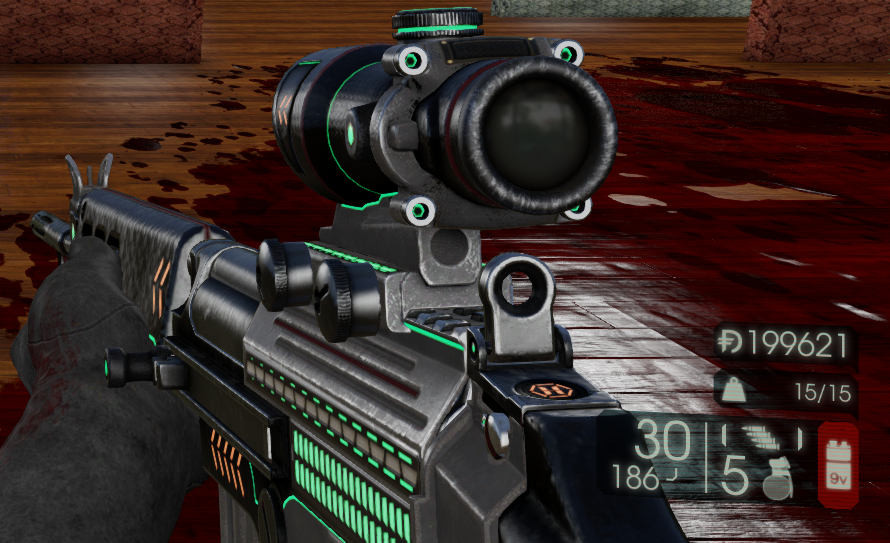
Waves 3-4: Assuming you have not died in the first 3-4 waves and perform well (i.e. kill trash and medium Zeds, refresh zed time). You will be able to purchase the HM-Tech 401(Tier 4,1500 dosh, 7 blocks of weight) in which the gun offers so much utility to the commando as it can:
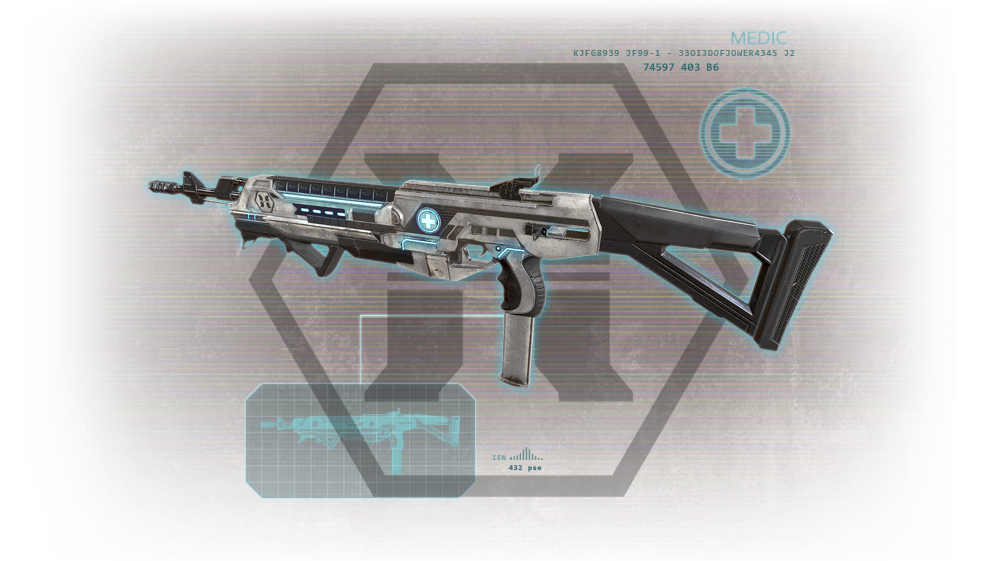
1) The 401 provides excellent trash handing power in which most trash zeds can be eliminated in a single head-shot or 2-3 body shots.
2) Decent medium Zed clearance: For head-shots, siren needs 3, bloat=6 (decap), husk=7(decap, or 2 shot to its fuel tank), 3-4 hits to the E.D.A.Rs chest core
3) Provides healing to your teammates by shooting 3+1 medical darts (15hp for each dart), the extra 1 dart can be ejected 1-2 seconds later since the 401 has the fastest medical dart recharge rate among all medic weapons.
4) High stumbling power among commando’s arsenal on par with the Tommy Gun, which could be useful if you are going to SOLO big-zeds
5) High magazine capacity (60 default, 100 if over-capped–Reminder: Only applicable to the first magazine)
6) Sufficient ammo pool (460 total, 580 if over-capped)
7) Economically friendly, which means:
– 1 dosh per bullet
– The absence of the OVERKILL problem in comparison with the SCAR-H and AK-12. The base damage of HM-TECH 401 is 35, compared with AK (40) and SCAR (55), the damage of 401 is enough for you to handle most trash and medium zeds
8) The only weakness of this weapon: It handles QPs and FPs poorly. But the gun itself is decent for SCs if you have enough backpedal.
Waves 5-6: FN-FAL (Tier 4, 1500 dosh, 8 blocks of weight) is your best friend to:

1. Exterminate big zeds, especially for FPs and QPs as they are 25% more vulnerable to the rifle damage type supplied by the FN-FAL. For the number of headshots needed to decap (NOTE: NOT an elimination) SC=14 and FP=20. QPs are an exception and they can be KILLED with 14 accurate headshots.
2. ONE BODY SHOT trash Zeds: Significantly improved the management of the ZT extension. Those zeds include, Clots, Cysts, Slasher, Stalker and Crawlers
3. A SINGLE HEADSHOT to kill a GOREFIEND DURING ZED TIME: If you selected Machine Gunner (Level 25 skill), the extra 3% damage of the FN-FAL permits the gun to reach the threshold to 1 shot a Gorefiend.
4. The only drawback of this weapon is probably the low ammo pool (30+160=190). Nevertheless, such problem can be alleviated by performing over-capping, allowing the FN-FAL has a total ammo of 50+192=242.
Waves 7-10 and boss fight: Maintain the loadout of 401+FAL, fulfill the job as a commando aforementioned in part 1
TO CONCLUDE OR TL:DR:
401+FAL is the META(Most Effective Tactic Available) for the Commando
Load-out ONE:

However, if your team already has a god-tier medic that you don’t even need to worry about healing your teammates, the (upgraded) SCAR-H Assault rifle is an excellent substitute for the HM-TECH 401.

Load-out TWO:

-Basic enemies including clots/cysts/slashers/crawlers/stalkers can be finished with a single body-shot
-Gorefast=1 HS, Gorefiends=2 HS and Rioters=3 “leg-shots”
-Medium zeds like husks, sirens and bloats requires 2-3 shots to their weak-points
A special case is the E.D.A.Rs, 3-4 shots to the chest core is needed to guarantee a kill even with the 2 strongest assault rifles (bullet-sponge smh……)
The SCAR AND FAL combo allows you to solo a lane even easier since both ARs are capable of dealing promising damage to any zed types. I suggest using SCAR-H for trash, medium zeds and scrakes. FAL will be your solution to QP/FPs.
Load-out 3 (a fun build, complete trash specialization, applicable to lower difficulties) : When Commando goes
NOTE: This load-out allows you to handle trash effeiciently while providing team support/healing to your teammates. However, you must select Tactical Reload (Level 5) so that your Stoner LMG can reload quicker.


The reason I chose Hemoclobber is that I parries raging FP with a parry strength of x0.5 (receive 50% less damage when successfully parried an attack) and heavy attack heals you 30 hp, which helps a lot especially when you need to solo a fleshpound.
Part 4: Number of shots required to kill or decapitate a zed
Assumption: 6 players, HoE difficulty, skills configuration RLLLR
HS stands for Head-Shots, BS stands for Body-Shots
On wave 1:
3 BS
3 BS
7 “LEG-SHOTS”
7 “LEG-SHOTS”
Don’t even bother to body shot them
Don’t even bother to body shot them
4 BS
5 BS
8 BS
9 BS
2 BS
2 BS
2 BS
2 BS
5-10 BS (avoid BS)
5-8 BS
2 shot to his fuel tank makes him explode
Avoid BS
2 shot to his fuel tank makes him explode
Avoid BS
By reading the stats, it is remarked that HS with the Commando is far better than BS. The commando is classified as a precision-based perk in which head-shots is much more effective than shooting zeds’ body. Thus, all of the stats starting from below will be HS only, except for E.D.A.R.s and Rioters (Please forgive my laziness).
On wave 2:
Avoid HS
Don’t even bother to body shot them
7 HS for Tommy Gun
2 shot to fuel tank makes him explode
On waves 3-10 and boss wave:
3 “LEG-SHOTS”
2 SHOT TO FUEL TANK
1 SHOT TO FUEL TANK
(1 only during ZT)
5 BS
3 BS
SCAR-H AR (Tier 4 VS Tier 5)
1 BS
2 BS for clots and slashers
1 BS for cysts
1 BS
1 BS
2 BS
3 BS
4 BS
5 BS
2 shots to fuel tank
2 shots to fuel tank
Several Conclusion can be drawn from the table:
1) It reduces the number of shots by 1 to handle trash and mediums
2) It saves a couple bullets when it comes to SC/QP take-down
3) Basic enemies can be killed in a single HS/BS (no need to worry about 2 body shot slasher/clots)
NOTE: I did not include FP because even tier 5 SCAR cannot decap an FP within a single mag (31 shots needed), UNLESS you over-cap it (50 in the first mag thanks to Eat Lead)
Stoner 63A
2 BS
3 BS for slasher/clots
2 BS for cysts
1 BS
2 BS for stalkers
1 BS for crawlers
3 BS
5 BS
6 BS
8 BS
3 shots to its fuel tank
3 shots to its fuel tank
Several Conclusion can be drawn from the table:
1) It reduces the number of shots by 1 to handle mediums (siren, bloat and husk)
2) It saves bullets when it comes to SC/QP take-down
3) Basic enemies can be killed in a single HS/ 2 BS (no need to worry about 3 body shot slasher/clots)
NOTE: If you think upgrade is a bit too much for the stoner, it is entirely fine you go duo ARs by pairing Tier 4 Stoner with SCAR-H/AK-12/Tommy Gun/M16.
It is hoped that the availability of the tables above can contribute to the familiarisation with the number of shots needed to get a clean kill/decap a Zed. The memorisation of those data allows improvements associated with ammo management, target prioritisation and most significantly, ZT refreshes.
Part 5: How to refresh Zed Time (ZT) properly
ZED TIME (ZT) is probably the most iconic and essential asset to you and your whole team. For the details in relation to the mechanic, please refer to this website: [link]
Basically, when ZT kicks in, it has a duration of 3 seconds and the whole “world” will be slowed down to 20% of the original speed. Any perk can refresh the ZT once by killing a Zed. (NOTE: Here I used the word REFRESH because ZT is actually a count down timer starting from 3 sec all the way down to 0). The Commando is the only perk who can refresh ZT by 6 times. In other words, maximum of 20 seconds of ZT can be offered by an experienced commando.
During ZT, all 10 perks will have their ZT skills activated. For instance, Gunslinger gets the Fan Fire activated (Shooting and Reloading in Real-time) which directly raises his DPS by 5 times. This allows GS to terminate almost everything in front of him. SWAT and Firebug will thank you a lot since they can shoot in real-time without consuming ammo.
Even though you are not Level 25 yet, the ZT allows you to read the environment and aim for Zed’s weak spot much easier as the speed of moving your mouse remains unchanged (i.e. real-time)
So back to the main point of this section, how to refresh ZT in a PROPER MANNER?
Method 1: When ZT starts, count to 2.5 seconds and immediately kill a ZED. You may try to say it out or count using your heart.
Method 2: When ZT initiates, wait all the way down until the Black/White effect is about to fade away OR when the Zed’s action is about to turn from moving from slower (20% original) to its normal speed. The 2 signs aforementioned signals ZT is about to end. At that exact moment, kill a Zed to refresh it and repeat.
Method 1 is safer but method 2 allows maximum possible ZT for your teammates to become John Wick. However, if you missed that instant moment of Black/White Effect fading away, you can no longer refresh ZT.
Method 3: A “Compromise Approach” (For those players that are un-confident about head shooting zeds)
Don’t be afraid of body-shot trash zeds to extend ZT, clots/slashers/cysts only require 2 body shots from HM-TECH 401, or if you are running an upgraded SCAR-H, 1 shot is all you need. Also, 2 body shots from FN-FAL is sufficient for gorefast termination.
The essence of Method 3 is to do some pre-firing to ensure that you only need a single body shot to eliminate a zed when Zed Time is about to end
Last but not least, please don’t feel sad when you cannot refresh ZT long enough because it is affected by various factors such as:
1) Latency/Internet delay: For example, if you have entered into a server with 200+ ping, your bullets will exhibit significant delay from shooting the round to the time that the bullet impacts the enemy.(usually around 1-2 seconds depending on the distance between a player and the zed). Such delay may mess up with your ZT extenion and hence you may want to try to kill a zed 1-1.5 second earlier if you are using method 2.
2) The distance between you and the target zed: If the distance of a zed from you is very far (>20m), I suggest shooting the zed 0.5 second earlier rather than waiting for the black/white effect to fade away. This is because a small amount of time is needed for the bullet to travel to the zed WITHIN the zed time. Hence, it is better to shoot earlier rather than missed the zed time.
2) Other perk stealing your ZT: For instance, you have couple of gorefasts in front of you and ZT starts.This permits you to offer a full ZT. Then,a demo kills all of them in front of you using the M79. On lower difficulties it will be fine but on higher difficulties like suicidal and Hell on earth, you may need to notice the demo to leave some trash zeds for you in order to perform sufficient zed time refreshes. This is notably critical if multiple big zeds are present.
3) No Zeds available during ZT, the scenario is especially true when a wave is about to end or it is just the initiation of the wave. Please don’t feel bad as you can do nothing about it.
4) Significant screen tilting induced by demo’s destroyer of the world (Level 25). This is especially true when the demo shoots explosives to you directly.
5) Firebug’s weapons are obstructive to your visibility too
6) Berzerker’s body block bullets
7) Potato aim (tbh, everyone does that)

To summarise, if you can refresh ZT up to:
9-12 seconds: Decent
12-15 seconds: Very Good
Full zed time: Arnold Alois Schwarzenegger as the commando
Part 6: Big Zed Take-downs
Assumpation: 6 players , HoE difficulty, skills RLLLR.
NOTE: Big Zeds are never a top priority for the commando since other classes (sharpshooter, gunslinger and demo) are designated Big zed hunter. What you should do is to provide cover for them while they are taking down big zeds. Providing cover means kill those trash and medium zeds that may interrupt your teammates when they are performing big zeds take-downs.
On rare occasion like you need to hold a lane on your own or all of your teammates died, it is inevitable that you need to take down those big zeds.
SC take-downs:
Points to note: If you have successfully landed 20 shots of HM-TECH 401 to a scrake’s head, it will exhibit a stumble animation. At that moment of 1 second, cease fire and wait for the animation to end. Then, continue head-tracing the scrake, it should be decapitated if 10-15 headshots are landed.
QP take-downs:
FP take-downs:
Points to note: Learning the raging animation of a fleshpound/ quarter-pound is the key to performing a successful take-down. When it starts the raging animation, his head will go down first—>tilt to left of your screen—>tilt to right—>left again—>the head goes up. Please familiar with such animation (↓-L-R-L-↑) so that you can keep head-tracing while FP is raging. Hence, you can probably decapped a FP even before his raging animation ends.
To sum the clips up:
1) Head-tracing is a must in order to decap big zed (Practice makes perfect) since the head-health for the big zeds is significantly less than body health


2) If FP is raged at spawning, try to block his attack using your KF-BAR (perk knife) first and then take him down using the FN-FAL.

Since either block or parry gives you identical damage mitigation, it is suggested that you should hold the middle mouse button (default button for knife to block) to take the hit from a FP.
3) Usually, QPs are spawned in groups, it is better to request help from sharpshooter, gunslinger and demo when multiple QPs appear in your lane.
Part 7: Advanced skills and notes for the commando
1. Taking down big zeds while extending ZT: This probably defines the highest skill ceiling of a commando
2. Target prioritisation:
3. Positioning: When big zeds arrives and you are laning with a big zed hunter, try to stand behind GS/SS/DEMO as this permits a clear visibility for him to aim for the heads of big zeds. Remember: Body blocks bullets
4. RULE NO. 1 IN KF2: ONLY ONE COMMANDO IN EACH TEAM: more than 1 commando means the disruption of ZT refreshes as both mando can get kills within a single ZT. ZT can only be refreshed 6 times maximum. Having more than 1 commando WILL NOT increase the number of ZT refreshes by another 6 times.
(Rule No.2: Never close or weld doors in KF2)
(Rule No.3: Never pick up your teammate’s weapon and sell it)
Consequently, if you entered into a public match that already has a commando present, it is better to choose another perk to play like sharpshooter, gunslinger and support.
5. Report the health of big zeds: The commando is the only perk that can see the heath bars of all zeds. If multiple big zeds appeared/raged, call out those that have lower hp first and let your teammates to take it down first.
6. One shot kill is the best approach to refresh ZT: As I mentioned before, one shot to kill only yields 2 results: Either you hit or you miss the shot on a zed. More than 1 shot to kill a zeds results in uncertainty (You may miss the first shot/the last one/all shots). This explains why FN-FAL is a handy weapon to possess on a commando as it can fulfill the role of 1-shooting trash zeds and 1 shot Gorefiends within zed time.
7. An over-capped FN-FAL can kill 2 fleshpounds within a single magazine: After you have over-capped the FN-FAL, it has 50 bullets in the first magazine (thanks to Eat Lead) and this allows you to take-down 2 fleshpounds without reloading.
8. If you are using FN-FAL to refresh ZT, you may try to body shot instead of head-shooting the trash zeds (applicable to stalkers and clot variants) if 2 of them are lined up together. This is because FN-FAL actually has a penetration value of 2 (although KF2 wiki stated that the gun has ZERO penetration: [link])
If you do so, 2 trash zeds will be killed at the same time, meaning a ZT wasted.
Hence, it is better to either body shot them or adjust your positioning if they are lined up together and such only takes 1 bullet of FN-FAL, which is identical to head shot
It is highlighted that for crawlers, it is better for you to use 401 or other assault rifles for ZT refreshes as FN-FAL can penetrate through 3 crawlers with 1 bullet. Meaning 2 Zed time wasted
9. On boss fight: Commando’s target priority remains unchanged, eliminate the trash zeds summoned by the boss to create/refresh ZT. This allows your teammates activate their Lv25 perk skills and presumably deals tons of damage to the boss. For instance, Dr. Hans Volter can’t even suck player for health regeneration as his shield has been broken. Patriach can’t even run away and heal himself. The berzerker won’t even fear the Abomination when the commando keep cleaning trash zeds to refresh ZT.
You don’t need to understand the contents of the conversation, you just only need to understand how powerful ZT could bring to your team during the boss fight.
If the boss is the King Fleshpound, commando may feel less valuable but still 401 can provide heals for your teammates and FN-FAL allows you to handle QPs summoned by the boss.
10. With Fallback (level 10) and Hollow Point Rounds (Level 20) equipped, your KF-BAR will be strong enough to penetrate through rioters’ armour to kill then in a single heavy smash. This could save you a couple of bullets, particularly on wave 1 when multiple rioters appear.


Walking forward (W)+ Heavy smash (Right click)+Headshot is all you need to get a rioter OOFed.
11. Commando’s grenade is the traditional HE grenade, which is considered the best in terms of trash clearing due to its high damage (300) and extremely short fuse time (1s).


– If your lane is overwhelmed by trash zeds, it is worth deploying 1-2 to them to push back.
– If you really need to handle multiple Quarter pounders by yourself, HE grenades could assist you
NOTE: Avoid deploying those HE grenades in a close proximity to yourself. This could deal massive damage or even instantly kill yourself.
Part 8: Useful In-game chat/voice commands for the commando
The edition on the game file KFInput.ini is the key to customise/create in-game dialogue with or without voice
Step 1: Locate the file KFInput.ini: C:UsersYOURUSERNAMEDocumentsMy GamesKillingFloor2KFGameConfigKFInput.ini
Step 2: Press Ctrl+F and search for the phrase “[KFGame.KFPlayerInput]”
Step 3: Begin adding chat and/or voice commands AFTER the last statement of the [KFGame.KFPlayerInput] or ABOVE the phrase “[IniVersion]”
For example, you want to inform your teammates that this will be your last Zed Time refresh. You can copy and paste my statement below:
Bindings=(Name=”five”,Command=”say LAST ZED TIME!!!”,Control=False,Shift=False,Alt=False,bIgnoreCtrl=False,bIgnoreShift=False,bIgnoreAlt=False)
Step 4: Save Copy of KFInput.ini to your desktop
Step 5: Launch KF2 and enter into a game, try pressing 5 to see if the chat command works
If performed correctly, this should happen when you press 5 in-game:

Other useful commands:
Bindings=(Name=”G”,Command=”say Throwing Grenade! | GBA_Grenade”,Control=False,Shift=False,Alt=False,bIgnoreCtrl=False,bIgnoreShift=False,bIgnoreAlt=False)
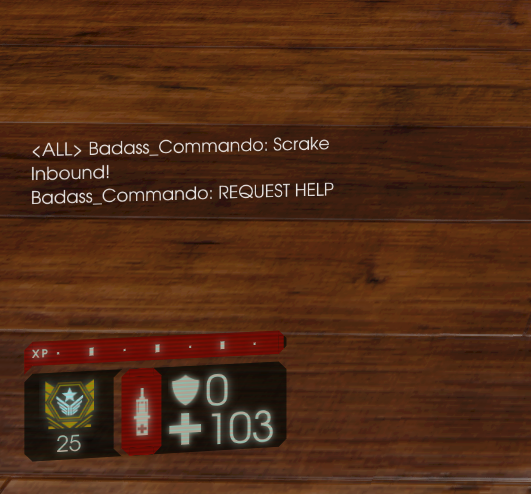
Bindings=(Name=”H”,Command=”say Scrake Inbound! | PlayVoiceCommsDialog 2″,Control=False,Shift=False,Alt=False,bIgnoreCtrl=False,bIgnoreShift=False,bIgnoreAlt=False)
Bindings=(Name=”J”,Command=”say Fleshpound Inbound! | PlayVoiceCommsDialog 2″,Control=False,Shift=False,Alt=False,bIgnoreCtrl=False,bIgnoreShift=False,bIgnoreAlt=False)


Here is my special one:
Bindings=(Name=”[“,Command=”say Stand Your Ground? I DON’T CARE!!! | PlayVoiceCommsDialog 5”,Control=False,Shift=False,Alt=False,bIgnoreCtrl=False,bIgnoreShift=False,bIgnoreAlt=False)

Acknowledgements and Final words
KF-TestingMapRedux all credit to Fauxy_
Killing Floor2 wiki[wiki.killingfloor2.com]
(link for his Youtube video about his commando guide)
SETBIND | Console Keybinding 1.0 created by Bottlefrogger
Some Final words:
The commando is A MUST on any high difficulty of gameplay. A full Zed-time refresh (18-24 seconds) operated by an experienced commando can potentially reverse any “♥♥♥♥ hits the fan” situation (e.g. Defence line breached, multiple raging big zeds onto your team) back to normal. It is also highly recommended that the commando is the perk that every newcomer to KF2 should try out first since the perk can bring so much utility to the whole team, revealing stalkers, showing ememies’ health bar, provide healing (HM-TECH 401)……the list goes on.
Here are my guides to other perks in KF2, check them out if you are free!