![INFRA Complete Guide and Walkthrough [Ch.7 - 8] [2018] for INFRA](https://steamsolo.com/wp-content/uploads/2021/07/infra-complete-guide-and-walkthrough-ch-7-8-2018-infra.jpg)
Overview
Complete Guide for the seventh and eigth chapters of INFRA, including all collectibles with images separately from the game walkthrough. Written in June 2018
CHAPTER 7: WORKING OVERTIME [Walkthrough]
Total of Collectibles in this chapter:
⦰ Missable Achievements: 7
🏹 Geochaches: 1
🗎 Documents: 23
🔨 Repairable Spots: 4
🖻 Photographs: 85
—
We have reached the Central Metro Station, bu we`re still far away from our office. As our protagonist just wants to take the sewers for some reason, he is going to be confronted with more danger during his return to the office
—
Map 1: Service Tunnels
Total of Collectibles in this module:
⦰ Missable Achievements: 2
🏹 Geochaches: 1
🗎 Documents: 9
🔨 Repairable Spots: 2
🖻 Photographs: 16
Video Guide
[link]Walkthrough
Go through the tunnel and photograph the rubble on the right (P1), then go up the ladder. As soon as you`re up there, take a photo of the leak in the pipe to the left (P2). Go up the stairs to find yourself inside a building. In this hall one of the pillars is damaged. Photograph it (P3). Crawl into the pipe room and climb it up to the next level. Next to a locked door is the fan system. Look through the window into the locked room and manipulate the fan machine so that the light is off. Example: Left – 19 – Right – 16.
Get back into the pipe room, crawl into the vent and go down the fan. Go outside and to the dumpsters on the left of the street. There`s a document inside one of them (D1). Go down the street until you reach a manhole and go inside. Go into the canal to your left. To the left is another pipe you can crouch through. Take it and go to its far end. There`s geocache next to the grate here (G1). Go up the ladder in this pipe and go on the street again.
Look at the bench up here and grab the access card. Then jump down on the street you were on before and use the access card to unlock the grate and the locked door with the clock behind it afterwards. There`s a document in this room (D2) and another document next to it (D3). Go down into the manhole again, but in the canal, this time, go to the right. Take a photo of the broken flood door to the left of you (P4).
Crouch through this exact flood door, go up the stairs and you`ll reach another room. Photograph the electrified floor here (P5). Push the lever to your left and turn it on. Then crawl under it to another area. There`s some damaged cement here (P6). Two levers are positioned here. Both should be off. If one of them is on, turn him off. Go over the water now and turn the lever in it off to turn all electricity off. The area at the far back is now accessible. There`s a document on the table here (D4).
A switch is at the wall here. Turn it to the right. Climb up the ladder and push the fan override button. Then go down and to the other end of the hall and turn the left switch on to fix this facility (R1). Go through the gate in the back of this room and you`ll reach a long hall. Don`t go down the door in the middle yet, but take a photo of the dirtied wall at the right side at the end of this hall first (P7). Now, go down the stairs in the middle, grab a chest, place it on the palette in the storage room and climb over the door to reach another corridor.
There`s nothing in this corridor though. Go into the big hall next to it. You`ll automatically gain the next document by an audio tape recording here (D5). While you`re hearing the audio tape, photograph the damaged ceiling (P8). Then save the game. An action sequence will start. Photograph the broken pillar (P9). After you`ve finished the action sequence, photograph the rubble behind you (P10). Go sharp to the right. Here`s another pile of rubble you should photograph (P11). To the left is a door that says ‘Don`t flood’. Photograph it too (P12).
Now enter the room opposite in this hall. This is another large storage room. Climb up the shelf to the right, but don`t leave it on the next floor yet. There`s a hidden vent if you continue to follow the shelf. Enter it. There`s an elevator here. Open it and take it up. Open the elevator door and photograph the safe to your right (D6). There`s also a document on the table next to it (D7). Go up the stairs, push the button and enter the loft.

Here`s a TV with a tape recorder. Go into the entrance hall to your right and grab a tape off the floor. Enter it in the tape recorder and start it to receive this achievement as well as another document (D8).
Look at the bookshelfs and push these books in the order below:
(1) ‘Stalburg & Steel’
(2) ‘Transformation of War’
(3) ‘Business Law’
(4) ‘Stalburg Bunkers’
(5) ‘Stalburg in World War II’
(6) ‘Planning’
Return to the elevator and take it down again. Crawl out the vent grate and get onto the correct floor. You`ll soon see an open hole in the wall to your left. Grab a chest to the left and place it there to get into the adjacent room. There are some batteries in here.
Leave the room and go forward. There should be a small room immediately to your right. Photograph the broken pipe inside (P13). Outside, photograph the missing bridge (P14). Jump down and go the left. There are three directions you can take here. First go to the right.

Read the note inside the room and find all 5 beer bottles hidden here. These are the locations:
(1) On top of the shelf
(2) Behind the barrels
(3) In a shoe
(4) Behind a palette
(5) In a pipe
You should get the achievement now
Push the power switch inside this room, then leave it. Crouch through the ‘Keep out’ sign and take the funicular. When you leave the funicular, immediately photograph the broken cement on the floor next to you (P15). Go into a room at the far left. There`s a document inside here (D9). Also push the two buttons in here for a repair spot (R2). Go into the high voltage room and photograph the broken cement in the ceiling (P16).
Leave the room and enter the control room. Use the code ‘7923’ to open up the big gate in the hall. Go through the door and push the button to finish this module.
Map 2: SNW Bunker
Total of Collectibles in this module:
⦰ Missable Achievements: 2
🏹 Geochaches: 0
🗎 Documents: 7
🔨 Repairable Spots: 0
🖻 Photographs: 17
Video Guide
[link]Walkthrough
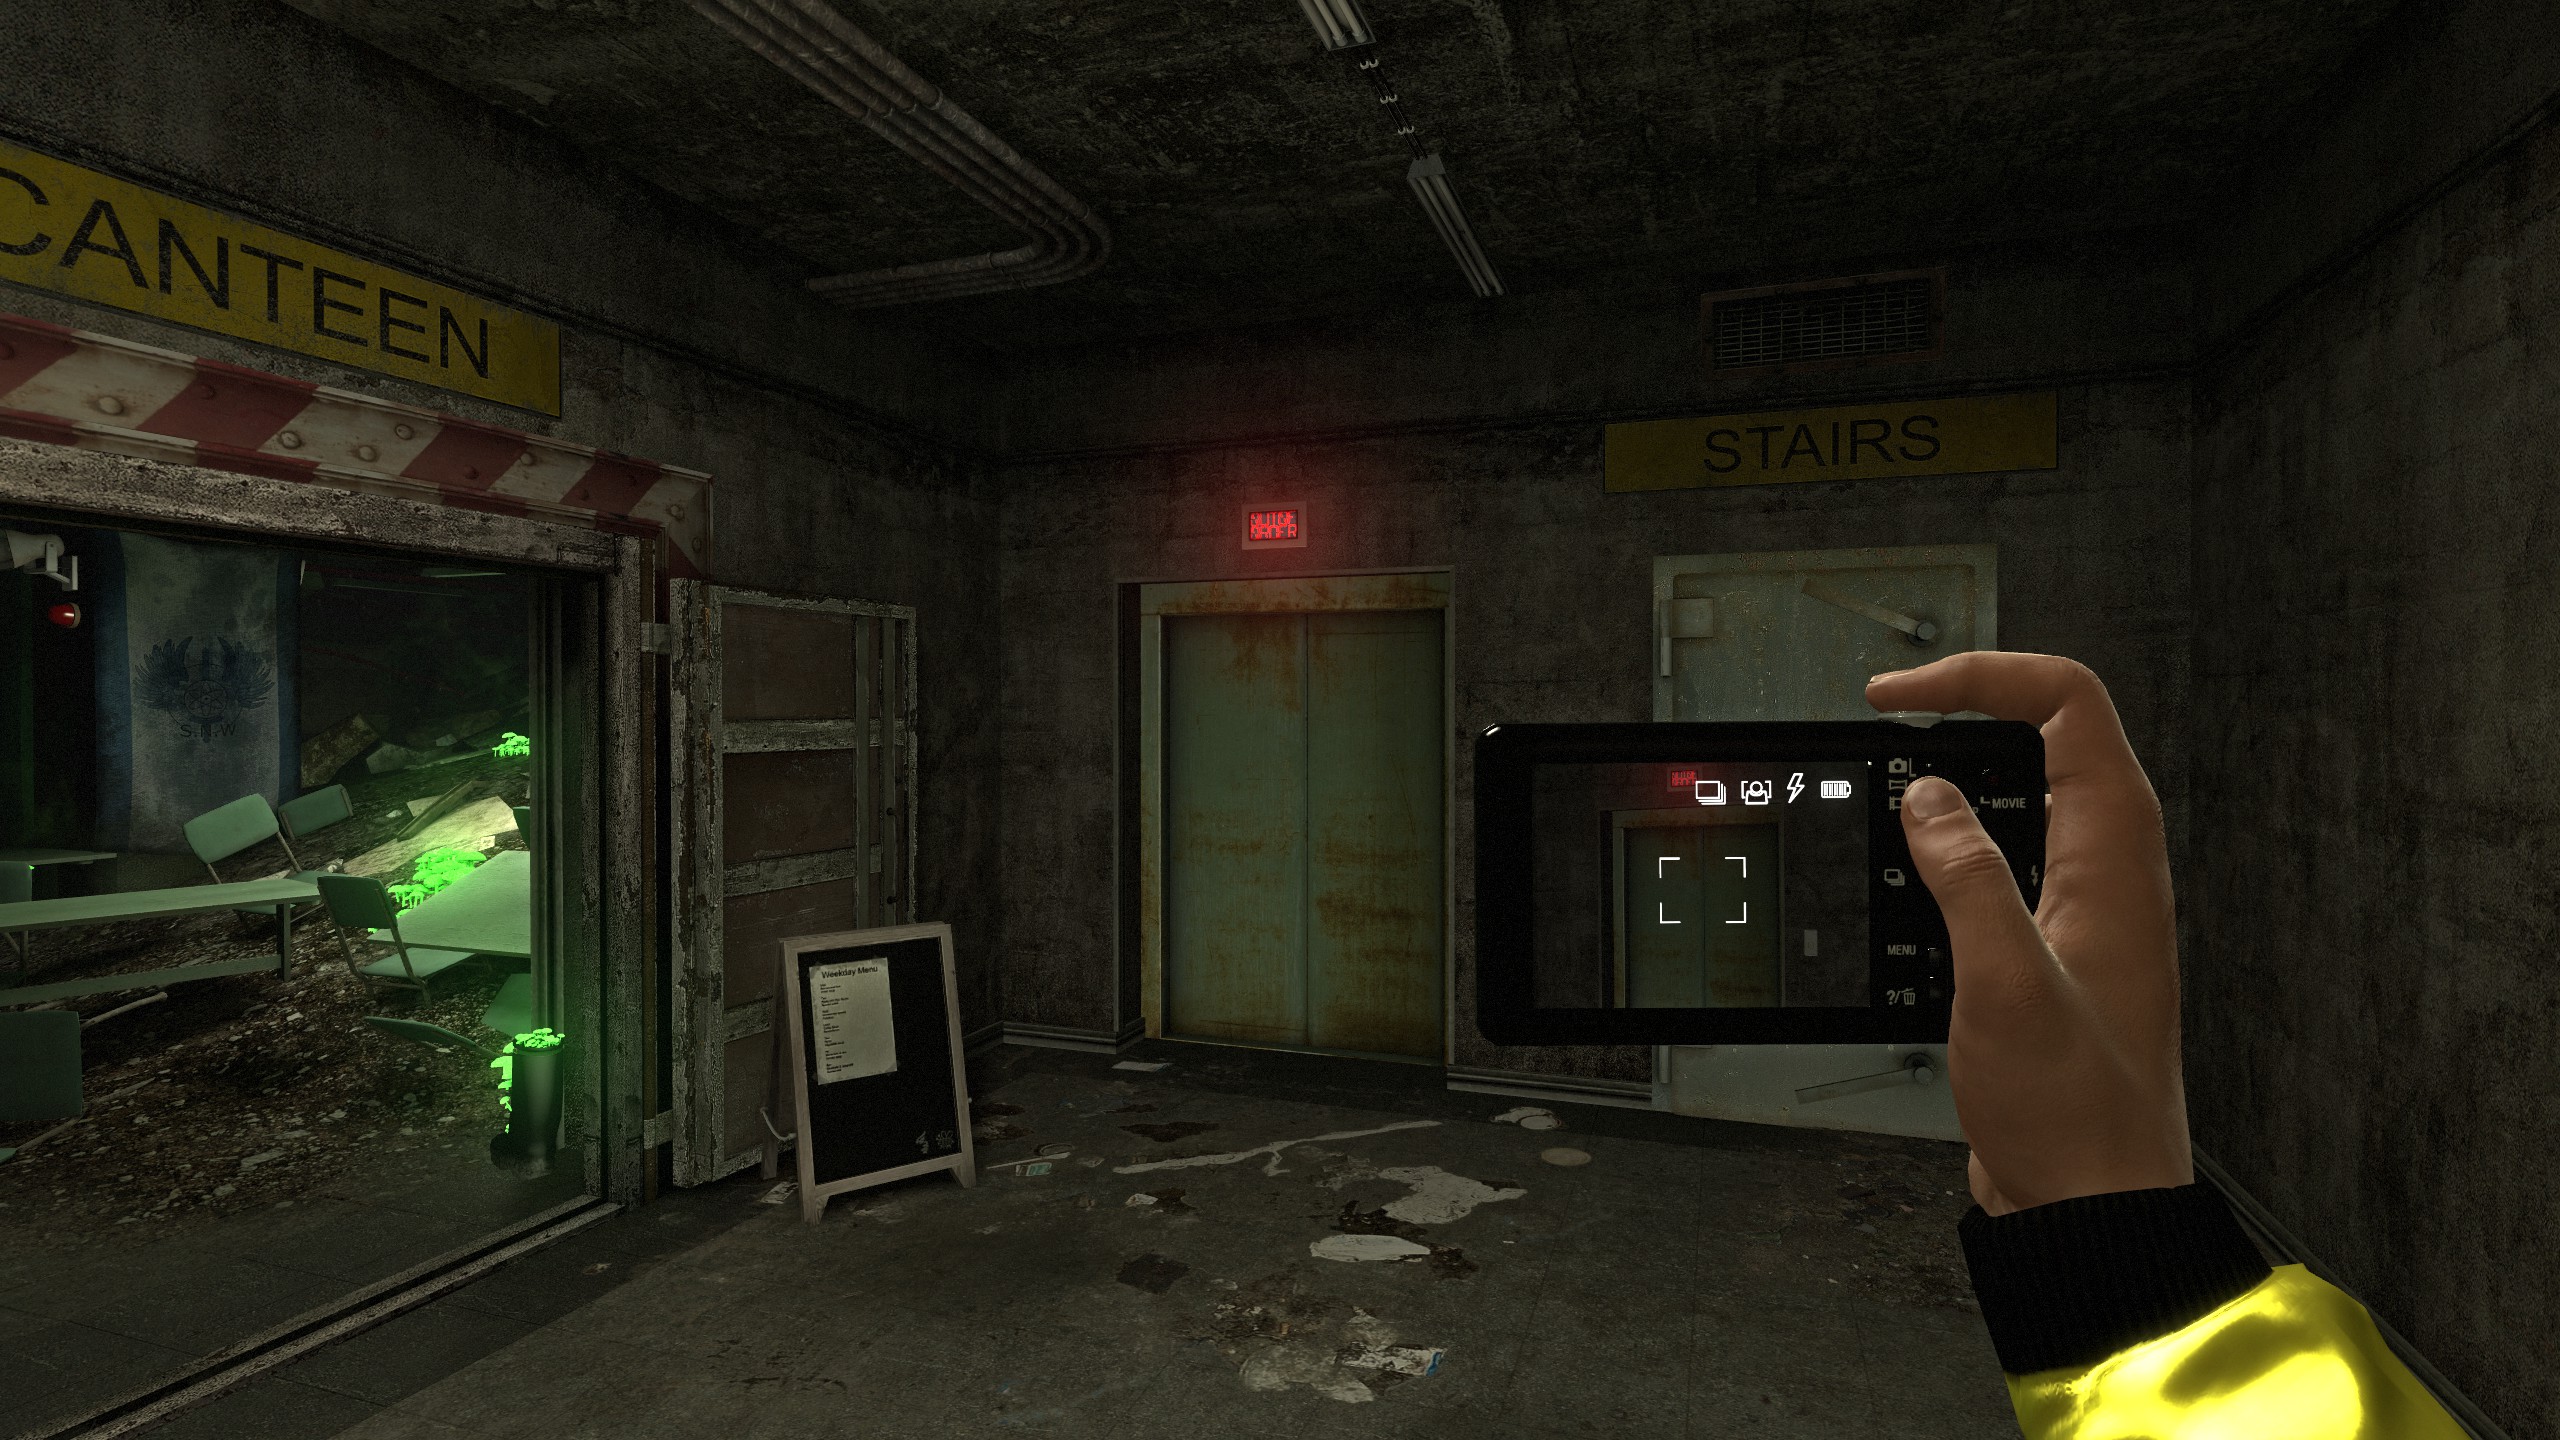
As soon as you enter the next area, you will see a bunker door to your left and a control room to your right. Enter the control room and take a photo of the document inside (D1). Go through the bunker door and the next one right after that. Go all the way straight forward until you reach a control room. Push the button in there and restore the power. Go all the way back to the control room we were in at the beginning and push the right button in there to open the gate in this hallway.
Go through the gate into the crash site area and photograph the train crash (P1). Don`t take the elevator down yet, but go right along the railing until you can climb in a crane. Lower the container with the left mouse button and move it all the way to the right. Push the container at the right out of the way to clear the path to the rightmost door. Return to the elevator and take it down.
Go around the left side of the train and open the second door on your left. Photograph the corpses (P2), then leave the room and take the next door on your left. Photograph the ‘Uranium Enrichment’ sign (D2) and the Uranium cells behind it (P3). Leave the room and again and take the last door at the end. Photograph the broken staircase (P4), then take it all the way up.
In this new area, first enter the laboratory. Go inside, push the green button and enter it. There`s another document on the table here (D3). Also, don`t forget to photograph that… weird device in the corner of the laboratory (P5).

Save the game. There`s a hemisphere lying on the shelf below the weird device. Take it and place it upon the weird device. You`ll die and get this achievement. Good thing you saved.

Leave the laboratory and go to the door that says ‘Sleeping Quaters’. Enter the code 2077 on the number pad next to it to be granted access to these rooms. This will unlock this achievement.
You`ll find yourself inside an old bunker area. Don`t go into the pool area yet. Take the second door on the left instead and photograph the document in the bathroom (D4). There`s also a key lying to the left of it. Take it. Open the leftmost door in the hallway with that key and enter the next room. Crouch through the hole in the wall and photograph the computer (P6). Now enter the pool area we talked about before.
Photograph the mushrooms in the pool (P7), the mushrooms next to the barrel (P8), mushrooms in front of you (P9), to the right of you (P10) and on the hill next to them (P11). Enter the hallway behind the door here – which is another corridor – and take a photo of the area in room G5 by crouching (P12). We`ve done everything we can here.
Go all the way back to the control room of the beginning of this chapter. Enter the bunker area again and the control room where you restored the electricity. There`s another door that you can open here. You`ll find yourself in a large corridor again. Enter the third door on your left, opposite the B2 door. Photograph the damaged cement here (P13). Return the corridor and photograph the broken elevator at the end of it (P14). Enter the canteen and photograph the mushrooms in there (P15).
Take two items in this room with you from now on. Leave the canteen and enter the corridor opposite of it. Take the first door to your left to reach an office room. Use the shelves to climb up to the vent gate and enter the vent with your two items. Leave one of them next to the sensor in this vent. You`ll reach a ventilation room. First climb down the ladder and photograph the mushrooms there (P16), then go on the second floor.
Here`s another vent gate. Climb through and place your second item in the middle near the sensor. Behind here is another office area. Photograph the document on the table (D5), start the projection (D6) and photograph another document in the room at the back (D7). Climb up one more floor and push the ventilation button. This will grant you access to one more floor above you.
Climb up the ladder above the fan and photograph the broken cement in the room at the top of the ladder (P17). Climb down the second ladder in this room to reach the next module
Map 3: West Stalburg Runoff System
Total of Collectibles in this module:
⦰ Missable Achievements: 3
🏹 Geochaches: 0
🗎 Documents: 3
🔨 Repairable Spots: 1
🖻 Photographs: 29
Video Guide
[link]Walkthrough
As soon as you exit the pipe, there`s a book to the right of you. Open it and take a photo (D1). Climb down the ladder to your right. As soon as you reach the bottom, photograph the blocked pipe in front of you (P1) and the blocked tunnel to the right (P2). Go to the left and photograph the blocked tunnel there too (P3). Go up the small ladder next to you and photograph the damaged cement on the wall next to the door (P4). Go through the door. Soon you`ll reach a hallway below the metro rails.
Turn to the left and go some metres. The first corridor to the left that branches of here has a leak in it and glows red. Photograph the leak (P5). Continue going this path until you reach a broken catwalk. Take a photo of this broken catwalk (P6). Return to the hallway and cross it to reach the right side. The catwalk here is not broken and there`s a ladder next to it. Climb it down.
We`ll call this level in this flooded room the first floor. Take a photo of the broken catwalk up here which has been fixed with some wooden planks (P7). Take down the next ladder to the ground floor and photograph the flooding (P8). Walk all the way along the pipes to reach another broken catwalk that you should photograph (P9). Now it`s time to fix this place.
Climb up all the way into the hallway again. There should be a valve behind a palette here. Take it and return to the first floor in the flooded room. Place the valve on the sewer pipe and turn it off. Go down to the ground floor and close the central pipe. Open the water pipe down here too. Then climb up to the first floor again and close the water pipe to repair this pipe complex (R1). Afterwards, leave through the door on the first floor.
Photograph the broken window in the house in front of you (P10). Climb through the window. In a box here is a fuse box. Throw it outside the window. Climb over the boxes and turn the valve behind the shelves. Then turn the middle valve. Photograph the leak in this room afterwards (P11). Take the hammer from the table, then leave the house.
Take the fuse box and the purple valve with you and go down the stairs in the hallway. Photograph the leak you fixed some moments ago (P12). Destroy the brick wall to reach the coffee room behind. Place the purple valve on the wall and enter the two fuses that should now be in this room. One valve is still missing though. Return to the room we were in earlier, climb through the window and remove the valve from the pipe at the top left. Return to the coffee room and insert the last valve. Start the engine by flipping the engine levers.

Place the orange can in hatch 1 and the green can in hatch 2. You can find the red can under the table in the room with the broken window. Then turn the valves so that the green light is shining. Afterwards, push the button and drink the coffee. Switch bobby positions at the bottom left two times. After you`ve drank all three coffees, this achievement should pop up.

Replace the green can with the red can. Again try out all three bobby positions and drink all three coffees. Every time you`ll have to leave the room though in order to trigger a sequence. Afterwards, the door to the next room should open and you`ll be awarded with this achievement.
Photograph the broken catwalk (P13). Then jump down into the water and photograph the blocked path to your left (P14). Also photograph the damaged roof here (P15). Go into the other direction and photograph the damaged cement on your left (P16). Go all the way to the end of the tunnel. Take the chest here and place it so that you can reach the platform above. Get all the bricks down here and throw them on the platform above. Then climb on the platform. Place the blue valve on the designated spot. After it gets stuck, throw the bricks in there. Then open the flood door and quickly leave this area before you drown to death.
In the next room is a document on a sofa (D2). Also photograph the leak in the tunnel (P17). Then turn the valve to stop the leak. Above the valve is another water leak in a pipe. Also take a photo of that leak (P18). Then start the minitrain. You`ll reach an area where another minitrain is blocking your way. Photograph it (P19). Then go into the control room, flip the switch to ON and pull the power lever. Also push the two levers left of the ‘Possibly damaged’ lever to change the tracks. Return to the minitrain and take the ride through the tunnel.
When you reach the next set of locked doors, climb up the pipes to your left and enter the room behind the grates. Turn the switch on and unlock the door. Push the button next to the minitrain and start your ride again. You`ll immediately see a room to your left. Photograph the broken cement on the right wall (P20). Continue your ride until you reach the next locked door.
Climb down the ladder and go into the next room. Go through the door straight in front of you to reach a staircase. Take the valve below the staircase, then take it up, unlock the door and insert the valve. Turn it. Return to the room below the staircase and take another ladder down to reach the lowest level. Photograph the water leak next to the flood doors (P21). Go to the gates opposite of the flood doors and photograph the dynmite lying around at the side here (P22). Sneak through a gap in the grate and photograph the dead fish around here (P23).

Climb up the chest here to reach another secret hallway. Walk some metres until you find a hole in the tunnel. Photograph it (P24). Walk through it and photograph the cave to get this achievement (P25).
Return to the flood gates and climb up to the first floor again. There are two buttons here, and behind them an electricity box. From top to bottom pull the switches this way:
Up, Down
Up, Up, Down,
Up, Down, Down
Down
Up
Down
Push the red button to open flood gate 4. You don`t have much time now. Quickly run through the flood gate, photograph the broken pillar down here (P26) and the damaged pipe at the top at the end of the tunnel (P27). Quickly return to the previous room before the flood door closes again.
Return to the minitrain and go through the next gate. Immediately photograph the leak to the right (P28). *According to the comments, you can go through the tunnel on the right here in order to be able to photograph a train and a collapsed tunnel*. Go through the door in the middle of the tunnel to reach another staircase. All the way below the staircase is a pair of keys. Take it. It`s well hidden behind some cans. Leave the staircase at the bottom and open the hatch down here with the keys you got. Go down the hatch, photograph the document down there (D3) and the mushrooms (P29). Then return to the staircase and take the vent to leave this module.
Map 4: West Stalburg Runoff Cistern
Total of Collectibles in this module:
⦰ Missable Achievements: 0
🏹 Geochaches: 0
🗎 Documents: 3
🔨 Repairable Spots: 0
🖻 Photographs: 19
Video Guide
[link]Walkthrough
In the next room go down the ladder all the way to the flooded basement and photograph the broken pipe right next to the ladder (P1). Walk through the small corridor and photograph the broken flood door behind it (P2). Return to the ladder, go up one floor and exit the room by using the door.
There`s another corridor here. First go to the right and take a photo of the cave-in (P3). Go through the flood door in the opposite direction. Directly behind that flood door is another flood door which can`t be opened. Left of it is some damaged cement (P4). Go down the ladder into the bunker area.
There`s a lot to photograph here. Go straight through the pillars in front of you and you`ll see a small container building to the left. Enter it and photograph the document inside (D1). Leave the container and look at the pillar to the right of you. It`s damaged, so take a photo (P5). Go into this direction and you`ll soon see a blue truck. The ceiling right above the truck is damaged. Take a photo (P6).
Go to the generator next to the red elevator and turn it on. Climb up the ladder and then use your abnormal platforming skills to reach the elevator. On the outside of the elevator, pull the switch. Go inside, turn the motors on. Then use it to go all the way down. Once you`re at the bottom, pull the Auto Up switch in the elevator and quickly run up the construction site again before the elevator catches you. Jump on top of the elevator to reach a new area.
Push the first flood door overwrite button and then use the opposite construction site to go down to the bottom. Hurry; after you`ve reached the bottom, quickly go to the right and photograph a broken pillar (P7). Then, before the flood door closes, hurry through it into a new area. You`ll reach a really gigantic room. Photograph the water in the middle (P8) as well as the broken cement on the back wall (P9). There`s also some damaged cement behind some blue pipes near the big water metre (P10). Also photograph the container that`s located in the mid-air above you (P11) and the blue pipe next to the ladder (P12).
Climb up the ladder. On the next platform, photograph the damaged blue pipe left of you, above the water metre (P13). Go over the other blue pipe and up the next ladder. Enter the container and leave it through the window. Go through the door and photograph the dynamite (P14) and the broken gate (P15). Take a chest outside and place it on the other chest so that you can reach the top of the container.
Go over the pipe and up the next ladder to reach the top of this room. Take the keys out of the control room to your left. Then go in the opposite direction and take a photo of the damaged cement to your left (P16) and the asbestos next to it (P17). Before you go down through the door, photograph the rope (D2) and the note on the chair next to it (D3).
You`ll find yourself in a staircase. First go down and photograph the steam leak (P18). Go all the way up to the top, crawl over the pipes and go through the next door. Photograph the damaged electric wire to the right (P19). (According to Malkav0, i missed a photo on the ceiling here. Thanks for pointing it out). Go straight into the next room, climb down the ladder and follow this path for a while until you reach the next module.
Map 5: Coal Power Plant
Total of Collectibles in this module:
⦰ Missable Achievements: 0
🏹 Geochaches: 0
🗎 Documents: 1
🔨 Repairable Spots: 1
🖻 Photographs: 4
Video Guide
[link]Walkthrough
In the next room, grab the fuse from the bottom level, climb up the ladder and insert the fuse into the fuse box. Then push the door button and go through the door on the right. In this corridor, first go all the way to the left and photograph the broken machine (P1). Now go to the end of the corridor in the opposite direction and jump on the tower in the middle of the next room. Climb up the tower and then go up the spiral staircase.
Up here, take a photo of the broken red pipe in the hallway (P2). Go up the next staircase and open up a sliding door on the right. You`ve reached the power plant. Go up the staircase and enter the control room. Look out of the window and photograph the missing catwalk to the left (P3). Then grab the walkie talkie and keycard from the table and photograph the document that`s on top of it (D1).
Leave the control room and use your keycard to reach the generators. Palce the valve from the shed behind on you on the steam feed, the generator to the right. Turn both Steam Feed valves to the max, then photograph the steam leak behind the generator (P4). Close both steam feed valves again, then turn the valve where the leak was seconds ago. Turn the steam feed valves up again, but not to the max. Try to make them reach an RPM of ~2950. Pull the generator 2 sync lever in the control room. Now turn up the steam feed to the max again and then pull the boiler 2 lever in the control room… to… fix this plant? (R1)
CHAPTER 8: LATE FOR A MEETING [Walkthrough]
Total of Collectibles in this chapter:
⦰ Missable Achievements: 5
🏹 Geochaches: 11
🗎 Documents: 20
🔨 Repairable Spots: 6
🖻 Photographs: 68
—
It`s never too late to be blown up in a power plant. We`ve again ruined a power plant in search for our office. Will our protagonist finally reach his office after leaving the underground facilities and entering the city?
—
Map 1: Destroyed Coal Power Plant
Total of Collectibles in this module:
⦰ Missable Achievements: 2
🏹 Geochaches: 1
🗎 Documents: 2
🔨 Repairable Spots: 2
🖻 Photographs: 18
Video Guide
[link]Walkthrough
Look out of the window and photograph the damaged generators (P1). Additionally the leftmost window in this room is broken. Take a photo of it (P2). Climb out of said window. Take the stairs up and then jump behind the fire. Jump on the chest and turn the crank to repair the exit gate (R1). Enter the machine room by going around the back and you`ll get another call from Robin.
Enter the corridor with the control room by using the stairs and then take the exit door to leave this place. You`ll find yourself outside. On the right is some broken cement, photograph it (P3) – as well as the pipes to your left (P4). Enter the next room.

We only want to get this achievement, not this actual ending. Thus save the game in the room here. Then go down the spiral staircase and take down the ladder. You`ll soon reach an elevator. Take it down and you`ll get this achievement. Load back your previous save

Go up the stairs to the right. As soon as you reach the top, you`ll notice some smoke. You need to crouch through the next set of doors. The back door in this corridor is broken. Photograph it (P5), then enter the control room. Push the vent button. Unplug the computer and plug it again. Look at the control panel and turn all lights to green except the bottom left and bottom right button. Then, turn the two switches in the center on the bottom. After that push the vent button again to fix this (R2).
Go all the way down again and take the spiral staircase even further down. Go down another ladder and you`ll immediately notice some damaged cement to your left (P6). You`ll reach a garage. Take a photo of the broken window here (P7). Behind a box here is another geocache (G1). In the next hallway, photograph the broken floor (P8). Enter the elevator and quickly pull the emergency lever.
Get out of the elevator and take a photo of it (P9). The house on the right needs some fuses. On the cart next to the elevator is a fuse. Enter it there. You can also climb over a chest behind the elevator. Photograph the cave-in behind there (P10). Go all the way through the hole on the right next to the cave-in to reach another document (D1). Also photograph the cave-in behind the document (P11). Return to the elevator.
Photograph the dynamite on the minecart opposite of the elevator (P12). Go to the left and photograph the flooding (P13). Here´s another fuse too. Take it with you. After backtracking for a short while, take the path on your left. Here`s another cave-in (P14) as well as another note on a chest (D2). Go in the direction of the dynamite. In a cave to the left is another cave-in (P15).
Enter both fuses in the fuse box and pull the main switch. Outside of the house, set the switch to the bottom position. Enter the house again and turn the main switch off again. Then set the switch outside to the top position. Go inside the house again, pull the main switch, climb on top of the house and let yourself be moved to a new area.
Photograph the cave-in behind the wooden bars (P16). Jump on the ladder and photograph the missing ladder on the top (P17). Start the minitrain and let it destroy the wooden bars. Behind there take the big wooden bar with you and place it next to the ladder. Crouch through. You`ll soon see another cave-in to the right (P18). Then continue your path and you`ll conclude this module.
Map 2: Castle Rock Bay
Total of Collectibles in this module:
⦰ Missable Achievements: 0
🏹 Geochaches: 3
🗎 Documents: 2
🔨 Repairable Spots: 0
🖻 Photographs: 5
Video Guide
[link]Walkthrough
You`ll soon reach a bay. Enter the house to your left and walk up the stairs at the far back. In this damaged room lies a geocache, hidden behind some tapestry (G1). Leave the house and you`ll soon reach the first bridge. Don`t cross it yet, but continue going alongside the river until you reach a second bridge. There`s some slight damage on the cement beneath it. Take a photo (P1). Return to the first bridge and start crossing the construction site.
You`ll soon see a container to your left (According to the GothicKing13`s comment there`s another photo you can take of the underside of the bridge here – directly underneath the bridge by the scaffolding).
Enter the container, photograph the document inside (D1) and take the keys. Go outside and around the container by using your key and grab a chest from the top of the container. Return to the construction site main area and use this chest to climb onto the bridge.
You`ll soon have to take the ladder down to another construction site. Take the small chest with you and use it to climb over to another area with another container. Take the keycard from inside it. Pull the lever inside and start the generator outside. Call the elevator down and grab the chest. Then pull the lever inside the container up again. Now use this chest to climb up to the bridge again and use the keycard to go through the gate.
Walk alongside the rails until you find a deserted train that you should photograph (P2). Go on a parking lot to the right. Don`t go on it yet, but go all the way right and crouch below two bridges. Then get below the second bridge and photograph the damaged cement here (P3). Walk along the wooden plank to find another geocache behind you (G2).
Return to the parking lot and climb through the window of the old building. Leave the house on the other side to reach a bigger room with a person sitting on the ground. After you`ve reached the bottom of the room, photograph the note on the chair the person left behind (D2). Go outside and directly to your left to find a leak in a container that you should photograph (P4). Enter the house on the opposite side and photograph the barrels inside (P5). Climb up the barrels and you`ll soon reach a garage. Grab the key inside here.
Leave the house where you came from and use the keys to enter the cave to the right. Go deeper into the cave. At the first intersection go left. At the second intersection there`s a geocache to the right (G3), but the path continues to the left. You`ll reach a cave. Leave it by using the stairs to the left and you`ll reach the next module.
Map 3: Castle Rock
Total of Collectibles in this module:
⦰ Missable Achievements: 2
🏹 Geochaches: 2
🗎 Documents: 4
🔨 Repairable Spots: 1
🖻 Photographs: 9
Video Guide
[link]Walkthrough
Exit the room and enter the streets. Go forward and when you have the possibility to, cross the small alley on your right. Go down the stairs and then turn to the right in the direction of the small boathouse.
You should soon notice a little box to the right with different items in it. Next to the fuse is a fuel button. This one is quite important. Take the fuel button with you, because we`ll need it later. Go further in the direction of the boathouse and as soon as you reach the boat, go right around the boathouse in order to find a geocache hidden on the side to the left (G1). Don`t leave the boathouse area yet, but go in the other direction. There`s a white keycard lying on a restaurant table here which you should grab.
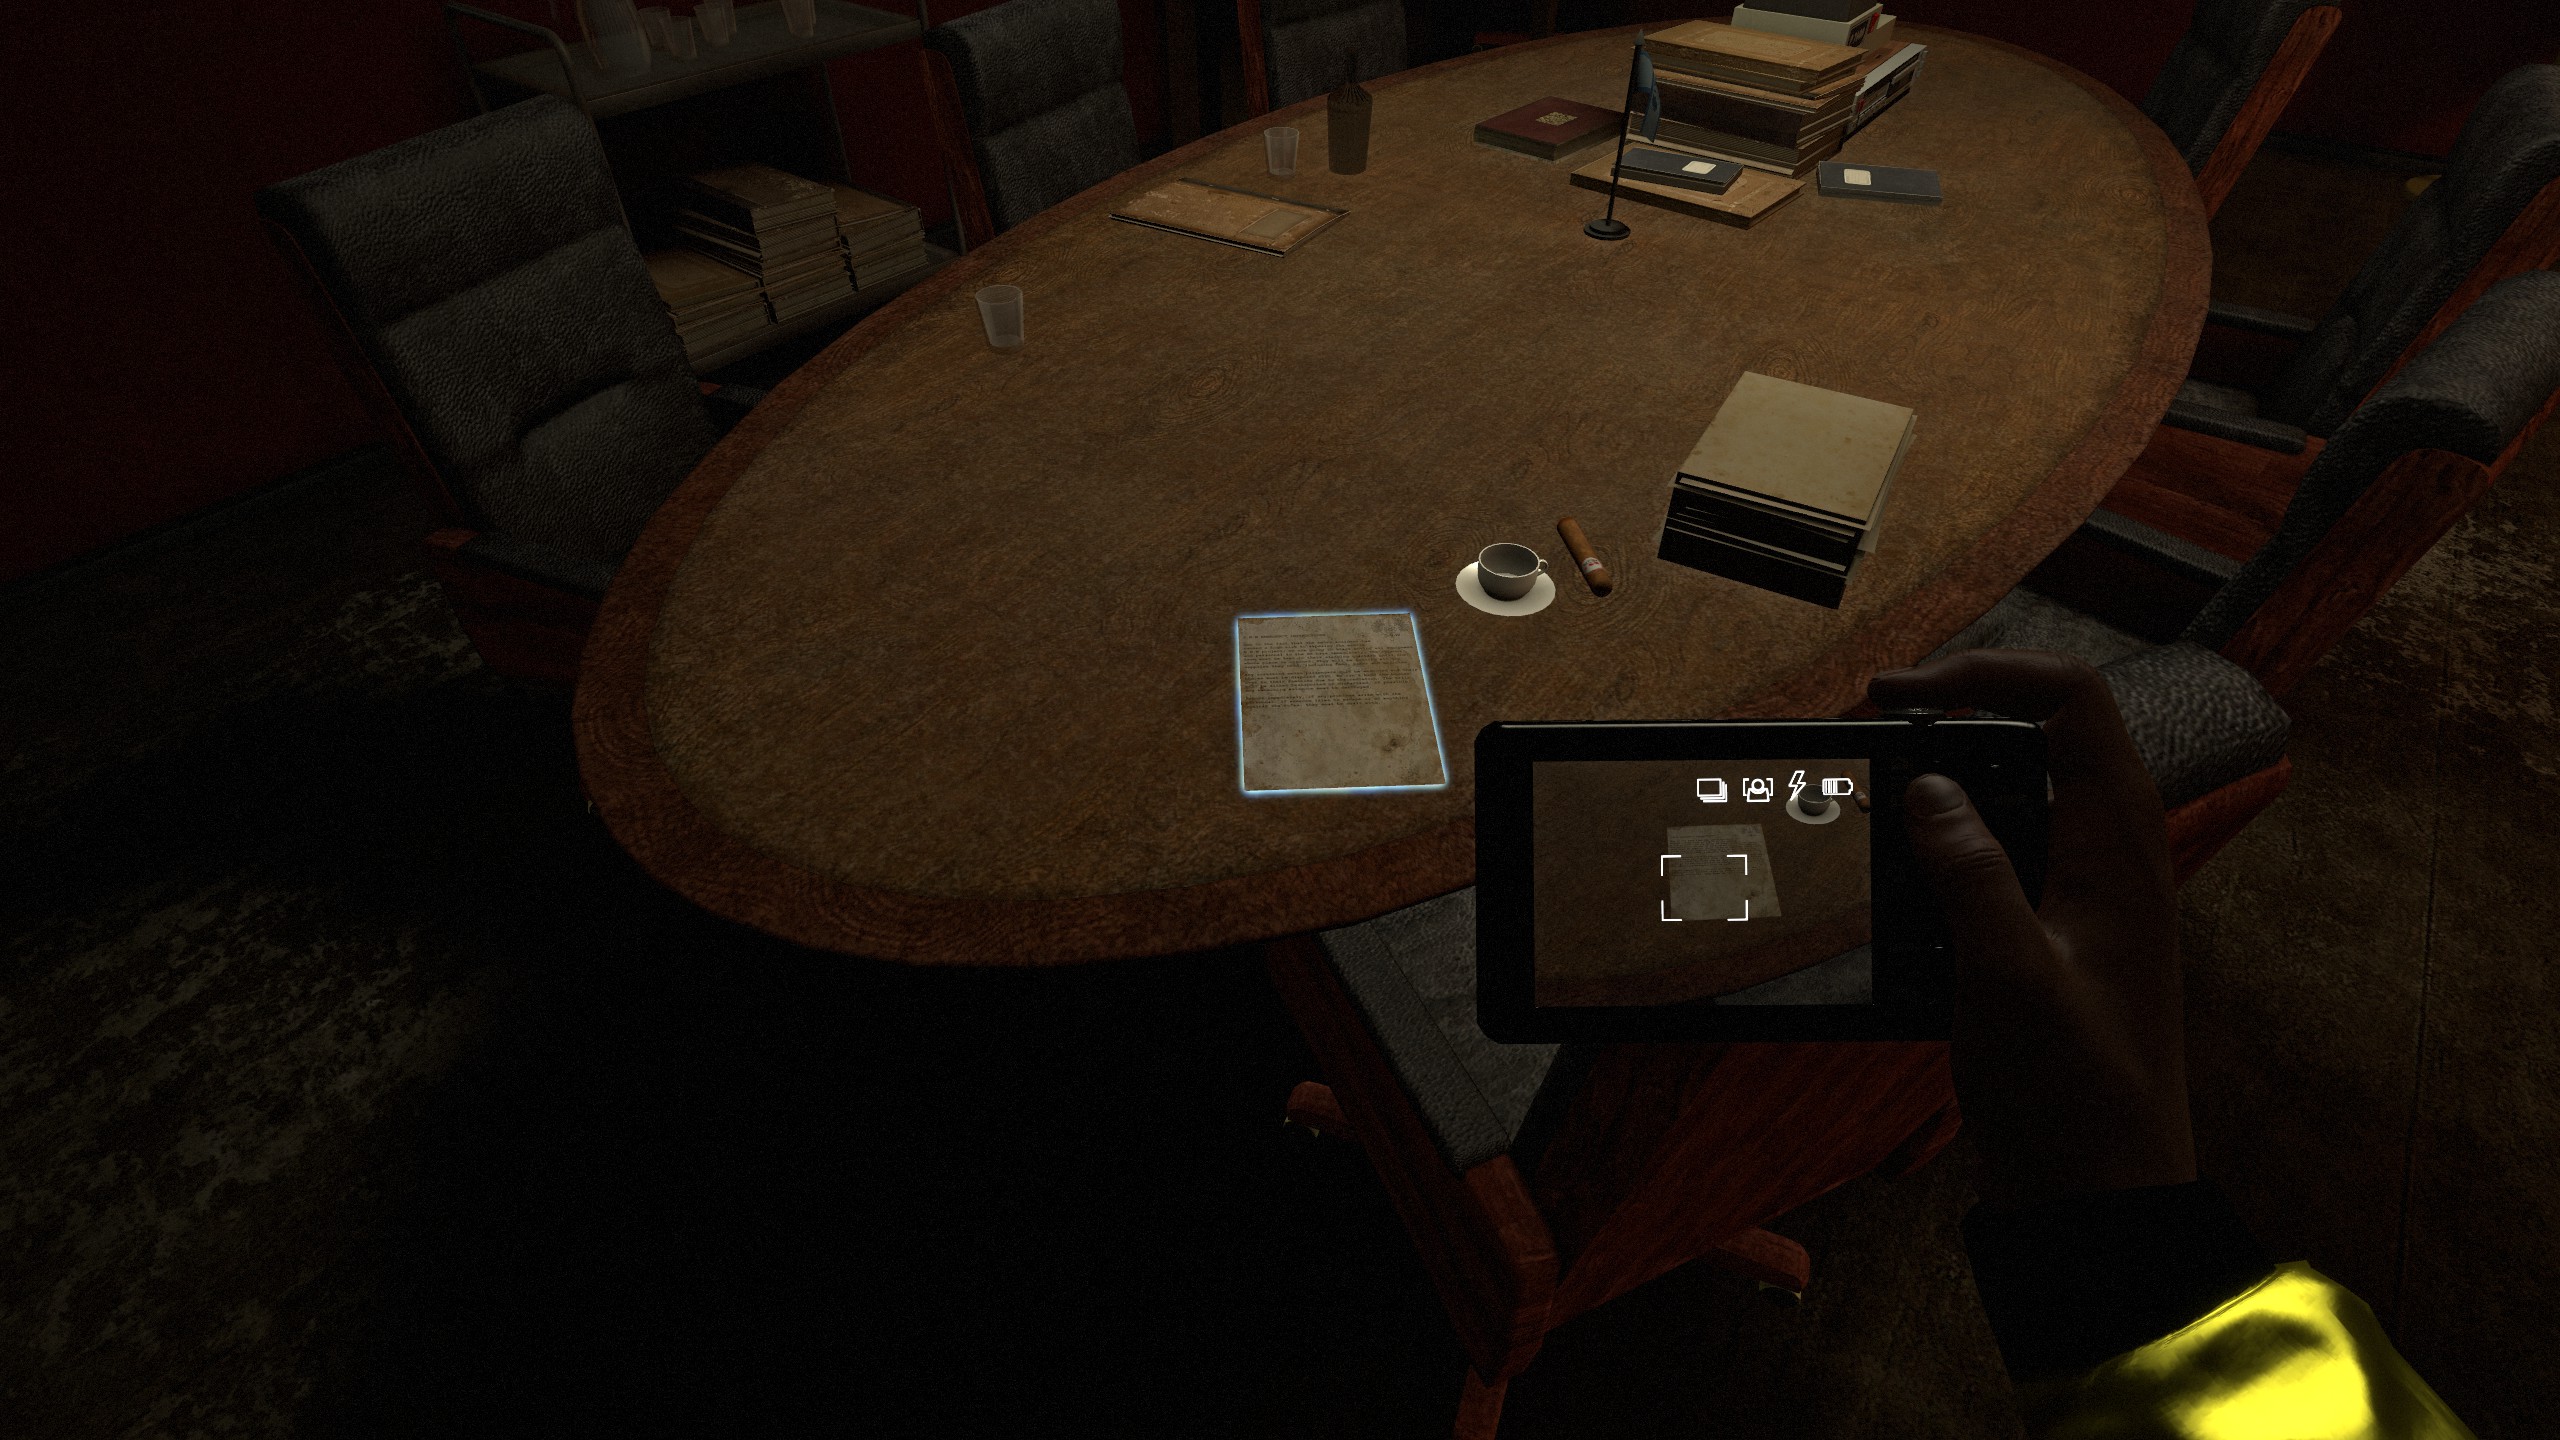
Go along the street next to you. There`s a bunker door at the far end. Enter the bunker and photograph the broken cement in the corridor there (P1). In the main room, photograph the water leak (P2) as well as the documents on the table (D1). Use the fuel button from before by inserting it in the fuel pump in the corner of the room.
Afterwards leave the bunker. You should see a running generator in front of you with a red fuel filter lying next to it. Take it also with you into the bunker and insert it in one of the fuel lines.
Leave the bunker and go up the street to the right. When you reach the main street, take a sharp turn to the right. Photograph the broken car here (P3). There`s also another fuel filter lying next to the car. Grab it and insert it in the other fuel line inside the bunker.
Now return to the street with the broken car. Follow the main street in the opposite direction and then cross the street here. In the next alley, first take the turn to the right. You`ll see a battery store to the right with a damaged window (P4).

Grab a flower pot from the left of you and throw it against the already damaged window of the battery store. Then enter the battery store to be granted this achievement
Grab the keycard from inside the battery store, then leave it. Now follow the alley in the opposite direction thus reaching a construction site. Enter the container here, grab the keycard from inside and then…
(1) Flip the main lever outside down.
(2) Go to the lever box and turn down all levers except the bottom right and the top right one.
(3) Flip the main lever up again. Go up the stairs and open the grate.
(4) Go down and flip the main lever down again.
(5) Go to the lever box and flip the top right lever down. Then flip the second-to the left bottom lever up.
(6) Flip the main lever up again to finish this puzzle.
Go up the stairs again, through the grate and then continue going up the stairs to the left. To the left should be an entry point for a castle. Don`t enter it yet, but access the greenhouse to your right. Grab the boltcutters from inside and photograph the mushrooms (P5). Leave the greenhouse and go down the alley all the way down to the right until you reach the beach again. Go along the downside of the beach until you reach a small toilette stall. There`s a geocache lying underneath it behind some flower pots (G2).
Return to the castle we talked about earlier. Enter your credit card and the PIN 1337, then access the castle ground. Enter the basement area by using your boltcutters. Go into the first room to the right and grab the keys from the bottom shelf. Photograph the mushrooms in the next room (P6). In the next room, photograph the burner (P7). Unlock the bedroom with your keys and photograph the document inside (D2). Also don`t forget to grab the keys next to the document. Take the main button outside of the shopping cart in the hallway with you due to you needing it later on and then leave the castle area.

On the street, go down the stairs again, but don`t go down to the construction site yet. Instead, continue going forward until you reach a door to a basement in a house to the right. Open it with the key you found to unlock this achievement.
Inside, photograph the gap in the wall to the right (P8) which you should crawl through afterwards. In the next room, photograph the mushrooms (D3) as well as the document on the table (D4).
Return to the bunker from the beginning and insert the main button in the device. Left of the fuel pump, open the fuel pump line. Then push the generator button to repair this place (R1). Afterwards, take a photo of the mess in the fuel pump room (P9), then leave the room by using the exit door, thus finishing this module.
Map 4: Castle Rock Drawbridge
Total of Collectibles in this module:
⦰ Missable Achievements: 0
🏹 Geochaches: 1
🗎 Documents: 6
🔨 Repairable Spots: 1
🖻 Photographs: 15
Video Guide
[link]Walkthrough
In the next room, take a photo of the broken button to the left (P1). Open the second door with a fuse from under the table. Behind the door is another fuse. Open the third door with it. At the end of the corridor behind the third door is a damaged roof (P2). Take the fuse from the box in this hallway and open up the last door. Behind it are some mushrooms (P3). Crouch into the next corridor.
First go all the way to the left and remove the grate there. This is a secret room thus there`s a document at the end of this room which you should take a note of (D1). Return to the corridor you came from, move in the opposite direction and drop down into the next room. Photograph the damaged cement in here (P4), then leave the room.
Go all the way to the left and change the green lights on the wall to red lights. Then go up the stairs, enter the control room and take the spiral staircase to the top. There`s a document lying here that you should photograph (D2). Look at the monitor. Set the Manual/Auto to Manual, Remote/Local on Local and the upper colored line on Red2. Push the button left of the computer to lower the bridge. After the bridge has completely lowered, set the Bridge Gates on the Monitor to Open (R1).
Leave the control room and go on the bridge. First go to the left and photograph the bar that blocks you way (P5). Then go in the opposite direction. You`ll soon see some kind of blast at the shore to the right that you should take a photo of (P6). You`ll reach the middle of the bridge. Go down the ladder here, around the corner on the left and grab the geocache from the ceiling (G1). The damaged cement next to it is also photographable (P7). Return to the bridge.
Continue going along the bridge and photograph the steam leak in front of you (P8). Then go down the ladder to the right. At the bottom, turn immediately to the right and photograph the broken pillar here (P9). Also photograph the dead fish next to the boat (P10). Go along the quay to find some more dead fish (P11). Also photograph the wrecked viewpoint at the end of the quay (P12).
Enter the boat by climbing on top of it and jumping on a balcony. Below the bed in the bedroom the (!) first key is hidden. Grab it. Soon you`ll reach the main corridor on this floor. On the left is another note that you should take a photo of (D3). Go along the hallway and into the storage room to the left. There`s the (!) second key on the shelf here. In the next room – which appears to be the master bedroom – is another document (D4).
Go down the stairs and photograph the document on the chair (D5). Take the (!) third key from the top of the television. The (!) fourth key is in the bathroom. In the kitchen climb up the ceiling to get access to a new room. Open the safe by using the combination from the note: 23, 18, 4, 17. Take the (i) fifth key from inside and the exit key. Unlock the conference room downstairs with your five keys and photograph the document inside (D6). Leave the boat and unlock the gate at the end of the quay.
Go through the gate. Photograph the sunken ship on your right (P13), the car accident (P14) and then go along the street. At the next intersection, first go to the left and photograph the unstable scaffolding (P15), afterwards go through the door in the opposite direction thus completing this module.
Map 5: Point Elias
Total of Collectibles in this module:
⦰ Missable Achievements: 1
🏹 Geochaches: 3
🗎 Documents: 5
🔨 Repairable Spots: 1
🖻 Photographs: 10
Video Guide
[link]Walkthrough
Enter the next hallway. If you go straight forward, you`ll soon see that the tunnel is flooded. Photograph the flooding (P1). Then go in the opposite direction and walk up the stairs. You`ll find yourself in the middle of a park. Go straight forward and when you reach a wall, turn to the left.
To the right you should be able to photograph a flooded street now (P2). Turn around and enter the bushes on your left. Crouch through them to find a hidden geocache (G1).
Walk the street to its end to find a burning car blocking your way. Photograph it (P3). Go back to the plaza and grab the authority ticket from the car below a passage. Take it with you and go through the passage. Go down the spiral staircase and you`ll find yourself in parking garage. Place the parking ticket on the car blocking the door here. Afterwards, photograph the document on the table next to it (D1).
Go through the door behind the car to a new street. Take the first alley to the left and go all the way through. On the street at the far back, turn right and photograph the truck blocking the street (P4). Go along the left side of the street and then enter the greenwar shop. Go through the door on the right and photograph the note on the wall (D2). Also photograph the damaged cement on the wall (P5) and in the room behind that damaged cement, photograph the mushrooms (P6).
Return to the note you photographed pull back the carpet in the room behind the note. Grab the key and open the door with it. Enter the code 092# on the alarm device, then go up the spiral staircase. Photograph the shelf on the right. This counts toward a document (D3). Also read the document on the table (D4). Exit the house and go up the stairs next to it.
Cross the street by using the bridge and go through the alley on the other side of the street. You should soon see a railing to the right. Photograph the flooding on the ground below (P7). Don`t turn to the right, but continue going forward. You`ll see a grate to the left. Behind it is a small room with a geocache inside (G2). On the next street, go to the right first and you`ll soon see some damaged cement on the right wall (P8). Directly on the left should be a greenwar garage. We can`t open it yet, because the generators are turned off.
Go in the opposite direction on this street until you find a ladder you can climb up. Grab the key up there. Return to the railing where you photographed the flooding below. Take the other path here and you`ll soon see a green high voltage door to the left. Use the keys to enter it. Behind there, photograph the wet floor (P9). Use the vent to get inside the generator room. Push the buttons in the order 24 to repair the generators (R1). Return to the greenwar garage and use the code 7533 to enter it.

Directly go to the bed on your left and drink the coffee. You`ll be teleported to the wasteland. Wait 5 minutes without doing anything. You`ll be teleported back to the bed and receive this achievement.
Go up the stairs and photograph the broken elevator to the left (P10). Go up one more floor to find some more documents (D5). Leave the house by using the backyard and go to the right. Warning: Don`t go too far to the right. Otherwise you`ll leave this module. Instead, jump on the platform to the right next to the stairs. Use your amazing jump & run skills to jump on the balcony next. Climb up the ladder on the opposite side to find the last geocache (G3). Then return to the backyard and follow the path until you reach the next module.
Map 6: Point Elias Metro Station
Total of Collectibles in this module:
⦰ Missable Achievements: 0
🏹 Geochaches: 1
🗎 Documents: 1
🔨 Repairable Spots: 1
🖻 Photographs: 11
Video Guide
[link]Walkthrough
You`ll reach a train station area. Go down to the station and photograph the steam leak in front of you (P1). Walk along the station until you reach a storage room. Go inside and photograph the broken cabinet which counts toward a document (D1). Climb up the ladder and pull the lever. Jump inside the elevator and crouch outside. Then photograph the broken elevator from outside (P2).
Go to the end of the station. Below the last bench is another geocache (G1). Also photograph the maintenance train access door to the right (P3). Enter the other storage room and go up the ladder to find a yellow valve. Take it with you. Return to the first storage room with the elevator and place the valve on top of the elevator. Then turn it.
Go to the ladder that`s placed next to the second storage room and climb it up. Photograph the first (P4 and second steam leak (P5). At the end of the path turn off the valve and then go the other way. Drop down next to the train and walk along the train until you reach the maintenance entrance.
Go inside the tunnels on your left and photograph the flooding here (P6). Take the wooden planks with you all the way through the tunnel and then climb up the ladder. Start the yellow generator. Take the wooden planks with you through the vent and place it on the hole so that you can pass through. On the other side turn the red valve and then push the green button on the generator. Then wait some time until the path to the spiral staircase finally opens up (R1).
Go down the spiral staircase and push the button. Photograph the damaged cement behind the giant gate (P7). Then get onto the mini train and start it. At the next intersection pull the lever to change tracks. Go along the right path anyway though and photograph the cave-in at the end (P8). Get onto the minitrain again and continue driving. Photograph the steam leak on your right during the ride (P9).
Go through the door at the end of the tunnel and up the spiral staircase. *According to the comments, the damaged concrete at the top of the spiral staircase can be photographed as well*. Photograph the flooding here (P10). The next map will load now. Photograph the flooding again afterwards (P11) and then go through the door into the office parking lot. Go through the door on your right and follow the path until you find your boss and some people. They will give you your next mission. Return to the parking lot and start the car to finish this chapter.
Collectibles [Chapter 7 – Map 1]
Module 1: Service Tunnels
P1
P2


P3
D1


G1
D2


D3
P4


P5
P6


D4
R1


P7
D5


P8
P9


P10
P11


P12
D6


D7
D8


P13
P14


P15
D9


R2
P16


Collectibles [Chapter 7 – Map 2]
Module 2: Crash Site
D1
P1


P2
D2


P3
P4


D3
P5


D4
P6


P7
P8


P9
P10


P11
P12


P13
P14

P15
P16


D5
D6
Note: I forgot to photograph the projector screen in this very room (as the last screenshot). Just start the projection to receive this document automatically.
D7
P17


Collectibles [Chapter 7 – Map 3]
Module 3: Stormdrain
D1
P1


P2
P3


P4
P5


P6
P7


P8
P9


R1
P10


P11
P12


P13
P14


P15
P16


D2
P17


P18
P19


P20
P21


P22
P23


P24
P25


P26
P27


P28
D3


P29

Collectibles [Chapter 7 – Map 4]
Module 4: Old Bunker
P1
P2


P3
P4


D1
P5


P6
P7


P8
P9


P10
P11


P12
P13


P14
P15


P16
P17


D2
D3


P18
P19


Collectibles [Chapter 7 – Map 5]
Module 5: Main Power Plant I
P1
P2


P3
D1


P4
R1


Collectibles [Chapter 8 – Map 1]
Module 1: Main Power Plant II
P1
P2


R1
P3


P4
P5


R2
P6


P7
G1


P8
P9


P10
D1


P11
P12


P13
P14


D2
P15


P16
P17


P18

Collectibles [Chapter 8 – Map 2]
Module 2: Construction Site
G1
P1


D1
P2


P3
G2


D2
P4


P5
G3


Collectibles [Chapter 8 – Map 3]
Module 3: Stalburg City I
G1
P1


P2
D1


P3
P4


P5
G2


P6
P7


D2
P8


D3
D4


R1
P9


Collectibles [Chapter 8 – Map 4]
Module 4: Quay
P1
P2


P3
D1


P4
D2


R1
P5


P6
G1


P7
P8


P9
P10


P11
P12


D3
D4


D5
D6


P13
P14


P15

Collectibles [Chapter 8 – Map 5]
Module 5: Stalburg City II
P1
P2


G1
P3


D1
P4


D2
P5


P6
D3


D4
P7


G2
P8


P9
R1


P10
D5


G3

Collectibles [Chapter 8 – Map 6]
Module 6: Path to the Office
P1
D1


P2
G1


P3
P4


P5
P6


R1
P7


P8
P9


P10
P11

