![[99.9 % COMPLETE]Borderlands 2 Badass Challenges/ Legendary Weapon/ 3rd Party Tools Guide [Abandoned] for Borderlands 2](https://steamsolo.com/wp-content/uploads/2021/07/99-9-complete-borderlands-2-badass-challenges-legendary-weapon-3rd-party-tools-guide-abandoned-borderlands-2.jpg)
Overview
I feel I won’t remember almost all of the secrets and tools I use for Borderlands 2, with the Pre-Sequel taking up all of my time. This guide is to help me keep track as well as assist with the various location based challanges. Later on, I will put tips on completing various challanges (All techniques will be legit, i.e NOT using said 3rd party programs to modify the game) and hopefully finish with a list of ALL the Legendary Gear in the game and their various effects.
Introduction
This guide is meant as a reference for me as once the Pre-Sequel is released, I will probably forgot almost all of it.
This guide includes a walkthrough of the Badass Challenges which will NOT use cheats to acheive, they will have legit strategies. Any tips on completing said challenges are welcome and I will name you in the edit.
NOTICE: This guide IS going to have info on various hacks that can be used with the PC version of Borderlands 2, suggestions on various programs is WELCOME. If you have a problem with the use of 3rd Party programs or cheating on a game, do NOT post it in the comments. I will delete any comments involving people hating on such gameplay and all it will do is waste both of our time.
*SPOILERS AHEAD, YOU HAVE BEEN WARNED*
Title isn’t enough? Fine then.
This guide will contain various information on Bosses, Loot, and Locations in the game. It is meant for Endgame play and I will not warn when something comes up as the nature of the guide is spoilers.
–Area Based Challenges, Loot, and Trivia–
are new to the Borderlands series and can be found in the Character Menu Tab.
Each challenge, when completed, gives Badass Points. When the player obtains enough of these points, they receive a Badass Token which can be redeemed in the same menu for small passive bonuses that affects all of the players characters. These bonuses stack and, with enough time, can max at 255% bonuses.
When you enter an area, go ahead and scan the list for any unusual challenges.
–
includes items such as the Lascaux, which is generated on the map everytime you start the game, and boss loot, such as The Infinity, which is dropped by a unique enemy.
Loot will follow this format:
includes just random facts about the area and little fun things. For instance, in Windshear Waste after you reach a certain point in the game, you can pick up The Gear and start a Lord of the Rings style mini quest which is not on the quest logs *Full information of this mini quest can be found in the Eridium Blight section of this guide*.
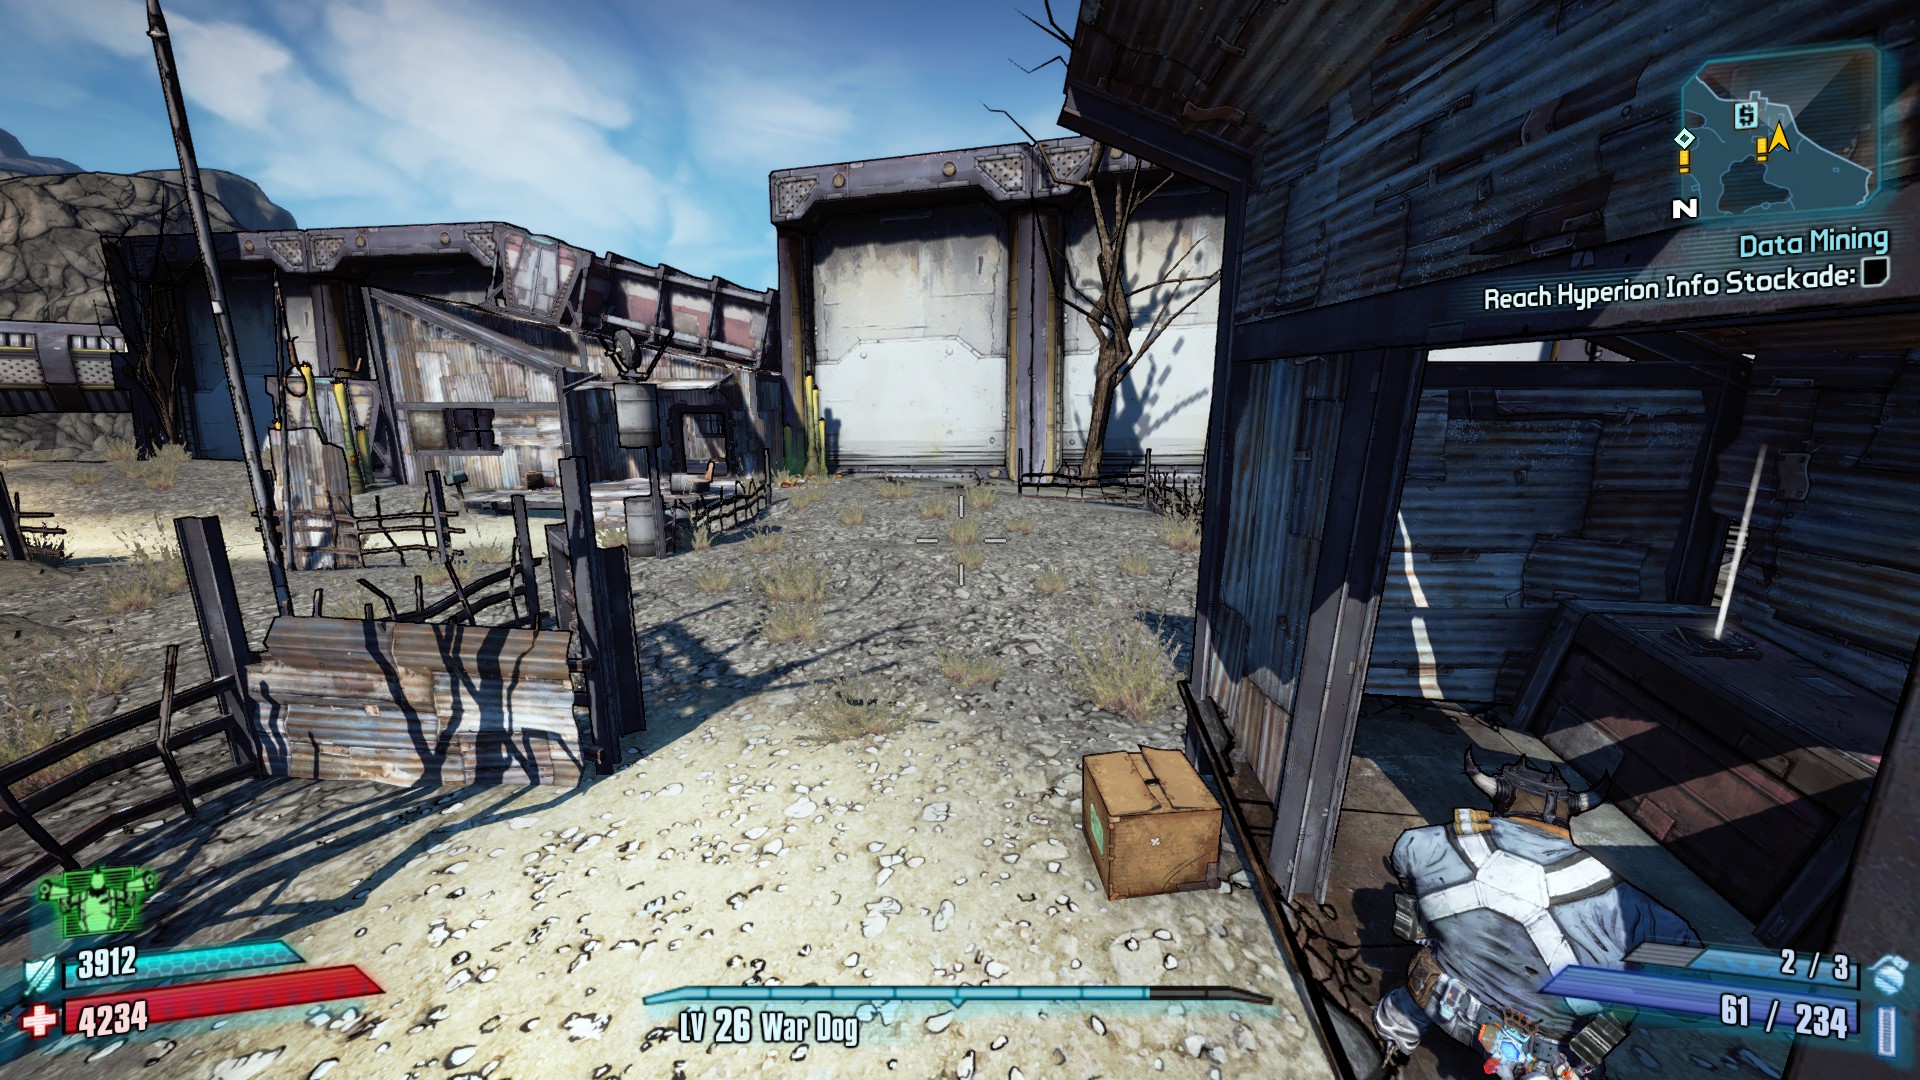
Arid Nexus – Badlands
Challenges
Beginning of the End
Description: This echo is in the shed near T.K. Baha’s House.

Description: Near what used to be the Catch-a-Ride outside of Fyrestone.

Description: This Echo is near the Bus stop from the first game, in a Dumpster. If you don’t know where that is, go to the Saturn Boss Fight Area.

Description: This Echo is in Fyrestone, on top of a building near a water tower.
Forgot to take a Screenshot, but it is on a shelf in the back left corner of Dr. Zed’s.
Description: In Dr. Zed’s house. Follow the electric lines to find the switchbox to disable the electric fence. To reach it, you need to be on top of the highway to the Hyperion Info Stockade.
Boned
Description: Kill Bonehead 2.0
Strategy: He is located in the same spot as in the first game, behind Fyrestone, although he is a loader in this game.
Hey! Over Here!
Description: Locate the hidden CL4P-TP
Description: Behind a the building that used to be Marcus’s store in Fyrestone, there is a deactivated Claptrap on the cliff. This is a throwback to an easter egg in the first game.

Loot
Trivia
–Return to the Borderlands
-This area is a redone version of the Arid Badlands from the first Borderlands game.
Arid Nexus – Boneyard
Challenges
Cult of the Vault x2

Description: This symbol is on top of the Eridium Pipeline, a nearby ramp will help you get to the top. It is near where you break the pipe with your car later in the game.
Description: This symbol is on an out of bounds tower to the south of the fast travel.
Under Pressure
Description: Hit the hidden button at the refinery’s base to summon Hyperion troops. Then, kill them.
Strategy: Find the button, push the button, kill all the baddies.
Description: Go to the Norther most Catch-a-Ride on the map. To the left of the console is the lever in question. Kill everything for this challenge.
Dead Air
Description: Turn off the radio on Hunter Helquist’s back.
Strategy: Either the first time you open the doors to Hunter Helquist or then on after, he will not notice you. Walk up around behind him and press your interact button (E Default). If he sees you, either get near him to cause him to melee and sidestep around him or toss a singularity grenade between him and you. It’ll cause him to be dragged back first towards you.
Hint: Using singularities in this fashion is very useful for killing Shield Nomads.
Loot
Trivia
–Arid Badlands Debux
-The Arid Nexus areas are the same area as the Arid Badlands from the first game (First area).
Bloodshot Ramparts
Challenges
Cult of the Vault

Description:After the crate bridge, you keep heading straight and will eventually find a port-a-potty chest in a leftwards corner. Walk around the ramp to the right of this and you can find the symbol under the ramp.
The Last Place You Look x5
Description: Find all five missing car keys in Bloodshot Ramparts.
Description:This car key is in the trunk of a car to the left when you first enter this area.

Description:In the first open area, Before the area with an overhang, this car key is in the back of a car tipping on the edge of the dam.

Description:In the area with the overhang, this key is in the left door of a car sitting on top of a bus.

Description:This car key is in the back of a car hanging above the main path.

Description:This last car key is to the right of the Marcus Shrine.
The Not-So-Phantom Tollbooth
Description:Pay the toll.

Strategy: Right at the entrance, before the first open area, put 5 dollars into a donation box
Loot
No Area Specific Loot
Trivia
-Players can be sacrificed at the Marcus Shrine for guns. The few times I have done this, the guns haven’t been very good.
Bloodshot Stronghold
Challenges
Cult of the Vault x2
First Symbol

Description:Inside a security room in the prison block. Climb up a later near Roland’s cell and walk along the pipes to get to it.
Second Symbol

Description:Before jumping down to Splinter arena, look to your right. Symbol is against the wall.
Bloodshot Memories x6
Description: Find the lost recordings of the Bloodshot clan.

Description:Right after the first room with bandits, on the table to your left.

Description:In the room with the Turret, go along the right wall. Before you reach the Porta-a-Potty, this Echo is on a table to your left.

Description:In Satan’s Suckhole, Follow along the inner ring and you’ll run into this Echo on a chair. If Mad Mike is at the 12 o’ clock position, this one is at 3.

Description:This one is in the flooded room. In the middle is a shack with this one inside it, the opening is on the other side of where you walk in.

Description:When you walk into the prison block, this Echo is on a table near the entrance.
Description:Right near the Exit to Bloodshot Ramparts, this one is on the ground to the right of it.
Eff Yo’ Couch x5
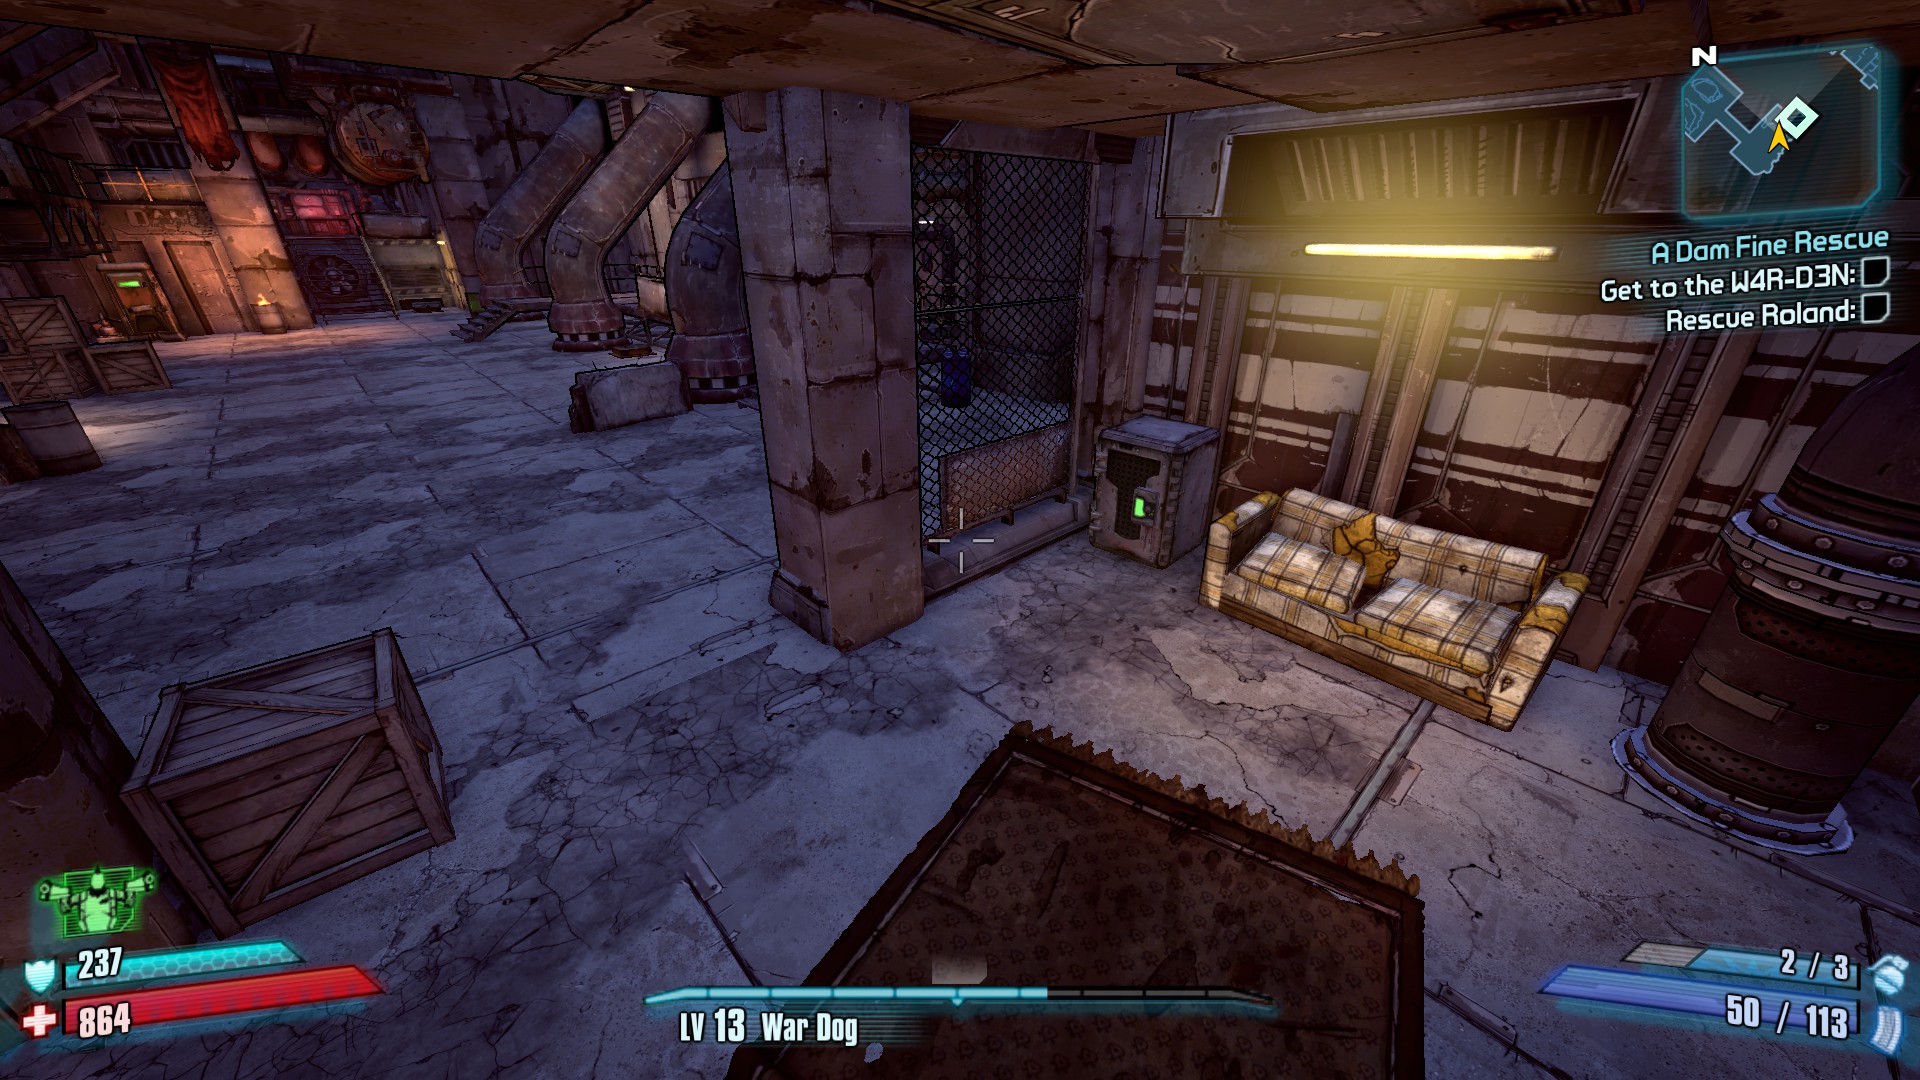
Description: Jump on all 5 couches in Bloodshot Stronghold.
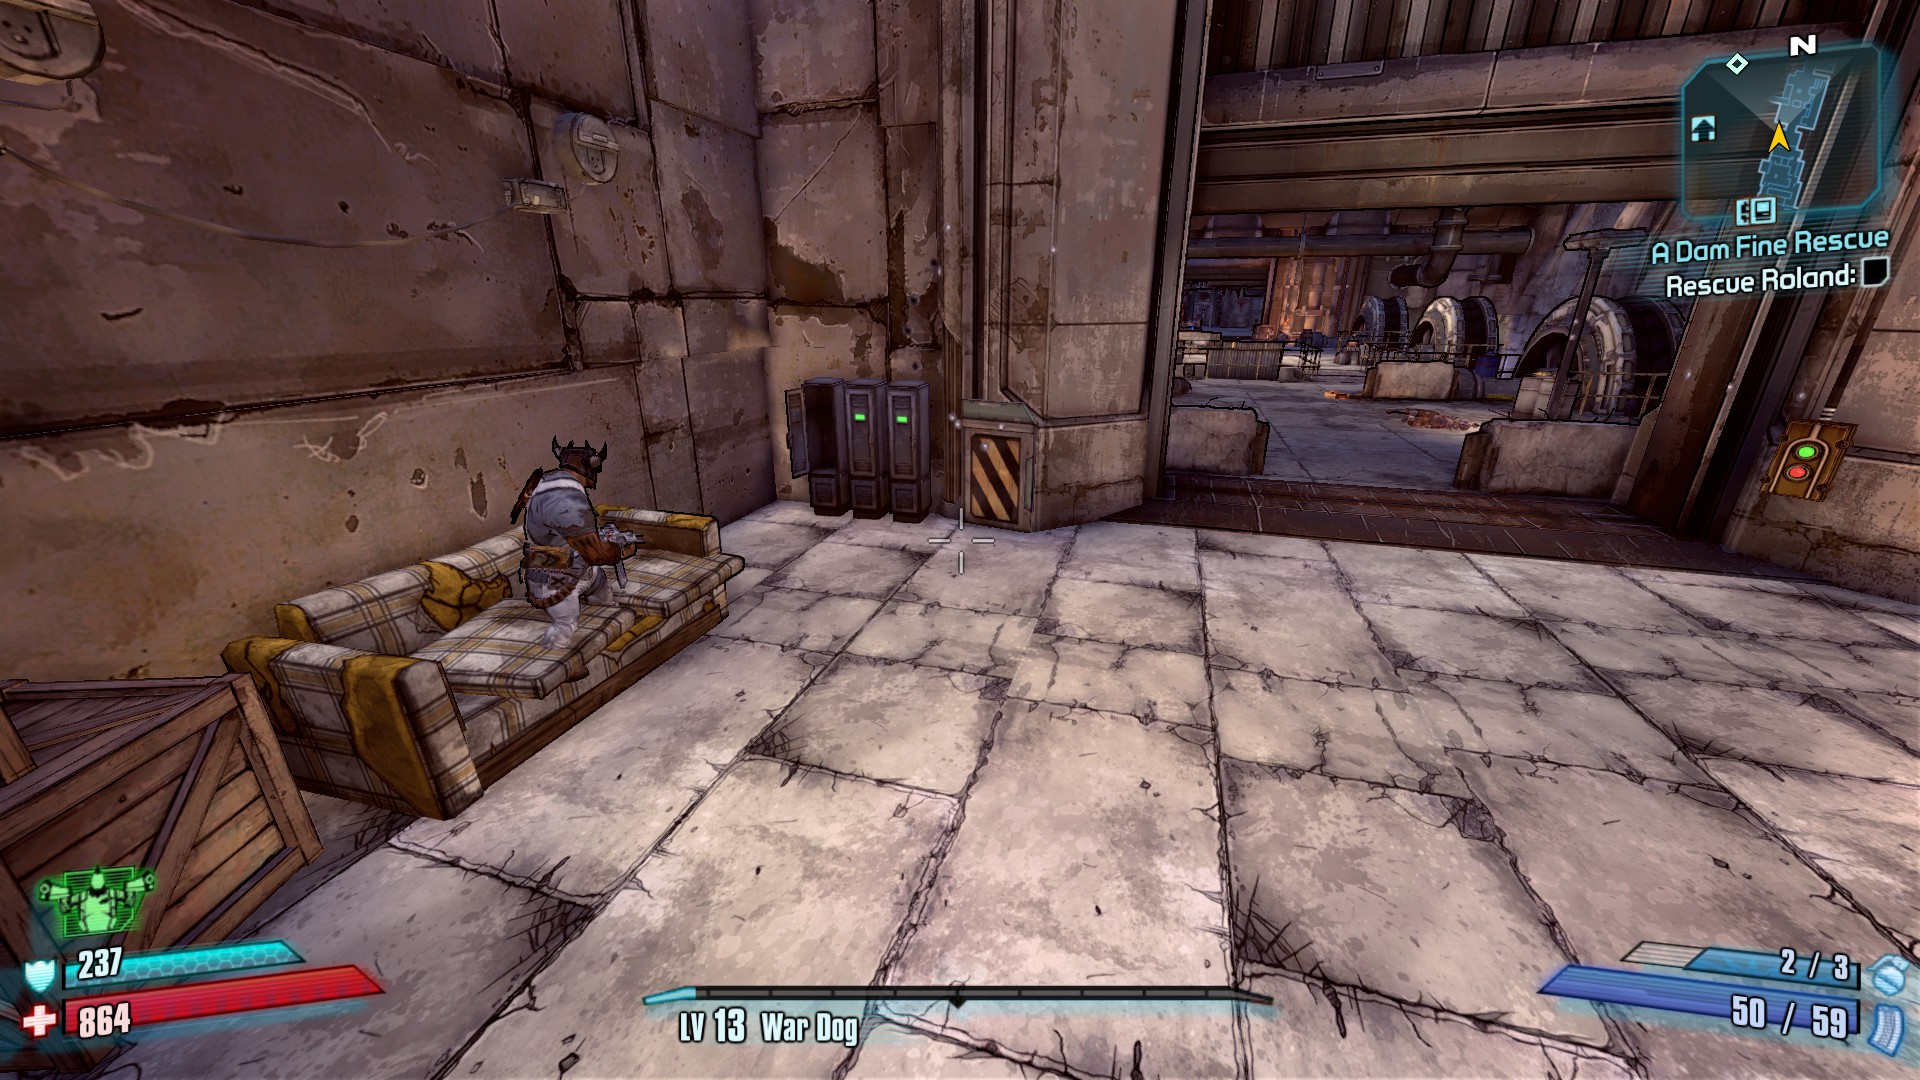
Description:After the first area with bandits, this Couch is against the wall on the left.

Description:In the room with the Turret, this couch is against the wall to the left of where you walk in.

Description:In the flooded room to the right, Past the Echo in this room.
Description:On the Splinter Cell Mission, when you first run into a room full of Rats, this couch is to the right.

Description:After killing the Splinter Cell, this couch is in the room before the gun chest reward.
Give It a Whirl
Description:Kill an enemy by knocking him into the whirlpool.
Strategy:The whirlpool in question is in the area called Satan’s Suckhole. I have had the best results using a singularity grenade to pull people from the upper levels down. Anything that can be used to move enemies is viable though.
Cut ‘Em No Slack
Description:Defeat the splinter group in their assigned order.
Strategy:When you drop into the arena, kill them in the order they appear. If they disappear before you kill them, remember which order they appear and wait until they all attack you, then you can kill them in the correct order.
Loot
Trivia
In the cell block area, behind the first Vault Symbol is a row of switches. Hitting the one marked 4 unlocks a cell with a red gun chest.
After Splinter Cell, in the room with the last couch, There is four switches. Against the far wall from where you walked in is 5 lights. Pressing 4 switches in this area (TV, Floor Lever, Wall Switch, and Valve) changes the lights. Making all these lights green spawns a mini-boss.
Caustic Caverns
Challanges
Cult of the Vault x2

Description: On your way out of Caustic Caverns, after learning of what happened to the mining crew, there is this long ladder up which leads to a one way gate by the entrance of the map. About 2/3rds of the way up this ladder is a corridor behind you with this symbol at the end of it.

Description: By the Minecraft easter egg, in the North-West section of the map, this symbol facing the coast.
Can’t Feel A Thing
Description: Stand in the corrosive ooze for thirty seconds without falling into Fight for Your Life.
Strategy: This one is all about health regeneration as the damage done to you is a percent, not a set amount. The most universal way of doing this is finding a shield that either lowers or nulls corrosive damage. Otherwise, it is up to you to figure out different ways to cause your health regenerate.
Ever Blow Bubbles…?
Description: Use the corrosive bubbles to reach the broken rail.
Strategy: Out in the corrosive lake immediately to your right as you walk in there is 3 sets of broken rails.
Below these rails are bubbles the grow and pop in the corrosive lake, run INTO these and they propel you up. Trying to jump with them will only result in you taking corrosive damage.
Harcheck’s Revenge
Description: Kill Blue before he can regenerate any of his leg crystals.
Strategy: Another challange where the point is to shoot something till it is dead, if you can’t do it, return again later and try again.
I Bet I Can Make It [Hidden]
Description: Make it to the lone island.
Strategy: In the area where you fight Blue, across from where you walk in and he spawns is a single lone island. The challange is to make it to this island. You’ll need approx. 8k shields and some skills to either increase movement speed or add health or shields.

Loot
2 Items, Shotgun Blockhead and Sniper Rifle Longbow. Both are found in the Minecraft Easter Egg area from the enemies that spawn there.
There is also a character head for all the characters in the same area.
Trivia
Minecraft Easter Egg
In the North-West corner of the map, you’ll find a set of rails and a minecart. Normally the minecart is used in a mission where you escort it along the tracks to process some eridium but near it is something more interesting.
Jump on the rocks to the right of the minecart and you’ll come upon and area with suspicious looking Dirt blocks that you can break with melee.

End of the Line
Challenges
Cult of the Vault

Description:Under the last overpass, before reaching the Boss Arena. Do not jump down else you’ll have to make your way all the way back.
Master of All He Surveys
Description: Kill Willhelm without destroying any of his surveyors.
Strategy:You’ll want to kill Willhelm as fast as you can, the longer you take the more surveyors join and will eventually make this impossible. If you can’t do it fast enough, return after the Wildlife Exploitation Preserve.
Loot
Trivia
Willhelm will be a playable character in The Pre-Sequel.
Eridium Blight
Challenges
Cult of the Vault x3

Description: Bandit Camp near Lover’s Jump.

Description: Bunker to the left of the gate that leads to Hero’s Pass.

Description: Eridium Extraction Plant, from the Dust entrance, head through the first gate to your right, then head left to the structure. On the left side when approching.
Can You Hear Me Now
Description: Destroy all 4 communication dishes
Description: From the start fast Travel, go through the gate to your right. Look towards Hero’s Pass, this dish is off in the distance above the mountain.
Description: From the gate you went through, look towards the facility to your left. This dish is on top of the building.
Description: Go back through the gate. Head towards the bridge at the end of the road (There is a ton of Rakks above it), this dish is visible to the left of the bridge near a water tower.
Description: Wrap around to Hellsfont Volcano, near where you would start your trek to get the Vault Hunter Vs. The Volcano challenge, turn around and this dish is visible.
Save the Turrets
Description: Complete the fight at the gate before the Loaders destroy the tower turrets.
Strategy: This is one of those challenges where your best bet is to kill things before they kill things. If you are having a hard time, contine the progress or start True Vault Hunter mode to level up more, you can always re-select your character to change the difficulty back and do this challenge.
Pipe Dreaming
Description: Walk on top of the Eridium pipeline.
Strategy: First off, go across the bridge down the road from the fast travel. Head straight from the bridge and look for this vertical pipe on the right edge of the map.
Go around back and jump on top of the foundation and clamber on top of the pipe.
To get up to the next area, open the dumpster up here and use the open lid to reach the area above it.

Drop down to the pipe below, run along it until you come to a section that is apart from it. Jump across the gap and try to land on the pipe below for a red chest.
Vault Hunter vs. The Volcano
Description: Get up close and personal with the volcano.
Strategy: Go straight from the fast travel, across the bridge, hug the left until you reach Mount Hellsfront. Before a drop down with your car, there is a path the winds backwards a bit to your right.
There is quite a few scripted dangers along the path, but I’ll let you figure those out.
At the end of the path, you’ll find a midget named Geary, killing him has a higher chance of dropping some character heads. Read the Trivia below for the special thing that happens with Geary.
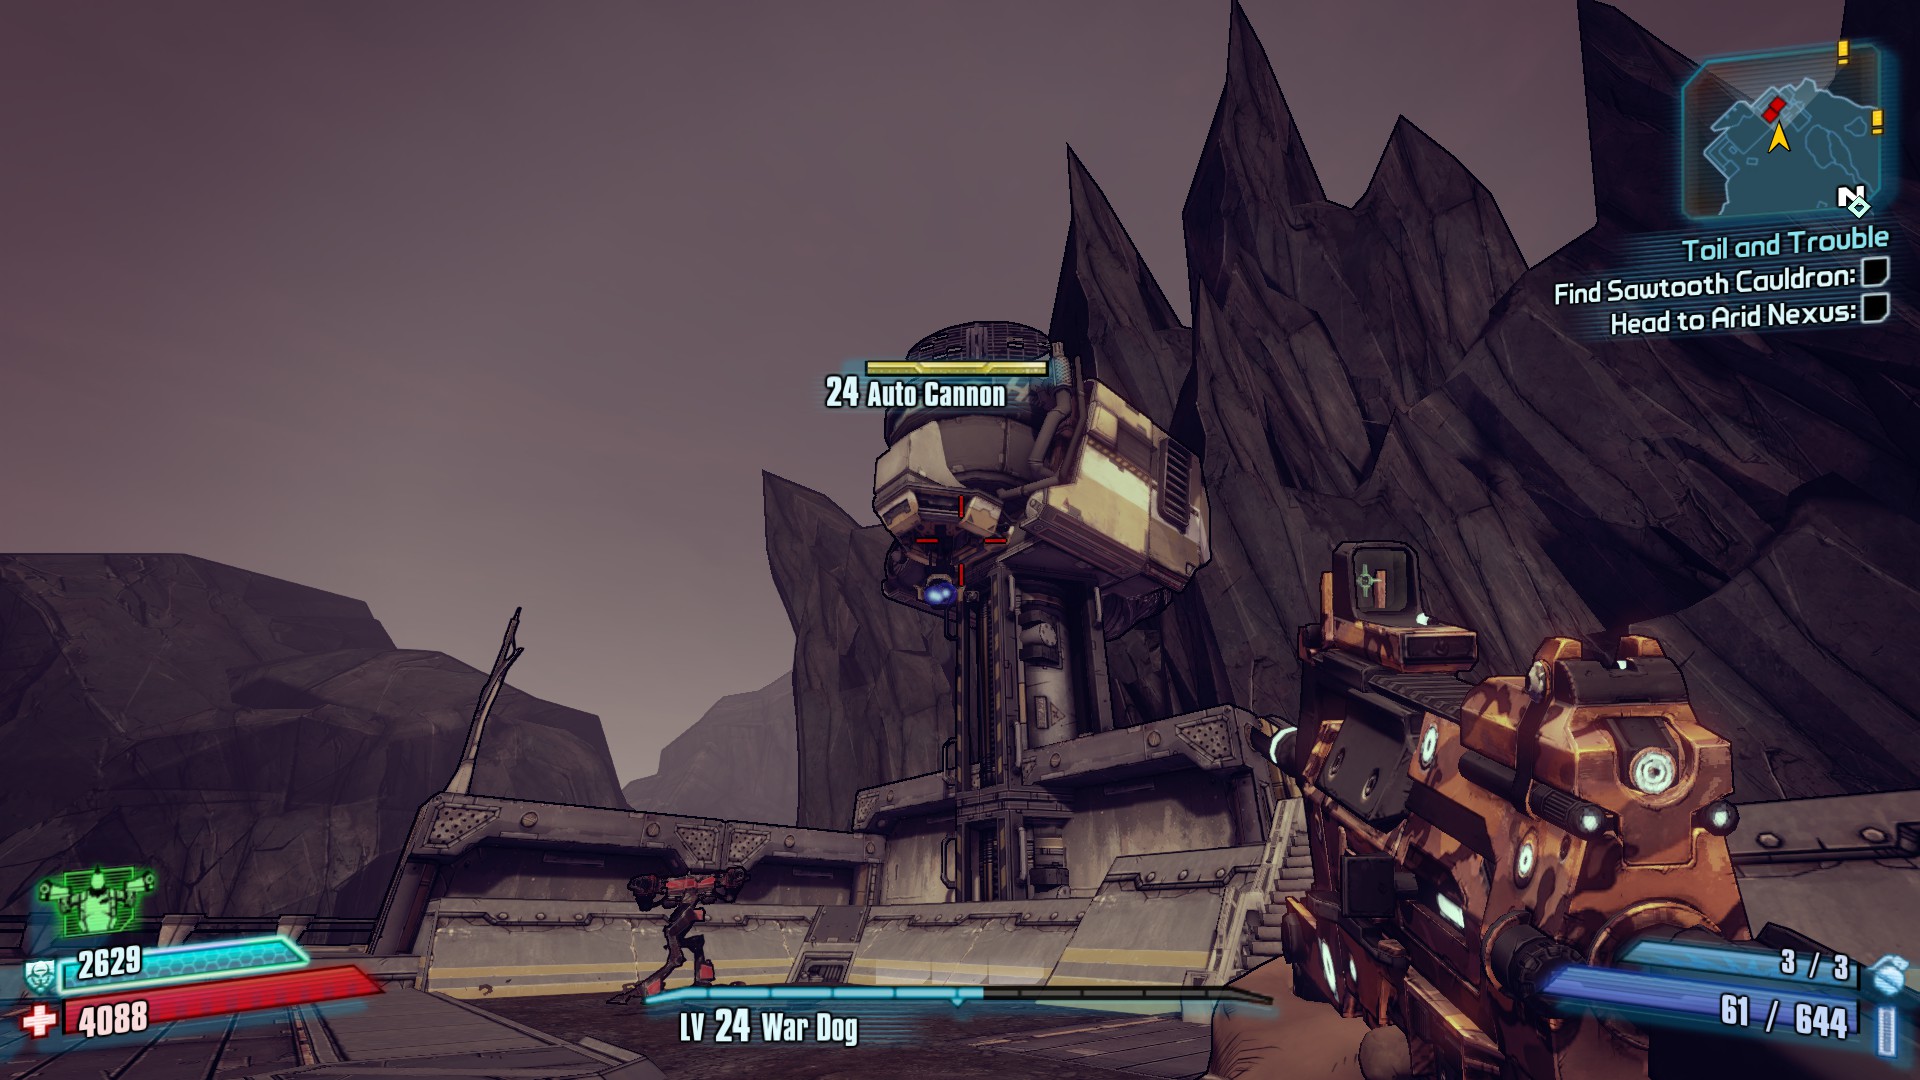
Bring out the Big Guns
Description: Destroy all five Hyperion tower turrets.
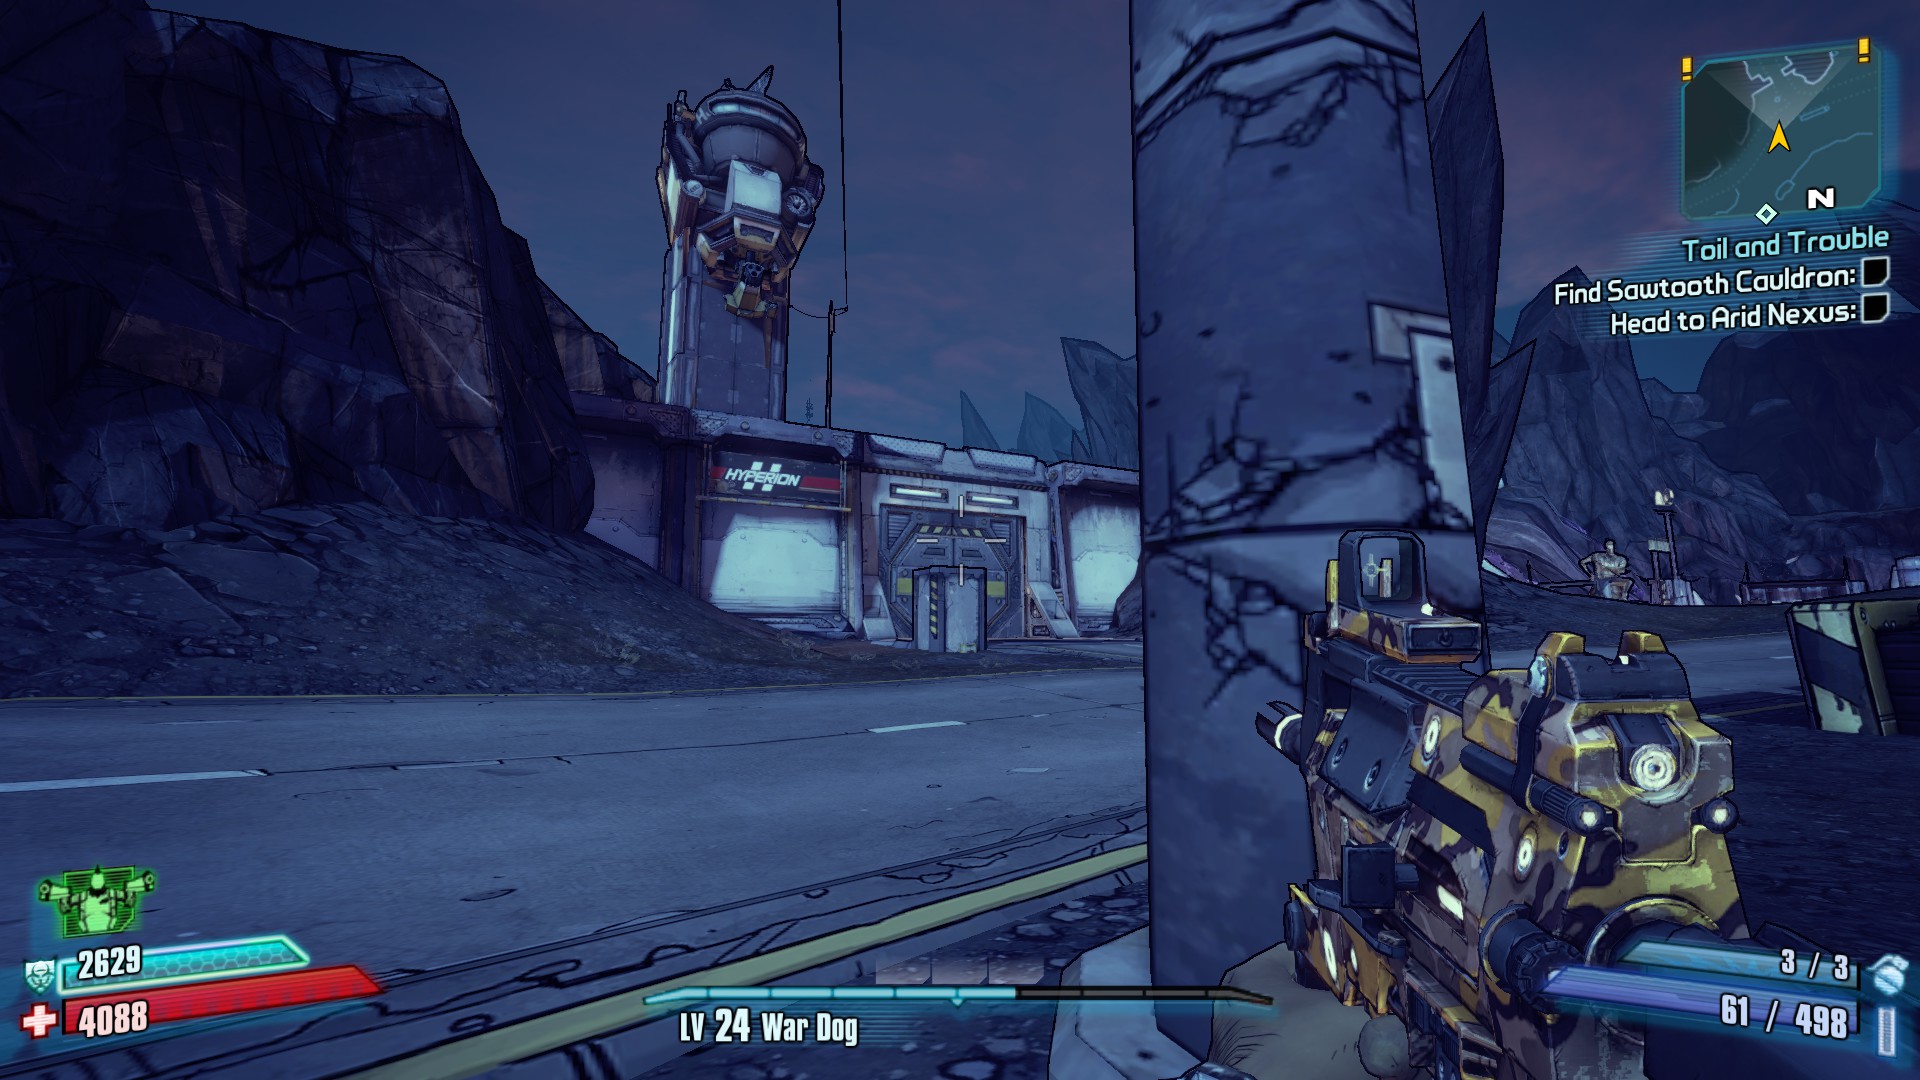
Description: From the fast travel, this cannon is above the gate to your right.
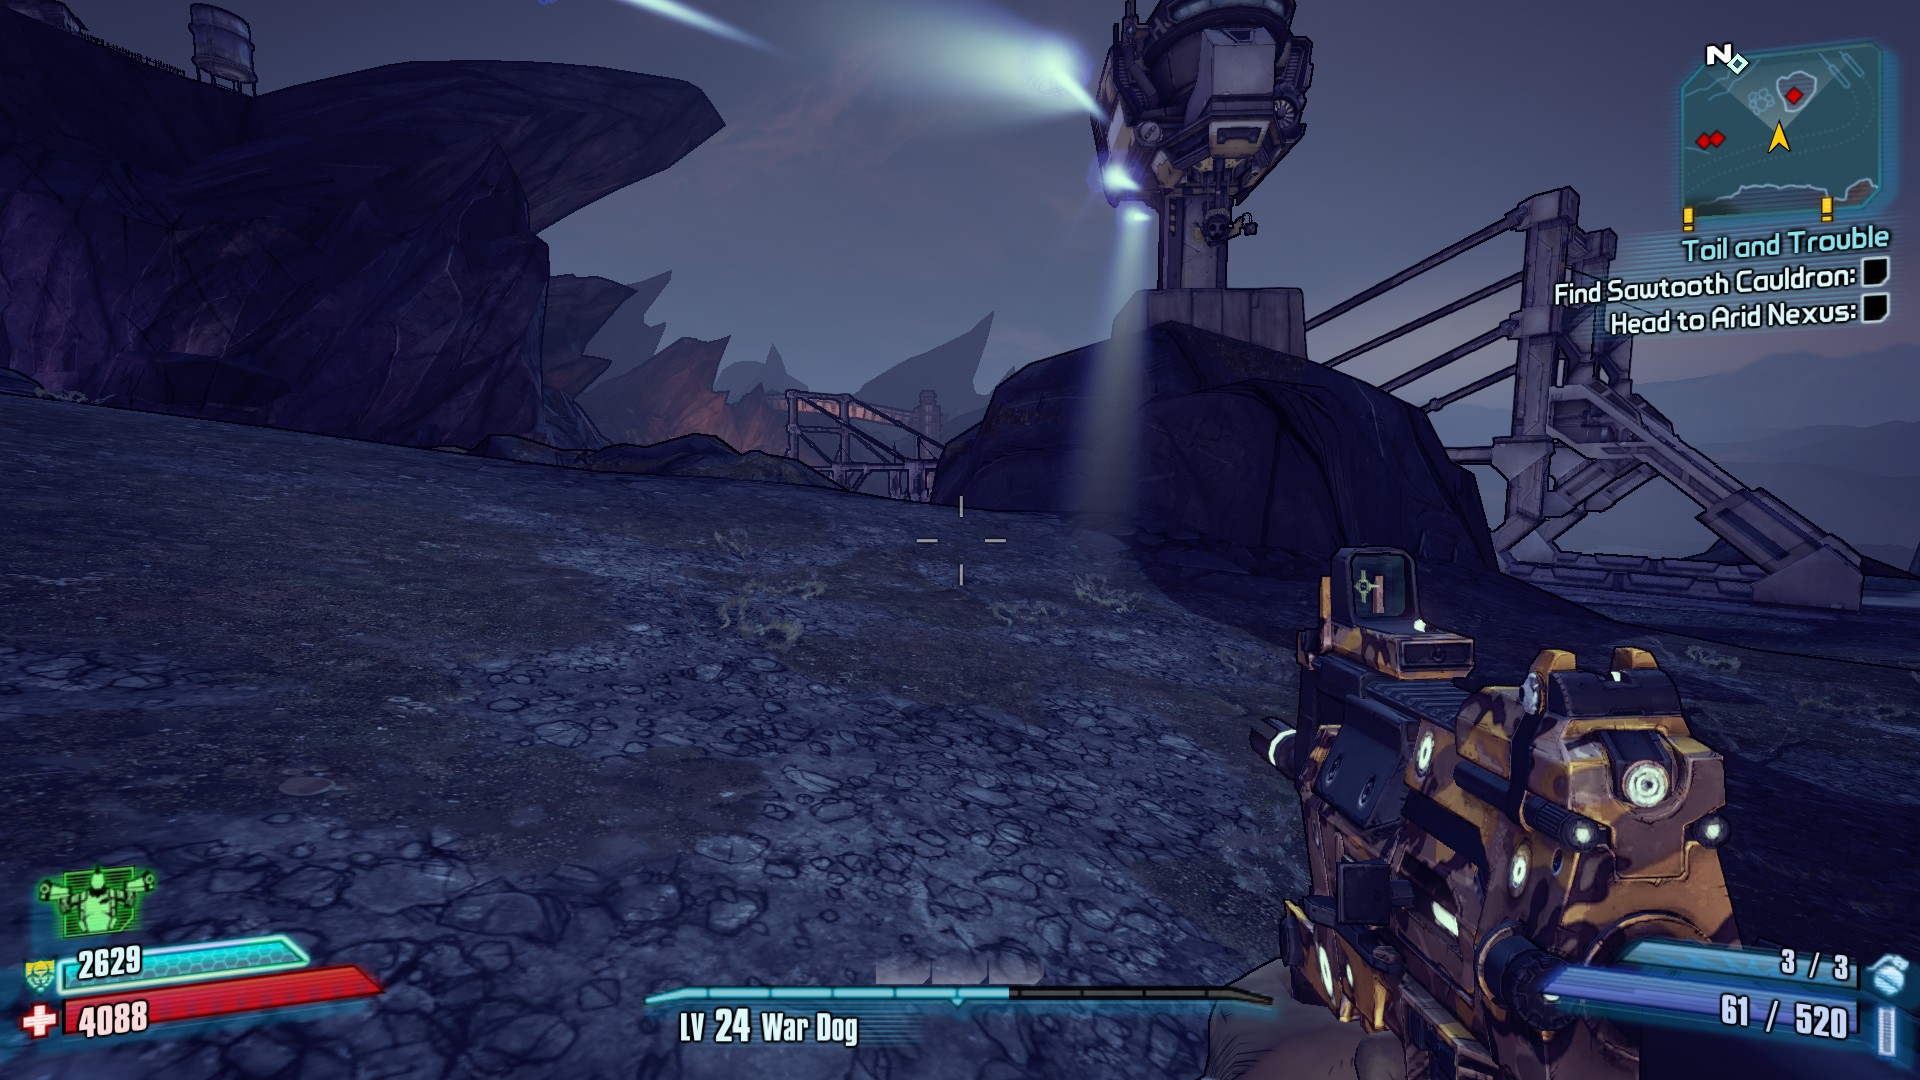
Description: Continue from the gate down to the bridge past the road, this cannon is next to the bridge.

Description: Instead of crossing the bridge, drop down into the crevass next to it, wrap around to the right and start heading towards the right side of the map.

Description: This cannon is on the bridge that gets raised during the storyline, I don’t remember what area it leads to.
Description: This cannon is in the South East edge of the map. From the fast travel, go through the gate to your right, and pretty much head straight across.
‘Twas Slag Killed the Beast
Description: Find King Mong and kill him while he is slagged.
Strategy: Rather self explanatory, somehow slag King Mong and then kill him. You don’t need a slag weapon for it to count.
Loot
Eridium Blight (Cont.)
Trivia
–The Lord of the Gears (A.K.A, One gear to loot it all)
-On Mount Hellsfront, there is a midget named Geary. In this allusion to Lord of the Ring (LOTR) he is Gollum.
Back at Claptrap’s place, in the fireplace is a gear. You can pick it up to start this Easteregg in True Vault Hunter mode after you kill the final boss.

Make your way all the way back to Mount Hellsfront and to Geary with this item, let him slap you. This is Geary stealing the Gear from you (Make sure you don’t have any auto retaliation i.e Spike Shield). He will suicide into the lava, which will cause three Rakks to fly in and drop 3 red chests on the cliff behind where Geary is. But be warned, there is a restriction to this quest
YOU CANNOT USE VEHICLES OR FAST TRAVEL
You have to hoof it from Claptrap’s Place all the way to Mount Hellsfront.
Fink’s Slaughterhouse
Challenges
Cult of the Vault

Description: I found this one while trying to make things more interesting, regardless, it is behind a pillar in the far left corner of the arena. Easy enough to get as you can grab it before pushing the button to start a wave of enemies.
Loot
Nothing Special Here, Post if you know something.
Trivia
Nothing Special Here, Post if you know something.
Friendship Gulag
Challenges
Cult of the Vault

Description:In the back of the Gulag, to the left of the cells, Behind some crates.
In the Middle of the Night
Description:After night falls, alert a guard tower to your presence.
Strategy:As the mission says, show up at night or just wait for night to fall (At most 10 minutes). Just find a spotlight and run into it. It will summon enemies, but nothing tougher than what is in the area.
Loot
No Area Specific Loot here.
Trivia
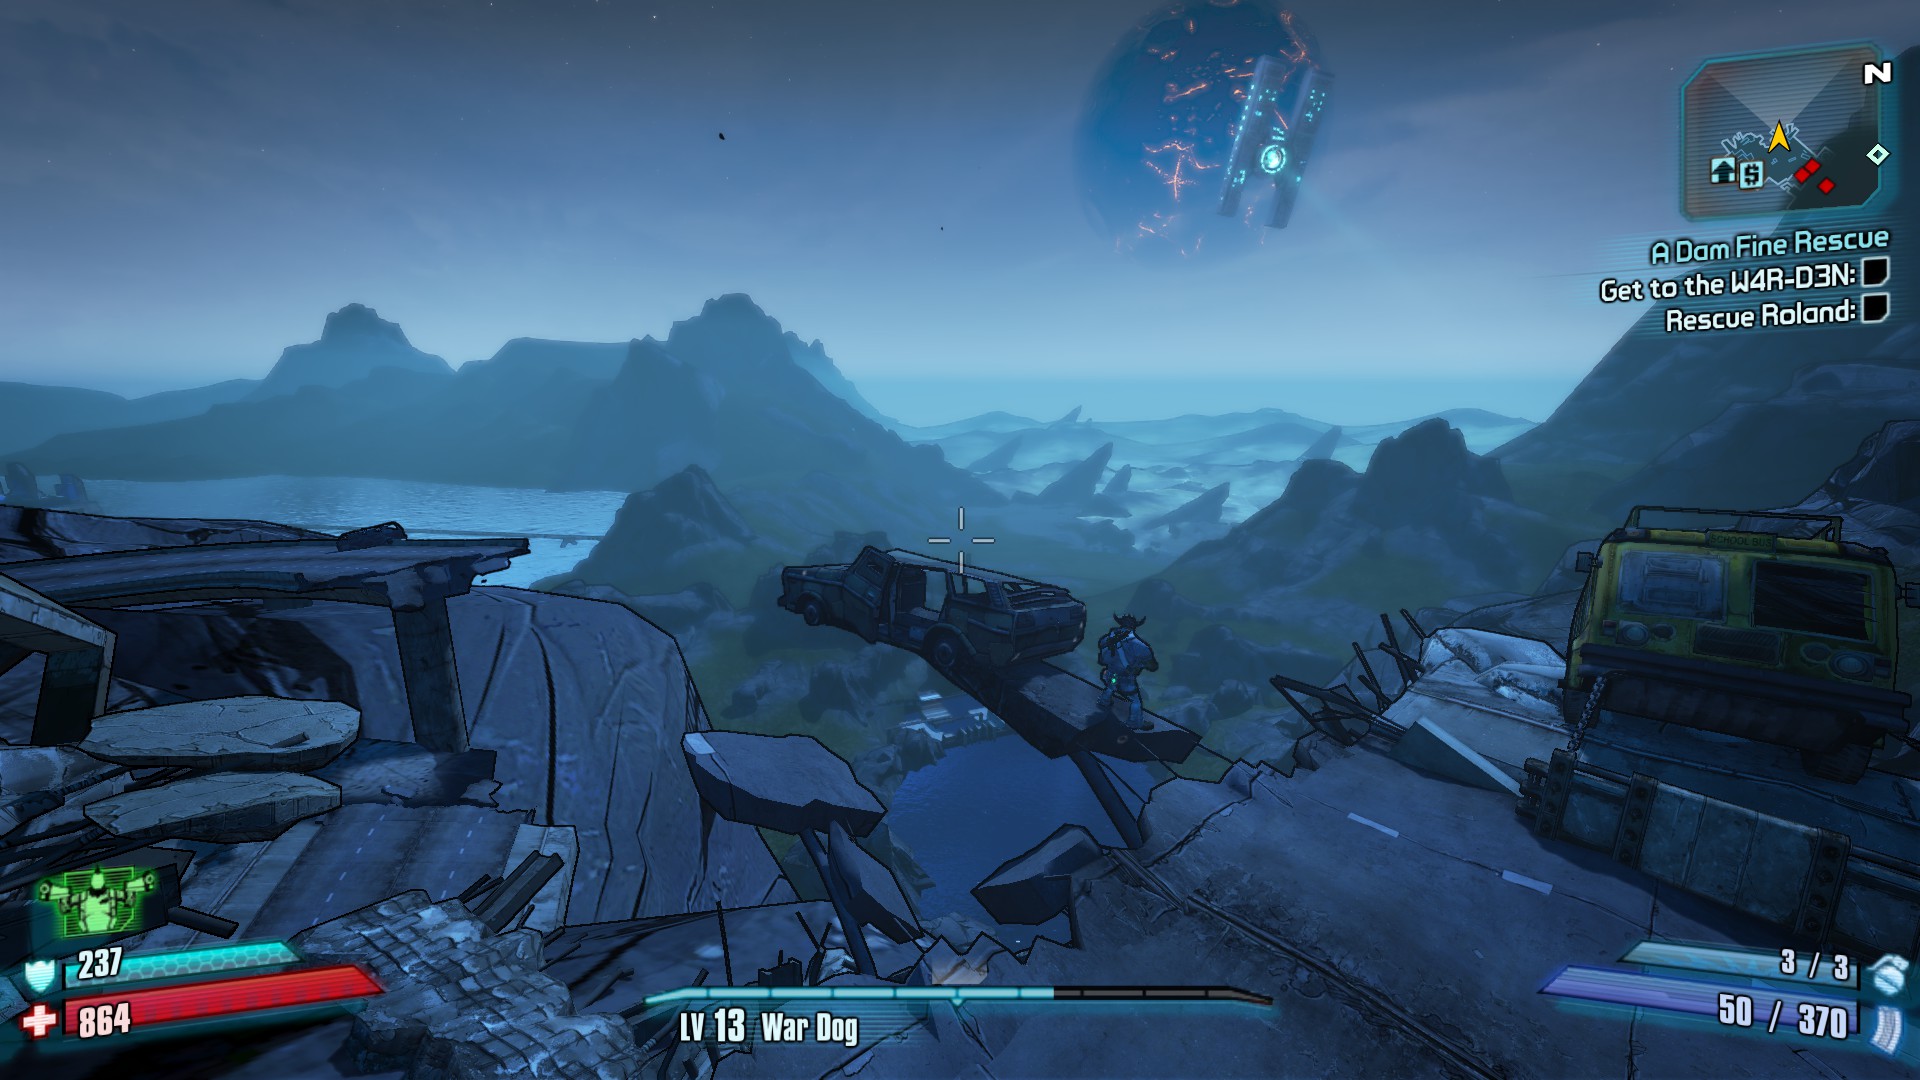
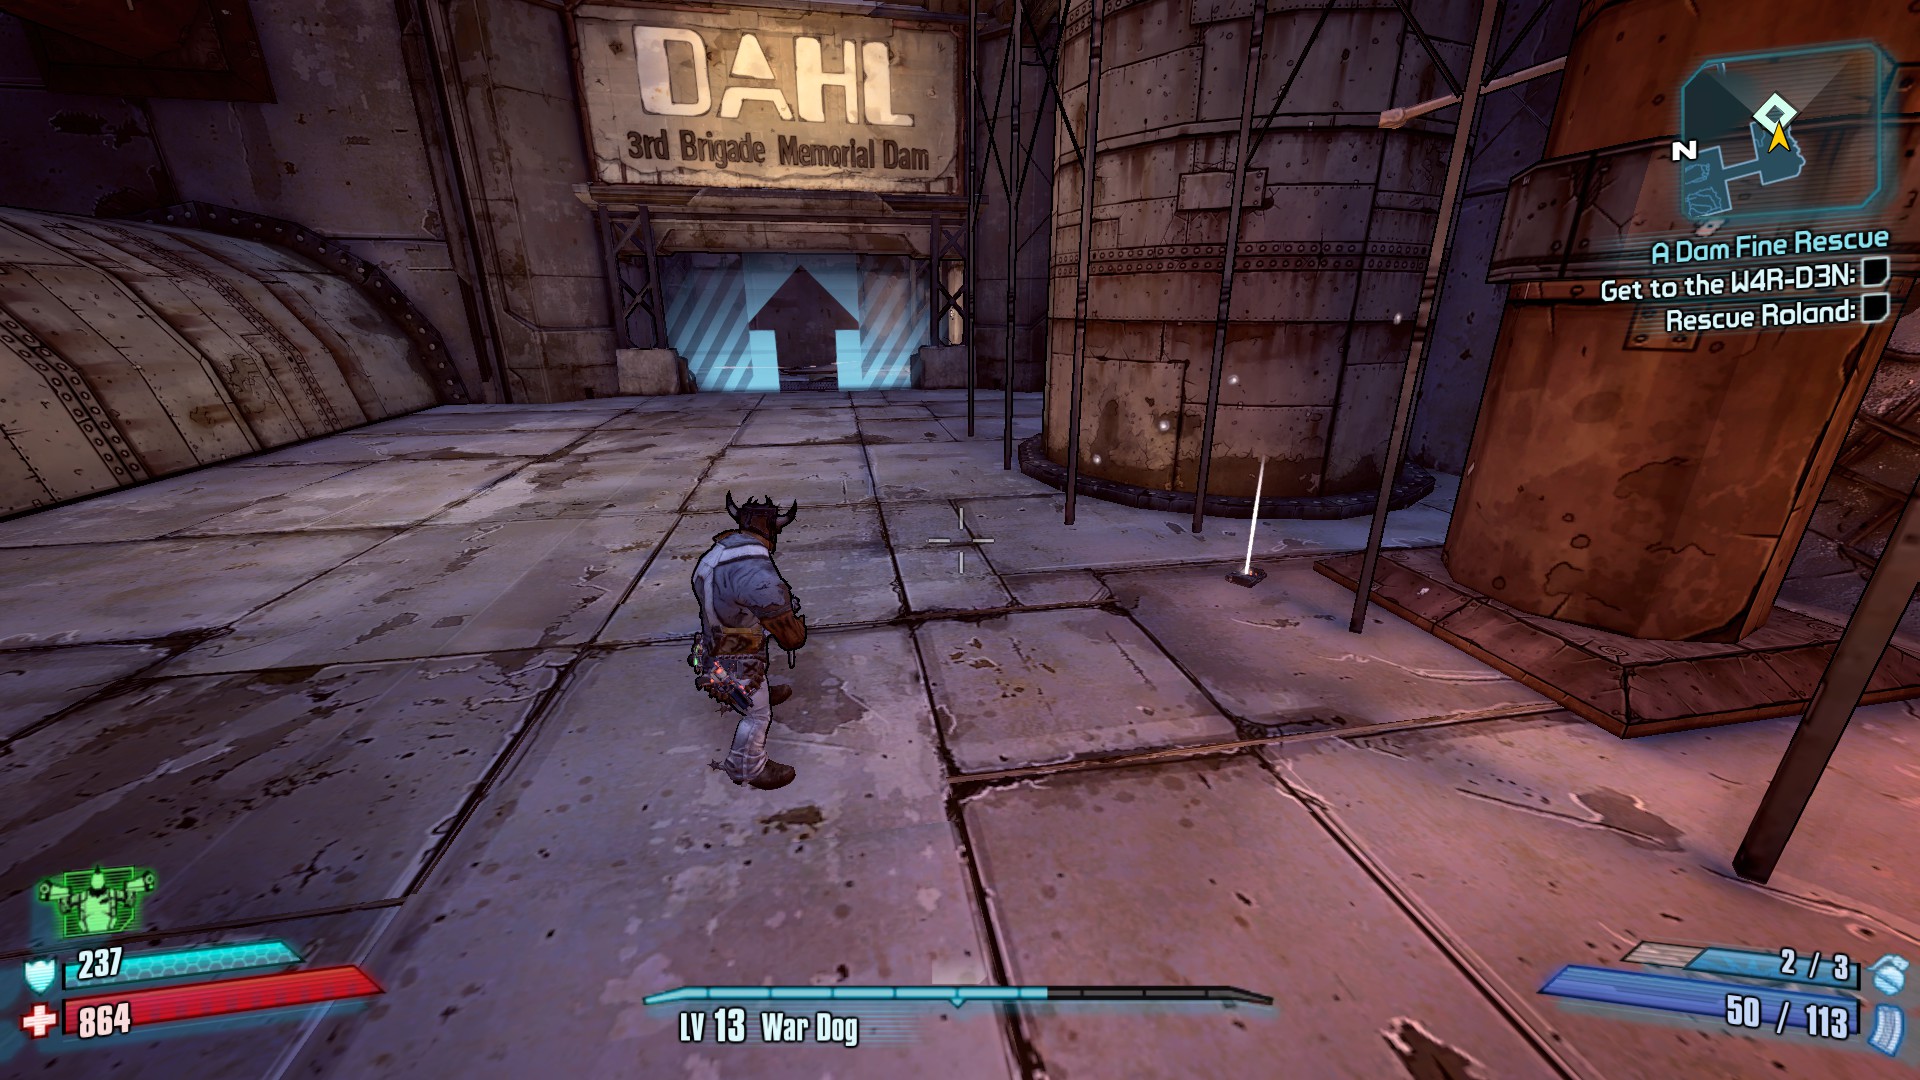
If you don’t save Roland before the Drop Barge shows up at the Bloodshot Ramparts, he ends up in jail in the back of this area. You’ll have all the time you need to defeat W4R-D3N.
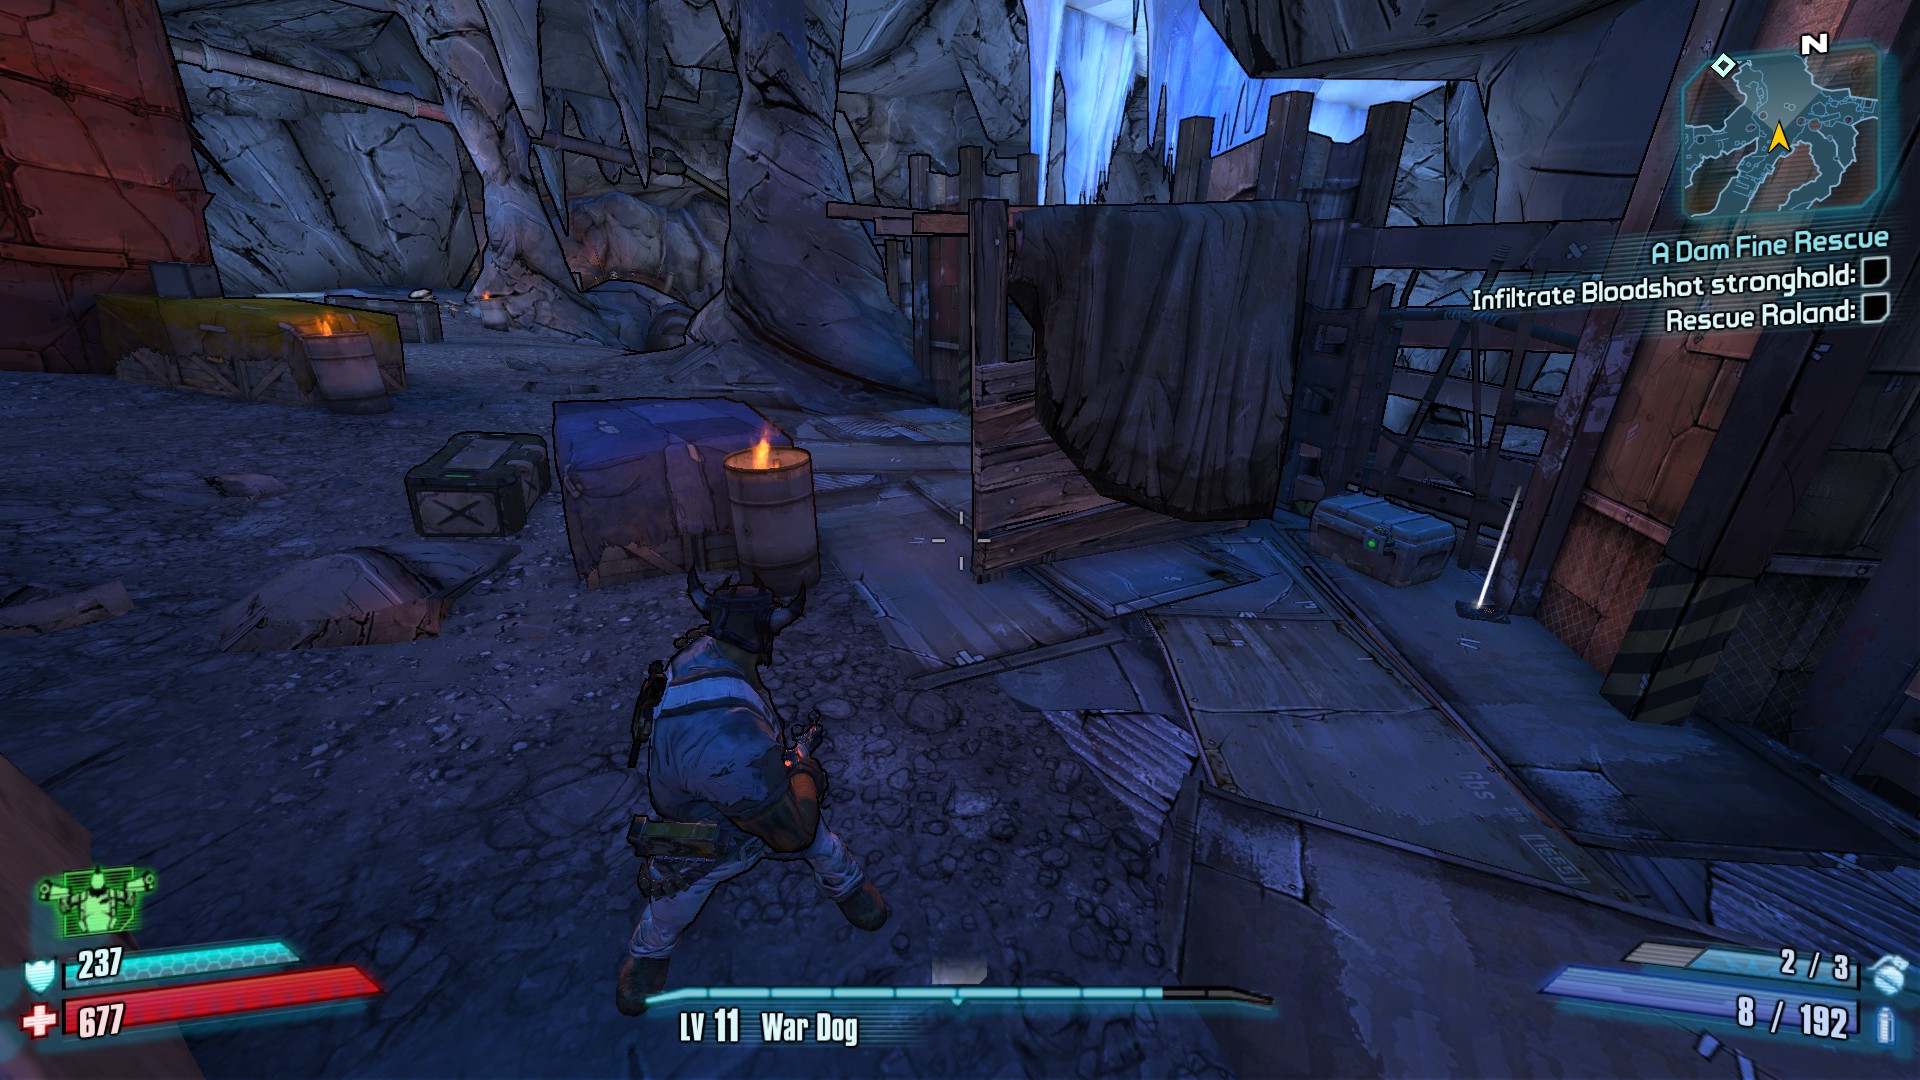
Frostburn Canyon
Challenges
Cult of the Vault x2
First Symbol

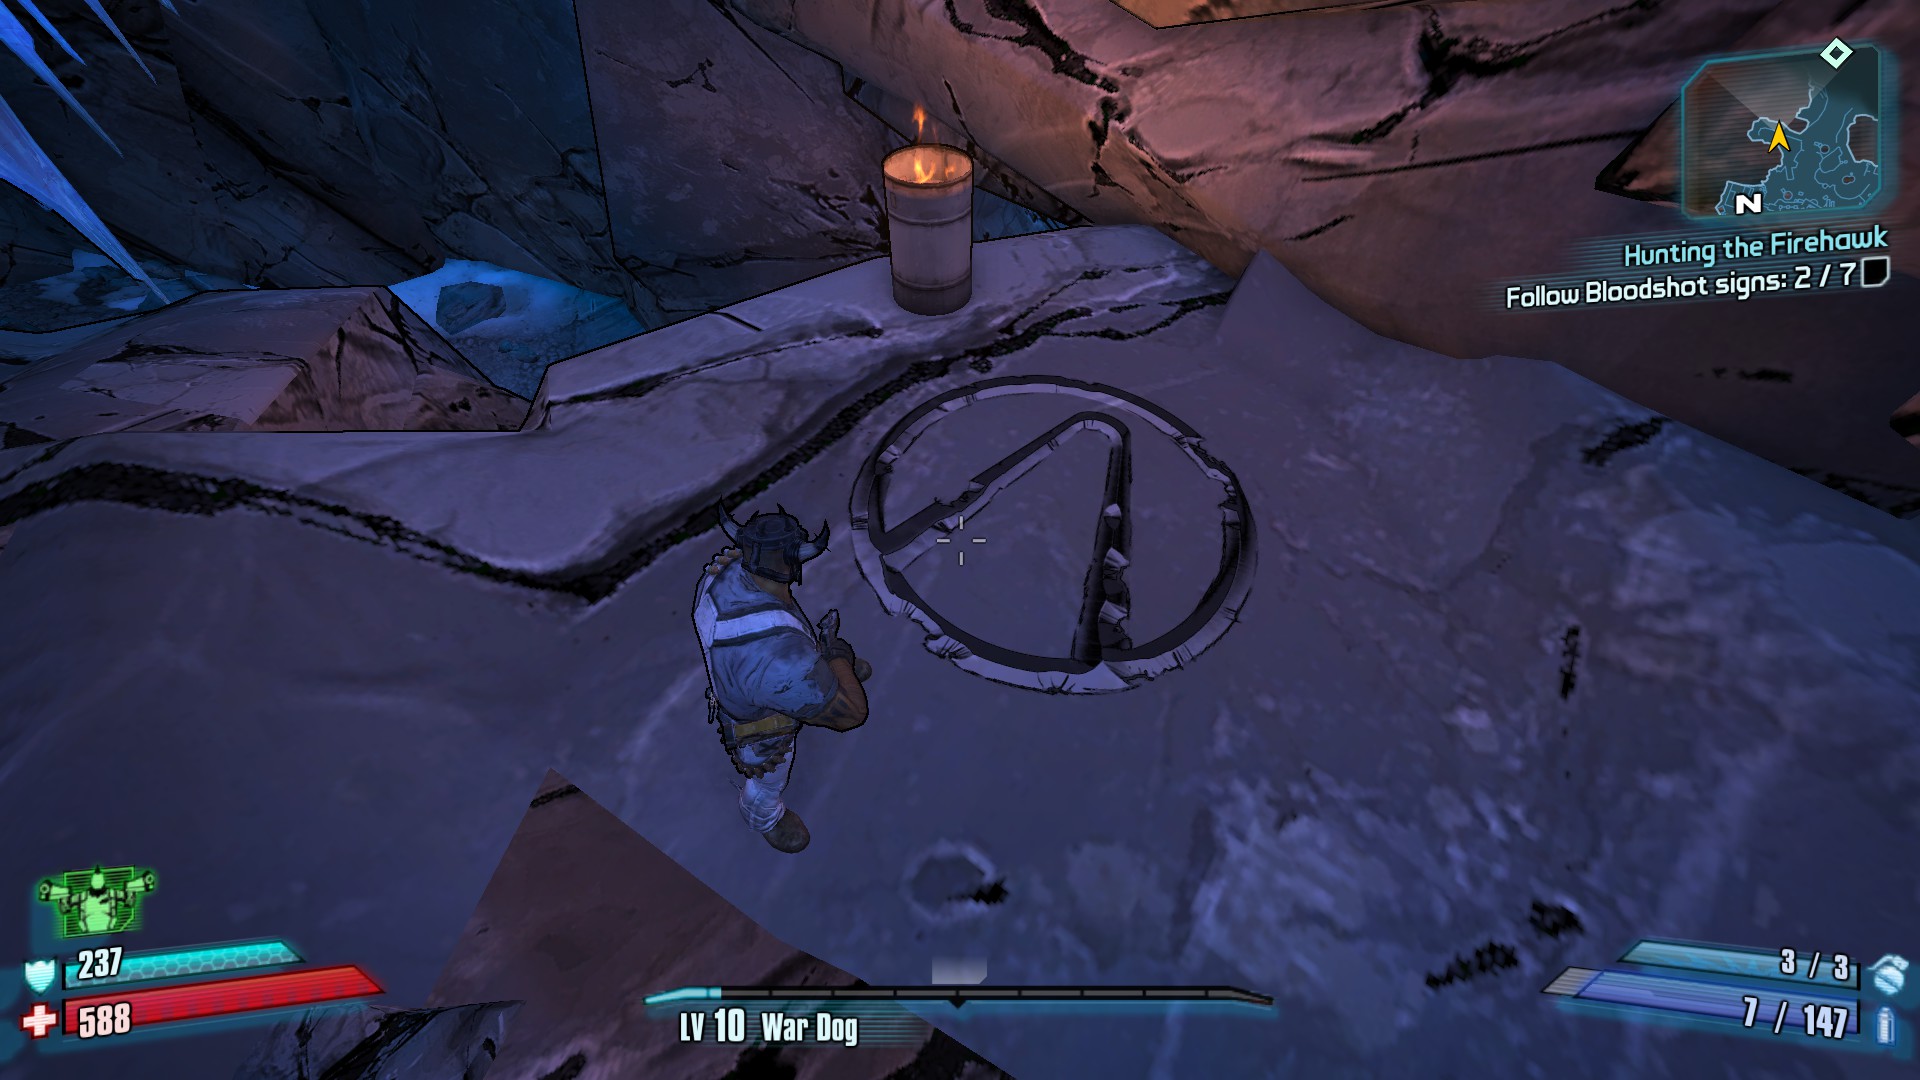
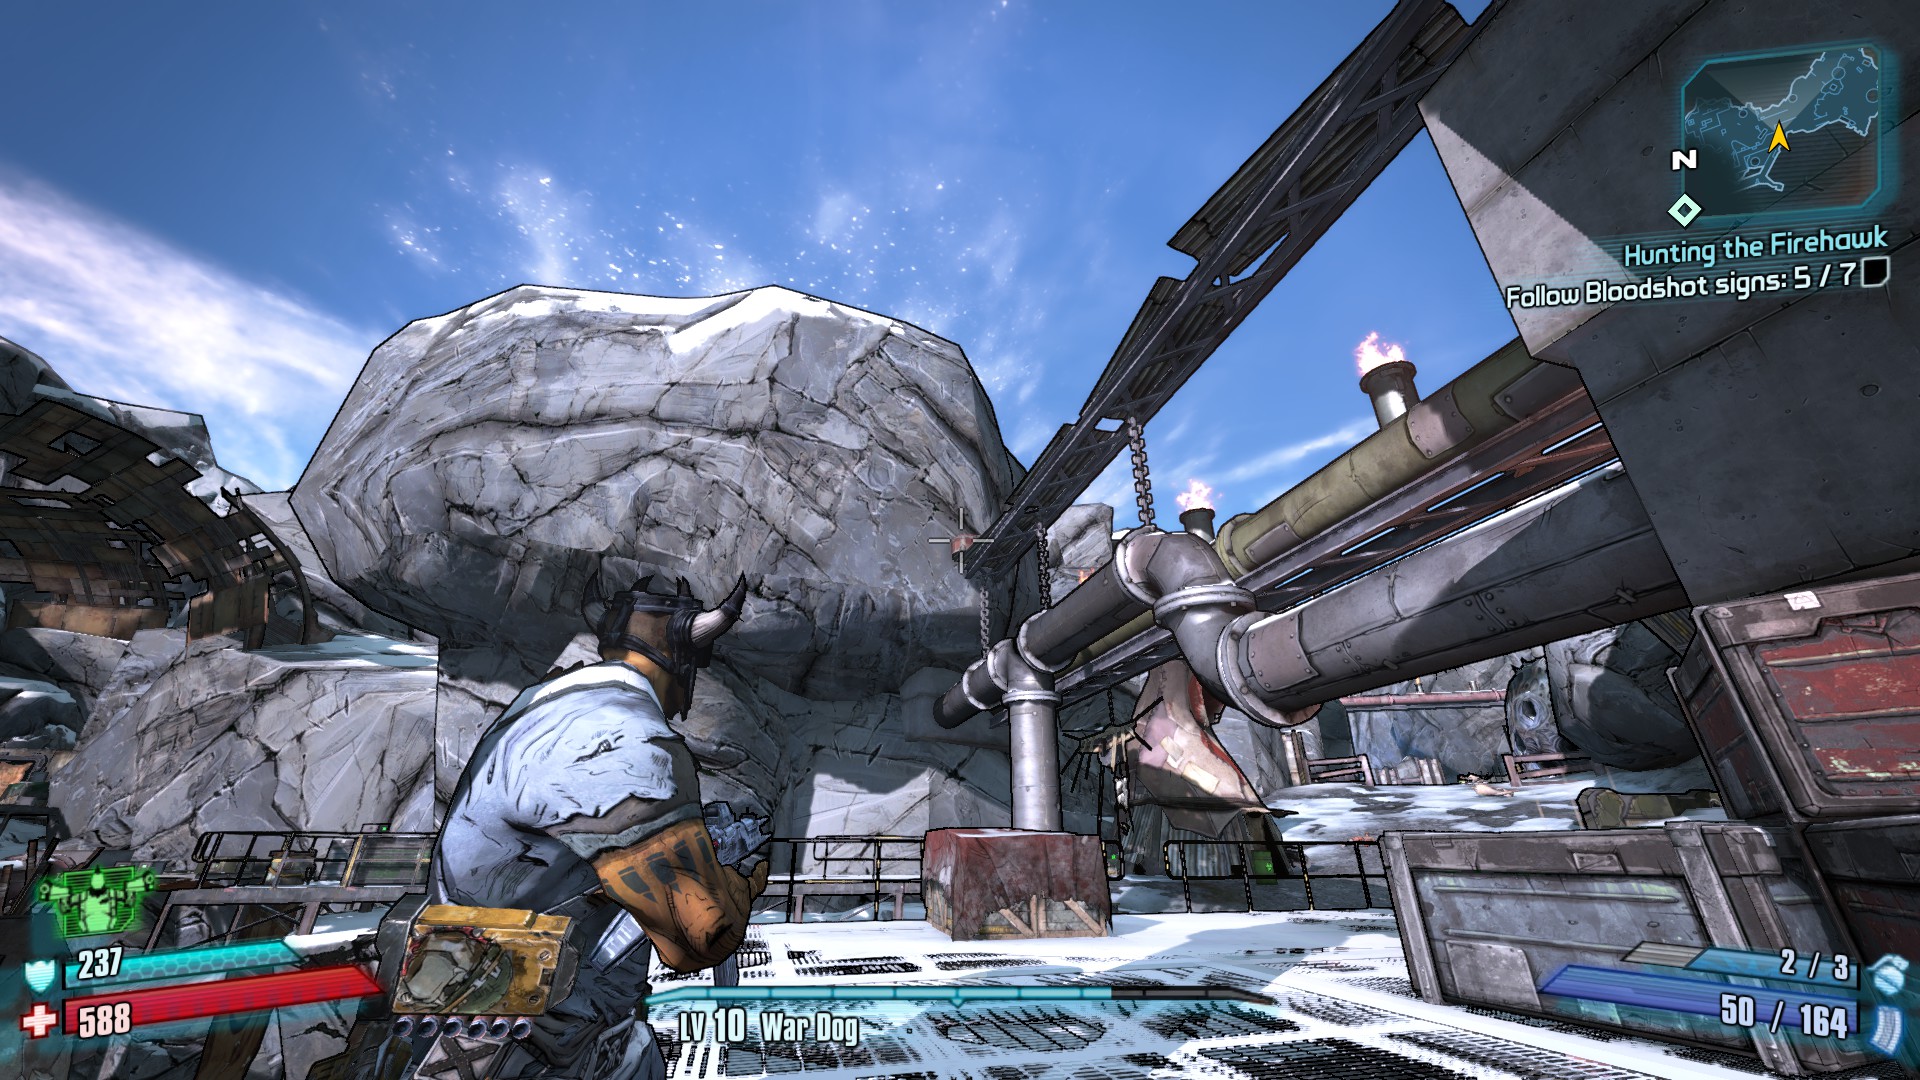
Description:First one is above the second Firehawk sign, right at the entrance of a cave, look to your left. There is a passage winding upwards, at the top when the path levels out is a big Vault Symbol on the ground.
Second Symbol


Description:This symbol is at the entrance to the Firehawk lair (The correct area has a Badass Psycho running at you). Instead of heading the same direction of the Psycho, go right towards an icy area with a dead end. Jump down and in the back right corner of the pit is the last symbol.
Praise Be to Scorch
Description:Kill Scorch without damaging his minions.
Strategy:This one is relatively easy as long as you don’t use Spike or Nova shields as well as any weapons with AOE (Area of Effect) type damage.
Burning Sensation x3
Description:Find Incinerator Clayton’s chronicles of the Firehawk.
Strategy:Pictures with Descriptions of the locations below.
Description:This is in the cave around the between the second and third Firehawk signs. Head towards the first bandit camp and hug the left fence (Seperating the spiderant hive and the bandit camp). It is hidden behind the fence just a bit so you have to actually walk up to it to see it.
Description:This one does not follow the main story path. In the camp where Spycho spawns, head right and stay above the enemies. Near the switch to turn off the electric fence in the main camp is this recording.

Description:This one is opposite of the second Audiolog, head straight across and you’ll find a shack above a Spiderant camp. Behind the shack is the last audiolog.
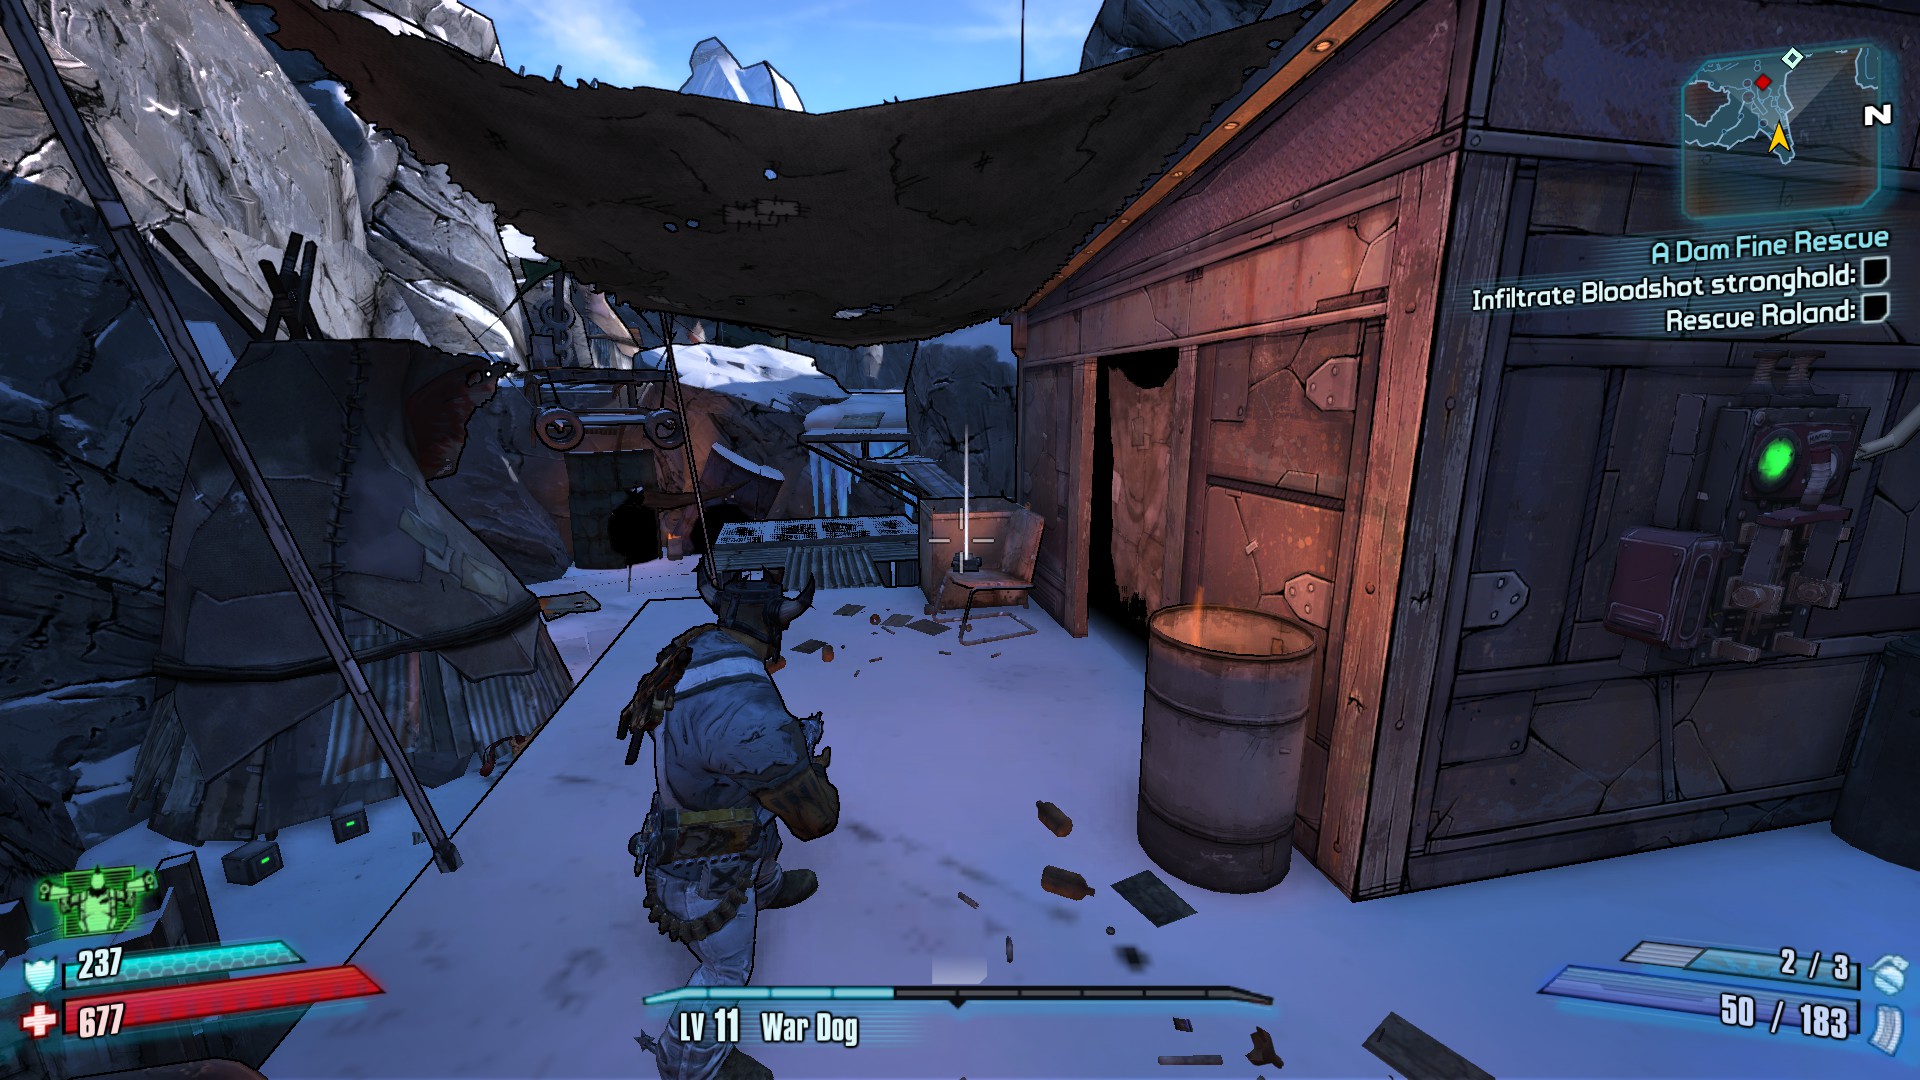
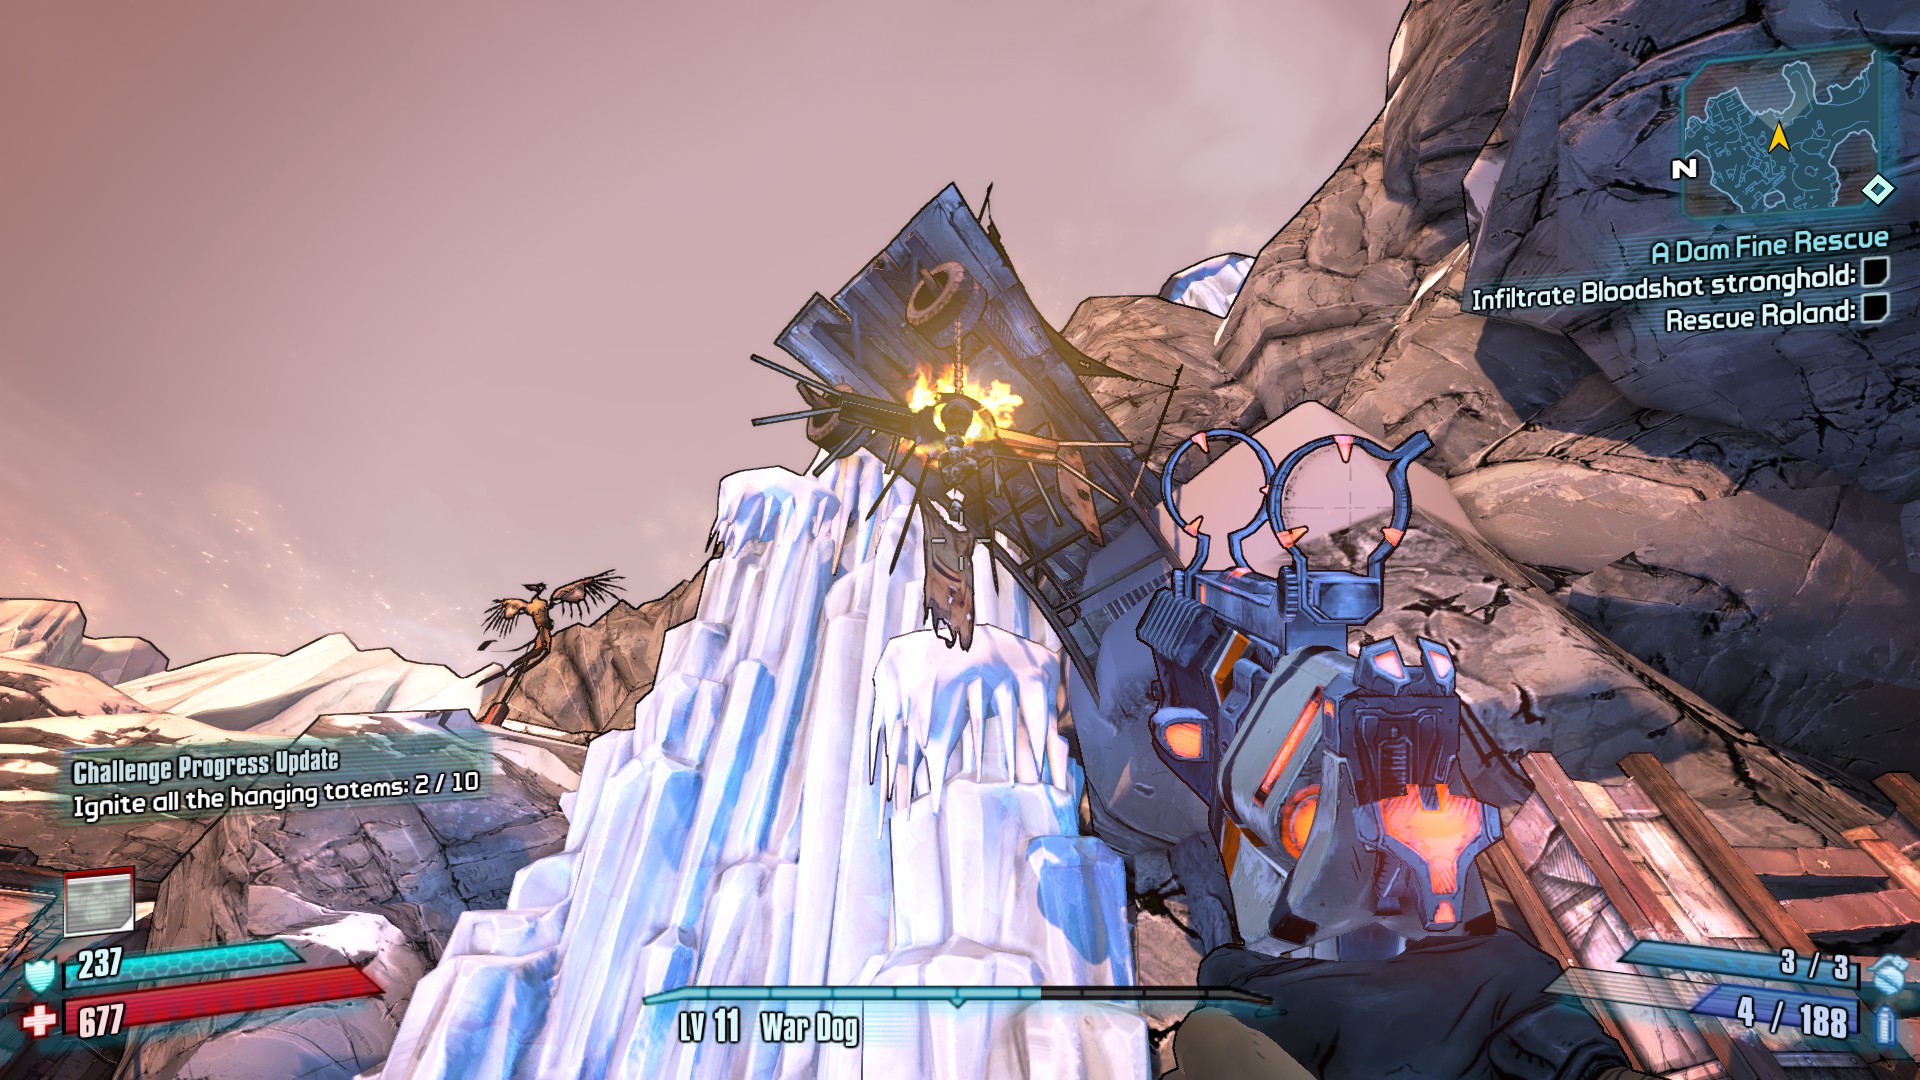
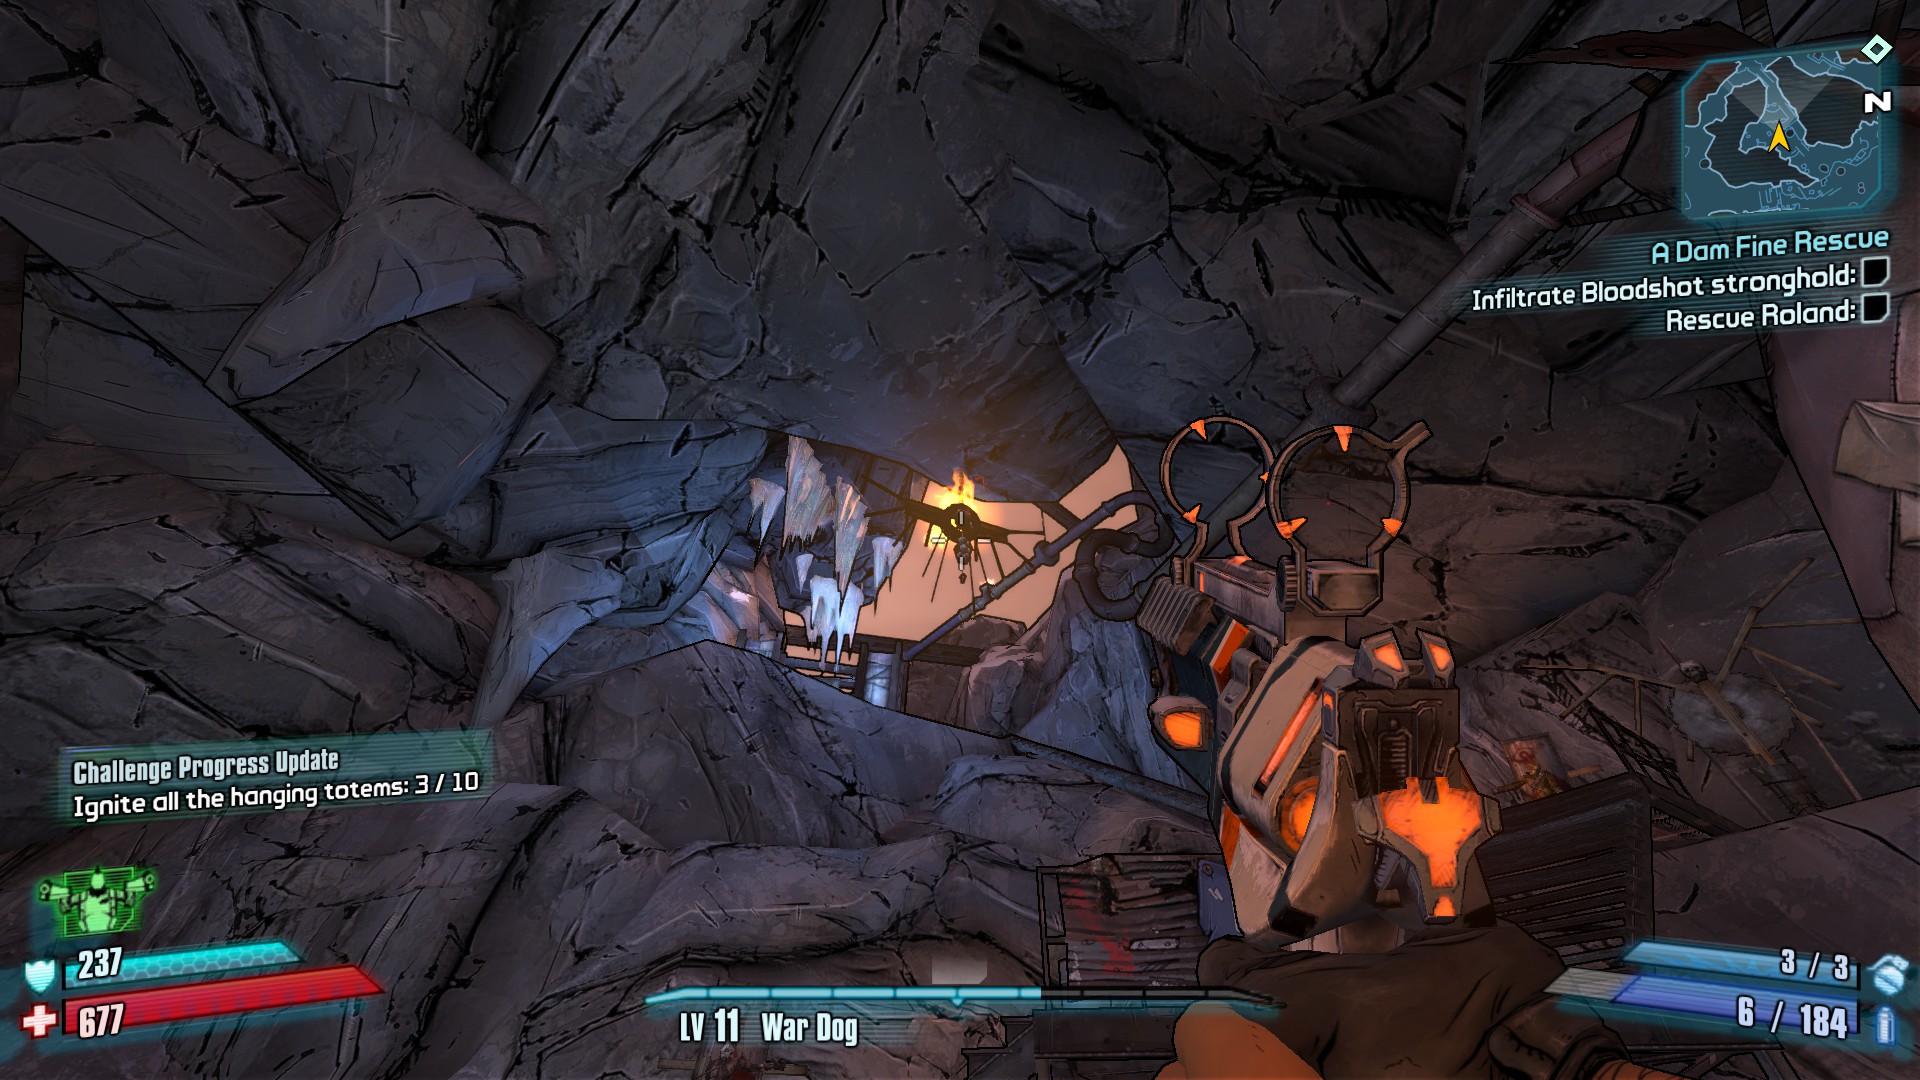
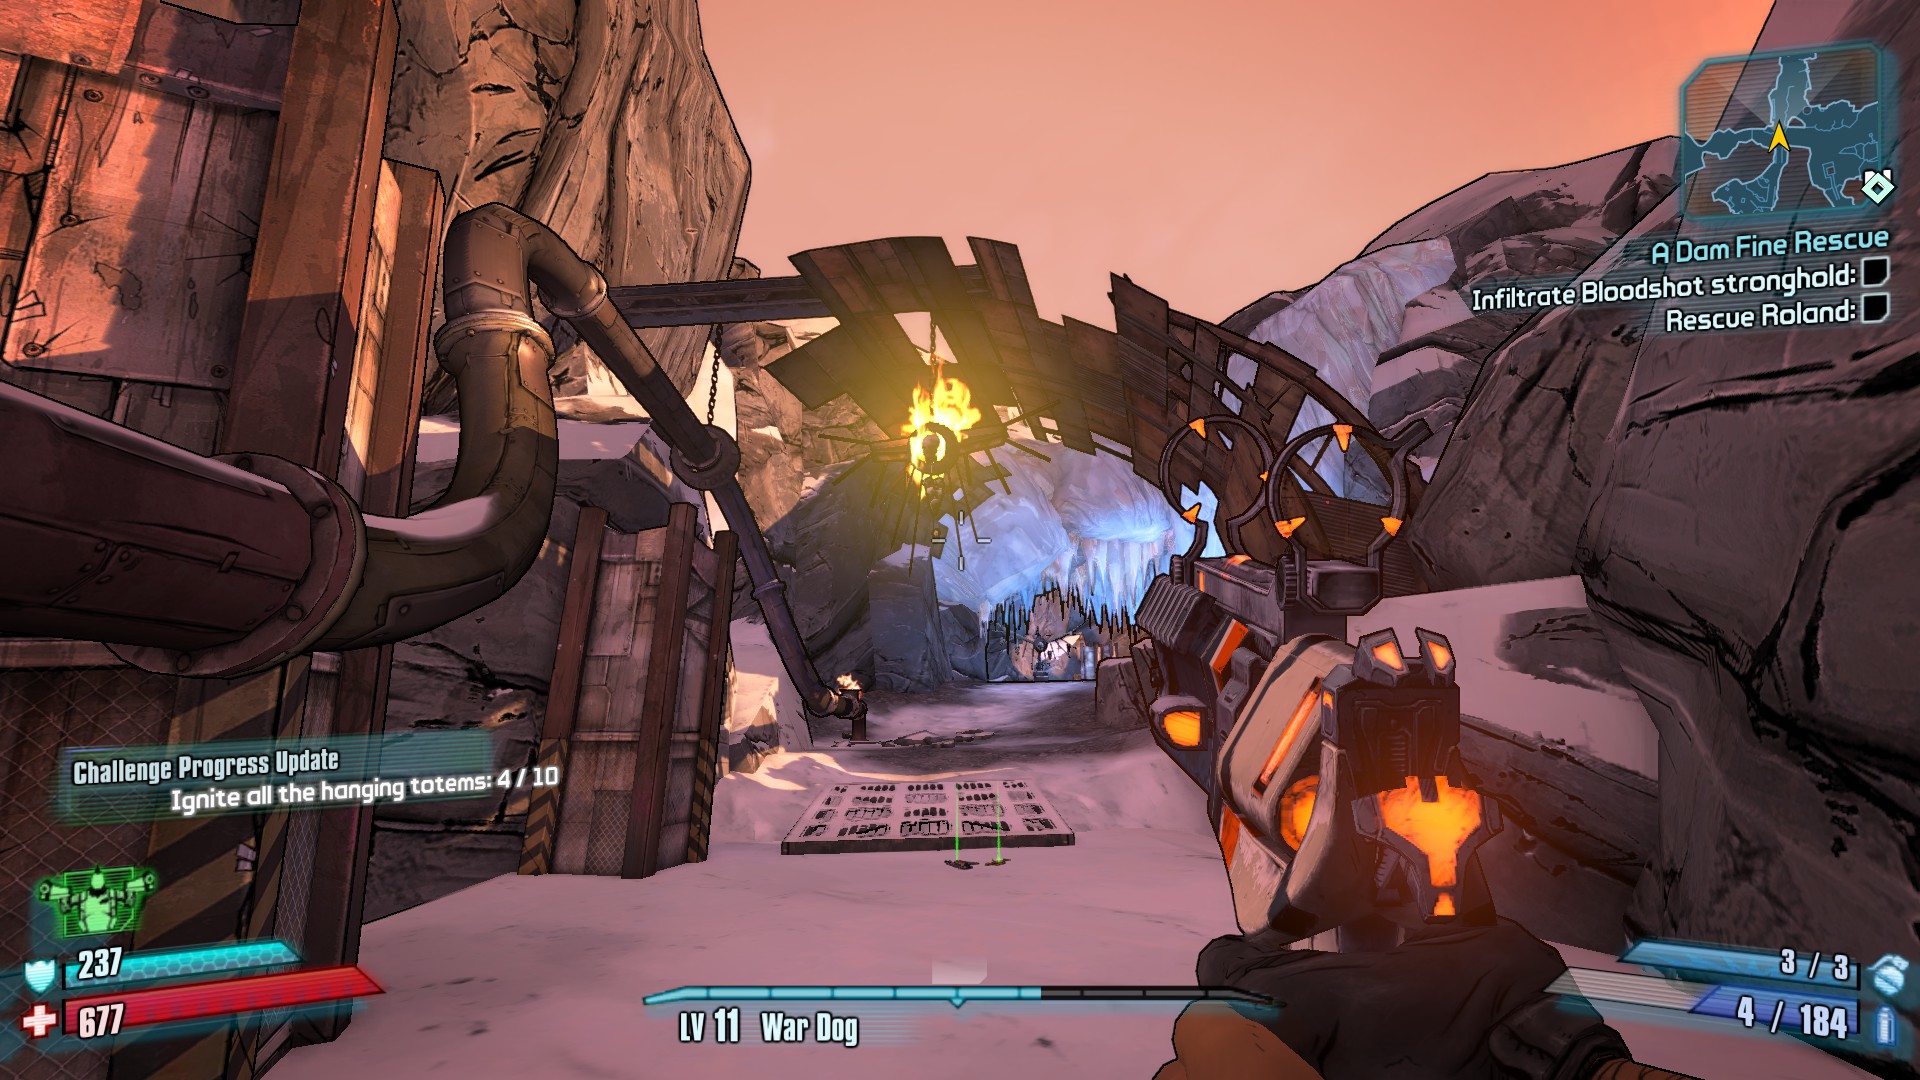
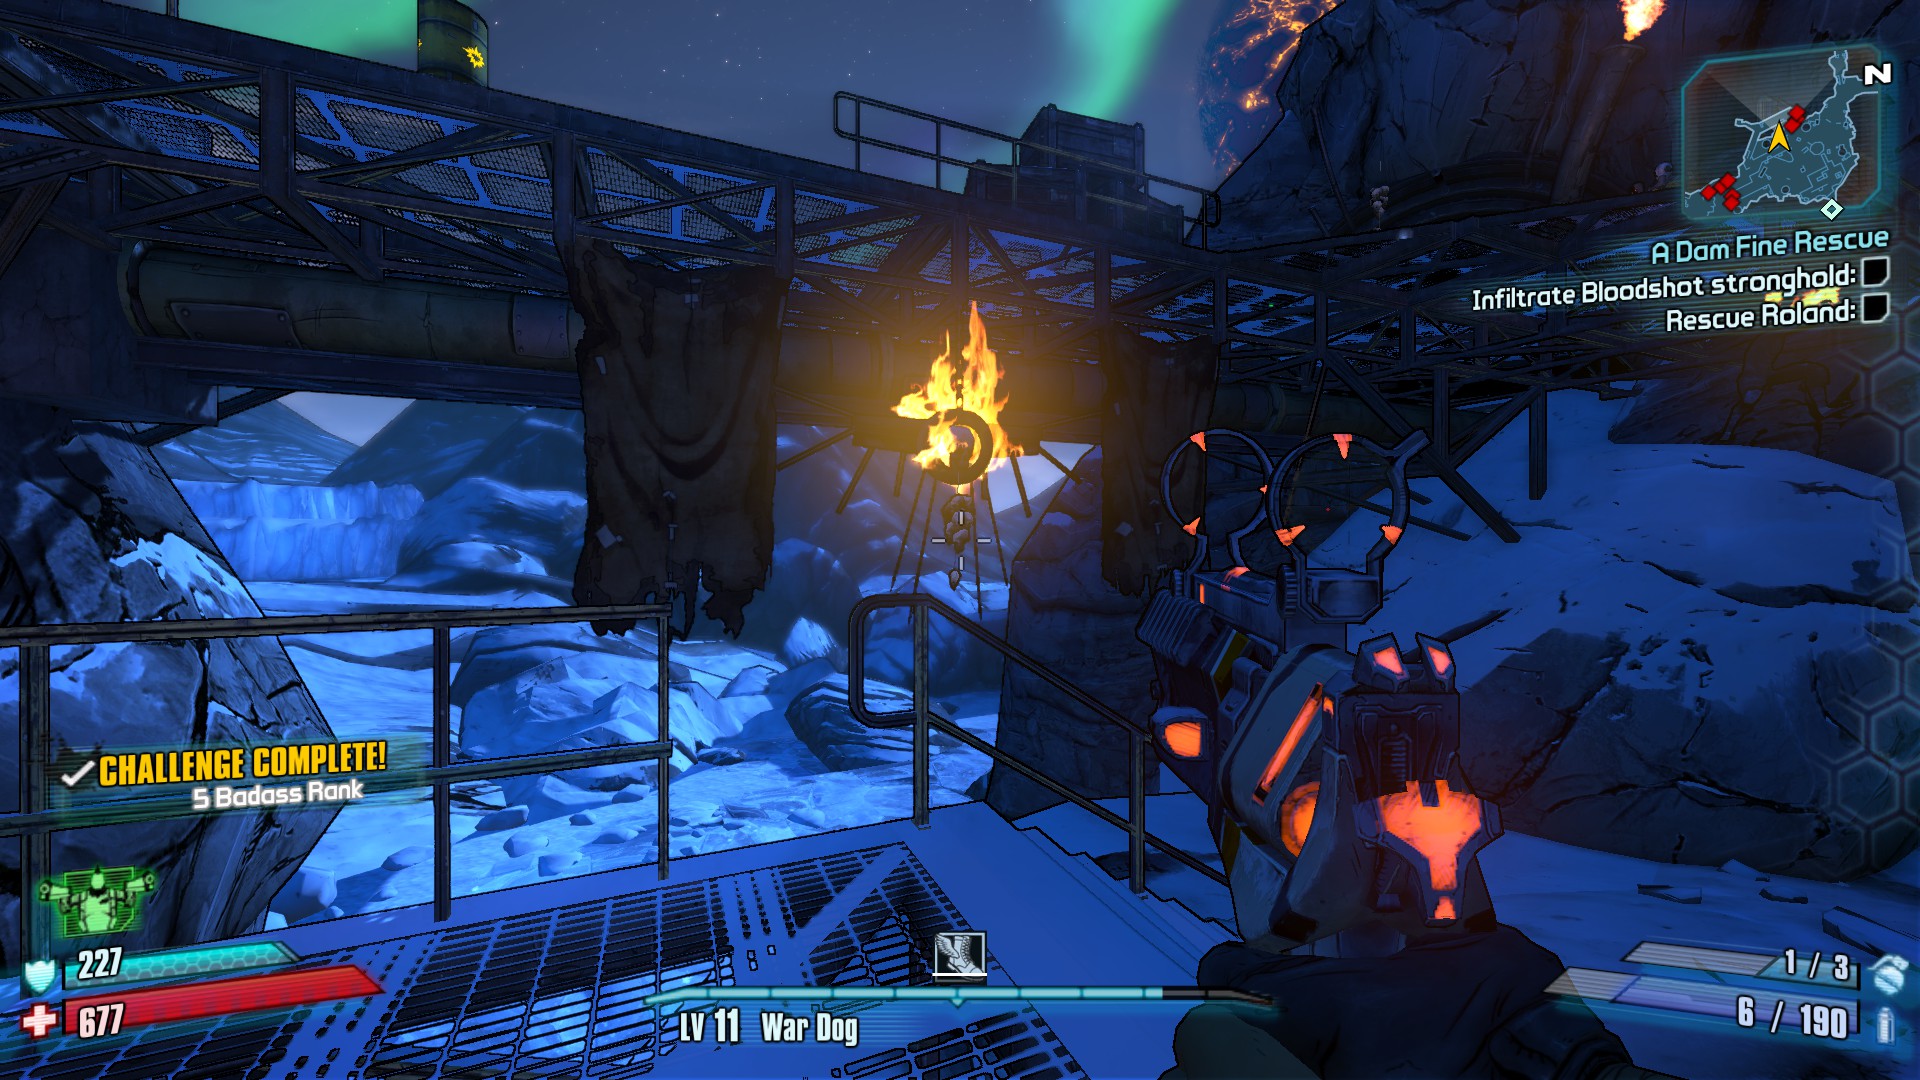
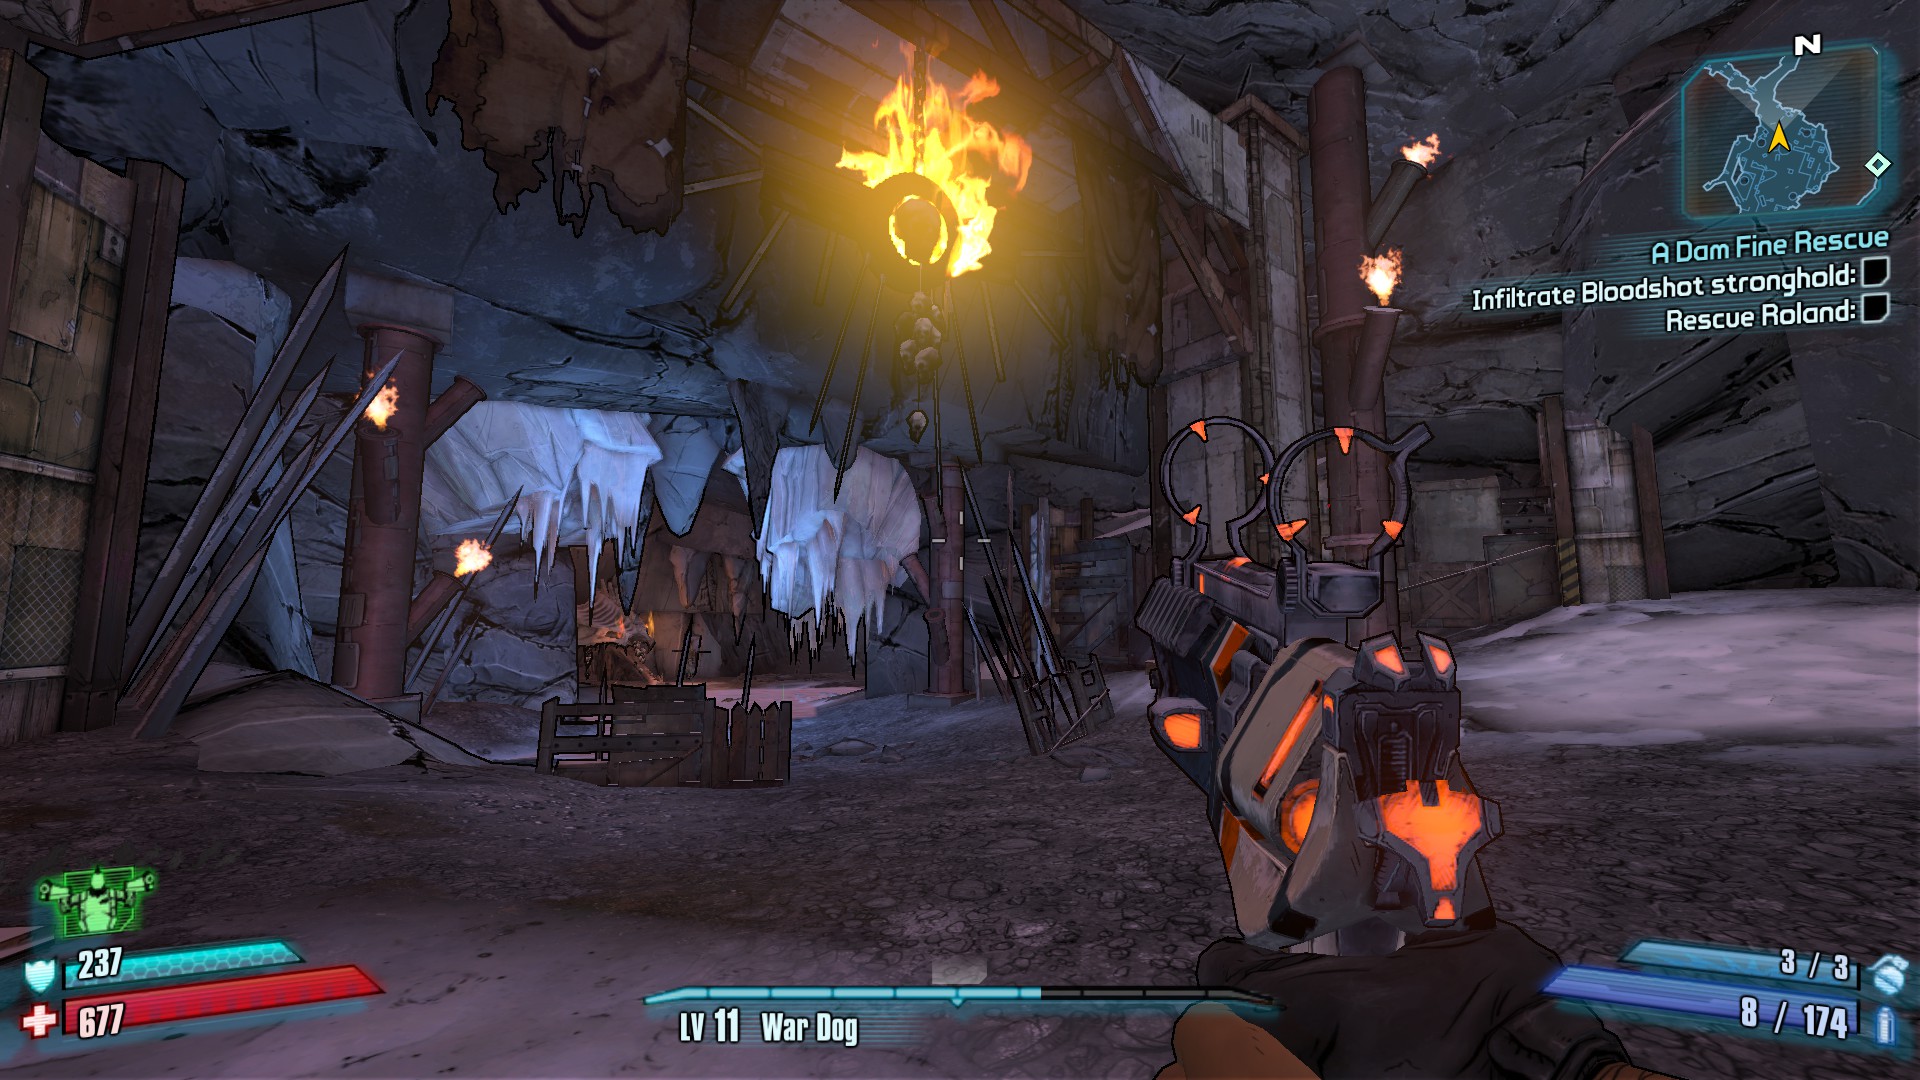
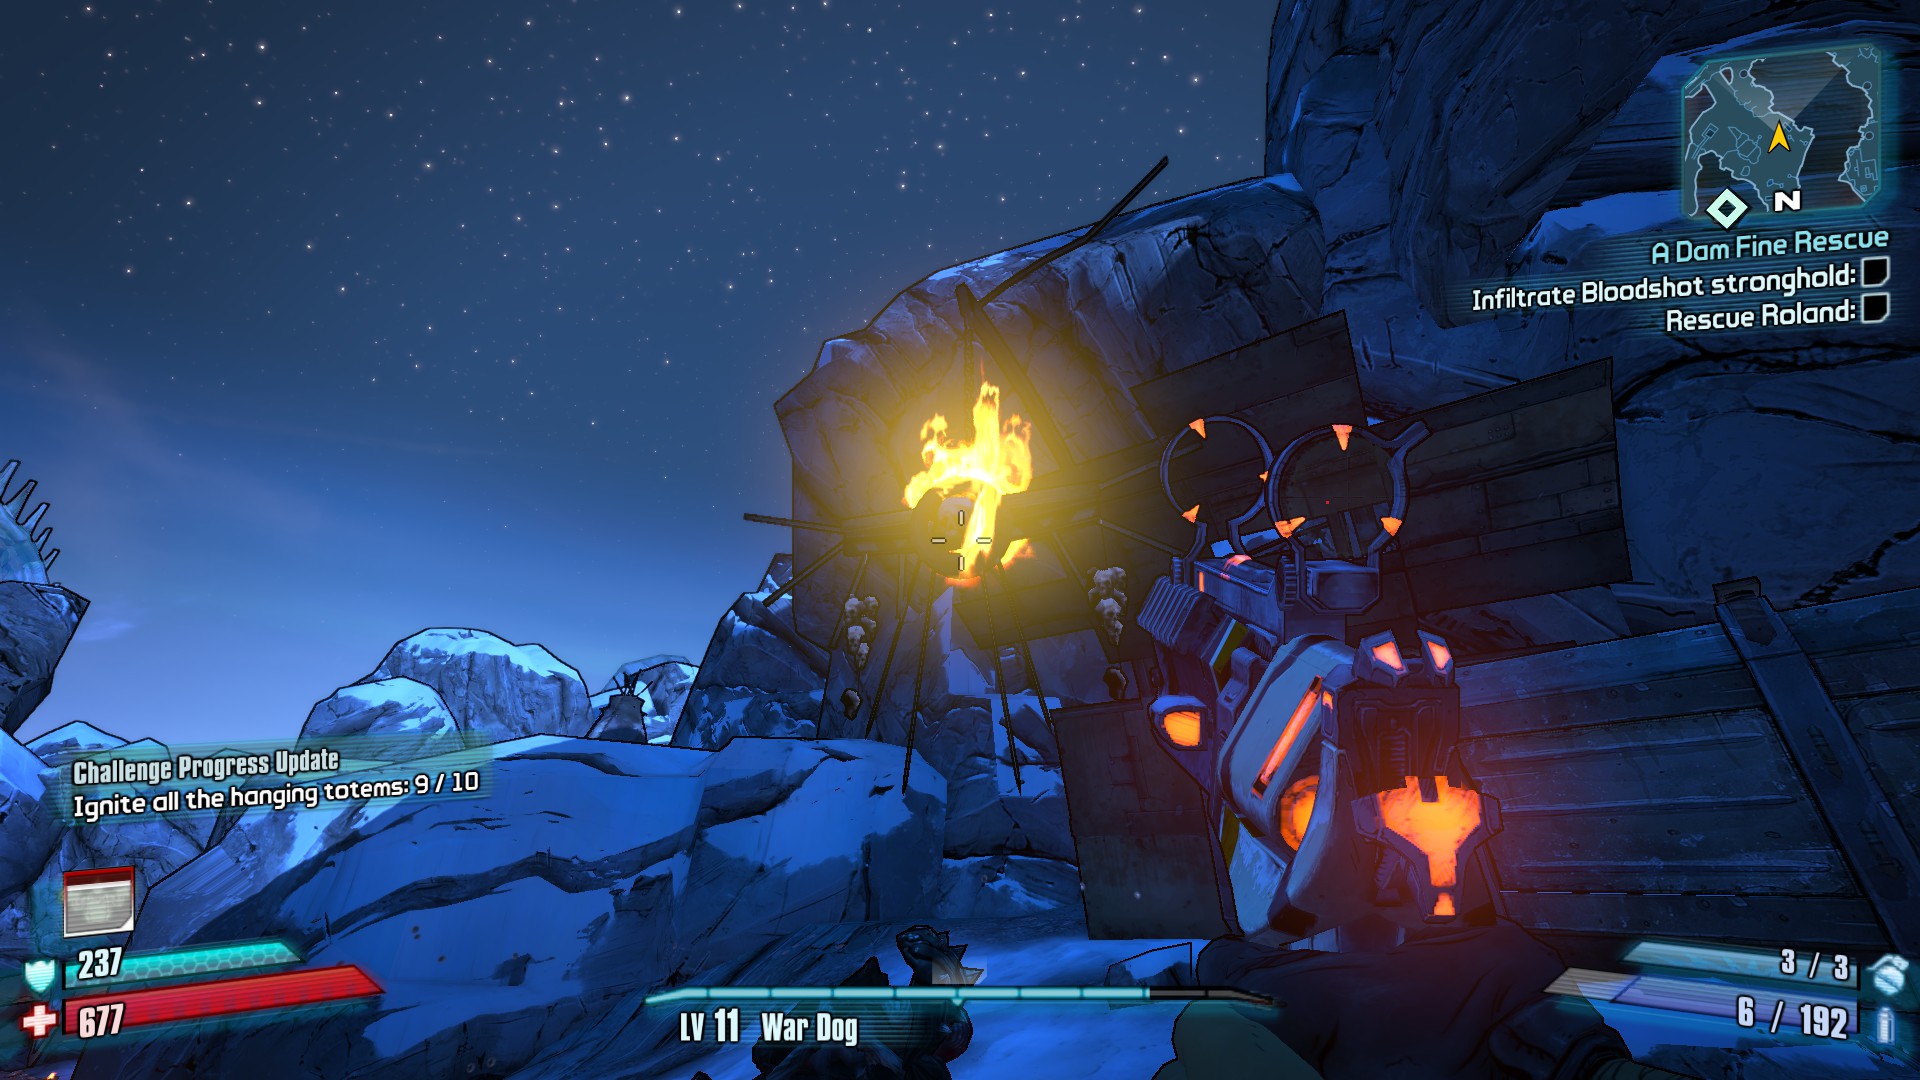
Totems of Fire x10
Description:Ignite all the hanging totems.
Strategy:This one is annoying as the hanging totems that can be ignited look a lot like other totems which are enviormental only. The good thing is 7 of these follow the firehawk path (With one of them in your line of sight).
Note:You need to use a fire weapon to set the targets on fire, One shot does it but you need to hit the skull in the center.

Description:At Incinerator Clayton’s camp, head down the slope on the right. This one is hanging midway between the cave and Clayton’s camp.
Description:This one is right above the cave entrance. Second Firehawk sign
Description:This one is near the stairs out of the cave, before the 2 Badass Psychos
Description:This one is on the bridge where the two Badass Psychos rush you.

Description:This one is near the overlook for the bandit camp outside of the Firehawk’s lair. Hanging onto one of the pipe

Description:This one is at the overlook to the bandit camp outside the Firehawk lair. The first hidden chest on the map is above it (Look at the first Trivia entry).
Description:This one is in the bandit camp outside the Firehawk’s lair. Go to the center and turn 90 Degrees left. It is hanging to a catwalk.
Description:Right at the entrance to the Firehawk lair, near the path split to the second Vault Symbol

Description:This one is near the entrance to where Spycho spawns, hanging to the stairs leading up.
Description:This last one is between Scorch and a bandit camp. To get to it start from the entrance of the area and instead of heading towards Clayton’s camp, go left. The last totem is in this camp near the side opposite of you.
Loot

Trivia
Hidden Chest in the Bandit Camp outside the Firehawk Lair. At the overlook to this camp (Entrance) Above you on one of the pipes is a red gun chest.
Jump onto the crates on the right in the picture, jump onto the pipes, then to reach the chest you’ll have to jump on top of the fire spouts and jump the rest of the way up. Crosshair is pointed at the chest.
Hidden Chest Near Spycho Bandit Camp Under the stairs up to where Spycho is, there is a gun chest.
Hero’s Pass
Challenges
Cult of the Vault
Description: Right at the start, look on the cliff next to the vending machines.

Description: After the last bridge, this symbol is on a support. Continue down a bit further and turn around.
When Nature Calls
Description: Discover where the engineers do their business

Description: At the start, look to your left. This toilet is in a crate by the helipads

Description: Right after the broken bridge jump, this toilet is between a building and a grinder.

Description: When approaching the last open area, this toilet is on the right side, between two crates.
Environmental Protection
Discription: Disable the grinder arm control panels.

Description: After the broken bridge jump, the control panel is above and to the left of the grinder.

Description: Down the stairs from the first one, against the cliff on your left.

Description: Cross the bridge to your right, head right again and this last console is overlooking the lave river.
Loot
None here, Comment if you know something.
Trivia
Nothing here, Comment if you know something.
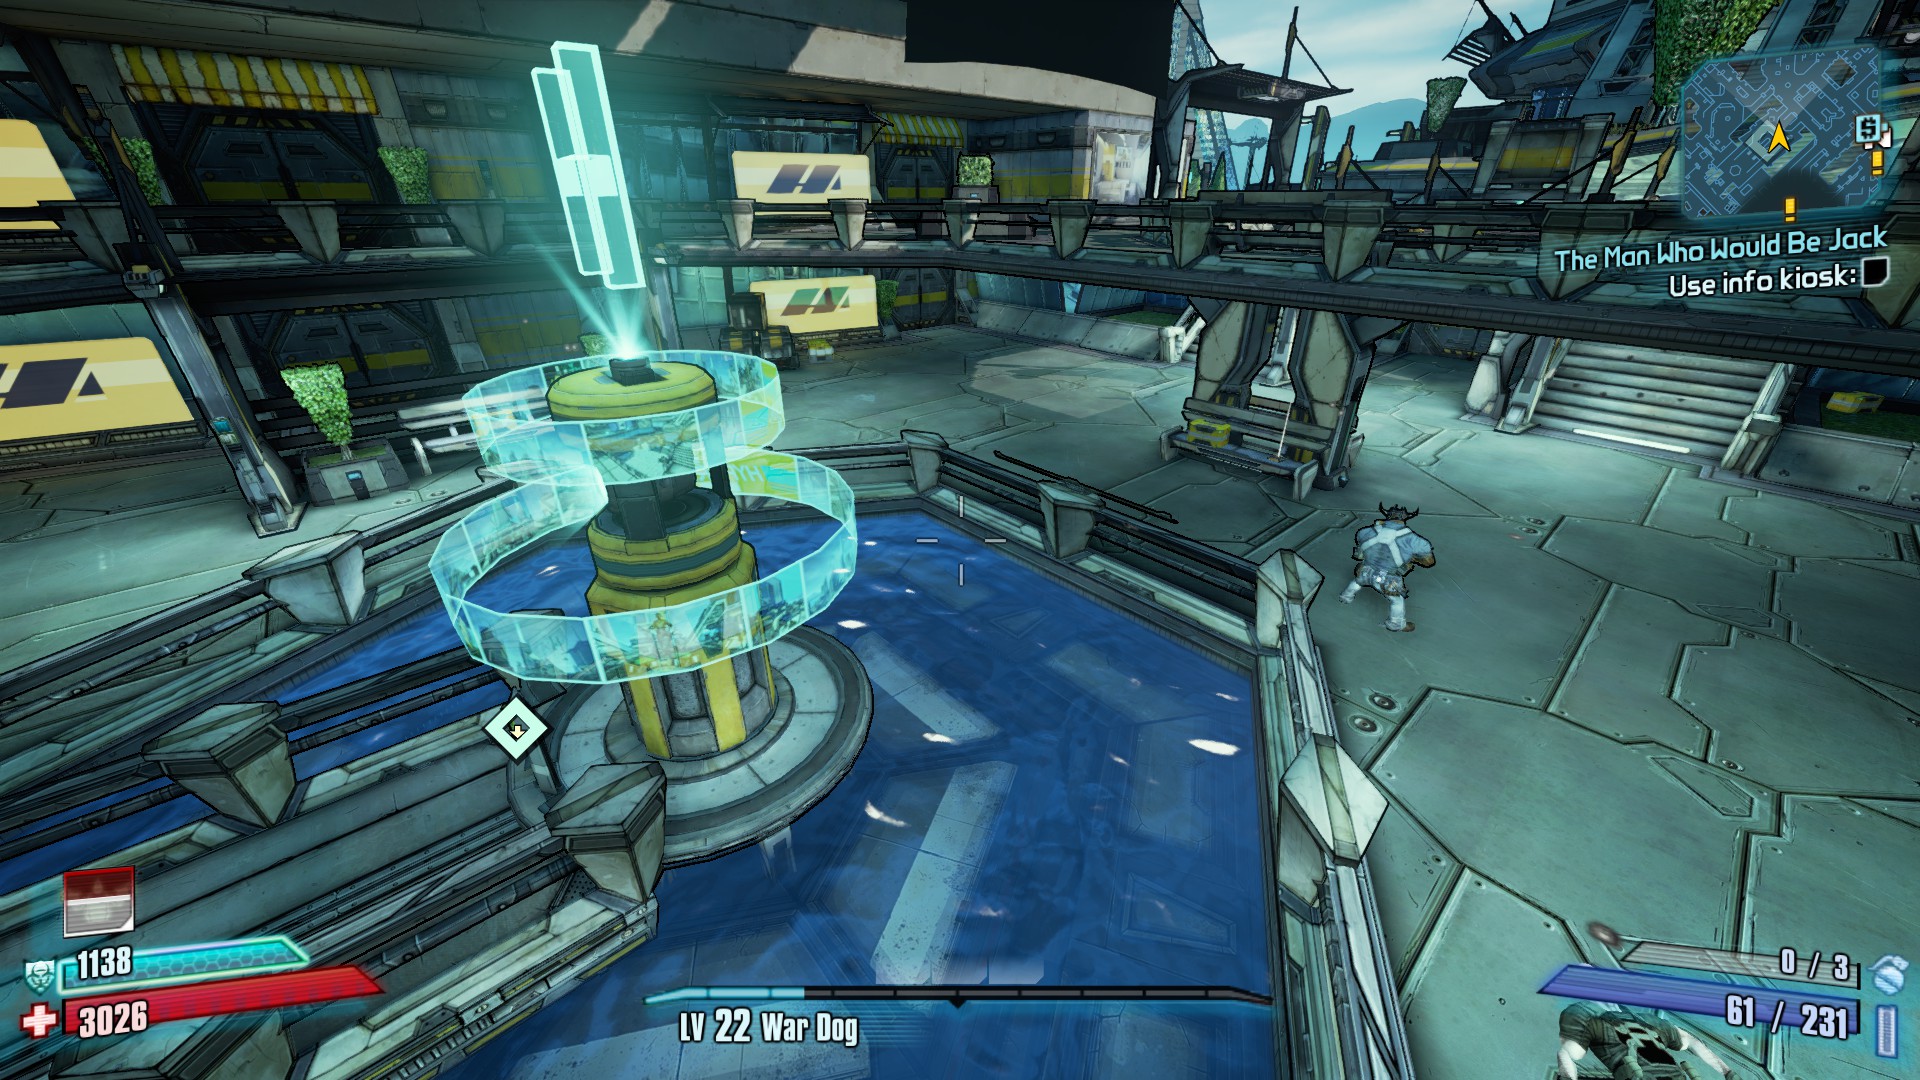
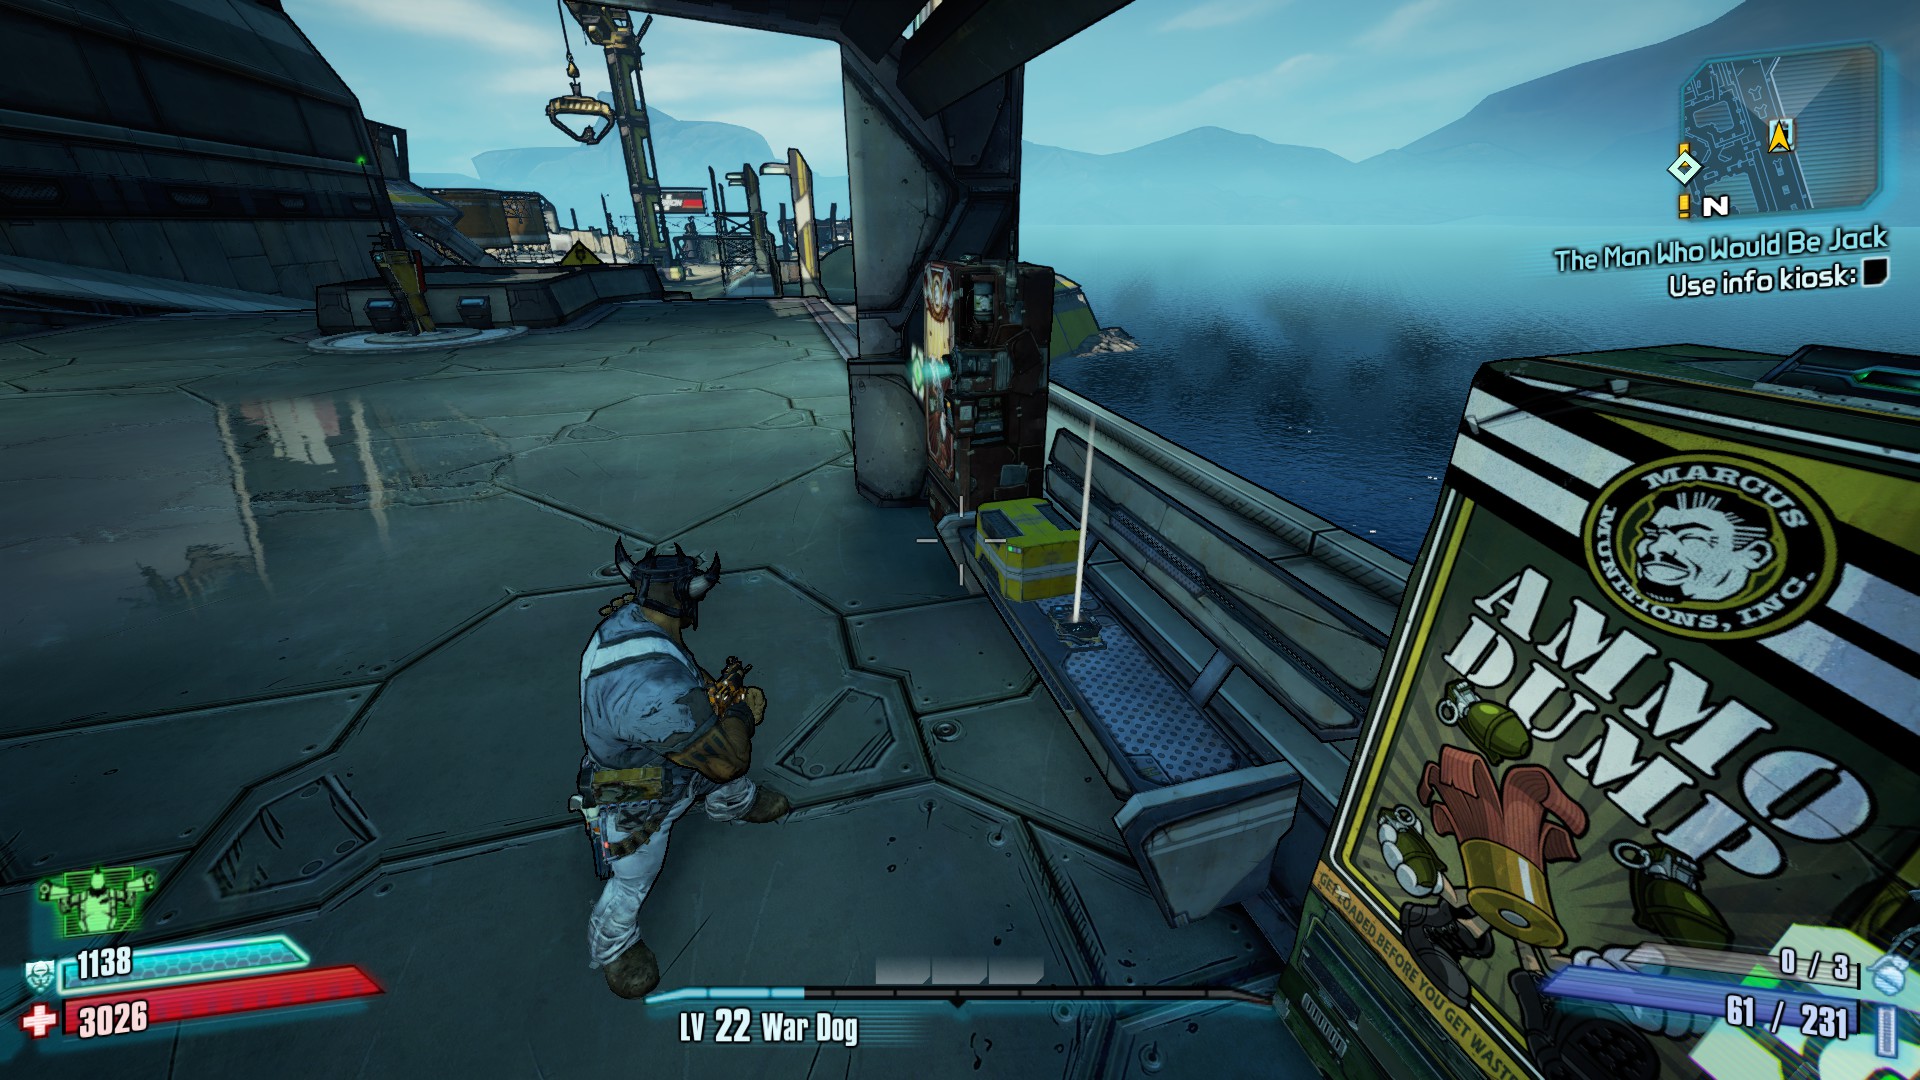
Opportunity
Challenges
Cult of the Vault x2

Description: From the entrance, Head right and go down the stairs. In front of you should be a small lake with three bridges. Underneath the right-most bridge is this symbol.

Description: This one is harder to find, go to the eastern section of the map where you’ll find pits. In one of the pits, at the bottom, there is a section of metal bars that you can crawl under. This symbol is on the opposite side of the bars.
Opportunity Knocks x3
Description: Find the lost Hyperion audio recordings in Opportunity
Description: Entrance of Opportunity, to the right of the Dr. Zed machine on a bench.
Description: In the area where you kill the Jack Double, this Echo is near the center of the area on a bench again.
Description: At the far end of Opportunity, this last Echo is between some vending machines.
Top o’ the World x3
Description: Explore your way to three rooftops.

Description: Behind the northern-most Jack Statue, climb along the glass panels on the side of the building to reach this roof.

Description: By the farthest vending machines from the entrance, jump up to these diagonal supports to reach this rooftop.


Description: This one requires a friend.
In the Western section of the map (by a helipad), there is a window cleaner scaffolding that can be operated by a single button at the base of it. Call it down, then jump up. Have a friend press the button again once you are at the top. From there, you have to jump sideways onto an empty rail hugging the building. Walk across and then jump onto the balcony.
Shame the Foreman
Description: Kill Foreman Jasper without letting him construct any turrets.
Down With Big, Handsome Brother x8
Description: Destroy the security cameras located throughout Opportunity.

Description: Overlooking the Jack Statue to the left of the entrance to Opportunity, this one is attached to a balcony.

Description: This one is to the right of the entrance, There is a set of vending machines between the ones by the entrance and the westward most machines. Look north, this camerea is on a roof.

Description: Go to the Living Legend Plaza (The area that shows Hyperions version of Pandora History). From where you get a quest, turn left. The camera is at the top of the stairs.

Description: Go down where the first vault symbol is, this camera is at the end of the bridge on the upper left corner of a big H sign.

Description: Go to the southern most Handsom Jack Statue, Turn to look at Opportunity. Go around a nearby fountain and this camera is on a lightpost.

Description: Go to where the Jack Double is, this camera is by a walkway unreachable by the player. (If you kill the enemies here, you may notice red dots still on the map. These are enemies on the walkway. The camera is to the right when standing at the center of the square.

Description: This camera is overlooking the pits from the southern most end of the map. On the edge of the Pits and The Residential District.

Description: From the camera above, this last camera is on the other side of the same building.
Loot
Trivia
Nothing here right now.
Sanctuary
Challenges
Cult of the Vault x5
First Symbol

Description: Inside Scooter’s Garage, under the stairs near the back. It is under the crosshairs.
Second Symbol

Description: Near Marcus’s Store, in an alleyway to the left of the storefront, behind a dumpster.
Third Symbol

Description: In front of Moxxi’s Bar, On a support pillar for a generic building to the right of the entrance (Front of Moxxi’s is when you turn DIRECTLY right when walking into Sanctuary).
Fourth Symbol

Description:On top of the building behind the “This Just In!” News stand.
Fifth Symbol


Description:This one is harder, Multiple pictures incoming. First off, get on the bench outside Marcus’s Store, Jump on the overhang next to it. Jump across the street to the other side of Marcus’s towards Moxxi’s hugging the Left Wall. Finally, the symbol is in the second story porch against the wall. The symbol is in front of my character.
Jackpot!
Description:Get Three Vault Symbols or Triple Eridium Bars on the Lucky Shot slot machine.
Strategy:Shove tons of cash into the slot machines in Moxxi’s Bar. Can’t really tweak this. If you have unlocked True Vault Hunter mode, you can earn cash over there then head to Normal Mode and spend cash in the machines at less cost.
Rise of the Crimson Raiders x4
Description:Uncover the history of Crimson Raiders
Strategy:
Description: In front of Moxxi’s Bar down the stairs, then go towards the Plaza. Audiobook is on the corner.

Description: Out front of Marcus’s Store and between Crimson Raiders HQ.

Description: On the counter for Marcus’s Store

Description: Inside Moxxi’s Bar, on one of the tables.

Loot
Trivia
A character can appear in Sanctuary named Micheal Mamaril, when interacted with he will give you loot.
Sanctuary Hole
Challanges
Cult of the Vault

Description: Underneath the stairs where the bandits drop the chest.
Sugar Shack
Description: Find the secret bandit shack.
Strategy Only slightly hard to get to, this is near the beginning of this map.
There is this mission with Marcus where he wants you to find a safe of his and take it back from bandits. When you get to the point where the bandits drop it into the hole, look right on the stairs.

Jump onto these flat sections and follow along. Walk into the shack to get the acheivment.
Down the Rabbit Hole
Description: Jump in the big hole.

Strategy Look to your right and down a bit. See the giant hole the map is named after? Jump into it and die.
Loot
Nothing here, Comment if you know something.
Trivia
Nothing here, Comment if you know something.
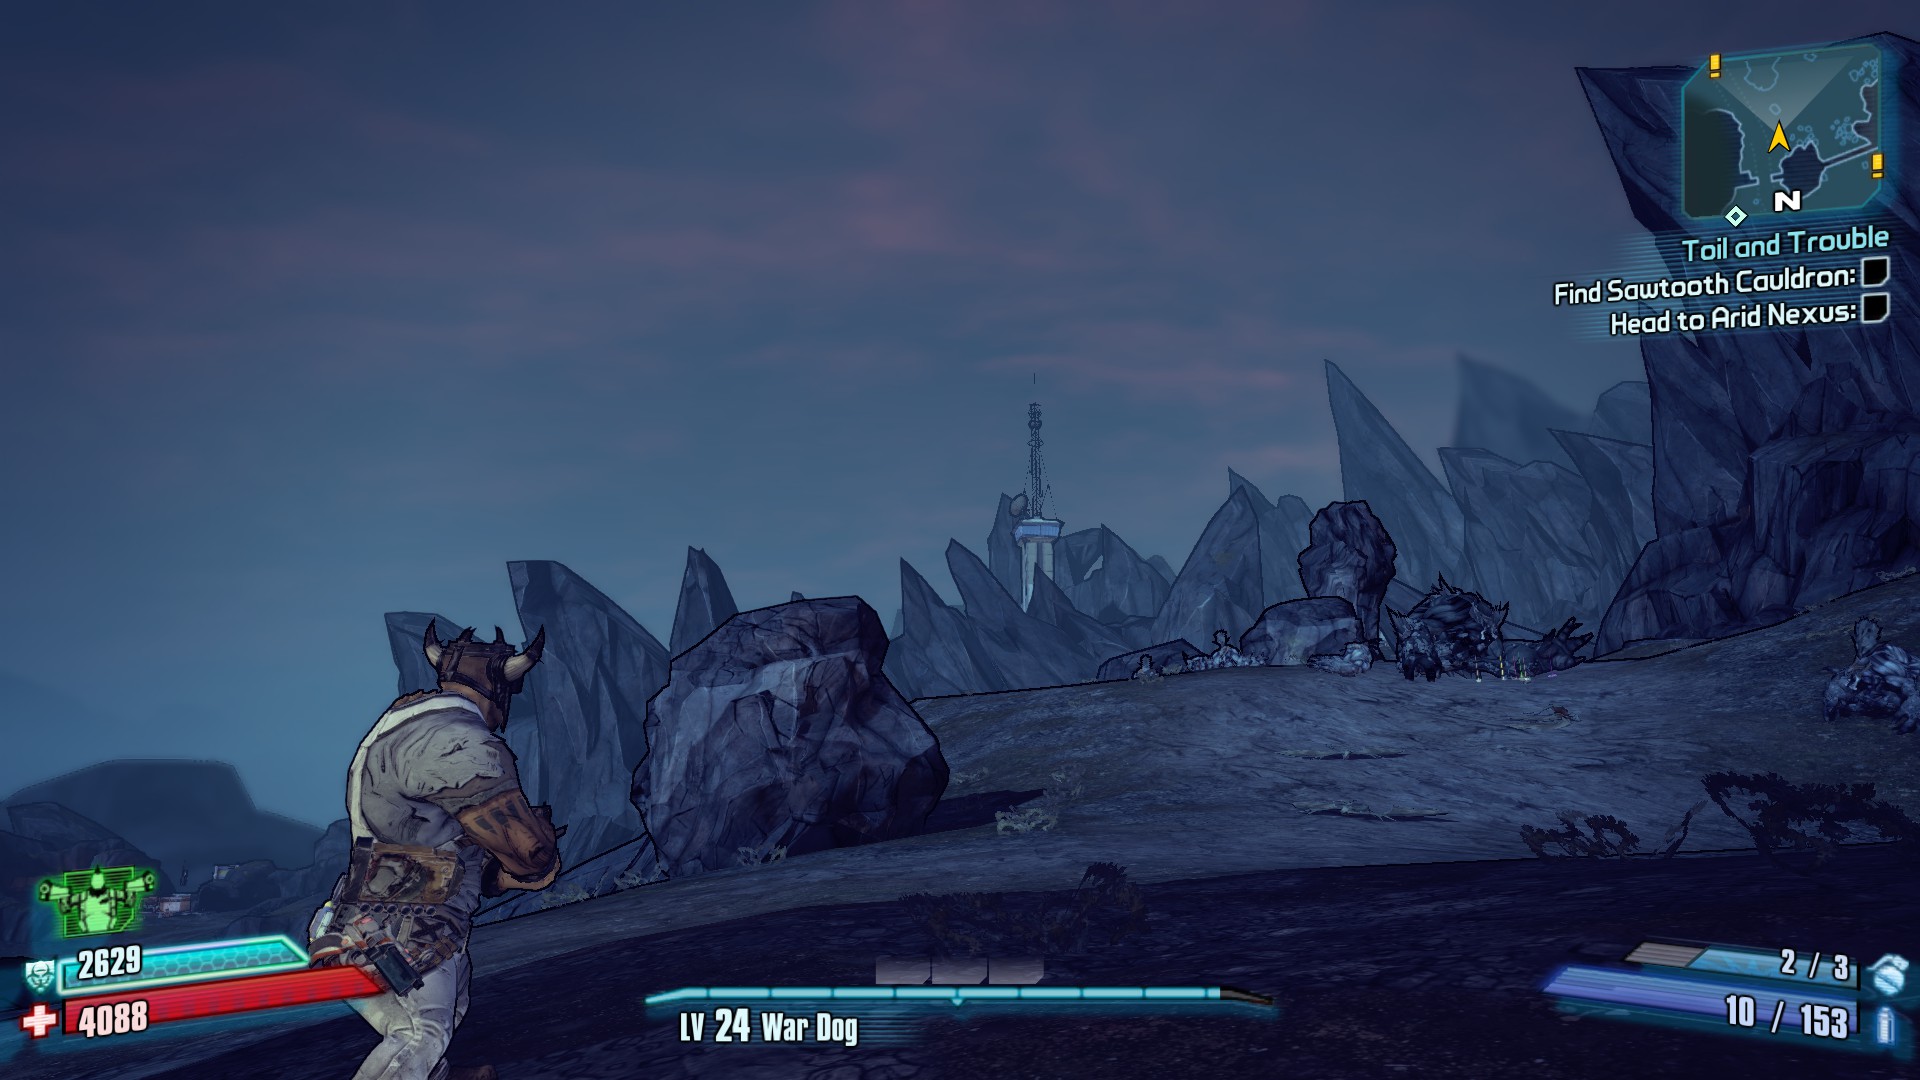
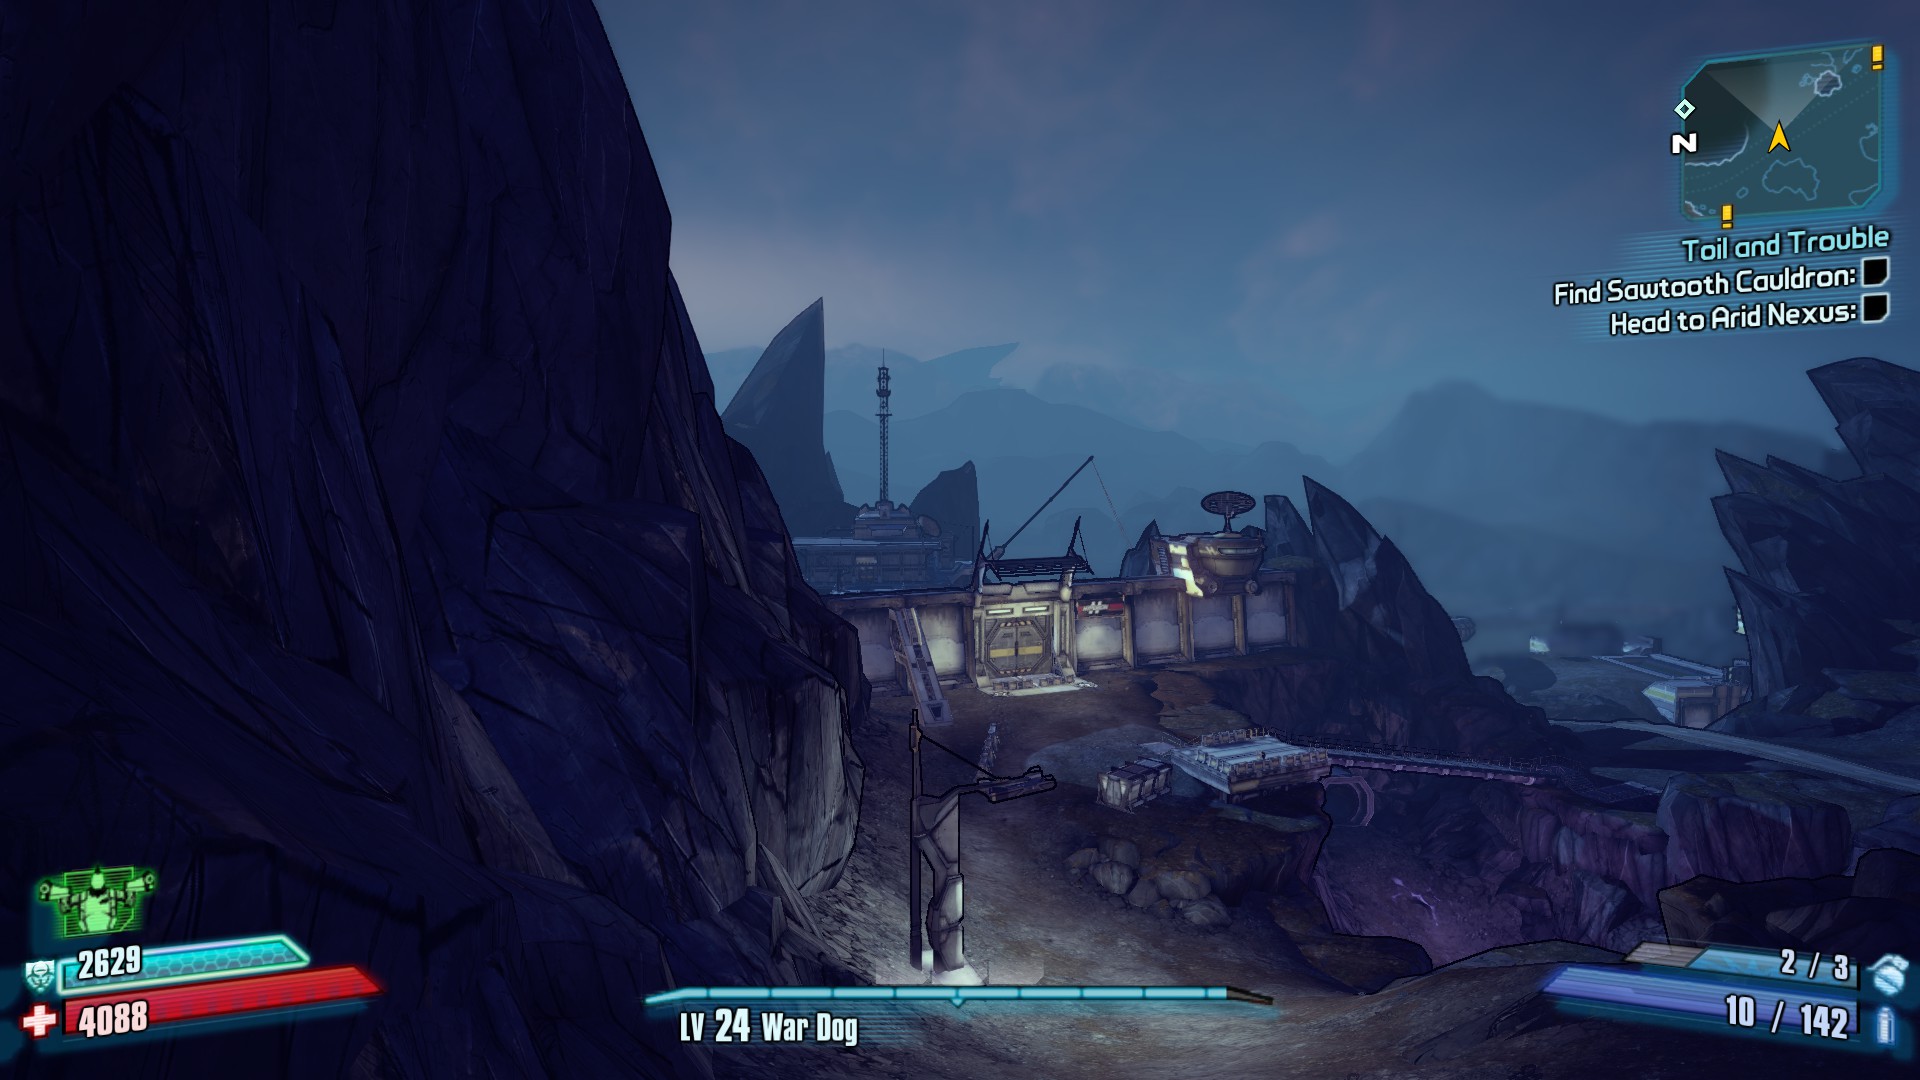
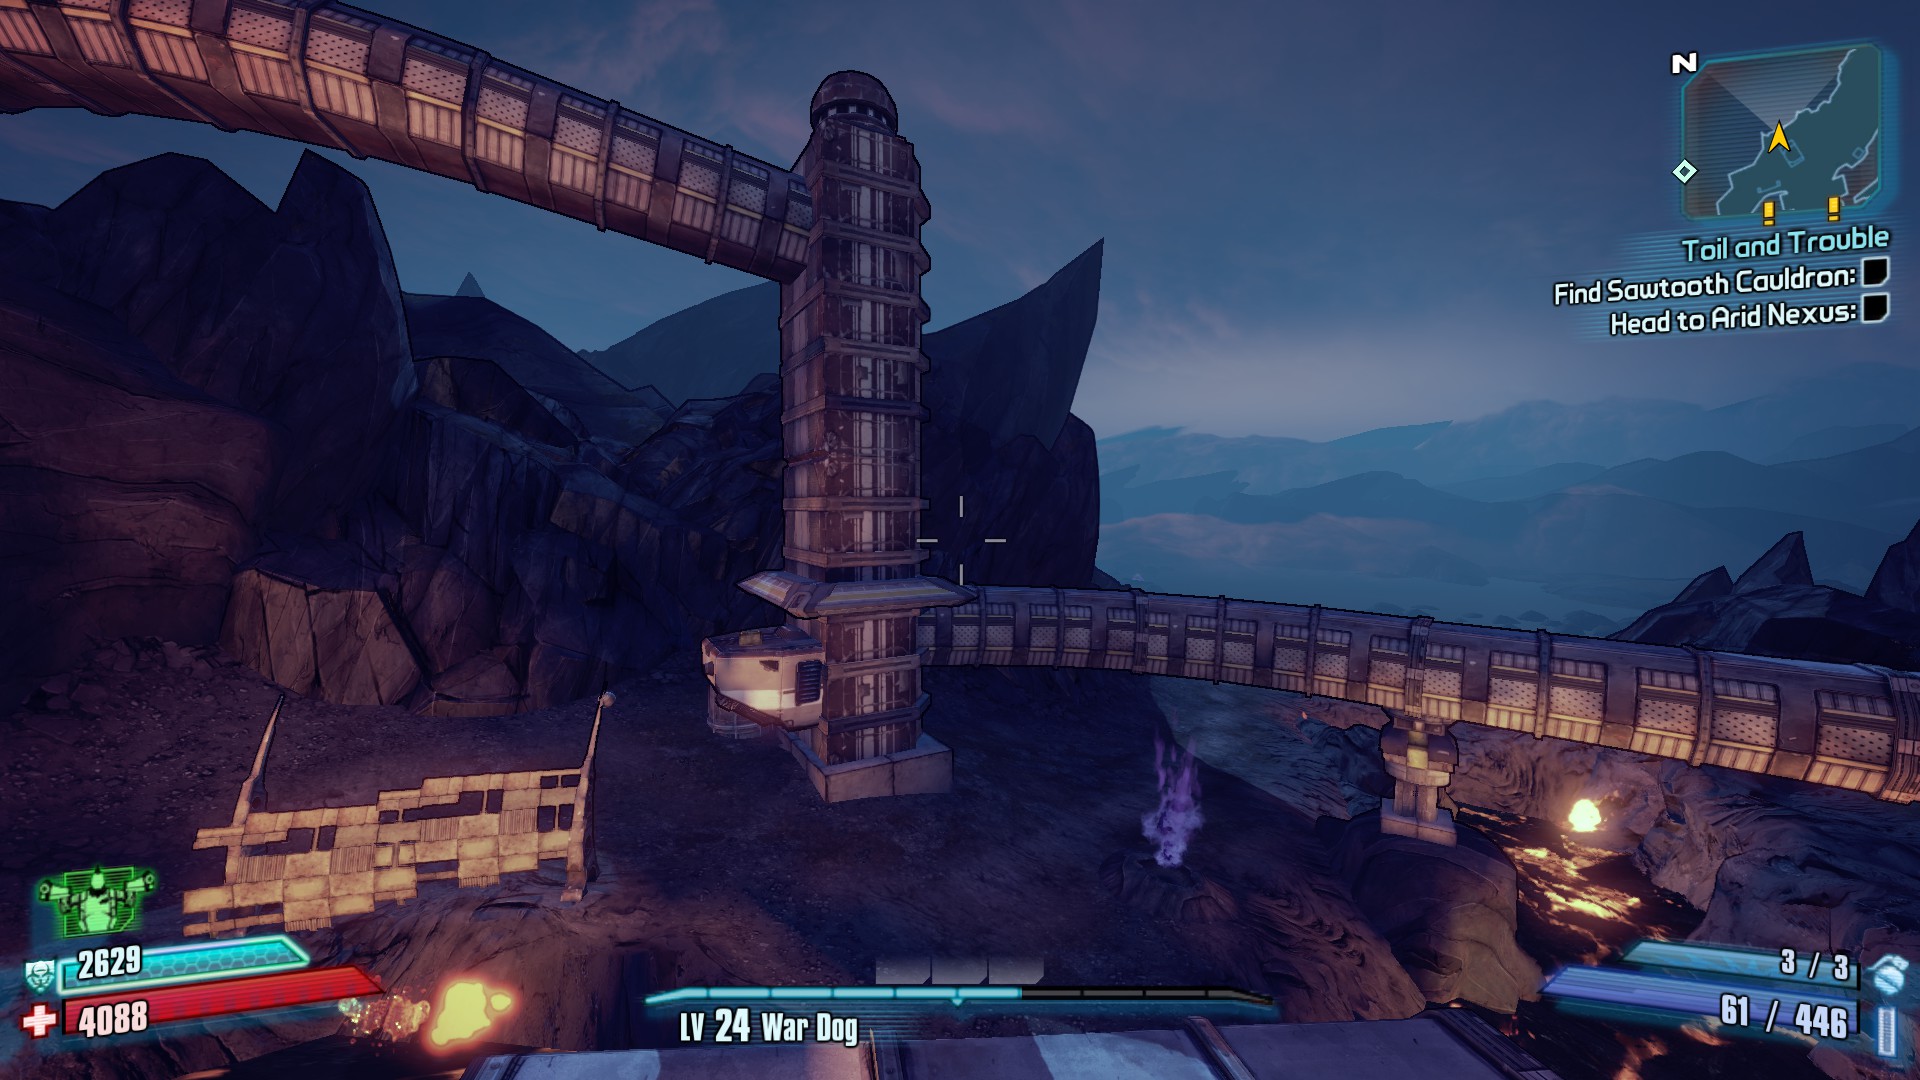
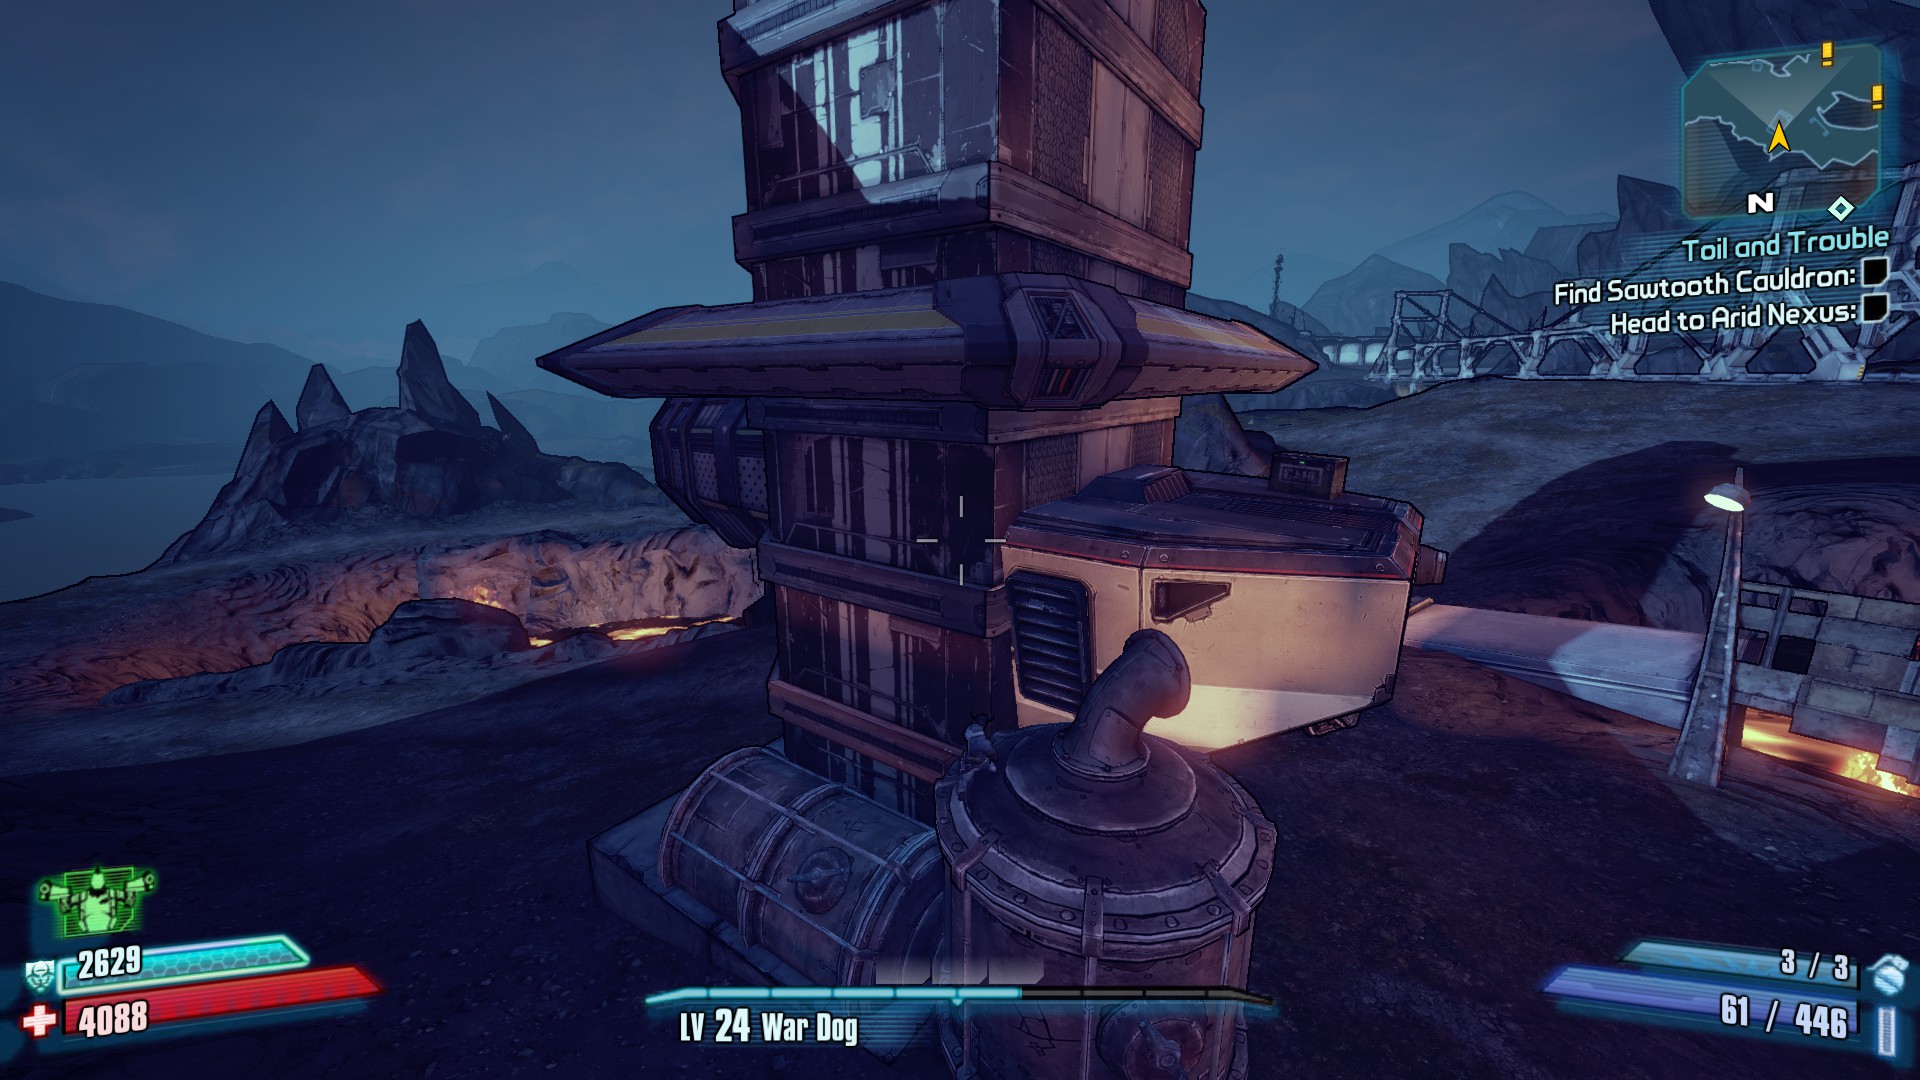
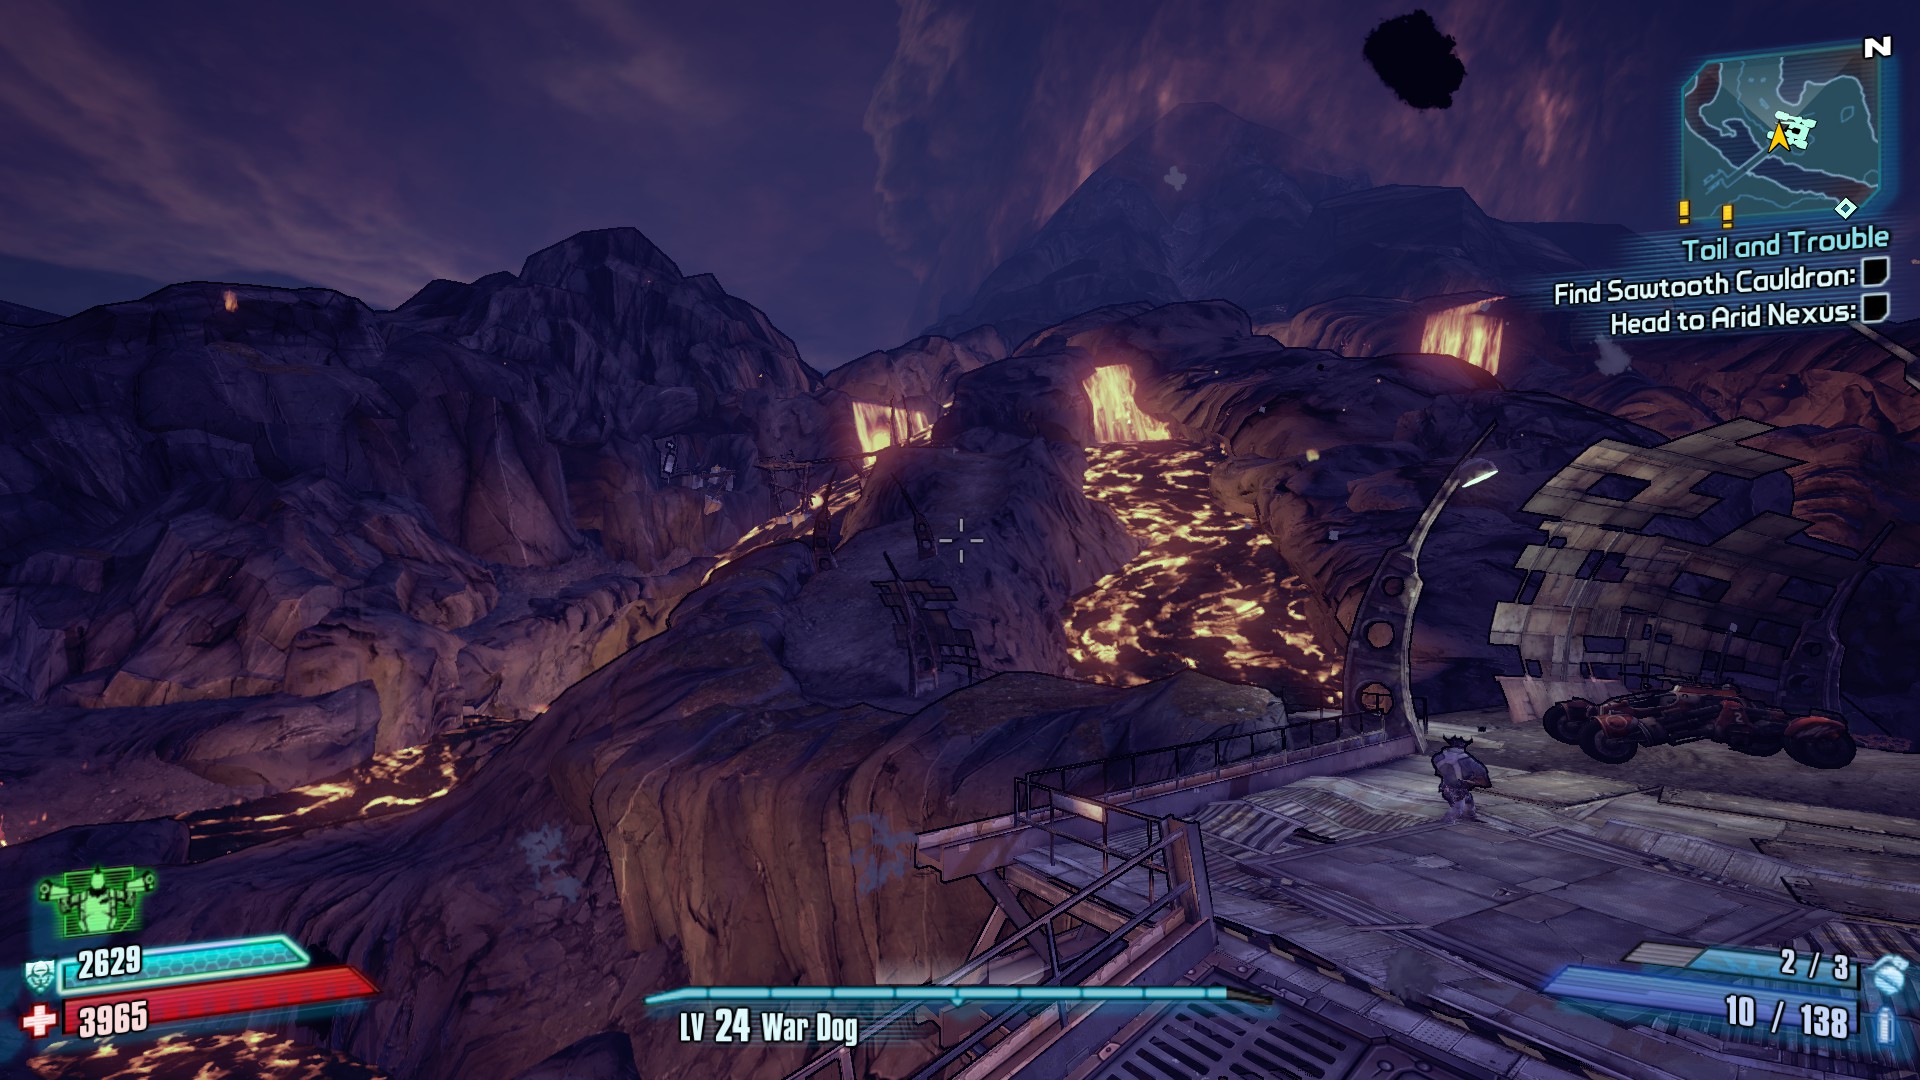
Sawtooth Cauldron
Challenges
Cult of the Vault x2

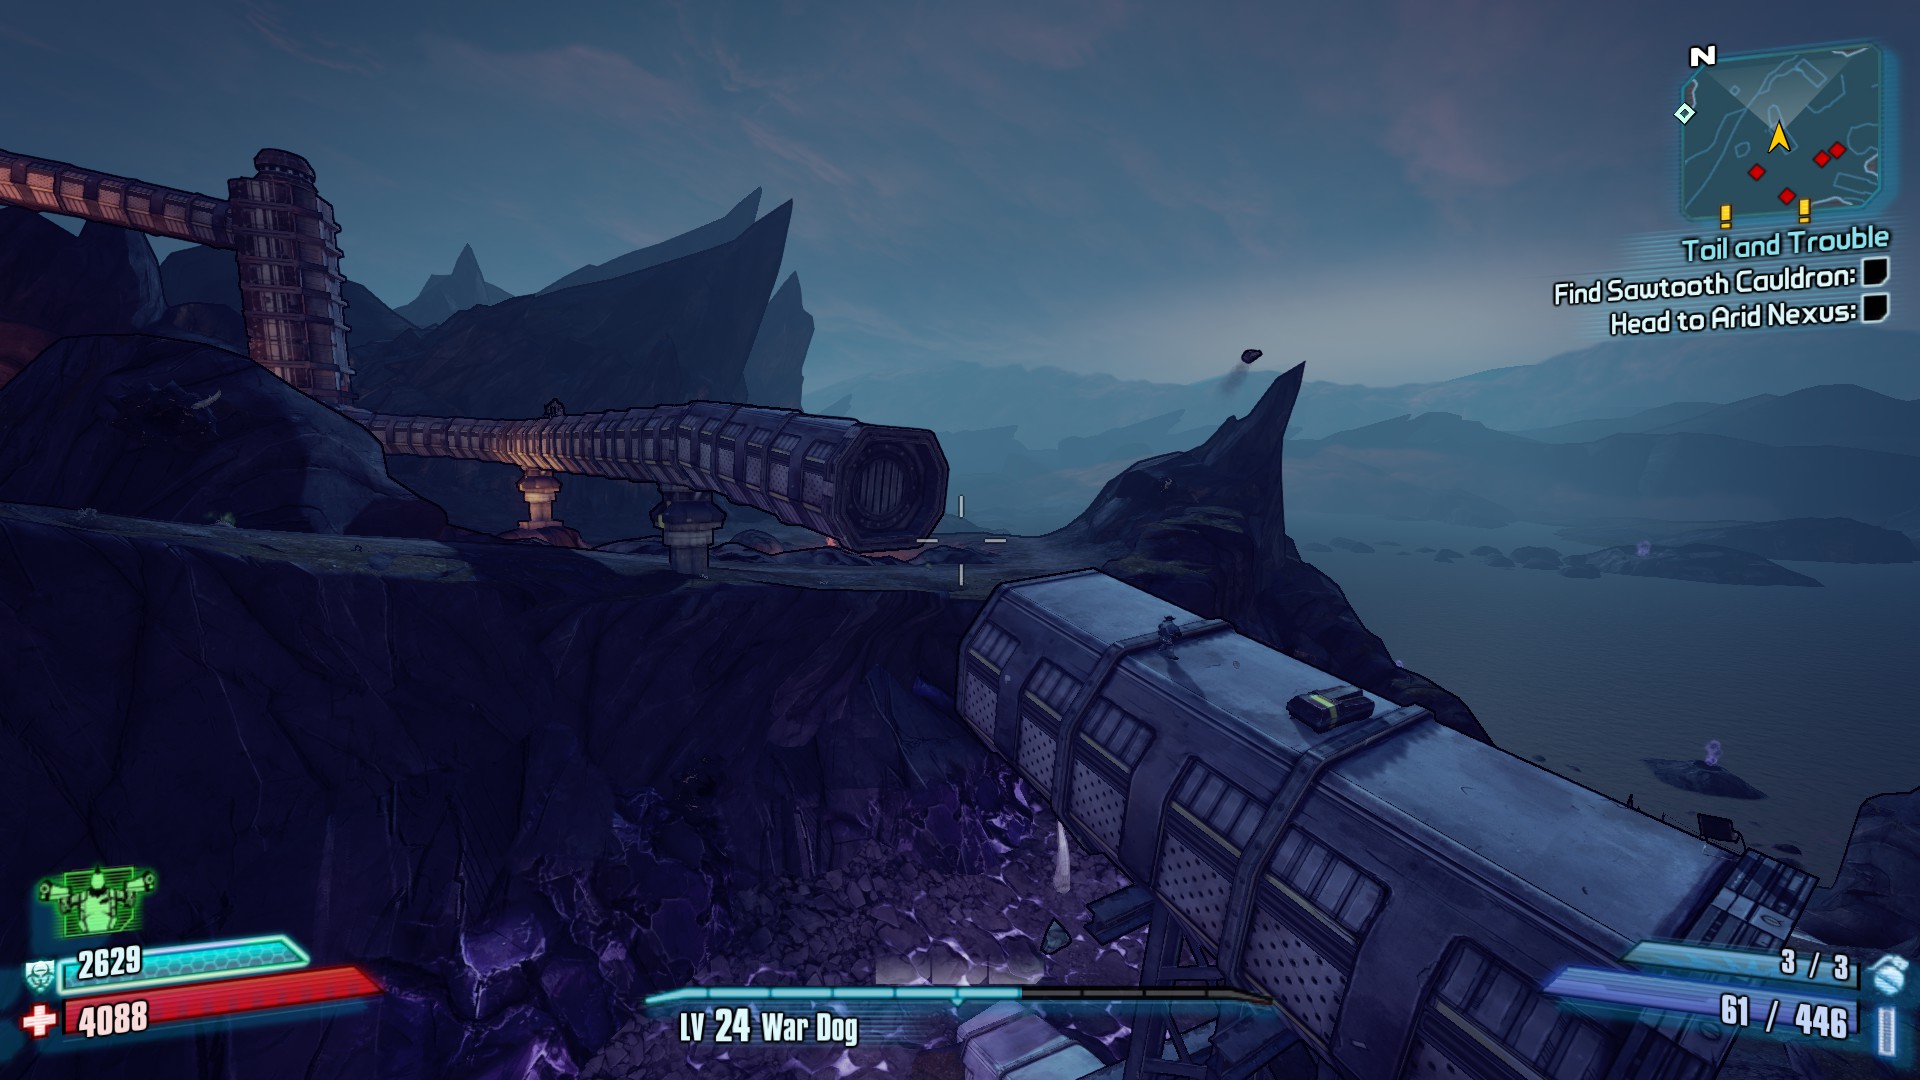
Description: This Symbol is in a small area on the west-most side of the map. It is against the wall in a crate on this small section of land.

Description: Inside the elevator shaft to the top of the bandit camp, this symbol is to your right when looking out while going up. To reach it, go to the top, hit the elevator switch, exit and then drop on top of the elevator as it goes down. Get ready to jump for this one.
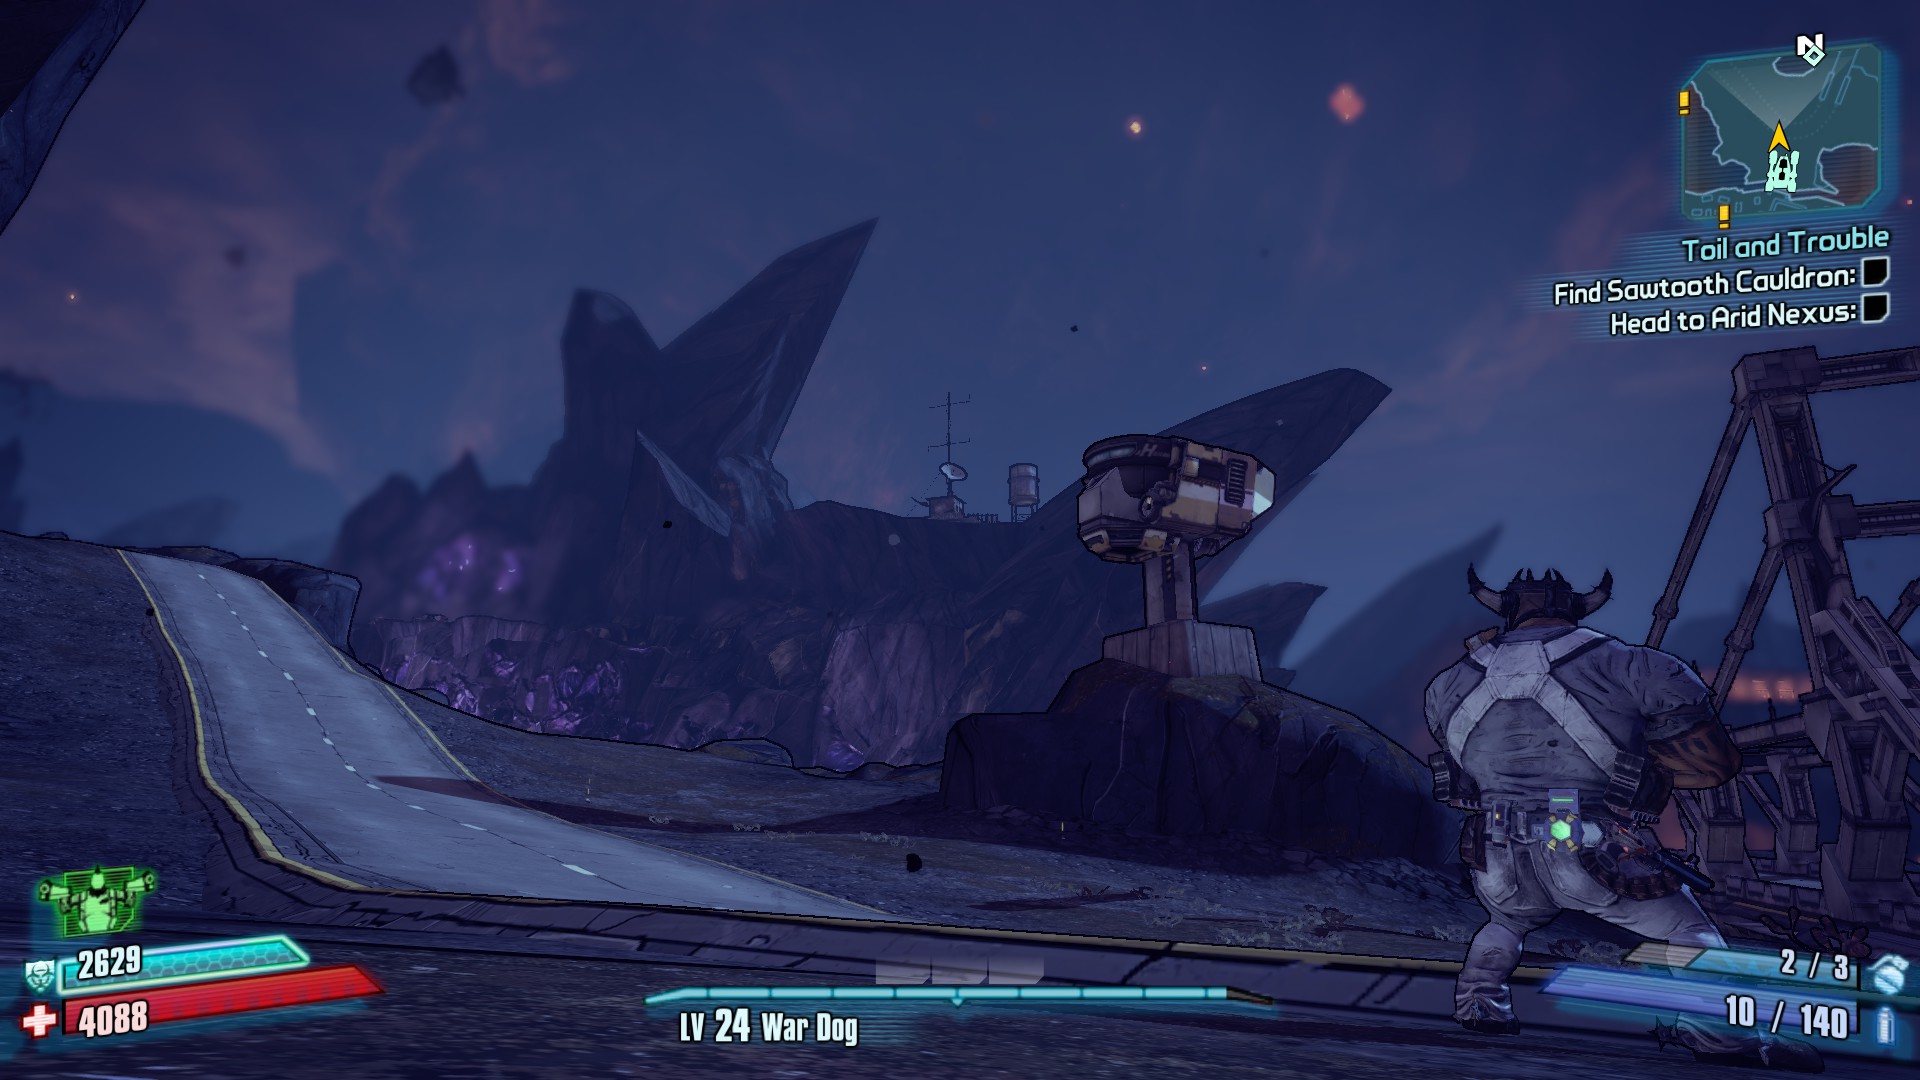
Race to the Top
Description: Get to the Buzzard Nest within two minutes of entering Sawtooth Cauldron.
Strategy: Overlevel for this one and figure out the path to the elevator that leads to the top of a bandit camp. Complete the storyline in this area before attempting. Rush on through the enemies without stop and when you reach the elevator, just take it up without killing the mini-boss.
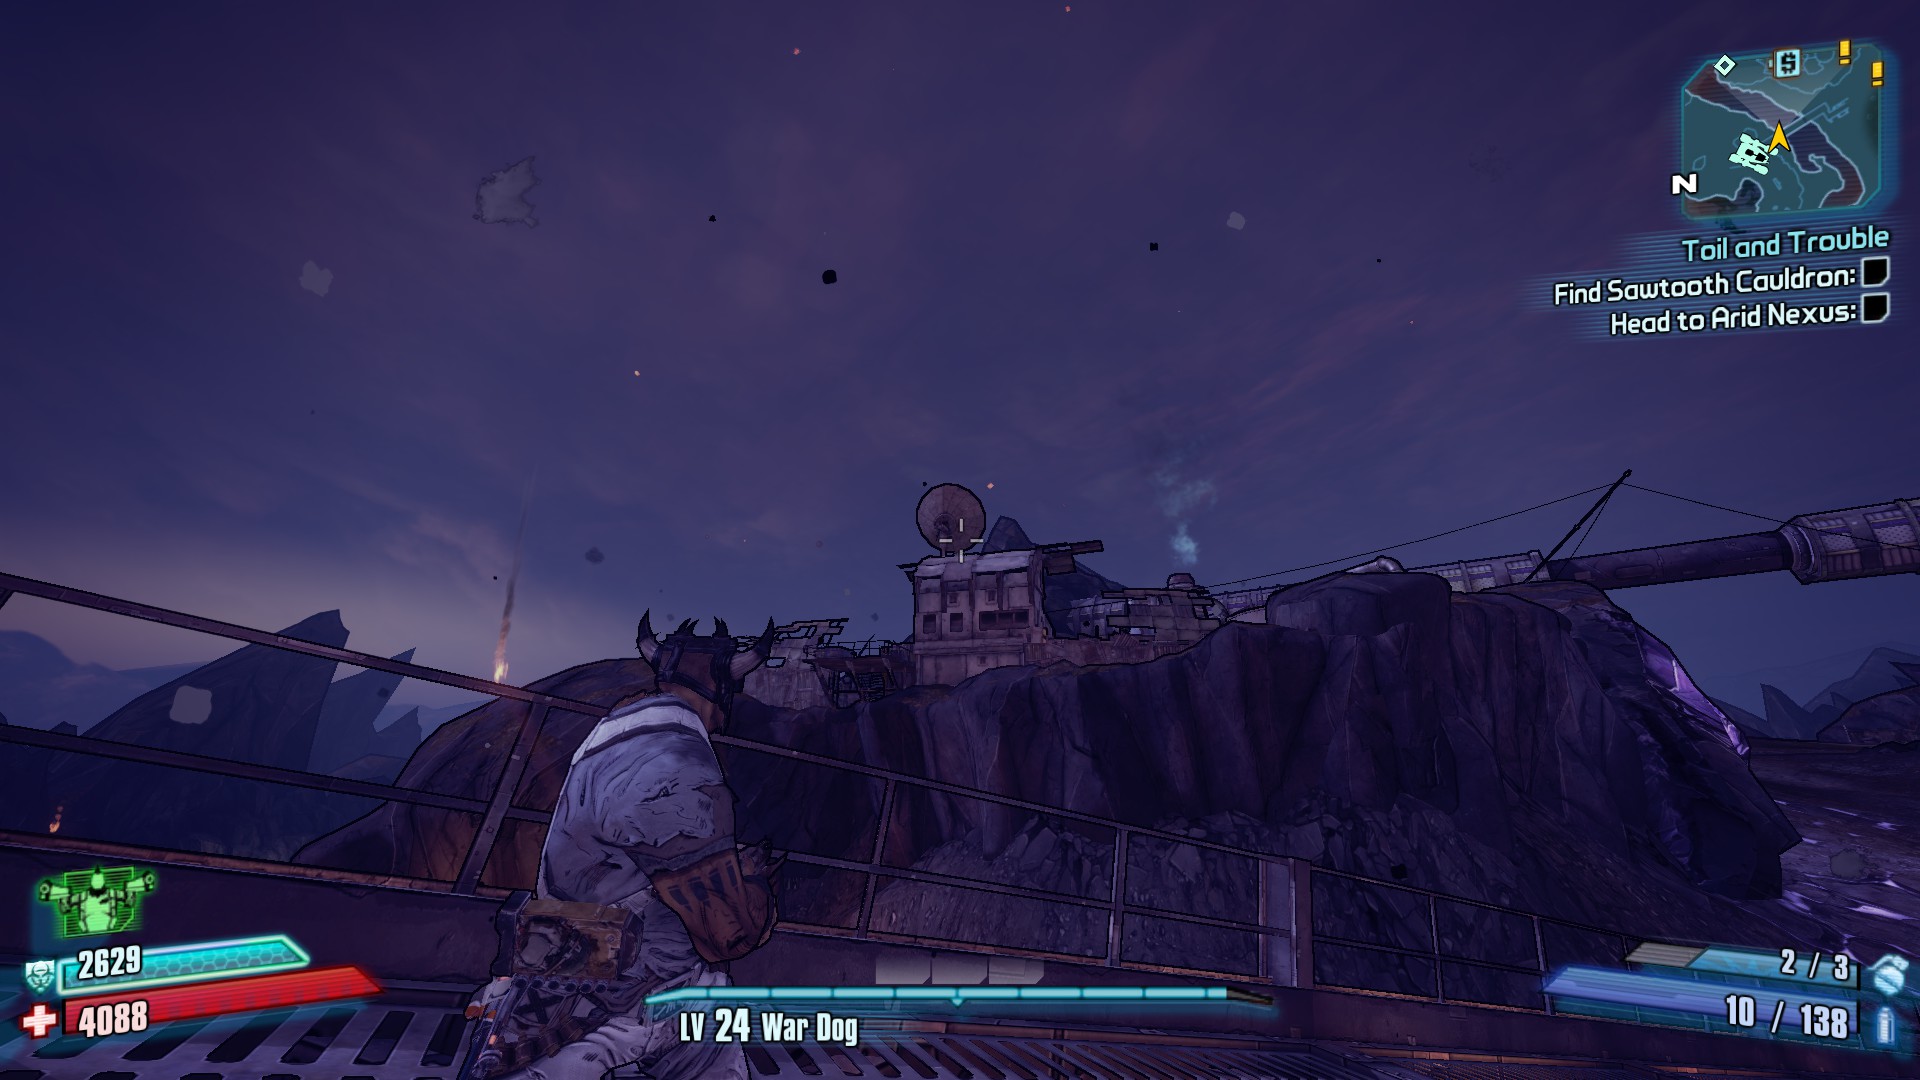
Happy Camper
Description: Fine Avie’s hidden campsite.
Strategy: Go to the top of the bandit camp VIA elevator. Go to the south-west side of the tower and look down to your left. There should be a lone fire. This is it, jump down to it.

Haiku Hitman
Description: Find out why Zero came to Pandora.

Description: This first echo is near the fast travel, head towards the bandit camp and look to your right.

Description: Down in the open area, west of the main bandit camp. This Echo is on the right of the area.

Description: Where you blow up that one Buzzard to get Mortar to bring the elevator down. This echo is on the second level of the structure behind it.

Description: This Echo is at the top of the main bandit camp behind the building to the East of the elevator.
Loot
None that I know of, post if you know something
Trivia
Nothing here, ‘cept this area is big.
Southern Shelf
Challenges
Cult of the Vault x2
First Symbol

Description: You get access to this shield with the mission, Shielded Favors. Near the end, you take an elevator up to a shack and buy a shield. Head out back and turn right, you are going to walk along that side of the shack and climb onto the roof. Head towards the back again and carefully jump down on top of the “porch” roof. For your trouble, you get this Vault Symbol and a Gun Chest.
Second Symbol


Description: Half way up Flynt’s Ship, right before the lever to bring Claptrap to you Via. Elevator, you jump into the area above where the bandits ambush you inside the shipment containers. You then jump across the shack roofs all the way back to the other side of the ship, for your trouble, the second Vault Symbol and another Gun Chest.
Make Boom Go Boom
Description: Kill Boom and Bewm without any players taking a direct shot from Big Bertha.
Strategy: This one is pretty easy, when you enter the boss area, head directly to your right. There is a giant ship part sticking out of the ground

Hide behind this and destroy Big Bertha first, then you are free to roam.
Fireproof
Description: Kill Flynt without any players taking damage from his dragon breath.
Strategy: I don’t really know what his Dragon Breath attack is, but here is a foolproof strategy. Shoot him till he dies and try not to catch on fire. If you mess this one up on the first time around, go up around 5 levels and fight him again.
Loot
Trivia
It is INCREDIBLY easy to get the Hurly Burly challange maxed out during the mission “This Town Ain’t Big Enough”. Stand above the eastward location (Known as the Pond) and shoot once around the pups to get their attention. All they will do is toss projectiles at you allowing you to get the challange completed.

Southern Shelf – Bay
Challanges
Cult of the Vault x2
First Symbol

Description: Head to the right immediately outside of the cave you start in. Keep going around till you come across a grounded ship. This symbol is on the side opposite of you when walking up.
Second Symbol

Description:In the farthest corner of the bandit camp, behind a building that you can walk under.
Midge-Mong Has No Friends
Description:Kill Midge-Mong and his rider before they summon backup.
Strategy:Shoot him as much as you can. More than half the time I don’t get this one on the first go, so level up then come back as he brings out backup really quickly.
I Can See Your Corpse from Here! x4
Description:Find all four telescopes in Southern Shelf Bay
Strategy:All the telescopes are around the bandit camp, describing the locations will be tough so I am going to use pictures on this one.
Description: Right before the bandit camp

Description: On one of the boats on the water around the Bandit Camp

Description: At the end of the boat gauntlet, near one of those junkyard chests before you jump off a boat towards the bandit camps plaza.

Description: Right outside the bar where Midge-Mong appears.

Vault Hunter on Wire
Description:Get to Blackburn Cove via tightrope
Strategy:This one is REALLY simple, on your way to the bandit camp, you have to pull a lever to bring a platform to you. Instead of doing this, just walk across the chain pulling the platform.

Loot
Trivia
None here, send in any suggestions.
Southpaw Steam & Power
Challenges
Cult of the Vault x3

Description:At the start of the map, jump down to where you see the three Psychos arguing. Turn around and next to the ladder is this Symbol

Description:Between the first and second Assassin, in the right hand corner across from the second assassin. To reach it, jump on the handrail and then onto the pipe.

Description:Between the second and third Assassins, after you go down stairs, above the second generator near the third Assassin spawn. To reach it, jump on the rotating gear and jump up onto the generator.
Boss Run
Description:Kill all four assassins within ten minutes.
Strategy:This one is easy again but probably should be done after you complete the “Assassinate the Assassins” mission. Once you know the route through, just run it killing all enemies around a boss spawn to bring them out faster.
Loot
Trivia
-The four assassin’s names are scrambled numbers (i.e Wot = Two)
The Bunker
Challenges
Cult of the Vault
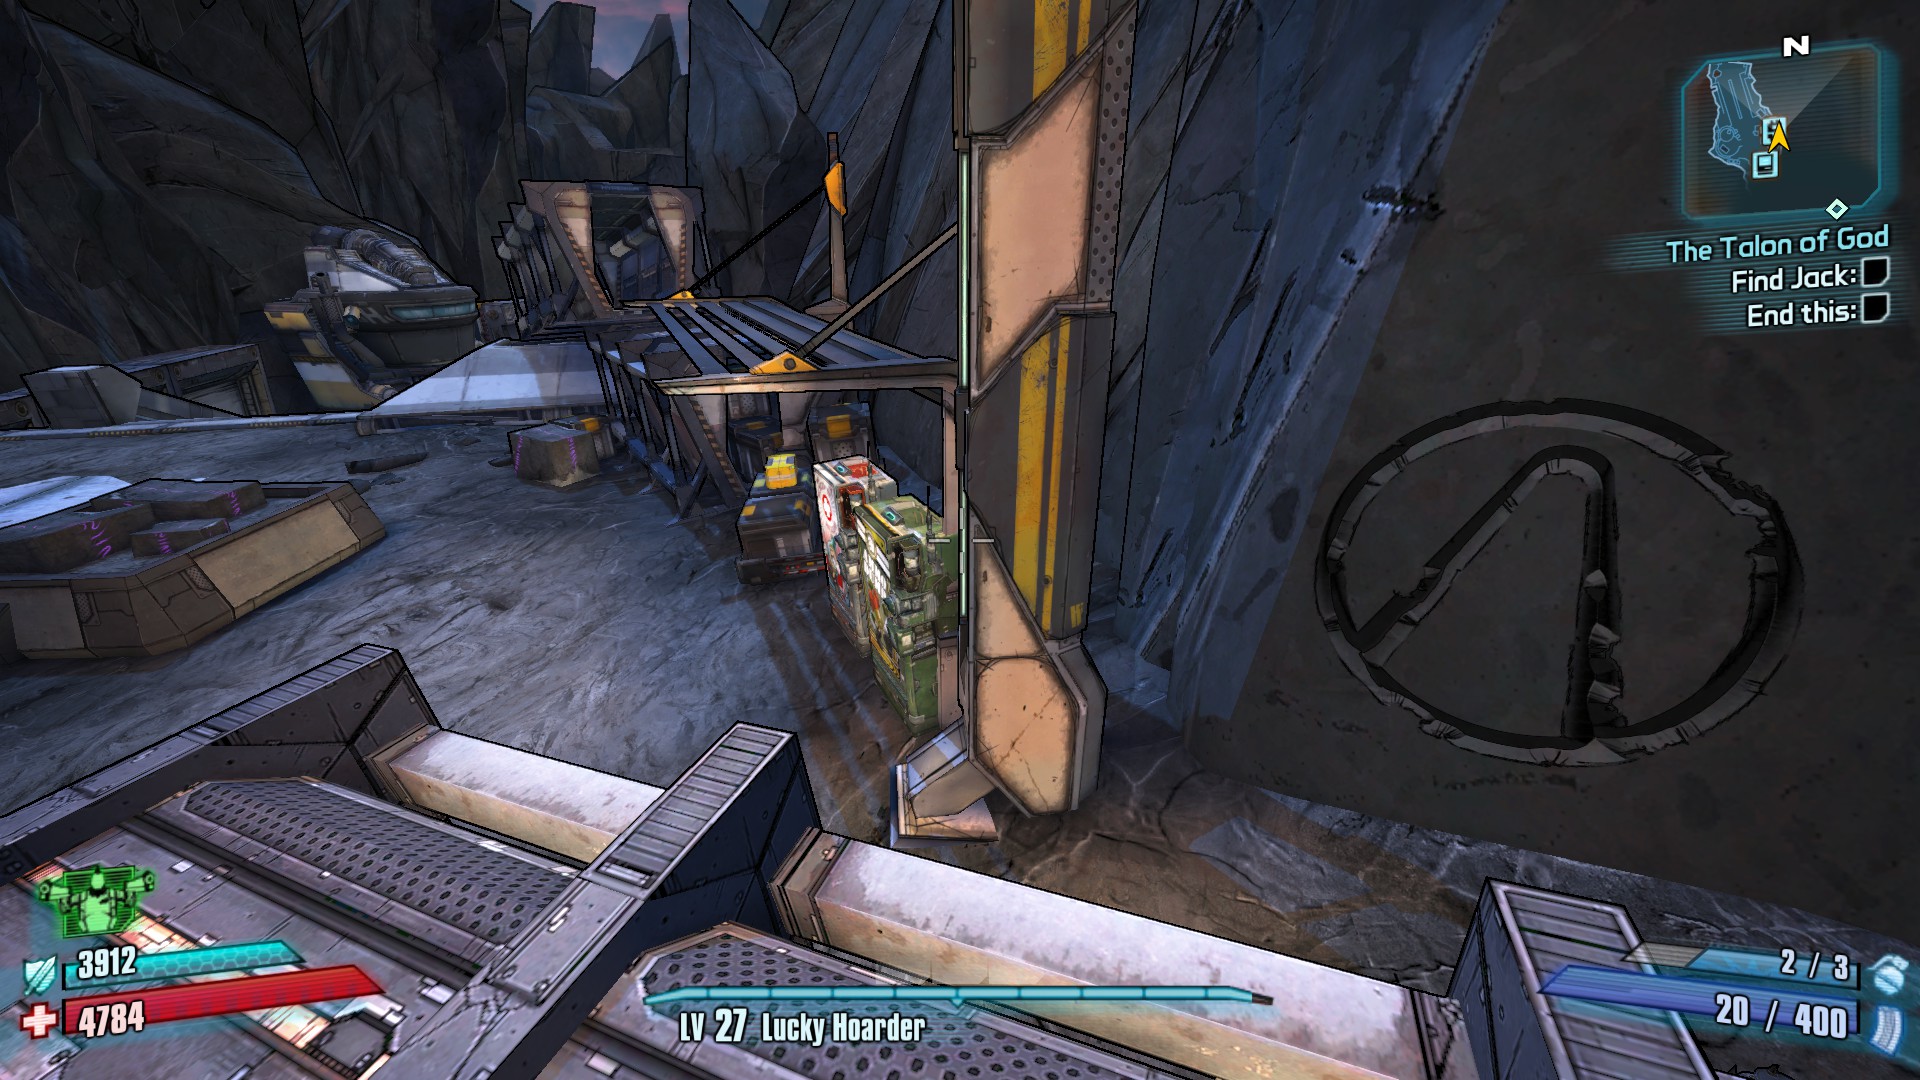
Symbol is mid right in the picture.

Description: In the back of the bunker arena, on the lower level. Wrap around on the walkways, this symbol is behind some foliage on the right side of an area.
BNK-3R Buster
Description: Defeat BNK-3R without destroying any of his Auto-Turrets.
Strategy: This one is going to require more than one go at BNK-3R (Partially because the challenge is unlocked after you beat him once). Bring more powerful gear and a good shield on your return because this boss has a larger health pool than most.
Shoot at BNK-3R when he flies up to the sides of the map and aim for the Red Cluster in the center of the front end of him. The turrets in question spawn on the sides of BNK-3R, Diagonal from the weak spot, try to avoid shooting high or low of the center as BNK-3R floats back and forth while stationary.
Loot
Equipment
Heads


Trivia
–Hidden Chest
-Behind where BNK-3R sits idle when you first enter the area, there is a chest sitting above the waterfall near the back of the map.
–Peek at Terramorphous
-Go to where the chest is mentioned above, start out looking towards the distance. Every once and awhile Terramorphous will breach the water (And sometimes it looks like he does Jazz Hands).
The Dust
Challenges
Cult of the Vault x3

Description:At Moonshiner’s Shack (Small circular bandit camp), jump on the buildings to your left to get to this symbol. It is above the car spawn.

Description:Under a helipad at the Goose Nest, the Symbol is above my character.

Description:At Hodunk Speedway, this symbol is across the bridge behind the fence. Under the bridge, to your left is some stairs. Walk up and jump around on the right side of the fence at the top to reach this.
Dust to Dust x3

Description:In a broken car at the entrance of Ellie’s Garage to the right.

Description:Inside the Hodunk Trailer Park, behind the first building on the left.

Description:Inside Moonshiner’s Shack (Small circular bandit camp), at the left of where you walk in.
I’ve Got a Crush on You
Description: Have a buddy crush you in the car crusher.
Strategy: This one is better done early into the game, that way the money loss isn’t too big. The car crusher is around Ellie’s Garage to the right. The description is a little wrong as whoever presses the button also gets the challange.
The Van Is Damned
Description: Find and loot the roaming Cara-Van.
Strategy: Wait until you receive an Echo while sitting in the Dust. The Cara-van spawns near The Friendship Gulag and leaves the map at the Three Horns – Valley entrance, just wait by Ellie’s till you see two runners escorting a van. Kill the Runners, and the Van driver will surrender. To reach the gun chest on the top, jump up on the rear bumper.
NOTE: The Cara-Van respawns after you quit the game and restart.
If You’re Not First, You’re Last
Description:Complete the Hodunk Speedway within the time limit.
Strategy:This one takes some practice if you aren’t used to driving. At the far end of the track, before the bridge, is a shortcut which will help. The Afterburner Relic (Received from Ellie) is useful, but not needed. The timer is invisible so just take a couple of laps till the challange pops up.
NOTE:If you have completed the Hodunk Speedway mission, where you blow up racers using fireworks, the crates will still collide with your car even though they are gone.
Loot
The Fridge
Challenges
Cult of the Vault x2

Description:Near the entrance to the fridge when you first show up. On the first shelter to your right on the roof. Go around to the other side of the shelter and clamber up the rocks to get to this symbol.

Description:This symbol is near the first one, follow through till you make it to a bridge with cars on it (Before you reach an overlook of the Fridge). Look immediately to your west, this symbol is behind the base of the structure.
Note:In the picture, I am looking at where the first vault symbol is.
It’s Off to Hell We Go
Description:Kill all of Laney’s midget companions before killing Laney herself.
Strategy:This one requires a semi decent shield, just kill the 7 midgets that spawn in with Laney. You may want to clear the area of rats prior so you won’t have to deal with taking extra damage from them. Avoid using grenades and any abilities that fire on their own or have splash damage.
Fairest of Them All
Description:Kill Laney before any of her midget companions die.
Strategy:This one is much easier to accomplish, I think Laney even shows up first so just make sure she dies and try not to headshot a midget till she’s dead.
The Rakk Knight
Description:Find Rakkman’s audio diary.
Strategy:You have to go through the passage behind Laney to reach this audiobook. After Crystal Claw Pit, but before the elevator up to Rakkman. This Echo is sitting on a crate along the main path.
Trapped Rat
Description:Find the rat frozen in time.
Strategy:This one is a little tricky, Right after Crystal Claw Pit (Where you later fight Smashead) you’ll find a closed in area with a chest inside. Bump the window you are looking through (Make sure the respawn station starts up) and then kill yourself with grenades or a rocket launcher. When you respawn you should be inside the closed in area.
Stiff Competition
Description:Kill Smash-Head without killing any of his Midget Boners.
Strategy:Once again, with any challenge dealing with killing, you may want to over level. All the same, just make sure you don’t shoot midgets before you kill him.
Loot
Trivia
Nothing here, Post in Comments if you know something.
The Highlands
Challenges
Cult of the Vault

Description: In the Hyperion Base, Second Floor, Right after the constructor to your right. This symbol faces Overlook
Failure to Communicate x3
Description: Find and destroy all Hyperion comm towers.

Description: (I destroyed the thing before taking a picture) This one is directly above the vault symbol in the Hyperion Base.

Description: This one is on the far edge of the map opposite of Overlook. I sniped it from the Hyperion Base so the Map above is in the wrong spot.

Description: Get on the bridge to Opportunity. Turn left and look Offshore for this one. Be patient when firing as it took 4 seconds for the porjectiles to reach it.

Description: Go to Blake Bridge, look away from Opportunity, this last comm tower is 45 degrees to your right.
Winds of the Highlands x8
Description: Find all the windsocks.

Description: Go all the way through the Hyperion Base, look to the right at the end and see this Windsock on the cliff face. Jump along the rocks to reach it.

Description: This Sock is on the edge of the map near a bandit camp overrun with Stalkers.

Description: Go to Blake Bridge, this Windsock is on the cliff face, clamber along the rock wall to reach this one. (Whoever put a windsock here had to be drunk)

Description: By where you drop down after shooting Henry, This windsock is right on top of a Catch-a-Ride.

Description: This Windsock is in Overlook, to the right when you walk in.

Description: This windsock is directly right of the bridge to Opportunity. Next to it a Badass Stalker will Always spawn.

Description: Opposite of the bridge to Opportunity, to the left of where you walk in from The Highlands – Outwash

Description: This Windsock is in the middle of the open area opposite of Overlook. It is on top of a cliff and takes a few tries to reach it. Jumping up to it is tough. (I probably should disable HUD and take a picture of here some time again).
Loot
Trivia
-Double Rainbow!
To reach this Easter Egg, go to the Hyperion Base and follow through till after you defeat the Constructor on the bridge. Walk straight across and look over the cliff for a tent on a lower cliff edge. Jump down to it and stand around the tent. When you trigger the event, you will hear either Claptrap or Handsome Jack. Look towards Overlook to watch this.
The Highlands – Outwash
Challenges
Amazingly, There is nothing here.
Loot
Trivia
Nothing Here, Post if you know something.
Thousand Cuts
Challenges
Cult of the Vault x2

Description: Behind the Buzzard Factory (Where you meet the Slab King) on the left side.

Description: Walk to No Man’s Land, head left. This symbol is in a burnt building on the second floor.
Portrait of the Gunzerker as a Young Man
Description:

Description: Near the entrance to Slab Town, this Echo is to your right in a corner with a Dumpster.

Description: In the back corner of slab town, to your right when walking in. You have to jump across using the boat as a stepping stone.

Description: This echo is under Broke Face Bridge(?), you can get down there by falling through a hole in the bridge near the Buzzard Factory.

This last Echo is out of the way, go to the Buzzard Factory and look away from it. There is a rock to itself with a building on it. To the right at the base of the rock is an elevator up. This echo is all the way around in a corner.
A Grave Matter
Description:

Description: On your way to the Buzzard Factory, Hug the left cliff edge of Slab Town, 2 gravestones are here overlooking the bridge across.

Description: To the right of Facey McShooty, This lone gravestone is overlooking No Man’s Land.

Description: The last six gravestones are to the right of the Lone Gravestone. Go to the Buzzard Factory and turn around. They overlook the Competitor Deterence Field.
Slab UHF
Description:


Description: This is a tough challenge, to reach the antenna, go to the Buzzard factory. Climb up the stairs as you would to reach the Slab King, But Do Not drop into the building. Walk along the outside of the factory, heading towards Broke Face Bridge. Tightrope onto the bridge and walk across the metal supports. Jump across to a gun chest. To the right of this chest is the antenna in question.
To start your ascent, walk around to the back of the antenna and jump on some girders to get up to the base. I cannot help you much after this except for the fact that you should make your way clockwise from this spot. Near the top is an Electrical Box that you have to activate to get the challenge.
This will be a VERY frustrating Challenge, keep trying.
Loot
Nothing here, Send in Suggestions.
Trivia
Nothing here, Send in Suggestions
Three Horns – Divide
Challenges:
Cult of the Vault x3
First Symbol

Description:This symbol is in the bandit camp known as Wind Break (Where you go to grab the power cell). It is behind a shack overlooking the ocean. To reach it, you walk out onto this metal grate next to the building (When no enemies are around), turn around, and then grab it.
Second Symbol

Description:This symbol is on the back of a billboard near a big bandit camp. Use pictures as a guide.
Third Symbol

Description:This one is in the bandit camp mentioned above, at the far back of it behind a building again.
Man’s Best Friends
Description:Kill Boll without hurting any of his poor snow skags.
Strategy:This one is easy, near where Boll spawns is a mini bandit camp that has a Badass Nomad and Badass Psycho spawn from a small shack. Above this camp is another boat that has ran aground. There is a ladder allowing you to climb to this ship and all you need to do then is snipe Boll through one of the portholes.

Loot
Trivia
In the bandit camp where you pick up a hyperion device to start to Catch-a-Ride outside, you can head alongside the cliff behind the camp and find a Toilet chest. Loot from the chest is slightly better than your gear when you first come to the area.
Three Horns – Valley
Challenges
Cult of the Vault x3

DescriptionNear the southern end of the map, there is a shack with a Badass Nomad and Psycho. In the shack is this symbol.

DescriptionNear Southpaw Steam and Power Plant, alongside the fence surrounding the entrance. To reach it you have to jump on pipes outside the plant.

DescriptionRight outside the Bloodshot Stronghold, to the left of where Big Maw spawns in. Follow around back behind the buildings and you will find this symbol.
This Ain’t My First Rodeo
Description:Explore your way to the top of the Happy Pig Motel sign
Strategy:There is a geyser outside of the Happy Pig Motel, that when stood on will launch you high into the air. Position yourself on the rim of the geyser towards the motel and you should launch and land almost directly on it.
NOTE: This is impossible for Krieg to do as he “weighs” more than everyone else and as such, the quest does not show for him. He has a higher knockback resistance which messes up the challange.

Loot
Trivia
Using the geyser in front of the Happy Pig Motel, you can jump next to where Doc Mercy Spawns. This makes farming for infinity so much easier as you can spawn in the Happy Pig Motel after you finish the quest “No Vacancy”.
Tundra Express
Challenges
Cult of the Vault x2

Description:Near the North-Eastern corner of the map, where the train spawns, you’ll find a small bandit building with a few Varkids. The symbol is on the side of this building.

Description:On top of the research building (The one with an electric gate at its foot), this symbol is on the roof. If you look through the window next to this symbol, you can shoot the switch that powers the gate at the bottom and get to a Red Chest.
Positive Reinforcements x3

Description:In the Buzzard Training Academy, this switch is on the catwalks.

Description:In the camp where the train waystation is, this switch is on the platform.

Description:In the bandit mining camp (The one with the mining rats), this last switch is in a tight corner between a thumper and the conveyor belt.
King of the Buzzard World
Description: Explore your way to the roofs of Buzzard Academy.

Strategy:In the Buzzard Training Academy, find this helipad and jump on the crates to get onto the roof. Where my character is is where the challenge triggers.
What’s Yours Is Mine x5
Description: Disable all of Tiny Tina’s pink mines.
Strategy:There is a switch on the pink mines scattered around the map, clear enemies from the area then crouch walk to the switch. I rapidly tapped forward to avoid mishaps. Do not run or use abilities around the bombs as if they go off, you have to restart your game and try again.

Description:This one is outside the farm house in the North Eastern corner of the map.

Description:In the northern section of the map, to the east of the above bomb. Between the train Waystation and the Buzzard Training Camp.

Description:By the second Vault Symbol, in the North Eastern section of the map.

Description:In the Mid Eastern section of the map, this bomb is north of the Bandit Trap (part of a mission) south of Tiny Tina’s home.

Description:This is the thoughest bomb to disable. Make your way to Madame Bartlesby, but before you get all the way up keep an eye to your left. This bomb is on an outcropping towards the Bandit Buzzard Training Camp. The switch is opposite of you facing the cliff edge.
Bug Off
Description:Kill Madam Von Bartlesby without any players taking damage from her bug bombs.
Strategy:Your best bet to acheive this is to overlevel by progressing the story by one or two areas (I think after the Wildlife Exploitation Preserve you should be a high enough level)
Loot
Trivia
At the entrance to this area, there is a snowman next to the vending machines. Shoot its head to find a Flynt’s Tinderbox (This only works once and when you are on the mission “A train to catch”).
Vault of the Warrior
Challenges
Cult of the Vault

Description: At the bottom of the elevator, to the right of it is a small platform in the lava. Symbol is against the wall.
The Warrior’s Way
Description: Defeat the Warrior without shooting his chest
Strategy: Shoot at his head for crits, watch out for when he moves as he might make you shoot his chest accidently.
Dying of the Light
Description: Find the last Fireworshipper.
Strategy: From the beginning, go to the first scenic overlook of the arena.

Climb next to the cliff, with it to your right and look down. You should see tons of spikes and such. Use those to climb down. Jump on top of the cage to help your way down.

To the right of you, I think south, is a little cavern. Get over to it for this challenge.

Wildlife Exploitation Preserve
Challanges
Cult of the Vault x2

Description: Go to the ship at the docks, ride the crane head to reach it.

Description: On your way to the last Mordy’s Stash location. After the first small building you run through but before the Creature Slaughter Dome Building. To reach it, climb along a rock ramp to the right when approaching the second building.
Mordy’s Secret Stashes x3
Description: Find Mordecai’s three hidden stashes.

Description: After the first small building you run through, under the overpass to your right.

Description: Next to the second building, with the Creature Slaughter Dome, behind the waterfall.

Description: After the second Vault Symbol, follow the overpass to the end. Jump on the giant mushroom to make it to the last stash.
Siren’s Song x4
Description: Find out why Maya came to Pandora.

Description: At the lighthouse near Casa De Mordecai.

Description: After the first small building you run through, outside a building to your right.

Description: After the third building you go through, stay above the stalker pit and continue along the road. This echo is at the end of the road.

Description: This last Echo is before the elevator to the boss room, to the left of the elevator on a chair.
Bear Minimum x5
Description: Find five teddy bears trapped in stalker goo.

Description: On approach to the Preserve, this bear is above the very first river you have to walk across.

Description: After the first small building you run through, this bear is on the opposite side of your approach on a mushroom. (Use the map for help finding the bear).

Description: After the dome in the second building, head directly left when you get outside again. Walk along the rim of the dome and find this bear in the corner of one of the supports.

Description: In the first specimen cage after killing the Badass Loader in the third building you run through.

Description: After the speciman building, walk directly across. This bear is stuck in a mushroom.
Ride Together, Die Together
Description: Kill Tumbaa and Pimon within ten seconds of each other.
Strategy: This one is rather annoying to complete as a good amount of the time, they won’t spawn together. Your best bet is to keep running the map and when you see one, hope you can find the other. If you can ever see both of them in the same area, try to knock down both of their health slowly until you can kill them in less than a second each. Alternatively, overlevel to the point where you can one shot both of them.
Loot
Trivia
–The Big Bear Easter Egg
-There is a small easter egg with the crane in The Wildlife Exploitation Preserve. There are two echoes hidden on the map, when both are found you can place a Teddy Bear overlooking the dock on the map. The crane will then start to pull a giant Teddy Bear out of the ship.
Before you drop into the first specimen pen after the dock, to your right.

To the right of the lever to turn off the electric fence in the docks, in the corner with the grass.

To the left of the switch to turn off the electric fence in the docks. To get up there, you need to jump on the barrel. If the barrel is destroyed, you need to restart. Look at the crane for the Easter Egg (It’ll take a little while for it to show up).

Windshear Waste
Challenges
Only one challenge here, and it is entirely easy to get to.
Cult of the Vault

Description: Once you get into Claptrap’s Place, Head right of the fireplace. There is a closet door you can open and at the back of the small room is the Vault symbol.
Loot
Trivia
-There is a pile of money on a table in Claptrap’s Place, interacting with it allows the player to pick up the cash.
–Unique & Legendary Equipment–
Once I find the time I’ll add previous tables and add ways to farm them.
Pistols
Unique
Legendary
*Mission Reward
**DLC Exclusive
***DLC Exclusive Mission Reward
Submachine Gun
Unique
Legendary
Assault Rifle
Unique
Legendary
*Mission Reward
**DLC Exclusive
***DLC Exclusive Mission Reward
Shotgun
Legendary
*Mission Reward
**DLC Exclusive
***DLC Exclusive Mission Reward
****Creepers are located in Caustic Caverns, Go to that section for more info.
Sniper Rifles
Unique
Legendary
*Mission Reward
**DLC Exclusive
***DLC Exclusive Missions Reward
****Badass Creepers can be found in Caustic Caverns, Go to that section when it is available to find out where.
Rocket Launchers
Unique
Legendary
Spawning Vermivorous is time consuming and hard to do legitly, here is some tips on trying.
- First, be on True Vault Hunter or Harder, he won’t spawn unless you are.
- Second, go anywhere that has tons of varkids. I suggest Caustic Caverns as the warehouse about 1/3rd of the way around is chocked full of them
- Third, Trigger the spawns and then run away. The first thing they try to do is try to evolve (The game ticks through randomly 3 times and if it fails, they don’t evolve)
- Repeat step 3 around 4 times and hope your Crazy Badass Varkid goes into their pod.
[/th]
There is statistics on your chance of a varkid going all the way to Vermivorous, but don’t look it up. It is depressing. The chance does get higher with more players, but once again, it is depressing. [/tr]
[/table]
Note: HH stand for Head Hunter DLC
*Mission Reward
**DLC Exclusive
***DLC Exclusive Mission Reward
–Character Heads–
Source: [link]
I could add the screenshots for all the heads here, but considering that the guide is taking me around a minute and a half just to load all the pictures that already exist I’d rather save the time it takes for around approx. 60 more pictures to load. To save space, I’ll only do the Character heads that get dropped by foes.
–3rd Party Tools & Desktop Exploits–
*Any comments dealing with how wrong it is to play games with cheats will be deleted.
————————————————————————————————————————————–
—Gibbed Game Save Editor
–Website: [link]
-This save game editor is the best I have seen for Borderlands 2, it allows tweaking of items, quests, stats, currency as well as item creation.
————————————————————————————————————————————–
—Cheat Engine
–Website: [link]
-This tool is used for many games and is usually only really good for broad strokes. With enough searching though, you can find cheat tables that are very powerful. All of the screenshots in a 3rd person POV were made possible through one such table. Below is the link to the forum post for it as well as the Dropbox link to the up-to-date version of the cheat table.
Forum[cheatengine.org]
Dropbox[www.dropbox.com]
———————————————————————————————————————————–
Infinite Golden Keyes on Desktop
For PC:
- Go to DocumentsMy GmaesBorderlands 2willowgamesavedata(RandomNumber)profile.bin
- Right click profile.bin and click “Properties”
- Change this file to “Read Only”
- Go into Borderlands and use the Golden Chest as much as you want
IMPORTANT: When done, make sure you change profile.bin back. Forgetting to do so will Freeze the shared stash, Badass Points (But Not Challenges), and Default Character.
For Mac look at this article, under “Working Cheats”: [link]
Closing
P.S. I am going through the game with a fresh character to make sure I am being thorough, If an area you want is missing, please wait. I complete on average 2 areas a day, more if one of the areas is small. At the same time, I am writing the graphs (To make them pretty like they are, I have to go through a decent amount of extra typing) and taking screenshots of everything that exists so what would normally take me 15 minutes to complete is edging to be an hour and a half.
If you have suggestions for any existing section (Mostly Trivia or missing Loot since Challenges should be complete, but if one is unclear do tell me and I’ll do my best to fix it), feel free to post in the comments.
And once again, do NOT post hate about the use of 3rd party programs, I’ll just delete them anyways.
Changelog
7/17/15: Cleared up some facts about the Geary easter egg.
11/11/14: Added and Completed Rocket Launchers and Fink’s Slaughterhouse
11/3/14: Added and Completed Sanctuary Hole and Caustic Caverns. Edited description to support guide status. Guide Officially closed at this point unless someone finds a glaring error in it (Missing area or false statements).
10/1/14: Added and Completed Hero’s Pass and Vault of the Warrior
9/29/14: Added and Completed Arid Nexus – Badlands/Boneyard and Sawtooth Cauldron
9/25/14: Completed Eridium Blight
9/23/14: Added Eridium Blight (Completed Cult of the Vault)
9/22/14: Added and Completed The Bunker
9/19/14: Added and Completed Opportunity
9/18/14: Added and Completed Thousand Cuts (Need Challenge Descripts)
9/17/14: Added and Completed Wildlife Exploitation Preserve
9/15/14: Added and Completed The Highlands, Shotgun, and Sniper Rifle. Late Night Update so tell me if you see errors.
9/14/14: Added and Completed Submachine Gun
9/13/14: Added and Completed The Fridge and The Highlands – Outwash.
9/12/14: Added and Completed Friendship Gulag, Tundra Express, End of the Line, and Assault Rifle. Revised Pistol Tables to include specific DLC. Started Organizing Areas in Alphabetical Order. Realized I was mis-spelling Challenges, fixed now.
9/11/14: Added and Completed The Dust, Bloodshot Stronghold, Bloodshot Ramparts, and Pistols
9/10/14: Added and Completed Southpaw Steam & Power.
9/8/14: Added and Completed Frostburn Canyon and Three Horns – Valley.
9/7/14: Started guide, Fully Completed guide from Beginning to Sanctuary. 3rd Party Tools Section Completed, Suggestions Welcome.
Bonus Video (Shameless Self Promotion)
If you guys have ever played through the Tiny Tina DLC, you probably remember those Floor to Ceiling mashers that just kill you and steal all your cash. A long time ago I figured the solution to these out (After around 4 deaths, oh and before you say that isn’t a lot, before I tossed myself at this I had lost around 10 million just playing through the DLC) and posted a video.
The wierd borders was from me failing to use FRAPS effectively, I fixed that later but then upgraded my computer and haven’t downloaded FRAPS since then.