Overview
This is an overlook of the basic Campaign and Scenario gameplay of Cortex Command, and will cover the phases of ground missions, bunker building, gameplay theory and general advice.
Introduction
Hi. I’m Nicolai, or Kuranes as I go by on steam. I happened opun Cortex Command a while ago and have become rather fond of it. My goal with this guide is to make the gameplay a little more accessible to a newcomer. I will not cover such things as the controls, and I will do my best to avoid optimal moves or “solutions” since it’s very much is a game about creative warfare!
This guide now has a russian version available, courtesy of Lana Del Ray: [link]
But lets get too it…!
1. Touchdown
When first starting a mission you will be choosing a place to send down your Brain-Bot and Anti-Air Drone. But where will you choose to send them down?
In this endeavor you have a very fancy tool, called Scanning. Before starting a mission you can choose to spend 250oz to reveal the surface area of a planet. But 250oz is a lot of money, especially early on. And it is up to you to decide if you can afford it and not.
But even without Scanning you can, by hovering the landing zone indicator along the ground, get a feel for the layout of the level. It should be said that all the Scanning and “hovering” in the world won’t tell you were the precious gold deposits rest, but some area descriptions sometimes give hints about at what depth gold may lie.
But generally you’ll want to find either low or high locations, such as a mountaintop or lowland between two hills. This is to provide natural cover and make the approach to your base more dangerous, by giving you open areas to gun down approaching enemies.
2. Securing the Landingzone
After touching down you need to keep your Brain-Bot intact, since losing him is gameover! And the best way to do this is to shoot everyone not bearing your uniforms.
The first, and most basic line of defense, is already down. Namely your Anti-Air Drone: It is decently armored, carries a light machinegun and 2 ground to air missiles.
But that, in itself, isn’t going to keep you safe when soldiers comes charging. Your Brain-Bot carries a Digger by default and digging yourself below ground is a great idea because that will give you a lot of natural cover and by keeping the Anti-Air Drone next to the hole, enemies are forced to deal with it. While it’s only a light gun, having to enter point blank range to enter the hole is a death sentence.

A noteworthy strategy is to make a tunnel with as many sharp corners as possible when digging. Long corridors will aid the enemy when hunting for your brain bot, but sharp turns will force them within Digger range.
At this point you might also want to get some cheap troops down with diggers to expand opun your economy, although through clever play you can simply use your initial funding, but nothing says shock and awe like completing a mission with more money than you started.
A basic soldier with an Assault Rifle (or something among the lines of) placed on an adjacent hill is also a real benefit, most assault rifles in game have good rate of fire and a decent magazine size, meaning you can pin down enemies, and tear up those who get to close.
3. Protect your Investments
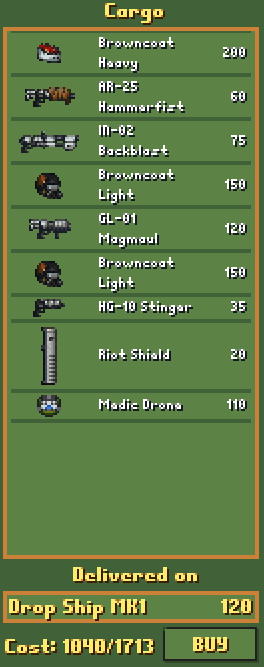
Don’t needlessly throw soldiers away, consider not only the harm your equipment can do to the enemies (and thus their economy), but the harm equipment can prevent to your economy. Maybe a side arm does cost a little extra to bring, but losing a 200oz soldier to an untimely reload is stupid. Just like a Dropship, although more expensive than a Rocket, can place your troops more safely. By the way, all Rockets and Dropships refund their cost on their safe return, but you’ll have to pay up front to get them. Can I afford to be cheap if I have a 1000+oz squad of soldiers coming in? Medi-Drones can also go a long way to keeping investments alive, especially tougher or armored soldiers.
But just the same should a smart shopper ask himself “Do I really need to purchase extra rifles when I can just scavenge?” There is no need to spend unnecessary amounts of money, just as there is no need to throw the money already spent away.
The conclusion here is that at the bottom of it all, you’ll want to make your opponent lose money while preventing your losses. You both manually have to spend money on your troops and equipment, and every time you destroy some of his hardware, he is losing money. If you through placement and equipment can make a 200oz soldier kill four soldiers of similar cost, then you’re going to win in the long run.
4. Into the Unknown
With everything, hopefully, set up we’re ready to strike at the enemy! But there is one big, and rather ominous problem here, everything outside your immediate line of sight is pitch black. That is unless you’ve scanned the surface of the planet. But let’s assume you haven’t. Right here lies the really big question of “what is waiting for me out there?” or more correctly “how many machineguns and sniper rifles are pointing my direction?” The safe thing here is to always assume. Luckily this is a venture you’ll only have to do once or twice per location. Once the darkness is revealed it will stay that way. Only by constructing new guard towers or outposts on the surface can the opponent force you to re-explore the area. Also holding Q or E lets you pan to see beyond your troop’s field of view.
There are a few ways to explore in relative safety. Having a light unit with a sniper rifle can be used to look far into the darkness, and will let you take potshots at enemies, should they not have seen you. A light unit carrying a Riot Shield and a pistol can also let you take a walkabout, without the risk of your head suddenly exploding. The third option is a little unconvential, but highly effective to the point of exploitation, a crate filled with crabs! Crates cost 20oz a piece and crabs are free, so loading up 7-10 crabs and dropping a crate will both serve as a nice distraction but will also help reveal the area as crabs will, most likely, crawl into bunkers and spaces and get themselves shot.

And don’t forget Anti-Air-Drones can help you keep gained territory free of enemy air-drops.
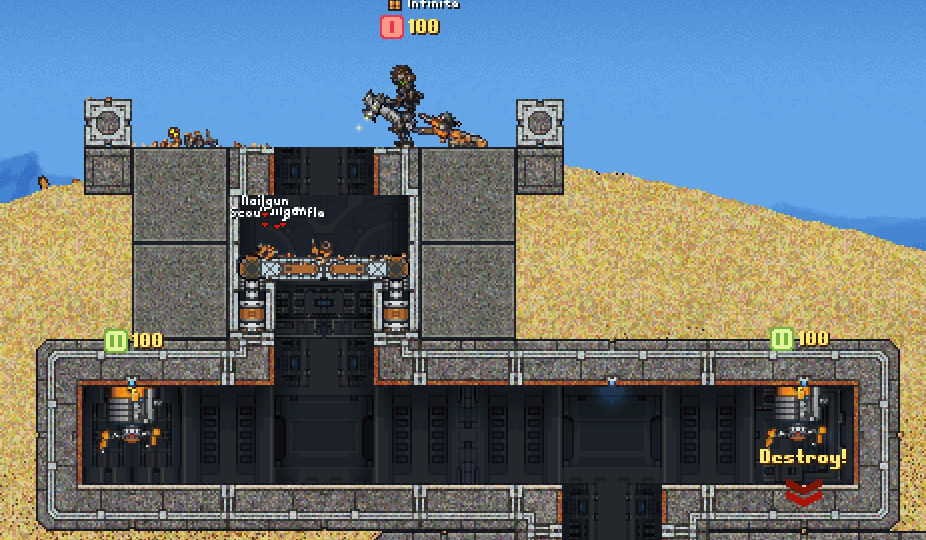
Now, let’s assume you have managed to both find the enemy bunker and take out his outside troops. But now you have to enter the lion’s den. This can of course vary from a simple hole in the ground with a few lightly armored guards, to a concrete maze of violent horrible death. If this is the enemy’s first visit here you can safely know he hasn’t constructed any bunkers, but in later territories you can never be sure how large, deep and well-guarded bunkers are.
Simply diving in is, rather obviously, a bad idea. Sometimes a machine gunner will lurk just inside and in the plain hole the Brain-Bot will have a Digger which can shred just about any equipment up close. No. We want to take our time; chances are the surface is already secured and the enemy is desperately holding on to this territory with what remains of his armed forces.
First thing you should be aware of is alternative entrances. Is his guard tower linked to the complex? Although it might take a little digging to get into, you can assume he’d want you to get in through the front door. So if we can circumvent some of his defenses this way, do it. Maybe if it’s just a network of tunnels you could dig yourself into one of his tunnels, to give him a surprise.
But approaches aside I’d like to endorse a few different pieces of equipment for bunker breaching:

Dependent on the situation, a digger is a lovely tool for creating alternate paths into your opponent’s bunker. Whether its large amounts of earth, concrete or steel there is a tool for the job.

When you never know what is around the corner, having a sheet of metal between you and whatever may lurk there is grand.

These are three great tools for hurting enemies around treacherous corners. Each of them is capable of hitting targets around a corner or down a shaft without endangering yourself either by being seeking, covering large areas or having grenades that can bounce.

A devastatingly powerful flamethrower, one of the most dangerous close range weapons short of a Turbo Digger.

Having it rest out of harm’s way provides you with a good way to let your troops patch up between encounters.

This is a great way to see through walls, and in turn around corners. That also prevents nasty surprises and thusly lets you prepare accordingly.

A brilliant, and cheap, alternative to traveling by jetpack since it isn’t affected by weight
5. How to Build Bases
After destroying your foe on the battlefield and claiming some territory for your own, you can begin building planetside bunkers. And fiddling around with controls aside, how do you do it? Actually most of it can be deducted if you’ve read the previous section, but I’ll restate it anyhow.
A bunker is your main line of defense and this is how you keep your brain safe. But when constructing it there is a number of functions it should have. The first, and most brief one, is access to gold deposits. When you’re building a bunker, you can tunnel way faster and easier than normal so make at least one pipeline with accompanying miner leading straight into a sizable deposit of gold.
Secondly you should have defensive measures, ei the gauntlet. This is a question of creating a row of staggeringly unfair encounters, any advantage you can get you should grab when constructing these. Forcing opponents to go rub up against a heavily armored drone or get them into a large room with sniper fire from all sides, is not only mean but completely encouraged! Also door systems are both cheap and something your opponent will manually have to break through. It’s a nice way to prolong his tour in your theme park of death.
Considering the previously mentioned grenades, there are a few ways you can counter-act them in your bunkers too! Grenades are affected by gravity, and can only fire so high into the air, before gravity pulls it to the ground. Having sections where your opponent has to go UP rather than just down or horizontally makes grenade usage hard for him, while easing it for you.
But this maze is obviously your last line of defense and this brings me to the third part of bunker construction. Battelfield control, stuff like Minefields, Anti-Air Drones and watch towers all serve to both keep your opponent on his toes and makes it harder for him to advance on your territory.
6. Running a Business
While we have mostly everything covered now, there is one last aspect of Cortex Command I’d like to talk about. Mainly the campaign map. Between planet side defenses and assaults you’ll have to balance your overall budget. Although I won’t break out the charts, I will be juggling a few numbers.

The campaign map is run in days (turns), and each day you can distribute your available cash among various areas. When starting out you will be prompted with various locations containing gold. At the start of each day you will receive 1000oz from each area you hold, so establishing an early foothold is essential! I’d suggest pumping ALL your initial cash into an assault of an area of your choosing.
But what can you do with your hard earned money and what should you be aware of? Well at its basic level you have three options for what you can do with your cash each turn.
1, You can launch planetary assaults.
2, You can spend money on building bunkers.
3, You can keep some in reserve in case you’ll get attacked.
It’s hard to establish guidelines when conditions vary so greatly from turn to turn, but I’ll try.
All of these options are rather straight forward, but there is something to be aware of when assaulting: about 500oz will be deducted from your assault budget to pay for a Brain-Bot and turret, so plan accordingly and keep this in mind to not get surprised by 700oz assaults suddenly running low on cash. About the planetary scanning, I can’t clearly tell you when to and not to do it. But spending the 250oz is a great help when you’re assaulting enemy bunkers!
Bunker building you should have down by now; otherwise there should be sufficient information in the previous section. And the reserve is basically always a good thing to keep, because it really hurts having spent 2000oz on a bunker complex in another area and having to defend this one with your remaining scraps of cash.
7. Quick Summary
Here is a quick list of guidelines compiled from the previous sections, for easy access and visibility:
• Try to find a drop zone with a lot of natural cover
• Create natural cover for your brain by digging it down
• Favorable conditions is the main way to get more bang for your buck
• Don’t throw away your men’s lives, clones are expensive
• Don’t buy equipment you can just scavenge
• Be wary when exploring – always assume
• Don’t take the entrance if something else is available
• Grenades go a long way in tight spaces
• Bases should create as favorable conditions as possible for your troops
• Remember 500oz is deducted from your assault budgets
• Try to keep monetary reserves, just in case
• Most importantly of all, have fun and don’t be afraid to experiment!