Overview
Army General Strategic Map Tips valid as of Nov-20.The tips/exploits below range in cheesyness: from a fresh, mild Cheddar to a well matured Limburger.
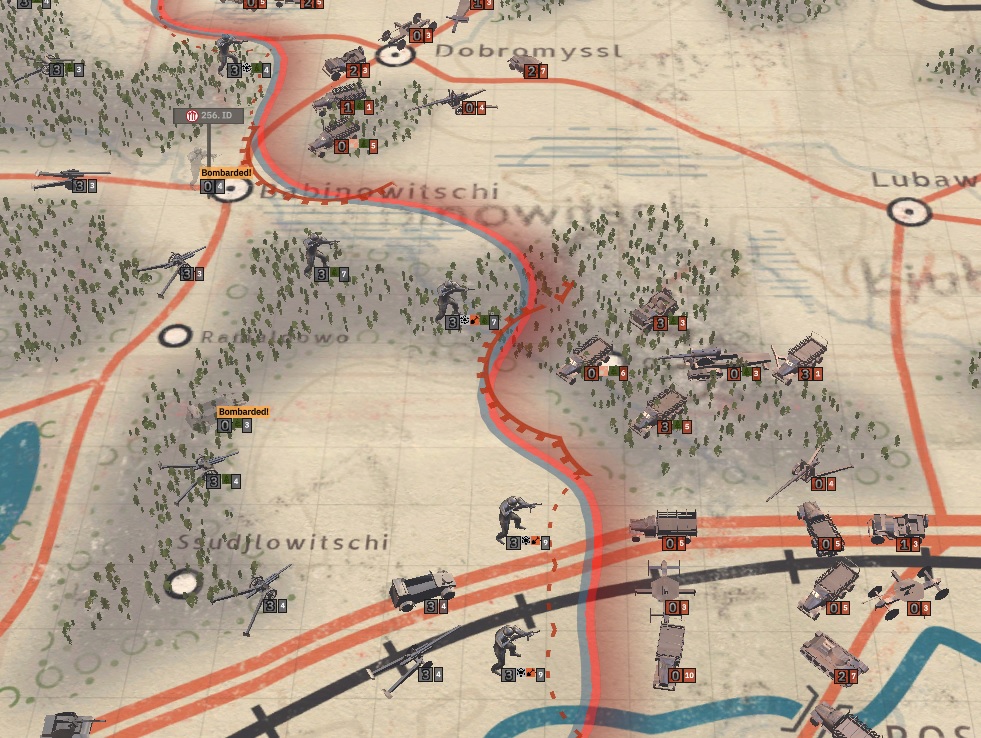
Bridge Defences
Place 1x unit, dug in, 2x spaces behind the central square of a bridge.
This will mean that (ignoring regiments with 4 Action Points) that only 1x unit can get in range to initiate battle as they must be on the bridge to be in range to start a battle. Thus your dug in unit can only be attacked at most 1x per turn. This means you can bring in your best supporting regiments and do not have to worry about a 2nd attack.
If you have artillery you can bombard the unit on the bridge and/or any 4AP units within range to stop any attacks completely.
By funnelling the attackers (most of the time Soviets) to a bridge it means that the enemy cannot take advantage of any numerical superiority by forcing you to spread out your defences to cover a broad front.
The above strategy is also effective on the Karelia campaign as Finland to keep the Soviet regiments funnelled in the gaps between the lakes to negate their superior numbers.
Air Force kick
The AI is not the best at reacting to flanking manoeuvrers. This means that on certain campaigns, like Orsha and Bobruisk for the Axis, it’s not too difficult to send a regiment to the enemy airfield. This will boot out all air units currently at this airfield.
If they retake the land they can (if available) bring in reinforcements. However in most campaigns most of a sides aircraft strength is the starting regiments.
Encircle enemy units
As mentioned previously the AI is not good at reacting to regiments flanking. Thus always be on the lookout to make flanking moves, preferably with motorised units with 4AP.
Artillery and Air bombardment
Notice that elite enemy tank regiment near your front lines next to all those infantry regiments? Don’t worry, bombard it.
You have taken their most powerful regiment out of action and don’t need to use up a regiment slot/s just for anti-tank capabilities.
AA Regiments
On the face of it AA regiments look naff. However they are a very versatile support unit.
i) AA screen:
If your AA screen wins an interception battle it will force an enemy air unit to retreat. This is extra advantageous if the enemy attacks you and 1x of their regiments is aircraft. You haven’t not just denied them the use of Aircraft in the tactical battle but they have wasted a regiment slot which they could of used to bring in more infantry, artillery or tanks.
The longer you have a AA regiment dug in the larger it’s defence bonus will be when combat is initiated with an intruding Air regiment. Thus get them dug in as early as possible. The combat values of AA regiments on their own are in most cases minimal compared to enemy air regiments (especially on hard mode), thus the defense bonus is key. Without it your AA will most likely lose.
ii) Anti tank/anti-vehicle:
Most AA units will have high velocity guns of 75mm or above. These can be used to knock out enemy tanks and vehicles at range. Be aware of the penetration values of the guns (both with APBC and normal AP) and the enemy tanks. E.g. if you have Flak 88mm and are facing light tanks you can engage at 2,000m. If you have a Romanian Vickers ACA 75mm and are facing T34-85’s you want to be doing close range shots, preferably ambushing from the side.
iii) Anti-aircraft:
Yes I know, duh!
If you want to suppress and make enemy aircraft retreat before they have the chance to attack your lines use large calibre AA.
If you want to kill aircraft use small calibre. Be aware though that their lower range and suppression means there is more chance the enemy will be able to attack one of your units.
This is because low calibre AA has a higher ratio of damage to suppression compared to heavy AA. When you only have heavy AA often the enemy is already fleeing due to low morale before you can kill them.
Dug In units are king
When used correctly the AT & MG bunkers, Barbed Wire and Trenches provided by the dug in status are massive force multipliers.
AT bunkers can transport snipe and deal with light armour at distance or ambush heavier armour at close ranges.
MG bunkers (especially MG42 ones) can suppress and mow down hordes of attacking infantry.
Barbed Wire can be used to funnel the enemy as AI are coded to generally avoid it as well as slow them down in your ‘killing zones’.
Trenches give your infantry units more protection and stealth than buildings or thick forests and can be placed anywhere. Trenches are also important in creating a ‘leadership chain’ which allows you to give up to +2 veterancy to units across your frontline on the tactical map. Likewise if your leader units have radios they can provide ‘corrected fire’ to any artillery (except mortars) within 1,500m of their position.
Even if your bunkers get destroyed they would have at least forced the enemy to expend ordnance which they would of otherwise used against your own units. As long as the regiment keeps it’s dug in status the same defences will be available in the units next defensive battle.
Preserve units in Dug In regiments
On a battle initiated on your dug in regiment try to minimise the amount of units you place from the dug in regiment.
If you do deploy units from your dug in regiment try to place them in safer areas.
Doing so will preserve the strength of your dug in, frontline regiment, meaning you don’t have to rotate it. Rotating it would be risky as it would take 2x turns to move in a new unit, set it to fortify, and finally have the dug in status. When your non-frontline units become too depleted you can rotate them out.
All this means that if the enemy eventually launches an attack with 3x elite regiments then you can defend against it with 3x strong regiments; 1x on frontline dug in and 2x strong non frontline regiments. This is instead of defending with just 1x beaten up regiment and 2x strong non frontline regiments.
Spread out frontline regiments
Each ground regiment has a ‘aura’ of 1x square around the unit which enemy units cannot enter.
Thus, you can leave 2x empty squares between each front-line regiment. Thus if I had 4x regiments and I had to cover 9x squares then I would have 3x regiments on the frontline whilst 1x regiment is in reserve and is free to support any if they are attacked.
–
-R-
–
–
-R- -Reserve-
–
–
-R-
–
However, with just 1x square gap then all 4x regiments would have to be on the front-line. If I were to use one of the neighbouring regiments to support then they would lose their dug in status (if they had it):
–
-R-
–
-R-
–
-R-
–
-R-
–
Slow down enemy advance whilst retreating units without battle
On some axis campaigns like Baranovitchi and potentially Berezina you might want to make a strategic withdrawal to a defensive line you are setting up further back. However, you can stall the enemy advance by only retreating enough squares so that no enemy regiments can initiate battle with you on your turn. Thus in a perfect scenario, facing only 3AP enemy regiments and no exposed flanks, your defensive line can retreat just 1x square per turn indefinitely. This gives you lots of time to get regiments dug in, reinforcements brought in, AA screens to accumulate a defence bonus etc.
Whilst doing this be mindful of enemy regiments with 4AP, especially when on roads. They have 1x AP of travel free to use to get themselves into a attack position. Thus if both you and the 4AP regiment is on a road be wary of them attacking you even if they are 3-4 squares away.
Recon the opposing side by playing their campaign
While a bit cheesy before or during you start a new campaign e.g. Bobruisk as Soviets, you could start that same campaign as the Axis and see the full extent of the units they have, positioning, what reinforcements they can get and where they can be placed.
This means that you know from the start where they are strong and weak, where you expect them to come from etc. An important note is enemy air regiments. If you know the starting composition of the enemies air units, what they could bring in then and which ones they had used during the current turn, you can more accurately predict if and what they might bring in.
Roads and defensive lines
On parts of some campaign there are North-South roads which you can setup defensive lines near. This includes the North side of the map on Berezima or Centre on Baranovitchi.
In such situations place the regiments you want dug in 1x square in front of the road while your non-frontline regiments you want to support, preferably motorised, on the road. By placing on the road these units use up less AP for each square travelled, meaning nearby regiments can come in Phase A or B rather than Phase B or C. The roads also help to quickly move reinforcements to other areas on the front-line and rotate depleted units without losing as much AP.