
Overview
This guide shows how to export and upload models from Blender to the SteamVR Workshop.The guide assumes you have a textured and U/V mapped model ready for use.Note: This guide is out of date. SteamVR does not support direct import of meshes anymore. See the documentation for SteamVR Home for instuctions to make your own Environments.https://developer.valvesoftware.com/wiki/SteamVR/Environments/My guide on how to import models from Blender:http://steamcommunity.com/sharedfiles/filedetails/?id=890780029
Preparing the model
Before exporting the model, we need to make sure it is in a format suited for SteamVR.
Arrange you meshes into a single object, and scale it so that the units are represented as meters.
SteamVR only supports a single material per model, and any lighting needs to be pre-baked into the texture. Make sure your object only has one material, and that it has the texture file assigned to it.
If your model is made up of multiple materials, you can duplicate the object, U/V map it to a single space, and bake textures from the old object(s) to the new object. Save the texture as a PNG file and replace the materials of the new object with a new one with the texture assigned to it.

Exporting to .obj
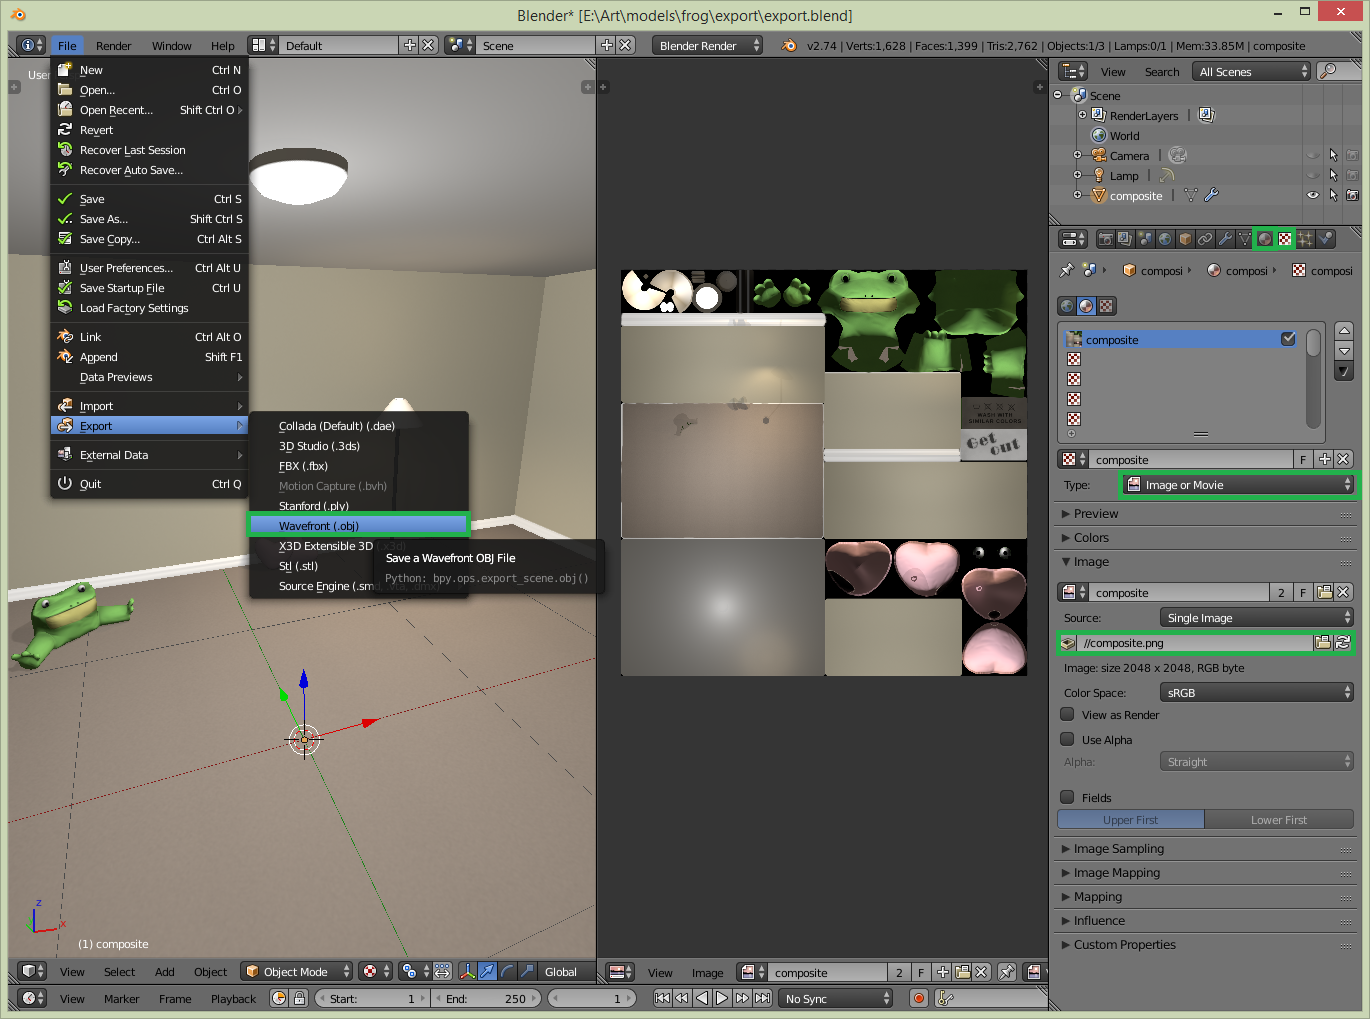
To export your object, select it, and select Wavefront (.obj) from the File -> export menu at the top left.

Select the Selection Only option, and the Smoothing Groups option if you are using the Edge Split modifier. The other options can be left to their default settings in most cases.
Save the .obj file in the same directory as your .blend and texture file.
Move or copy the .obj and .mtl files the exporter created into an empty directory, along with the texture file. The Workshop uploader uploads everything from the directory the .obj file is in, so be sure to keep it clean of anything you don’t want to make public.

Uploading to the Workshop
Note: As of writing, the ability to upload models is only available in the beta version of SteamVR.
From the SteamVR dropdown menu select Workshop and Upload New.

Select the model type from the dropdown, and fill in the fields as needed. Select the .obj file for the File field, and add a thumbnail image. Make sure to set the visibility to Private (it can be changed from the Workshop page) so that you can test and verify that the model works before releasing it. Click the Submit button to upload your model to the Workshop.

To verify that all files uploaded correctly, subscribe to the model and navigate to the SteamSteamAppsworkshopcontent250820 directory. All subscribed items will appear as subdirectories. Find your item and verify that all files are present. The thumbnail and a .json metadata file should also be there.