Overview
The walkthrough beats Haydee.
Entering the Blue Zone
Let’s load up.

Here’s what we need in our inventory before heading into the final zone of the game:
Weapons and ammo – we’ll be finding ammo on the way, but there are a lot of hostiles. As long as you have something that shoots lead on you, you should be okay.
Wi-Fi Remote and Receivers – you should have at least two Receivers. If you have all three, all the better.
Crowbar – for opening various crates.
Body Armour and Medkits, optionally – if there’s ever a time to care about survivability, it’s now. We’ll be finding quite a few Medkits in the blue zone, so don’t be shy about using them if you take damage.
Pliers, optionally. If you have them, you’ll avoid taking a big chunk of damage right at the beginning of the Blue Zone, but that’s about it.
Two 
At least one inventory space – the more the better, but you need to have one.
When you’re ready, leave the Green Zone and return to the Bridge.
Bridge
Move around to the right and climb back up to the bridge.
On your left is the Blue Zone.


Blue Zone, Entrance
Head through the door opposite. New to the Blue Zone, we have some greenery…

Water Platform Room
And water! Isn’t that a nice change from pitch-black darkness and toxic gas?
This room in particular is a whole jubilee of pillars and platforms and buttons and gates. There are seven buttons in this room, all toggling a different platform or unlocking a certain gate. Don’t worry if the map doesn’t make any sense – we’ll take it step by step.
First, if you hang down from the platform you’re initially standing on and shimmy around to the other side of the blue railing, you can find a Medkit amongst the plantlife. There’s quite a few items hidden in this fashion in the Blue Zone.
Let’s kick things off by hitting Button 1, right next to the door you entered from.
This will raise a platform in the water you can jump across to hit Button 2 in the back-left corner.
Take a jump into the water. Haydee’s swimming controls are a bit awkward – hold shift to swim, and hold the right mouse button to direct Haydee towards the crosshair, allowing you to swim up or down. You might want to practice underwater swimming for a little bit while you’re here getting wet.
Also along the back wall of the room, directly opposite the entrance door, you’ll find a pillar with a button just under the water on the right side. That’s Button 3. Hit it, and then swim back to the entrance platform.
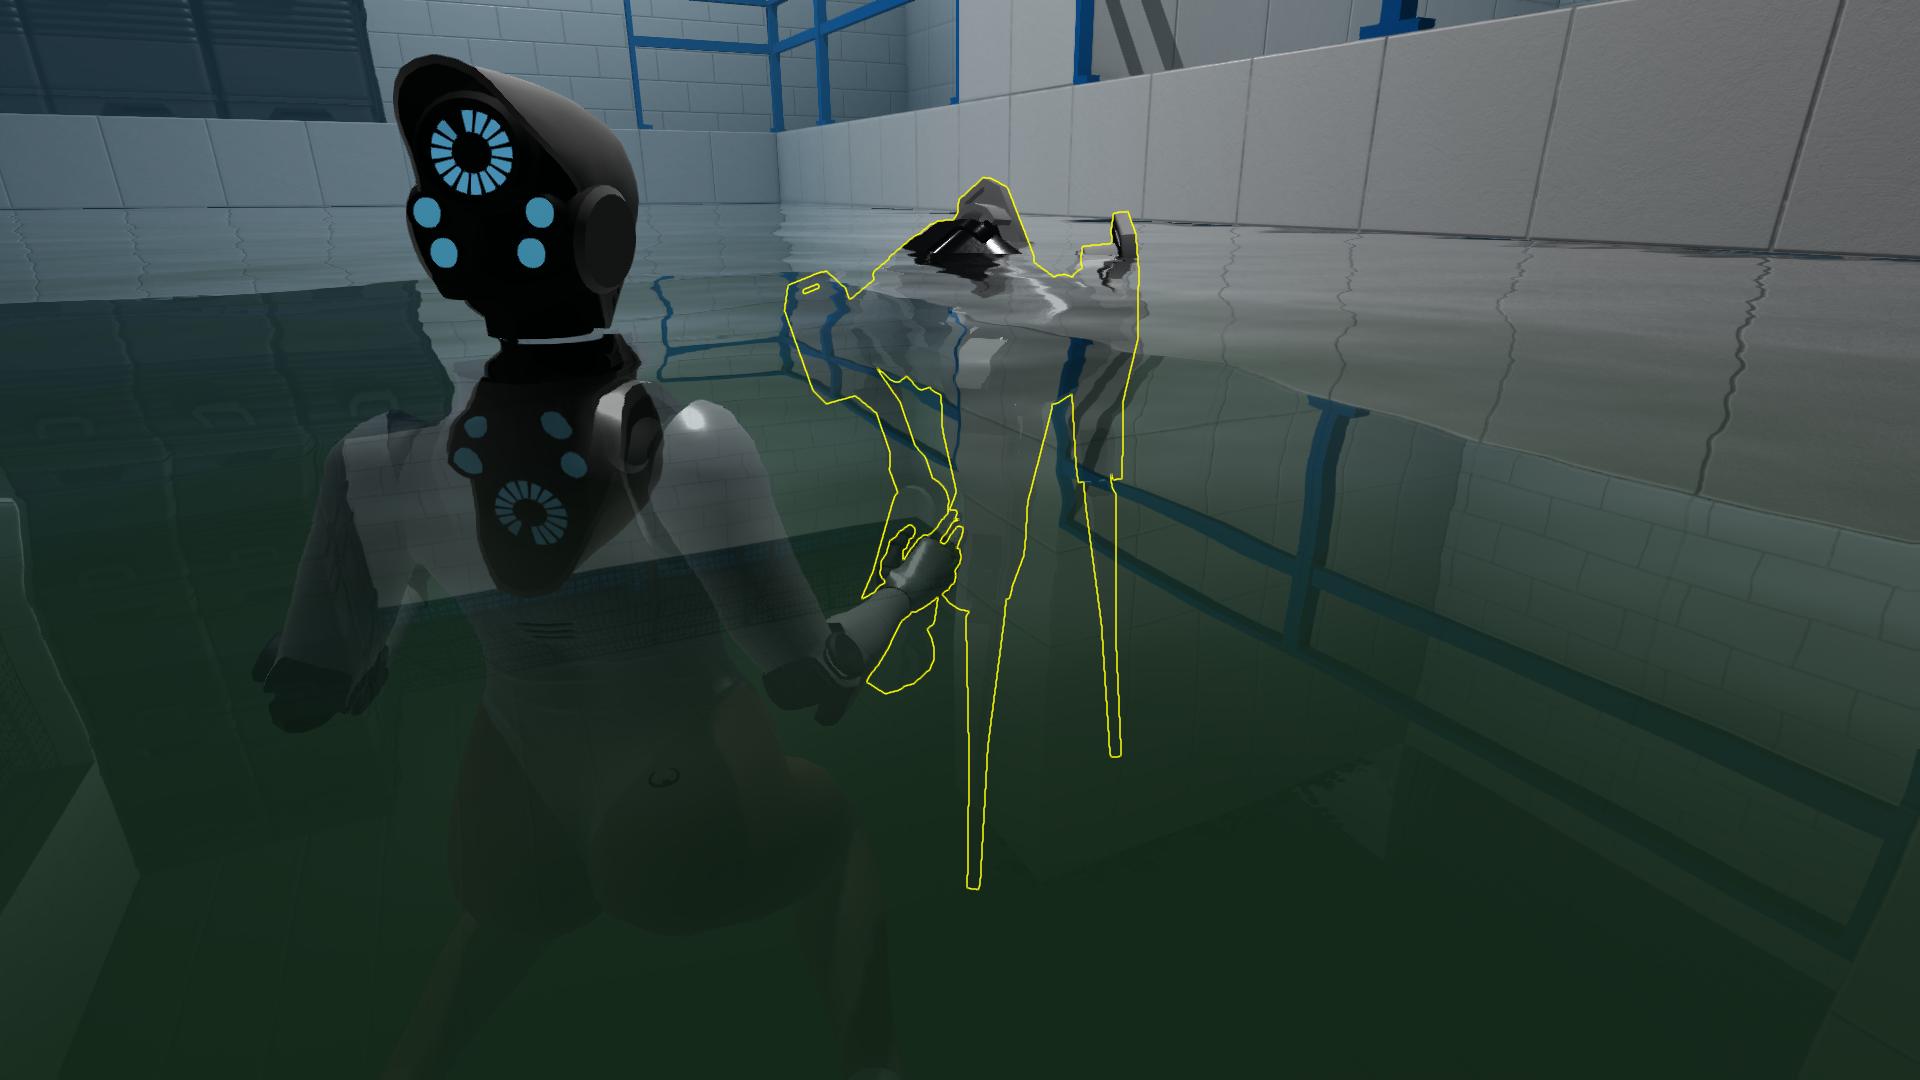
Make your way across the pillars in the water, one-by-one, until you reach the back-right corner with a grate and Button 4. Don’t push the button – it’ll just drop you in the water like some kind of sick joke. Instead, place a Receiver on it.
Jump back onto the previous platform and hit your Remote. This will raise a pillar in front of you. Jump onto it and jump to the locked gate. Then, hit your Receiver a second time to open the gate.
You can just continue if you don’t care about the Receiver – you only need one from here on. To get it back for a future achievement, read on.


At the exit door, you’ll encounter Button 5 and Button 6. Hit button 5 – the one on the left. Don’t hit Button 6, place another Receiver onto it. Then, hop back into the water.
Make your way back across the platforms and you’ll see a new pillar raised with a little crawlspace above it. Jump over and climb into it, but hold at the corner.
There’s an armed mine directly underneath the next button. There’s not enough space to be able to get to a safe distance, so if you want your Receiver back you have only two choices: disarm it with the Pliers, or take damage.
With the Pliers, inch forward slowly until you can get the yellow highlight from the mine. Disarm it, and pick it up for 1 Mine if you can spare the space.
Without the Pliers, just back yourself as far as you can and shoot it. You’ll take a hefty chunk of damage (about 40-50% of your health), but at least you have the Medkit from this room.
Snatch your Receiver from the button and hit it to raise the platform in front of the locked gate again. Then, return back to the platforms, jump across and hit your Remote at the gate to open it once more.
To the right of the exit you can find 10 Magnum Rounds hidden in a bush. Grab your Receiver from Button 6 and continue through the door.


Working through the Blue Zone
A-B Connector
Be ready to fight.
A Walker is directly ahead of you, and a Slasher awaits just around the wall to the right. The Walker may be closer, but it’s still a better idea to target the Slasher first.
Just step forwards and it’ll rush you before the Walker has even seen you. Kill it, and then kill the approaching Walker.
Plug one of your two Blue Keycards into the Blue Keycard Reader to the left and enter the door.


Room A-1
On the back-right corner of the room as you enter, you can grab a Medkit hidden in the shrubs.
This fight is tricky, and requires some good reflexes. First, hang down from the ledge and shimmy as far to the left as possible. There’s a Slasher around the corner just under the entrance, and it’ll attack as soon as you drop to the ground. There’s a rather long landing animation for Haydee, so you’ll need to drop, switch to your weapon while in the air, and stagger the Slasher.
Even with perfect execution you’ll only be able to hit it a few feet from where you’re standing, so don’t fret too much if you take a hit.
Head around to the Slasher was standing. You’ll find a button and a few dead Haydees. One of the corpses (third from the left) is holding 10 Pistol Rounds. Be ready to fight, and hit the button.
This will open the next door, and also spawn a Slasher in front of it. Should be no problem for a battle-hardened Haydee like yourself. Kill it and continue.


Room A-2
To your immediate left is a crate you can Crowbar open containing 10 Magnum Rounds.
You can search this Water-Walker in the middle of the room for 10 Pistol Rounds. I guess they’re not the best swimmers.
Pull yourself up on the other side of the water, and you’ll see an armed mine to your right. Shoot it, or disarm it with the Pliers for 1 Mine.
In the shrubbery in front of where the Mine was you can find a whopping 5 Diskettes.
Climb up onto the crates and then grab the ledge from there. Shimmy to the right to the corner, and then pull yourself up to the crawlspace. Enter the crawlspace and head left.
At the end of the crawlspace, hit a button shrouded in darkness to open up a second crawlspace at the exit.
Returning back from the crawlspace, hang off the ledge and start shimmying right, over where the armed mine was on the wall.
On the other side, climb up into the crawlspace to the left of the door to find a corpse with 20 SMG Rounds.
In front of the crawlspace you’ll see a pillar next to the exit. Grab onto it and shimmy around to the right to find a button. Hit it to give us a shortcut if we ever need to pass through this room again, and then exit through the door.


Room A-3
Climb around the little pillar to your left as you enter to drop down onto a small platform above the water. From here, jump clear across the water and grab the ledge under the railing on the opposite side.
This is about the longest-distance jump possible in Haydee, but if you could pass Room 3 of the tutorial way back in the beginning, you can definitely land this. Just jump from the very edge of the platform.
On the other side, climb up into the shrubbery past the big grate dividing the room.
There are 10 Pistol Rounds in the shrubbery at the end, but what we really want is the button on the wall opposite where you just jumped to. Hit it and turn around.
The immediate effect is pretty hilarious – a dead Walker will be released from a cage at the bottom of the pool, and shoot out of the water like a majestic dolphin before splashing onto the surface. Lovely.
Either climb back the way you came, or take a dive underneath the big grate. I suggest putting your Crowbar onto your hotbar, because there’s a locked crate beneath the water.
There’s a series of crates in a line at the very bottom of the deep pool in this room. The crate we want is second-closest from the entrance, or second-furthest from where you just pushed the button.


Quickly Crowbar it open for 20 Magnum Rounds – a full stack!
Finally, loot the Walker floating in the water like a dead fish for a 
Under the water on the platform you made the long jump from is a button that’ll open up the one and only way back.
Climb back onto the platform, make the jump across again and pull yourself up. On the left is a Yellow Keycard Reader – how convenient. Be ready to fight! Unlock the door and head through it.


Room A-4
There’s a Slasher in front of you. Kill it and turn around. Aim at the door you just entered from and start walking backwards.
A Slasher will spawn directly in front of you. Scrap it.
A third Slasher awaits around the left corner. Strafe out and put it down. Enter through the door behind the third Slasher.


Room A-5
Don’t try this jump – you’ll die.
Instead, climb up onto one of the pillars to your left or right and grab a Medkit from the shrubbery.
Jump safely into the water below and enter the door.


Working through the Blue Zone (continued)
Room A-6
This room has two Slashers, and they’ll both attack you at the same time. One’s on the first right, and one’s further down the room. Raise your weapon and aim down the submerged corridor. Walk slowly forwards until they aggro and rush you.
Kill them both and enter the door on the first left.


A-Save Connector
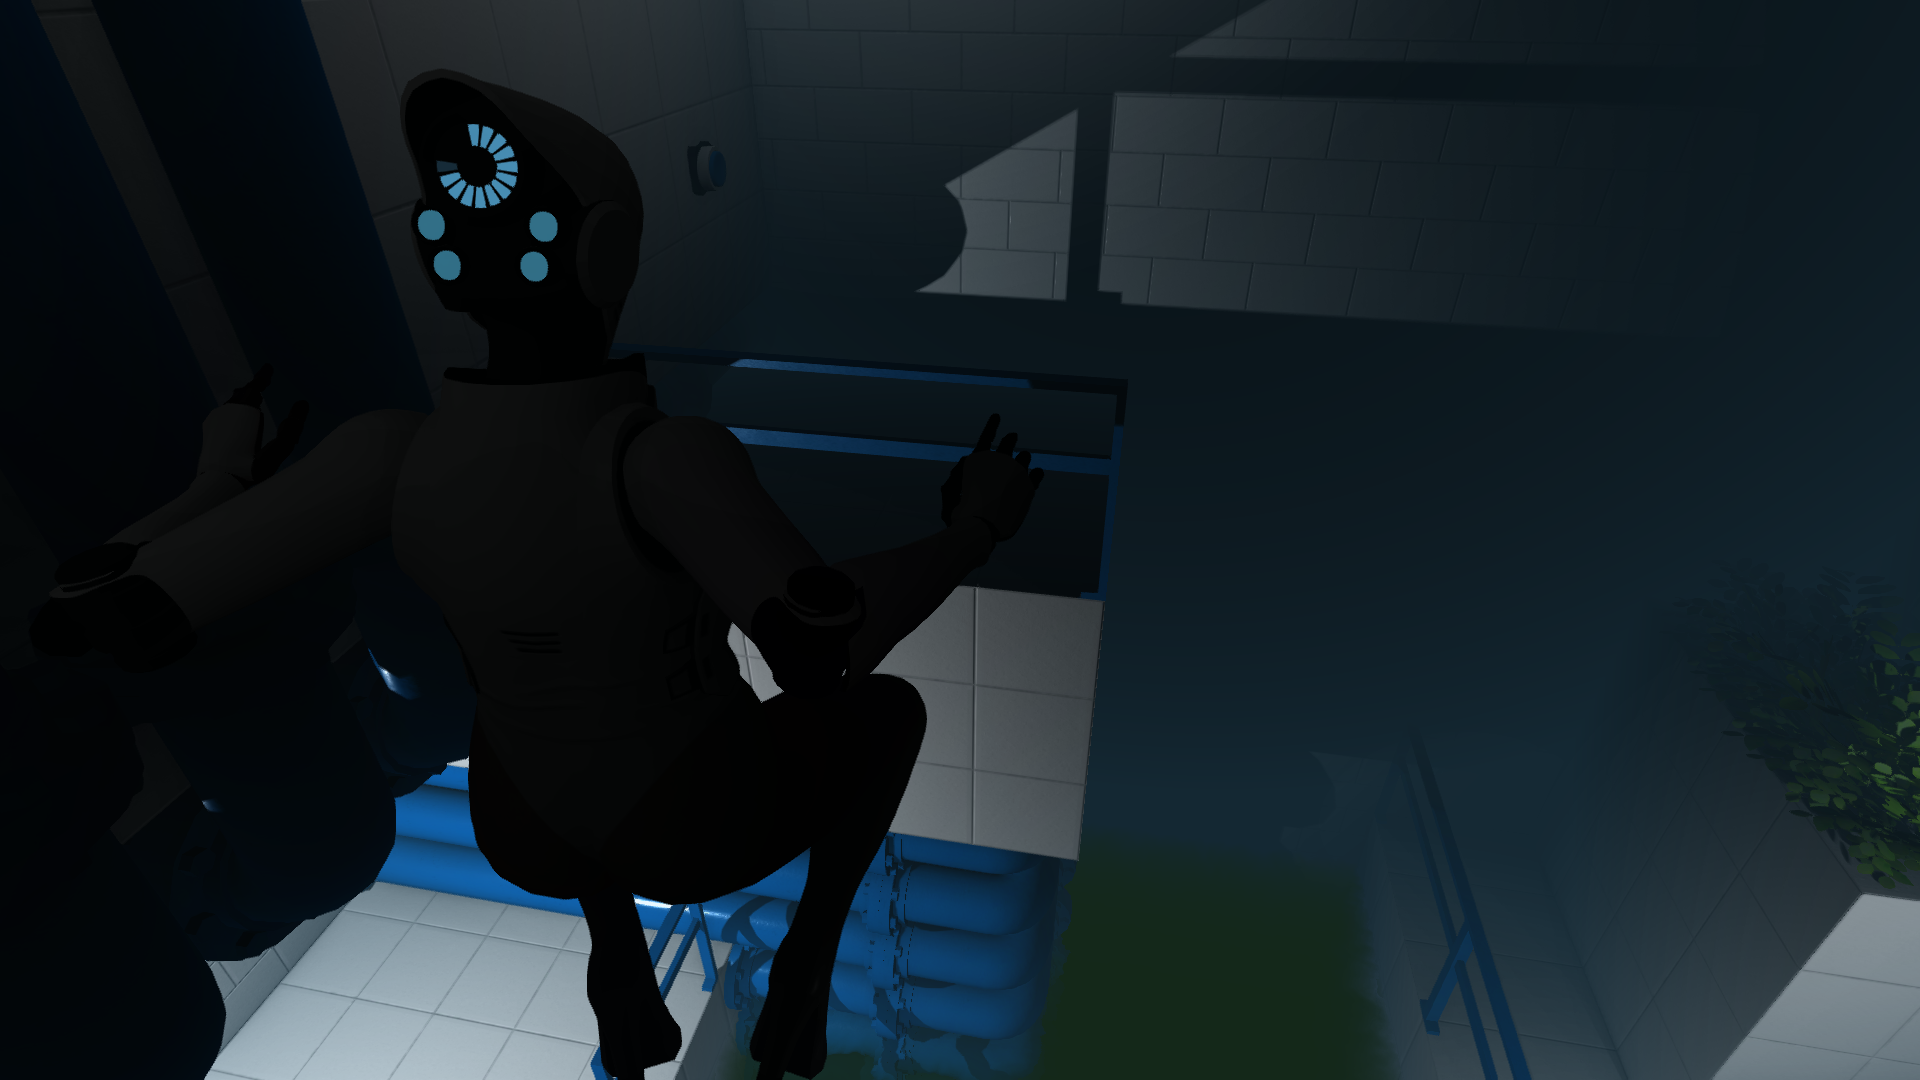
Head through and climb up in front of the locked door. Climb up to the right, jump across the water and grab the ledge beneath the railing.
Shimmy around to pull yourself up on the ledge and hit a button.
Turn to your right and jump across the water again to grab another ledge, beneath another railing. Up here you’ll find a second button to push.


A-Save Point

Store your Pliers, as you won’t need them any longer. Here’s what we should have:
At least one weapon
Wi-Fi Remote and all three Wi-Fi Receivers (if you have them)
Your other Blue Keycard.
Crowbar, if you want to – it gets you a Medkit, but that’s about it.
The Screwdriver
I suggest you also bring a Mine, if you have one.
You should probably save your game, because there’s really only one or two more save points after this.
Once ready, hit the button and open the door opposite the save point to exit.

A-Save Connector
Head back over the water into the previous room.
Room A-6
Three more hostiles have spawned in this room.
Down the left end of the room, a Slasher and Walker wait on either side.
Down the other end, a Slasher is waiting at the entrance. As soon as one Slasher sees you, both will attack, so raise your weapon and start walking down the right – towards the entrance.
Kill the Slasher that charges you and spin around to deadstop the second one.


Room A-7
As you enter, jump straight forwards, grab the ledge and enter the crawlspace with your Screwdriver.

Pink Keycard Room
Four buttons. This is similar to the Power Room in the Black Zone, but instead of needing to hit two buttons at the same time, you need to hit four.
If you don’t have all three Wi-Fi Receivers, you’re going to need hands like the Flash to open this gate. I wouldn’t even bother. If you do have them, place them all on and give the Remote a click – right as it beeps, hit the fourth button. If timed right, the gate will open.
Inside, you can find the 


⠀⠀⠀⠀⠀⠀⠀⠀⠀⠀⠀⠀⠀⠀⠀⠀⠀⠀⠀⠀⠀⠀⠀⠀⠀⠀⠀⠀⠀⠀
⠀⠀⠀⠀⠀⠀⠀⠀⠀⠀⠀⠀⠀⠀⠀⠀⠀⠀⠀⠀⠀⠀⠀⠀⠀⠀⠀⠀⠀⠀⠀⠀⠀⠀⠀It’s beautiful!
⠀⠀⠀⠀⠀⠀⠀⠀⠀⠀⠀⠀⠀⠀⠀⠀⠀⠀⠀⠀⠀⠀⠀⠀⠀⠀⠀⠀⠀⠀⠀⠀⠀⠀⠀⠀It’s sexy!
⠀⠀⠀⠀⠀⠀⠀⠀⠀⠀⠀⠀⠀⠀⠀⠀⠀⠀⠀⠀⠀⠀⠀⠀⠀⠀⠀⠀⠀⠀⠀It’s… completely useless.
Aside from an achievement, it serves literally no purpose whatsoever and I have wasted your time getting it.
Just throw it away, grab your Receivers and leave this pathetic, pathetic place.

Room A-7
With that pointlessness out of the way, drop down into the water, turn away from the door next to it, and dive.
You’ll swim past a turn – keep heading forwards and back up into air.
Here you’ll find two corpses that you can loot for a Medkit and 20 Pistol Rounds. Jump back down into the water.
The floor of the water here is littered with scrapped Slashers. Two of them contain loot.
Just on the left side as you jump back in, fourth from the button ledge, you can loot one for 40 SMG Rounds.
Swim around the right corner, and then around the next left corner. Immediately around the corner, also on the left, you can loot another for 3 Diskettes.
Around the left bend you’ll pull yourself up to another door – head through.


Room A-8
Whew. We got some climbing to do.
Jump up the ledge to your left, shimmy around and pull up. From there, jump to the next ledge and pull yourself onto that.
Grab the ledge with the grating in front of you and shimmy to the left, climbing up a series of platforms.
At the top you’ll reach a door – don’t enter it, instead, turn around.
This is another max-range jump. There’s a lot of fall beyond you – if you’re close, but miss, you will probably grab the ledge down lower and survive.
I would still be very careful with this jump, but you should be pretty experienced by now. Make the jump and pull yourself up.
Plug your second Blue Keycard into the Blue Keycard Reader and continue.


Room A-9
Disregard the somewhat forboding hostiles locked in cages and continue through the door.

A-Save Connector
This is actually the room in between the Save Point and the submerged corridor, at the very top.
The way forwards is on the ledge up to the left – there’s a little gap you can squeeze through.
On the other side is a door. Head through.


Orange Keycard
Letter Tiles Room
In front of you is a 4×4 series of sixteen tiles, each one with a letter on it. You need to walk across the letters in a certain order, to spell something out.
Can you figure out the word? I’ll give you a hint: it’s probably the most obvious word you can think of.
The solution is H-A-Y-D-E-E.

You can also walk over the letters H-A-V-O-C for an achievement, and S-H-I-T if you’re as immature as I am.
Once solved, the grate on the opposite side of the room and you can loot a Haydee corpse for the 
This keycard is the sole reason the previous 95% of the game exists. This keycard opens the ending.

But there’s more than one ending. If you wandered off course in certain other zones, you may have even already found an Orange Keycard reader elsewhere.
We’ll get around to choosing the ending in a short while. For now, we backtrack.
Grab the Orange Keycard and exit back out.
A-Save Connector
If you wanted to avoid the fight in the next room, you could always jump down to the water and take the long route, but you should be okay taking the quick way – especially if you have a Mine.
If so, crawl back through the gap into the previous room.

Room A-9
Be ready to fight.
Somewhat predictably, once you’ve walked forward, all three cages will open and the hostiles will attack.
The solution: a Mine. Just place it in between the two and move forward. The hostiles will be released and two of them will immediately be killed, leaving you with just the one in front of you to deal with.
Without a Mine, you’ll have to be very quick with your shots and turn around rapidly. Backpedalling can help with this.
The lone Slasher’s cage contains a button you can use to open the door again. Head through.


Room A-8
Either make the jump back or try to drop from the ledge onto the ledge below – either way, enter the opposite door.

Return
A-4 to A-8 Connector
The world’s lamest Walker waits immediately around the corner.
Be ready to fight and walk into the darkness – a button on the back of the second pillar opens the door ahead and drops the Walker’s lame brother in front of it.
Kill it. You should still be ready to fight as you enter the next room, as two hostiles will attack as soon as you enter.


Room A-4
A Slasher will immediately attack around the right corner. Kill it first, and then deal with the Walker ahead of you. Enter the door behind the Walker.

Room A-3
Head back onto the other side of the grate and climb onto the platform. If you forgot to raise the platform, the button’s in the water next to the opposite door.
Either way, head through the door.

A-Return 1
Jump into the water and pull yourself up onto the ledge in the back corner.
From there, turn around and jump to the ledge opposite.
While hanging onto the ledge, hit the button. Drop back into the water and return to the platform you just jumped from.
To the left is another ledge you can grab. Pull yourself onto it into the other corner, and enter the crawlspace.
Drop out the other end, be ready to fight and unlock the door.


A-Return 2
Kill the Walker at the top of the stairs and then hit the button immediately to your left from where you entered, next to the door. Then, head up the stairs into the door opposite.


Entrance
You can drop down to return to the Bridge if you like, but let’s err on the side of efficiency and get to the final save point instead.
Head into the next door.
A-B Connector
Having done a full loop of the outer ring of the Blue Zone, let’s head into the inner rooms.
Opposite the entrance is a button. Be ready to fight and press it, – doing so will spawn a Walker to your right.
Deal with it, and then head through the now-opened gate to jump up and grab a ledge.
Shimmy around to the right side, where you’ll find 20 Pistol Rounds and a vent. Open the vent with your Screwdriver and climb on through.


Room B-1
Drop down from the gap in the crates and move around to the left. Jump up onto the crates again and look up and to the left to see another gap near the ceiling. Climb through this and follow it around for a Medkit.
Safely drop back down and move back to the crates you climbed up onto. Turn around and you’ll see another stack of crates to jump to.
Further back, in the corner, you can Crowbar a crate open for another Medkit. Crawl under the little gap in the grating through the water and enter the door.


Room B-2
There are some hostiles down to the left – ignore them for now and enter the door.

B-Item Box Room
Climb up onto the black crates and turn around – you’ll see a little room a bit up you can jump to.
You’ll find an Item Box here, but no Save Point to be found. There is actually a Save Point for this box, but it’s in a completely different room, down the hall.
The items you’ll need will… vary, but one thing you absolutely have to have on you right now is a weapon and ammo.
I strongly suggest you bring 1 Diskette from your Item Box – that way we can save in the next room and take stock.
There’s a crawlspace just next to those black crates back down that contains 20 Pistol Rounds – yippee.
Once you’ve grabbed a Diskette, exit back out and get your gun ready.


Room B-2
The path below splits into two. There’s two Walkers waiting – one on either turn. The one on the left is a little closer, so get it to see you and attack. Then you can backpedal and kill them both.
Take the left turn.


B-Save Connector
There are two drop-vents in the ceiling of this room, but they won’t spawn hostiles yet. Head around the corner and enter the next room.

B-Save Room
Climb onto the Save Point itself and move around to the left to find 30 SMG Rounds tucked in the wall.
Additionally, if you walk through the shubbery to the right of the Save Point…
It’s really well-hidden, and near impossible to see without the Night Visor, but there’s a dead Haydee slumped into a corner of a tiny little room beyond.


On her contains a Power Node.
You know, one of these things:

I… don’t know why. It doesn’t seem to have any purpose. I guess we could’ve come here first thing and made the Black Zone marginally faster, but otherwise this is just a worthless little secret. It doesn’t even have the excuse of having an achievement attached like the Pink Keycard.
Anyway;
Here we make a decision.
Haydee has three endings: a ‘fake’ ending, a ‘true’ ending, and what I would call the ‘third option’.
You can reload your save after one ending and see the other two, although they’re a rather simple and poignant end.
I’m going to tell you how to get all three, starting from this Save Point. If you want a specific one (the ‘true’ ending and ‘third option’ are almost identical except for one small detail), just select a particular section from the sidebar.
Or, if you want all three, just read on.
No Way Out (Fake Ending)
All three endings begin this same way: by getting ready to fight and exiting the save point.
B-Save Connector
As soon as you step forward, two Slashers will spawn – one at either door. The one that drops in behind you is only going to be a couple of feet from your face, so turn around, aim behind you, and start walking backwards.
You have to be super quick with turning around, as the closer Slasher is actually slightly delayed to throw you off. If it suits you, you can try sprinting to the corner to catch the further Slasher off first and then turning around.
Either way, with them both dead, remain ready to fight and continue back into the next room.


Room B-2
A Slasher will immediately attack from around the right corner. Be ready for it, and deadstop it.

If you need to duck into the Item Box Room, here’s a quick inventory checklist:
Weapon(s) with ammo
Orange Keycard
Body Armour and Medkits
That’s it. Continue through the door directly ahead of you.
Room B-3
Keep your gun at the ready. When you turn the corner, another Slasher will attack from a little alcove to the left. Drop it and head into the next room.

Room B-4
Climb onto the crates to your right and then shimmy left. Drop down and enter the door.

Room B-5
Jump down into the water ahead of you and enter the next door.

Room B-6
You can surface for air immediately above you.
Dive down deep and swim to the other side. You can pull yourself onto a ledge to find a button. Hit it and swim back – coming up for air if you need to – and through the door back to the previous room.


Room B-5
Swim up, up, up, as high up as you possibly can – there’s a lot more water now, so you can surface in front of a completely different door. Enter it.

Room B-7
This room has a simple enough puzzle, but if you don’t understand it it could very easily kill you.

First, loot the various Haydee corpses on the floor for 10 Magnum Rounds, 20 SMG Rounds, and a Medkit.
The opposing door has a panel with three lights above it – they’re currently all switched off.
There are four other panels – one in each corner of the room, one of which will be turned on, the one on the back-right.
There are two buttons on each side of the door, serving a distinct purpose:
The left button will move the green light counter-clockwise to the next panel in the room. It will also toggle the left light above the door on/off.
The right button will move the green light clockwise to the next panel on the room. It will also toggle the right light above the door on/off.
Your goal is to have both of the side lights on, and the center green light to have been shifted to the panel above the door.
Sounds complicated? There’s more: every time the green light shifts to a corner panel, a hostile robot will spawn.
So, be ready to fight and push some damn buttons:

This is the order we want:
Press the left button. This will spawn a Walker to your right (FR). Kill it.
Press the left button again. This won’t spawn a hostile.
Press the left button a third time. This will spawn another Walker, this time to your left (FL).
Finally, press the right button. This will open the door. Enter it.
Room B-8
This room has no roof. Weird.

Room B-9
Wow. That’s a lot of bodies. Where did they come from?

They can be looted, incidentally, for 3 Diskettes, a Medkit, 3 Mines, 20 SMG Rounds, 10 Magnum Rounds, and 31 Pistol Rounds.
There’s also an Orange Keycard Reader, so just plug in the Orange Keycard and–
Oh.


Game over.

Remastered (True Ending)
The next two endings are fundamentally the same path but with a different choice at the end.
At the last save point, get ready to fight and exit.
B-Save Connector
As soon as you step forward, two Slashers will spawn – one at either door. The one that drops in behind you is only going to be a couple of feet from your face, so turn around, aim behind you, and start walking backwards.
You have to be super quick with turning around, as the closer Slasher is actually slightly delayed to throw you off. If it suits you, you can try sprinting to the corner to catch the further Slasher off first and then turning around.
Either way, with them both dead, remain ready to fight and continue back into the next room.
Room B-2
A Slasher will immediately attack from around the right corner. Be ready for it, and deadstop it.
If you need to duck into the Item Box Room, here’s a quick inventory checklist:
Weapon(s) with ammo
Orange Keycard
Body Armour and Medkits
Wi-Fi Remote and Wi-Fi Receiver
Night Visor
Mines, optionally.
Take the right corner and head back into this door – we’re heading alllll the way out of the Blue Zone.

Room B-1
Crawl under the gap in the grate to your right and then climb onto the crates. Jump onto and over the crates to your left, and return to the gap in the crates to your left again to exit.


A-B Connector
Entrance
Climb over the shrubbery in front of you, hang down off the other side and drop safely to the floor. Head through the door at the opposite end of the corridor.


Bridge
Cross the bridge and drop down the platforms to the right to reach the lower platform. Enter the door.

Red Zone, Bridge-Entry Room
Press forward.

Save Hub
Press forward.

Black Zone
Night Visor on and be ready to fight. Press forward.

Floor A
A Walker waits to the right. It will try to stop you. Don’t let it.
Follow the path the Walker stood in. On your left, enter the Lift.


Lift
The Lift is at A. If it isn’t, you’ve made a grave error.
Climb the Lift. Enter the above floor. Be ready to fight.

Floor B
A Slasher attacks from your right. End it.
Head down the hall. Enter the Save Point.


B Save Point
Save, and exit.

(continued)
Floor B
Return down the hall. Enter the door we haven’t been through yet – the one opposite the Lift.

Orange Keycard Room
Place your Receiver on the button. Click the Remote, step past, and click it again. Beware – there is an armed mine around the corner.
The red light in the middle of the floor signifies a mine. Step with your back to the wall and shoot it.
There are 2 Mines in front of the door you can take – they aren’t armed.
Unlock the door using the Orange Keycard. Be ready to fight, and enter.


Hall
Kill the Slasher who dares to wait for you. Turn around, aim towards the entrance door, and walk backwards.
A second Slasher will attempt to ambush you. Punish it.
As you approach the door opposite, it will lock. Reach it, then aim at it, and begin walking backwards away from it.
A third Slasher will drop down in front of you. Destroy it.
Return to the entrance door. Press the button to the right of it, and then return to the opposite side. Enter.


Gauntlet
The button next to the door ahead will not unlock the door. Instead, it will spawn ten Slashers, one by one, from the four corners of the room – in random order.
Place Mines if you think it will help. Be quick, be accurate. Reloading can be dangerous – switching weapons is faster.

One Haydee.
Ten dead Slashers.
Continue.
Divide
The Walkers and Slashers will avoid the lone figure, as if they recognize your right to passage. Or perhaps, out of fear.

Continue.
The Master
The queen sits upon a throne of corpses. Like and unlike the slain before her.

Indistinguishable, yet unique. Gained complete control, and yet lost all control.

She is different.
She’s not like the others.

Neither are you.

Game over.


Deadlock (Third Option)
Repeat the process from the Remastered ending, but keep a Mine with you until the very end.
The Master
Place it in front of your quarry. Do not move to safety. Let it arm.
Destruction mutually assured.


Game over.

Game Done?
Game done.
Congratulations on – one way or another – beating Haydee. If you thought it was difficult, imagine beating it without any hints or guides at all, like I did.
I hope this walkthrough helped you, or indeed anybody. If it helped just one person, then all this effort would have been worth it.
Around 150 hours. Over 1,400 images.
It’s not perfect, but I think it’s the best text Haydee walkthrough there is. Probably because it’s the only text Haydee walkthrough there is.
Some special thanks real quick:
u/-420_points on Reddit for the Haydee art I used for the thumbnails.
RoboFish for a few corrections and pointing out a bunch of things I missed.
Various other Steam users for pointing out other things.
Scumcreep[www.twitch.tv] for finding the locked crate in C-3 in the Black Zone and being generally cool about my walkthrough.
Lerm for politely putting up with my constant natter about the walkthrough for the last few weeks.
Antales, RomanKL and the rest of the Haydee team for making such a fun, and brutally challenging video game.
Vlad Plotnikov for making the soundtrack I’ve been listening to on repeat for dozens and dozens of hours.
And you, for reading these frickin’ guides in the first place.
I think that covers it!
Once again, if you have any more questions, corrections, suggestions, complaints, death threats – either leave a comment or email me at [email protected]. I’ll get back to you real quick.
Next, at least as far as Haydee, I’ll probably be ironing out all the ‘challenge’ achievements and possibly attempting to get the speedrunning world record for this game. We’ll see. Maybe I’ll make more guides in future.
Vanessa out.
