Overview
A complete guide to Armello’s Perils from the Butcher Baroness and her pet Fool.
Greetings
“Hello there pretty ones!”
I know you are eager to read all about Perils, so here is everything you need to know from my long experience playing Armello.
Perils are challenges played to the board by the King and other players. To pass them, you have to match every symbol by rolling dice or burning cards with matching symbols. The symbols required are the same for each peril every time it’s played.
Below is a complete guide to the Peril symbols. If you know which symbols you need to match ahead of time, you can plan ahead in order to pass a Peril.
If you lose any Peril there is a penalty, such as gold loss, health loss, prestige loss, being moved around the board against your will, losing action points, or gaining rot.
Mastering Perils is essential to suceeding in Armello. Minimising your risk from dangerous Perils, turning them to your advantage with the right set-up, and using them against other players at the right moment will often lead to victory.
There are two types of regular Perils in the game: Trickery Perils and Spell Perils. (You can find out how they work below). Trickery Perils are drawn from the trickery deck and Spell Perils are drawn from the magic deck. There are no Perils in the item deck. Once a regular Peril is stepped on and played, it is removed from the board.
There are also four Palace Perils, which work differently from regular Perils. (See the Palace Perils section for more information).
To match symbols for a Peril, you can burn cards, rely on the luck of the dice, or a mixture of the two. (But note: you will pass very few Perils if you rely only on dice – even Griotte herself with a dozen dice can lose a Peril if she doesn’t burn cards). Some items and amulets will also help you match symbols for Perils, or increase your dice count.
A good player will use ‘safe’ Perils (Perils with a minor or nonexistent penalty) to their advantage to burn useless cards out of their hand. For example they may play a Wandering Circus to the board and then walk onto it so they can burn out Rot cards that are cluttering up their hand.
Good players sometimes deliberately fail certain Perils in order to gain an advantage, or to disadvantage another player. For example, they might deliberately fail Banish in order to move closer to their quest.
Trickery Perils
“Come. Try me. You little morsels.”
There are 17 Trickery Perils in the game. Trickery Perils cost gold, prestige or rot to play to the board. They primarily target prestige, gold, items and followers. They rely on Wits to pass. For Trickery Perils, the number of dice you have when trying to pass it is equal to your wits points + your day/night clan bonus (if applicable) + any card or item buffs (if applicable).
They are most commonly found on Settlements and Dungeons. The most common symbols you need to pass Trickery Perils are Shields, Suns, and Moons.
The cost to play trickery cards is reduced the more towns you own. For each town over the first one you own, the cost of a trickery card is reduced by 1 gold. So filling the board with Trickery Perils can be extremely cost effective if you own a large number of towns. Wise players often play Perils around the palace, to prevent other players from accessing it.
Note: Card rarity does not affect what Perils the King plays to the board, it only determines how many copies of each card are available for players to draw.

Effect: -1 Action Point, -1 Health
Cost: 2 gold
Rarity: Uncommon [3 in deck]
Found on: Dungeons, Forests, Mountains
Symbols to match: Shield, Moon, Sun

Cost: 1 gold
Effect: -1 Gold per Claimed Settlement (including Clan Grounds)
Rarity: Unique [1]
Found on: Settlements
Symbols to match: Rot, Moon, Sun

Cost: 1 prestige
Effect: -2 prestige. If target is Prestige Leader, you steal the prestige.
Rarity: Rare [2]
Found on: Settlements
Symbols to match: Sun, Shield, Moon

Cost: 2 gold
Effect: Steal 2 cards from target’s hand
Rarity: Common [4]
Found on: Plains, Forests, Settlements
Symbols to match: Sword, Shield, Sun
Note: If you step on your own Wandering Circus, the two cards that are ‘stolen’ will be returned to your hand. So if you’re using your own Wandering Circus to remove useless cards from your hand, make sure to burn them. If you’re using someone else’s, burn up all your good cards so you can clutter up their hand with useless cards!

Cost: 1 prestige
Effect: -2 Health. If target dies, they gain 1 rot.
Rarity: Rare [2]
Found on: Dungeons, Swamps
Symbols to match: Rot, Moon, Sword

Cost: 3 gold
Effect: -4 Magic and -1 Action Point
Rarity: Rare [2]
Found on: Settlements, Stone Circles, Dungeons
Symbols to match: Moon, Shield, Sun

Cost: 3 gold
Effect: Steal 1 Equipped Item
Rarity: Rare [2]
Found on: Settlement, Dungeons
Symbols to match: Shield, Moon, Sun

Cost: 2 Gold
Effect: Exile to nearest Mountains, turn ends immediately. You will not claim the settlement or be able to complete any quests before you are exiled.
Rarity: Rare [2]
Found on: Settlement
Symbols to match: Sun, Shield, Sword

Cost: 2 gold
Effect: Steal 2 gold. If target is scouted, steal an item too.
Rarity: Uncommon [3]
Found on: Settlements
Symbols to match: Sun, Shield, Sun

Cost: 3 gold
Effect: -1 Action Point and -2 Health
Rarity: Uncommon [3]
Found on: Any tile (except palace)
Symbols to match: Sword, Shield, Sun

Cost: 2 gold
Effect: Target’s Explode Pool becomes zero until the end of next turn
Rarity: Uncommon [3]
Found on: Settlements
Symbols to match: Shield, Moon, Sun

Cost: 1 gold
Effect: Steal 3 gold and give 1 gold to the poorest hero
Rarity: Uncommon [3]
Found on: Any tile
Symbols to match: Moon, Sun

Cost: 1 prestige
Effect: -2 Health per Follower equipped
Rarity: Unique [1]
Found on: Settlements, Dungeons
Symbols to match: Sun, Shield, Shield

Cost: 3 gold
Effect: Steal 1 Recruited Follower
Rarity: Rare [2]
Found on: Settlements
Symbols to match: Shield, Sword, Moon
Note: If you play this card directly to a player with the Stranger, the Stranger will always be removed first, before other Followers.
But … if you step on this as a Peril, you have an equal likelihood to have the Stranger removed as other Followers. If the Stranger is your only Follower, failing the King’s or another player’s Bribery is a great way to remove him from your retinue. [He will not be removed if you step on your own Bribery].

Cost: 2 gold
Effect: -2 gold. If target is scouted, they retreat.
Rarity: Uncommon [3]
Found on: Any tile
Symbols to match: Sword, Shield

Cost: 4 gold
Effect: Unequips all Items
Rarity: Rare [2]
Found on: Dungeons, Settlements
Symbols to match: Sun, Moon, Shield

Cost: 3 gold
Effect: -1 health. If you have a bounty, -1 extra health per bounty level (maximum health loss is 4).
Rarity: Rare [2]
Found on: Any tile
Symbols to match: Shield, Shield, Moon
Spell Perils
“What in the Wyld?”
There are 10 Spell Perils in the game. They require Spirit to pass. (It doesn’t matter if you have any magic left or not when passing a Spell Peril, only your Spirit matters). They primarily target your health and movement, or give you rot. For spell perils, the number of dice you have is equal to your spirit points + your clan bonus (if applicable) + any cards or buffs (if applicable).
There are far fewer Spell Perils than Trickery Perils overall, but other players tend to play them more frequently because magic is easier to come by than gold. The King seems to play Spell and Trickery Perils about equally.
The largest variety of Spell Perils can be played on Dungeons, but they can be played fairly evenly across the board. The most common symbols you need to pass Spell Perils are Shields and Suns.
Spell Perils are particularly difficult for low Spirit characters. Characters with 2 Spirit or lower can auto-fail some Spell Perils. The most dangerous of these is Lightning Strike, which hits you for 3 points of damage and makes your turn end immediately. The King often plays Lightning Strike to Plains, so low Spirit characters should be particularly careful when stepping on Plains tiles with an unknown Peril.
Note: Card rarity does not affect what Perils the King plays to the board, it only determines how many copies of each card are available in the decks for players to draw.

Cost: 2 magic
Effect: -1 Health and -1 Action Point
Rarity: Rare [2 in deck]
Found on: Forests, Plains, Swamps
Symbols to match: Shield, Sun, Moon

Cost: 4 magic
Effect: Teleport to furthest dungeon from your location
Rarity: Rare [2]
Found on: Dungeons, Stone Circles
Symbols to match: Sun, Sword, Shield

Cost: 1 rot gain
Effect: +1 Rot and Poisoned for 2 turns
Rarity: Unique [1]
Found on: Settlements, Swamps
Symbols to match: Rot, Rot, Shield

Cost: 2 magic
Effect: -1 AP and -2 cards from hand
Rarity: Rare [2]
Found on: Forests
Symbols to match: Sun, Shield, Sword

Effect: -2 health and forced off Mountain
Rarity: Rare [2]
Cost: 2 magic
Found on: Mountains
Symbols to match: Sun, Shield

Cost: 3 magic
Effect: -1 health per point of target’s Rot
Rarity: Unique [1]
Found on: Stone Circles
Symbols to match: Wyld, Shield, Shield

Cost: 1 rot
Effect: All cards in target’s hand change to Rot symbols
Rarity: Unique [1]
Found on: Dungeons
Symbols to match: Rot, Moon, Sun

Cost: 4 magic
Effect: +1 Rot and +1 Rot Spell Card in target’s hand
Rarity: Unique [1]
Found on: Dungeons
Symbols to match: Rot, Sword, Sun

Cost: 2 magic
Effect: -2 health at night, -1 health during day
Rarity: Rare [2]
Found on: Dungeons, Plains
Symbols to match: Sun, Moon

Cost: 5 magic
Effect: -3 Health and turns ends immediately
Rarity: Rare [2]
Found on: Any tile (except Palace)
Symbols to match: Sword, Shield, Sun
Palace Perils
“Won’t I look great in a crown?”
There are four Palace Perils: two of them test Wits and the other two test Spirit (you can tell which are which by the little flags next to them). They are in the same place every game and always require the same symbol matches. They are more difficult than regular Perils. Regular Perils require 2-3 symbol matches, but Palace Perils will require 4.
If you lose a Palace Peril, it will remain in place, and you will be kicked out of the palace and lose health equal to the number of symbols you failed to match. But once a Palace Peril is beaten, it is gone forever, for you and all other players.

Expendables (trickery card) can be played to Palace Perils to reduce their difficulty. It will remove symbols from right to left, in this order:


Tricking Paths and Fool’s Fountain:
1. Rot
2. Shield
3. Sword
4. Wyld


The Unseen Death and Mother’s Maze:
1. Rot
2. Moon
3. Sun
4. Wyld
Notes on Palace Perils:
Every Cursed Lands played to a Palace Peril will add one symbol to the Palace Peril, normally a Rot. (If one or more Expendables has been played to a Peril before it is cursed, Cursed Lands will restore whatever the last removed symbol was). Cursed Lands can, in theory, be played an unlimited number of times to a Palace Peril, resulting in many Rot symbols that are impossible to pass.
As of 2.0, Agent of Misfortune no longer works on Palace Perils. It can be played to Palace Perils but will not increase the amount of health lost. It is better to play it somewhere else.
Perils by Location
“I’ve more friends than I need already.”
Knowing what possible Perils you could step on in each location can allow you to weigh up risk and reward when planning your route. Ideally you should aim to step on a Peril on the last move of your turn, to avoid losing Action Points.
Settlements and Dungeons are the most dangerous places for Perils, as the largest variety of Perils can be played to them. Many of the most dangerous Perils are only playable to Settlements or Dungeons. Swamp Perils can also be dangerous, as the King frequently plays Plague to them.
Any Tile
Crooks
Mercenaries
Sharpshooter
Lightning Strike
Plains
Total Perils: 7
Trickery Perils: 4
Crooks
Mercenaries
Wandering Circus
Sharpshooter
Spell Perils: 3
Lightning Strike
Moonbite
Tanglevine
Mountains
Total Perils: 5
Trickery: 3
Crooks
Mercenaries
Sharpshooter
Spell: 2
Blizzard
Lightning Strike
Forest
Total Perils: 8
Trickery Perils: 5
Crooks
Mercenaries
Merry Thieves
Sharpshooter
Wandering Circus
Spell Perils: 3
Lightning Strike
Tanglevine
Wake the Trees
Swamp
Total Perils: 7
Trickery Perils: 4
Crooks
Mercenaries
Plague Bearers
Sharpshooter
Spell Perils: 3
Lightning Strike
Plague
Tanglevine
Settlement
Total Perils: 17
Trickery Perils: 15
Beheaded
Bribery
Cat Burglar
Crooks
Hoodwinked
Mercenaries
Merry Thieves
Pick Pockets
Saboteur
Slanderous Toads
Vile Official
Wandering Circus
Welcoming Party
Witch Hunters
Spell Perils: 2
Lightning Strike
Plague
Dungeon
Total Perils: 14
Trickery Perils: 9
Beheaded
Cat Burglar
Crooks
Hidden Trap
Hoodwinked
Mercenaries
Plague Bearers
Sharpshooter
Witch Hunters
Spell Perils: 5
Banish
Call of the Worm
Dark Influence
Lightning Strike
Moonbite
Stone Circle
Total Perils: 7
Trickery Perils: 4
Crooks
Mercenaries
Sharpshooter
Witch Hunters
Spell Perils: 3
Lightning Strike
Banish
Rite of Wyld
Increasing Peril Difficulty
“How unlucky for you dearie.”
There are a number of cards and effects that can increase the difficulty of perils.
To a Single Peril

1. Cursed Lands
Cursed Lands increases the difficulty of a single peril by adding another symbol to it that you have to match. The symbol is always Rot (unless Expendables has been played to the Peril first). This card stacks, so you can play it multiple times to the same Peril. As one of the cheapest and most plentiful magic cards in the game, it is very useful, especially playing to Palace Perils to prevent other players entering the palace early.

2. Agent of Misfortune
Agent of Misfortune is also played to a single Peril. It will cause the Peril to cost -1 health per symbol that is not matched. So, for example, if a player steps on a Peril with 3 symbols and only matches 1, they will lose 2 health. It does not stack, so playing it more than once to the same Peril does nothing.
If you play AoM to the Palace, the Palace peril will cost -2 health per symbol not matched, instead of its usual -1. As of 2.0, playing Agents of Misfortune to the Palace no longer has any effect.
AoM is a very useful card to play to ‘safe’ looking perils that other players might deliberately fail, and it can be very helpful for protecting your towns. AoM and Mercenaries is a deadly combination.
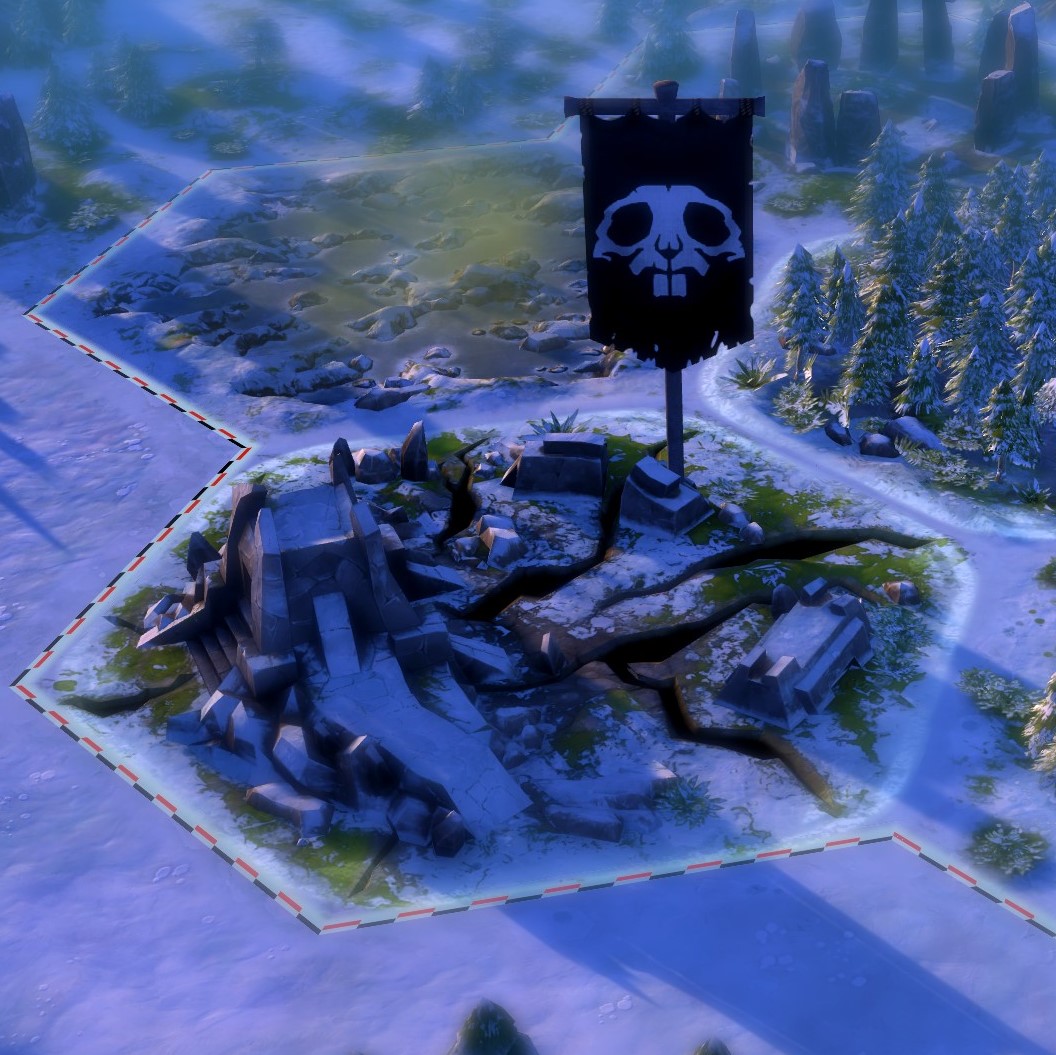
When Cursed Lands or Agent of Misfortune is played to a Peril, a crossbones will be added to its flag beneath the skull.
A normal Peril

A Peril that has had its difficulty increased

To Perils Overall
4. Fight Boosting Cards
The two cards that increase fight (Feral and Brazenberry Ale) can increase the difficult of Trickery Perils by lowering your wits. The lower your wits, the fewer dice you will have to roll during the Peril, lowering your chances of passing it. For low Wits characters like Fang and Sana, this can mean auto-failing some Perils. Try to avoid Perils while the card is active, especially on towns.
5. Yordana’s Curses
Yordana’s Curse of Fate increases the difficulty of any Perils a player faces by +1. It adds an extra Rot symbol to every Peril they face. It can be played multiple times to the same person, and it will stack.
Her Curse of Skill can increase Peril difficulty by lowering your wits or your spirit, leaving you with fewer dice to pass the Peril.
6. Lowered Explode Pool
Cards that lower your explode pool can make it harder for you to pass Perils, because they leave you with fewer chances to roll dice again. Saboteur can be particularly hard on players with low Wits or Spirit facing Perils, as it lowers their slim chances of passing the Peril even further.
7. Call of the Worm
Call of the Worm seems like a harmless card, but it can wreck your plans to use cards to match symbols in a peril by turning all the symbols on your cards into Rot. It can be a mixed bag though – sometimes it can provide you with the Rot symbol you need to break into the Palace.
8. King’s Decrees
The following King’s Decrees add or affect Perils:
- Cursed Kingdom (Day 2): The King plays Cursed Lands to all normal perils.
- Private Security (Day 3): Plays Mercenaries on all settlements without other perils.
- Fugitives Unleashed (Day 3): Four trickery perils appear in the Kingdom.
- King’s Agents (Day 4): Plays Agent of Misfortune to all existing perils.
- Black Death (Day 5): Plague Perils ravages Armello’s settlements. Settlements that already have a peril are spared.
- Dark Storms (Day 5): The King plays 4 Lightning Strike perils to random tiles.
- Ripped Reality (Day 6): Random stone circles received a Banish peril.
- Sovereign City State (Day 6): One unclaimed settlement gets permanently fortified and Mercenaries and Agent of Misfortune is applied.
- Desperate Defense (Day 8): All palace perils are removed; guards with 1 HP are spawned in their place if the tile was empty.
- Dark Curse (Day 9): 4 new perils are placed adjacent to Palace and Cursed Lands are applied on them
Passing Perils
“Every dog has their day, I guess.”
There are lots of ways you can increase your chances of passing Perils. Even a low Wits, low Spirit character can pass every Peril with the right equipment and a bit of planning.
There are many items, rings, amulets and strategies that can help. These are just the major ones.
Scout
Any item or state that gives you scout will allow you to see what Peril is on a tile, and to see what symbols you need to pass it. This gives you a huge advantage, as you can walk onto safe Perils, avoid dangerous ones, and see if a Peril has been Cursed. Any character who plans on stepping on a lot of Perils (Griotte, Twiss, Sargon, etc), should aim to have some sort of Scouting equipment or use Scouting cards like Divination frequently.
If you get the Goblin’s Game, the permanent Scout option is almost always worth the price of -1 Body.
Expendables (Trickery Card)
Played to a single Peril. Removes 1 Symbol from the Peril, lowering its difficulty by 1. Symbols are removed from right to left. More than one Expendables can be played to a Peril – if you play enough of them you can remove all the symbols from a Peril, allowing you to auto-pass it. As of 2.0 there are only 3 of them in the deck, so use wisely.
Expendables is best used on Settlement and Dungeon Perils, which tend to be the most difficult in the game. If you’re a low Spirit character, you may also want to play it to any Plains Perils (especially those near your clan grounds), in case they are Lightning Strike.
Expendables can be played to the Palace Perils, but be careful doing this, as it will make the Perils easier to pass for other players too. You should aim to play it secretly (when you are stealthed), when other players are distracted (e.g. during a battle) and close to the time you intend on breaking into the Palace. It’s often better to play them to Mother’s Maze or the Unseen Death, the two spirit Palace Perils, as most players try to break in on the wits Perils instead.
Clan Affinity Dice Bonus
Your clan affinity dice bonus gives you +1 dice in Battles and Perils either day or night. It’s very important to be aware of what time your clan affinity is, as for low Spirit characters it can be the difference between auto-failing a Peril or having a chance to pass it.
For example, vanilla Mercurio has 2 Spirit. If he steps on a Lightning Strike Peril during the day, it’s not possible for him to pass it as he’ll only have 2 dice and the Peril requires at least 3. But if he steps on it at night, he has a chance of passing it, especially if he has a Sword, Shield and Sun card in his hand ready to burn.
The Clan Affinity Dice Bonus can also make it possible for you to enter the Palace even if you have only 3 Wits or 2 Spirit. It’s extremely difficult, but it’s possible. I’ve seen a 2 Spirit character break into Mother’s Maze thanks to their Clan Affinity and a helpful Wyld explode.
Amulets
Think
+1 Wits. One of the best amulets for Trickery Perils, as it will not only increase your dice count during Trickery Perils, it will also allow you to hold more cards in your hand, allowing you to match more symbols.
Feel
+1 Spirit (and +1 explode pool). Good for low Spirit characters, especially if you plan on stepping on a lot of dungeons. Think is almost always the better choice though, combined with good Peril-passing equipment or a helpful ring.
Watch
Provides a guaranteed first symbol match when facing perils. Hands down the best item for passing Perils. It pairs well with the Rat clan ring that gives you 2 gold for every Trickery Peril you escape. However, it is almost always better to equip yourself with any of the other amulets listed, as they will give you other benefits besides passing Perils.
Discipline
+2 Clan Affinity Dice Bonus. This means 3 extra dice during your clan affinity time. For low Wits or low Spirit characters, this can make passing Perils a breeze. It’s one of the best and most underrated amulets in the game.
Resist:
Gain +1 Shield in Battles and Perils. This works just like Leather Armour. It’s an extremely useful amulet because a Shield is the most common Peril symbol, required in 20 out of the 27 Perils. But you’re probably better going with Think and equipping Leather Armour instead.
Rings
Aquamarine (Bear Clan):
In Battles and Perils, +1 Moon and +1 Explode Pool if you have 3 or less Rot. Moons are the third most common Peril symbol in the game. Great in theory, fairly useless in practice.
Taaffeite (Bear Clan):
+1 Shield and Explode Pool in Forests. This is useful for passing Perils in Forests, as 7 of the 8 Forest Perils require Shields. However, the Forest Trickery Perils are all pretty easy, and the Spell ones can be easily passed by most Bear Clan characters because of the their high Spirit.
Emerald (Rabbit Clan):
Gain +2 Shield on Plains in Battle and Perils. This is a useful ring for other reasons, but its extra Shields during Perils are a welcome addition. It’s especially good for helping Barnaby and Hargrave pass Lightning Strike, which is commonly played by the King onto Plains.
Sunstone (Rabbit Clan):
In Battle and Perils, +1 Sun result while you have 3 or more Gold. If your playstyle tends to result in a lot of gold, this is not a bad ring for passing Perils. Suns are the second most common Peril symbol in the game, used in 21 out of 27 Perils, and are present in almost all of the Spirit Perils, which are the most challenging to pass.
Black Opal (Rat Clan):
Gain Stealth and +1 Sword in Settlements Day and Night. An undervalued ring for passing Perils. Rats spend a lot of time in Settlements, and Settlements have the most dangerous and numerous Perils. Swords are only used in 6 of the 17 Settlement Perils, but they’re used in three of the most dangerous – Lightning Strike, Mercenaries and Bribery. Accompanied by Leather Armour, this ring can have even Mercurio passing Lightning Strike with ease.
Items
Sailor’s Lantern
Gives you Scout. As stated above, Scout is vital for doing well on Perils. Although it takes up an item slot, Sailor’s Lantern is worth equipping for low Wits, high Fight characters (who can sacrifice an item slot), for characters like Twiss and Yordana who don’t battle much, and for most rats.
Leather Armour
In Battle and Perils, +1 Shield. One of the most versatile cards in the game, as it gives you protection in both Battles and Perils. Shields are used in 21 of the 27 Perils. You should always equip it if it becomes available, even in preference to cards that provide greater protection in Battle.
Adventurer’s Kit
In Perils, +1 Die. They stack, so you can equip 3 and get 3 extra dice in Perils. Helpful for breaking into the Palace, but you are better equipping Leather Armour than equipping one of these.
Brilliant Fool
In Perils, +2 dice. If you’ve ever used the Brilliant Fool, you will know that your chance of passing Perils increases dramatically when he’s equipped. Low Wits or Low Spirit characters who get him are extremely fortunate. He can make breaking into the Palace very easy.
Items or Cards that Increase Wits or Spirit
Any item or card that increases Wits or Spirit, such as Helm of Heroes, Focus, etc, will help you pass Perils more easily. It’s always worth playing Focus or Evil Eye to yourself before stepping on any dangerous looking Perils.
Buffing Your Explodes and Explode Pool
Items or cards that buff your explodes, such as The Moon Scythe, Aflame, etc, will help you pass Perils by giving you more chances to match symbols – but only if you have high Spirit. They are best combined with items that buff your explode pool, such as the Turquoise Ring.
Farewell
With this guide in your paw, you should be on your way to passing Perils and using them sneakily against other players. With a little memorisation and deduction, you will soon be guessing which Perils are being played to the board and waltzing onto them with all the glee of a rat queen with 8 wits.
I hope this guide has been useful to you, fellow Armellians. Take care dearies.