Overview
This guide provides the locations, the contained items and their costs, the needed requirements and, if needed, the solution how to get to the chests. This guide contains SPOILERS to the game, so be aware.As i’am not an native english speaker please feel free to correct my language or ask if anything remains unclear.
Intruduction
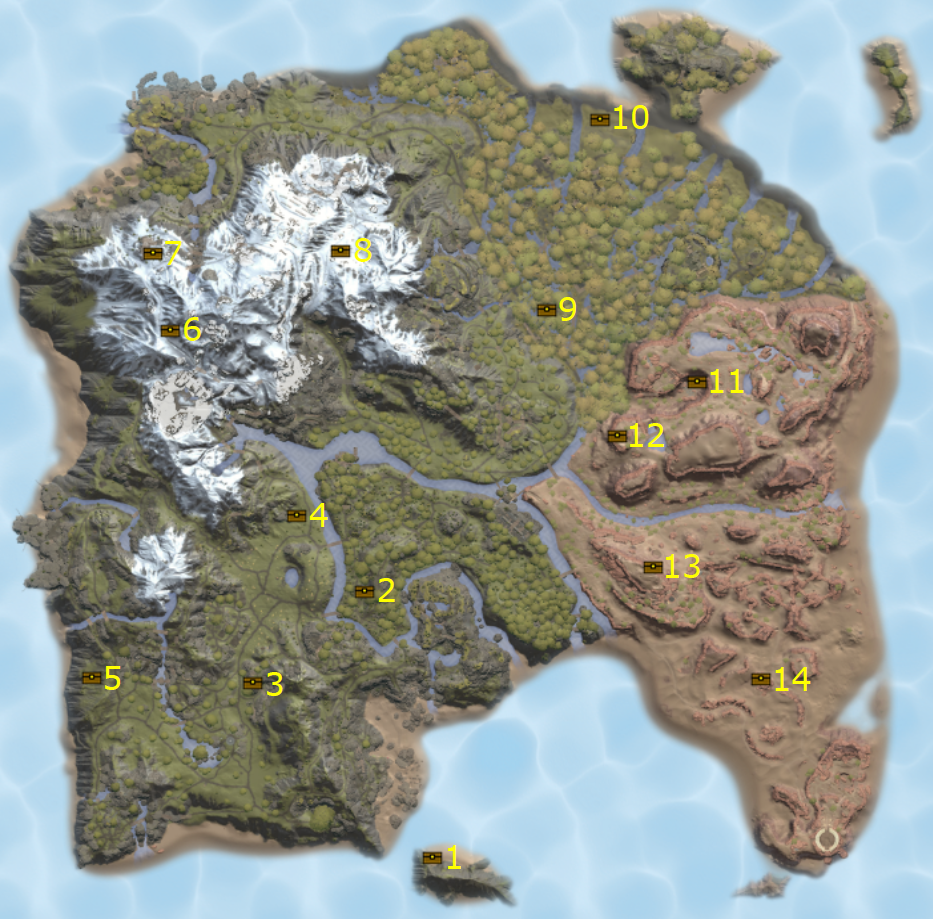
The map with the chest locations comes from [link].
There are 14 confirmed chest on the map. You will need an Albamare Key for each of them. Every Albamare Key costs 8 Key Graphite. To open all chests you will need 8 * 14 = 112 Key Graphite. According to the map [link] there are 117 Key Graphite spots. Many of them provide more than one Key Graphite, which leads to a total number of 202 Key Graphites.
Because there are so many Key Graphites on the map and i had no problem to find enough to open all chest only collecting what was on my way, i’am not sure if i will make an Key Graphite guide.
Some of the chests are easier and some are harder to get. This guide provides the location, the contained item and its cost, the nedded requirements and, if needed, the solution how to get to the chest.
Requirements
There are four different requirements, which are needed to get to some of the chests. You will get all of them during the main story. I don’t want to spoiler you and so i censored the ways how to get them.
You will get the Explosiv Keg and the idea to craft them from one of the Tambas, a few moments bevor you are allowed to enter the first of the three vaults. The explosive arrows work as well.
You will get the Conducting Lantern inside the Hollow Mountain vault.
For further informations look at my guide for this vault.
COMING SOON
You will get the Taming Bands inside the Ancient Stables vault.
For further informations look at my guide for this vault. [link]
You will get the Scouting Lens inside the Dune Observatory vault.
For further informations look at my guide for this vault. [link]
The chests 1, 2, 3, 6, 12 and 14 don’t require an item to get to the chest.
The chests 4 and 8 require the Conducting Lantern to get to the chest.
The chest 9 requires the Taming Bands to get to the chest.
The chest 13 requires the Scouting Lens to get to the chest.
The chest 10 requires the Taming Bands and the Explosiv Keg to get to the chest.
The chest 5 requires the Taming Bands and either the Conducting Lantern or the Scouting Lens.
The chest 7 requires the Conducting Lantern and either the Taming Bands or the Scouting Lens.
The chest 11 requires the Scouting Lens and either the Conducting Lantern or the Taming Bands.
Chest 1 Outgoer’s Shield

Outgoer’s Shield
Level 2/5
Ingredients:
- 2 Lean-Iron
- 6 Dullrock
- 5 Marrwood
None
None
Chest 2 Outgoer’s Shinguards

Outgoer’s Shinguards
Level 2/5
Ingredients:
- 1 Morrow Haw
- 1 Stuffcloth
- 1 Alpafant Leather
- 1 Crassbone
None
None
Chest 3 Wedgewood Sword

Wedgewood Sword
Level 2/5
Ingredients:
- 2 Gravel Moos
- 6 Marrwood
- 1 Stiffrope
- 3 Grandcone
None
Go inside the tower and stand on the movable platform. Turn around and shoot at the aiming target to lift up the platform.
Go to the first floor and stand on the next movable platform. Shoot at the aiming target to move the platform to the tree platform nearby and you will find the chest.
Chest 4 Broadhead Arrow

Broadhead Arrow
Ingredients:
- 2 Marrwood
- 5 Dullrock
- 2 Puffle Feather
Conducting Lantern
Use the Conducting Lantern to lift the plaform up. Notice there is one side that sends out lightnings, which damge and hit you back.
Hit the aiming target to turn the platform around, so you have side without the lightnings shown to the platform with the chest and you can jump over to it.
Chest 5 Hunter’s Sword Tier S Loot

Hunter’s Sword
Level 5/5
Ingredients:
- 10 Lean-Iron
- 2 Alpafant Leather
- 1 Waddletooth Blubber
- 3 Bleeker Antenna
- 5 Crassbone
- 1 Litter Essence
- 1 Cariblin Essence
- 1 Krocker Essence
- 1 Fexel Essence
- 1 Gobbledew Essence
Taming Bands
Scouting Lens or Conducting Lantern
As you can see on the sign on the picture above you will need a tamed Weddletooth to get to this chest. Tame one with the Taming Bands by holding R and search the dirt nearby. You will find two pins here …
and here.
If you want to solve this puzzle with the Scouting Lens …
you should now take the pin out of the pin socket on the backside of the building and you will find the egg symbol hidden under a platform above you. The symbol tells you to use the Scouting Lens to get more informations about this place.
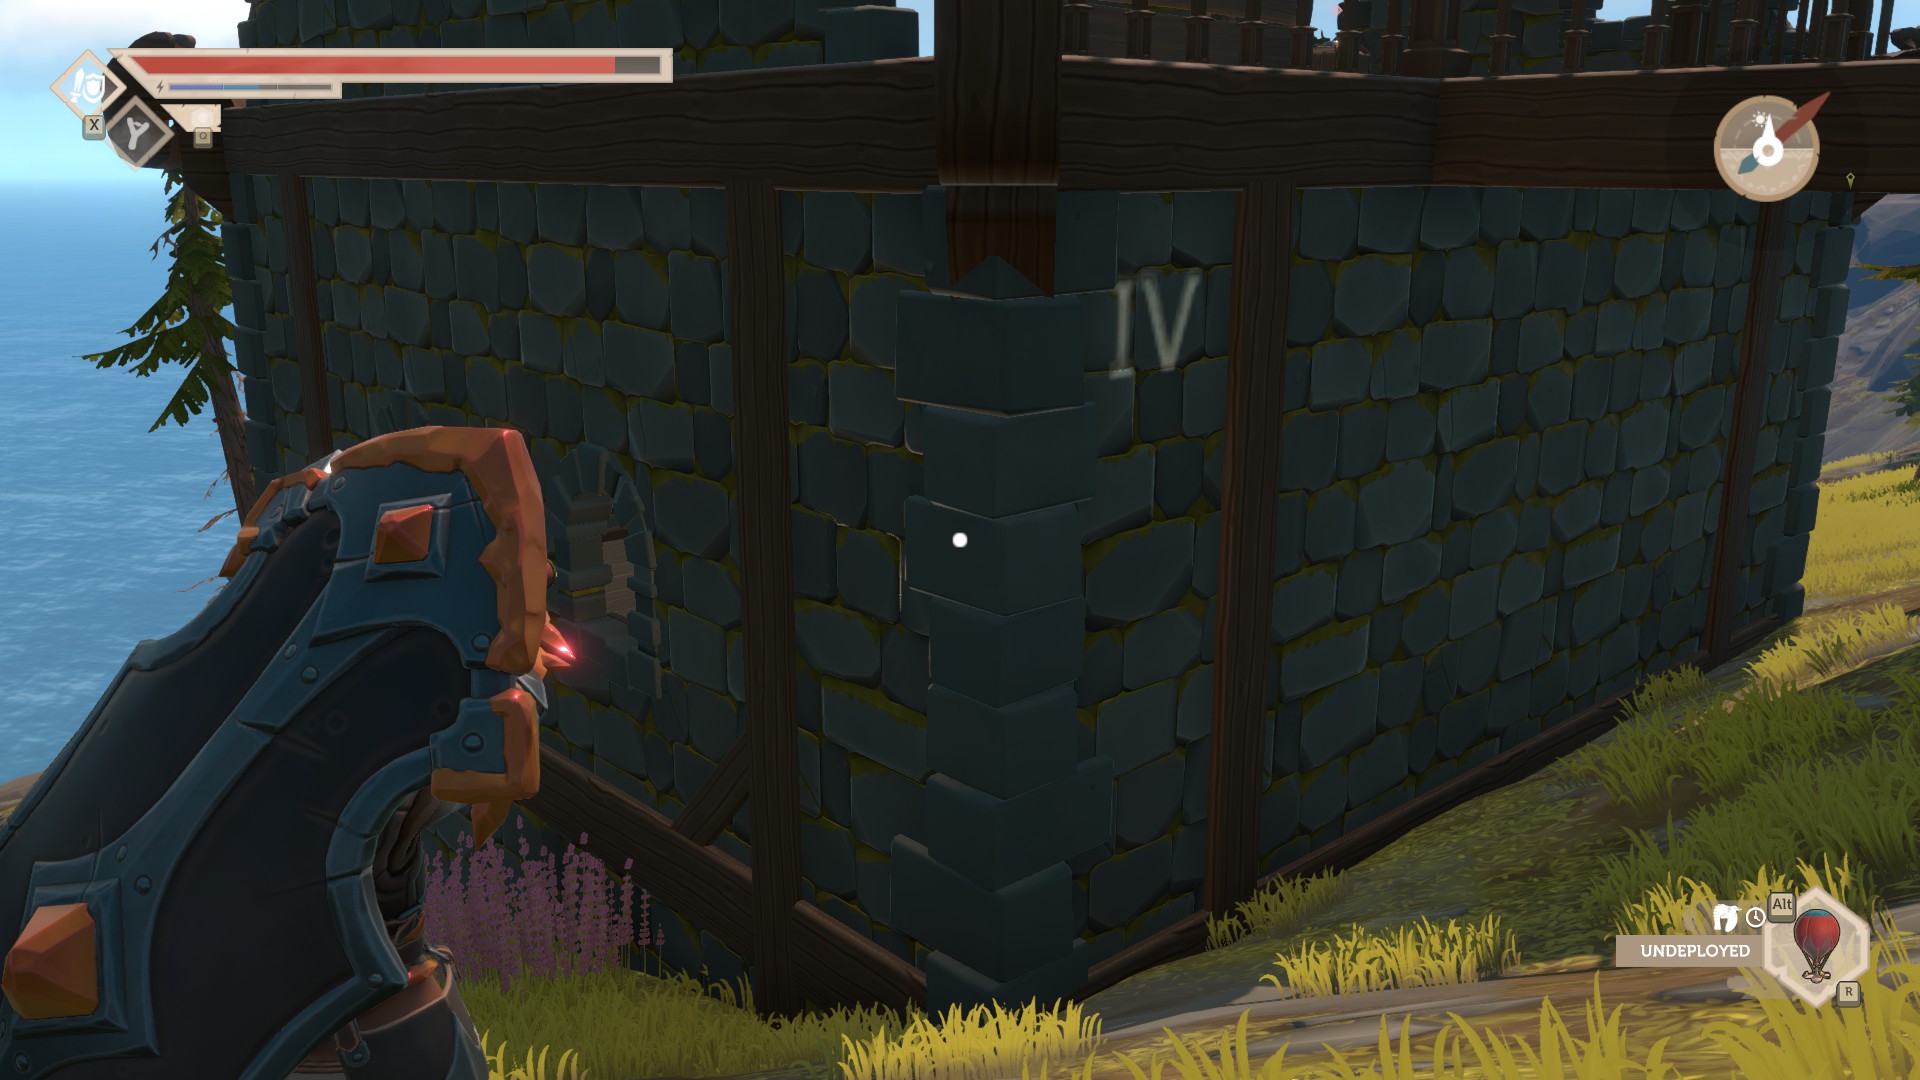
As you can see the pin from this pin socket has the roman number IV. The pins you have found in the dirt have the numbers I …
and III.
The last pin is located on the platform above the building and has the number II.
As you have four pins now and there are four pin sockets on the rooftop you only need to know now which pin to put in which pin socket. The Scouting Lens helps you again and shows the roman numbers at the edges of the building. The I in the northeast, …
the II in the southwest, the III in the northwest, …
and the IV in the southeast.
Once you have placed the pins in the correct pin sockets, …
…
…
…
If you want to solve this puzzle with the Conducting Lantern …
you will need to go on the platform above the building now and pull the simple lever.
Once you have done that you can activate the target with the Conducting Lantern under the simple lever. You only need to do that one time.
The blue lines on the floor will now light up if you have placed one of the pins in the correct pin socket. The pin from the pin socket at the backside of the building belongs to the southwest.
The pin from the platform above the building blongs to the southeast.
The pins you’ve found in the dirt with the Weddletooth belong to the northeast …
and the northwest.
Once you have placed all pins correctly …
… the movable platform lowers down and you can enter the chest room.
To leave the chest room shoot at the aiming target and the platform will bring you up.
Chest 6 Outgoer’s Arm Guards

Outgoer’s Arm Guards
Level 2/5
Ingredients:
- 1 Morrow Haw
- 1 Stuffcloth
- 1 Alpafant Leather
- 1 Crassbone
None
None
Chest 7 Hunter’s Vest Tier A Loot

Hunter’s Vest
Level 4/5
Ingredients:
- 4 Lunarodos
- 5 Bleeker Antenna
- 1 Droolica
- 4 Stuffcloth
- 2 Slick Pearl
Conducting Lantern
Taming Bands or Scouting Lens
If you use the Taming Bands …
you should take a look at the bleeker symbol next to the western platform.
Tame a bleeker and let him stay near the smybol, by pressing R if he is in position, and the western platform will rise up.
You will find an electric point on the eastern platfom now, where you can use the Conducting Lantern to raise this platform too. …
If you use the Scouting Lens …
you should take a look at the balloon symbol next to the eastern platform.
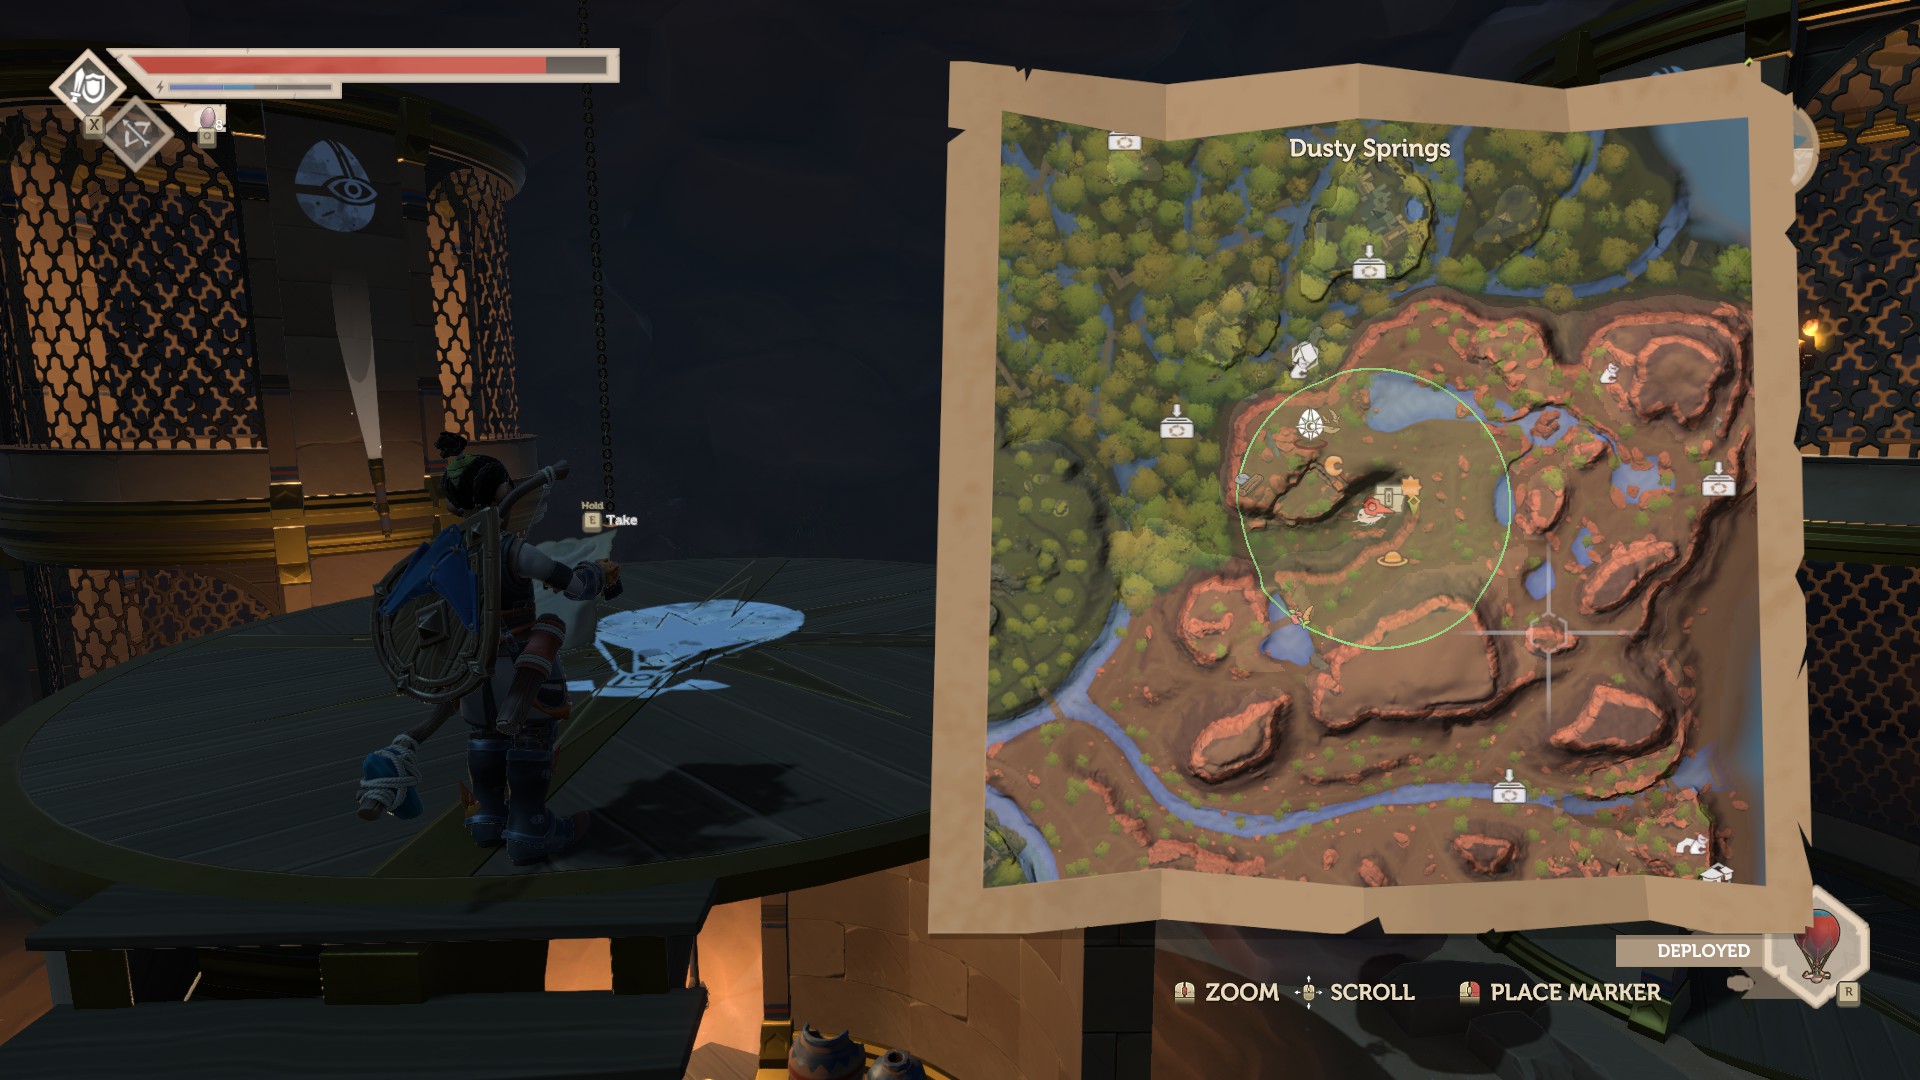
Deploy the balloon at this point by, holding R, and open the map.
Shoot or hit the aiming target in the correct order you see on the map, northeast, southwest, northwest, soutcheast and the platform will raise up.
Once you have done this you can activate the Conducting Lantern target on the western platform and it will raise as well …
…
Go to the platform in the middle and pull the simple lever. You can see now the symbols next to it and the symbols on the raised platforms in the east and west.
Turn the western platform until the symbol is the same as shown on the middle platform next to the simple lever.
Do the same with the eastern platform.
Once you have placed the platforms in the correct position they will lower down again and the door to the chest room opens.
Chest 8 Hunter’s Arm Guards Tier A Loot

Hunter’s Arm Guards
Level 4/5
Ingredients:
- 4 Lunarodos
- 3 Bleeker Antenna
- 3 Waddletooth Blubber
- 2 Stuffcloth
- 1 Droolica
Conducting Lantern
The chest is on a very high platform. To reach it you need to lower that platform by raising three different columns around it. First go to the column in the west and use the Conducting Lantern
The mechanism will move and reval the column and a pin.
Take the pin and place in in the pin socket at the column in the south.
This mechanism will also move and you can the the second column.
Go to the column in the east and shoot at the aiming target.
Now you can see the last column.
If you activate one of the column they will raise but fall down after it, because you have to activate them in the correct order. To get the correct order go to the mechanism at chest platform and activate it. the signs behind it will light up and you get the order in which you need to acitvate the columns. Activate the column in the east …
the west …
and the south.
Once you have done everything correctly the signs will light up …
and the chest platfarm will lower down.
Chest 9 Hunter’s Pants Tier A Loot

Hunter’s Pants
Level 4/5
Ingredients:
- 5 Lunarodos
- 4 Bleeker Antenna
- 4 Stuffcloth
- 1 Slick Pearl
- 1 Droolica
Taming Bands
As the sign at the tower shows you, you need a tamed Puffle to get this chest.
Once you have got a Puffle, place it under the sign and jump with his help to the platform above.
Follow the path and jump inside the tower.
Open the door of the tower with the simple lever inside.
Place the Puffle inside the tower …
use it to jump at the platform over you.
Pull the simple lever on the moveble platform and enjoy the ride upstairs.
Once you have reached the upper area, follow the path and you will find the chest at the end.
Chest 10 Hunter’s Boots Tier A Loot

Hunter’s Boots
Level 4/5
Ingredients:
- 3 Lunarodos
- 3 Bleeker Antenna
- 4 Waddletooth Blubber
- 3 Stuffcloth
- 1 Droolica
Explosive Keg
Taming Bands
As the sign shows you, you will need a Waddletooth to get to this chest. Go tame one and come back.
Place an Explosive Keg in front of the trash and blew it up.
Let the Waddletooth search for a pin inside the dirt, behind the trash.
Place the pin inside the pin socket and an aiming target will get shootable.
Shoot at the aiming target to move the platform and jump over it to the chest platform.
Chest 11 Hunter’s Bow Tier S Loot

Hunter’s Bow
Level 5/5
Ingredients:
- 3 Crassbone
- 4 Bleeker Antenna
- 2 Lean-Iron
- 2 Waddletooth Blubber
- 5 Alpafant Leather
- 2 Litter Essence
- 2 Cariblin Essence
- 2 Krocker Essence
- 2 Fexel Essence
- 2 Gobbledew Essence
Scouting Lens
Conducting Lantern or Taming Bands
To get this chest you need to have at least the Conducting Lantern or the Taming Bands and the Scouting Lens. There are four towers in the area, one in the middle, one in the east, one in the south and one in the northwest. If you shoot at the aiming target in the middle tower you will see that the other three towers start to turn themself.
Go upstairs on the middle tower and you will see the balloon symbol on the floor.
Place the balloon of the scouting lens outfinding by holding R and open the map by pressing M.
You will see a sun symbol, a planet symbol and a moon symbol on the map in the directions of the three surrounding tower. Take a look at the towers and you will see the egg symbol which tells you to use the scouting lens by pressing R.
Every tower has the same three symbols you saw on the map. If you turn the towers the symbol the telescopes, that are mounted on the tower walls, can “see” changes. The goal of this puzzle is to let the telescopes “see” the symbol which is related to them on the map. Shoot at the aiming target until the sun symbol is shown on the east tower. Go to the tower and pull the simple lever. From now on the tower is looked and will not turn anymore.
Depending on the outfinding you own, you can either look up the northwest tower with the Conducting Lantern or the south tower with the Taming Bands.
If you own the Conducting Lantern turn the towers until the telescope of the northwest tower “sees” the moon symbol.
Go to the tower and look it up with the Conducting Lantern by pressing R.
If you own the Taming Bands turn the towers until the telescope of the south tower “sees” the planet symbol.
Tame a bleeker with the Taming Bands, by holding R next to one and place it inside the south tower to look it up.
After you have looked up two of the towers turn the remaining one until its telescope “sees” the related symbol. The northwest tower needs to “see” the moon symbol, …
while the south tower needs to “see” the planet symbol.
Once you have turned every tower correctly the tower in the east raises and you can get to the chest.
Chest 12 Outgoer’s Trousers

Outgoer’s Trousers
Level 3/5
Ingredients:
- 2 Morrow Hay
- 2 Stuffcloth
- 2 Alpafant Leather
- 2 Crassbone
None
None
Chest 13 Outgoer’s Sword

Outgoer’s Sword
Level 2/5
Ingredients:
- 4 Lean-Iron
- 4 Dullrock
- 3 Marrwood
Scouting Lens
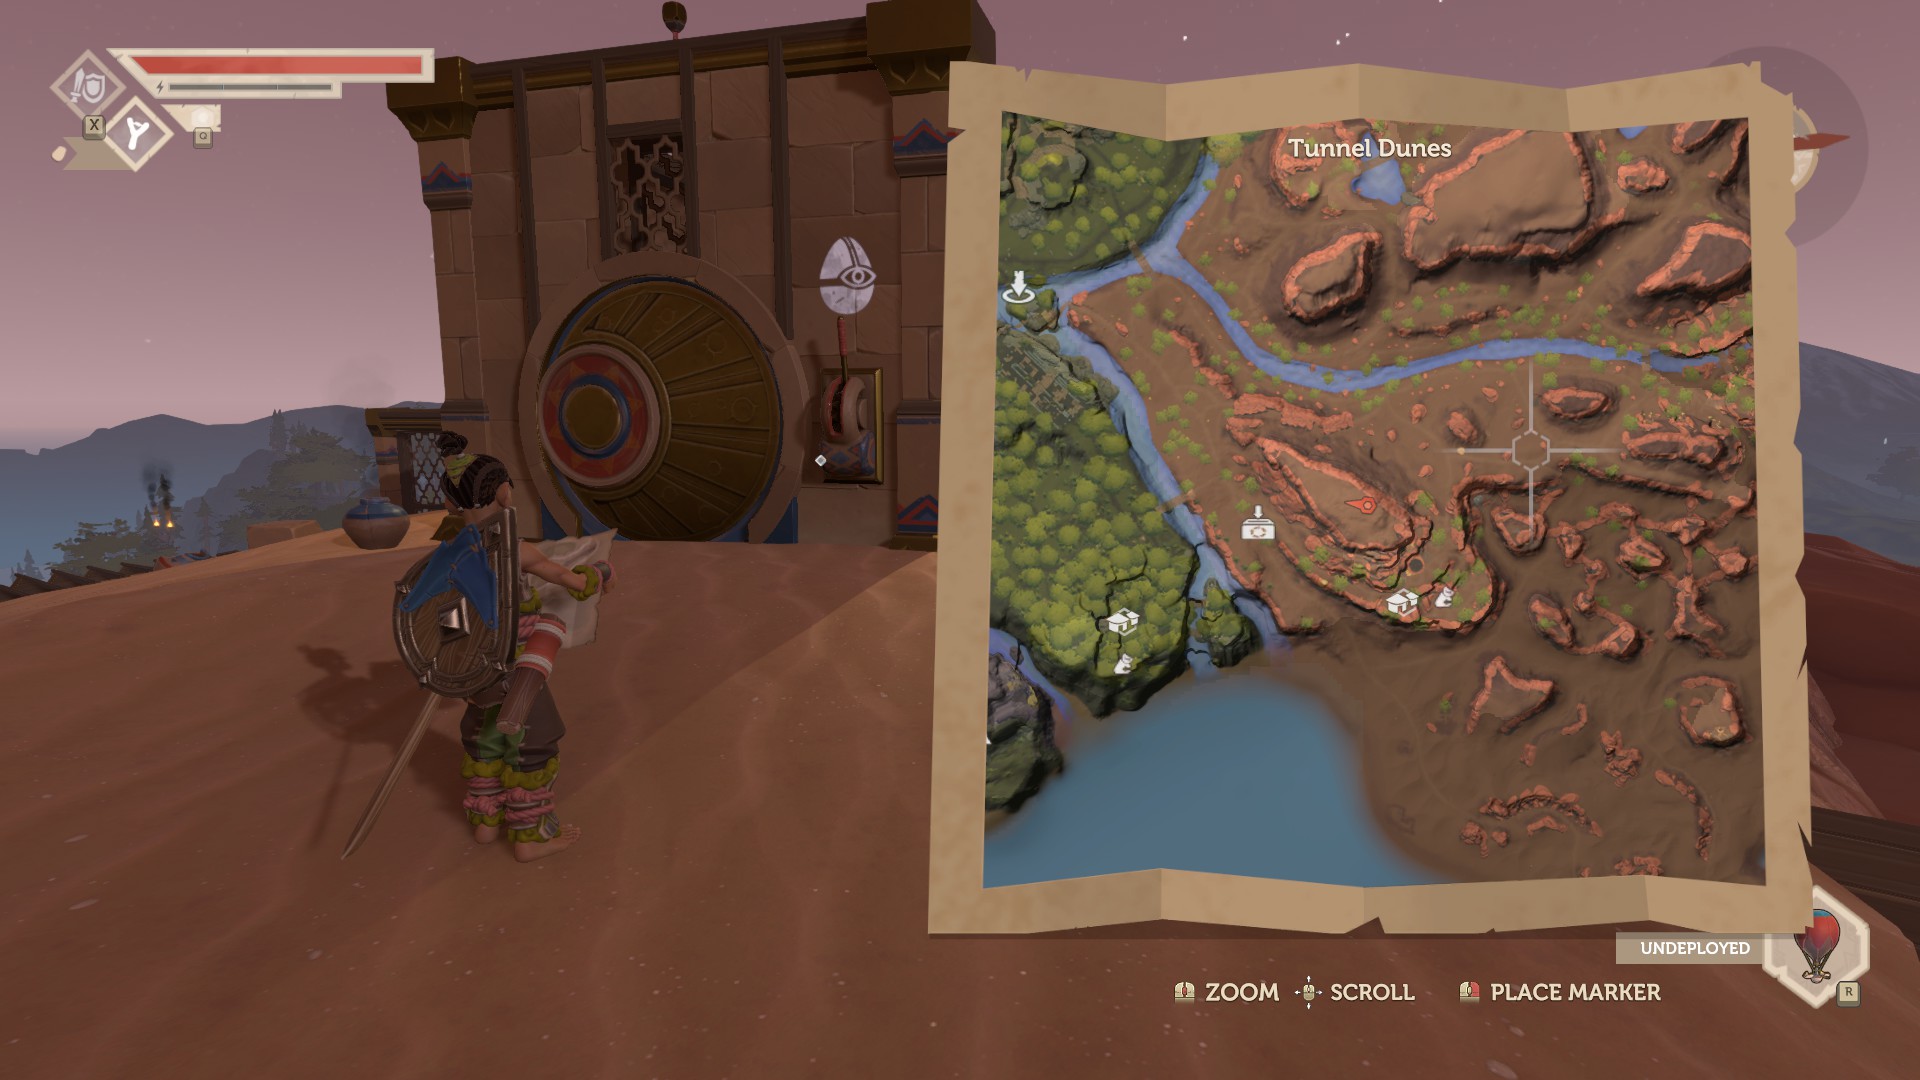
As you can see in the picture above the egg symbol is shown, so you need to use the Scouting Lens to know what to do. If you use it, you can see at each of the four symbols above the four pin sockets is one of the roman numbers I, II, III and IV. On the star symbol it shows the I, on the moon symbol it shows the III, …
on the sun symbol it shows the IV and on the planet symbol it shows the II.
Get the pin with the I here, …
the pin with the III here …
and place them like this in the correct pin sockets.
Do the same with the pin IV from here, …
and finally the pin from the II here …
and place them like this in the pin sockets.
Once you have placed them corectly, go to the door and pull tht simple lever next to it. Now you can enter the room and get the chest.
Chest 14 Outgoer’s Jacket

Outgoer’s Jacket
Level 3/5
Ingredients:
- 2 Morrow Haw
- 2 Stuffcloth
- 3 Crassbone
- 2 Alpafant Leather
None
None


