Overview
Building an efficient neighborhood.
The Basics
This guide will show you an efficient housing district that can be used on nearly every peaceful map in the campaign as well as most free play maps.
What you should know:
- This guide is focused on making a residential area, while some buildings involved do use production buildings/farms they are not explained in detail. In general, as long as these are placed within the collection radius of the stalls in the residential area that need them and out of the way of other buildings in the guide, placement is unimportant.
- The Production Chain – Farms/Raw Resources > Stalls/Storage > Residents/Storage. Farms and Logging Camps will gather materials until there is enough for a delivery to a granary or a warehouse. Stalls can grab materials from farms or storage, houses can grab materials from stalls or storage.
- The Collection Radius – When clicked, a building will show a colored radius, yellow for industry and green for housing. Other buildings will appear colored if they are in the original buildings radius. (Ex: A meat stall will highlight goat farms yellow.) This means that materials can be gathered directly from the farm rather than waiting for a delivery to a storage yard that is within range. This also applies for houses in range of a stall. As houses grow, the radius of collection will grow as well.
- You Can Move Houses – This residential layout will have you move houses to make space for buildings needed for growth as well as natural growth as stage two houses can be placed over stalls.
- Storage Accept/Deny – Granaries and Warehouses have a list where you can allow or deny certain goods from being allowed to be stored there. This is important as some goods not needed by resident homes can overwhelm your warehouse (Ex. wood or linen) leaving no room for the things they do (Ex. clothes or olive oil).

The Layout, Well Water, and Meat
The Basic Grid

First Level Need – Well Water
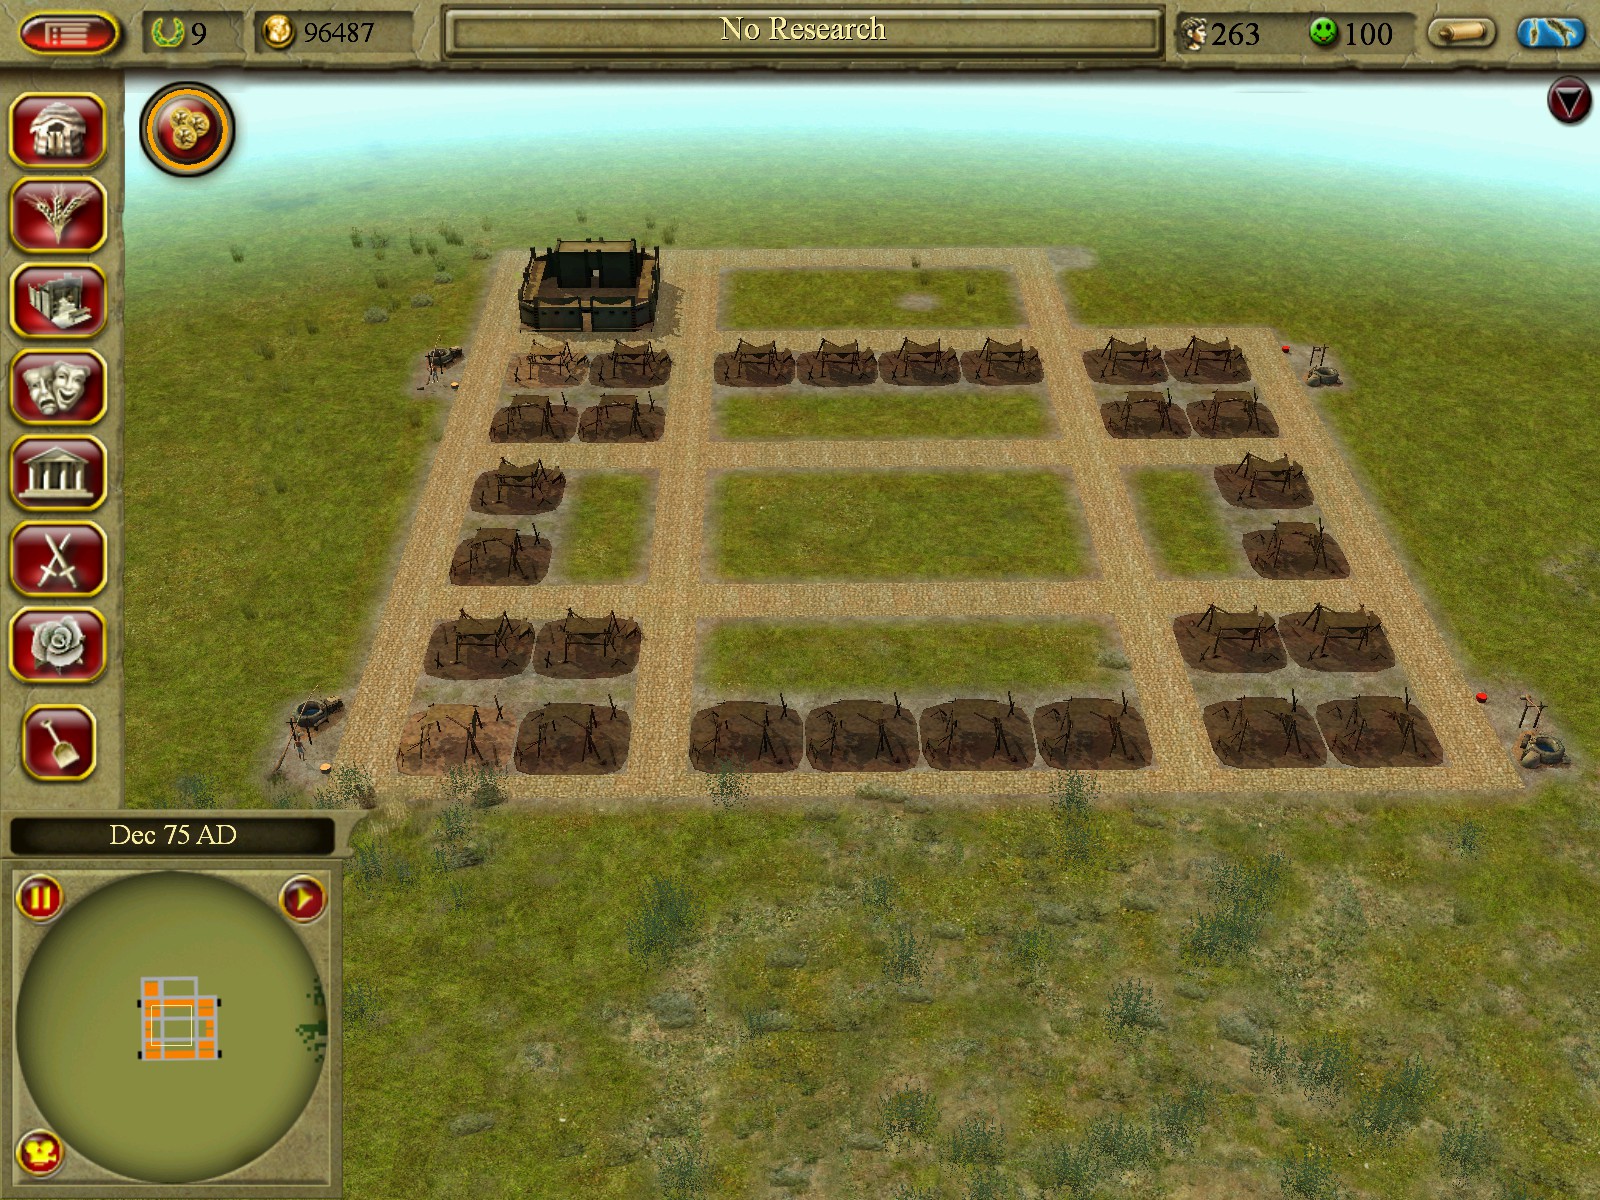

Add water wells on the sides as seen in the left picture. Shacks in the middle can still reach the well as shown by the green highlight on the building. These wells are temporary as later games have the cistern availble and once you complete lead working research on the current map the entire map will have water access.
Second Level Need – Meat
Once you start getting into tangible goods it’s a good idea to have a place to put excess goods so if demand ever spikes you won’t see a shortage since you’ll have some extra supply stored. With this design both a warehouse and a granary will fit next to each other in the center.


Placement of the meat stalls are important to ensure all shacks can get stall access. You will want to place the stalls two stalls width away from the edge on both the top and bottom of the warehouse side. As seen above, all shacks in the area can reach the meat stalls. Be sure that when you place the goat farms they are within the collection radius of the stalls or the stall will sit unused. I placed the goat farms at the top as seen in the screenshots for the purposes of this guide, both stalls will reach them easily in this position.
Sanitation, Clothing


When sanitation huts are available, they can easily be placed behind the storage or granary as seen above. With the research sanitation you shouldn’t need more than two per residential area.
Third Level Need – Clothing
Place the clothing stall on the other side above and below the granary like the meat stall was placed above and below the warehouse two stall widths away from the road. This ensures that all shacks can reach the clothing stall like the meat stall.


Olive Oil, Religion, and Beds.
Fourth Level Need: Olive Oil.


As you can see above, both the far left and right houses can reach the stall. This will be true for both the top and bottom of the area.
Fifth Level Needs: Beds and Religion

Bread and Entertainment.
Fifth Level Need – Bread

Fifth Level Need – Entertainment
On the left is a musician patio placed in a cross of an extension of the road lines with a little decoration. Musician patios require a musician school to operate. On the right is a tavern placed in an opposite corner with decoration.


The left screenshot shows where I placed these particular entertainment venues. These venues can really be placed anywhere around the residential area. What is interesting to note, is that despite being out of a houses reach, the musicians patio is still able to be accessed. The tavern does not share the same benefit.


Pipe Water and Baths
Sixth Level Need – Pipe Water

Sixth Level Need – Baths


Working in the baths is a bit tricky. To start place the bath on the outside of a corner square. Having the bath on the outside of the residential area like this provides poor service area. To fix this issue we need to get the corner houses to upgrade so they can be moved over stalls so the bath can moved into the best place to provide better a service area.


In this screenshot, one of the houses is ready to upgrade and is about to be placed over a stall. Once the corner houses are upgraded and moved over stalls, move the baths into the vacant corners. This will ensure all the Insulas have a bath within reach.


At this point the only stall you will need to add for the next series of housing will be the fruit stall. Other stalls can be added to provide additional goods, I recommend an extra meat, bread, and/or fruit stall as food is something you want to keep full otherwise your happiness will drop quickly.
The Insula Stage and the Grammaticus
Compacting to Insulas


Keep moving houses and have them ready to upgrade to Insulas. If you don’t want to place anymore stalls due to an overabundance of goods, Insulas can still be placed even without a stall underneath them. The leftern Insula in the picture has no stall in it. The goal here to to have the top and bottom of the residential rectangle area (where the stalls are) filled with Insulas. You can also see in the right screenshot the collection radius of these Insula.
Seventh Level Need – Grammaticus
This building fits snuggly next to the temple where a house once was. It’s a little longer length wise than a house, so it will only be able to face one of two ways. Be sure to place this next to each temple. I also recommend researching education to increase student space as even with two schools it will be well used.

Fruit and Doctor’s Office
Eighth Level Needs – Fruit
At this point, Fruit stalls can be placed anywhere on the stall row. Be sure to place one in the top and bottom stall area and also have a farm nearby as per the previous production buildings.
Eighth Level Needs – Doctor
This building fits in nicely with the Grammaticus, there is a 2×4 blank area which is great for some decoration. Be sure to place it on both sides.

Hospital and Slaves
Ninth Level Needs – Hospital
Once you have moved the last of the houses to Insulas, the hospital will be place in the opposite corner of where the baths were before they were moved. There is a bit of extra space as the hospital isn’t as robust as the baths, so I fill in the empty space with decoration.

Ninth Level Needs – Slaves


The big S. This building needs to be placed around the outside of the residential area. Wherever you place it make sure you place it on the opposite end as well so all Insula’s can get access.
Final Tips and Closing
- For research, I recommend taking all the techs that speeds up research first. Then take all the research that increases taxes. Taxes alone can make a city make massive amounts of Denari. Grabbing any tech that reduces need or access time should be chosen as a case by case basis for whatever your houses need at the time.
- Have the center residential warehouse only accept Tunics, Olive Oil, and Beds. If you do this, make sure you have a warehouse for the other goods to go to. When you have a sizeable amount of money, consider making a warehouse specialize in one type of good for each production item.
- As above, have your center residential granary only accept meat, bread, fruit. Olives, Grapes, and wine can easily fill a granary rendering it useless for residential needs.
This wraps up the Residential planning Guide. At this point the Insula’s upgrade into a Villa which are larger and require even more stall access. Unfortunately, I am still experimenting with risher residential designs that work for any space and haven’t come up with anything concrete enough for a guide. Hopefully this basic design has helped you with creating a compact yet functional living space.