Overview
Warning: this contains spoilers!continue if you want to spoil the story for yourself or have watched or played BatIM
Chapter 1
Gameplay:
You start as Henry going into the studio and (of course) the door is locked behind him (great.)
You have no choice but to explore the studio and find the Ink Machine
(Henry does not know it’s the ink machine, yet though.)
You are then given another task which is to get two dry cells to bring up the ink machine.
One dry cell is on the shelf and one is in the box by the shelf.
Then the player must go to the power room to continue the game, he must find six items:
A music disk, a bendy plush, an ink jar, a cog, a wrench and a book.
Once you get all the items you go back to the power room and put them on the pedestals.
Next, you go back to where the bendy plush was and turn the valve by the projector.
You then go back to the power room (again) and flip the switch.
Finally the ink machine is turned on, and Henry goes to the ink machine room only to find it boarded up. Then you must go close to the boards to continue the story (with and ink bendy jumpscare)
Henry, the player must try go back to the entrance resulting with the floor falling and dying (not).
Now, you must turn a valve to drain the ink. You do this three times until you get into a room with an axe. You grab the axe and cut down the boards (if it wasn’t obvious enough) and end up in a ritual room, where chapter two starts.
Story:
Henry is invited back into the studio by his old friend, Joey Drew. Little does Henry know is that it was a trap. He is forced to turn on the ink machine every time the game replays. There is not an option other than to turn on the ink machine and continue the never ending loop.
The six items:
The six items you have to collect are theorised to be from some of the workers of the studio
Wrench: Wally Franks
Cog: Thomas Connor
Ink: Henry Stein
Music disk: Sammy Lawrence
Book: Joey Drew
Bendy Plush: Shawn Flynn (If i’m wrong correct me pls)
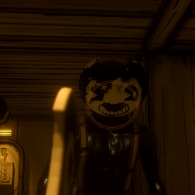
Ink Bendy:
A humanoid-ish nightmare variant of the cartoon devil, he is missing one glove, he is soulless and can transform into a much more nightmarish form in chapter 5. His eyes are covered in ink, so he probably uses his hearing to know where Henry is. He is a voiceless character that can go through walls (but for some reason he doesn’t use that power in chapter 1) and covers the walls around him with ink.
Chapter 2 (unfinished)
Gameplay:
You wake up where you left off, in the ritual room, probably hours (or even days) later
The only thing you can do is grab the axe and break down the boards on the door next to you, as the ceiling behind you has collapsed. You then proceed to utility shaft 9. (and the game tries to scare you by chopping a plank, nice) If you go to the right, you can find a tape recorder. If you play it, after the tape Sammy can say “I said, can I get an amen?”
Then, you go to the direction of the bendy cutout by the ritual (spoopy) and if you try chop it, it explodes into many pieces. But, when you look away, and look back at it, it fixes itself.
You then walk at 0 miles an hour in a hallway flooded with ink. While you are doing that, a humanoid figure crosses the hallway in front of you whispering
“Sheep sheep sheep it’s time for sleep, rest you head, it’s time for bed.”
When you get to that hallway he was just in, you find out that he’s gone the a hole in the wall (well that’s what I think, I can just imagine him constantly banging his head as he tries to get in the hole)
You then encounter another cursed bendy cutout (or maybe it’s the same one) next to an entire shelf of… bacon soup.
You then have to find 3 switches.
The first one is behind the bacon soup on the shelf.
The second one is by the coffins (not the starting area coffins)
The third switch is in plain sight, you don’t even have to look for it as you’ve already seen it.
You then bring up the gate by pulling down the lever you just activated.
Chop down the boards, walk through and look to the right.
Walk over to the barrels (but not too close) and look to the right again. A flooded stairwell.
Enter the room to trigger Henry speaking, then you can pull the lever.
After you’ve pulled it, go back and you’ll have to fight “searchers” to unlock the rest after pulling the lever.
You must go through the hallway on your right and activate the tape right by Sammy’s office.
Then you must go searching the trash cans to find the keys that he dropped to unlock his closet.
Once you’ve opened the closet listen to Sammy’s tape, remember the instruments as you need to remember them for later. Example of pattern: Bass, Piano, Bass, Banjo.
You then want to go to the projector room (up the right staircase of the music department) turn it on, then go back to the instrument room and play the instruments in order. Then Sammy’s sanctuary will open, letting you turn the valve in there. You then want to go to the area marked “infirmary” as you just drained the ink in that.
You go down there and pull the lever that says “Utility access”
You go down the and find that a searcher has the valve you need to continue.
Next, you follow the sewers down to a room with a box lift. You need to lift it up, and get the searcher to go under it and then you pull the lever on the opposite side and smash him.
Grab the valve, put it back on and turn it. It will then grant you access to Sammy’s office.
Then you turn the lever and proceed.