
Overview
An easy guide on how to boost FPS and Stability in Hell Let Loose
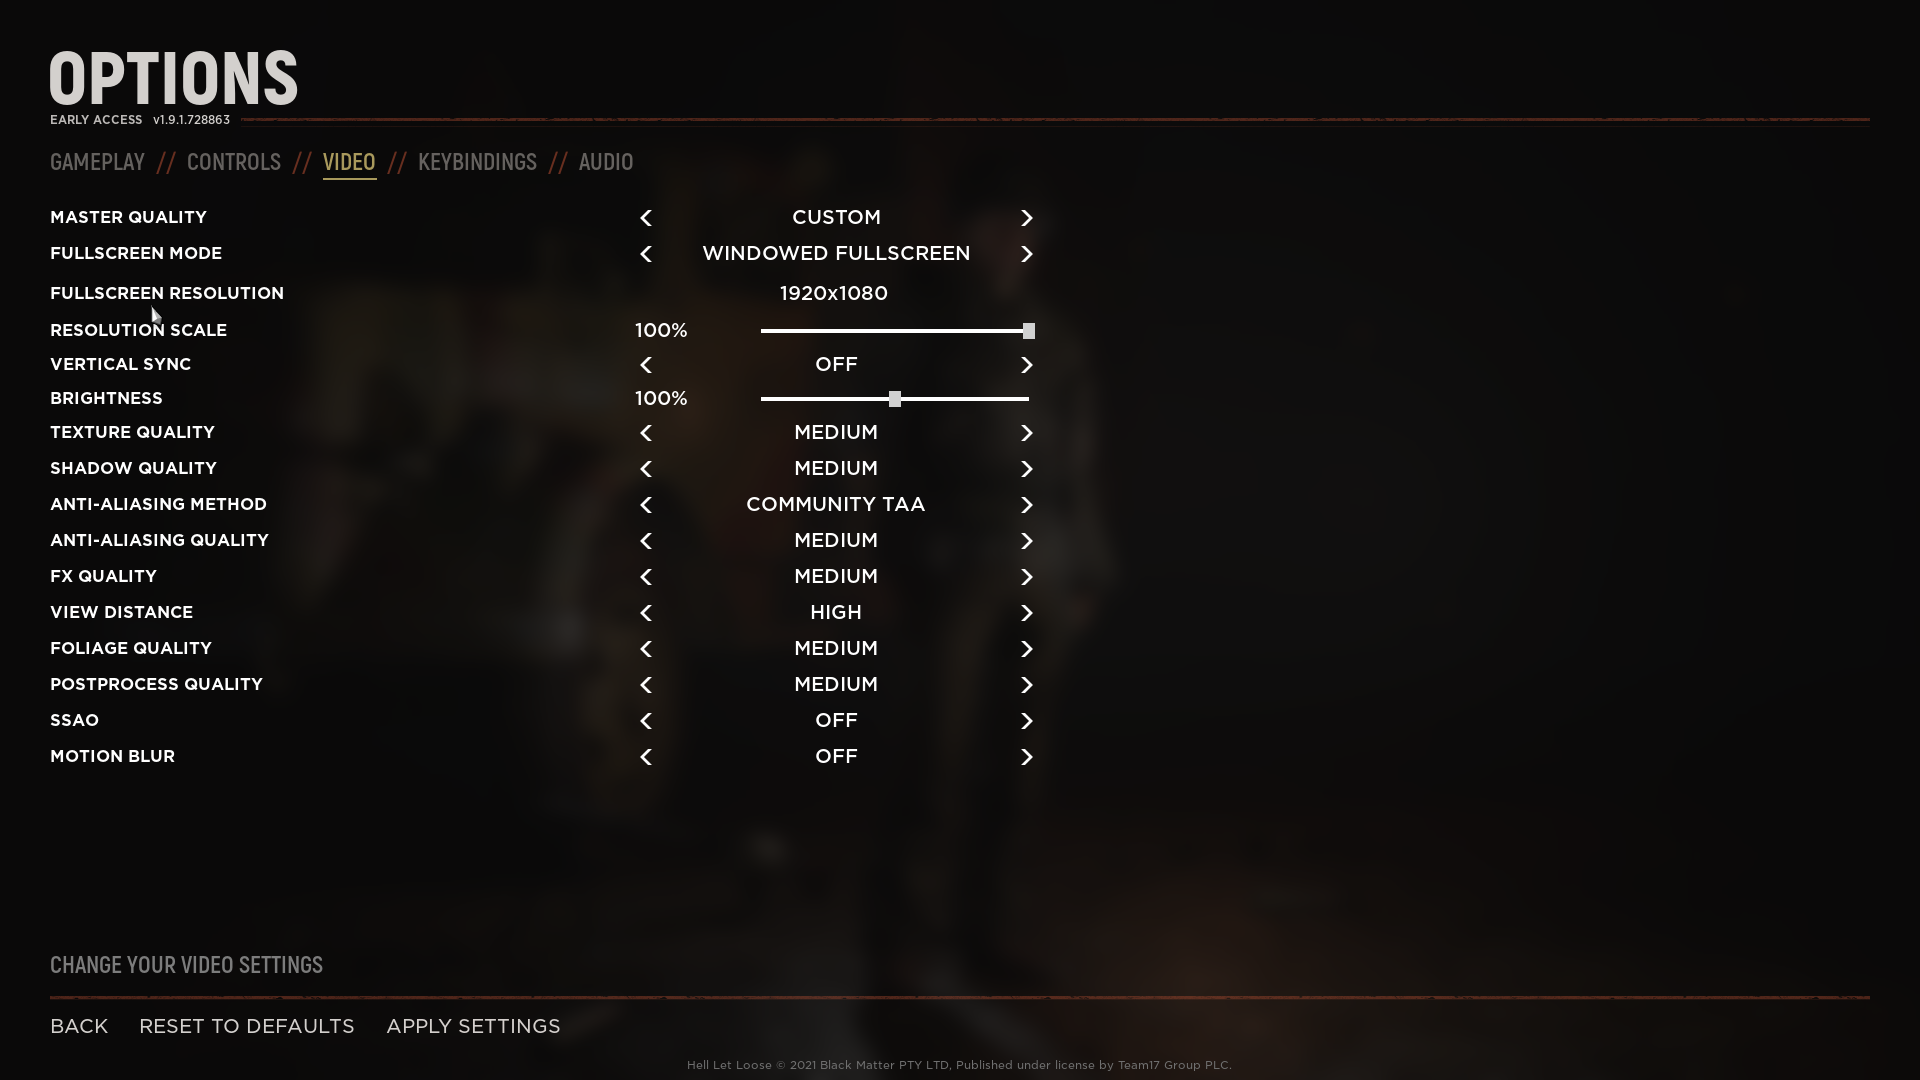
Game settings
Changing the V-Sync settings is up to you, but from what I have noticed there is no noticeable difference.
Launch Options
If you do this, make sure to launch Hell Let Loose from Steam, And not from the Desktop icon or start menu. The Launch Options will only be applied on Steam and not anywhere else.
To change the Launch options, go to your Steam library, right-click on Hell Let Loose, and click Properties. In the new menu select Launch options.
Launch options you should use.
- -refresh [Monitor refresh rate]
- -USEALLAVAILABLECORES
- -malloc=system
- -dx12
-refresh [Monitor refresh rate]
Replace [Monitor refresh rate], with your monitors’ refresh rate. (Example: -refresh 144 for a 144hz monitor.)
-dx12
-dx12 will make the game use DirectX 12, this will increase your framerate a lot. However, it can cause severe issues with crashing. If you want to use Dx12 make sure to set Fullscreen mode to “Windowed fullscreen” in the Hell Let Loose settings.
It should look like this:

Windows settings
Open Windows Settings and click on System. Click on Power & Sleep and click Additional power settings, on the right side of the Settings menu. Here select “High performance”.
For even more performance, you can install the “Ultimate Performance Power Plan”.
To install it: Open a command prompt (as administrator), and run:
After that, follow the steps on how to change the powerplan above. But now select “Ultimate Performance Power Plan” instead of “High performance”.
Open Windows Settings and click on Gaming. Click on Xbox Game bar and turn it off.
Now Click on Game Mode and turn it off.
Drivers
To fix a lot of stability issues you should always be on the latest graphic drivers.
Download the latest graphics drivers here:
AMD Drivers[www.amd.com]
Nvidia Drivers[www.nvidia.com]
Clearing Shader Cache
Go to your NVIDIA control panel > Manage 3D Settings, turn off Shader Cache and hit Apply.
Reboot your PC.
Go to %username%AppDataLocalTempNVIDIA CorporationNV_Cache and delete the contents of the folder (You can paste that address directly into a Windows address bar).
Go back to your NVIDIA control panel> Manage 3D Settings, turn On Shader Cache and hit Apply.
Source: knaldtech[docs.knaldtech.com]
Optimizing Windows 10 For Gaming
To Optimize Windows 10 For Gaming, use this guide I found on YouTube.
Source: https://www.youtube.com/channel/UCjidjWX76LR1g5yx18NSrLA
Enjoy!
I hope this guide helped you increase your FPS and Stability. If you liked the guide, leave a like, an award and add it to your favorites!

In upcoming updates there might be performance fixes, so stay tuned!