
Overview
Guide on how to choose army colors in Skirmish mode.
Introduction
This guide will teach you how to choose your own color in Skirmish mode and how to set up mods in Halo Wars Definitive Editon for Steam.
I find Halo Wars to be quite a fun RTS game, but I find it odd that you cannot pick your own army’s color in Skirmish mode like so many other strategy games allow. I originally learned how to do this because I would play Skirmish a lot with my brother and we wanted to play as red team and blue team.
After learning how to change colors, I decided to create this guide to show others how to pick any color you want from either the in-game team colors or create your own unique color through the RGB scale.
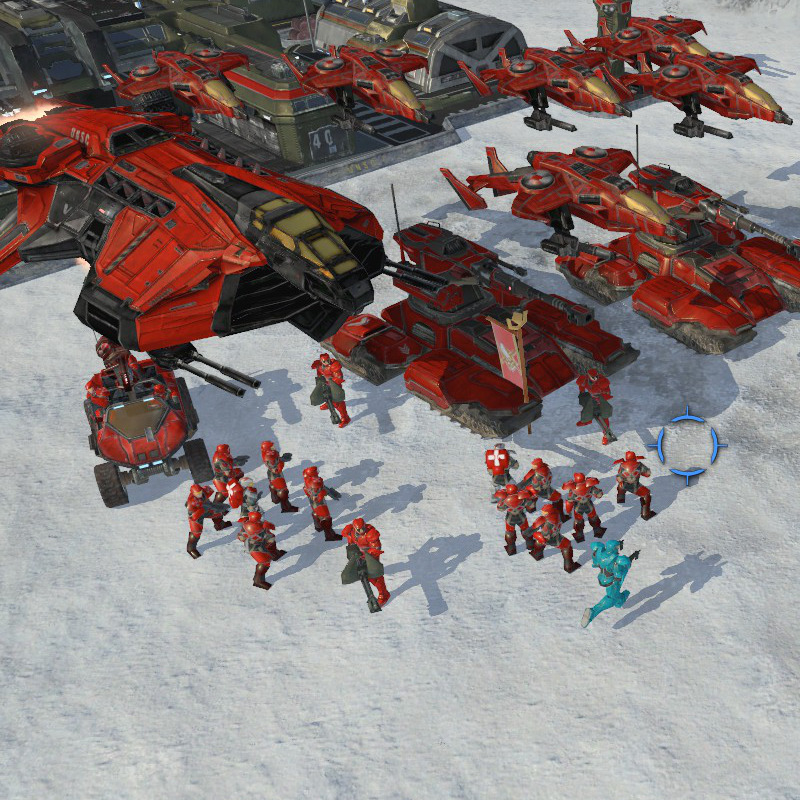
Here is an example of UNSC Player 1 using the Red Team color which is originally exclusive to Covenant Player 3.
Setting Up Mods
First thing is you need to set up your Halo Wars game to be able to use mods. A simple process that can be done in just 2 easy steps!
- The ModManifest file was added in a game patch that essentially allows your game to read mods, without having to completely unpack and patch your game manually every time you install a mod.
- For Windows Users go to C:Users{username}AppDataLocalHalo Wars
(“username” of course will be whatever your login name is on your PC.)
*If you do not see the AppData folder then type it in your Explorer address bar manually OR enable “Show Hidden Folders” and disable “Hide Protected System Files” in your Windows Explorer settings to make the AppData folder visible. It is a hidden folder by default! - Inside the Halo Wars app data folder, you should find a text file called ModManifest
If the folder is empty, no worries. Just create a ModManifest file.
“Right-click -> New -> Text Document” - Double-click your ModManifest file to edit it in Notepad.
Simply type your {HaloWarsInstallDirectory}overrides as the only line of text.
Again, your install will be wherever you chose to install Halo Wars. For most people it should look something like this.
C:Program Files (x86)SteamsteamappscommonHaloWarsDE
*Be sure to click SAVE when you are done in notepad!*
Once finished you should have a ModManifest text file located in your Halo Wars folder under AppData. Upon clicking it, you should have a single line of text that appears similiar to this.
C:Program Files (x86)SteamsteamappscommonHaloWarsDEoverrides
Please note that not everyone’s will be the same, it depends on where you installed your Halo Wars game!
An easy way to find your install directory if you aren’t sure where it is…
Go to your Steam Library -> Right-Click Halo Wars Definitive Edition -> Click Properties -> Click the tab “Local Files” -> Choose “Browse Local Files…” -> Window should pop up of your install location, just copy the address at the top of Windows Explorer.
The overrides folder is where you will unpack your mods to have them be read by the game. Setting it up is very simple.
- Go to your root Halo Wars install directory.
- Right-Click, add New Folder, name it “overrides”
Done! That’s all it takes, it’s literally just adding a new folder called overrides.
Basics to PlayerColors.xml
To change team colors you will need to download this file, playercolors[www.dropbox.com] This is the file used by the game to determine which colors is assigned to players in Skirmish mode. We will be editing this to change what colors each player will be.
First we need to set up our overrides folder to emulate the game’s file branch structure.
- Go to your overrides folder (the one mentioned in the previous part of this guide) and create a new folder inside it called “data”.
- Move the playercolors.xml file you just downloaded and place it inside the “data” folder. The file structure should go like this “overridesdataplayercolors.xml”
Now the mod is succesfully installed. Next we will be editing the playercolors.xml.
Any text editor should work like the standard Notepad, though I recommend using Notepad ++ because it keeps things neat.
You can download it here, NotePad ++[notepad-plus-plus.org] (I will be using it in my screenshots.)
Once you load up the playercolors.xml it should look something like this.

It may look confusing, but its not. Here’s a quick run-down of what’s what.
Underneath the <skirmish> is rows, each row being a team color. The color ID’s go from 0-15. By default the game has assigned colors 1-6 to be used by UNSC forces while 7-12 are used by the Covenant. At the bottom is Friend or Foe colors that show up on all teams regardless of player color when you enable the “Friend or Foe Colors” option in the game’s option menu.
We will be omitting color ID’s 0, 13, 14, 15 (I’m not entirely sure what they are used for.)
Also worth mentioning that the <spc> section controls Campaign colors, so you can use it to edit your color for campaign mode. Big thanks to Gamther for finding that out!

I threw this picture together showing the default colors in-game along with their ID’s.

The number values beside objects, corpse, selection, minimap, ui are the actual colors on an RGB scale.
Objects are the colors of bases and units.
corpses are the colors of well the dead bodies.
selection I assume is the color of your currently selected units.
minimap is the color of the minimap (duh).
ui is the color of your user interface (also known as a hud.)
These will usually all be about the same color except corpse, which is a much darker version of the color. It makes it so when units die, the become a darker to well show that they are dead.
A quick note on how the game assigns player colors for those who do not know.
There are 6 team colors for each faction. UNSC uses colors 1-6 and Covenant 7-12 (refer to the image above with colored squares and numbers.) Some colors you will hardly ever see, unless you have a full 3 vs 3 battle with only UNSC leaders or only Covenant leaders.
Now we will do a simple color swap. For this example I will be showing you how to play as the Red Covenant color on UNSC.
- First we will start by scrolling down to the bottom of the playercolors.xml. You should see <civ>
The first half is UNSC while the bottom half is Covenant. - Next we will be changing the text color=”1″ to color=”9″ on the UNSC section.
This changes UNSC’s Player 1 from standard Green to a shiney new Red.
Remember to save your work when you are done!

And that’s pretty much it to color swapping. You just change around those numbers to swap up colors. You can mixmatch anyway you want or assign anyone to any color. Be aware that you can make teams share colors, but that might make it confusing when playing. It won’t mess up teams though, everyone will still shoot the opposite team, so no worries there.

The next section will cover how to create your own team colors using the RGB scale, so you won’t be limited to the 12 preset team colors.
Creating Your Own Team Color with RGB Scale
This will show you how to create your own team color for those who want more than the default game colors.
Go to this website and pick a color you want. [link]

Then take the RGB values and insert them over the color you want to replace in the playercolors.xml
For this example, let’s say we want to replace the default UNSC Green with a nice royal Blue.
Go to row num=”1″ replace the values of objects, selection, minimap, and ui with your values you got from color picker.
For corpse, go back to the color picker and darken your color a bit. Copy the new values of the darkened color and paste them over the corpse value. This way when your units die, they will get darker and not be bright like your living units. It isn’t necessary, but I recommend it.
Aaand that’s it. Your done. You just created your very own team color.
Here are some previews of my UNSC colors that I made for me and my friends to play with.


Credits and Thanks
I want to thank Kornner Studios for the modding programs and development tutorials that helped me learn how to mod Halo Wars. This guide wouldn’t have been possible without them.
And thanks to my brother for pushing me to learn how to make him Red team haha.
I hope this guide wasn’t too bad! It was my first guide ever and I spent waaay too long on it.
I also want to thank everyone for reading this far, you finally made it to the end. Congrats!
Troubleshooting
I cannot respond to every single comment of “It doesn’t work.” If you are having problems please re-read the guide and try again. While I can’t see a reason it shouldn’t work on everyone’s game, I cannot guarantee it will work as everyone’s computer is different.
* Make sure you have your PlayerColors.xml file placed here.
C:Program Files (x86)SteamsteamappscommonHaloWarsDEoverridesdata
* ModManifest.txt file placed here.
C:UsersnameAppDataLocalHalo Wars
You MUST replace name with your computer’s login name! Everyone’s computer login information is different! If you cannot find the AppData folder, then its a hidden folder on your OS. Either unhide hidden items or manually type the address in Windows Explorer’s address bar to find it.
* Inside your ModManifest.txt should have a single line of code,
C:Program Files (x86)SteamsteamappscommonHaloWarsDEoverrides
This basically corresponds to wherever you have your PlayerColors.xml placed.