Overview
This guide includes information for all the weapons, combat and enemies in Mirror’s Edge. Many say that the combat in Mirror’s Edge is awkward but thankfully infrequent. If you take a look at the size of this guide you will find that combat, although not extremely common, was regular enough for Dice to put a lot of detail into weapons, enemies and fighting techniques. I also found that if you understand the weapons and learn how and when to use them and when not to, the combat becomes much more fluid. Therefore I challenge you to try and use the way weapons and combat the way they were meant to used. Read this guide (or even one section) and then try the combat again, and see if you play differently (and hopefully with more fun). If there is anything that is incorrect, I have missed or you would like me to add please say so via the comments so I can make this guide as informative and accurate as possible.Note: This guide may contain some spoilers as you may read about weapons and enemies that you have not yet encountered.Note 2: The clip sizes in this guide are based upon how many SWAT it can disable before it runs out. One to two SWAT is small, medium three to four and large is five and above. This is based on Medium Difficulty.
Close Quarter Combat Techniques
This section explains how to effectively take out different enemies in hand-to-hand combat. I formulated a pretty standard melee combat technique that can take out any enemy. You do not need that much space for this method so it is good in small and enclosed spaces.
First you run at the enemy with as much speed as you can get, when you get close slide kick them. They will bend over and give you the opportunity to take them out in two different ways. Number one is to go round to behind their gun arm and do a rear disarm. You can’t always go round the back and expose yourself to other enemy units in some situations however. This is how I do it for all units except Pursuit Cops. I slide kick them, then pummel them as much as possible, just button spamming the attack button, then when they are close to recovering I retreat three steps back, then run at them and slide kick them again. They will once again bend over and give you the opportunity to deal them a finishing kick to the head.
Now depending on different units and their armour they might collapse before you can finish this whole combo, which is good. A variation of the method I just explained was do the first part of slide kicking them then pummel them, but don’t bother retreating, they will hit you with their gun as they stand up but that leaves them open to a finishing hit from you, before they can hit you again. I only do this if everyone else has been taken out adn they are the last guy.
For Pursuit Cops I do the same method but slightly differently, because once they hit you, you lose your rhythm which makes it easy for them to finish you off. Therefore you can’t afford to get hit. This is how I deal with Pursuit Cops. I run at them, they will run at you. They will most likely try and fly kick you, you will slide kick them however and your kick will hit where as theirs will pass over you. Then see if you can hit them a couple of times then take a few steps back and run at them again and slide kick them. Timing is crucial as even a split second too early or too late and they will hit you and you will lose your rhythm.
Keep doing this until they are down. Another way to take them down which is easier but riskier is to slide kick them as they jump kick you, then run around the back and reverse disarm them. This is much riskier however as Pursuit Cops recover faster from slide kicks so you have to make sure you are in the perfect disarm position as you only have one try before they stand up and start hitting you, making it almost impossible to get any distance from them before you die.
Helpful Combat Tips and Tactics
Here are just some general tips for relatively new and experienced players alike that may get stuck on some levels or just want some helpful tips and tactics.
1.Never ever stop moving. Your only advantage in any situation is your speed. If you try and hide in a corner they will call in all nearby units and slowly box you in until you have no chance of escape.
2.The next tip is when you are under fire never run in a straight line. Even if there is no cover you will want to try and zigzag which will hopefully make them miss a few shots. This won’t work for long and soon they will hit you but it does buy you a few seconds to get to cover or escape.
3.The third tip is when being shot at always use whatever cover you can. There might be almost nothing but even sliding behind a pot plant will offer you cover for half a second before you start running again. Most enemies in the game carry heavy weaponry and that makes them slow. Even officers that carry machine pistols or normal pistols can easily be outrun. If you don’t think you can take out an enemy or enemies, just run, if you use what cover is available, nine times out of ten you will escape.
4.For number four it is only use a weapon when absolutely necessary. They slow you down and most make you unable to run or move effectively, losing your only advantage. The only time I use guns are to take down an enemy that might be cornering me and blocking my escape. Despite guns slowing you down, never stop moving even if you have one. Though you have a gun they will still surround you if you stop and most likely have more men than your gun can take down, this means that you can’t just stay in one spot and gun them all down.
5.That brings me onto my next tip. The only time you ever stop moving is when you have a gun with pretty much full ammo and no where else to go. You will want to find a corner of a room with preferably a close and covered escape route to somewhere that is more suitable for fighting on your terms. Wait for the two closest enemies to come at you, preferably firing at them when they are running rather than waiting for them to come at you and be ready in guarded positions. Once they are down the other members of the squad will be a few seconds behind them giving you a chance to bolt. If you still can’t escape you will want to pick up a new gun and move somewhere else, as they are moving to corner you in your old position and they take time to adjust to your new location, giving you a small advantage.
6.My last tip is if there is a relatively big obstacle between you and an enemy like a big crate or a wall of a small building like you find on roof tops. Wait on the opposite side you are going to flee from, then when the police turn the corner and are facing you, bolt around the corner they didn’t come from, this is good as Blues are slower than you and will take a few seconds to come around the other side you are on and open fire on you. This uses your biggest advantage and only advantage over them, your speed.
Colt M1911 Handgun
 This is a handgun as obviously shown above. Its name is the Colt M1911. It’s the gun most used by normal police officers. Surprisingly it is one of the most accurate long range weapons of the game (the same as the triple shot pistol) apart from the sniper rifle, and as it isn’t automatic it has almost no recoil allowing for precision firing. That makes it surprisingly good for shooting targets from a distance beyond the reach of spray weaponry such as what SWAT use. As this is a more precision weapon it is great to use against snipers if you can get your hands on one and they are relatively close. This isn’t meant to be a very long range weapon however so although it has a further range than other weapons and is more accurate, it cannot even nearly match the sniper rifles range. It is the next best thing however if you don’t have a sniper rifle. The other really handy thing about a handgun is that you can still do all your parkour moves and keep it on you until you need it most, unlike most weapons which you have to drop once your done with them because they stop you doing any parkour. It has a relatively small clip size of nine shots, capable of taking out about two or three police officers or one SWAT officer.
Glock 18 Handgun
 The Glock 18 is a triple shot pistol. As shown in the image it looks almost like the normal pistol except it has an extended magazine and fires three bullets at a time instead of one. It also has a slightly different look as it is in fact a completely different handgun. It has the same range as the normal pistol but has a bit more spray as it fires three bullets. It has a small clip size, however due to me finding it only once the only enemies I could test it out on was Pursuit Cops, (And it was good at taking them out by the way) It took out two of them before emptying as it takes three shots of three bullets to take each out. This gun is rarer than every other weapon however. It is in fact the rarest gun in the game as it is only ever found it once where a police officer was holding it. (To find out where see the Bonus Section)
Taser
 This is the taser. I will tell you it was a massive pain trying to get a screenshot of it. I had to try and get it as the Pursuit Cops hit me. I then cropped out the Pursuit Cops and enlarged the taser, which caused some stretch as you can see. It is a very close range weapon, probably no more than three metres range. It is also the only weapon in the game you can’t pick up and once you take down the Pursuit Cop the taser disappears. My favourite thing about this gun is when you do a reverse disarm against a Pursuit Cop you would pull his head up then grab his taser and taser him from point blank which is pretty funny to watch. Occasionally once the taser hits you once, as soon as you recover the Pursuit Cops would just pull the trigger again and send another electrical charge down the wires, then when you recovered, taser you again, this kept happening until you died. This doesn’t happen every time but when it does it makes the taser a formidable weapon despite the range limitations. This is the only weapon in the game that Faith fires into the guard when disarming them.
Steyr TMP Machine Pistol/SMG
 The Steyr TMP is a submachine gun crossed with a machine pistol and is definitely my favourite gun that doesn’t slow you down that much and allows you to do your normal parkour. It has a small clip size as all pistols do, allowing the disabling of two PK SWAT. It isn’t at all good on range though as it is full auto meaning you have to get quite close to make it effective and stop it from spraying everywhere. Precision firing is definetly needed from anything further than a few metres as if you just hold down the trigger it can spray a lot and waste valuable bullets. This gun is great against Riot police I found as they are lightly armoured and susceptible to gun fire, especially automatic weaponry.
Heckler and Koch MP5K SMG
 This fully automatic machine gun, the Heckler and Koch MP5 is the main gun that SWAT officers are issued in the beginning chapters of the game. I found it pretty much a slightly inferior version of the G36C. There isn’t a whole lot of difference between the two Heckler and Koch’s except that they look different and the MP5 does slightly less damage, has a slightly smaller clip and slightly shorter range. This gun has a medium clip size as it can only take out three SWAT if carefully fired with possibly a bullet or two to spare if you’re lucky. After using other guns I definitely did not like this gun much as I just found it worse in every way than other automatic weapons. This gun has less bullets that do less damage and this stopped you spraying as you wouldn’t kill anything becuase you had to make sure every bullet fired counted, meaning you had to nail every shot to effectively take down an enemy.
Heckler and Koch G36C Assualt Rifle
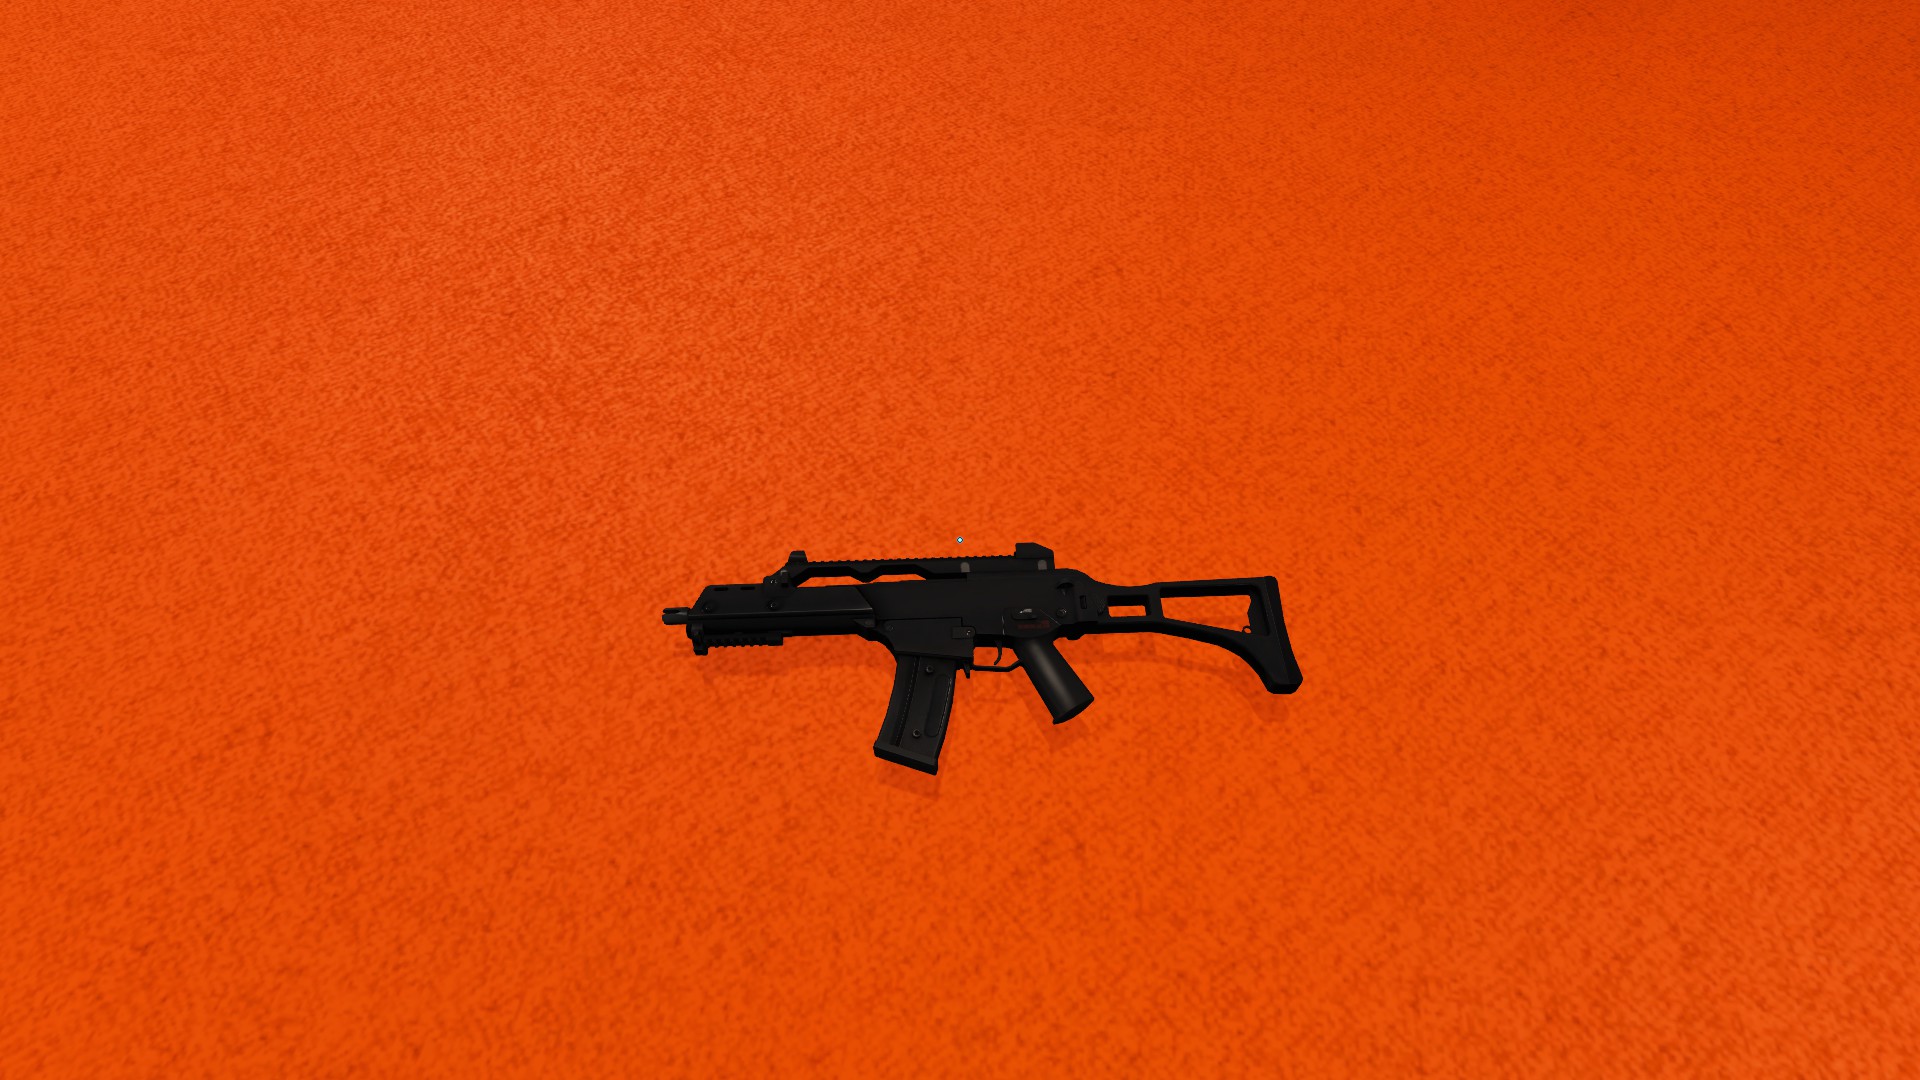 This here is the Heckler and Koch G36C. It has a rapid rate of fire meaning it does tend to spray a lot, so use it in very controlled bursts. It isn’t very good if you just hold down the trigger but controlled fire can take out three SWAT and have a few bullets to spare. This means it has a medium clip size. Overall this was probably the weapon I had the most fun with in the game. This was because it was the most multipurpose gun in the game. Short bursts made it a relatively accurate long range weapon, you could fire an occasional shot as cover fire and not worry about ammo shortages, or if you were annoyed at an enemy you could just spray from close to medium and sometimes long range and disable an enemy if you weren’t worrying about ammo.
FN SCAR Assualt Rifle
 Next up is an assault rifle called the FN SCAR. It has a medium clip size meaning it can take out three SWAT officers if you nail every shot. It’s also more accurate than the G36C if you just want to hold down the trigger. This is because it has less spray as it doesn’t fire as rapidly but each shot is more powerful so it does about the same damage as the G36C in the end. Despite it being probably a better weapon in some situations I didn’t like it much and used other weapons where I could. As it is an assault rifle it is best to use it in bursts as every shot counts.
FN Minimi Machine Gun
 This here is the FN Minimi. You know it has got to be good when it gets its very own special class of heavy SWAT to wield it. It has a massive ammo clip capable of taking out however many enemies you need to take out and still having enough ammo to take them all out again. (I can’t tell you how many it can take out as there are not enough enemies in one section to try it out on) The maximum I have used it on was about six SWAT and even after that there was plenty of ammo left over. This gun has a good range, despite it being a machine gun which makes it spray and each of its bullets does heavy damage, meaning you don’t need to fire that many bullets to take down someone anyway. This gun was epic and I used it on occasions if I had to keep replaying a combat area (because I kept dieing) and just wanted to get it over with. That brings me to the reason I didn’t like it much. While fun on occasions if you want to feel like a badass I felt it was way too overpowered when compared to the other weapons. When I mentioned I took out six enemies I was taking them all on at once with only extremely limited cover. The gun is just that good, unless the SWAT units have one, then you don’t want to leave cover. On Hard difficulty, it can take out exactly 5 SWAT, with a miss or two before it runs out.
Neostead 2000 and Benelli M3 Super 90 Shotguns

 There are two types of shotguns in this game. The ones the SWAT use called the Neostead 2000 (on the left which I will just call the Neostead) and the ones the Riot officers use called the Benelli M3 Super 90 (on the right and I will just call it the M3). I don’t think they should be classified as two separate guns as they are both shotguns with only a few differences. The M3 is worse, as it carries fewer shots than the Neostead. Just a word of caution as the M3 is pump-action it takes time to pump after each shot so in a combat situation if you fire, miss then try to pump it again the enemy will have taken you down before you can get it ready again. So don’t miss, make every shot count. The M3 has a medium clip size, killing four enemies, while the Neostead has a large clip size that allows the elimination of six enemies. The shotguns were hard to judge on clip size because the amount of shots to kills depended on how close you were to your target. I ended up judging it from point blank or maximum damage as a result. The range of the shotguns are terrible, allowing a one shot kill of a SWAT unit only if you are about a metre away. Personally I think the riot shotgun looks way better but if I had a choice I’d choose function over form. (The Neostead) Both shotguns are good against any unit but as I have already stated, you do have to get quite close. If you do just want to stun them for a couple of seconds though you can fire from far away, they will take a step back from the shot and just generally get a bit stunned for the few vital seconds you need.
Barrett M95 Sniper Rifle
 The Barrett M95 is a sniper rifle and is definitely one of the most lethal weapons in the game. Offering a one shot kill anywhere on the target, all the range you need and a scope to go with it as well as six shots meaning a large ammo clip, it is a hard opportunity to pass up if you can get your hand on one. As well as this the only time you really use it is to shoot other snipers which are far slower to lock onto you so you almost never get hit in a sniper duel unless you have two or three snipers aiming at you. I have tried this gun at closer ranges and not using the scope but each bullet or melee strike that hits you just puts your aim off to much so you are hit again before you can adjust the aim. This makes it especially difficult to use it at closer ranges against automatic weapons.
Smoke Grenade

 Up top left is a smoke grenade before it explodes and to the right a picture of the peak amount of smoke that came from the grenade. A few times throughout the game you will see PK units using smoke grenades and very rarely Pursuit Cops. They are rare in the game and therefore information about them is extremely limited. SWAT units throw them, then for the few seconds you can’t see them will try to advance on you as much as possible. The smoke from the smoke grenades doesn’t last long and doesn’t cover a large but it does hide a PK units for a few seconds before it disperses. An example is that there is in fact a SWAT officer behind the smoke on the right picture but the smoke completely conceals him from view.
Flashbang Grenade

 On the left is what a Flashbang grenade looks like. You may need to click on the picture to expand it so you can see it properly as it is quite small. To the right here is the peak effect a flashbang will have upon your vision when it explodes near you. Your ears also go deaf for a few seconds but your hearing does recover very slightly before your sight. Flashbangs aren’t used often in the game. The flashbang is a simple weapon, it is thrown, explodes and stuns you stopping you from knowing where you are going or where PK units are around you. Testing the effects of the flashbang I found that from the moment it explodes, your senses fully recovers on the fourth second. I find that despite the fact that it does completely blur up your vision you can still keep running on the course you were running before you got blinded and your senses will most likely recover before you hit a wall or other obstacle so it doesn’t pose a major threat to you, it’s more a mild inconvenience.
Police Officer
 This guy here is the normal PK police officer. The first unit you go up against in the game, as well as by far the easiest. A few solid hits of fists, legs or bullets will disable this cop with ease. These cops carry the Colt M1911 pistol and the Glock 18 which is a triple shot pistol, which is only ever found once in the game. (To find out where look at the Bonus section) There isn’t a whole lot to say about these guys or tips on how to defeat them as they are easy. The one thing they are good for though are trying out new moves and combos on them with only minimal resistance.
Sniper

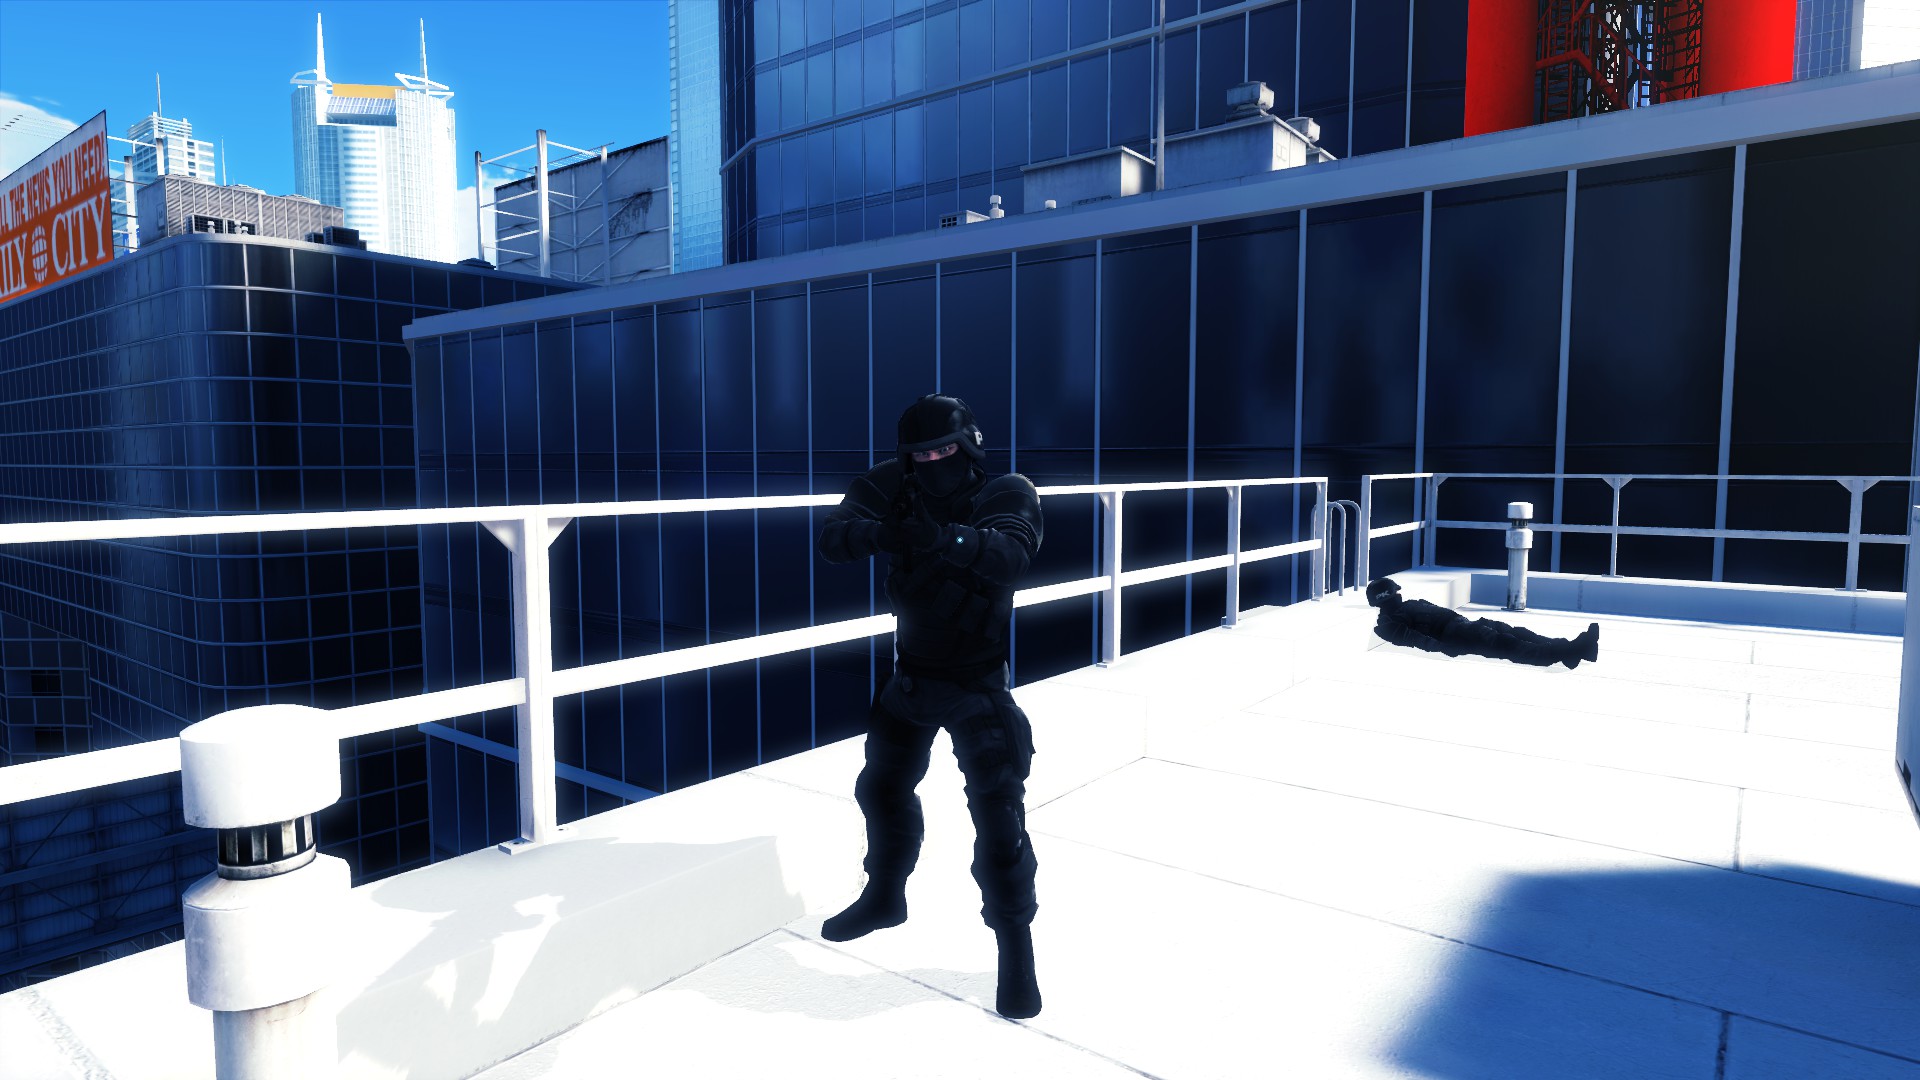
 PK Snipers look the least like proper police officers out of all the different police. Wearing all black and a balaclava they look rather like gangsters. As might be obvious snipers only carry sniper rifles. They use the Barrett M95. These sniper rifles all have red lasers for the sniper to see where they are shooting and these are the only way for the player to see where they are aiming. In close combat any melee will get them down quickly but from far away if you don’t have a sniper rifle they are a different story. You won’t want to leave cover because although they take a while to lock on your position once they have you their little red lasers are never far away. Therefore, you don’t want to give them much of an opportunity to lock on to you so once you leave your cover try not to stop in one place for long. Make sure to never be holding a heavy weapon that slows you down otherwise you are easy pickings for them. If even one shot hits you, it puts you off balance and you get stunned, leaving plenty of time for the other snipers to finish you off. This is especially important on Hard difficulty as two sniper shots finish you off. In a sniper duel these guys are relatively easy to beat as they take a while to aim and even a bad player can snipe them before they snipe you no problem.
Riot Officer
 This here is the PK Riot officer. They can carry three different possible combinations of weapons. The Steyr TMP (SMG/Machine pistol),Benelli M3 Super 90 (shotgun) or a Riot shield and the Steyr TMP. If they carry the riot shield they have a visor attached to their helmet but that is the only difference. They are the second easiest enemies to kill in the game but can occasionally catch you by surprise and take you down. These riot police are however extremely deadly with a riot shield and as they always have backup behind them and you can’t disarm them of their shields, this makes them practically invincible. It took me twenty or thirty minutes of trying with a special plan to take a riot officer down on easy difficulty. (To see how I did it see the Bonus Section) Therefore you can’t usually kill a Riot officer if he has a riot shield. When they are equipped with a riot shield, to stop you coming to close they also have a machine pistol and can hit you with their shield. So if you see Riot police with a shield just run. Otherwise the Riot officers are relatively easy to take down. They have armour that it is only just better than a police officer’s so one more hit and they are down. I found the best combo for me was to slide kick into them, then while they were bending over just pummel them.
Pursuit Cop
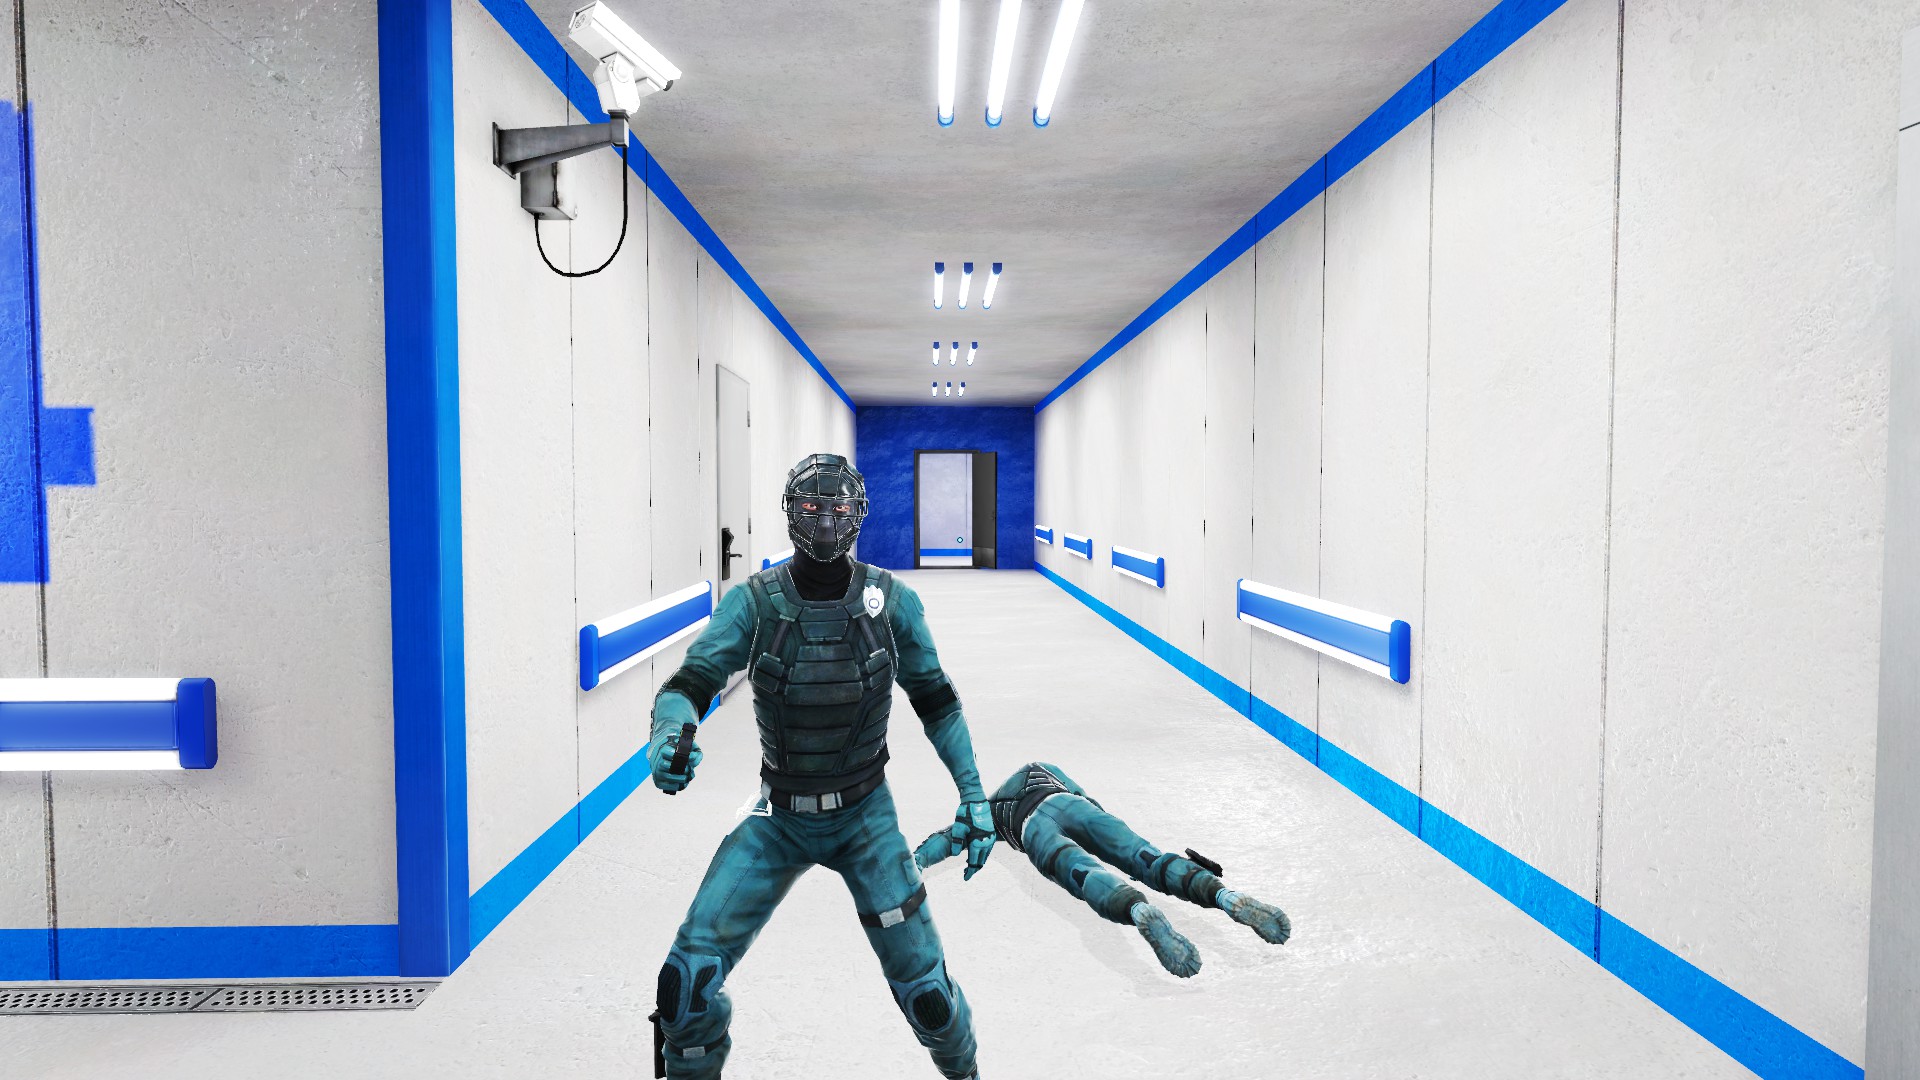 These guys here are Pursuit Cops. Pursuit Cops are by far the hardest to take down in hand to hand combat and it took me a while to figure out a strategy to beating them. What I do is run towards them, they do the same, then when they usually go to jump kick you in the head you slide kick them, hit them once with your fists then when they back flip away, you run towards them and slide kick them again and see if you can hit them once with your fists. Keep doing this to take them out. By using this strategy I could take out three Pursuit Cops at once on medium difficulty. As mentioned in the Taser section their tasers are very close range but are very effective. These special officers have body armour only made for melee and a few of any bullets will take these enemies out without any effort, especially automatic weapons. It is also possible to do a reverse disarm on a Pursuit Cop. You can stun them by slide kicking into them , then go around the back and do a special disarm. Unlike regular disarms you grab the taser, jam it into his chest, and fire it. This knocks the guard unconscious. It is not possible however to steal their weapons. Reverse disarms are risky though, as these officers are highly trained and recover from a slide kick much faster than any other officer. They also possess and use smoke grenades, albeit very rarely.
SWAT
 The PK SWAT unit is the most common enemy in the game and can be quite challenging when in faced in squads. They carry four different weapons. The FN SCAR, Neostead 2000 and Heckler and Koch G36C and MP5. All of these weapons are deadly in their hands and are not to be taken lightly. If you can get in close definitely try to disarm this hostile as quickly as possible otherwise they can become a major threat, stalling for time while other units close in on you and make escape impossible. Make sure if you disarm them a maximum of only one other hostile is in sight of you or you will get shredded. Once you have a gun the playing fields become much more even except that one gun can’t take out however many SWAT and other Blues you are probably facing so you will want to take out as many of them as possible with the weapon before they start to surround you and you can’t make another disarm. Once you are in their sights you have to get to some kind of cover in seconds before they just spray bullets at you and you can’t avoid them, so make sure you are never stuck on a walkway with SWAT around you. Once again my best technique to taking them down was to slide kick, then pummel them however they will hit you once with thier gun when they straighten up so make sure you aren’t on low health, or go round the back and do a rear disarm.
Heavy SWAT
 The Heavy SWAT unit is very similar to the normal SWAT unit except he has bigger pads on his shoulders and thighs and he is just generally a bit bigger. He has better armour meaning it takes more hits to bring him down. His only weapon is the FN Minimi and he is the only unit in the game that is armed with it. These guys are also found on PK helicopters. (go to the Helicopter section to see more) If you are caught out of cover with one of these guys having visual contact on you, you will most likely die unless you find cover in the next second or so depending on game difficulty. These guys are easy at close quarters but it is hard to get right up to them. They are a bit sluggish and slow which makes them easy to disarm, but if you mistime the disarm they will hit you away and unleash lead from point blank leaving no chance for you to escape or try a second time. These guys are very deadly enemies at any range and definitely not to be under estimated. As you can see I couldn’t actually get close enough, even on easy to get a good screenshot of these guys so I had to make do with what I could, and believe me, I tried many times to get a better screenshot.
Police Helicopter
 This here is the PK helicopter and is surprisingly hard to get a good screenshot of with a FN Minimi trying to shred you as you line up the picture. That brings me onto my weapons part about the helicopter. On each side of the helicopter facing outwards is a Heavy SWAT officer armed with a FN Minimi. (For more about the Heavy SWAT or FN Minimi see their sections) As there is a SWAT unit on either side, if the helicopter turns it still has someone aiming at you and this also makes it difficult to try and get past it on its small blind spots. This isn’t as important on easy and medium but on hard if you just run with the helicopter facing side on to you, you will most likely die as the SWAT unit has a perfect shot at you right out in the open. These helicopters aren’t much of a threat unless on Hard but on any difficulty they are very maneuverable and can turn side on from any position to get a good shot at you in just seconds so you have to make sure you value those few precious seconds and make them count by getting in cover before the chopper can bear down on you.
Bonus Section
How to Take Down a Riot Officer With Shield
Start
Please note: I can only do this on one section as it is a good area to take them out. This is Chapter 4: Ropeburn, Checkpoint F. Two SWAT and a riot officer are blow torching the door trying to knock it down. Run to the door and turn left, go as far back as you can and press yourself against the wall. Wait for the door to fall down and the riot officer to walk through. Don’t move until he stops and pulls out his gun. Bolt out the corner, run into the room he just came out of and as you enter the door take one step and slide kick. You will hit a SWAT officer and make him bend over. Run around him so you are looking out of the door way and you can see him more easily and quickly either pummel him or do a rear disarm, a rear disarm is better. If you pummelled him pick up his gun and turn towards the darkness, the other SWAT officer will have fired so you will know where he is in the general direction. Fire until he falls (I just sprayed)
Option 1
If you think you can make it out the door without the riot officer hitting you with his shield, then go for it, otherwise refer to option 2.
Option 2
Then run to the officer you just shot and turn around (make sure you are not to close to the back wall), the riot officer will have followed you so as he turns the corner try and see if you can shoot past his shield with the rest of your ammo then drop the gun and pick up the second officer’s gun but don’t fire it. The riot officer will by now have hit you with his riot shield and sent you falling to the ground. This is the part where luck kind of plays a part. He should walk up to you and stand over you, or maybe just in front, about on your head but he shouldn’t fire. Jump up and try and bolt out the door, do not fire, just run. He will probably knock you over the first couple of times you try it so wait until you are healed before you jump up again. When you get close to the door he will shoot you when you get knocked over so just try and run past him and don’t stop.
End
If you make it and bolt out the door, turn right down the walkway you hid in before and don’t go to the back but stand back a few meters so as he comes out he doesn’t hit you with his shield. Try and fire past his shield as he turns the corner towards you and see if you can hit him. You should get at least one hit before he turns towards you, see if you can get past his shield again but otherwise just empty you ammo into his shield. Then turn and place your back flat against the wall. As he comes towards you hit him from side on, making sure you don’t waste a hit on his shield. Also making sure he doesn’t turn his shield towards you, you have to use the moment when he is stunned and doesn’t move.
Well that was a long list of instructions but if you can follow them you can say that you have taken out every enemy in the game. This may not work every time and is very hard to do, but proves it is possible to take down a riot officer.
How to find the Glock 18
Let’s get right into it. To find the Glock 18 you need to go to Chapter 6- Pirandello Kruger, Checkpoint E. As you exit the lift go straight and do what you normally do, run through the building and bust out the window onto to the roof top, jump onto the stairwell and keep going as you normally would. Then when you reach the next roof top a PK Police Officer will bust open a door facing directly towards you and start firing. He has the Glock 18 and once you have taken him down you can pick it up and use it yourself.
Funny Screenshots
Faith is feared throughout the country and all the Blues have a different response to her. Some want to shoot her while others put up their hands in surrender and try to back away.


So you supposedly escape through the Pursuit Cops training ground, well then, why did I find this guy practising his moves over bins in a corner while his friend is lying down resting from training so hard? I think I found the real training ground.
Resources and Ending Note
I hoped you enjoyed my guide and found it helpful and informative. I found, gathered and wrote all the information in this guide myself however I did use Mirror’s Edge Wiki for a few of the gun names that I didn’t know. I also personally took every single screenshot of every picture you see in this guide.