Overview
A detailed guide for hazard assistance against those pesky, OP prickly wires that have the highest kills of the game; as well as places to take cover, NCO spawn points, Mini-map basics and other tips that can save your life!Authors: {Pirates}Bahman, {Pirates}Heidi(Arya)Date Published: 9/4/2017Date started: 8/3/2015
Barbed Wire: What the beast looks like
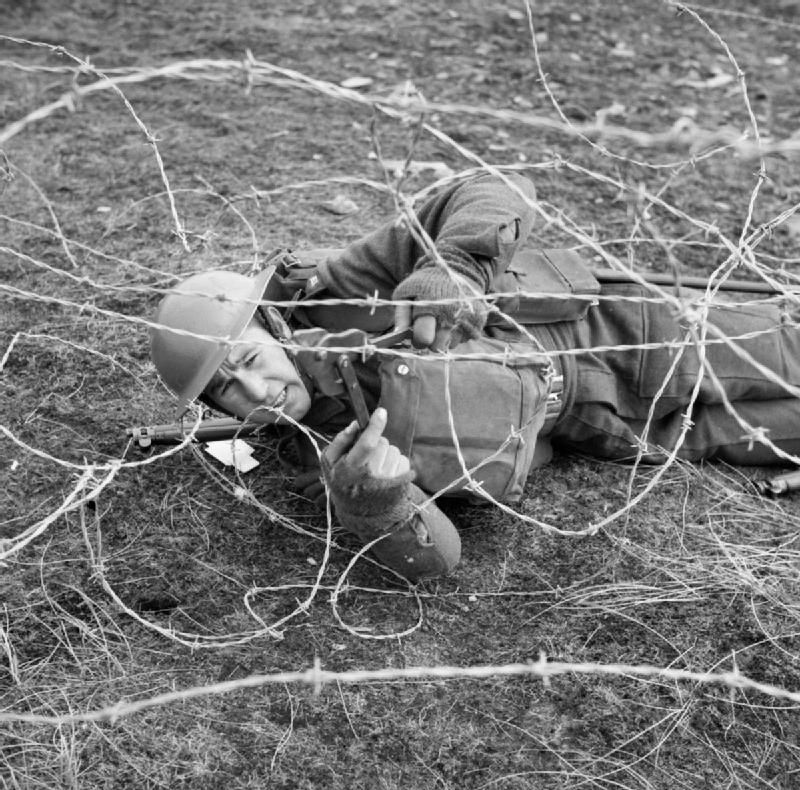
The best killer in the game. You can identify this gnarly, perfidious menace by its prickly thorns of death laid down throughout the battlefields in several kilometres.
Many new players aren’t aware that barbed wire can kill you in the game. Just like in real life, its designed to help funnel the enemy (and your own team) to attacking through the holes. However, in this guide,

we can show you how to get around and even go through barbed wire!
That’s right.
You can go through barbed wire.
You can go through barbed wire??? YES!
How? Run through it by holding down the shift key while going forward and pressing the spacebar at the right place and right time (Shift + W then Spacebar)
This will allow you to have enough momentum and push to get over most obstacles, including barbed wire.
This guide will prepare you to show you where and when to jump.
Of course, make sure you’re clear to go before you jump over, because there might be an enemy waiting for you to make the jump!
The red marks indicate displacement, everything else is self explanatory!
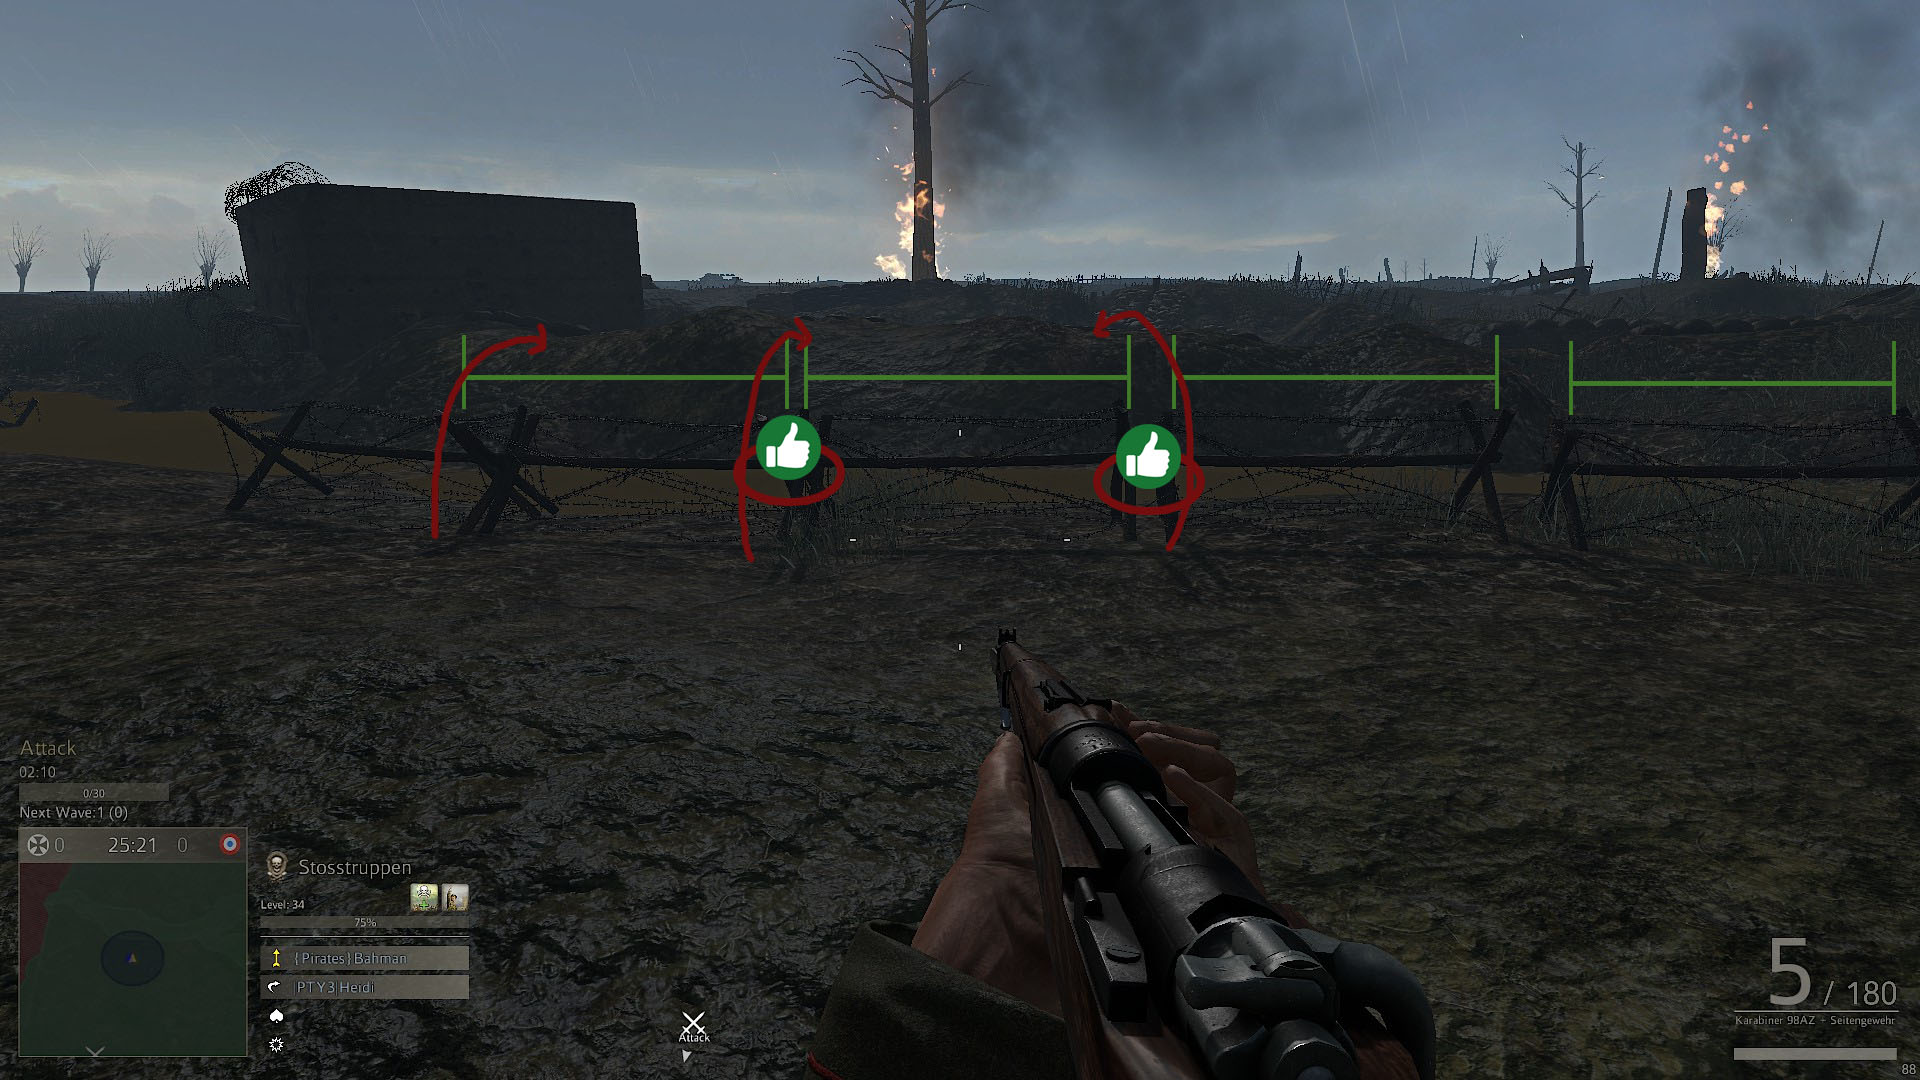
Barbed wire in Verdun is divided into segments. The green lines indicate these segments. Barbed wire has its ends that are wooden are “X”s, while the middle part of the barbed wire is where most people get caught in. These wooden crosses are excellent places in which to jump through and optimize the fastest way to go through, what may seem like, insurpassable rows of wire.

In this particular screenshot on the left side of the Entente trench in Vosges, we are emphasizing the breaks in the barbed wire. As noted, there will be big gaping holes in the barbed wire. The middle part of the wire is death. The sides, ESPECIALLY the part of the wire with big breaks, are safe to jump over. Be sure to jump over them at an angle.
The next few screenshots show openings for barbed wire.


Got caught in wire? Here’s what you do
*******Don’t Panic*******
Unless you know you won’t land in another segment of barbed wire, DO NOT jump. You will hasten your untimely demise.
Slowly move out of barbed wire.

When you are caught within barbed wire, you will get a notice at the bottom of your screen, it reads:
“You are entangled in barbed wire! Move away carefully”.
You do just that.
Move away CAREFULLY
tap your W, or S keys slowly. If you ran into barbed wire, tap S to back out of it. If you pranced backwards, tap W to move out of it.
Note that when you move around in barbed wire for a bit, it slows you down. In fact, thats what barbed wire intends for you to do, its a mechanic. Not lag. Additionally, if you move too often and within barbed wire, your screen will start to have a red border.

Yes. THAT red border.
When that occurs, it means you’re close to dying in barbed wire. Don’t be a lemming and keep moving like you’re at a Black Friday sale at Best Buy trying to get a Panasonic stereo set for $19.99.
Stop whatever you’re doing, crouch/prone (press C to crouch, or ctrl to prone) to avoid getting shot, and WAIT until your red border disappears.
Once it disappears, it is safe to move again, so proceed to keep trying to get your ass out of the wire.
If you don’t:
You will be #Verdunplanking

Argonne, not quite gone!
ARGONNE
Ahhh yes, the infamous meatgrinder

Here, this is the no man’s land between the first 2 trenches. Coming from the central powers to entente on the far right side, you can shift + W up to the designated circle place and press spacebar to jump.
This particular topography of the map allows you a boost. The higher contours allow you to use that upward momentum to jump.

This is the close-up of the jump spot. It looks daunting at first. Like a knob of nasty matted hair that built up and you want to comb the ♥♥♥♥ out of so you can straighten it out.
Never fear, you can jump at an angle that was shown from the previous screenshot.

This is in no man’s land between the two trenches in the first line of defense. This time, its on the left side of the central powers, right side of the entente. The iron cross indicates the left forward position of the central powers.
You can run and jump in that area. This place is one of the favorites of the central powers to defend against the entente who often like to prone and crawl their way like someone who just had 6 Fireball shots
This is a case of the barbed wire that you can never jump over or get over. You will have no choice but to funnel through either side of it. The sheer height of this mound, coupled with its proximate distance to no man’s land and your own trench, makes it impassable for both the attacker and defender to get over it. Trust me, if you try to jump over this barbed wire, you’ll look as desperate as an angst ridden teen looking for a date on prom night.

These are smaller barbed wire. Despite their thinner appearance and lesser width than their more bustier counterparts, they still pack the same punch by slowing you down. You can simply jump over them using higher elevated ground. Jumping over the wooden stake points work the same too!
A strip of barbed wire from the Central Powers’ point of view; located on the left side just outside the first line of defense:


———————————————–CP’s 2nd trench back————————————————
Quite the challenging set of barbed wire isn’t it? What are you going to do? Turn around?

Did Jason and the Argonauts turn around when they fought the skeletons?!?!?!
♥♥♥♥ no, they fought them like badasses!
Reference for you Kiddos:
Tackle it! The best way to tackle this particular set of barbed wire is to zigzag through it real fast. Challenge yourself! There are always loopholes within the wire sets.

Vosges, Picardie and Flanders
VOSGES:
Welcome to Vosges! the small forest map with just one trench on either side.
Apart from the tall, alpine forest and rustic scenary, this quiet sector also has that dastardly pricked menace literally waits for you…to be on edge.
Hue…

You can run from here on top of the trench to the other side of the same trench with 4 seconds left of desertion. No hacking here! Just a quick way to travel without having to meander inside the trench.
Of course, you can be all Sun-Tzu and be all “Be extremely subtle, even to the point of formlessness. Be extremely mysterious, even to the point of soundlessness. Thereby you can be the director of the opponent’s fate.” and just ♥♥♥♥-all and run throughout the trench. Your choice of course.
Here, on the left side of the central powers trench, you can see how these barbed wires are spaced out. They aren’t twisted;
<——-Reference
Barbed wire is in sections. Pay attention to where they end. They are small holes for you th jump through.


This place is on the left side of the Central powers trench and on the right side of the Entente. Great place to jump. Again, bunny hop yourself over the barbed wire. That space is perfect for you to fit your cozy body through!
Please note the spaces (again with the spaces, oy) between the barbed wire. They are always separated in sections. These are small openings for a reason! They are very inviting, just like a Hobbit-holes in the Shire.

PICARDIE:
Welcome to everyone’s favorite daytime map.

This is the right side of the 2nd Central Powers trench. Where do i go? What do I do? Should I just do a mad pivot like Travolta?
<——Reference |No dude, You attack this barb wire just like real life problems: HEAD ON
So take our advice so far: what should you do first?
Thats Right.
Look for where the barbed wire ends.
Then.
Shift + W towards a place of higher elevation and/or an opening between two barbed wire segments.
Finally, Profit.
2nd trench back from the frontline of the Central Powers, we see this barbed wire set on the right side.


Wire is a baddie
Additionally, on this left side, you can hop this area with a bunch of white rocks (textured on the ground). It’s a nice standpoint to jump from right into the trench.


How do I spawn my teammates? Can I just run randomly into a MG fire?
…No.
Spawning is an artform that requires meticulous spacing sometimes (not really, its quite easy!)
Step 1: Know who bought the farm
Check your squad list. If they’re red, they’re dead! If you are NCO (or a diligent member of the recon squad, wait for them to respawn!)
Step 2: Get into a crater, trench, deep depression, or anything that goes down and deep into the dirt. Go to a lower altitude basically!
The safest bet is: The lower the place is, the more likely it is for you to spawn your teammates, help them out as this will also help your team out by keeping inside the enemy trench as often as you can.
For additional information, check this guide out!
[link]
Take Cover!
Use craters, trench covering, wagons and broken down tanks as cover!
Attacking, it’s rudimentary my dear
Advance. Do not stay behind and try to shoot from your own trench. It is looked down upon. So please, move up.
Attack it for the Republic/Empire/Kaiser/Donut. If you fail. Atleast you did it gloriously like the video above.
However, You want to do this:
So please, move up, take as much cover (I.e. Go into holes, and bombed out crevasses on the ground). Check your corners, and don’t hesitate to shoot at anything that moves (if you dont memorize the uniforms yet).
Flanking, its not just a type of steak
{Maps, draw on them like a coloring book}

Defending isn’t for chumps
“He that outlives this day, and comes safe home,
Will stand a tip-toe when this day is nam’d,
And rouse him at the name of Crispian.
He that shall live this day, and see old age,
Will yearly on the vigil feast his neighbours,
And say “To-morrow is Saint Crispian.”
Then will he strip his sleeve and show his scars,
And say “These wounds I had on Crispin’s day.”
Old men forget; yet all shall be forgot,
But he’ll remember, with advantages,
What feats he did that day. Then shall our names,
Familiar in his mouth as household words-
Harry the King, Bedford and Exeter,
Warwick and Talbot, Salisbury and Gloucester-
Be in their flowing cups freshly rememb’red.
This story shall the good man teach his son;
And Crispin Crispian shall ne’er go by,
From this day to the ending of the world,
But we in it shall be remembered-
We few, we happy few, we band of brothers;
For he to-day that sheds his blood with me
Shall be my brother; be he ne’er so vile,
This day shall gentle his condition;
And gentlemen in England now-a-bed
Shall think themselves accurs’d they were not here,
And hold their manhoods cheap whiles any speaks
That fought with us upon Saint Crispin’s day.”
We have a map?!?!

Player Indicators:
Red triangles = enemies, revealed by a recon plane if you are in a recon squad
White triangles = teammates
Green triangles = squadmates outside of NCO’s command aura (which offers some buffs based on squad level)
Blue triangles = squadmates in NCO’s command aura, as well as the NCO
Blue circle around blue triangle = NCO’s command aura
Color Indicators:
Solid Red = out of bounds/off-map
Red-tinted = “enemy controlled land”, on defense this is NML (no man’s land) and the enemy territory behind it; on offense this is the enemy trench you are intended to capture
Yellow-tinted = objective depending on attack or defense. Defend has a “shield” on it while attack has 2 crossed swords.
Attack/Defend Indicators:
Crossed swords = The trench you should currently be trying to assault
Shield = The trench you should currently be trying to defend as it is where you’re enemy will be assaulting
NCO Skill Indicators:
If a plane flys overhead it means a recon squad NCO has used their recon plane call-in. This reveals all enemies in that sector (i.e. your trench, no man’s land, or enemy trench) to that squad on the minimap. There is no way to discern, to my knowledge, if it is an enemy or friendly plane, so keep in mind it may indicate your enemy now knows where you are.
Closing comments
We hope you have fun reading this guide as we had fun making it!

You will soon see the war’s end.
Feel free to leave a comment and a like!