
Overview
This guide was created with the intent to help folks out that are struggling with certain bosses. -DISCLAIMER- I am no professional at this game. This is not a definitive, MLG strategy guide as much as it is these are the strategies I HAVE PERSONALLY USED and have had consistent success with. If there are some better/preffered strategies the community would like to share, I would be happy to include them in the guide.
<———Introduction———>
This guide assumes you, dear reader, understand the basics of Fight N’ Rage and beatem ups in general, and expects nothing more of you. Hopefully this guide can help those of you struggling in certain difficulties and bosses by giving you a strategy you can work with.
<——-The Cat Brothers——->
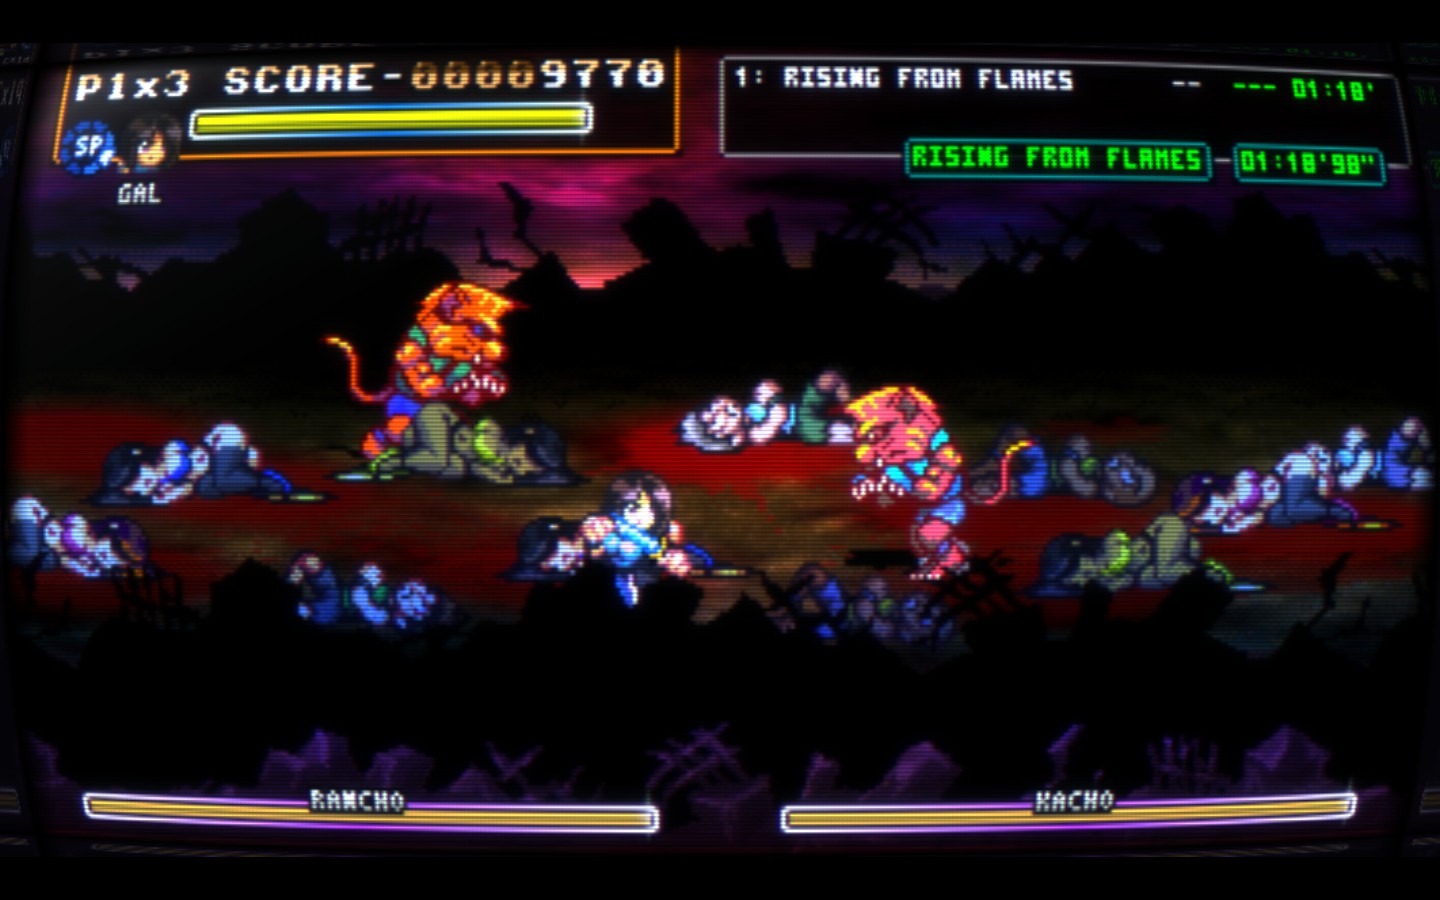
The Cat Brothers (as I like to call them), in my opinion, are probably better off not being regarded as bosses themselves, but merely an introduction to the Electric Cats. So…
Fighting the Cat Brothers is pretty simple. They operate exactly the same as the normal Cat enemies, trying to get behind you, punching you in the face, leaping through the air. As such, how one would take down a normal Cat enemy/Electric Cat is the same way you would approach these two, EXCEPT the Cat Brothers will eventually break out of grabs performed by the player. Repeating combo-throws will result in this happening.
Don’t try to grab them too much, and stay away from their wake-up attacks. Remember, there’s some goons running around, so throw them into them for extended combos and an easy way in.
————————————————————————————————————————————–
<————Rider Phoenix———->

The R. Phoenix is entirely identical to the typical Biker Rat, except he comes in with a bike, and his goons are constantly trying to run you over.
This strategy pertains to the goons trying to run you over more so than the boss himself.
Waves of Green Biker Rats will be spawning on the top most and bottom most of the screen. You can try to knock them off with an ariel to take advantage of the explosion produced by the bikes, but that may also cause you problems.
In addition, Green Biker Rats will be spawning in the middle of the screen, but they won’t be driving right through. Instead, they’ll spawn, wait, and then try to run you over.
Stick to the middle of the screen and beat down the boss, while using the Green Biker Rats that come in with their bikes to abuse the explosion damage.
If a bike is going to explode and you are near it, simply do a down evade or up evade twice to avoid the explosion.
————————————————————————————————————————————–
<——The Fly Bosses—–>

Gotta love the tenacity of these “basic-enemy-bosses.”
These Fly bosses aren’t your typical fly enemies. They generally ariel recover after getting comboed, so you can’t stand over them if they get knocked down. They are also immune to throws and always break out. Other than that, they operate similarly to standard Red Fly enemies.
There’s a few things you can do. You can either…
A.) Bait them into giving you free SP by grabbing them and promptly parrying the punch they will always try to perform after breaking out, allowing you a nearly infinite combo string.
B.) Anti-air them to death, because invincibility frames are a very, very, very special thing.
Or C.) Juggle them over in a combo to the wall, and stick them in the “mix”, as shown below. Doing this allows you to endlessly pound on them as they smack into the wall and prevents them from ever recovering or counter-attacking.

<———Golden Wolf———->

I’ll just say it now, I hate this boss. Not cause he’s difficult, but because he’s so…odd and out of place.
Considering the fact that the Golden Wolf is just a super-armored Wolf enemy, attacking him like any ordinary Wolf enemy might seem enticing, but it isn’t.
The Golden Wolf’s super-armor can make him difficult to handle, especially with all the goons running around. Fortunately, if you’re smart enough to know, you can use the melee weapons provided to you from the nearby barrels to enhance your damage against him and maintain a safe combo string, avoiding his attacks altogether.
The Golden Wolf also breaks out of grabs and hits you right after faster than most “grab-immune” enemies would. If you’re feeling spiffy, you can try to bait the counter-attack after a grab for a parry, and promptly use the special for free damage.
Or, ya know, just take care of the goons first and leave him for last…
————————————————————————————————————————————–
<——–Tracy——>

Tracy is essentially a beefed up whip girl. She has a larger health bar, and can summon cats to help her out during the fight.
Approaching Tracy is much like approaching any whip girl in the game. Come up to her, punch her in the face, combo-throw, and then rinse and repeat. Or, you can leap to her, kick her in the face, combo-throw her, and rinse and repeat. Or, you could parry that whip attack, and punch her in the face. Or dash attack, and punch her in the face.
Long story short she’s an easy boss.
————————————————————————————————————————————–
<———General Tiger———>
————————————————————————————————————————————–
Ah, if it isn’t the lady killer himself.

General Tiger will be the first of his kind you face until the Raft, Club, and Final Encounter levels. He has a long range slide attack that allows him to go into a spin kick combo afterward, and has the ability to block your attacks after so many hits, negating infinites (for the most part).
You can either rush in and dash attack him for a combo, or let him approach you from above or below, as he won’t try to hit you unless you’re facing him head on.
If you do face him head on, parry his slide attack. It’s very noticeable and he will do it from so far away you should be able to get the timing down.
Be wary after you knock him down. General Tiger has a wake-up attack, and will promptly do so if you stand over him.
Also, there are two Apples given to you for this boss fight if you do things right. One is in the Barrel, and another is provided by a Sumo Pig later on in the fight.
Personally, I like to abuse the SP moves on him if I know I can get the health and restore all that I lost. Racks up lots of damage and can set up for longer combos, provided you don’t goof up and get hit and die.
————————————————————————————————————————————–
<———–The Bisons———>

————————————————————————————————————————————–
The Bison Bosses are actually pretty easy once you figure them out.
They will always try to charge punch you from afar, and if you do it right, you can parry the punch and combo them afterward. If you’re not sure you can parry the punch, evade up or down to completely avoid the punch, and then you can walk over and punch the boss instead.
Up close, the Bisons will try to do a small punch combo on you. This is the only really tricky part about them, but you shouldn’t engage them that close unless you’re punishing them from their unsafe charge punch.
You can’t combo-throw the Bisons forward, but you can Backwards, so use that to your advantage. And you can use projectile weapons, like knives, stars, and even melee weapons for easy damage.
Another thing to note is that if you are extremely close to the Bison, and are in such a position where you can’t dodge easily or parry, you can attempt to throw the Bison to force them re-position. They will always break out of forward throws, regardless of your character choice, and will break out of all of Gal’s throws. However, when they break, they will re-position somewhere else, and never counter attack.
Also, use the goons that are around to barricade yourself from one of their charge punches. The punch might as well kill off the goon, so you can crush them soon after for extra points and that lucious extra life.
Lastly, if you stay close to any kind of wall and evade, the Bisons will suffer lots of endlag. It is perhaps the easiest way to punish them, but not the most rewarding (parrying the punch is better).
————————————————————————————————————————————–
<———O’ Hara———>

My first time playing this game, this boss gave me a run for my money. Nowadays, he’s easy as hell.
O’Hara has a multi-hitting lunge attack if you give him distance, and a wake-up/anti-air that also has multi-hitting properties. His jab distance is also pretty nice, so he will jack you up if you let him.
O’Hara doesn’t handle dash attacks very well though. He is also not immune to combo-throws. These two combined setup for some easy combos on the fat cat, and some easy damage. He will break out of repeated combo throws though.
If you’re not accustomed to parrying, then I suggest dodging O’Hara’s lunge attack by side-stepping. He has enough recovery frames to allow you to get some hits on him. If you are accustomed to parrying, press the directional buttons the moment he is a little ways ahead of you to parry the very first hit. Once you do that, perform a special move as fast as you can to break through the other hits and get him in hitstun. Parrying every hit from the lunge is risky. The same can be said about his wake-up/anti-air attack, only, for those two moves, I don’t suggest parrying them at all. It’s even harder to parry those, and as long as you properly time your “shoryuken” special move, you should be fine.
Some of the nearby goons will drop projectile weapons, so use those. Also, one of the pigs will drop an apple. Abuse the SP while you can and heal up if you want.
The Fat-Cats (the red and green recolors of O’Hara) in the Final Encounter stage, in the grassy/foresty area, do NOT have wake-up attacks, meaning you can bunch them up together, knock them down, and do the same over and over again. They do have the lunge attack and the anti-air, just not the wake-up. They can also be thrown repeatedly, unlike O’hara, who will break free.
————————————————————————————————————————————–
<———Minotauro———>

Oh hey there, “not ricardo.”
Minotauro is a pretty easy boss, given you know how to work around his attacks. He has a slow pound attack up close, a giant leap that, if he touches you, will turn into a very damaging throw, a wake-up attack, and a helicopter punch.
To put it simply, just stay out of his range and avoid getting grabbed. Minotauro has super armor on basically everything, so comboing him isn’t the best strategy.
He does have a weakness to throws. All kinds of throws. That’s where you’re going to get him. You can run towards him, grab, and pummel, or you can go for a combo throw.
Using goons against him is also a viable strategy, and in some levels (since you encounter him in 3 different areas) enemies will drop projectile weapons which you can always use to your advantage.
Gal can infinitely combo throw Minotauro in the elevator section of the Final Encounter stage. Simply start a combo on Minotauro and then throw him into the wall over, and over, and over, until he’s dead. That being said, you still have to worry about the goons running around. (Example below)
Unfortunately, F. Norris can only extend the combo-throws for so long. It’s still a viable strategy to use with him, it’s just once the combo stops you’re going to want to find a safe place to stand.
————————————————————————————————————————————–

<———Diane———>

Ugggghhhhh…
Diane is annoying. Her voice. Her attacks. Especially her attacks. She can break out of combos, block attacks, has an anti-air attack, a long range-kick that’s wicked fast that can be done both on the ground and in the air, and combos. She also likes to maintain distance from you, making it difficult to approach.
Taking Diane head on is not a good idea, but dash attacks, especially F. Norris’ slide kick, can open her up for a short combo. Throwing enemies into her is a good idea, so use that to your advantage.
As always, if you’re feeling spiffy, you can try to parry her lunge kick, but it might not end well for you.
However, the best way to take out Diane is to use the projectile weapons provided for you, and the absolute best way to beat her is to use the boomerang.

In the first section, after taking the detour, you will have to fight an assortment of goons, as always. One of the Sumo Pigs that appears will drop a boomerang. Pick it up and walk over to the next section, which should be filled with barrels that are also filled with projectile weapons and an apple. Allow one of the enemies to hit you so you drop the boomerang (preferably a rat because they do less damage). Take out the rest of the enemies, and during the “Demonstration” phase, pick up the boomerang. And then…
Throw the boomerang at her. Over…and over….and over…and over…and over…and over…
————————————————————————————————————————————–
<———Teenage Mutant Hammer Turtles———>

Teenage Mutant Hammer Turtles! Teenage Mutant Hammer Turtles!
Turtles in a half shell, Turtle Power!
I’m sorry I had to
Bash, Blitz, and Granuja all act the same, and they all have the same attacks. They will strike you with their hammer if you get close, and will retract into their shells to perform a super-armored ramming attack.
For the most part, these hammer turtles will be trying to ram you with their signature shell attack than try to hit you with their hammers. The good news is that the attack only hits once, and can be easily parried. The bad news is that there’s three of them, and if you don’t parry, it hits like a truck.
The strategy I like to use is to simply dodge around anytime they come charging in, and attack anybody whose not already in their shell. This lets me do damage to all 3 bosses and prevents me from having to anything too risky.
I also find using dash attack is effective, as long as they don’t retract into the shell. If they do, dodge as soon as you can.
Gal cannot throw the turtles at all. She can use this to her advantage though, forcing the bosses to reposition.
F.Norris cannot throw the turtles forward, though there is a small window to perform his jump throw. He can throw the turtles backwards, without fail, and can jump throw them as-well from a backward throw.
Ricardo can throw the turtles forward or backward. It doesn’t matter.
Interestingly, using your anti-air attack can be effective against them, as it lets you avoid any ram attacks and deal damage to anybody near you.
————————————————————————————————————————————–
<———Blades and Rasher———>

These guys can be a real pain in later difficulties.
Blades and Rasher are unique bosses in the sense that they keep their distance from you and pester you with projectiles, or in other words, throw $h*(! tons of knives at you. They have a close ranged slice attack, a single knife throw, and then a knife flurry.
I find rushing them down is a great way to take them out. They can’t handle airel attacks at all, and given their size, are pretty easy to land some more devastating combos on. The same can be said with dash attacks, another weakness they have.
However, Blades and Rasher have the advantage of projectiles, and will become a problem for you if you don’t pay attention. Parrying their projectiles is very risky, though it could save your life if you find yourself caught in a knife flurry.
Speaking of knife flurry, anytime you are above them, as shown in the screenshot below, and they are preparing for a knife flurry (they make a little chuckle/laugh before they start throwing) you can jab them out of it. Just mash the punch button until they walk into your fist and beat on them.

Last, but finally not least, use the walls to your advantage. I cannot stress this enough for these bosses in particular. Making sure they don’t have room to make distance is key to kicking their rear ends to high heaven and back. This is especially crucial with Blades, who you encounter at the end of the gauntlet before you start the Final Encounter.

<———Raven———>

Total Push Over.
Raven is by far the easiest boss in the game, no matter what difficulty. His projectile attacks and his swooping attacks can be completely negated using your own anti-air attack (It’s the Down Up Punch attack). Use it any and every time he does something remotely close to an attack, just not right next to the ledges.
If you want to take him out faster than usual, you can hit him with a downward ariel attack when he swoops in and proceed to combo him afterward. This might put you in the unfavorable position of being next to the ledge, so be careful if he comes back with avengance and you anti-air yourself into the shark infested ocean. it’s not I know but it’d be awesome if it was
————————————————————————————————————————————–
<———Attary & The Servants———>
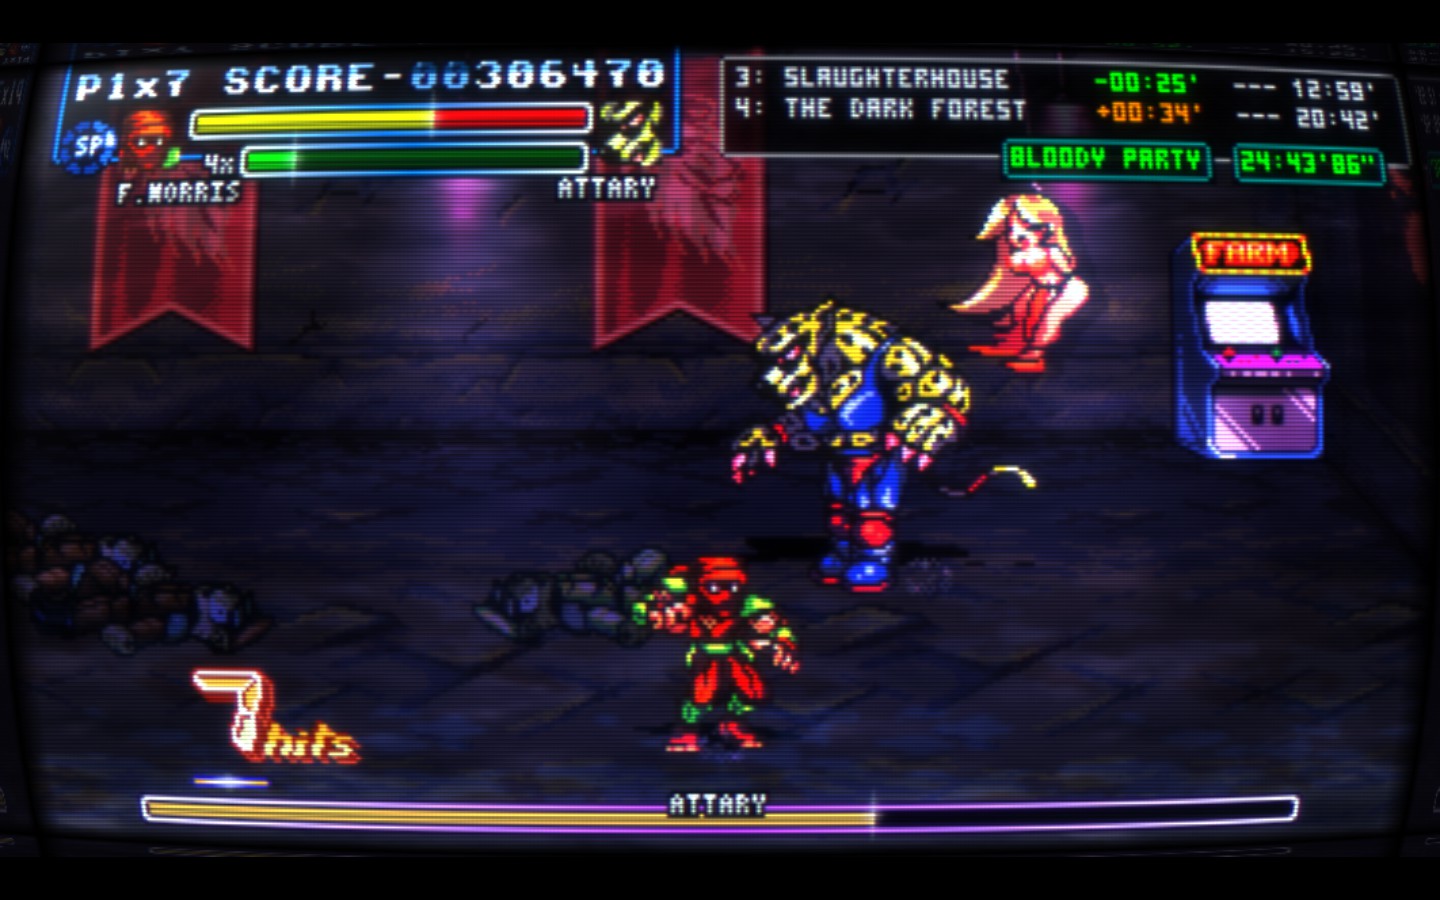
My favorite boss in the game. Such a fun fight.
Attary has a multitude of attacks. Some hit hard, others not so much. Most do hit hard though. He has a long winded, but very damaging headbutt attack. He has a simple jab combo that comes out pretty fast, especially on harder difficulties. A command grab that will TONS of damage if you don’t get out fast enough. And a leaping body slam that can cover great distances. He also has a wake-up, which lets him dash away and negate any pressure you were trying to apply. Luckily it isn’t an attack.
First things first, get him near the wall. Always get him near the wall.
Fighting against Attary is very much like fighting a legitimate wrestling match. He will try to stay out of your range, so try to stay out of his. This will end up with the two of you walking around for some time until one of you screws up. Play your cards right, and it will be Attary every single time.
Whenever you let Attary have distance, his go to move will be the body slam. It only hits once, and can be parried. However, it’s a little odd with parrying, at least for me, so I’d recommend just walking away, maybe even up evade, down evade, or dashing away, and then punishing him afterwards with a full combo.
If you get too close, Attary will do either two things. He will try to jab combo you, or he will try to headbutt you. If you’re feeling spiffy, you can parry both attacks, but I’d recommend only doing that for the headbutt. It only hits once, and he has a long cool down afterward for a full combo.
If you’re close enough to Attary, but not exactly in jab range, Attary will try to grab you. If he does so, and you’ve done your spacing right, he will completely wiff the grab and be left in a vulnerable state (shown below in the screenshot). That’s your time to strike. If he does grab you, you can break out of it, but you have to be wicked fast. Like instantly after getting grabbed. Otherwise you can kiss 25% of your health goodbye.
It’s important to note that Attary cannot be grabbed by Gal, F.Norris, or Ricardo. Not even combo throws.
The Servants
————————————————————————————————————————————–
These same strategies apply to the servants at the end of the game, just before the Boss. This time, you’ll have to take into account the fact that there are two Attarays. The Servants also don’t have a wake-up, so you can keep up the pressure no problem.

However, the Servants CAN be thrown by F.Norris and Ricardo. F.Norris can do backwards throws and Ricardo can do forward or backward throws and even get a pummel or two. Gal cannot grab the servants.

<———Those Freakin’ Dobermans———>

From reading the discussions and general comments, I see that a lot of people have a hard time fighting the Dobermans, I myself included, and I think it’s fair to say they deserve a spot in the “Boss Guide” because they do seem to be rather challenging.
The Dobermans have pretty good mobility on the ground, a solid 3 jab combo, and that nasty, nasty wind-up punch.
There are four different ways to approach the Dobermans I have found to be effective…
Scenario A.)
The wind-up punch can be baited by jumping when you’re close to them. By the time you land, you should be able to jump again. Do so, and when they stop underneath you, go for a downward ariel attack to stun them and combo them afterward. This strategy is easy to pull off and is the best to use when fighting more than one.
Scenario B.)
Dash attack them. Playing a lot of F. Norris has taught me the wonders of dash attack, and that dash attack works very nice on the Dobermans, but only if you’re doing it from mid-range. Long range of course doesn’t work, cause you’re too far, and up close doesn’t work because they will wind-up punch you in the face.
Scenario C.)
Be patient and wait them out. The Dobermans will try to engage you diagonally from time to time, and when they do, they will walk right into your jab’s range. Dodge any and all attacks, use SP for invinvibilty, and keep your cool.
Scenario D.)
“git gud” and parry the wind-up punch. It’s probably the most effective way outside of baiting them with a jump, because they are totally vulnerable afterward. It’s also incredibly satisfying.
Unless you’re Rambo with a machine gun in a helicopter, don’t fight all 3 Dobermans at once. Take them out one by one.
————————————————————————————————————————————–

<———The Boss———>

For being such a big, burly lion man, you sure do like to fight like a ♥♥♥♥♥-cat.
The Boss comes equipped with a big, mean, heavy artillary machine gun that, depending on the difficulty, either shoots in short bursts or fires at an insane rate. He can bash you in the face with his gun, and he will break out of any forward throw you perform on him.
The trick to fighting the Boss is recognizing where he’s going to land when he jumps, and avoiding his gun fire. Eventually, he will land right next to you, and that’s when you strike. Hit him hard. Make every hit count.
Another way to fight the Boss is to widdle away his goons. They can be annoying during the fight, and if you get rid of them, eventually all that will remain is you and the Boss, so you can take all the sweet, precious time you want to savor your victory on him. This does mean you can’t be as aggressive/haphazard like because now there’s no meat shields to protect you from his machine gun fire.
The Boss also doesn’t do well against arial attacks, as long as you get him when he’s reloading or already firing. If you get him when he isn’t, he’ll jump backwards and shoot you down.
Fortunately for those of you who aren’t confident in your parrying abilities, I actually suggest that you parry his bullets! Timing the shots is pointless, just button mash left or right and you’ll practically parry every projectile. I’m not even kidding.
If parrying isn’t your style, or you’re not confident enough, hang out around The Boss’ throne. He gets antsy and will leap to you more often if you stay there than if you move around.
————————————————————————————————————————————–
<——–Final Thoughts——->
If there’s anything I’ve missed, or any tips other players have found that are not present in this guide, please let me know and I’ll add them in.
Also, since this is a more general tip…
For those of you who play lots of F. Norris and know how to execute his secret special move, I highly advise you all to use it fighting against bosses, on any difficulty. It does so much damage, can’t be broken out of, works on EVERY SINGLE BOSS, and leads into longer combos. It also makes for a bad@$%# finisher when the screen slows down. Tight as hell!
Thanks for reading my guide! Hopefully this helps you all out in some way!