Overview
Introductory guide on champions, weapons and items
1. Introduction
If you really want to boil Quake down to its core: it’s all about map control.
Even though the game is very easy to jump into if you’re at all familiar with FPS games, the gap in player skill can be massive and there’s a lot of nuances that make Quake (and other games in the arena FPS genre) unique. But before we discuss the gameplay, let’s start with something very important: keybinds.
2. Before we begin: Keybinds and Settings
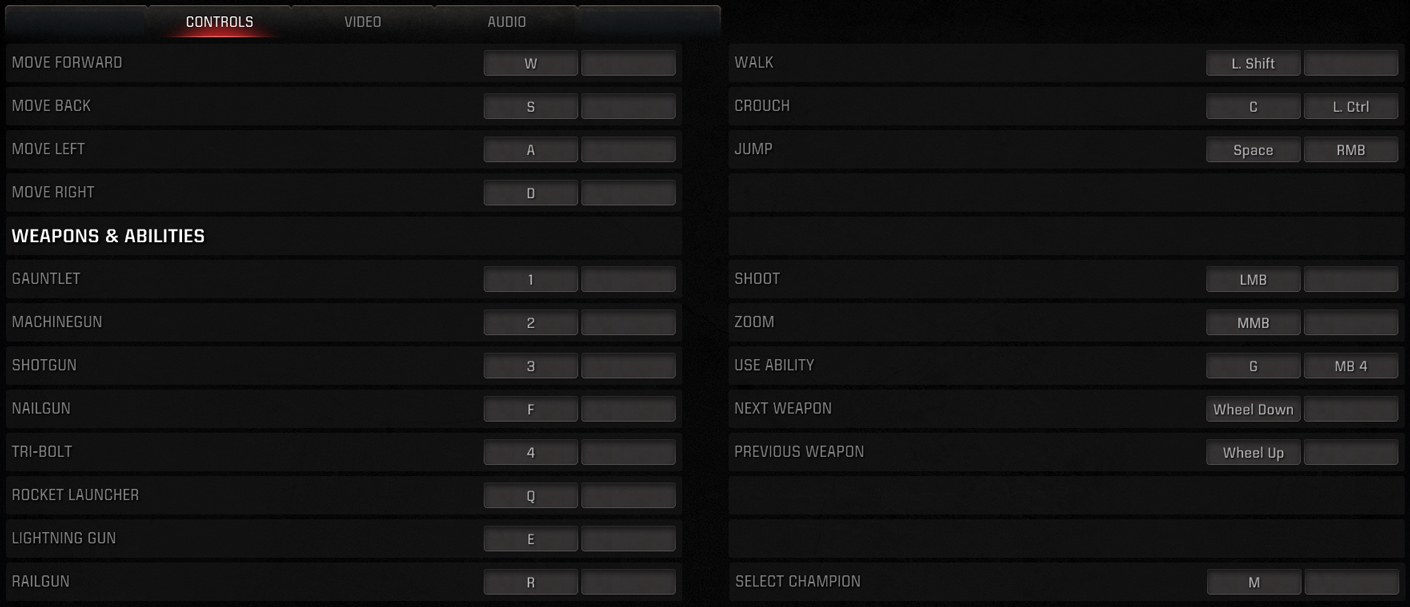
Rebinding your controls is something that may not be obvious to a newcomer but will drastically improve your play once you get used to them.
Why do it? The default keybinds for weapons of 1-9 are extremely clumsy and mousewheel scrolling is even worse for a game where you have to switch your weapons constantly.
General theory: we pick the weapon buttons that are closest to WASD for more comfort and ease of access and move everything that’s not as important a bit further away (like champion selection or the ability button).
Note: jump and crouch buttons are just preference. I just find it more comfortable to jump with M2 as someone who plays Slash constantly (because having to press movement buttons, space for jump and holding ctrl as well as maybe using an ability or switching a weapon is pretty demanding for my weakling hand).
Regarding non-controls settings: just set everything in video to something that gives you at least 120 fps or so, smoothness > muh graphics. I would also recommend to turn the music down to hear your opponents better (sorry, Chris Vrenna).
3. Movement
Okay, we loaded up into the game! Oh no, everyone’s flying around at Mach 5 speed and picking up all the items!
So remember when we talked about how map control is important? To be good at it, you gotta go fast. Transform into the blue hedgehog you’ve always dreamed of being but could never become and, ultimately, get the health/armor and weapons across the map like a vacuum cleaner.
It’s obviously not recorded in Quake but the principle is exactly the same. Just look at the button presses / mouse movement and try to replicate that in a custom game alone on a map without people killing you left and right. Eventually you’ll figure it out and then it’s just muscle memory.
Important note: in real scenarios, strafe jumps and bunnyhopping make you very predictable, so use them only get somewhere fast and not just all the time when moving.
Important note part 2: I don’t think rocketjumping needs a separate chapter, it’s pretty self-explanatory: press jump and shoot at the surface nearby you (floor for a jump, wall for a speedboost) at the same time. If you have jump bound to m2, you can just press both mouse buttons at the same time, incredible! Rocket jumps are most useful on Ranger due to his passive that allows for him to take less self-damage and is best used when your Dire Orb is on cooldown or you want to save it for later. Use them sparingly and in locations that make sense for it, like going to bridge from Heavy Armor on Blood Covenant or going to the Tri-Bolt spawn from Rail Gun spawn in Blood Run.
3.1 Anarki and Sorlag Movement: Aircontrol
Alright, you’ve seen those fancy moves this guy and girl can pull off and you want to do that too. Luckily for me, the aircontrol bunnyhopping is pretty easy to explain without a video. However, if you do need visuals, just look up “cpma movement”, “quakeworld movement” or something along those lines.

To go even faster, Anarki can also use strafe jumps in combination with his aircontrol to get higher acceleration while Sorlag has to do only with aircontrol acceleration. These movement types come from CPMA and QuakeWorld respectively.
Sidenote: both Anarki and Sorlag have very annoying lean animations when you spam “adad”, it makes them tougher to hit than other champions, so be sure to strafe left and right rapidly in 1v1 fights to make your opponent ragequit as quick as possible.
3.2 Slash Movement: Crouchsliding

In my opinion (and my opinion is biased), Slash’s movement is the toughest to master in Q:C. I’ll try to explain it in text here but once again, if you want visuals, there’s probably plenty of loud incoherent tutorials on youtube out there.
However, there’s a lot of nuances to that.
- First off, the later you press crouch, the longer you will slide. So, ideally, you have to press and hold it right before you hit the ground.
- Another factor that affects the longevity of your slide is how big of a drop you had before landing. The longer the drop, the longer you’ll slide: for example, you can drop from bridge on Blood Covenant (dm6) and get to the megahealth jumppad all in one slide.
- To get the maximum amount of speed right at the start, do a strafe/circle jump and keep on strafe jumping after each slide.
- Once you’re sliding, you’re able to go freely in any direction you want, but to conserve and gain speed, always do smooth mouse movement and press the side direction keys accordingly.
- Sliding is most useful for going in and out of a turn at a high speed (or making yourself harder to hit).
- There’s also a way to aim and slide around your opponent, and that is to simply hold forward.
PROTIP FOR SLASH USERS – AIM AND SLIDE AT THE SAME TIME! from QuakeChampions
:
The keys that you press dictate the direction that you’re circling around, so if you press W+A/D (like many of you do) – the center point of your circles will be towards your forward diagonals. And as many of you may have noticed, this view angle has limitations on aiming on many occasions. If you press W only, the center point will be straight ahead of you, this means that you can effectively crouch slide around your opponent while having your mouse fixed on them.
If you learn to use all directions for crouch sliding, you will be a formidable Slash combatant.
Here’s also a couple of Slash tips I can share that aren’t really related to the movement technique itself: - Crouchsliding is pretty damn loud, so if you’re playing duel, chances are your opponent will know where you are, so use it sparingly or just be aware of the sound you make.
- Slash’s ability, Plasma Trail, works wonders on teleport exits, jumppads and powerup spawns. As soon as you see someone walk into it, press the ability button again for maximum damage.
- While fighting an opponent, there are some situations where you may want to slide right past an enemy: you’ll exit their field of view and they’ll have to make a big mouse swoop to track you and readjust their aim while you see them at all times.
Note how I don’t just crouchslide every time, aim adjustment and dodging is always the priority when you’re fighting. But if you’re still wondering about going fast, it’s mostly about the initial strafejump mouse flick, and pressing w+a/d and moving the mouse in the same direction, then strafe jumping again and so on.
4. The Items
Now that we’ve discussed the basics of movement, it’s time to familiarize ourselves with the item pickups we want to control. In general, there’s 3 types of items: the ones that give you “stack” (heal you up or give you armor), weapons and powerups.
Beforehand, I have to explain how the health and armor system works in this game. Unlike previous Quakes, we now have these “dashes” as I call them:
So basically, when you pick up a +25 health bubble or small armor, you will heal up to a divisible of 25. If your current health/armor is less than 13 points away from the next 25 divisible number, then you’ll heal up to that amount.

That probably made no sense at all, so for example:
- if you have 62 health and pick up a bubble, you’ll heal up to 75 hp
- if you have 63 health and pick up a bubble, you’ll heal up to 100 hp
It’s a pretty unintuitive system unlike what id thinks but don’t pay too much attention to it.
You may also notice that you can overcharge on health and armor with Megahealth, Heavy Armor and Armor Shards (that you pick off of dead dudes). The smaller the health/armor pool of your character, the faster your overcharge will drain to its normal limit.
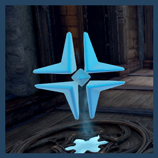
-Gives you 100 health.
-Can overheal for 50 points.
Spawns every:
30 seconds.
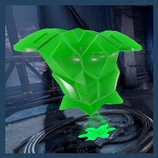
Gives you 100 armor. Can overcharge for 50 points also.
Spawns every: 30 seconds.
Heals you up to the next divisible of 25. Refer to the start of this chapter for more info.
Spawns every: 15 seconds.
Armors you up to the next divisible of 25. Refer to the start of this chapter for more info.
Spawns every: 15 seconds.
Reduces the current cooldown of your active ability by 10%.
Spawns every: 30 seconds.
Gives you 4x Damage (legit, unlike Q3) for 30 seconds, drops on your death and the timer on it stops until someone picks it back up.
Spawns every: 120 seconds.
Reduces all damage you take by 4x times for 30 seconds, drops on your death and the timer on it stops until someone picks it back up.
Spawns every: 120 seconds.
You got to take this spooky skeleton skull to your obelisk in Sacrifice. Can’t use your active ability unless you drop it.
Spawns 20 seconds after round starts.
5. Weapons
Guns. Hell yeah. In this section I’ll try to describe the best way to use them and how to play against them.
Regarding the starting weapons: my preference always falls onto the default machine gun, it’s hitscan and works at most ranges, compared to the shotgun (and it’s ammo limit at spawn) and nailgun’s projectiles that I don’t want to rely on.
Damage: 10 / 15 (with zoom)
It’s hitscan, good at any range. Gets more accurate but fires slower in zoom mode. Really good at finishing weak enemies off or when combined with quad damage.

Damage: 6*20
Close-range dominator. Favors flick-style aiming rather than tracking your target. There’s definitely a lot of downtime between shots, so you’d better make them count. Works well when you want to ambush someone who’s chasing you behind a corner.

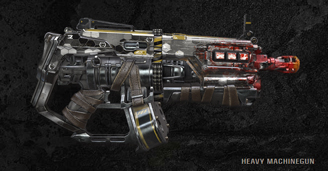
Damage: 20
Oof. Essentially a copy of the Plasma Gun from Q3. Shoots projectiles at a very fast rate of fire. Situational, but it excels at area denial, especially against someone with big hitboxes. Know someone’s running around the Rocket Launcher spawn on Blood Covenant? Spam that corridor and let them know about nine inch nails.
Sidenote: just like with the Plasma Gun, you can wallclimb with the Super Nailgun. It’s a bit tricky and doesn’t work on all walls but to do it you have to: look directly at the wall and hug it, aim at around 45 degrees from the floor (maybe even lower in fact), jump once and keep shooting it.
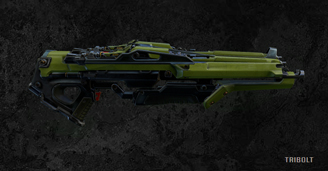
Damage: 3 * 10 / 40 (for a direct hit)
The newest addition to the gun roster. Fires 3 projectiles in an arch trajectory that explode after a little bit. It’s decent, good for area denial, especially on Blood Run. You can also perform jump boosts with it, including one to Heavy Armor also on Blood Run.

Damage: 100 / 1-100 (direct / splash)
THE weapon. Projectile-based, super versatile.
- Does not make sound when equipped.
- Very good for spamming spots where you expect an enemy to show up;
- Splash damaging multiple enemies in an area;
- Rocket jumping;
- But most importantly: launching your opponent in the air to make them vulnerable. After you do that, you should quickly switch to your Lightning Gun (or Rail Gun if you’re feeling lucky) and burn them down while they’re in air and moving in a predictable pattern. This works super well against someone like Anarki: you set up an ambush somewhere around a corner and just do that RL+LG combo.
- Direct rockets may sound tasty and they can kill weakened enemies in 1 shot, but generally, you should always be aiming at a surface next to your enemy (floor, walls) to deal splash damage since that’s more reliable.
- Don’t just spam rockets when fighting someone (and not denying an area). For example, when you see them jump, aim at the spot where they’re going to land and shoot there, instead of holding m1 and aiming sporadically.
- How to dodge:
- Try to stay away from the attacker to get as much time to react to the incoming rocket as possible.
- Or, instead, go as close or past them to make them deal self damage.
- Don’t jump around unless you time your jumps to get away from damage.
- Stay on the highground.

Damage: 7
It’s a hitscan close/mid range beam that can completely melt your opponent if used correctly.
- Works great against tanks / big hitboxes.
- Has knockback.
- Makes a buzzing sound when equipped.
- Best usage is against someone mid-air (especially on a jumppad), when you can easily track their movement trajectory and dish out a ton of damage.
- When you’re fighting someone who’s trying to dodge your LG, try to synchronize your strafes with theirs instead of just using your mouse to aim.
- How to dodge:
- Don’t jump. Please.
- Pull out your Rocket Launcher and try to bounce your opponent and throw his aim off.
- Strafe left and right a little bit and figure out your opponent’s sensitivity. If he overshoots when you’re doing small strafes, his sens is high and just keep doing that. If he’s hitting you, try to go for longer strafes.

Damage: 80 / 90 (with charged zoom)
Deadly accurate hitscan weapon that’s mostly meant for long-range engagements. Very long downtime between shots.
- Try not to use it at close range at all, if you miss your shot you’re probably dead.
- Always have cover next to you that you retreat in after the shot.
- If you expect or know someone’s coming from a certain angle, be sure to zoom in to charge additional 10 damage to your shot.
- Regardless of the badge they give you for headshots, they deal no bonus damage.
- How to dodge:
- Strafe like a madman and stop occasionally to throw your opponent’s aim off.
- You can actually just stand still when their Rail Gun is recharging and start do sidestrafes right before it’s back up.
- Once again, always have cover. If you need to go through the area you can bait out a shot by a very quick peek from it and then go where you need.
Time to put those keybinds we’ve made to good use! The environments and the conditions you fight in constantly change, so be sure to always have the right weapon equipped. Eventually you’ll figure out what works where and when, and it’s never too late to switch to a weapon you want to use in the fight.
And that brings me to how it works. Why does my gun switch for an eternity? Well, in Quake, you can only switch your weapon when it’s ready to fire. This is done to counter stupid stuff like shooting with a Rail Gun, switching back and forth and shooting it again instantly. So, while it may be fast to switch from something like a Lightning Gun and even Rocket Launcher (due to their rate of fire), the downtime between shots on the Rail Gun and Super Shotgun is pretty significant. So just be aware of that.
6. TL;DR: What to actually do in a DM/TDM match
You’re fresh off the spawn, there’s people killing each other left and right, what do you do? Well, unless you know your opponent is already low hp, don’t engage in a fight. Once you’ve learnt the maps (and that just takes time), you’ll quickly figure out where the closest guns to you are.
- Ideally, you should have LG, RL and RG, so that you’re able to take fights in all situations.
- Also ideally, you should control both Megahealth and Heavy Armor and time them after you’ve picked them up. 30 seconds for both, as we’ve discussed previously.
Chances are, these things aren’t really going to happen every time because DM/TDM in general is pretty chaotic.
Let’s look at some examples so that you understand what I mean:
- You’re spawned next to the Super Shotgun spawn on Burial Chamber. You picked it up and see that there is a guy camping on the Rail Gun spawn. He’s pretty far away for your shotgun to deal damage and the starting machinegun just simply isn’t going to cut it. You could try to get closer to him but that will be very obvious and the enemy will just shoot you down most likely.
Solution? Escape through the other way, preferably after shooting once at the guy just to deal at least some damage for free. Remember, it’s not always about the frag, it’s about sending a message.
- Unrelated situation: you picked up both Heavy Armor and Megahealth, but only have a Super Shotgun right now. Just due to your stack advantage, you’re allowed to make some ballsy moves. Your opponent may have more weapons and even better aim than you, but because you can tank more damage than normally, you can just go ham and try to fight them.
Just let the conditions you’re in dictate what and how you play. “I’m 25 hp, so I’d better avoid all fights and get my stack back up” or “I’ve got a Rocket Launcher, so I’d better stay on the highground” or “That guy was really low on health, he’s probably going to go for the health bubbles that are closest to him, I should catch him there” or “That guy just picked up Heavy Armor but he only has Tri-Bolt and I have the Lightning Gun and I’m right next to him, time to fight”.
These are just the calls you make during your play and you can always judge them afterwards and improve, as long as you’re actively thinking. After a certain amount of time, it will just become subconscious.
7. In Conclusion
When I set out to write this guide, I did not expect that it would take this much time. I remember having an old russian videogame magazine that would describe Quake 2 in all its glory, with pictures and item descriptions which would last for pages. Maybe it wasn’t the best piece of literature I could’ve read but I have fond memories of it and hope some of that transferred into this guide a little bit.
I’ve seen a lot of new players struggle with Q:C and leave it because it’s not always obvious what you should and shouldn’t do and there’s noone there to tell you that. With the Steam Early Access, I figured it would be a good idea to use the guides system and allow people to have something they can refer to with a click of a button in their overlay.
Regardless, thank you for reading this guide. If it helped at least one person, I would consider my mission successful.
If there’s something you want me to go more in-depth (Duel mode, Champions specifics, RU version of this guide maybe) or found an error somewhere, feel free to write about it in the comments.
In case you’re feeling nice (you look great today btw) and want to somehow thank me, you can always upvote this and tell your friends about Q:C (and this guide).
I also occasionally stream Q:C and Quake 1 speedruns, so if you want to watch that you can follow me on twitch[www.twitch.tv]!
And last but not least, I sometimes draw fanart and tweet about Quake-related things Tweets by jericho_rus. I don’t post much to clog your feed with my nonsense, but I would be very happy if you gave me a follow.