Overview
I will give you instructions on how you can share sound and model assets you’ve created through the Steam Workshop.
Introduction
This guide will give you instructions on how you can share sound and model assets you’ve created through the Steam Workshop.
Contributing to the workshop will allow other Source Filmmaker users to use your submissions in their own creations.
Importing
Before you’re able to publish your assets to the Source Filmmaker workshop, they will need to be compiled and placed into the usermod folder inside the Source FIlmmaker directory.
Within the usermod folder you’ll need to place the files so they follow the same folder structure. Most models contain mdl, vvd, vtx, vtf and vmt file extensions. You would place the mdl, vvd and vtx files within the modelsexample folder, and the vmt and vtf files within materialsmodelsexample.
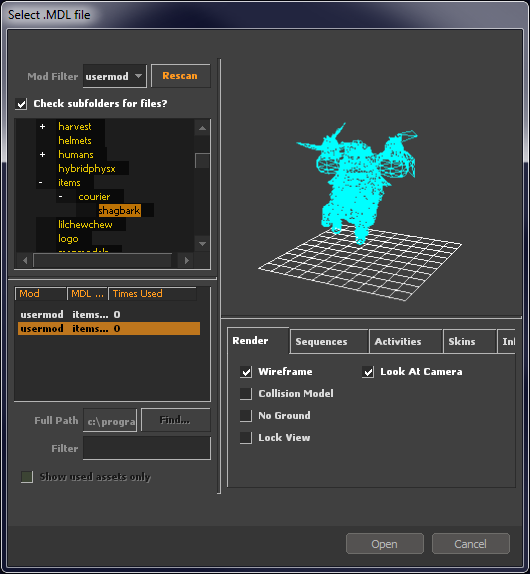
File paths are determined by the .qc file when the model is compiled. In my example below the mdl file will look for textures in materialsmodelsitemscouriershagbark, so I need to make additional sub folders for my model to work correctly in Source Filmmaker.
If the files have been placed in the correct directories the model/sound will appear on the asset selection menu.
Subscribers will view your model the same way that you view your asset in Source Filmmaker, so always ensure that it’s tested and ready before proceeding to the next step.
Uploading
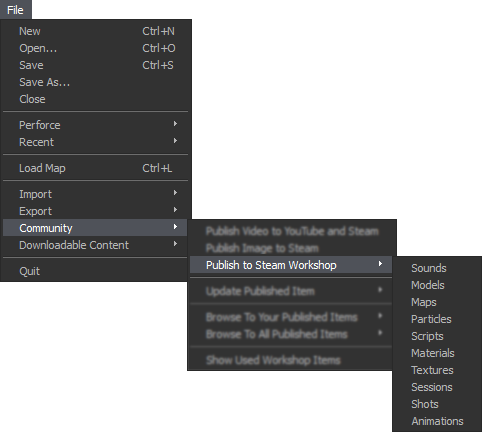
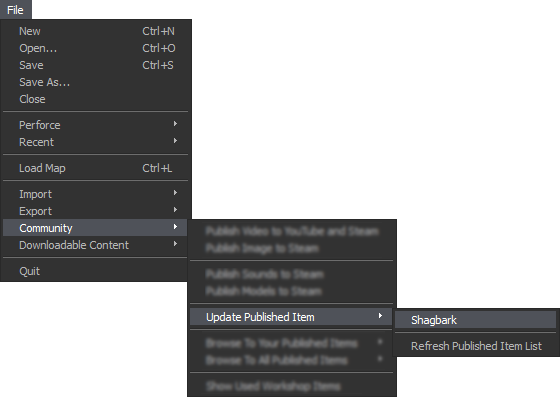
When you’re ready to publish, open up Source Filmmaker and click on File > Community > Publish to Steam Workshop at the top left. From the drop-down menu select the type of asset you’d like to submit.
From the publish screen select the plus icon (+) at the top right to add your files.
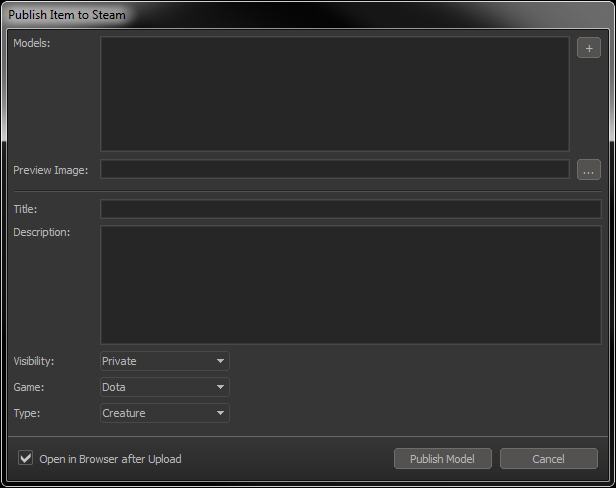
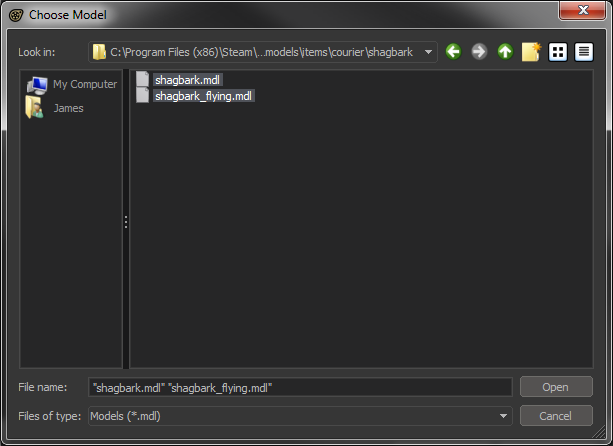
Navigate to the folder which contains your assets within the usermod folder. If you’re uploading models you only need to select the mdl files.
You’re able to select multiple files to include in a single submission by shift clicking.
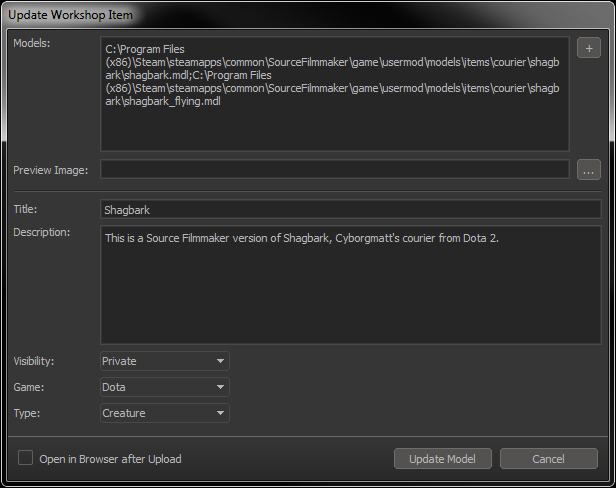
Once you’ve added your asset files to your submission you’re able to fill out the other fields including title, description, privacy settings and more. When you’re ready to submit click on the Publish button at the bottom of the window.
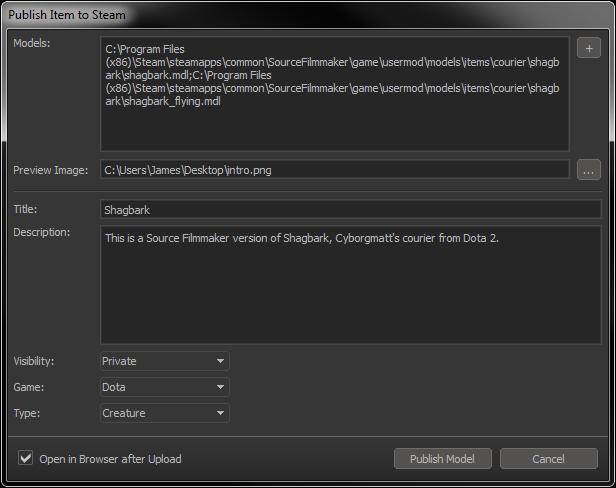
If you’re uploading a model you’ll then be given a list of dependency files which will also be uploaded. On this list you’ll see your materials and other files related to the model.

Once you click ok it will then begin uploading to the workshop.
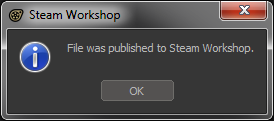
When the upload is done you’ll receive a prompt stating so. You can view your workshop submissions at any time by clicking the workshop link on your Steam profile.
Customizing
Once your submission is on the workshop users will then be able to subscribe to it to use in their own Source Filmmaker creations.
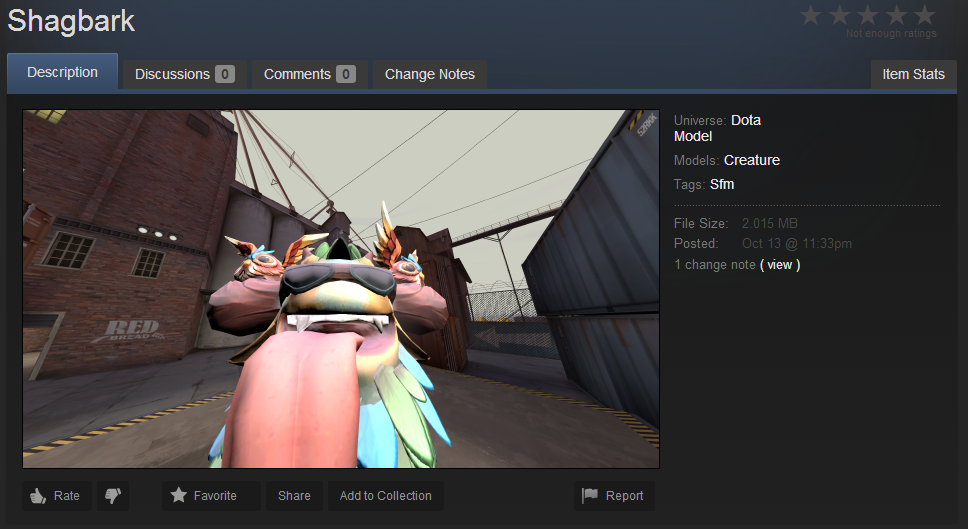
You can customize your workshop page by adding links and media by selecting the links in the owner controls box. From this section you can also adjust the privacy setting and the title/description.
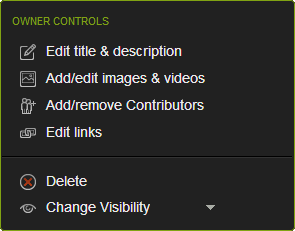
If the submission was a joint effort you can give credit to somebody by clicking the Add/Remove Contributor link. Adding somebody as a contributor will display their name in the “created by” section. Before their name will be displayed they will need to accept the request sent to them via email.

For more information on how subscribing works, you can read the guide I created below.
[link]Editing
If you’d like to publish an update to your workshop submission you can do so by opening Source Filmmaker and navigating to File > Community > Update Published Item. From the drop-down menu select the name of the submission you’d like to edit.
From the publish screen you can make adjustments to the fields you’d like to update. When you’re done making changes select the Update button near the bottom.
If changes are made to the files anybody who is subscribed to the asset will automatically begin downloading the update.
Closing Notes