
Overview
The goal of this guide is share a method of adding Killstreak Eye Effects and coloring. This is by no means the “official” way or the best way, but it is the only one I could find to consistently work. Hopefully it works for you as well!
Introduction
This method was shared with me by a very talented artist named R234, so most of the credit goes to him. I just made the guide.
Another portion of the credit goes to Sync. His amazing Particle file guide lists the Killstreak file names at the end. Trust me, you’ll be lost without it! [link]
This method isn’t perfect. Adding the effects and coloring them are simple, but from what I’ve messed with, they don’t lock quite as neatly as hats and miscs do, so a little manual positioning will be required. I’ll expand on that at the end.
Anyway, let’s get started!
Adding the effects
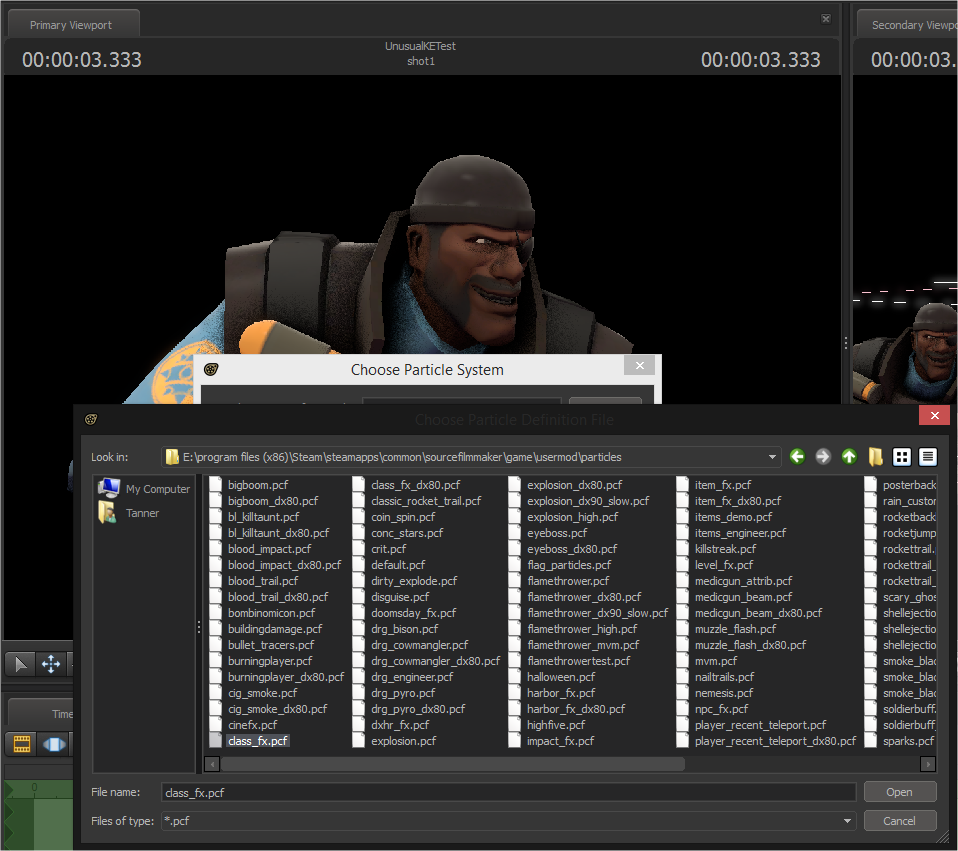
Much like a lot of items, the naming system isn’t exactly user friendly when searching for the killstreak particle you want. Fortunately, Sync’s amazing guide has this taken care of. Refer back to the Intro section for more information!
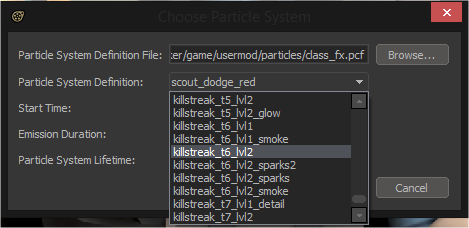
The Killstreak files are located under the class_fx.pcf. Open that and in the dropdown box, choose the appropriate file name. For this guide, I’ll be doing the full Incinerator effect.
Fixing and coloring the effects
Once you’ve added your particle system, you’ll need to tweak it a bit to get it to show up correctly.
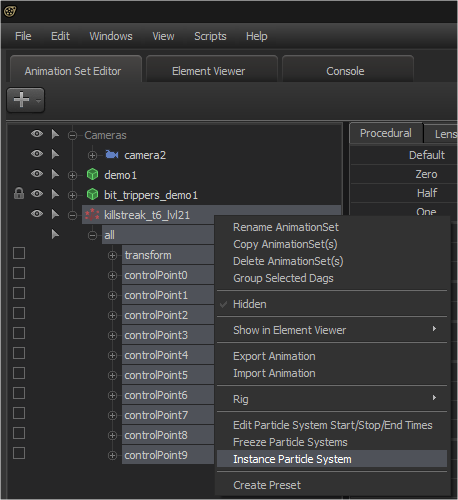
The following step is a MUST. You need to instance your particle system to be able to change the necessary settings. In fact, a good rule of thumb is to instance any particle system you use.
Just right click the AnimationSet and click Instance Particle System.
To edit the Particle System, right click the AnimationSet again and select Show in Element Viewer -> Particle System.
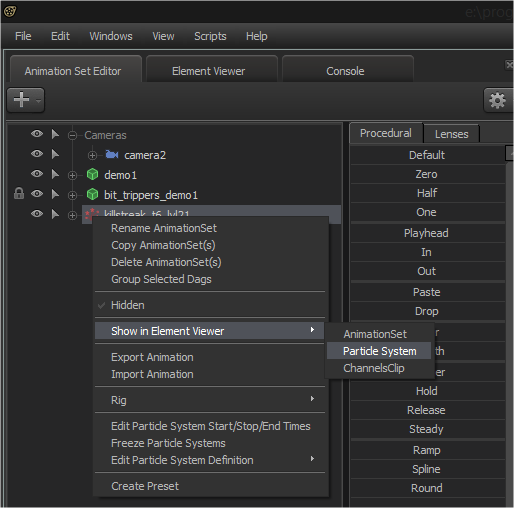
In the Element Viewer, expand particleSystemDefinition and click on the 

This will open up the Particle System Editor, allowing you to change the settings necessary. As you can see below, something doesn’t look right with this effect…
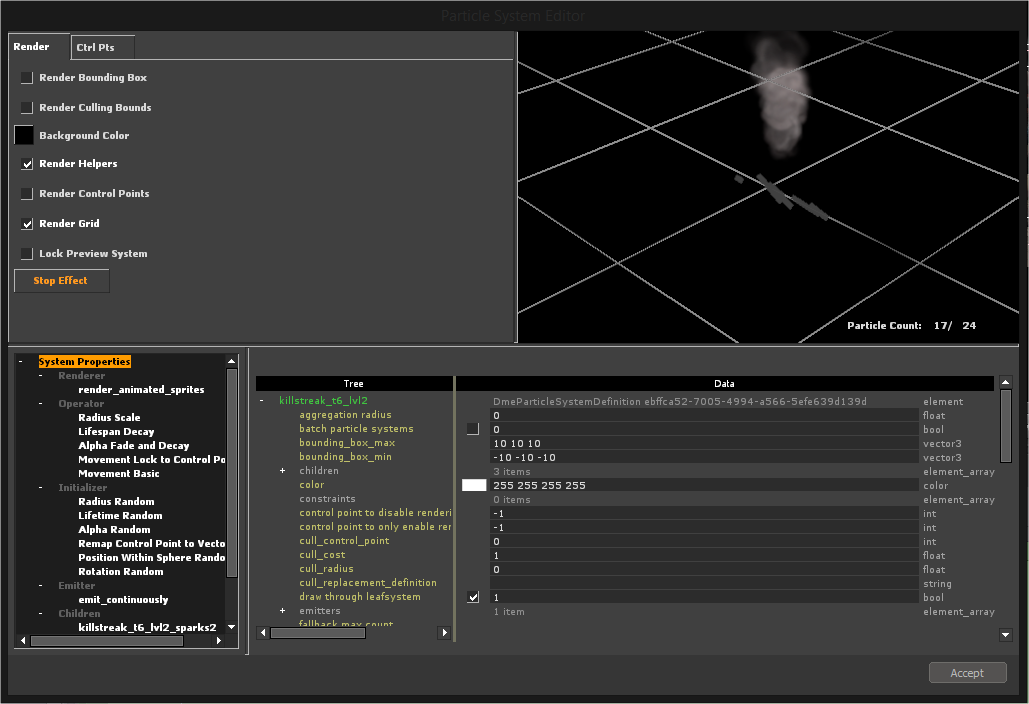
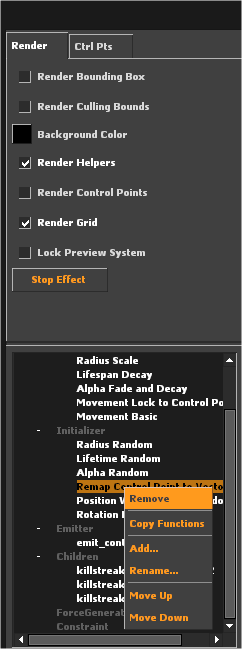
Under Initializer, find the variable “Remap Control Point to Vector” and remove it.
Right away, you should notice a glow at the past of the particle. That means it worked and you can start coloring!
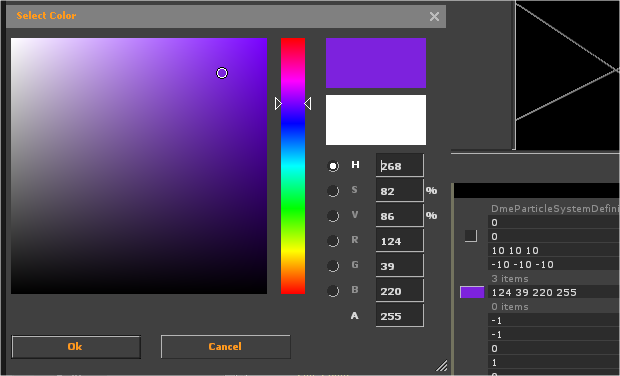
Go up to System Properties and adjust the color as necessary
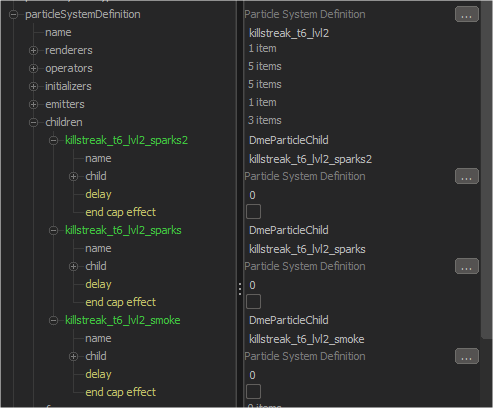
You will need to do this for the main effect file PLUS the file’s children for the effect to look right.
Singularity Fix
Gerbetta brought an issue with the Singularity particle to my attention and through some critical thinking, we figured it out. I’d already applied this fix before, so I didn’t think to check it again as the cause of Gerbetta’s issue. This is another one of R234’s fixes, so he gets the credit here.
Navigate to your SourceFIlmmaker directory and go to gametfmaterialseffects and add
to both of these files
Make sure you save these files to your gameusermodmaterialseffects directory!
Positioning the effect
This is where the guide gets a little less concrete, but hopefully, it will make sense. Unlike hats and miscs, these Killstreak Particles aren’t made with bones and control points relative to where they should be placed. I’ve found that the best method is to pose your model first, make any facial adjustments, THEN add the effects. However, we sometimes find a better pose after the fact.
I’m not an expert with bones or control points, so this section doesn’t have to be followed very closely. It’s just more my recommendation. There are several controlPoint bones to each effect, but their positioning doesn’t seem to affect anything, apart from controlPoint0.
When you import the effect, lock your model’s rootTransform bone to the Particle’s transform bone, select the transform bone and drag the zero slider to full. Secondly, lock the model’s bip_head bone to the Particle’s controlPoint0 bone, select the controlPoint0 bone, and drag that zero slider to full as well. With the controlPoint0 bone still selected, position it in the view port near the eye and scrub the playhead to get an idea of how the effect looks. Adjust the position as necessary.
If you let the scene play a bit and watch the particle system, you will notice it juts out a bit (presumably to compensate for the forehead or hat). You can actually control the direction it juts out in with the Rotation manipulator.
As I mentioned, this section isn’t concrete, but as for right now, I do know it works. I will update this if I discover simpler or more effective ways of doing this.
Conclusion
Hopefully this guide was of a decent amount of use!
Thanks for reading and remember, always remember to instance your particle systems!
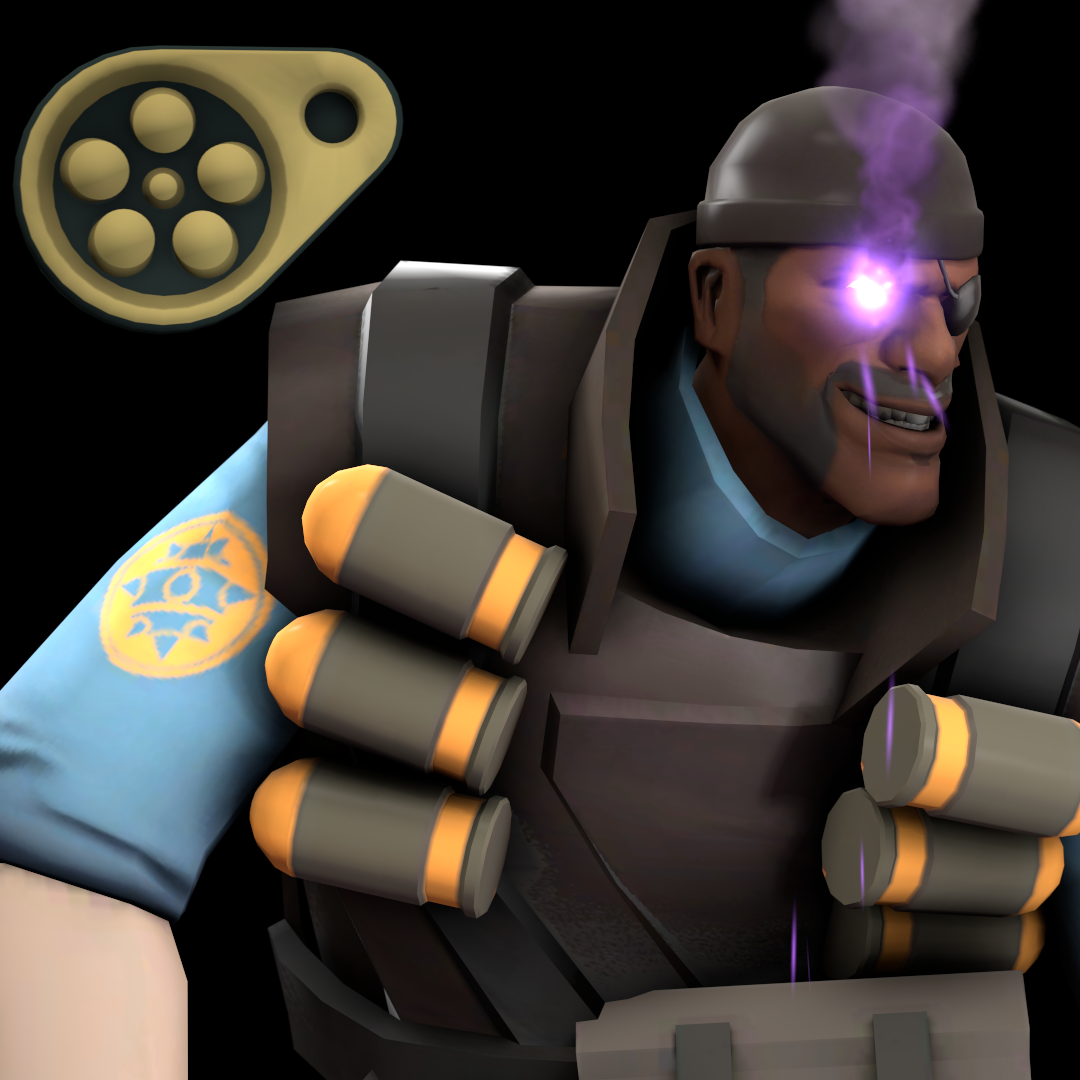
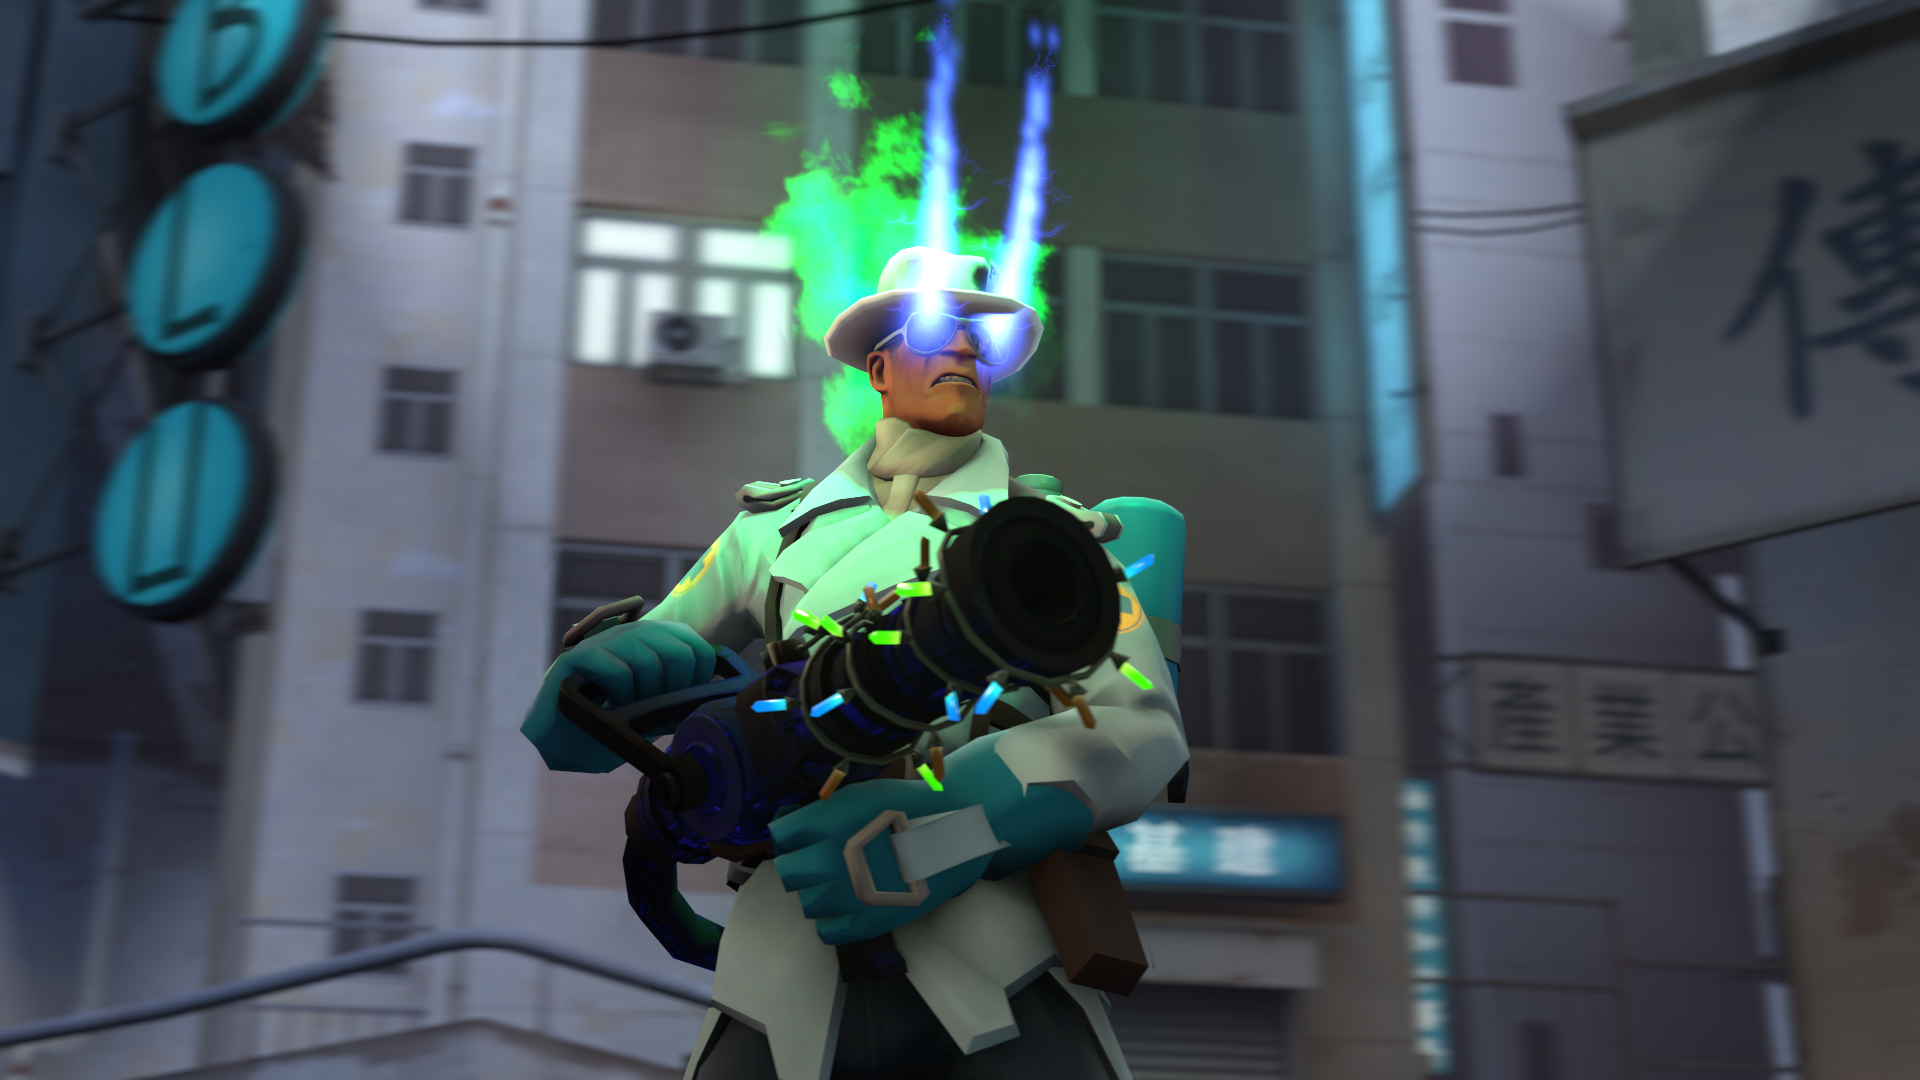
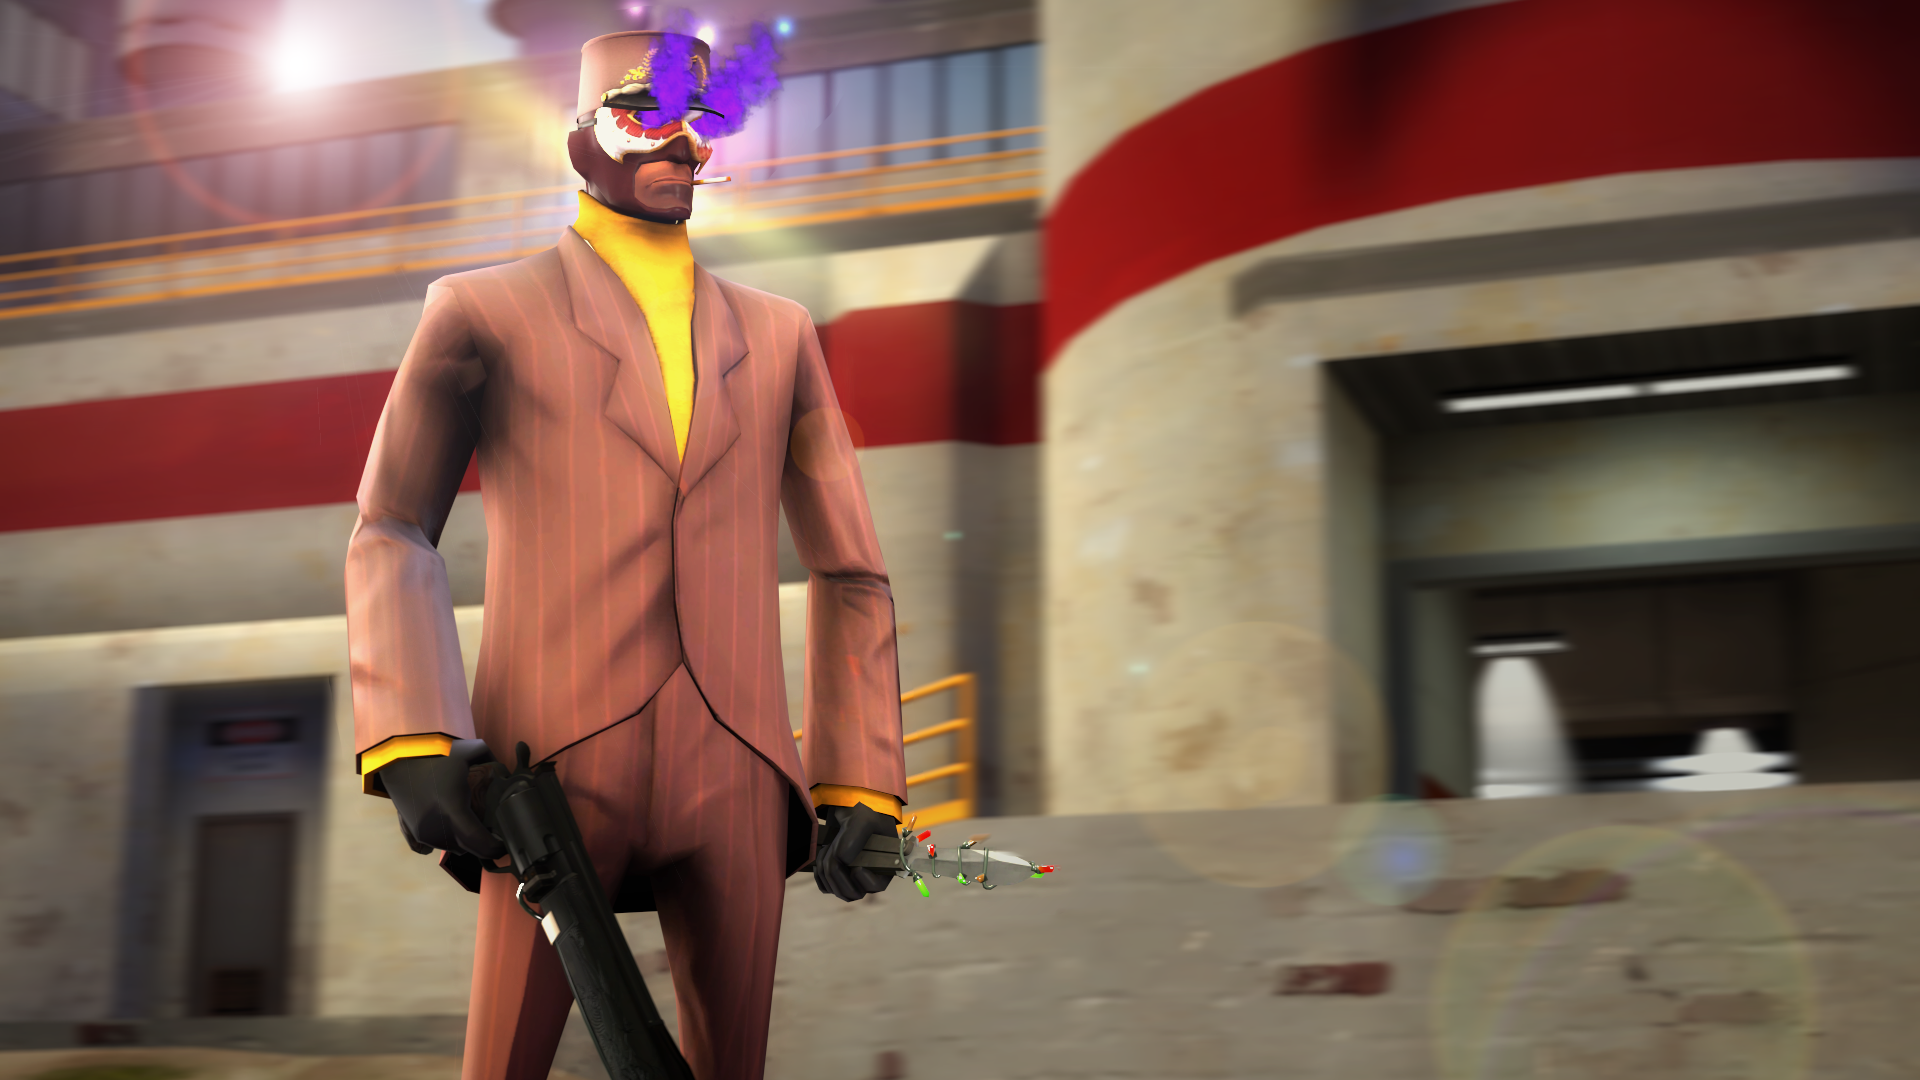
As a sort of proof of concept, I’ve attached a couple posters I made using this method.
Just to save people time, I’m aware of the contributor function, but because neither of the two people I listed are on my friend’s list, I can’t add them to this guide.