
Overview
Fix profiles not saving or loading and out of table range disc error while reading BIGFILE. Works for Tomb Raider Anniversary, Legend, Underworld, Lara Croft Guardian of Light.
About
Learn to create a Windows Virtual Hard Disk (VHD) and install game into it.
No mods required. Uses built-in feature of Windows.
Estimated time: 10 minutes
Note: you do everything at your own risk, I’m not responsible if something goes wrong.
I came up with this idea to fix my old Tomb Raider games. It doesn’t affect performance. It gives you the freedom to store the game in the virtual hard disk (.vhdx) file on different volumes or external drive. Files will appear as if installed locally on C: startup disk.
- ERROR OUT OF TABLE RANGE Disc error while reading BIGFILE.000
- unable to save or load or auto-save to profile
- game can’t find steam or crashes
- game won’t run unless installed to C: startup disk
- game won’t run unless installed to external drive and saving won’t work
- errors on Windows via Bootcamp for Apple Mac users
I have tested my idea works for these other games.
- Tomb Raider Anniversary
- Tomb Raider Legend
- Tomb Raider Underworld
- Lara Croft and the Guardian of Light
I haven’t tested the newer games but it may still work.
A VHD might help for any games that were hard-coded to run from specific drive letters, paths, file systems or partition schemes.


Rate it up and comment 🙂
You can help other people by commenting below. Say which game you’re playing and what problem you had with it. People will want to know how this guide solved your issue. Please favorite and rate up my guide if you want to make me happy 🙂 I spent a long time making it. I like seeing when it helped someone.
Before you begin
Read the Steam Troubleshooting and How-To’s.
Check out all the Useful Links I’ve included at the very bottom of this guide.
If you aren’t experiencing any of the problems described above then please try other troubleshooting steps. Some people may find virtual disks confusing. Only use them if you are confident in your computer skills and if it is likely to solve your problem. Don’t use virtual disks unnecessarily.
Check out Stella’s TombRaiders[tombraiders.net] website for game guides, info about common bugs, fixes and patches. You can even download savegame files[tombraiders.net] if you lost your progress. Thanks Stella!
If you see any errors like “Failed to find Steam” or “Steam Not Found” or “Could not find Steam” you might fix that by copying steam.dll file into the game install folder. Also note TexMod can cause the problem. Request help in Steam discussion.
If you see an error like “Autosave is damaged. Will be recreated” and problems persist, you might see here or here and read this steam guide “No Resume option and Croft Manor saving fix“.
If your computer has a multi-core CPU and Tomb Raider Underworld crashes on launch, you might solve the problem by temporarily lowering the number of CPUs used by the Steam applications. Open Task Manager, right click on Steam and choose Set Affinity, then deselect some cores and click OK. Try launch game. Remember that restarting Steam will reset the Affinity back to normal.
- Verify Integrity of Game Files (validate 100% files installed)
- Check for Programs Which May Interfere with Steam (eg. disable antivirus temporarily)
- Use Steam to move the game to a different disk/volume if possible
- Copy steam.dll file to game folder (see above: Game can’t find Steam)
- Run in compatibility mode[support.microsoft.com]
- Try to “Run as administrator” from the right-click context menu
- Logon as an administrator[support.microsoft.com] then try run the game
- Try disable Windows Data Execution Prevention (DEP) for the game (permanently) or system wide (temporarily)
- Update your graphics drivers (if the game runs but has graphical issues)
More ideas from the web (optional)
- Users recommend installing the game to C: drive
- Some users reported success moving My Documents folder to C: drive
- How to move a steam game to another drive without re-downloading[www.howtogeek.com]
- Official Steam guide to Moving a Steam Installation and Games (in entirety)
- An unofficial method to move steam game library[www.techspot.com] (I can’t recommend it as it might break other games in your library)
- Command line interface users might test this idea[hardforum.com] to use symlinks or NTFS junctions. I haven’t tried it.
- Reduce available CPU cores for the application.
None of these ideas work for you? Then follow the virtual disk guide below.
1. Install game with Steam
Open the Steam Library. Begin installing game to C: boot drive like normal.

Note this guide is for Tomb Raider: Anniversary but steps are similar for other games.
While your game downloads we can continue.
2. Create Virtual Hard Disk file
In Windows operating system, search for and open the app Computer Management for Disk Management. The new window should appear like so.

In the menu bar select Action then from the drop-down select Create VHD. A new Create and Attach Virtual Hard Disk window should appear.

We must store the new virtual hard disk file in a new folder at our drive root () and type a sensible file name for it. Never install multiple games inside a single virtual disk.
Create new folder at the root () of C drive:
C:VirtualHardDisks
Location for my virtual disk will be this folder, with this filename:
Select settings for the new virtual hard disk:
- Virtual hard disk size: 10GB to fit Anniversary. Greater than size of game.
- Virtual hard disk format: VHDX is best for modern Windows systems.
- Virtual hard disk type: Dynamically expanding is best to conserve storage.
When finished click OK.
Disk Management should now show a new disk of the size we chose.
3. Initialize Disk
By default that new virtual hard disk VHDX file we created should have automatically attached and appear in Disk Management.

Right click it and from the drop-down menu select Initialize Disk. A new window will appear.

Choose MBR (Master Boot Record) partition style because these games are very old and our VHDX has only a small file size.
4. New Simple Volume
After we initialized the disk it will be marked as unallocated. We should make a new volume on it. Right click it and select New Simple Volume.

A new window will open for the New Simple Volume Wizard. Click next to begin.

Click next again, using the default value of maximum disk space.

Choose Do not assign a drive letter or drive path. This is very very very very important!

Choose to format as NTFS and type volume label to be same as the VHDX filename.

Review and then finish the wizard.

Wait for download to finish
Stop and wait until your game has finished downloading and installing.

5. Making empty folders to mount the VHD
Only do these steps once game is 100% downloaded and installed.
Find where the saved-games folder is. Mine was here:
Rename that folder to something different, for example:
Create a new folder in the same place with the original folder name:
Right click the game in steam library and open the Properties window.

Select the Local Files tab and then click Browse Local Files. It will open a new window in Windows File Explorer to where the game files are stored.
My game files installed to this folder:
Rename that folder to something different, for example:
Create a new folder in the same place with the original folder name:
6. Mount to the empty NTFS folders
Return to Disk Management.

Right click the virtual disk and select Change Drive Letter and Paths. A new window will appear. It should not have any paths mapped yet.

Select to Add. Add Drive Letter or Path window appears.

Choose to Mount in the following empty NTFS folder. Click Browse. The Browse for Drive Path window appears. Browse and select the empty save-game folder you made, then click OK.
You should now see a path has been added to the save-game folder. Now repeat this process again to also mount the virtual hard disk onto our empty steam game files folder.
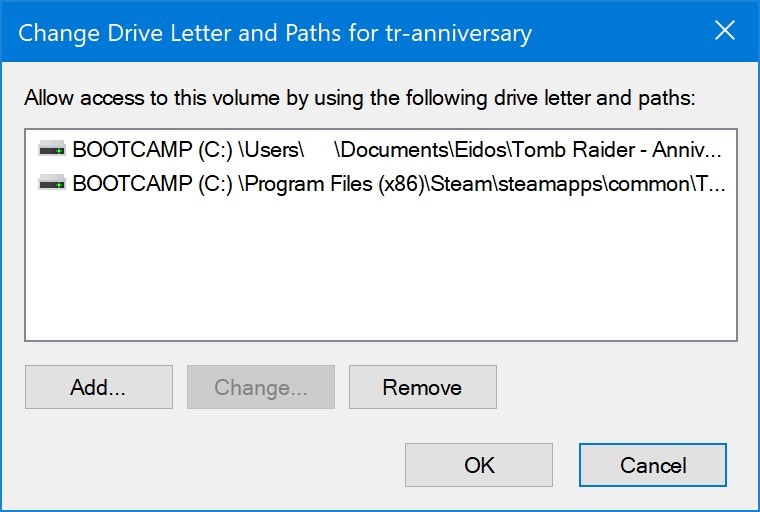
As you see in my case I mounted the virtual disk onto both these empty folders we made:
From now on any files you put in those folders would actually be inside the virtual disk we made. You’ll see the file size of the tr-anniversary.vhdx file will grow as we move in the game files.
7. Relocate game files to virtual disk
You need to put all the game files inside of the virtual hard disk.
Copy all files from inside this directory:
Paste them into this directory:
If done correctly the file size of .vhdx will increase.

If file size of .vhdx did not increase you made a mistake.
8. Verify Integrity of Game Files
Verify Integrity of Game Files. It should validate 100% complete. This means all game files are available inside attached virtual disk.

Delete this directory to clean-up at the end:
9. Read before you play
Remember the game won’t run and missing executable error appears if Steam can’t find game files. This happens when virtual disk is detached or mount paths are wrong.
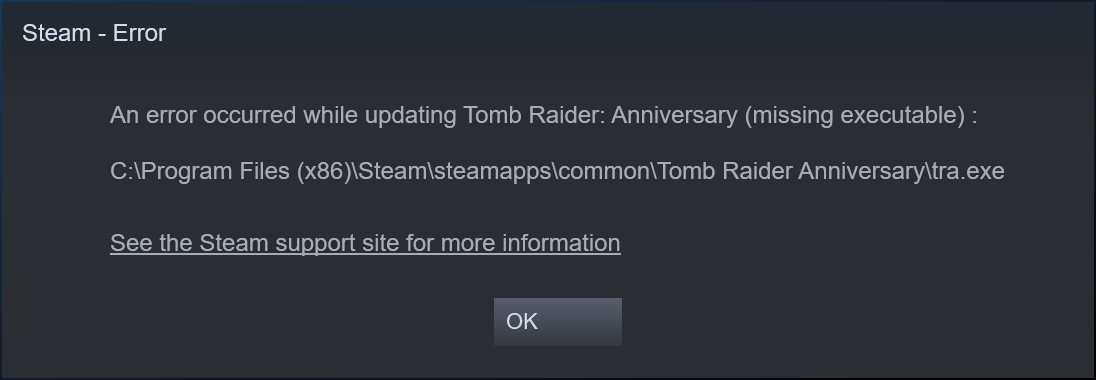
If you see this error then check virtual disk is attached and using correct mount paths.
An error occurred while updating … (missing executable) :
Virtual disks detach every time you reboot. Attach them again after reboot. You can make computer do this automatically at startup.
10. Launch game
Launch the game from Steam library. It should work. Ignore if it says default profile won’t load.

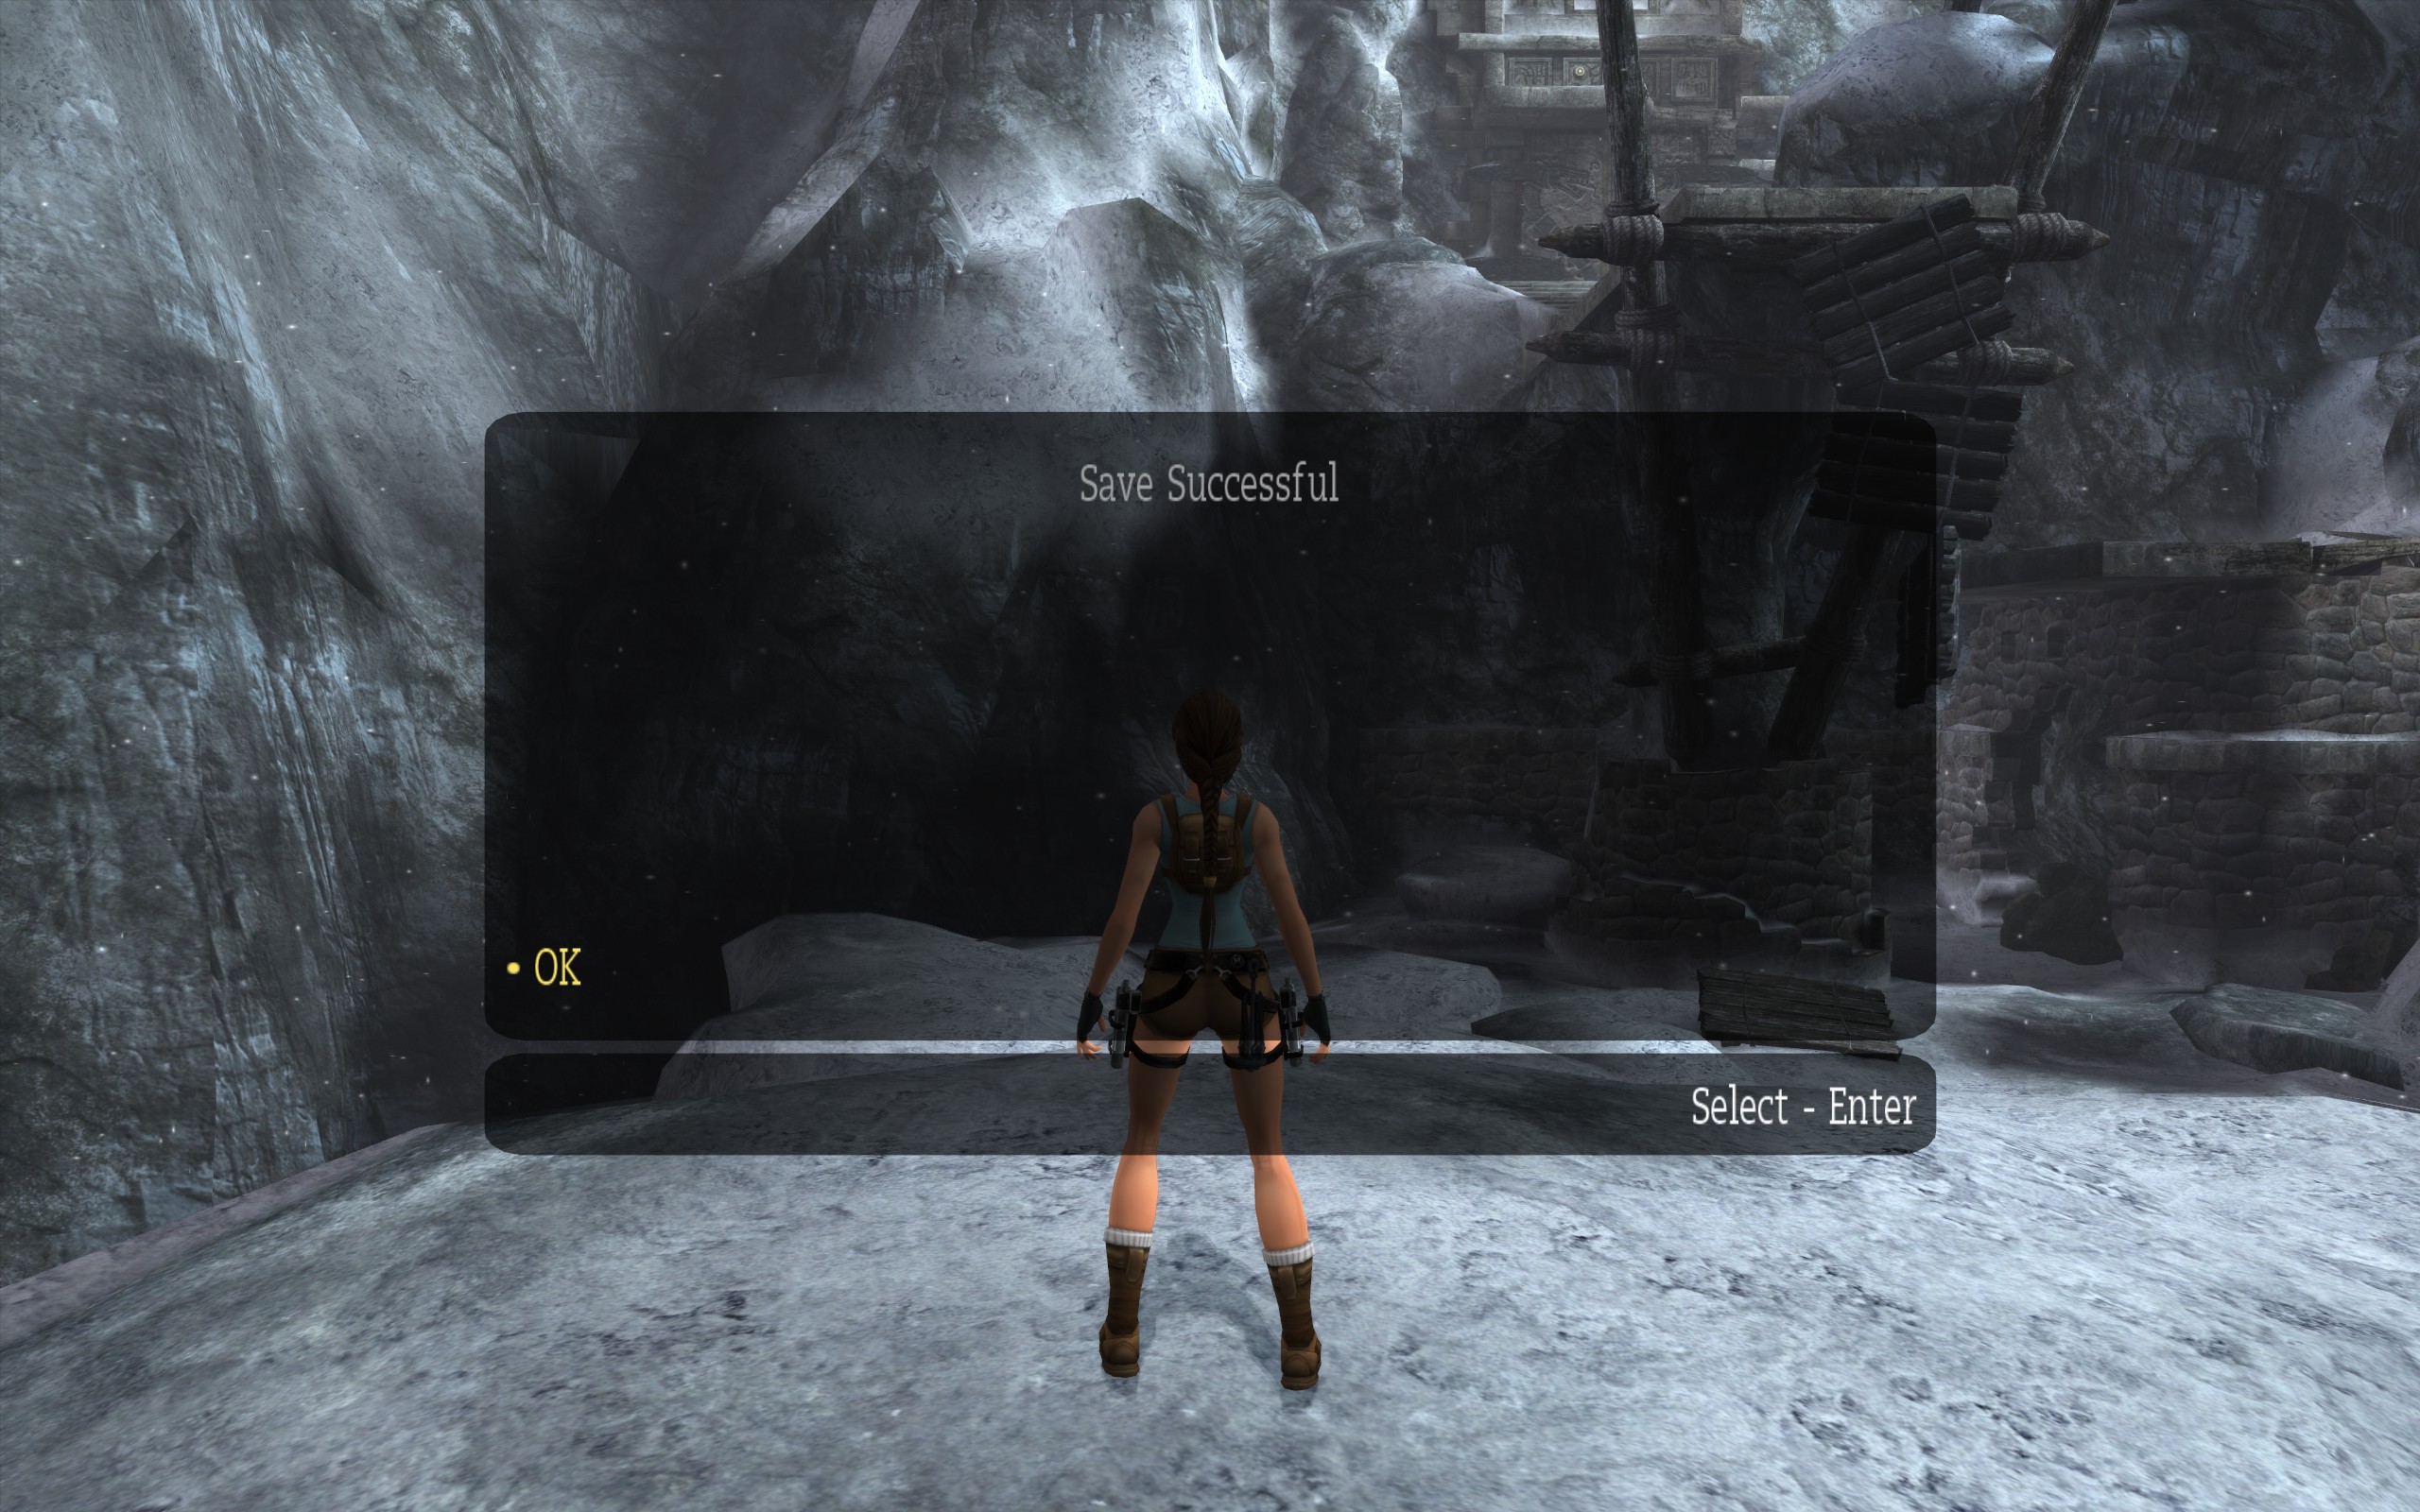
Create a new profile. Start a new game then try saving. It should work.
Please finish reading before you continue gaming!
How-to: Attach or detach virtual disks
Attach virtual disks by double clicking the vhdx file. It is OK if you see error Couldn’t Mount File because we didn’t assign a drive letter. Open Disk Management to see it did attach.

Attach virtual disks by opening Disk Management and in menu bar select Action then Attach VHD. This way you won’t see the error message.

Detach virtual disks by opening Disk Management window and right clicking the disk then from the drop-down menu select Detach VHD.


How-to: Auto-mount virtual disk at startup
Attach virtual disks automatically with Task Scheduler. This is optional.

Open Computer Management.
Select Task Scheduler. Select Create Task and the Create Task window appears.

Give the new task a name and description you’ll recognise. Make sure you check Run with highest privileges and Configure for: Windows 10. Change nothing else.
Select the Triggers tab. There are currently no triggers.

Click New and the New Trigger window appears.

Choose Begin the task: At startup. Make sure Enabled is checked. Delay task for: 30 seconds is optional but may work better for old computers. Change nothing else.
Click OK to add the new trigger.

Select the Conditions tab. Uncheck all boxes.

Select the Settings tab.

Select the Actions tab. There are currently no actions.

Click New and the New Action window appears.
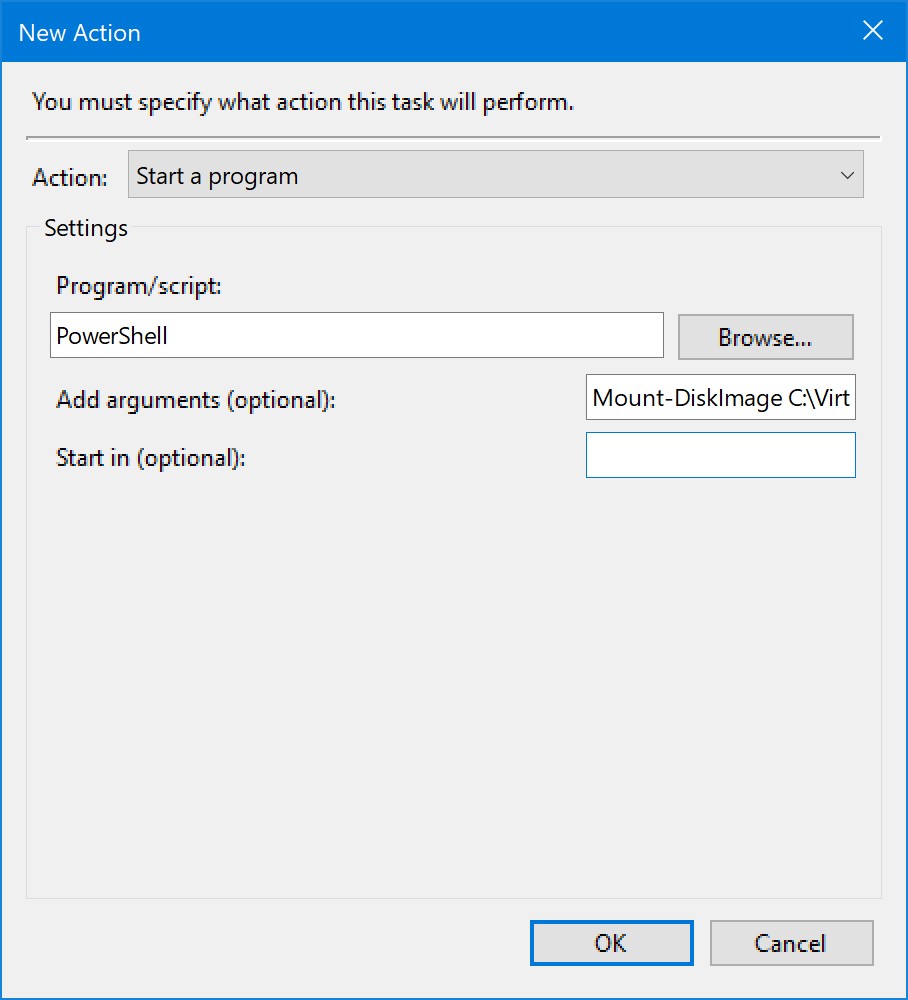
Use these settings…
- Action: Start a program
- Program/script: PowerShell
- Add arguments: type script below including path to your own vhdx file.
The path to your .vhdx file must always be exactly correct otherwise it won’t mount. If you move the .vhdx file then you must adjust the path in the argument. If you uninstall and delete the .vhdx file then remember to delete the action.
Click OK and the action is added to our new task.

New actions can be added for each virtual disk you want to mount automatically.
Click OK when finished.

Task Scheduler should now list the task. From the actions sidebar you are able to permanently Delete, temporarily Disable, or Run the task immediately.
First let’s reboot and login to test it works.
After you reboot some blue windows will temporarily appear as PowerShell runs the Mount-DiskImage script we specified in the action argument.

Open Computer Management and select Disk Management. You should see the virtual disks you specified were mounted automatically. Launch the game. It should work.
External drives
You can store the game (.vhdx file) on another volume or external drive.
- Close the game.
- Detach virtual disk.
- Copy or move .vhdx file to the new location.
- Open Disk Management.
- Attach virtual disk. Check NTFS mount paths are still correct.
Uninstall game
This is how to properly delete your game.
- Attach the virtual disk.
- Open Steam and uninstall the game like normal.
- Detach the virtual disk.
- Open Windows File Explorer and delete the vhdx file permanently.
- If you configured to auto-mount at startup then remove that action from Task Scheduler.
Useful links
These links may help you.
- Stella’s Tomb Raider Site – Save Files, Fixes, Patches, Walkthroughs and more![tombraiders.net]
- Tomb Raider Legend – Error – Data Execution Prevention
- Tomb Raider Underworld Crash On Launch caused by multi-core CPUs.
- Unable to load, change and create a profile. Note: solved with VHDs
- I still can’t save
- SAVE GAME LOST??? and no option to resume. The game runs but autosave got corrupted.
- FOUND FIX for losing saved checkpoints in Croft Manor
- No Resume option and Croft Manor saving fix
- Tomb Raider Anniversary – Missing Shadows?
- Tomb Raider Anniversary – Tip: *Don’t* Enable Anti-Aliasing
- Steam – Game Overlay Issue Fix – Manual Hooking
- Tomb Raider Legend – SteamOverlay fix for TombRaider:Legend – no PID searching
- Tomb Raider Legend – (UPDATED) How to ACTUALLY fix the Steam Overlay (not the “Non-steam game” way)
- Can’t Alt + Tab Help. Note: MSI Afterburner and Windows FSE are possible causes. Try disable screen-capture or overlay softwares (eg. Discord).