Overview
In this comprehensive guide, we will go over the strong points of having a core, and using multiple movement types to ensue redundancy and constant maneuverability even at low health. We will also cover the strong points of damage routing and using the mortar / SMGs to maximize damage. Credits to 1MINDGAMING for the inspiration and the motivation to do this!
What is a Hybrid Build?
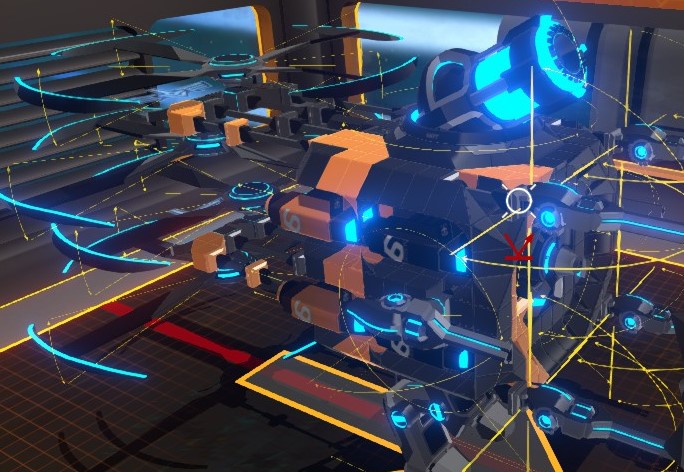
A hybrid build in robocraft is a build that utilizes many movement types to take advantage of each type that is placed on the bot. Here is a list of the advantages of having a Mech Copter Hybrid with a Hover core placed in the middle. (In this case).
-Lots of mobility-
-Will be able to fly to advantageous positions on the map-
-The ability to retreat in very low health circumstances-
These are just a couple of advantages of having many movement types on your bot. But there are also some disadvantages to having lots of movement types on your bot:
-Lots of CPU just for movement parts-
-Very costly to make-
-The mech (in this build) will not be able to jump/pogo-
Part One: The Hover Core
The first part of this build will be the construction of said Hover Core. The core MUST be damage routed to the back only. This prevents the core from breaking off from the front, since it will be connected to the back of the bot ONLY. The core should be built like so.
[Feel free to design your own core, but remember it MUST be small enough to fit into the armor around it]
Front:
Side One:
Back:
Side Two:


The Green colored items are the hovers that will be placed. I used lots of wedges to prevent the attachment of the core from the front and sides. Since it will only be connected from the back ONLY.
[Color Codes For This Section]
Green: 2nd Tier Common Hovers
Black: Blocks
Part Two: Armoring the Core
Now we will move onto armoring the core that will be inside of the box. Remember to only connect the core to the back of the bot so that the core will not be gutted when shot at from the front and the sides.
Front:
Side One:
Back:
SideTwo:
Bottom:
Top:


[Color Codes For This Section]
Light Green: Rare Prop Mount
Red: SMG Gun Mounts
Yellow: Epic Thruster Mounts
Blue: Rods For Back Rotor Mounts
Dark Green: Common Mech Leg Mounts
Pink: Rare Rudder Mount
Black: Blocks
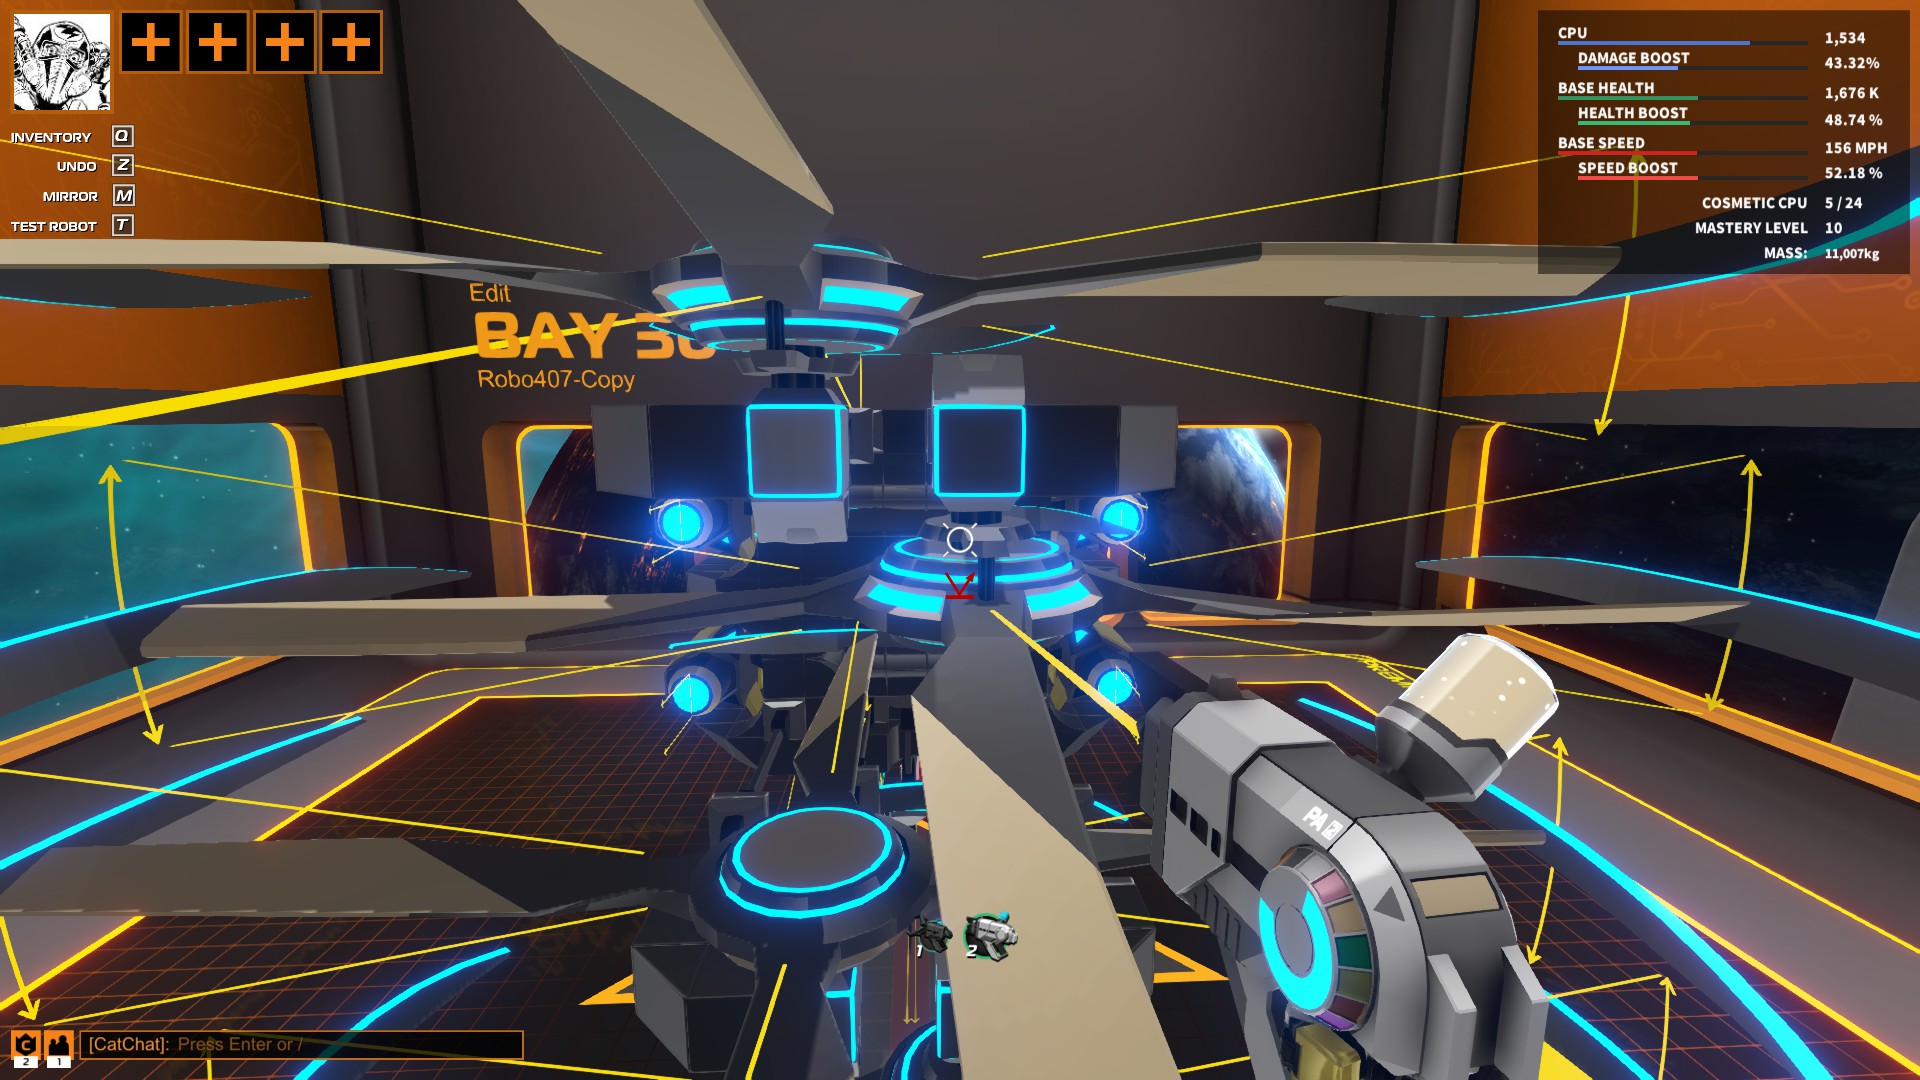
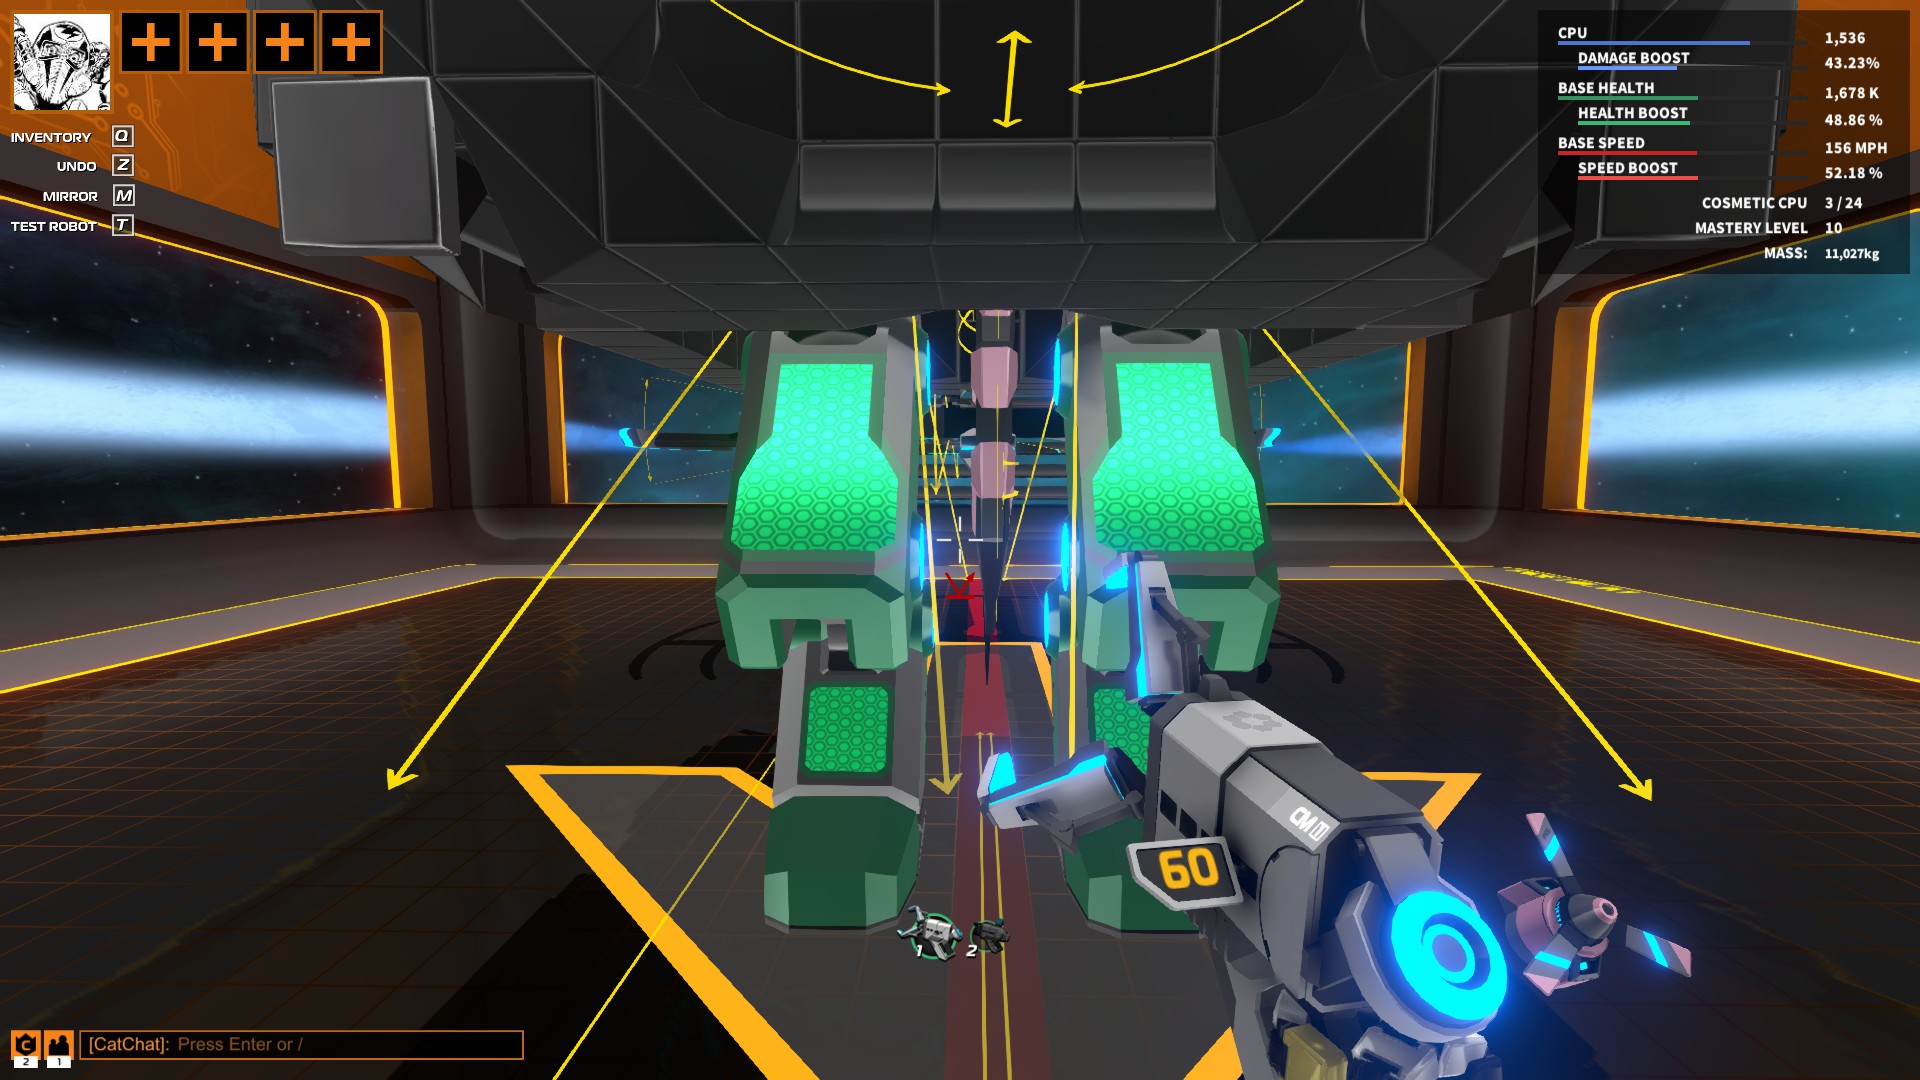
Part Three: Movement Parts (Mounted)
!If you must see where to place said items refer to Part Two of the Guide!
Here is all the outer movement parts on the armor itself mounted to the bot. Keep in mind that the thrusters are there for the speed boost, the propeller and rudder is there for easier forward and backward acceleration, and the mech legs are there for walking on the ground.
Front:
Side One:
Back:
(Before you mount the rotors, make sure to place the rods like so:)

Bottom:


[Color Codes For This Section]
Light Green: Rare Prop
Yellow: Epic Thrusters
Dark Green: Common Mechlegs
Pink: Rare Rudder
Purple: Rods that will be connected to the rotors
Tan: Epic Rotors
White: Headlamps that wil allow placement of said rotors
Black: Blocks
Part Four: Weapons (Mounted)
!If you must see where to place said items refer to Part Two of the Guide!
Now we will mount the SMGs to the armor surrounding the core of the robot. Remember that you will use the SMGs for precise fire / burst fire on opponents that you cannot hit with the mortar that will be placed on the top of the bot.
Front:
Side One:
Side Two:


[Color Codes For This Section]
Red= Weapons
(4 Front Mount SMGs, 2 Side Mounted SMGs, 1 Gyro Mortar)
Black= Blocks
Positioning To Use The Mortar To Cover The Middle Point In Battle Arena:
Positioning is KEY when using the mortar, especially when contesting the middle point. Here are the following positions with angles that will allow you to hit the middle point from cover:
Birmingham Station’s postions with angles:
[1st Positon]
[2nd Position]


Vanguard’s End’s positions with angles:
[1st Positon]
[2nd Positon]


Spitzer Dam’s positions with angles:
[1st Positon]
[2nd Positon]


O Valley’s positions with angles:
[1st Positon]
[2nd Positon]


Tharsis Rift’s positions with angles:
[1st Positon]
[2nd Positon]


Tihonium Canyon’s positions with angles:
[1st Positon]
[2nd Positon]
[3rd Positon]


Ending Note:
Please feel free to ask questions / converse in the comments below please, this is one of the first guides that i have written and i hope that it helped with building / playing a mortar bot.
[PLEASE BUILD YOUR OWN ITERATIONS SO YOU MAY LEARN!]
~Gat (IGN: MrDerpCat)