Overview
Kerbal Space Program career mode now has contracts, and building space ships on career mode now cost the game’s form of money. It wasn’t always this way. When the newest patch came out I had to create a new game three times just to finish all four of the first contracts before I ran out of funds. So this is mostly just a story about how to get your space program off the ground. I expect it to be boring but thorough.
Intro
There are guides and youtube videos that will show you how to get tons of science and land on Minmus and return to Kerbin on your first launch, but if you don’t take the time to learn how to complete simple contracts, you may get frustrated that the way the game was designed and the way you are learning to play don’t allow an organized progression of skill. I want to make a tutorial for the first few launches that make sense for someone who has never played the game, or has only barely started. This guide will not do the contracts for you, but it will give you warnings I wish I had before hitting launch. This runthrough will cover getting to 40k monies and getting enough parts unlocked through science that you can really experiment with a decent selection of parts. After that you will enjoy the game much more by figuring it out yourself.
This guide covers content which has likely been updated or modified making many of my screenshots irrelevant, but feedback shows that it will still provide a decent walkthrough of your first few hours (days for some) of the game. I’ve erased all my save games after some poor moding choices back in beta and will likely be making new screenshots while I attempt to follow this guide in the latest version of the game. Until then, know that the pictures in this guide are strictly historical in their accuracy of what the game looked like in the revision of the title.
I make no claim to this being the easiest or most efficient way to complete these first contracts but I plan on using it a few times and fine turing it to make sure theres not a obvious correction. The goal, of course, is to teach the use of both the building simulation and the flight simulation to a point where when you read a contract, you know how to complete it.

You now have 36506 Monies, but very few parts to use. Before we complete any contracts I would like to open up some things in the science building so we can get our science tech levels unlocked as soon as we launch our first craft. Click on the large hexagon shaped complex at the bottom of the space center to go to the R&D building and see what is available and how much science we need to research it.
The green icon in the center is what you start with, and the arrow points to the first unlock which is called Basic Rocketry. It includes a decoupler, two fuel tanks, and a Mystery Goo Containment Unit (MGCU). you will want decouplers for building staged rockets, and the MGCU for gathering science early on. The blue button in the right says you need 5 science to research basic rocketry. Go ahead and leave this building so you can go get your science on.
First “Craft”
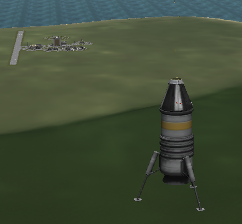
The tall building in the middle is the Vehicle Assembly Building(VAB), go to it. The first option on creating a new craft is what will control it, in this case your only option is a Command POD mk1. This is all you need to click. Now using the tools at the top of the screen you may name and save your craft if you like, but when done playing with those button, hit the green one to launch your lone powerless pod.
You will be taken to the launchpad. Remember how you wanted science to research your first set of new parts, right click your craft and click crew report. A new window opens up and you have the option to keep the data, transmit the data, or reset the experiment. Typically transmitting will not give as much science as keeping the data all the way to recovery, so the green button is the best choice. Unless mentioned, keep the data every time. If you wanted to transmit the data you would be using battery power, and need an antenna which this craft doesn’t even have.
Now look for the icon on the bottom right, thats your pilot, Jeb. He needs to get out to get more science so click the EVA button that appears on his picture when you mouse over his face. while he is hanging on to the ladder, right click him and take an EVA report. Now right click the pod again and store your data. Press space to jump from the ladder. right click Jeb again and take another EVA report, and then right click him again to take a surface sample. Store these 2 new pieces of data in the pod like the first report and then use ASWD to walk down the side of the launch pad and do these two science observations again and then return to the pod to store them again. Now find the door of the pod and stand beside it then press “F” twice to board it.
To finish this “mission” and recover the vessel, mouse over the altitude at the top of the screen and a green button will appear. a window will show you have you have just returned 1 crew report, 2 eva reports and 2 surface samples, totally around 30 science. You’ll also see that your were fully refunded for all the craft’s parts, and that Jeb survived, and has some form of reputation from being a mission veteran. I went back out a second time to check if I missed something and determined you can take a second set of surface samples for another 2.2 science per sample if you feel like being thorough. I recommend this now if you have time.
Spending your Science
You haven’t even left the ground yet and you have enough to unlock more than just Basic Rocketry so lets go to the research and development building and research it. Once you do three more options appear, some costing more than others. You can only buy one with currentscience levels, so your options are to get lander parachutes, engine and legs or get things to attach to the sides of your rocket or get some more options for lift-off propulsion.
Honestly any of these three options will be useful but you should start at the bottom, so you don’t have to worry about breaking engines on landing. All parts in KSP have crash tolerances, but whatever hits the ground first matters most. If the engine says you can set it down at 7m/s, 7.5m/s will destroy it and you will get no returned monies for returning it safely. The legs have twice the crash tolerance of any other part right now so they make too much sense to delay.
Most folks will research all three before saving for the next set of unlocks since that tier is 45 science each. If you do plan on rushing to anything, you’ll want to get survivability (the lander stuff) so that you can get batteries from “Science Tech.” When your engines are not firing, your pod will use a constant rate of electricity in addition to using much more to steer your craft, and with your current parts you can only recharge your pods internal battery by firing your engines which cost precious fuel. So until you unlock solar panels, batteries can be the difference between a nice three hour orbit mission returning intact and a “rescue from orbit” mission. Note: Some smaller engines don’t even recharge batteries.
Begin the Contracts
If you want to get to 5km, clearly you’ll need more than just a pod. Add a parachute above, some form of fuel and propulsion below. Caution: you cannot reach 5km with only the FL-T100 fuel tank. Add legs at the lower edge of the fuel container, 3 or more, if you do this you can trust that the legs will protect your engine unless your ship is massive. Your cheapest option and the one I recommend is the solid booster, with only 3 legs. You will want to set up stages on the right side of the screen so that your engine fires in the right sequence and your parachute deploys when it should(at a stage closer to 0). There should almost always be a parachute in stage 0, if you plan on landing somewhere with an atmosphere. When you are done making your new vehicle: name, save and launch.
If for some reason you have a parachute in your first stage you can fix it on the left hand side of the screen but don’t forget to fix your saved craft (in the VAB) to reflect this later. Once your staging looks right, hit space to light your engine.
ASWD control your pitch and yaw, and since this is a rocket, thats pretty much the same thing. Q and E allow you to adjust roll which once begun is very hard to undo. The point here is not to make your own record but to break the one they ask you to, getting to much higher will change what contracts they offer you next.
If you chose a solid stage booster once you reach 2km, hold down your A key untill your vessel is pointed at the western horizon. You will only be offered record breaking contracts for things you have not done, so you’ll want to avoid getting above 10km. and if you fly straight up until your fuel runs out you will reach 16.7km.
If you made your turn right you should be flying over the grasslands, where you can do more science. Once your engine runs out of fuel take a crew report. The right time to release your parachute is any time you are already falling and before you get to 500m since thats where it will fully deploy and really start to slow your descent. Once your chute deploys you can press G to enable your landing legs, and then G again to activate them.
Landing, Science, and Recovery

1. You need to EVA jeb.
2. Have him do an eva report while hanging on to the ladder.
3. Right click the pod and take the crew report out that you took while flying over the grasslands, then store both data back inside the pod.
There are two compartments in the Pod, one for crew and one for science, and oddly you can’t move the crew report you took while flying into the science compartment from inside the crew compartment.
4. Get back in and take another crew report, this one will be for being landed on the grasslands.
5. EVA again to the ladder and right click the pod, if it offers to let you take data(3) you did that right.
6. Now gently guide jeb to the ground, if he falls too fast or too hard he will die.
7. Have him take another EVA report on the ground, and a surface sample.
If you are happy with your results, use the recover vessel button hidden on the top center margin of the screen to recover the vessel. If for some reason your pilot and your vessels get separated after landing, like maybe you go out to take surface samples and do science then realised your spacecraft is too tall to get back into the pod, you can recover the pilot, then once looking at the Space Center, go to the tracking station and recover the ship. It should be listed in the far left. You won’t get all your science for that launch until both craft and pilot are returned. You should see that almost all of your funds were returned, all you paid for was fuel.
Closure
If you followed this guide, and didn’t skip any science or lose any engines, you should now have around 40 more Science to spend and 40k monies. Remember that this game is all about feeling like it will work and having fun trying it so I expect you can handle it from here. If you are unhappy with the way your current flight is going hit the escape key and revert to launch to try again. Unless you made a mistake building it, then you need to change your craft using revert to assembly instead. This ability to revert may not be available after you have crashed, or if you have EVA’d or changed your current craft so pay attention to spot things like missing parachutes before you are unable to while returning from a mission in space.
Not everything will be reverted or recovered right away. Once you put things into stable orbits you can switch between them or just return to the space center to build new ones. Your orbits will not decay so long as every part of them is above around 70km.
Honestly this should be all you need to follow along with the youtube video style guides. Here is one that doesn’t completely suck, though I did not make it so all credit should go to it’s author 5Th Horseman.
You can afford to follow along to finish the contracts that you picked up in the beginning if you need any suggestions on ship design, he makes a ton of mistakes so you don’t have to. His first video covers reaching space and the second gets you into orbit. Just remember to never do a contract that rewards you less that the amount you loose to parts you can’t recover because you jettison them mid flight (which means they explode when they return to the ground) and I’m sure you’ll do fine.
Final Notes. Mini guides.
Thank you for reading this far
I wanted to do more, but I also wanted to enjoy the game and so far this guide took around 9 hours of restarting over and over again Min-Maxing the first 2 contracts, and getting the maximum science per minute spent. If followed exactly you end up with about 104 science in less than 30 minutes. After finishing the reach space and orbit contracts, the new ones really start to get crasy with “situations” that you need to be in before you stage a part and activate it, and I just want to wing that now and not try to communicate what I learn anymore. I feel like this will probably be the feeling anyone else has after completing this walkthough so I wish you the best but I won’t be continuing unless someone asks for a specific contract they would like some ideas on.
A note on Science and Biomes
So far you should have crew reports, EVA reports(flying and landed) and surface samples for 3 places: KSC, the launchpad, and the Grasslands. Grasslands is a Biome(type of place that can be sampled) and the other two are places. You can reach 2 more Biomes and one more place without designing any new crafts, the ocean (called Kerbin’s water) is easy just turn east after reaching 1km, and the shores are reached at heading 315 after 1 km of climb.
There is also a runway which to do science on quickly would only require to to build and launch your lone pod from the space plane hanger instead of the VAB. I was able to get to 46 more Science after unlocking general rocketry and stability, which allowed me to get my battery tech researched.
A note on Controlling Liquid Fuel Engines and targeting altitudes.
Unless your engine is a solid booster, shift will adjust throttle up, CTRL throttles down, and X zeros throttle. Once you feel can coast to to your target altitude hit X to turn off your engines and wait till you have reached it, sometimes the drag will begin to slow you and you will want to get back up to speed so you can get there. If you are having problems holding a specific heading, the T key enables SAS which will use your battery faster but will lock you into a heading better than you could do with the keys.
A note on LANDING with liquid fueled engines.
You don’t “need” legs on your craft but they are nice, pretty much required on solid fueled boosters. If you don’t have legs, or you picked an engine your legs don’t protect because the engine is longer than they are, you will need to use a retro burn(one that accelerates you in the opposite direction to the one you are traveling) to slow your descent so that the landing(crash) will be safe(tolerated) and parts of your ship don’t explode on impact, even with a parachute this can and does happen often so learn to retro burn before you need to land things gently. This is good to practice because eventually the place you land will not have an atmosphere to use for your chutes.
Annex I, How to Rescue a Kerb (requested by commenter)
Okay so I have spent hours on wikipedia pages that are not even about kerbal space program figuring out how to do things like save a kerbal from orbit, and maybe thats not your idea of fun playing the game, so please ignore this and look there if you enjoy that kind of thing, I can only tell you how I do it, not the best way.
You will need some type of probe core and/or to make sure there are no kerbals in the seat you plan on bringing them back in before you launch, they cannot hang on to ladders and ride your ship back home to the KSC.
So far the way I get it done is something called a hohmann transfer, thats the word people who like wikipedia articles should read up on. It requires some special maneuvers that take much longer to explain than they do to actually execute. You have to begin on the same plane as the target of your rescue, which is best set by the heading you chose at lauch time, hopefully you are starting with a rescue with an equatorial orbit, as this allows you to just launch with a heading of due EAST (most of the time it’s east).
Simply put, make your orbit larger than the kerb you want to rescue, then target them in map mode. Once targeted, you can use the maneuver tool to try and create an approach on their smaller orbit that gets you closer to them around the time when you are the closest, then match their orbit with a second maneuver.
To move your closest approach closer to them you’ll want to make your maneuver on the opposite side of your orbit from the point where you are supposed to be near them.
This will make more sense with pictures I will get eventually.
Once you move your perigee (tightest spot in orbit) close enough to them to make “contact” you now want to use another maneuver to match the other side of your orbit to match theirs after you get a “rendezvous” of within 2km. I’m assuming that kerbals have some short distance radio comms and you have to wake them up, before you can switch to them using the ” [ ” key.
Once you and the stranded kerb are in roughly the same orbit (within 2km), you should switch to the kerb to get the remaining distance closed. It’s basically free fuel and much larger target to try getting the kerb to the ship than the other way around.
To activate the RCS jetpack, once you have made the kerb your active ship, press the “R” key. They have 5 units of RCS on their back, but don’t use more than a few pulses (taps of the key) because every fraction of a unit you use to accelerate you toward your ship will need to be compensated on arrival. If not, you will smack into your ship like something out of the movie gravity and ragdoll off into space, possibly altering the orbit of you and or your ship. So approach slowly especially once you can make out the features of your craft.
I like to count my pulses, so if I accelerate toward the ship with 3 pulses, once I start getting close I will pulse backward twice to cut my speed by 2/3. The controls are SHIFT to move you up, Ctrl moves you down and awsd are the normal left, up, down, and right. Q and E twist you, or you could just change your camera angle because forward is always away from the camera and back is always towards it.
Once you reach the craft, you’ll need to find a door, I like to put a light on the craft (use solar pannels to keep it powered) that iluminates the hatch. This is especially important on the dark side of the body you are orbiting, so hopefully if you like this idea you didn’t launch yet, but theres always that save game i told you about.
Like I said this was just from memory, I’ll try to get a few pictures for the guide in time. Hope this helps till then.