Overview
This guide intends to show how players of This War of Mine can add their own music to the in-game Radio Vysena through the use of mod tools and audio editing software. Details and images are provided so that even the least tech-savvy can manage. This guide intends to show how PC-users can do it themselves – if you’re a Mac user, then this guide may only be helpful for context, but would require some more practical work on your end as I am unfamiliar with Mac systems (sorry about that!)
Introduction
So you want to add some music of your choice into This War of Mine? Cool Kids of Death is awesome and fits so well into the game, but you want to add some variety to Radio Vysena. Not to worry, for now there’s an easy way to do so with your very own mod! This guide will take you through the steps on what you need to do to adequately put music into the game to listen to through the in-game radio.
This guide shows you how to set-up a Mod for This War of Mine, prepare sound files using Audacity, transfer files into the game’s folder, program the songs into the game’s code using the Mod Tools, and ultimately develop the mod for use in the game!
* Please note that this guide was first developed prior to the release of The Little Ones DLC. I don’t think this will be an issue, but I have yet to test it out for myself with the DLC installed. If anyone happens to come across an issue pertaining to the DLC expansion, let me know. I’m anticipating that those who download the expansion in the future after developing their own radio mod may need to re-make the mod so that there will not be any compatibility issues. If it works fine, then awesome!
** Also very important, please ensure that whatever music you are putting into your mod is for your own personal use. Do not develop a radio mod and then share it on the workshop for others to download, as you likely do not have the proper authorization to be distributing music even after altering them into a fuzzy radio sound. I don’t want you to get into any hot water or trouble for uploading copywritten material, and I don’t want such issues to jeopardize the availability of the workshop for us all – who knows, they might even take away our ability to extract and import sounds if it becomes a big issue, so it’s best we avoid that. That’s why there’s this guide, so that people can make their own radio mods and not have to download someone else’s.
So without further ado, let’s start into the making of the mod.
Part 1: Setting Up the Mod
First off, you will need to open the Mod Tools for This War of Mine.
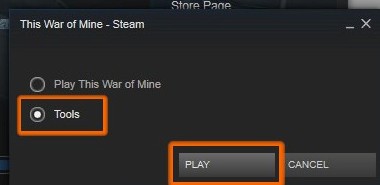
When opening This War of Mine in your Steam library, you’ll be given the options “Play This War of Mine” and “Tools“. Click on “Tools” to select it and then click “PLAY“.
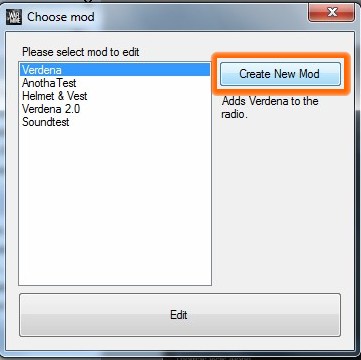
A window should open with a list of Mod projects to the left and a button saying “Create New Mod” to the right. If this is your first time using the Mod Tools, then the list to the left will probably be blank.
Click on “Creat New Mod“.

Enter a name for your mod, then a description that adequately describes the purpose of the mod (for your discretion). Under options, make sure that “Extract Sounds” is checked/selected. This will create the folders necessary for putting music in the mod. Once everything is sorted, you may upload an image to attach to your mod with “Set Image“. Once you are ready to move on, select “OK”, and the mod project should be made.

Your mod will appear in the list now, so select it and click “Edit” at the bottom of the window.
A new window will open called “Storyteller”. This is where you will be configuring the mod. It may look confusing at first, so be assured that while it may look overwhelming, this guide will only focus on the parts that matter, so don’t worry too much.
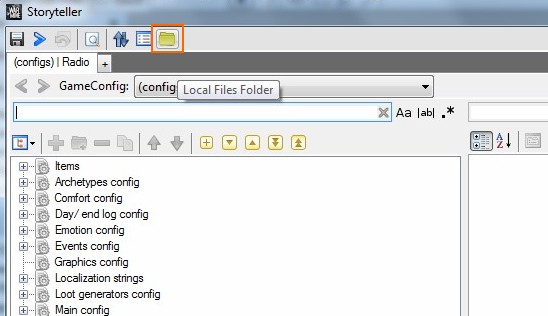
Look along the top of the window for an icon that resembles a folder. When you hover your mouse over it, a name should appear saying “Local Files Folder“. Click on this icon.

A folder shall open in a new window. This folder contains all the local files pertaining to the mod. It will also lead you to the location where you’ll want to put your music so that the music can be configured into the mod for use in the game. To get there, open the folder labeled “sounds“.
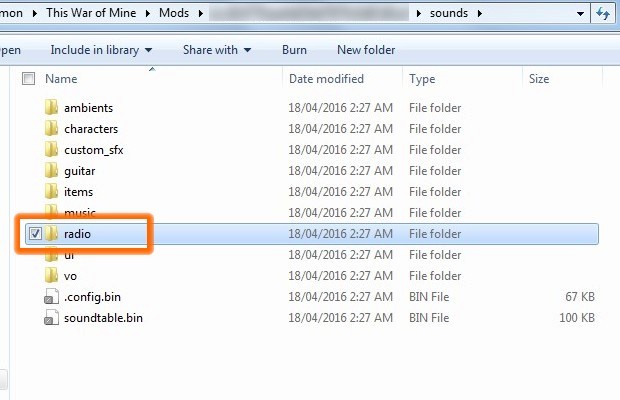
Once in the sounds folder, open the folder called “radio“.
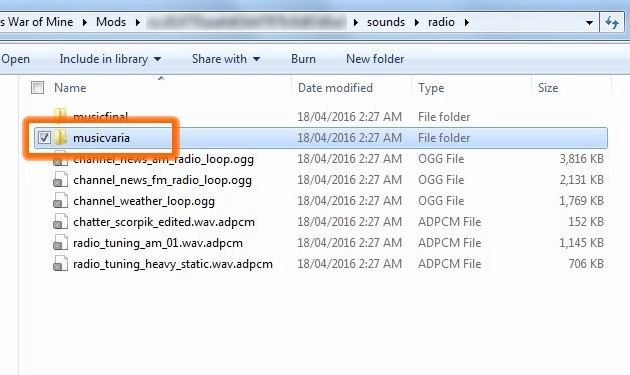
Now in the radio folder, open the folder named “musicvaria“
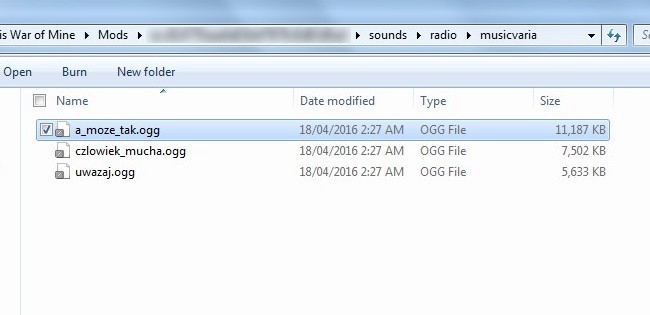
There you have it! As you can see, the musicvaria folder houses the Cool Kids of Death music played from the in-game radio. This will be the place you will put the music you want, out of ease for the mod. The music in “musicvaria” is played on the Radio Vysena station in-game, so all music can be dedicated to one single radio broadcast.

Now before you can import your music into this file, you must prepare it properly for the game. Before we continue with the next step, I suggest you make a copy of “a_moze_tak.ogg” and transfer the copy to a local folder, such as your “Documents” or “My Documents” or maybe even your desktop. It will be used in the next step, which is all about editing and exporting your song in the appropriate waveform and format.
Part 2: Preparing the Song
Choose a song you wish to import into the game. You cannot just throw it in the musicvaria folder as it is – it needs to be formatted. The song not only has to be in .ogg format, but it needs to be altered in sound editing software so that it will fit the radio. An un-edited song will be too loud and drown out all the other sounds in the game, and also too crisp to be coming out of a radio (we want immersion, don’t we?). This section will show how to properly prepare music for the mod.
Maybe you are familiar with sound editing or have a program you are especially familiar with, and maybe you know exactly how to prepare the files properly. If so, then good for you! Go right ahead and work your magic. For those of us less skilled and with limited resources, this part will guide you through some simpler steps on preparing the sound file for a desired music track. For the purpose of this guide, I will be showing you the steps using Audacity, a sound editing software that is freely available and will get the job done – and it is likely that many out there are familiar with such a software. If not, then no worries, this guide will show you only the processes necessary to proceed.
So open Audacity, and let’s begin.

Under “File”, go to “Import” and select “Audio“. Alternatively, you can simply press Ctrl+Shift+I.
Import “a_moze_tak.ogg” into Audacity. This should be the copied file I told you to make at the end of Part 1.
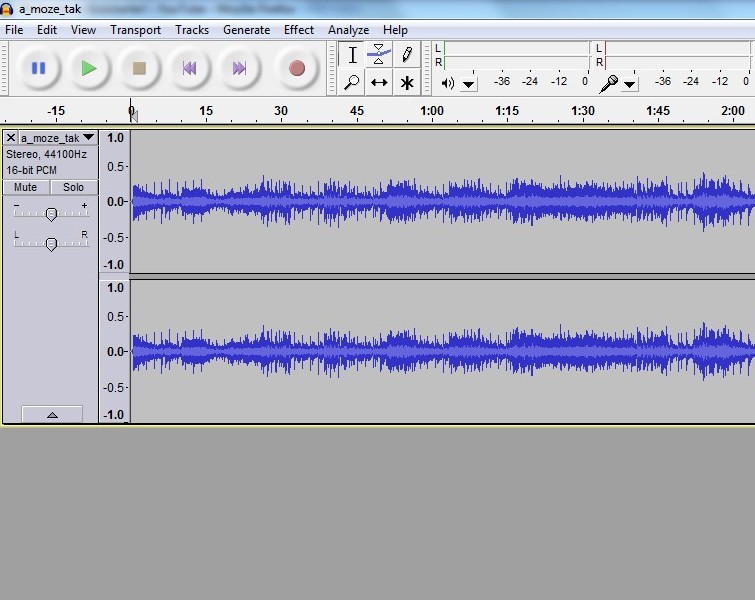
You won’t be editing it, just using it as a guide for how the song you intend to import should look in its waveform.
Next, import the song you want to have played through the in-game radio. For this example, we’ll be using “That Song” (You know, Big Wreck, I love that song).
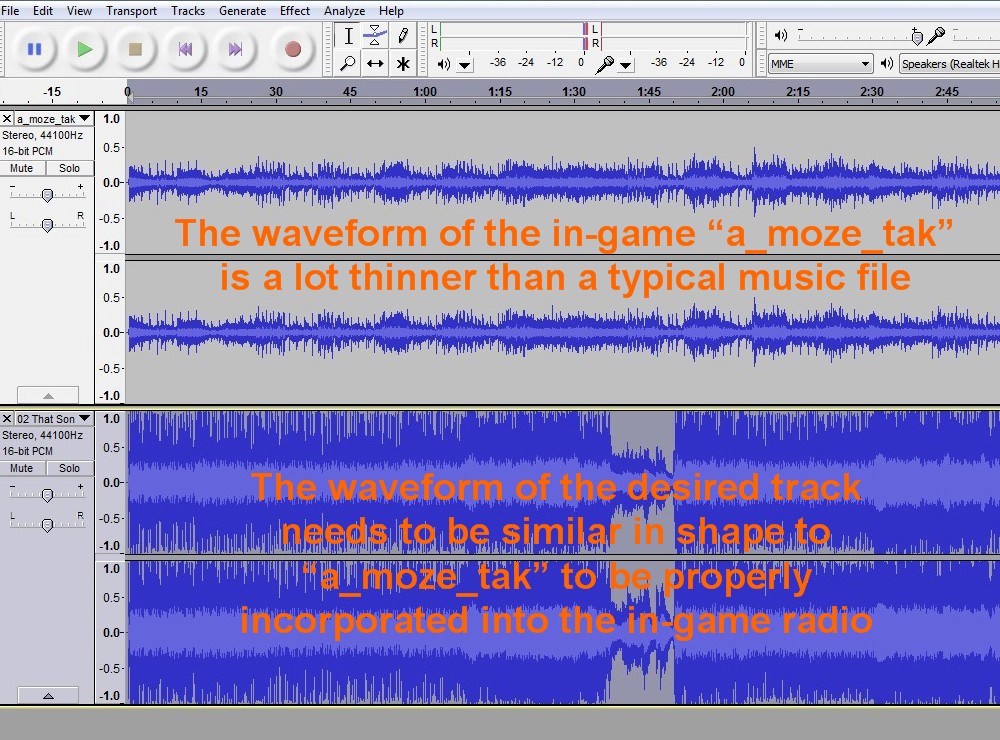
As you can see, the desired track we want to import into the mod has a much larger waveform than “a_moze_tak.ogg”. We want it to match “a_moze_tak.ogg” in volume and sound, as “a_moze_tak.ogg” has been engineered to sound like it is being played through a radio. To do this, there are a few simple and quick effects that you can use.
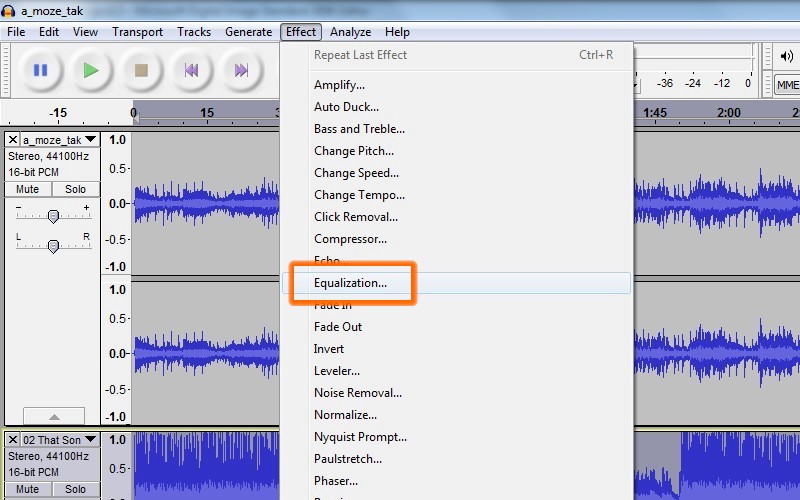
Highlight the entire track you want to edit (your desired track to import). Under “Effect”, select “Equalization…“.
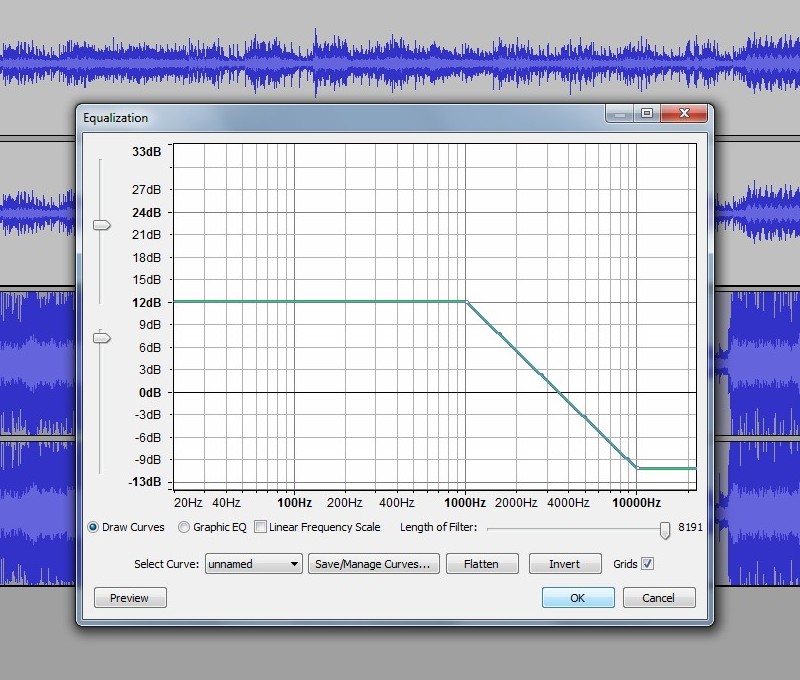
Make the line looks like the one above, with a dot at 12dB/1000Hz and another at around -10dB/10000Hz. This is going to make your song sound really loud at the moment, so I suggest you don’t play it yet, for courtesy of your ears and your speakers.
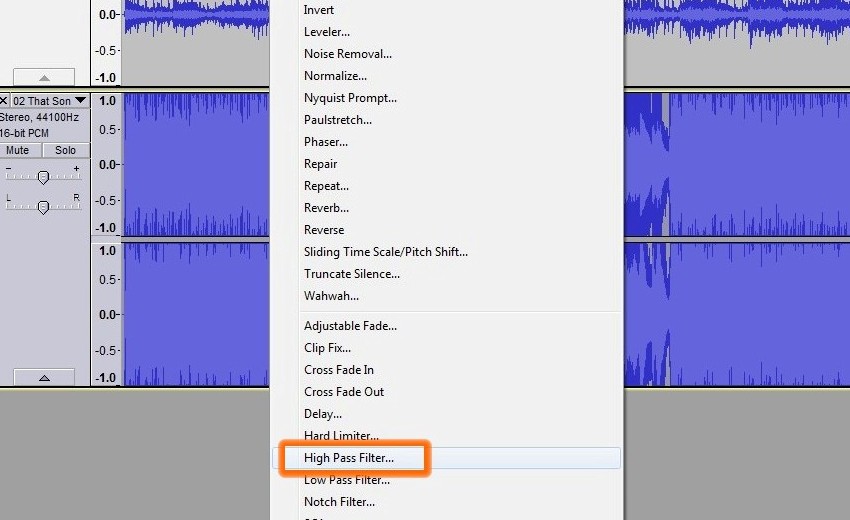
Next, also under “Effect”, select “High Pass Filter…“.
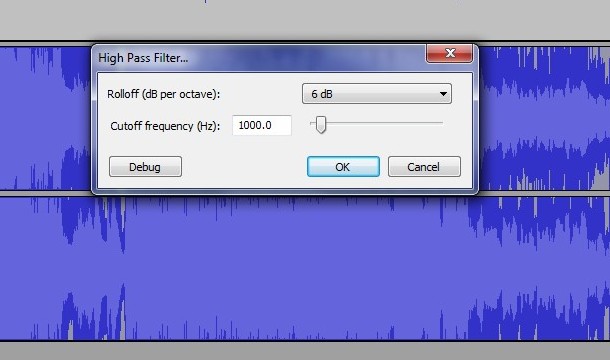
Have the Rolloff set to 6db and the Cutoff frequency set to 1000.0, then click OK. This should help distort your song a bit, but I still recommend you wait till the next effect before you give it a listen.

Now under “Effect”, select “Amplify…”.
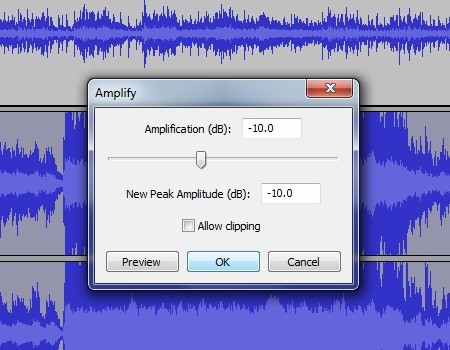
Set the Amplification to -10.0 and the New Peak Amplitude to -10.0 as well. Once that is done, click “OK”.
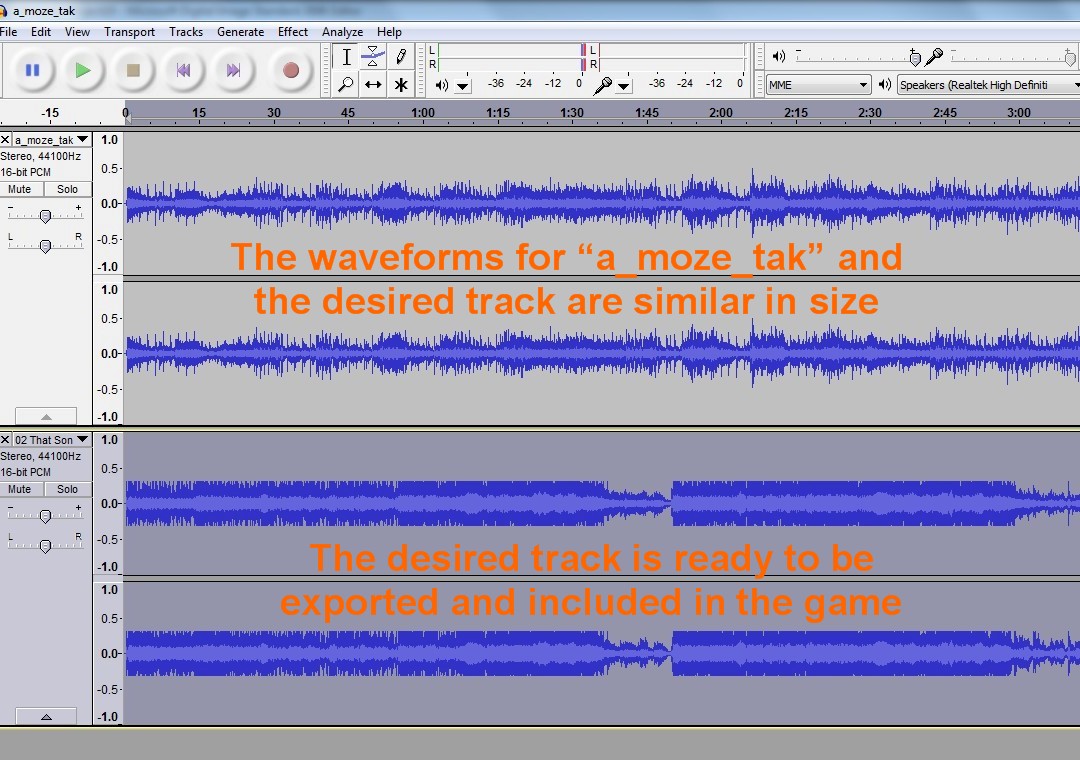
Now the song should be ready! Give it a listen, it should sound softer and a little distorted like it’s coming out of a radio. You should also see that the waveform is similar in size to “a_moze_tak.ogg”, and you can have a listen to both the song and “a_moze_tak.ogg” to make sure the altered song sounds equally ‘radio-esque’. This song is now ready to be exported.
Now with Audacity, there are two ways you can Export.

The first method is simply called “Export”. Under File, selecting this (or pressing Ctrl+Shift+E) will export all sound files in the project. Only do this if you remove “a_moze_tak.ogg” and the song you edited is the only thing left in the project. If there’s another song, the two will be saved on top of each other, which you don’t want to do.
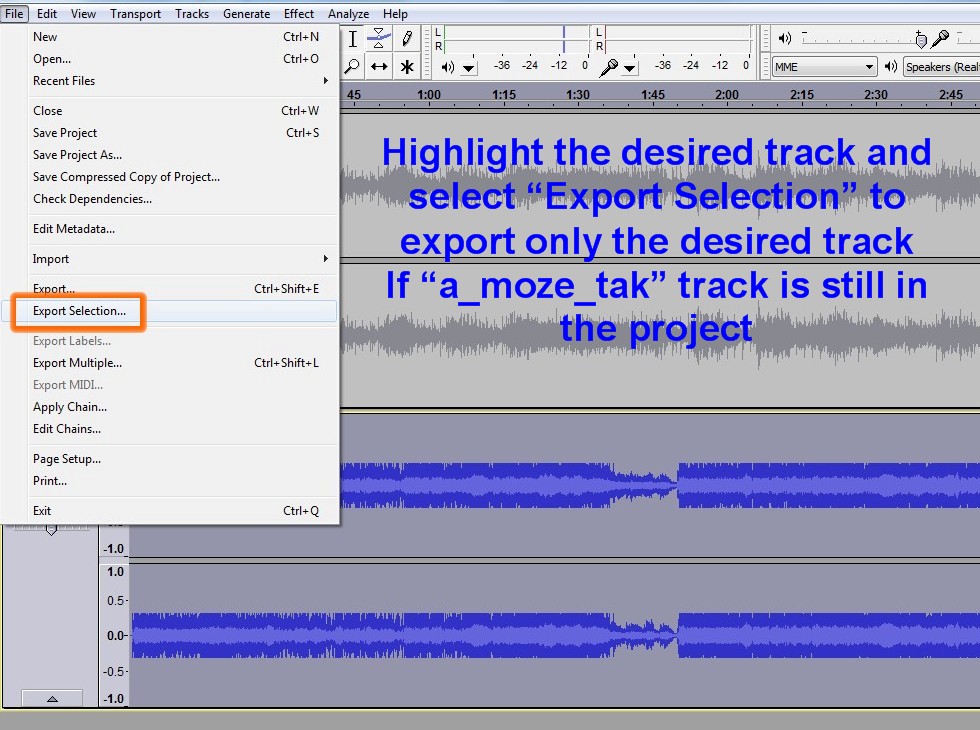
The second method is to “Export Selection“. Use this if “a_moze_tak.ogg” is still open in the window, and you intend on using it again with another song (because constantly closing and importing is tedious). Simply highlight the entirety of the song you want to export and select “Export Selection” under “File”. This ensures that only the song that was highlighted will be exported.

When saving the song, you want to make sure that “Ogg Vorbis Files” is selected under “Save as type”. This will ensure the sound file is compatible in-game. Thus, saving the song as a .ogg is key.
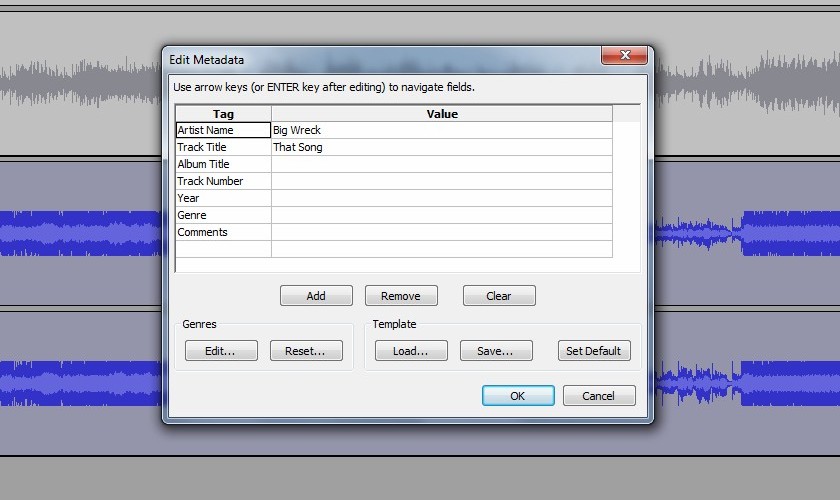
Once you click “Save”, another window will pop up asking for Metadata. It’s not really important, but you can fill it out if you wish. Click “OK” and the song should start exporting.
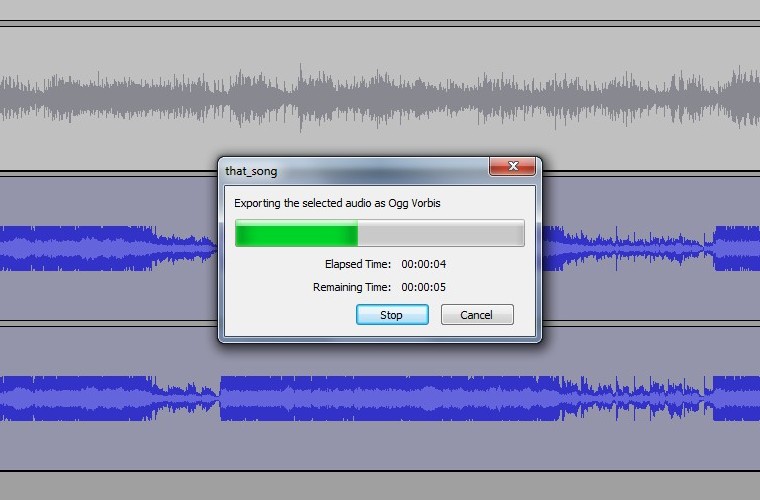
You should see this progress bar pop up saying the audio is being saved as Ogg Vorbis.
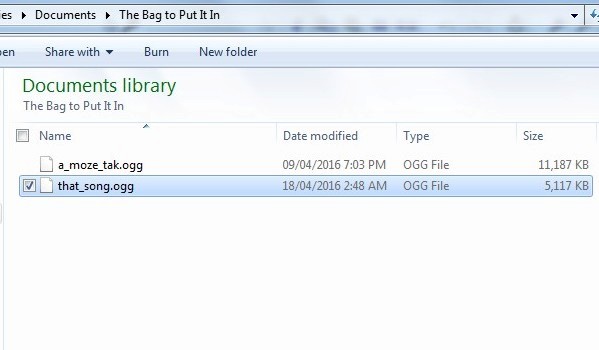
Once that’s done, your song is ready to import into the mod files! If you have some other songs you want to prepare for the mod, then repeat these steps with each song.
The next step involves putting the newly made .ogg file into the “musicvaria” folder, and it’s really easy!
Part 3: Importing the Song into the Mod Folder
So the song has been edited with some distortion effects and saved as a .ogg file. What’s next? Well, transfering it to the mod files!
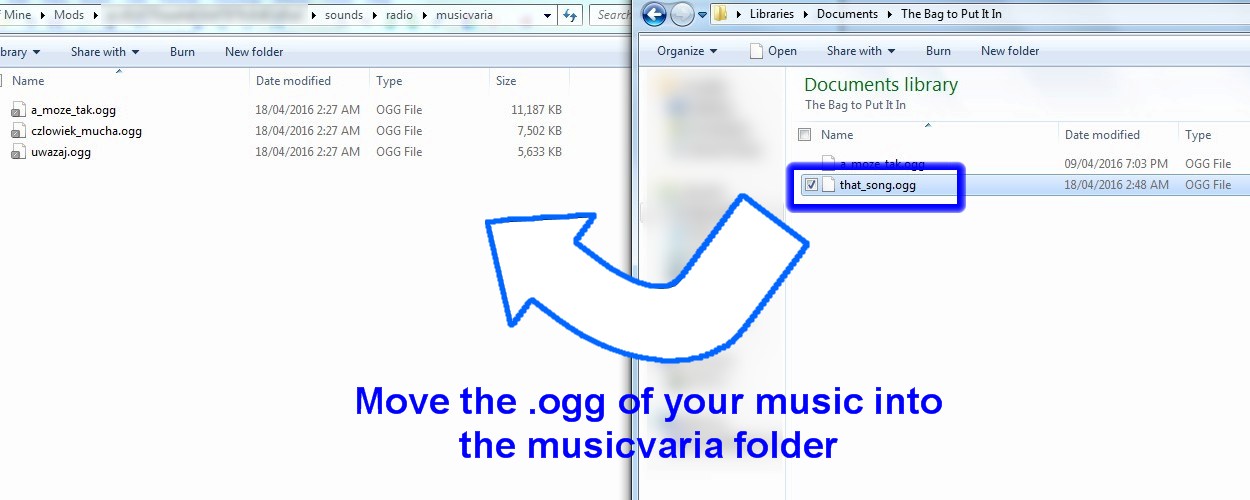
Select the song and simply move it into the musicvaria folder. Dragging and dropping works fine.

Once done, it’s now in the files with the rest of the music that plays on Radio Vysena. Next, you’ll have to configure the mod so that the song will play in-game.
Part 4: Configuring the Song using Mod Tools
So now that your files are in the “musicvaria” folder, you need to configure the mod.
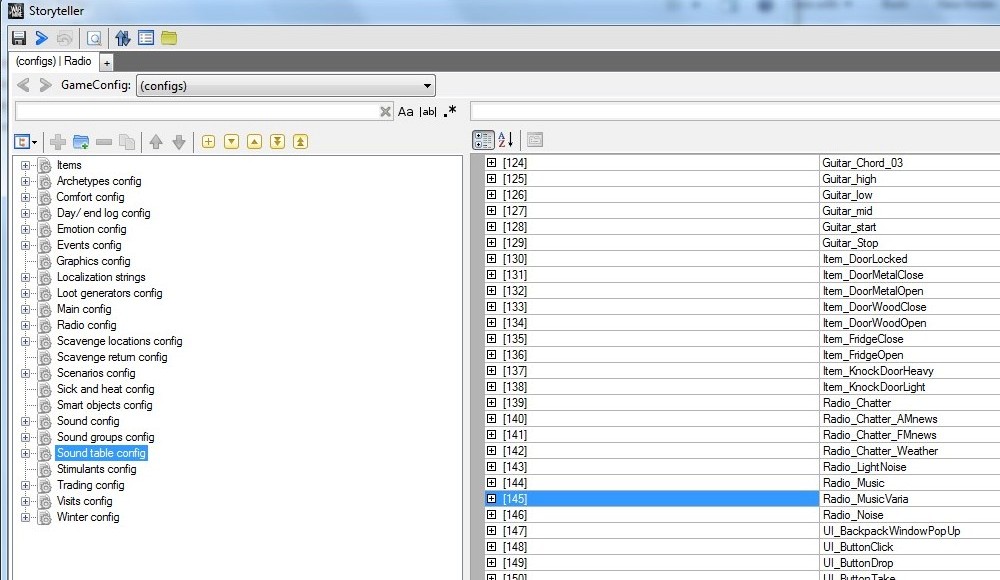
Have your mod open in Storyteller and select “Sound table config” in the left-hand margin.
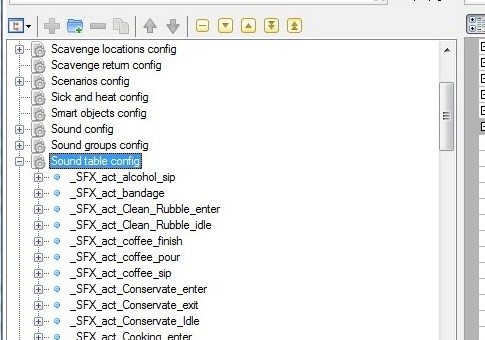
Click to expand “Sound table config” and see its long list of contents.
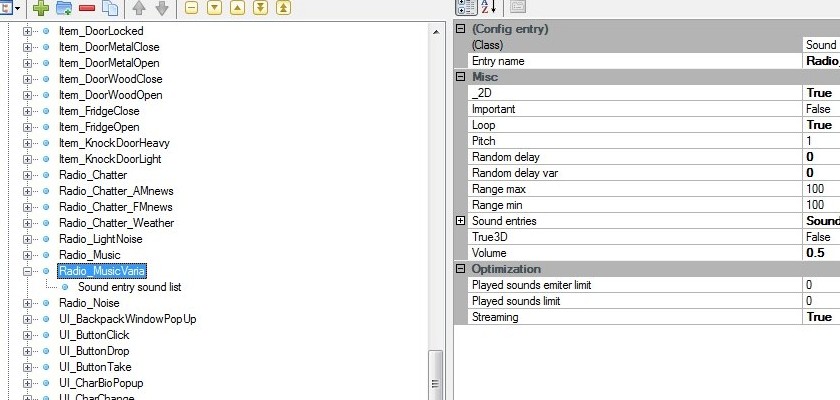
Scroll down until you find “Radio_MusicVaria“. Select it, and you will see a list of stuff appear in the right-hand margin. Click to expand it so that “Sound entry sound list” appears below it.
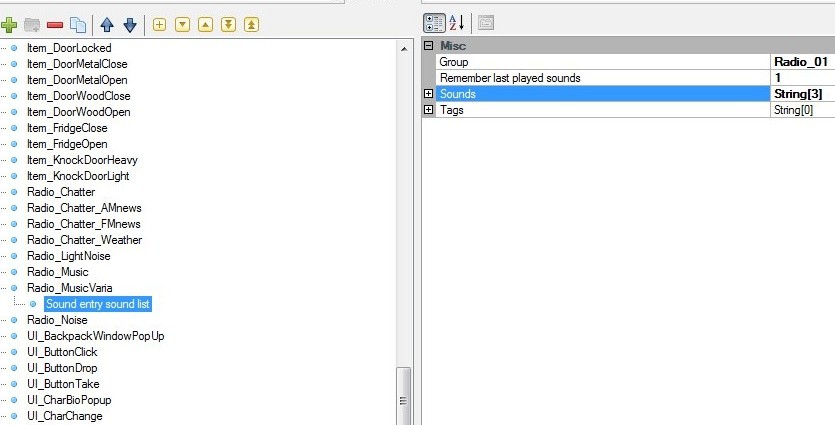
Select “Sound entry sound list” and you should have just the stuff you want to focus on in the right-hand margin.
In the right-hand margin, select “Sounds” and expand it.
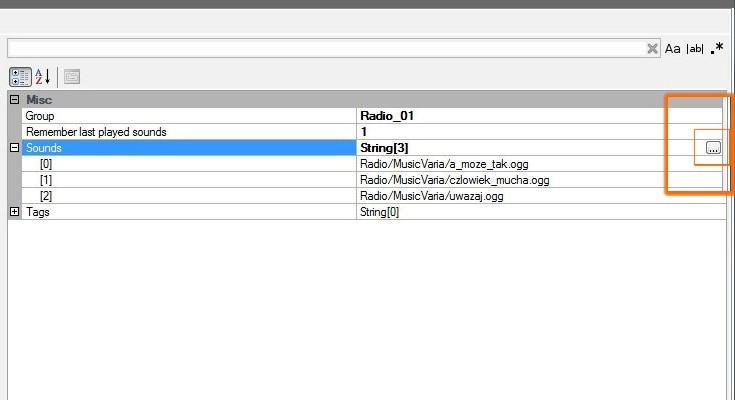
As you’ll see, the items that drop down are the songs that play on Radio Vysena. While “Sounds” is selected, there will be a white box with what appear to be three dots […] at the far-right hand side of the list. Click on that box to begin the proper configurations for your music.
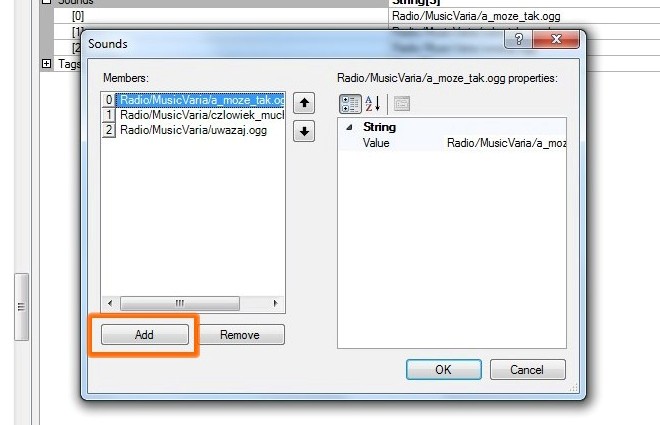
A window will pop up listing the items already configured with the radio. Click on “Add“.
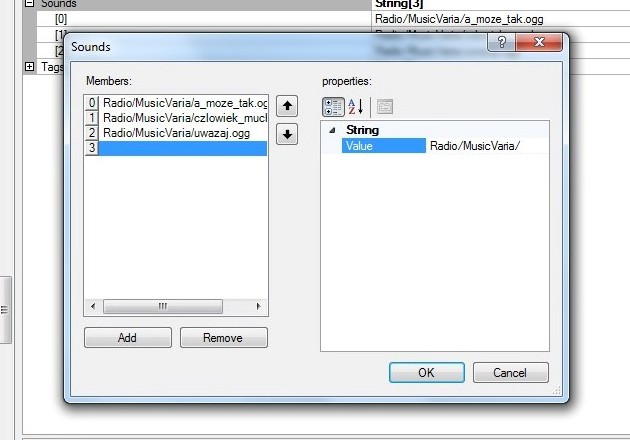
A new, blank item will be added to the list. All you need to do is fill out the Value so that your newly-added song will be linked to the radio.

Simple, just put in the filename of your song after “Radio/MusicVaria/” and it should be ready. As you can see with my example, I typed in “that_song.ogg” so that the value reads “Radio/MusicVaria/that_song.ogg”, similar to the other songs in the list. Think of it like a hyperlink, the game will be able to find the song in the mod files and play it in-game.
If you have added more music to the musicvaria folder, take this time to also add them to the list.
Once everything’s ready, click “OK“.
You’re almost done! The next step is finishing the mod.
Part 5: Finishing the Mod
Now you have one last thing to do, and that is to finish the mod so that it is ready to be played in This War of Mine.
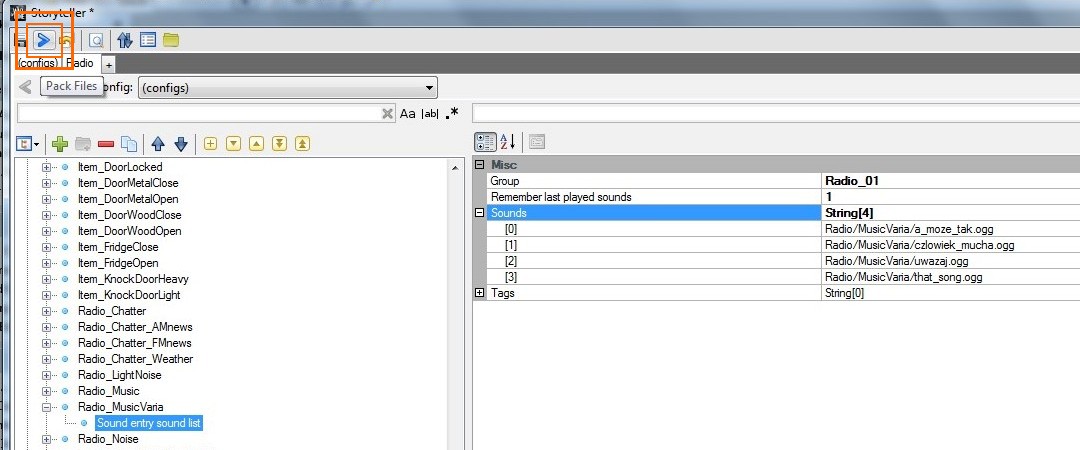
Look over the Sounds list so that everything looks ready, then look at the icons at the top of the screen. There’s a blue arrow that says “Pack Files” when you hover the mouse over it.
Click on this and the Mod should pack all the files and finish. Your mod is now ready and can be activated in-game!
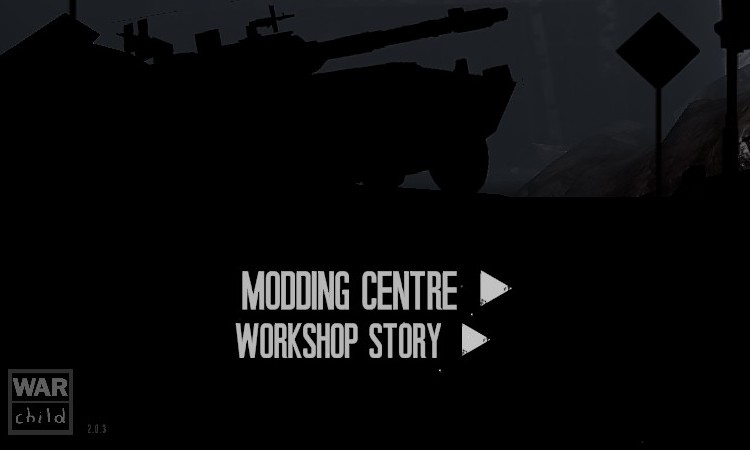
Boot up This War of Mine and when you reach the main menu, click on “Modding Centre“.
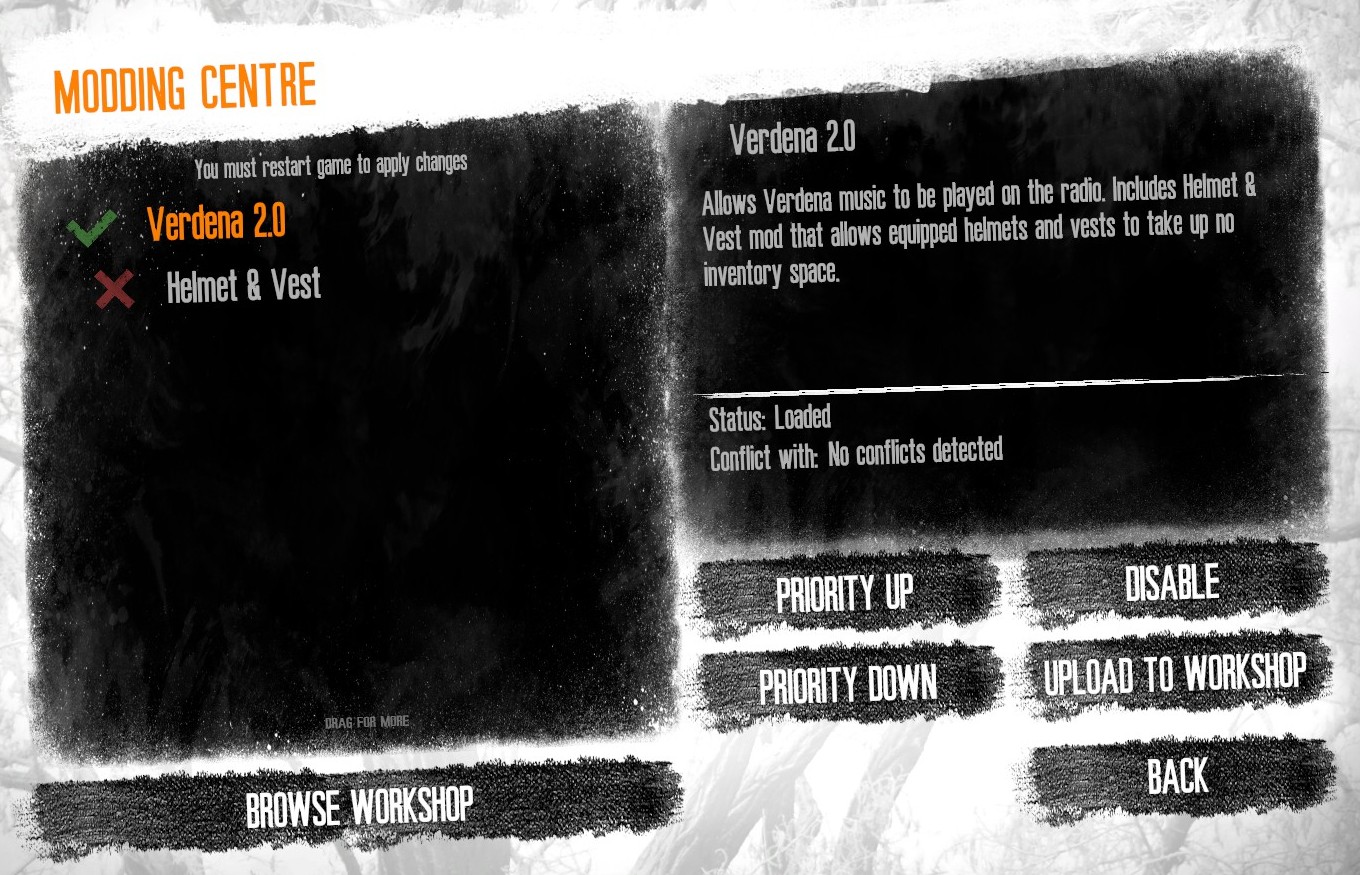
The Modding Centre lists all your completed mods. Select your radio mod and check to make sure there are no conflicts. You can enable it and disable it whenever on this screen.
If you are quite familiar modding This War of Mine, you can edit your mod to include other alterations. As you can see here, I have a mod that allows the radio to play music by Verdena (pretty awesome Italian band, check them out!) but also includes another mod I made that makes Helmets and Vests take up no inventory space.
When you’re in the Modding Centre, enable your new radio mod and and start a new game. Once your survivors have built a radio, select “Radio Vysena” and listen to some of your newly added music. It changes every day, so expect to find a different song play with each in-game day.
Conclusion
There you have it! You have modded This War of Mine to play music of your choice in the in-game radio. Have fun, and if you’re feeling up to it, explore the Mod Tools and get creative! Tinker around and familiarize yourself with the Mod Tools, and maybe you’ll come up with some really cool things to expand on this game.
Again, I must reiterate, if you are making mods involving the importing of sound and music files that are protected under copyright – do not upload these mods to the Workshop. As you can see with the intention of this guide – anyone can make their own radio mod so there should be no reason to upload them to the workshop. It is of the best interest for you and everyone else that the workshop is not compromised for legal issues such as sharing a mod with copyrighted music with unauthorized distribution. Keep the radio mods for your own personal use, for what’s best for the Steam community and your fellow modders of This War of Mine. I don’t want to hear of anyone – be it modders, the developers, or the platform the game is distributed on – getting into trouble because of the uploading of mods with music in them, or that because of it the developers – should they be inclined – would remove the ability to extract and reconfigure sound files in mods. Keep the music to yourself and for your own use and experience, and continue to have fun!