Overview
Guide on creating custom elevator floors and other tricks.
Introduction
This guide will tell you how to resprite elevator floors and will also tell you about other neat tricks you can do with elevators. I highly recommend you learn how to use the following because you will need it to make your elevators awesome!
Try reading this guide for help with adding notepad++ objects, it’s what got me started!
[link]Give this a try if you need help with creating custom sprites using HLM WAD Explorer!
[link]Elevators, Notepad++ and You
I assume you know what you are doing now? Good.

This image shows 7 lines of numbers, each line has a function. If you want to rotate your elevator for example, then change the fourth line (the first “line” would be 2410, the elevator ID). A quick way to find elevators using notepad++ is to CTRL + F and search for 2410. The elevator ID will always be 2410, don’t bother changing it. It should be noted that elevators use the 7 lines differently to your standard objects!
Lines 6 and 7 require further explanation. They are the positions the player spawns AWAY from the original elevator. So in the example I gave I didn’t change where the player spawned on the next floor so it stayed 0. However if I moved the position in which the player spawns to the right slightly then the values would change. It’s hard to explain, but it’s basically only used if you have issues with your player spawning in the elevator walls or something, this method lets you make tiny adjustments.
Something like this can be achieved, you can do almost anything you want… however.

- Setting the player spawn point OUTSIDE of the level borders will cause you to glitch back in.
- If you decide to set the elevator to go to the floor it’s already on then the game will glitch out and hardlock you. Yes… this will require you to ALT F4.
- Setting the elevator to take you to a floor that doesn’t exist will crash the game.
Making Your Own Floor
To begin open up HLM WAD Explorer and search for sprElevatorFloor. From there open up the tab at the top that says “Resource” and then click “Extract“. From there it will save an image, open up that image using Paint(.)net or whatever program you use. It should look like this.

FOR THIS NEXT STEP ONLY ALTER THE BROWN FLOOR. The brown floor acts as the default floor for the editor elevators. Changing the other floors will have no effect, but we will get to that later. From here you just open up HLM WAD Explorer and click “Resource” and then click “Replace“. Make sure you replace sprElevatorFloor.png! It will then create a Patchwad file, make sure it goes in the mod folder of your Hotline Miami 2 folder. Don’t have one then just create one.

Looking groovy! Let’s see what it looks like in-game.

This method works better for those who don’t want to add any additional floor patterns or for those who don’t want to use notepad++ techniques. It also doesn’t require you to spawn in a separate object, since elevators you place will keep the custom floor. Even with this way of doing it you still have a lot of ways you can make it look unique.
Adding Multiple Floor Types
So you have decided that you don’t want to be restricted to one elevator floor type? Well then I have good news for you! While I was unable to figure out a way to add actual elevators with different floor sprites I did come up with another solution that works.
As I said above, open up HLM WAD Explorer and search for sprElevatorFloor. Extract it and open up the spriting program of your choice. However this time instead of changing the brown floor we are going to remove it. Here’s what it should look like.

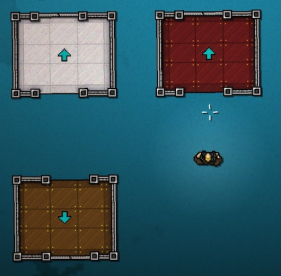
Now it’s time to add those pesky floors that have been absent from the editor. Add in an object, I like to do the first object on the list (some 50 blessings table) and change the sprite and object ID’s. Here is what it will look like in notepad++

You change the Sprite ID to 1331 (this is the elevator floor) and you change the Object ID to 89 (this is the object ID for the pizza box). This will let you, enemies and items go over it! Then change the frame number, this decides what elevator floor sprite the object uses. The reason the values go from 0 to 6 because 0 is the first sprite. In this example I chose 3, which would be that slick grey floor.

Just all you have to do is line it up correctly with the walls of the elevator. Then from there you can add multiple different types! You can also use your own custom floors (yes you can add back in the brown floor, however it must replace another sprite. Always leave the 5th sprite empty).

Woohoo! This is just an example, but you get the idea.
Extra Stuff
You can also resprite the walls of the elevator, to do this just open up HLM WAD Explorer and find the files called sprElevatorUp and sprElevatorDown and extract them. From there open up your painting app and just change them.
