Overview
§§§ DISCLAIMER: I am not skilled at this kind of task but for now competent people have yet to make tutorials of their own §§§This guide will aim at explaining to you how to make backgrounds for tabletop simulator using sceneries from other games (Here Skyrim).
! Disclaimer !
Just to make things clear, I have no more experience than the average gamer in the handling of digital pictures and the like. I’m no graphist or artist or whatever.
Then why make a guide?
Why make a guide then?
A few days ago I was searching for fantasy styled indoor backgrounds and didn’t find much. The only suitable background I found on the workshop was Pyrek’s Jorrvaskr Background, but Jorrvaskr wasn’t exactly what I was looking for either.
However, inspired by this mod I thought “Then let’s make my own using ingame console commands and screenshots”.
Here lied the problem: nobody had made a guide on how to achieve this, and while there were plenty of guides on google on how to make panoramas in real life, I could not find any real guide telling me how to make a spherical panorama in a video game.
After much trial and error and a chunk of my weekend I managed to finaly make something that was somehow good enough for me (again, I’m probably not very good at this). And this is so that you don’t waste your precious time (and so that my own hours were not in vain).
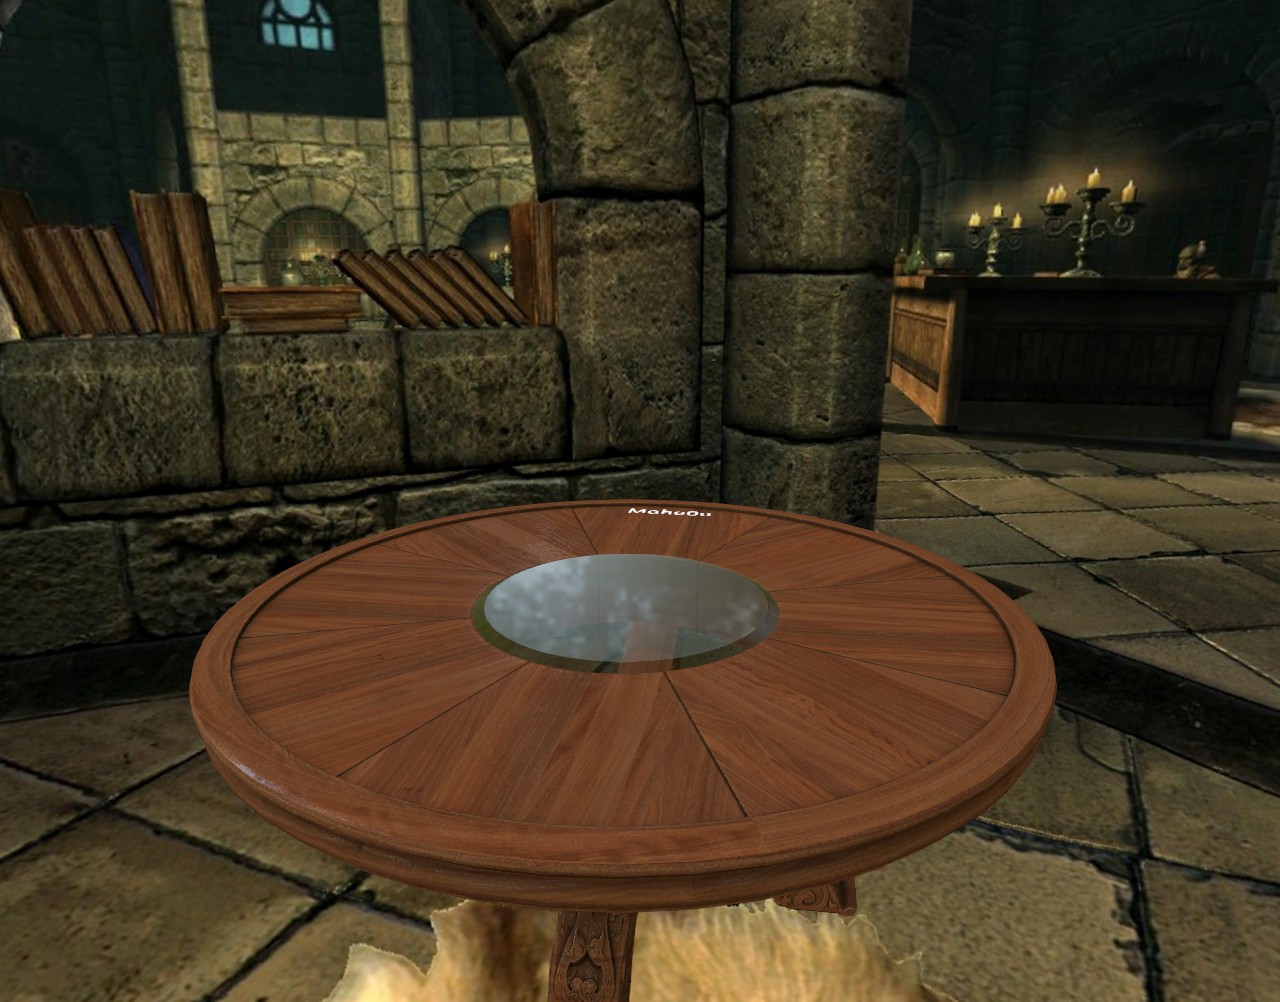
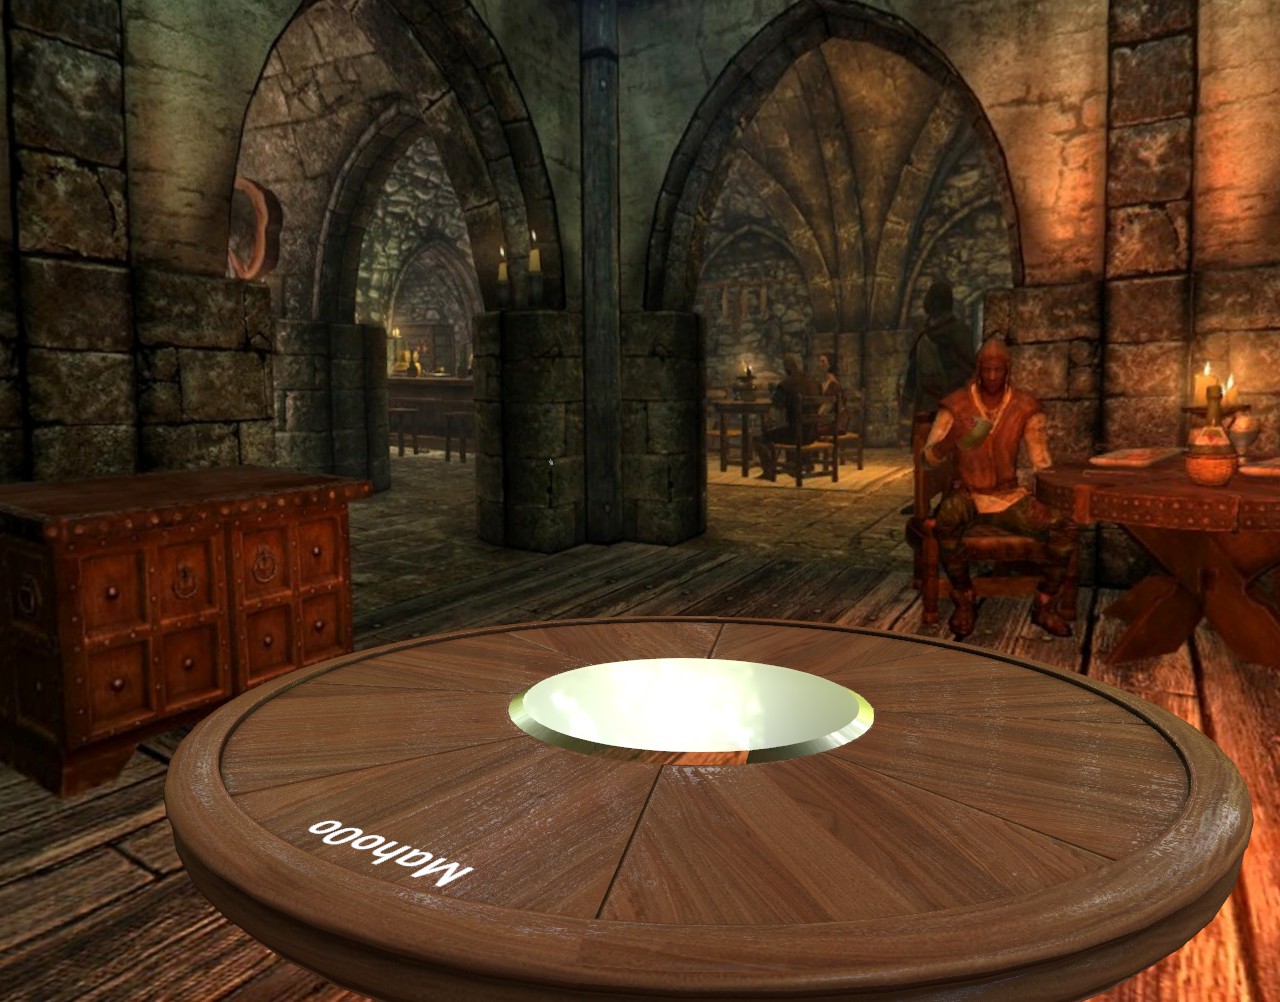
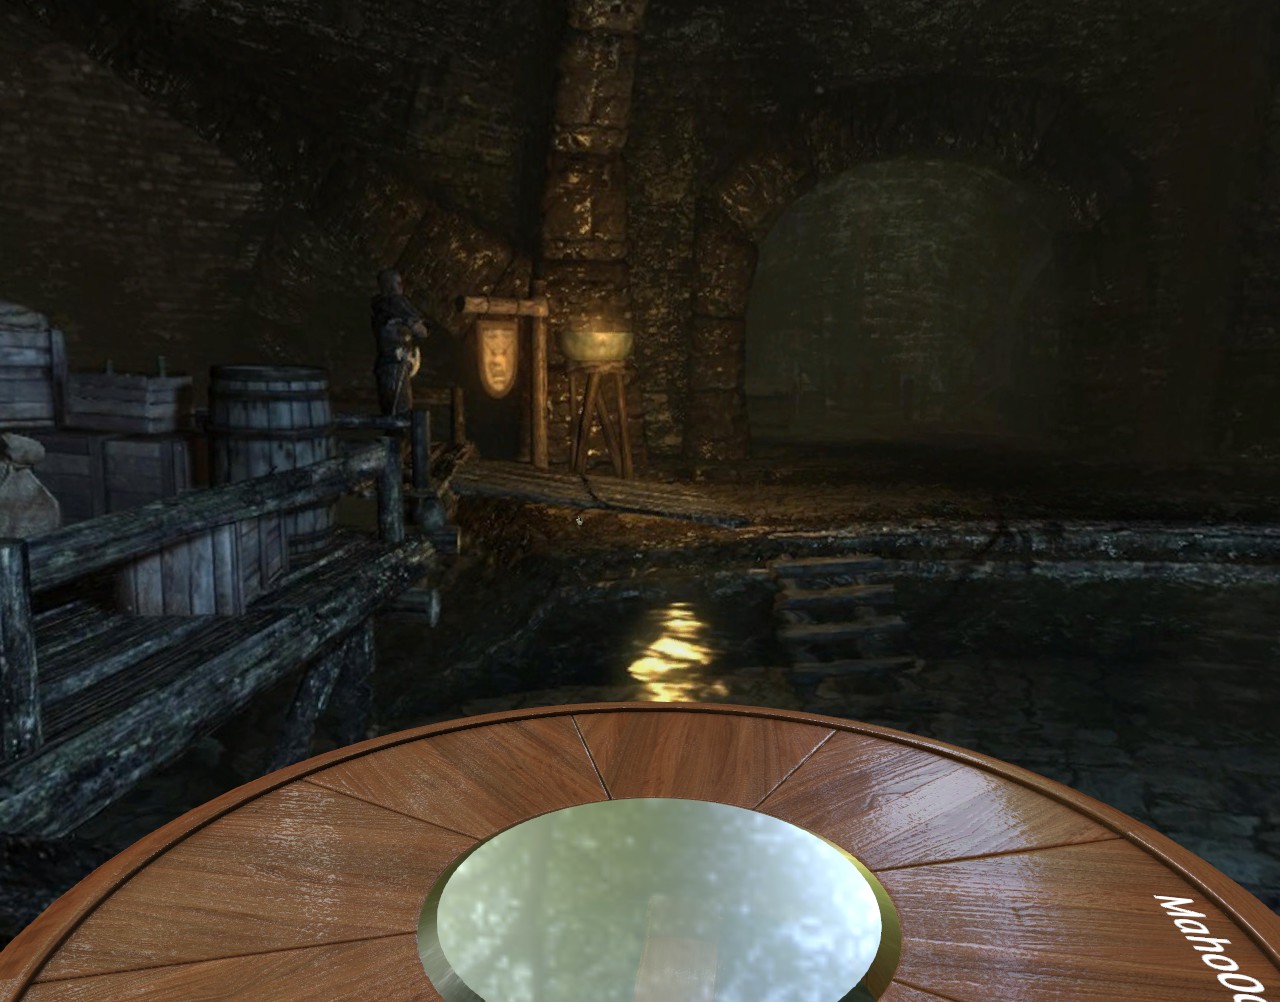
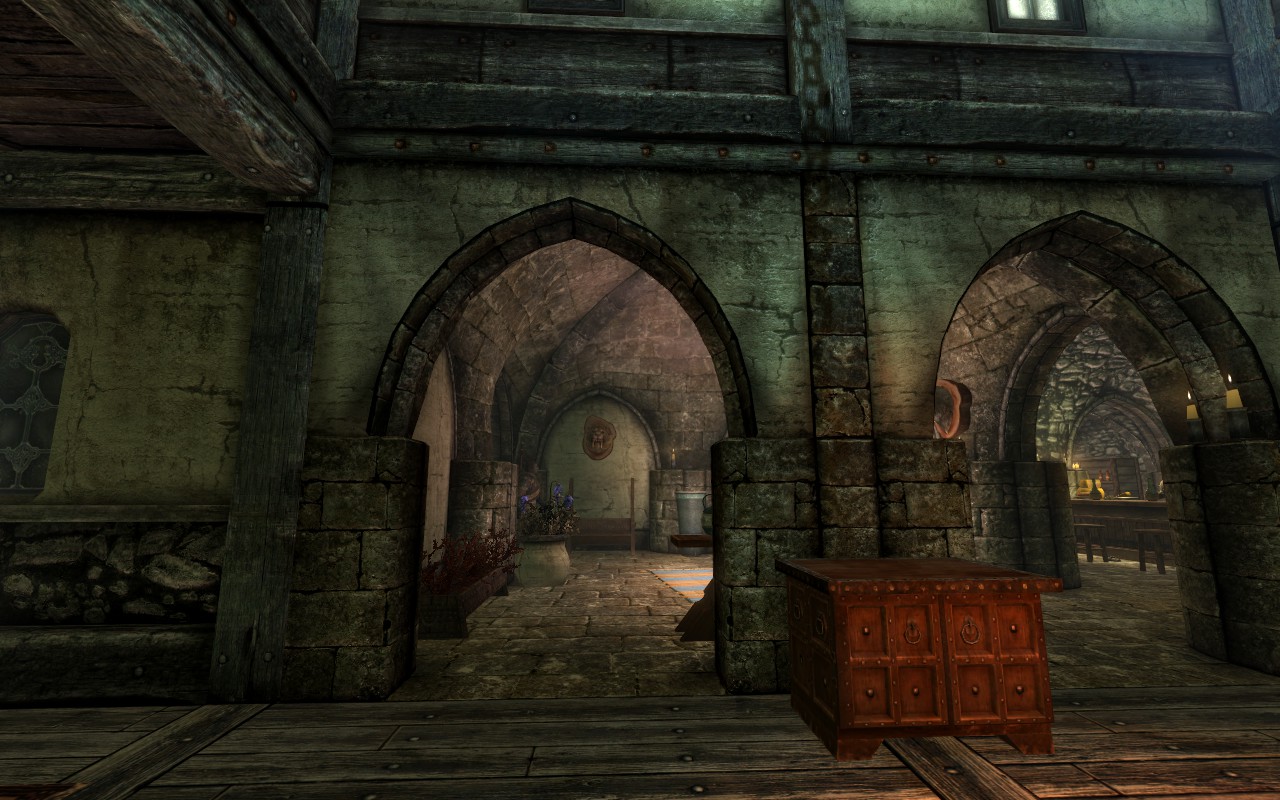
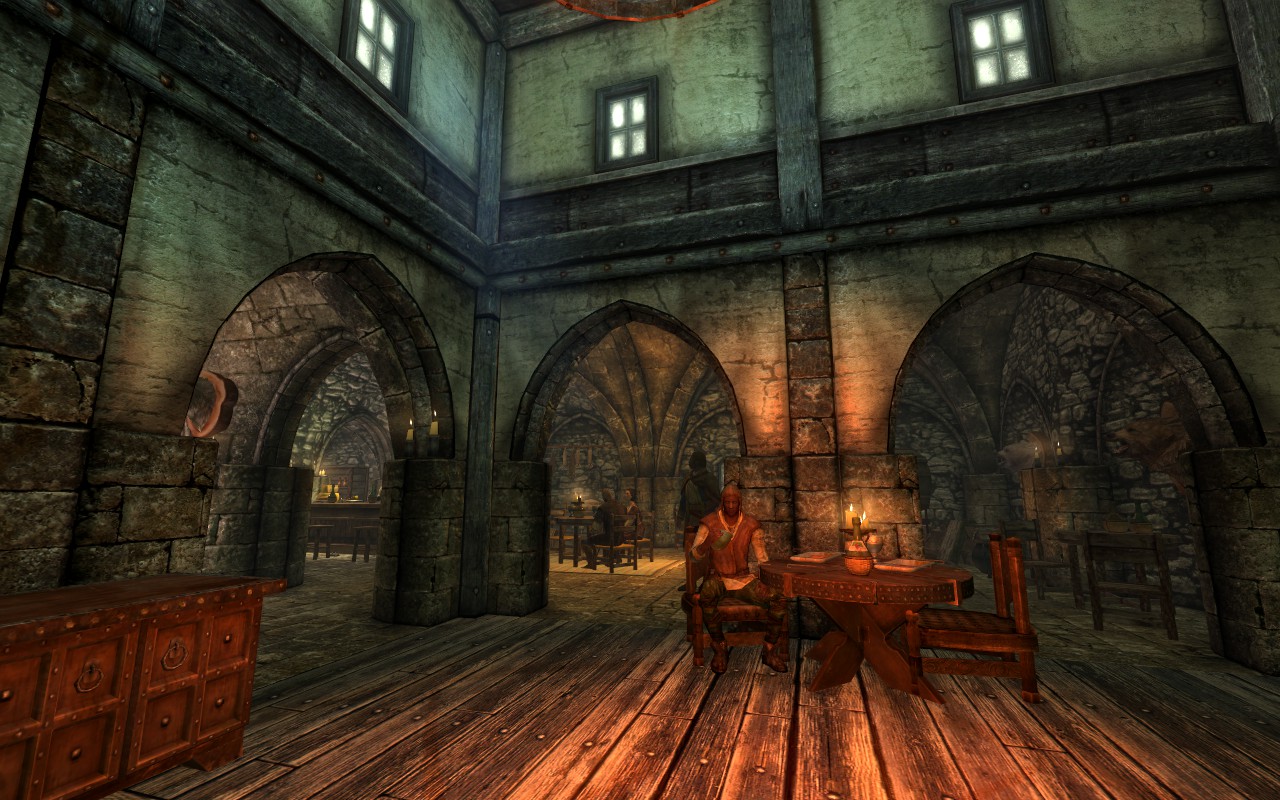
Here are screenshots of the final products (you can find them in the workshop):

Now let’s get on with this background crafting!
Things you need
You actualy don’t need much in order to make that background and provided that you already own the game the scenery you want is from, it’s entirely free!
As I worked with the old time favorite TES5 Skyrim that’s what I’ll be using as an example, but the only difference between this and any other game will be the console commands (yes, you will need those).

Second you need to find a list of useful commands for the ingame console you will be using, as explained previously we will be using Skyrim[www.uesp.net]. Google is your friend so go find that list for your game (If your game doesn’t have any I can’t help you but you can still probably make things work as well if you are in a totaly still room without NPCs).
And last sign in to Imgur if you have never done so before, this will let you upload pictures up to 50MB.
Finding your Spot, then commands
First you obviously need to find the spot you want as a background. It doesn’t matter if there are NPCs that may get in the way or even objects such as furniture and the like (but not walls or other meshes that open a gap in the “world” if you delete them). Make sure it’s not against a wall so that players don’t feel “cramped” and/or create other weird situations.
You probably had an idea as soon as you chose a game (my first thought went to the Winking Skeever in Skyrim, one of my favorite Inn in video games).
Now let’s start the work. Choose a timing you like (you’ll be deleting unwanted NPCs but maybe you want to keep others. In that case wait for the timing you like best) and open the console.
-The first command you will be typing is “tfc 1” (without the “, same for all following commands). In Skyrim it enables the freelying camera and stops time, now you can fly through ingame decor. Try finding a similar command in your game (and do so for every other command I will be explaining here).
-If meshes such as furnitures or even NPCs are in the way delete them by selecting them and typing “Disable”, some will not disapear this way and you will have to type “MarkForDelete”, save the game and load it instead (you’ll have to exit freefly camera mode and activate it again if you do so). In Skyrim effects (flames on candlesticks for example) will need time to disapear so you’ll have to leave the freeflying camera once.
-Now that your spot is cleared move to it, it’s time to disable the UI, in a lot of games it can be done without a console command. I used the command “tm” to remove all UI in Skyrim (it also removes the console so be sure to press the key to close it afterward or you won’t be able to move the camera).
-Finaly you need to set your Fov. In most PC games it can be done through the options menu but not in vanilla Skyrim I believe. It’s as simple as to type “fov 90” in the console though (after a few trials I found 90 to be best value, I might be wrong but that’s how it felt). Knowing your FOV value is extremely important so don’t skip this.
Now you should be ready to take those screenshots.
Taking Dem’ Screenshots
First let’s make some tweaks to steam if you have not done so. Go into Steam, Settings and then In-Game. Check the “save an uncompressed copy” and choose a folder that you would like to store the shots in.
Now you can start taking those screenshots using the key you mapped for Steam.
-Do not move from the spot you are standing on ingame and turn your camera using your mouse.
-This is a spherical panorama you are trying to take not a cylindrical one so don’t forget to take the whole ground including the part that is supposed to be under your feet.
-Take those pictures making sure they overlapse, best way is to find a point (it can be anything, a door, furniture, an NPC…) and make sure it’s still in the next screenshot.
-My advice is to take screenshots higher as you finish a full 360° turn.
-What I did is that I didn’t take screenshots higher than a certain point (higher end of walls and ceiling) because you wont be looking there in tabletop simulator and this saves precious data space you can later use to make the panorama higher res (but nothing stops you from doing it if you prefere having the complete sphere).
Here are a few suceeding screenshots of my own, you can see how they share points with the one coming before:


Your final number of screenshots should be between 20 and 30 (that’s counting the ceiling shots I said not to take… so actualy 15 to 20 is totaly fine).
Do not worry of having too few pictures, it’s possible to add more during the process.
Do worry about having too many! Having twice as many pictures doesn’t make it take x2 more time but much much more. That is due to the way the program calculates matching points between the images and probably other stuff I don’t understand.
I lost hours because of this, trying to match around a hundred pictures (yes, it was a stupid thing to do without a test run).
Again, 20-30 screenshots is more than enough, if you missed a small piece (heck, even a big one) you can add it later easily.
I suggest you leave the game open and don’t move from that spot while doing the stitching of images as you might want to go back and take more pictures.
Making the Panorama in Hugin
Now you have all your screenshots, let’s open Hugin.
Once Hugin is open click on the “Load images…” button.
It will give you a number of settings, choose Rectilinear (it should be this by default). Set the Fov to 90 and that’s all. Click “ok”.
Next simply press “Align…” this will take some time depending on your machine’s computing power but if you didn’t add to many images it shouldn’t take too long.
Once that’s done you should have two previews available, one being in a traditional frame the other being a sphere.
A lot of the time the picture will have loaded upside down, so move it by going into the “move/drag” tab, left clicking on the sphere and dragging the picture in the right way. Afterward click on “Straighten” to make sure it’s not weirdly misshapen.
Also make sure that the picture is not cropped out, if you see there is a frame on your preview that is not containing the whole panorama go to the “crop” tab and make it so that everything is inside.
You are pretty much done now, press “Create panorama”, choose either PNG or JPEG and put the highest res you can that’s under 50MB (or else you wont be able to upload it, you’ll have to make a few tries of the same panorama to make sure you have the right size but don’t do this now as you first need to check if you’re happy with it).
-Alternatively I propose that the first versions you make be “test” versions in the default resolution Hugin gives you. This makes the process way faster and once you have tried that background and are satisfied with it you can make the high res “final” one.
Uploading the background and correcting a few things
So, the Background is made but you don’t know how it will look. Let’s try it out! Upload it to Imgur get the image’s URL and open it as a custom background in Tabletop Simulator.
There are a few things you might want to tweak:
-If you are missing some spots (they will appear as black holes in the Hugin’s preview) just go take a few more pictures of the missing places ingame and add the screenshots to the project the same way you did for the first one and press “Align” again this should solve the issue.
-if you feel that your table is “too high” compared to the background you can change this a bit by going in the “crop” tab and cropping a bit of the top part of the panorama. Beware though as if you crop too much of it it will result in the ground extanding around you and not being able to see much of the background (I recommand to crop about 1 square and a half).
-if you want to see more of a part you can move the sphere around (in the Move/Drag tab) to try and make it look better, again beware because too much of this might end up with weird results. However do not fear experimenting as the Straighten button will fix those problems in one click.
Done!
With this you should be totaly done. Get your final Panorama out and use it when playing Tabletop Simulator!
I hope this has been useful and saved as much time for you as I spent on my side.
I would really appreciate comments, if you are more experienced than me in this field don’t hesitate to correct me. Also leave links to your custom backgrounds if you used this tutorial to make it! I’d love to see them and also I’m lazy and that would save me effort from making more backgrounds myself.
Good luck to you all.
-Maho0o