Overview
A guide covering basic, intermediate and advanced base automation with the RimFactory mod! If you’re looking to run a huge base with as little pawns as possible (for optimal performance), this guide will teach you how to automate cooking, manufacturing and even corpse processing!
Introduction
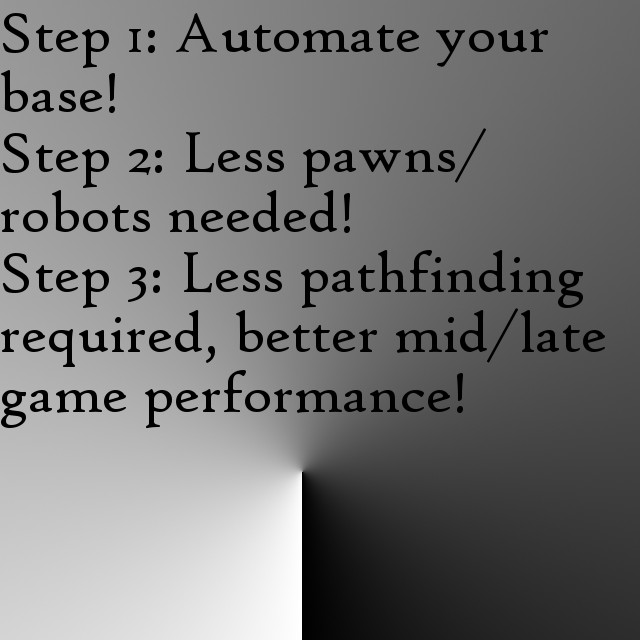
Rimworld tends to slow down significantly in the mid to late game when you have large populations, but then large populations become necessary to maintain large bases due to the amount of work that goes into feeding them and utilizing them for hauling and crafting.
Not anymore with RimFactory’s components that allow automation! With this guide, you’ll be able to run large bases with less pawns and produce at the same level – or even more – through building up machines that can harvest, craft and move items around without the need for pawns. Less pawns needed means less path-finding needed, and that tends to result in better in-game performance.
This guide starts off with a couple of basic systems before scaling up to an intermediate and advanced system. I highly recommend getting familiar with the basic and intermediate difficulty systems before trying the advanced system since they all build upon each other.
Section 1 – Cook for me: Automated Harvesting and Cooking
Difficulty: Basic
Jobs saved: Growing, Harvesting, Cooking, Hauling
Mods required:
Mods recommended:
- MoreBulkProduction – Adds some bulk production recipes
- Better Survival Meals (Continued) – Adds lavish survival meals for royal pawns
- SynthMeat – Growable Meat. More steady supply of meat than hunting, no need to ranch + cull and have a framerate drop because of too many animals. I know some prefer tofu as a meat substitute from the VGP mod series but I’d like to give my pawns actual meat.
Step 1: Build a Cultivator in your Growing Zone. Preferably the version with sun lamps unless you have a roof light mod installed or you need to save power for some reason.

Step 2: Build an I/O port where the Cultivator’s output (the yellow box) is set. The difference between I/O Fridge Ports and normal I/O ports are in the inputs/outputs allowed and temperature controls: I/O Fridge Ports can only take in food, manufactured (medicine/drugs/wort only), raw resources (plant matter only), body parts and corpses. This means you cannot input to (or output from) I/O Fridge Ports stuff like cloth or devilstrand because they fall under manufactured (textiles). Normal I/O ports can take in anything, but they lack temperature controls, so if your food is left in these normal I/O ports it will rot.

Now your crops will be automatically planted, harvested and sent to the correct Digital Storage Unit (DSU – from the RimFactory mod)! I’ve found naming the DSUs help when you have a few and don’t want to get them mixed up, so I’ve named the primary industrial system Resources and Food (R&F DSU) because it is where all the raw resources and anything related to food goes.

Step 3: Build an Industrial Cooker (or if you prefer, an Adaptive Assembler with the Recipes pre-loaded from your electric stove) and build I/O Fridge Ports for output from your DSU where your raw food is stored. You can play around with the settings for minimum stack/maximum size pulls: If your stack size is 5k for raw food because you use mods like OrgeStack (like I do), you can set it such that it will only pull from the DSU when the food stack of that particular food (corn, rice, etc) hits 5k. This helps to ensure that you don’t have small stacks of 100-200 lying around clogging up your output ports.

You’re done! You now have a system where food magically appears from automatically harvested.
(Optional) Step 4: But wait, there’s more! If you’d like your pawns to live in luxury and not have to walk to get their food from the fridge, have the fridge (not literally the fridges from RimFridge but I/O Fridge Ports set to output) magically pull food from the DSU!

(Optional) Step 5: Alarms blaring and jets need to scramble? Help them to pack quickly by putting survival meals within quick reach (along with the shells they’ll need to load, as you can see) with I/O Fridge Ports! You will have to use normal I/O ports for the shells, though, because I/O Fridge Ports don’t take in shells. And normal I/O ports do not act as shelves so I have placed them indoors because the shells would deteriorate if left in an unroofed and open room.

(Optional) Step 6: Finally, running a bunker/panic room and want (lavish) survival meals to be automatically stocked? You can build another I/O Fridge Port that automatically pulls/outputs excess/overflow survival meals straight to the bunker/panic room!

Tip: For some reason, I’ve kept the entire kitchen clean but sometimes my pawns got food poisoning from the Industrial Cooker’s lavish meals. Let’s just say there’s a reason everybody has a detoxifier stomach instead of a reprocessor stomach. But a small price to pay for not having to move an inch and having great food pop up from nowhere.
Section 2 – Produce for me: Simple Automated Production (Single Input, Single Output)
Difficulty: Basic
Jobs saved:
- Growing/Harvesting
- Tailoring/Smithing
- Hauling
Mods required:
Mods recommended:
- Industrial Rollers – if you need rollers or conveyer belts to move things around for some reason. Wireless transfer by the I/O ports should generally suffice, however.
- MoreBulkProduction – some mods add extra production for common recipes in bulk, so this could be useful depending on what you’re trying to produce. Doesn’t work for items like clothing, however.
[A Quick Mini-Guide for those that don’t know how to use Adaptive Assemblers and Recipe Databases]
- Build the workbench you want to build your product from. If you want hats, build a tailoring bench.
- Build a Recipe Database and place it directly beside (touching) the workbench.
- Click ‘Import Recipe’ and select the bill you want to import.
- Once the Recipe Database has finished importing the bill (it’s not instantaneous; after it is completed you will see the recipe stored when you click on the Recipe Database), re-install the Recipe Database within Access Range (cyan/light blue outline, not the white outline) of an Adaptive Assembler.
- Make ingredients accessible within the Ingredient Range (white outline) of the Adaptive Assembler.
- If your Recipe Database has correctly imported the bill and is within the Access Range (cyan/light blue outline) of the Adaptive Assembler, you should be able to add the bill based on whatever recipes are stored on the Recipe Database.
- With the correct Recipe Database and available ingredients, the Adaptive Assembler will build anything and get better at doing so over time. It will produce higher quality outputs faster as it produces more of the same product. Churning out legendary items at 200% production speed (and increasing as it produces more of the item – I’ve seen it hit 450% and above) will save your pawns a lot of time moving around and getting ingredients and crafting things, so it’s well worth the time to set up this system for mass production of things you plan to sell. Your pawns can handle more important tasks like making weapons and armor – leave the hats production (or whatever you plan to sell) to the machine and it’ll still run when they’re asleep or busy eating.
Learnt how to get food processed and cooked automatically? Great! Let’s continue with basic hat production since it’s one of the easiest and most critical systems to set up. You get this running properly; you get a free flow of silver/money coming in while you potter around your base building other things. (Well, you still have to sell the hats, but making caravans is less complex than getting automated supply of hats). Of course, you can replace hats with whatever you like to tailor to sell – dusters, jackets – and you can replace it with other products (psychoid leaves to yayo/drugs etc) if you wish. I’ll just be using hats as an example for this guide since it’s a simple example of single ingredient input (cloth) and single item output (hats).
Step 1: Get your raw materials growing and coming in from the field. In this case we’re looking at cloth, so cotton plants will automatically become cloth if you don’t use extra mods that require weaving etc.

Step 2: Send them to the DSU you’ve set aside for resources with an I/O Port (Mode: Input; Source: Resources and Food DSU). I’ve combined mine as mentioned above, so the Resources and Food DSU serves to store all the cloth.

Step 3: Build an I/O Port (Mode: Output; Source: Resources and Food DSU) within range of your Adaptive Assembler so that it has access to cloth from your DSU where you’ve stored that cloth.

Step 4: Add bills on your Assembler (pre-loaded from your Recipe Database – if you don’t know how to use it, read the quick mini-guide at the start of this section. “Linking” the Assembler to the Recipe Database just means putting the Recipe Database within the Access Range (light blue/cyan outline) of the Assembler so that the Assembler can access/read recipes from the Recipe Database.

Step 5: Build an I/O Port (Mode: Input; Source: Hats DSU or wherever you want to store your completed products, see the previous screenshot) at the output location of the Assemblers (yellow box) so that they’ll be whisked away for storage once completed.

Step 6: Build a final I/O Port (Mode: Output; Source: Hats DSU/wherever you’ve been sending your products to) near your caravan/transport loading area for quicker loading.
Tip: Pawns walking across the DSU move very slowly for some reason. That’s why I’ve locked off the DSUs to force them to load from the I/O ports instead of running back and forth. More I/O ports outputting the same product for selling = faster loading.

Tip: Assemblers and a few other machines from RimFactory have their own internal storage. If they’re supposed to place a completed item at the output zone (yellow box) and it’s detected to be full, it will store the item within the machine at no additional power cost (compared to a DSU where every stack stored consumes extra power). The Assembler will read something like “Items to be placed: _____” where ___ are extra items that can’t be placed because the output zone is full. You can use this to your advantage by setting Assemblers to produce more than you plan to sell: Since any extra items will just be stored in the machine itself, you have almost immediate replacement once the backlog of stored items are outputted as your pawns load what can be accessed.
For example, I’ve set my Assemblers to stop producing at 1.4k hats even though the Hats DSU can only store 768 items max. This means that as soon as I’ve loaded a batch of 700 hats into the transports for selling, I’ve got another 700 immediately filling up the DSU and ready to go while my pawns sell the hats and the Assembler comes back online to continue producing. Great if you plan to conduct massive bulk sales since your colonists can come back and immediately load up another 700 hats to sell without having to wait for the Assembler to churn out another 700 hats. Of course, you can set the Assembler to produce forever, but I’ve not explored the impact of storing 1k+ items in the internal storage of the machine so it’s worth experimenting if you have a lot of raw resources to burn through or you anticipate selling in rapid batches of 700+ items.
Section 3 – Produce for me: Complex Automated Production (Multiple Inputs, Multiple Outputs)
Difficulty: Intermediate
Mods required:
Mods recommended:
- [1.1] Nukes – for da big boom when you don’t want to use ICBMs but you need something to fill the gap between HE shells and anti-grain warheads. I find small nukes good for that gap and fusion nukes good for the gap between anti-grain and ICBMs, but the latter is a bit more difficult to manufacture. Nevertheless, this guide will teach you how to reliably manufacture fusion nukes so you don’t have to keep building missiles for when you need that extra oomph in bombing runs.
Nobody likes to be stuck making bullets like a factory worker in Rebuild 3, and neither do pawns find it fun to be stuck making munitions like high explosive shells (HE) or anti-grain warheads. This section will build upon the basics of one ingredient input –> one item output by looking at how you can use multiple ingredient sources to produce a variety of item outputs (such as munitions/shells, which are used as an example in this section).
It’s a fair bit of work, but on the bright side, once set up you’ll magically have shells ready for quick loading when the call for air support comes. And the shells will magically be replenished when they’re low without pawns needing to do any work. Well worth the effort, I’d say.
Step 1: Get your ingredient sources running. I prefer to run with Rimfactory’s Plasma (T3) with the mining nerf turned off so that basics like uranium, plasteel and steel and be mined.

Step 2: Build a pusher at the end of the conveyer belt and an I/O Port (Mode: Input; Source: Resources and Food DSU) so that any mined resources will go straight to your resource storage. Make sure the conveyer belts are powered by connecting them to your powerline so that things actually move.


Step 3: Import what you want your Assemblers to produce (in this example, munitions/shells) and build I/O ports (Mode: Output; Source: Resources and Food DSU) for every single resource type you need surrounding the Assemblers so that they can access both the recipe and resources needed for its production.

Step 4: Set up a single I/O port (Mode: Input; Source: Resources and Food DSU) at the output of the Assemblers which sends completed products back to the Resources and Food DSU for redistribution. Just build I/O ports (Mode: Output; Source: Resources and Food DSU) wherever you need those resources to appear along with tweaking the storage settings so that only what you need to appear actually appears.

(Optional) Step 5: Shells as raw materials for more advanced shells? No problem! Just build an I/O port which pulls anti-grain shells from the Resources and Food DSU and places them within Ingredient Range of the Assemblers.


(Optional) Step 6: Redistribute produced shells straight to your hangers with the help of I/O ports!

Section 4 – The Automated Corpse Processing System
Difficulty: Advanced
Mods required:
- Project Rimfactory Revived
- Harvest Organs Post Mortem – the mod I use for harvesting organs from corpses, but you can replace it with any mod which you prefer.
Mods recommended:
- Industrial Rollers – if you need the conveyor belts desperately for some reason.
- Corpse to Fuel – if you want to turn corpses into chemfuel instead of organs
- No Corpse Debuffs – useful when your pawns are hauling corpses
This Corpse Processing System involves multiple interlocking parts, so I would highly recommend being familiar with the Automated Harvesting and Cooking guide, Basic Automated Production and Complex Automated Production. Without understanding in detail what is going on in all three of those systems, it will be quite difficult to implement this system and you might not find things working.
Still with me? Good.
Let’s go.
Step 1: Build the workbench you’ll be importing the recipes from.
Step 2: Start sourcing your ingredients. As shown in the screenshot, I will need to use medicine for organ harvesting from the corpses in the recipe, so I will adapt the Complex Automated Production system (three inputs, one output) for producing medicine automatically. Produced medicine gets sent via an I/O port (Mode: Input; Source: Resources and Food DSU) to the Resources and Food DSU for later redistribution.

Step 3: Set up your Corpse Collecting Units. These are I/O ports at the perimeter where your pawns can haul corpses and dropped weapons/armor a short distance and drop them in so that they will be sent straight to your Corpse DSU for storage and access by other I/O ports later. Good for saving your pawns walking time.


Step 4: Ensure that your Corpse DSU’s storage settings are correct. You’d want it to generally catch/accept all corpses (except maybe colonist corpses if you plan to revive them) so that anything – human, animal, humanoid alien – can be dumped in there for later access.

Step 5: After pairing the Recipe Database storing your corpse processing recipe to an Assembler or two, ensure that materials for the Assembler to run (both corpses and medicine) are available via I/O ports (Mode: Output; Source: Corpse DSU (for corpses), Resources and Food DSU (for medicine).

Step 6: Build an I/O Port (Mode: Output; Source: Corpse DSU) where the Assemblers output spot is so that organs, tainted clothing and whatever’s left after organ harvesting is done (if there is; some mods destroy the corpse after harvesting and others don’t) gets sent back to the main Corpse DSU pile for access by other Assemblers.
Step 7: Now we need to take care of the tainted clothing and dropped weapons. I used the recipes from RimFactory’s Electric Furnace for smelting down both weapons and armor to raw materials, so link up I/O ports (Mode: Output; Source: Corpse DSU) and set the storage settings accordingly to pull the correct items within range of the Assemblers for smelting.


Step 8: Be sure to set the I/O port at these Assemblers to the correct DSU. Because these Assemblers will produce raw resources (wood, stone etc, chemfuel if you’re using Corpse to Chemfuel mods but not organs), you want these resources to be stacked with other resources in your Resource and Food DSU instead of forming another stack in the Corpse DSU. Change the I/O Source settings accordingly to Source: Resource and Food DSU.

Step 9: Finally, all the harvested organs and bionics go straight to your Corpse DSU while any weapons and armor gets smelted down to raw materials and end up in the Resources and Food DSU. You may build I/O ports to access the organs directly as you need.

(Optional) Step 10: You can use I/O ports to distribute medicine (like you’ve done for meals, shells and other resources) across your base! Fancy.

Conclusion
The sky’s the limit once you’ve mastered how RimFactory’s different components work together. With the ability to control what things should appear where and when, pawns no longer need to haul things around (with the exception of corpses in the first leg to the nearest Corpse Collecting Unit). Neither will they need to craft anything (outside of weapons and armor) as the Simple and Complex Automated Production systems show. With the defense of bases automated by turrets and regular daily activities automated with these two guides, they’re now free to gallivant around completing quests or launching attacks on pirate bases. And hopefully this would result in better performance with less pathfinding, so large populations are easier to support (and less necessary) in the mid to late game stages.
Happy automation!