
Overview
Games like Awesomenauts are all about team composition. A well balanced team with characters that compliment each other is one of the key requirements to victory. If you want to know how to pick the right character and improve your chance of winning, check out this guide!
Introduction
This guide will introduce you to the basics of team composition in Awesomenauts, as well as show you a few suggested compositions for you and your friends to try out. I must stress, however, that these suggestions are NOT guarenteed to work in a competitive match, or any match, for that matter. Player skill is also an important factor, so don’t expect a “how to insta-win” guide here.
Let’s begin by learning about what makes a good team composition.
You can read the update-log here![dl.dropbox.com]
Templates
Before we begin discussing the different templates, there are a few symbols you should know the meaning of:

 Fighter:
This marks a slot for a fighter ‘naut. Fighters are characters that have a steady high damage output. In most cases, they rely more on their basic attacks than skills for damage, and are often quite mobile. Awesomenauts like Leon and Gnaw are great examples.
 Nuker:
This marks a slot for a nuker ‘naut. While they might not always have a steady high damage output, they have at least one skill that does a huge amount of damage, often hitting multiple enemies at once. Awesomenauts like Coco and Clunk are great examples.
 Tank:
Tank:This marks a slot for a tank ‘naut. Tanks have a high amount of HP, so they can take more damage before having to retreat. They usually defend their fellow team members by body-blocking incoming damage. Clunk and Skølldir very much fit this role.
 Support:
This marks a slot for a support ‘naut. Supports, as the name implies, focus on supporting their team-mates by healing them and providing other buffs. Supports are often squishy, and when facing against wise opponents, they’re often singled out and killed first. Voltar is a classic example.
 Pusher:
This marks a slot for a pusher ‘naut. Pushers can hold lanes very effectively, destroying enemy droids quickly and protecting friendly droids by healing them or distracting the turret they’re pushing against. Voltar and Gnaw are good examples.
Of course, each ‘naut can correspond to several roles. For example, Raelynn is a fighter, and also a nuker. Characters can be broken down to even more roles, but I won’t cover it here. If you’re interested in learning more, check out my beginners guide[goo.gl], which also covers roles in Awesomenauts and MOBA games in general. Now, time to read about some templates for you to experiment with!
Featured in an endless amount of games, from MOBAs through RPGs to MMOs, the classic “support/tank/dps” build retains its usefulness in Awesomenauts as well. This all-around setup can hold against most other compositions.
Pros:
- The support and tank can help defend the fighter as he deals damage to enemies.
- Rarely retreat from battle, even if the fighter is injured.
- Provide a great balance of offensive and defensive capabilities.
Cons:
- Can be demolished early-game by an offense-oriented team.
- Might have difficulties pushing against the enemy in the late-game.
This composition is all about offense. Make use of your attack power and make sure the enemy has no other choice but to retreat or see the countdown timer again and again.
Pros:
- Can make a powerful push against the enemy right from the beginning.
- Easy kills!
- Each player can often hold their own alone.
Cons:
- Often squishy. A nuke or two can often make the entire team scramble.
- Ganks are extra dangerous. Any death results in a significantly weaker team.
A somewhat more balanced approach than the previous full-on offense composition, the tank in this one provides some much needed protection for team-mates. Try to keep enemies in place to maximize the nuker’s effectiveness and if you’re playing as the tank, remember that you need to protect your squishy allies as much as you can. This is a team game, and the team that plays together well wins more much more often.
Pros:
- The tank can provide some much needed defensive capabilities.
- The fighter and nuker are still a force to be reckoned with.
- Better chances of survival in team-fights thanks to the tank.
Cons:
- Squishy allies can be singled-out and ganked.
- Might have some trouble later on if the enemy team has a support ‘naut.
The nice thing about this composition is that the power of both fighters along with a support ‘naut with healing abilities, provides the constant push needed to keep the enemies on their toes at all times, especially in the late game stage. You can replace one of the fighters with a nuker.
Pros:
- Powerful in team-fights thanks to the support.
- Can easily maintain pressure on all lanes.
Cons:
- The support can feed the enemies a lot early in the game.
- Multiple nukers can annihilate this composition.
With a pusher and a support in your team, you can easily destroy incoming threats from enemy droids and ‘nauts. Your fighter can focus on defending and killing, while your pusher and support provide the protection and distractions your droids need to bring down turrets quickly.
Pros:
- Incredible pushing potential, even early on.
- The fighter will probably be able to get most of the kills, making him stronger and more devastating as the match progresses.
- If you play well enough, you probably won’t be on the defending side often.
Cons:
- A bit lacking on when it comes to damaging and killing enemy ‘nauts.
- Could get into some trouble if the match is long and the enemy team is composed of carries (characters who get incredibly powerful at later stages of the match).
These are just a few of the possible combinations you can try out in the game. Some work better than others, so try to play around with them and see if you can tweak and improve the compositions to be victorious.
If you’re less of a “free-style” person and want some more detailed examples, the next chapter will show you a few compositions I came up with for you and your friends to try out. Again, these compositions will not guarantee a win, but they might help improve your chances a bit, if you and your buddies have enough experience.
Example Compositions (Part 1)
Here are some compositions that I think will work well in the field. Got some of your own? Share them in the comments section! If you’d like, I will add them to this list (with credit to you, of course!).
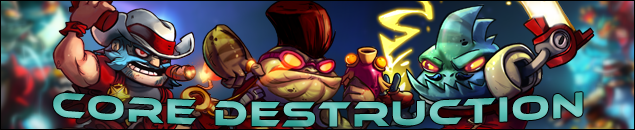

 Lonestar,
  Froggy G, Leon
The three classic ‘nauts available from day 1, these guys sure pack a punch. They’re all great fighters, with Froggy and Lonestar having powerful AOE nukes that can do some serious damage to anyone who gets close.
Tips:
- Having Leon and Froggy G in the team means you can pick your fights: either pull enemies in with Leon’s tongue or dash straight in with Froggy’s splash dash.
- If you’re fighting a losing battle, try to knock enemies away with Lonestar’s bull. Froggy and Leon both have escape abilities, so a well placed bull can save the entire team.
- You can also try to blind the enemy with Lonestar’s dynamite. If they get hit, they’ll have a hard time counter-attacking your team.
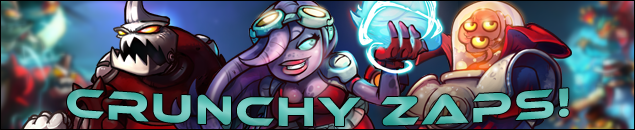
 Clunk, Coco,
  Voltar
The dynamic trio of Clunk, Coco and Voltar allow for various play-styles. Coco’s lightning ball can push enemies back when it explodes in front of them, right into Clunk’s jaws and Voltars suicide drones.
Tips:
- Coco is an agile character, so she can leave Clunk and Voltar on one lane while attacking and pushing the other. If danger rises, she can escape fairly easily.
- Voltar’s healing is amazing and can make Clunk near indestructible, which is important in team fights and when pushing against turrets.
- Coco’s lightning ball can knock enemies in or out of battle, while clunk’s bite can snare them to their doom. This gives you a bit of flexibility when picking your fights.
 Vinnie & Spike, Yuri, Skølldir
Use the advantage of flight against your enemies. Strike from above or dive in, set a trap or go head first, you can do a lot of things with these guys.
Tips:
- Remember that while you can fly, it takes time and it’s usually pretty slow. Stick around near Skølldir to fend off attackers and give yourself some breathing space.
- Try to throw enemies into turrets and mines as Skølldir. Combine the two for intense results!
- Yuri and V&S are very squishy, so try to avoid grouping up too much and get some space between one-another. Think of it as flies, flying around a giant Scottish piece of… viking man.
 Skølldir, Vinnie & Spike, Raelynn
If I had to pick a composition with the lowest chances for a failed gank, it would be this. The combined powers of Skølldir’s throw, V&S’ silencing smoke and Raelynn’s snipe means that once you get in, you aren’t getting out.
Tips:
- As Skølldir, try to focus on your throw and any snaring/stunning effects you have (Your main attack’s “Rubber Ducky Choker”[awesomenauts.wikia.com] and the Earthquake’s “Electric Hammer”[awesomenauts.wikia.com]) to help maximize your team’s assault during a gank.
- As Vinnie, remember to add the silencing effect (Red Bandana[awesomenauts.wikia.com]) to your smoke screen and deploy it just before the fight begins to make sure your enemies can escape or counter attack.
- As Raelynn, you’re OP. But other than that, you might want to focus a bit more on your snipe ability to finish off any foe who thinks they managed to escape.
Example Compositions (Part 2)
 Gnaw, Lonestar, Voltar
With these three guys (well… a guy, a creature and a floating brain anyway) on the field, any turret would flee in terror if they could. Focus on pushing against towers and create pressure on all lanes to achieve a quick win. (P.S: Have an idea what “P.U.S.H” might stand for? Leave your ideas in the comments!)
Tips:
- As Gnaw, focus on your weedlings first. Try to get a health upgrade to improve their durability and any damage upgrade if possible.
- After gnaw got his weedlings ready, at least Gnaw and Voltar should make a push along with your team’s droids. Stack those weedlings against the turret and let Voltar do his healing magic.
- Lonestar’s role is diverse in this composition, as he should protect allies while also defending attacked lanes if possible. Roam around and see what needs your help the most.
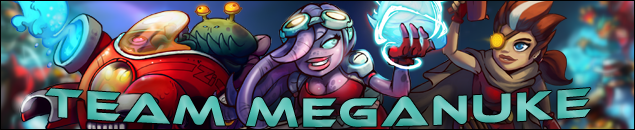 Derpl, Coco, Raelynn
Three nukers walk into a bar. There is no bar anymore. The entire city around it is also wiped out. Rarely can anyone survive an assault from these three ‘nauts, which is why they’re great for each other.
Tips:
- If at all possible, try to attack by surprise rather than fighting head on in team fights. Derpl takes time to deploy and un-deploy so try to take that into account.
- Coco and Raelynn can fare well enough on their own, but Derpl might need some help early on. Take care of him, he will be very powerful later on.
- The combined power of all 3 nukes can reach to over 230 damage! Only tanks with some health upgrades will survive this assault.
 Clunk, Leon, Vinnie & Spike
This composition works well alone or together, as each ‘naut can survive well enough alone and contribute a lot to a team fight.
Tips:
- Try to snag people as Leon and have Clunk bite and snare them. From this moment on you can count the seconds they have left to live with your fingers.
- You can spread up and go at it alone if you want, but during the late game (or earlier depending on the team you’re up against) you might want to stick together.
- As Clunk, remember to protect your allies in battle as much as possible. You can potentially take more damage than the two can take combined!
 Froggy G, Derpl, Gnaw
This time, Derpl takes the spotlight. Get Derpl as much solar as you can through kills and droid kills to get him to his full potential as soon as possible.
Tips:
- As Derpl, try to upgrade your turret gun to maximize your damage potential. Also try to set up traps by hiding in the bushes.
- As Gnaw, use your weedlings to protect and support Derpl. Very useful during turret pushes.
- As Froggy G, use your agility to locate potential threats and disable them with your dash. Don’t get yourself killed though!
Final notes
Thanks for reading the guide! It’s a bit shorter than usual, but hopefully it still contains enough information for you to find it useful. If you did find it useful, please help others discover the guide by rating and sharing it. Your friends and I will appreciate it!
As always, your opinion is important for me. Please let me know if you like the guide or not, and if there’s anything I can do to improve it. Your support is always appreciated and it keeps me motivated to do more and more guides!
[link]
Click here to read more guides!
Play on!
-Creepy Pie (AKA Jono00)