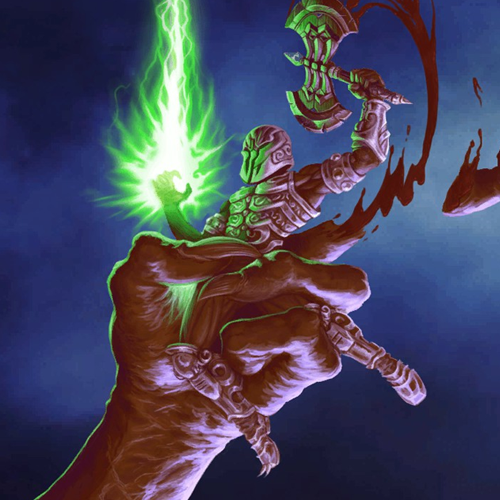
Overview
An overview of the weapons and enemies in Amid Evil
Before we begin
Any damage values and numbers are listed for Hard difficulty. As far as I know, enemies have the same health on all difficulties EXCEPT for Evil Difficulty where they get 20% extra. If I’m wrong feel free to correct me.
NB: This guide doesn’t factor in Soul mode, because you can’t predict when you’ll have it.
Weapons
Let’s go over the tools at your disposal

Don’t let the fact that this is a starting weapon fool you – The Axe is incredibly useful. You can beat like 80-85% of the whole game using only the Axe. The trick to the Axe is the ability to draw enemies towards you. If you’re close enough and swing the axe, the enemy you’re pointing at will warp towards you. This is useful for singling out an enemy at a distance, but this warp DOES NOT interrupt enemy animations, so you could get hit by an enemy immediately after warping them*. It’s important to know which enemies get killed in one hit. It’s also important to keep circle strafing so the enemy has a harder time hitting you.
SOUL MODE Turns the Axe into a meat grinder. It deals good damage, but generally the other weapons have more useful Soul Modes.
*Took a lot of restraint not to type “sucking them”

This one’s not quite as immediately powerful as the Axe, but it can be pretty useful. Fires two homing waterballoons projectiles with each shot. Pretty useful for enemies that move around a lot, or aerial threats.
SOUL MODE The Staff fires a lot faster, but the projectiles lose their homing properties. Not bad, very good damage output, but usually outclassed by the other weapons.

Your workhorse weapon, useful is most situations. The slashing projectile fired from the Whisper’s Edge can hit multiple enemies at once, so try to aim “between” two enemies, or if they’re in a line, fire next to them. Sometimes the slash will cut an enemy and keep going, though this mostly happens with weaker grunts.
SOUL MODE Ok here’s where things start to get interesting. In Soul Mode the projectile becomes bigger, faster, always goes through enemies (even if it doesn’t kill them) and it bounces off walls. If you’re in a small room or a corridor then Whisper’s Edge in Soul Mode becomes insanely powerful.

The Voltride is the only hitscan weapon in your arsenal. At first glance you might think “Yeah ok this isn’t bad”, but the true power of this weapon lies in it’s overkill mechanic. It works like this – once you zap an enemy enough times, he’ll stagger for like a second and die. If you keep zapping the enemy while he’s staggered, upon death, he will cast a chain lightning that will bounce and kill other nearby enemies. As far as I can tell, there is no limit to the number of times the lightning can bounce between enemies, so you could, potentially, clear a whole room just by killing one enemy. However, there are some things you need to keep in mind. Enemies need to be relatively close to each other for the chain to work. The chain lightning deals a set amount of damage (a bit less than a direct planet hit) so bigger enemies can stop a chain lightning, even if it kills them. HOWEVER, if you weaken a big enemy, beforehand, the chain lightning will kill him and keep going. (This is useful in The Sacred Path against Visage of Fire for example).
SOUL MODE The Voltride becomes a lightning gun – firing a continuous beam of lightning that will overkill enemies much quicker than usual. Pretty useful for taking out groups of enemies, though I prefer using the Whisper’s Edge for that purpose.

The Celestial Claw is pretty much your standard rocket launcher, but insteal of rockets it pulls planets from the universe and hurls them, which is pretty cool. Good damage, pretty useful for the second half of the game when you’re given tons of ammo for it. You can also rocket planet jump with the weapon, which is useful for finding secrets and skipping parts of the level.
SOUL MODE Upgrades planets into stars, which deal more damage, but otherwise function the same way.

The Start of Torment shoots a bunch of crystal, kind of like a shotgun. If you kill an enemy with these crystals, they’ll be sent flying to the nearest solid surface where they will remain for the rest of the game. It’s extremely satisfying. The only downside to this weapon is that you might have to get closer to your enemies so that all the crystals hit and you deal maximum damage. Also it uses 2 green mana per shot, so you might wanna keep an eye on that ammo pool.
SOUL MODE In Soul Mode the Star of Torment shoots a small homing projectile which will explode into smaller crystals in all directions on contact. The damage is absolutely insane too, killing bosses in a few seconds!

This abstract piece of modern art is your BFG. It shoots a slow moving projectile which, after moving a certain distance or hitting a solid surface, will explode into 10 purple lightnings, usually erasing everything in your immediate surrounding. It’s important to note that the Aeturnum’s projectile does NOT touch enemies, so aim it at the ground or the ceiling (usually the ceiling is better).
SOUL MODE Things get trippy for a second as you unleash a black hole. The black hole will suck any enemy in, but it can also suck the player, so don’t get to close to it. The only downside to this is that souls from enemies also get sucked in. But if you need something dead RIGHT ♥♥♥♥♥♥♥ IMMEDIATELY then this is the right tool for the job.
Astral Equinox
Equinox Acolyte

Acolytes are the basic melee enemy of this episode. They are relatively fast, but do little damage. Whisper’s Edge and The Axe will kill Acolytes in one hit, but their low health gels really well with the Voltride‘s overkill.
Lunar Deacon

Deacons are a bit slower than Acolytes, but have a ranged attack which is basically a downgraded Whisper’s Edge. This projectile is easily avoidable and can be destroyed by your superior Whisper’s Edge, though this is a waste of mana. The Axe and Whisper’s Edge kill a Deacon in 2 hits
Starlight Defender

Defenders lob bombs which explode after a few second OR upon contact with the player and enemies (though it doesn’t damage enemies). They have the same health as the Acolyte, but are often situated away fromt he player, so I recommend using the Staff of Azure Orb or the Voltride .
Astral Angel

Angels shoot small blats of electricity, but also have a melee attack if you get too close. They have about the same health as a Deacon, but move around a lot, so use the Staff of Azure Orb. Alternatively you could weaken an Angel with the staff, then finish him off with Voltride.
Apostle of the Moon
The Apostle is the toughest enemy in the episode. They have only one attack – a line of fireballs, which can be horizontal, vertical or even diagonal. There’s no pattern to the angle so keep your distance at all times. Use your strongest weapon against Apostles, like the Celestial Claw or the secret Star of Torment. Alternatively, if there are small enemies nearby, use the Voltride on them.
NB: an Apostle will END a chain lightning streak.

BOSS – MOON GUARDIAN
The Moon Guardian has a single projectile attack, which is easy to avoid the first time, but it circles around and has a lenghty lifespan. There’s plenty of health orbs scattered around the arena, including a +200 orb. So keep moving, watch your health, keep shooting and you should be good.
Domain of the Sentinels
Tip: The main weapon you’ll be using for this episode is the Star of Torment. There’s a secret one right at the beginning of the episode, so make sure to get it.
Sentinel Knight

The Sentinels are the only melee enemy this episode. They’re relentless and fast, so make them a high priority. When killed, they have a chance to spawn a parasite. The Star of Torment and Staff of the Azure Orb are the best weapon against Sentinels, since they always prevents parasites.
NB: The parasite’s spawn chance depends on the difficulty. On Evil, it will always spawn unless a Sentinel is killed with the Staff of the Azure Orb, Star of Torment or Aeturnum
Sons of the Scrounge

Also known as a Parasite, these enemies are small, fast and explode on contact. Usually they spawn from Sentinels, but sometimes they appear up on their own. Due to their small hitbox, it’s best to use the Staff of the Azure Orb, but the Whisper’s Edge also works.
NB: Parasites END a chain lightning
Sentinel Mage

Sentinel Mages move slowly and throw a red blob which explodes into smaller red blobs. Strafe left or right, but not back. The Star of Torment one-shots them, but really any weapon will do.

Watcher
Watchers shoot a slow moving projectile which homes in on the player, so try to bait it into a wall. Watchers have a lot of health, so use the Celestial Claw or Star of Torment.

Eyes of Pain
Eyes of Pain hang from walls and shoot eyes at you. They have very little health and come in groups, so you can use the Voltribe‘s overkill, or the Celestial Claw to clear them out.
Flesh Walker

Flesh Walkers are big and slow but hit hard. They shoot a torrent of eyeballs, which can be really damaging. Keep your distance at all times and use your most powerful weapons to quickly take them out. The Star of Torment takes 3 or 4 shots, the Celestial Claw takes 2, and the Aeturnum will instantly kill it.
BOSS – THE SCROUNGE

Despite it’s size, the Scrounge is incredibly mobile, leaping all over the arena. Ocasionally it will shoot a bunch of eyes at you, similar to the Flesh Walker. It’s more dangerous attack however is spawning a dozen Parasites. Due to the speed and mobility of the Scrounge, hitting it with some projectiles might be difficult. Apart from just shooting it until it dies, you can keep killing the parasites with the Staff of Azure Orb until they drop enough souls to activate Soul mode. Then just completely steamroll the boss with the Star of Torment.
The Sacred Path
Tip: At the start of the level there is a secret Max Orange Mana pickup. If you find it, you’ll get a huge advantage.
Protector

Protectors have two attacks – boulder throw and ground stomp, both of which are easy to avoid. Best weapon here is the Celestial Claw, as 1 shot is enough to kill them but in some instances it takes 2, not sure why. The Voltride is also good since it can stunlock a Protector.
NB: Protectors and Giant Protectors are resistance against the Whisper’s Edge and Star of Torment, so don’t bother using them
Creepers

A single Creeper isn’t dangerous, but they always come in groups, which makes them dangrous. The Axe one shots them, and they can be overkilled with the Voltride.
NB: If hit with a Flame Spirit’s projectile, a Creeper will turn into a Flame Spirit with full health.
Shrubnigurath

Shrubniguraths don’t move, but their projectiles leaves an acid pool which can damage you. The Celestial Claw and Star of Torment both kill them in 3 shots, but it’s better to save your orange mana for the Protectors.
NB: I came up with the name and Leon incorporated it. Thanks Leon
Flame Spirit

Flame Spirits shoot three projectiles in a horizontal spread, which are easy to avoid at a distance. Make these guys a high priority if any Creepers are nearby. The Staff of Azure Orb is really good against Flame Spirits, since it deals extra damage and destroys their projectiles.
Stone Snapper

Aw, they’re cute. Not much of a threat, can be easily killed with the Axe. But look at how cute they are.

Fire Visage
Fire Visages can ambush you if you’re not careful, since they move fast and don’t make any sounds before attacking. Their attack resembles a flamethrower, and it can be quite damaging if you’re caught off guard. The Star of Torment and Celestial Claw take 3 shots to kill a Fire Visage. Take care of them quickly before they get too close.

Giant Protector
These big guys for you are just tankier versions of the regular golems. They have a lot more HP – takes a whooping 5 planets to kill one. They throw a bigger rock at you, which explodes into smaller rocks, and can be a bit tricky to avoid. They also have a stomp attack, but you’ll probably never go near them. By the time you encounter Giant Protectors you’ll have the Aeturnum, so just whip that out and erase them from existance.

BOSS – CORRUPT SPIRIT
The Corrupt Spirit is probably the weakest boss in the game. Well, weakest experience, health-wise this Sauron wannabe has a ton of health. It stays in the center of the arena and throws bricks at you, which can be avoided by moving around. Just shuffle around and shoot at it until it dies. There’s an invincibility powerup in the corner and a +200 health pickup somewhere that’ll help you out.
Solar Solstice
Sun Seeker

Solar Seekers is are very fast and mobile. If they’re not hitting you, they’ll lunge at you to hit you. Usually appear in groups. The best weapon against them is the Whisper’s Edge, as 1 shot will do the job. The Axe is also really useful if you have enough space to keep circle strafing. The Voltride can clear out a whole group of Seekers, but due to their speed and numbers it can be difficult to get an overkill.
Solegionaires

Solegionaires are one of the most dangerous enemies in the whole game. They hurl burning spears, which can stick to any surface and deal damage as you walk over them, or impale the player and deal damage over time. But their most dangerous gimmick is their shield, which can deflect any attack back at you (aside from the Star of Torment). They won’t deflect the Star of Torment, but it takes 3 whole shots to kill one, so you might want to use the Axe instead.
Solar Seraph

Seraphs are pretty similar to Angels, so the same tactics apply here. Instead of a blast of electricity thet shoot a small sun, but it’s not very dangerous or hard to dodge.
Confessor of Dawn

Confessors behave similarly to the Apostles of the Moon, but instead of a line of fireballs, they fire a line across the ground which explodes after a second. This line is easy to avoid, but you should take care of the Apostle as soon as possible to avoid getting caught off guard. Use the Celestial Claw or Star of Torment.
Sol Butcher

Sol Butchers look pretty scary, but aren’t very difficult. Their massive sword shoot a wide projectile, similar to the Whisper’s Edge. They have a lot of health, so use your hard hitting weapons.
BOSS – SOLAR SAINT

The Solar Saint is the fastest boss in Amid Evil, and the most versatile. At first he’ll chase the player trying to hit him with his giant hammer. Sometimes he might spin the hammer and spawn a bunch of small suns, those are easy enough to dodge. He’ll ocasionally leap in the air and try to slam you, watch out for that. When you take down most of his health, he’ll start spewing suns in a clockwise fashion.
NB: The Solar Saint will absorb shots from a powered up Celestial Claw, so don’t waste your shots
The Forges
Peons

Peons shoot exploding harpoons and have a melee attack if you get close enough. Not a lot of health, one hit from the Star of Torment or Celestial Claw will take care of them. One detail I like is that they have to “reload” their harpoons after shooting both.

Laser Guard
Laser Guard keep their distance and shoot a red energy beam (or an Optic Blast, if you will). They don’t have a lot of health, but move around between shots, so you might have trouble hitting them. Use the Staff of Azure Orb.
NB: When spawning, Laser Guards have a brief moment of invincibility. Shoot them once their eye lights up
Flame Spirit

Flame Spirits jump around a lot and throw 3 fireballs at you. The Whisper’s Edge cuts through their fireballs, but the Staff of the Azure Orb is also effective.
Metal Fish

Metal Fishes aren’t quite as cute as the Stone Fishes and a bit more dangerous. Since they usually appear in large numbers, use the Voltride‘s overkill. The Whisper’s Edge is also effective, killing a fish in one shot.
Spike Drone
Spikes Drones remind me of those annoying roller mines from Half Life 2. Very dangerous and usually appear in groups. The Staff of the Azure Orb is pretty useful for keeping them back, and the Voltride‘s overkill can wipe out a whole group.

Saw Drone

Saw Drones are flying balls of steel that shoot giant bouncing buzzsaws (which are horizontal, weidly). Drones show up in groups, move slowly and stop to attack, so hitting them should be easy enough. Takes 2 planets from the Celestial Claw to take one down.

Overseer
Overseers shoot a harpoon that will drag the player if it connects. The harpoon itself isn’t very damaging, Overseers are placed near enviromental hazards which can damage or even kill you. Make this enemy your highest priority. If you have the ammo, use the Aeturnum, if not, spam the Celestial Claw until they’re dead.
Painmaster

Painmaster is a very accurate name. It moves slowly, but once it gets close enough, it will unleash a stream of spikes that will melt away your health in seconds. Keep your distance at all times. Erase this thing with the Aeturnum. If you don’t have one, the Voltride will slow him down, but takes a while to kill him.
BOSS – FORGEMASTER

The Forgemaster has a gimmick to him – he’s invincible while on fire. You need to bait him into the big pipes and douse him with blue forge juice to make him vulnerable, then hit him hard with your powerful weapons. Apart from that he’s pretty standard stuff. Throws some easily avoidable fire waves and three lines of fire on the ground. He has a dangerous jumping attack which can be avoided by moving forward and right.
Arcane Expanse
Tip: Enemies on this level are generally a lot harder to deal with, so be prepared

Battlemage Acrobat
Acrobats are a pain in the ass because of their dodge roll, which will make it hard to hit them at a distance. They’ll dodge every projectile, except the Celestial Claw, which coincidentally kill them in just one hit. Neat. If perchance you don’t have a Celestial Claw, the Staff of Azure Orb is useful due to it’s homing projectiles.
Cryspider

Cryspiders behave similarly to Solar Seekers – they’ll chase down the player and ocasionally do a lunge attack. They have a bit more health than the Seekers, as it takes 2 Axe hits or 3 Whisper’s Edge shots to kill them. I prefer to use the Axe to save ammo.
Cryserpent

The Cryserpent spits out an acid projectile which will stay on the ground for a bit and deal damage if you walk over it. Same thing as Shrubnigurath, basically. They have less health than the Crybeast, as it only takes 1 shot from the Star of Torment to kill them, but I recommend using the Axe, it’s very satisfying to shatter them.
Crystal Masters

They may not look like much, but Crystal Masters are very dangerous. They have a lot of health and their attack is hard to avoid. They shoot a cluster of small purple crystals, similar to your own Star of Torment, but theirs has an arc. Keep your distance at all times and use the Celestial Claw to eliminate them quickly – 3 planets will do the job.
Order of the Eclipse

The attack animation for these flying mages is so cool. They’ll stop moving to cast a solar eclipse which then flies towards you like a fireball. They’re immobile while casting, which gives you a chance to attack. It takes 2 planets from the Celestial Claw to kill one, but the first rocket will knock them back. The Star of Torment also works well.
Alpha Mage

Despite the intimidating appearance, Alpha Mages aren’t really a major threat. They’re very slow and their projectiles are easily avoidable by simply strafing left or right. They do have a lot of health though, taking around 7 planets to kill and sometimes survive a shot from the Aeturnum.
Crybeast

While mounted, the Crystal Master will shoot a projectile similar to the Star of Torment in soul mode, which is difficult to avoid. Once you deal enough damage to the Crybeast, it will die and then you have to fight a regular Crystal Master. When combined, this enemy has the most health in the entire game, as it takes 9 ♥♥♥♥♥♥♥ planets to kill it (7 for the mount, 2 for the rider) or two Aeturnum shots (it won’t kill both at once, unless in Soul Mode).
Cryshark

Big, fast and tanky, Crysharks only appear in the underwater sections of this episode. Their only attack is to charge at the player. Celestial Claw kills one in 2 shots, but the Aeturnum is recommended if there’s a group of Crysharks.

BOSS – TWIN TERRORS
There’s 3 things you need to keep track of in this fight – the orange snake, the purple snake, and the environment. Both snakes float around the sphere of water and try to headbutt the player. If you shoot them as they’re charging with a planet, they’ll change course. The purple snake shoots a bunch of projectiles in random directions, which will slightly home-in on the player. The orange one shoots a stream of fireballs in a straight line. Always stay on the upper half of the sphere so you have enough time to hit the bouncers if you get knocked out. It can be a bit tricky to land a shot, but the Aeturnum takes a huge chunk of their health.
The Abyss
Hand of Evil – Darkness

Ah, I remember when these guys were in The Sacred Path. Hands of Evil aren’t particularly dangerous and die in one hit from the Axe of the Black Labyrinth. Their projectiles can be cut down with the Whisper’s Edge, but it takes like 3 direct hits to kill one, so I don’t recommend it.
Eye of Evil – Shadow

These cross creatures shoot a laser which movesin a clockwise fashion, but at a distance it hits you directly, so keep your distance. They don’t have a weakness to any particular weapon, but I suggest the Celestial Claw or Star of Torment for their high damage.
Mouth of Evil – Umber

Umbers are the least dangerous enemies in the episode. They fire five fireballs which are pretty easy to avoid. Two hits from either the Star of Torment or Celestial Claw will kill one, but since they usually show up in groups, you can weaken each individual Umber, then overkill one with the Voltride to wipe out the bunch.
Fist of Evil – Night

Now these guys are a step above the rest. Their main attack is a rain of purple projectiles in a straight line, but they also have a melee attack if you get too close. They can also quickly close the gap, so make them your top priority. Spam Celestial Claw or use the Aeturnum
Bones of Evil

The most dangerous enemies this episode. Their melee attack hits hard and fast, but what makes them deadly is their teleport ability. They shoot out a white projectile which can teleport you right in front of them. Luckily this projectile is easily avoidable by strafing left or right, and the Bones of Evil are usuall placed far enough away to give you time to react. 5 shots from the Celestial Claw will kill it.
The final boss of Amid Evil is suitably epic. It’s not a bullet sponge with one attack, or a puzzle of lame puzzle. It’s immune to your regular attacks so for once Soul mode is accounted for. Now, there are four mana pools in the arena, and each one gives the boss a different attack:

- Blue – Shoots a whole bunch of Azure Orbs (thankfully without their homing property). This one the easiest to avoid, since you can just stand behind the mana pool and keep shooting until his second phase.
- Green – Shoots a continuous laser beam. The beam itself won’t catch up to you if you keep moving, you can even walk safely (hold Shift). If you want to stay on the green platform, stay on the edge, as soon as he starts shooting, move to the oposite direction and try to stay on the front side. If you get to the end of the platform, simply move backwards and in the oposite direction. Basically move in an infinity symbol.
- Orange – This one is the coolest in my opinion. Evil will throw a ♥♥♥♥♥♥♥ solar system at you. The projectile tracks your movement, so you can move in one direction and as soon as it starts falling, go in other.
- Purple – Evil will open up holes in space-time and try to punch you. Just keep moving and you should be safe from this one.
After you take him down to about 20%, Evil will destroy most of the platforms, and will start throwing … uh … reality tears, I guess. These ones I’m not sure how to avoid, but sometimes they’ll get blocked off by the mana platform.