Overview
Saw a new mod from the AtomTeam on the workshop, but people seem confused how to use it. This is how I’ve been using it.
Avatar 2.0 (UPDATED 4/14/2019)
Note the sections after this were written with an older version of the template avatar modkit in mind.
Now it is much easier to add avatars, without needing to build a mod in Unity.
Go to:
[link]And subscribe to this mod. It will be called “My Avatar.”
From there, navigate to: WhateverYourSteamLocationIsSteamLibrarysteamappsworkshopcontent5526201697933962Avatar_ResEntitiesAva
You should see two avatars there, with four total files. “ava2.png”/”ava2.asset” and “ava21.png”/”ava21.asset”
Picture and settings, basically.
ava0-ava39 are all valid slots you can replace here.
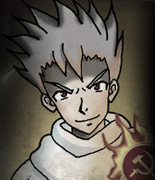
So for example, I’d paste this silly picture here:
As ava3.png, then copy ava2.asset and change the name to ava3.asset.
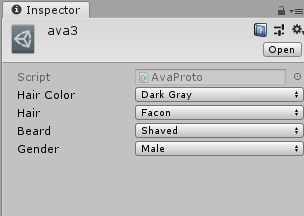
Your next step is to edit the asset file. Notepad works fine for this. When you do, you’ll get this information (the following is the ava2.asset example, which for reasons unknown has defaulted the bald businessman as a blonde soldier.)
{
“hairColor”: 4,
“hair”: 3,
“beard”: 5,
“gender”: 0
}
hairColor: 0-7, in order: Random, Dark, Brown, Gray, Blond, Blond_2, Foxy, Dark Gray
hair: 0-13, in order: Random, hairless, businessman, facon, tail, girl_wavy, girl_braids, girl_bouffant, girl_bob, girl_pony tail, girl_high bangs, girl_medium bangs, girl_parted bangs, unique short.
beard: 0-8, in order: Random, shaved, whiskers, mustache, beard, short beard, beard and mustache, short beard and mustache, long beard and mustache
gender: 0-1, in order: male, female
So just change the numbers to what best seems to fit your avatar and save.
TL;DR LIST
- Download Avatar 2.0
- Go to the above folder.
- ava1.png/ava1.asset all the way up to ava39.png/ava39.asset work.
- PNG dimensions are 155×180.
- Edit the .asset file to have your preferred options. So you can have your bearded female with creepy hair of your dreams.
- Launch ATOM, enable My Avatar mod, reload.
Avatar Modkit [STILL WORKS BUT YOU DON’T GOTTA DO THIS]
The workshop has a avatar modkit available from AtomTeam, linked to this Github:
[link]Just select Clone or download > Download zip, and extract the modkit-avatar folder somewhere.
You then need to download Unity. I downloaded the latest version and had no problems.
[link]After you have Unity set up, open project in the root modkit-avatar folder.
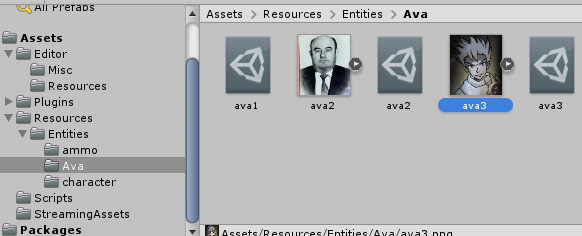
After that finishes loading, one way to find what you’re looking for is the Project > Assets viewer at the bottom.
Under “ava,” you’ll find what the mod in the workshop changed, replacing two portraits. I’ve only managed to replace up to ava39 with this and have yet to get it to accept ava40+ for adding new options instead of replacing, so keep that in mind.
This is a guy I know’s stupid character art I – poorly – photoshopped to better fit the low intelligence Possessed run I’m on.
In that file pane I showed you before, right click then “show in explorer.”
Easiest way to handle this is to take the four files – example:
1. avaxx.asset
2. avaxx.asset.meta
3. avaxx.png
4. avaxx.png.meta

And then copy them, deleting any – Copy suffixes and changing the numbers. Portrait sizes must be 155×180, and .png — bit size and so on doesn’t seem to affect it as I’ve gotten the game to recognize my pictures regardless.
So doing this process with “ava3” got me:
You want to then make sure the settings on the .png in Unity match this.

Finally, go over the other, blank ava file in Unity and change these settings as you see fit. Should be self-explanatory.

When satisfied, click Game > Build Mod in Unity. This should put the mod (default title My Avatar) in the localflow Atom folder ready to load.
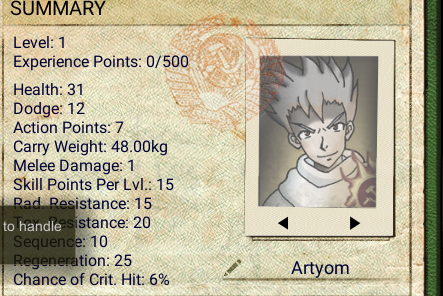
So when you open ATOM, My Avatar will show up as a mod you can load. Enable and re-open the game as normal, and you should see your updated portrait option.
Closure
Once you get used to it, this process is easy.
Then you too can add… highly immersive content to your friend’s game when you tell him you built him an avatar pack.
Like so.

