Overview
Tired of figuring out how to model a complex shape block by block? This guide will help you to utilize external tools for making a complex shape and turning it into a Stormworks vehicle.
Introduction
This guide shows an approach of using external tools for making a complex shape and turning it into a Stormworks vehicle.
Users who have experience in 3D modeling and are looking for a method to make as much use as possible of their 3D software for the groundwork will benefit more of this guide. With the acquired knowledge from this tutorial you will be able to use a 3D modeling software and model a structure as preparatory work for a Stormworks build. The preparatory work could contain e.g. modeling a complex hull for a big ship.
This guide will not go into any details of creating a 3D model itself. On the internet are many tutorials explaining that better than I can do. So you should have some basic knowledge of modeling in 3D to follow this tutorial.
One reason for writing this guide was the fact that you can speed up the process of e.g. making a ship. Due to the fact of making it in a 3D software like Blender many tools are available supporting you to model it and tweak the model more simply. Another reason for creating this tutorial is that I want to see people make use of this method as a further tool for creating nice builds.
Required software
You need the following software to follow along the guide:
-of course the game Stormworks: Build and Rescue
-Blender v2.79b (v2.80 does not work currently, since the used add-on is not available in this version)
-any spreadsheet software (I will use LibreOffice Calc)
-any text editor (I recommend using Notepad++)
Making a model
If you have already a 3D model you can skip this part.
After we have opened Blender we have to make sure to delete everything from this scene. To do that we simply press A to select everything. After that we press X to delete everything. As in the picture below Blender will ask us if it should delete the selected objects, we simply press ENTER to continue so they get deleted. Now we have an empty scene to work on.
For the purpose of demonstration I will use Suzanne, since it is a pre-built model. To add Suzanne to the scene we press Shift + A. This will open a menu where we can chose from different objects we can add to the scene. To get Suzanne we hover with the cursor over mesh, then over Monkey and click on it. No we should see a monkey head in the middle of the scene.
If the head is not in the middle of the scene you might left clicked somewhere in the scene, which moved the 3D cursor (the white and red striped circle). The 3D cursor determines the postion of new objects you add. To fix our problem we first have to bring the 3D cursor back to the center of the scene. To do that simply press Shift + C.
In order to bring our object we have created to the centered cursor we select the object we want to move with right click. After that we press Shift + S which opens a menu called Snap. Then we click on Selection to Cursor. This will take our selected object to our 3D cusor.


Its Important to keep the object in the middle of the scene. Imagine, that every point in our scene has three coordinates defining its position. The middle of our scene has the coordinates x=0, y=0, z=0. The coordinates for the points we create relate to the center of our scene. If we don’t create our object around the center of the scene, it can happen that parts of it later don’t appear in Stormworks, because in Stormworks you can only have an object going 255 blocks in every direction along the axis (x ,y , z).
Now we have created a model to work with. Because Suzanne is too small to see any details like the eyes or the mouth we need to scale her up. To do that press S. By moving the mouse away from her origin you can scale her up. To do that more precise you can type in any number you want representing the factor of being scaled up. I want her to be five times larger so I type five in and press ENTER to confirm it.
For now our model is complete. At this state you should be finished with your modeling, because in the further procedure no changing of the model is possible anymore.

Preparing the model for further process
To make our model look like it is made out of blocks we utilize an add-on. To install the add-on we press Ctrl + Alt + U. This will open the Blender User Preferences. Then we click on the tab called “Add-ons”. After that we search for an add-on called “Object: Add Advanced Objects”. To activate it we tick the little box as shown on the picture. Afterwards we can close the Blender User Preferences.
Before moving on we need to make sure our model is in the center of the scene. To check that select the model. Then press N with the mouse cursor being within the 3d-viewport. This makes the Sidebar region showing up. Here we can see the location of our selected object. If the location is not x=0, y=0, z=0 you can procedure as stated in the section before or by just typing the zeros in.
Now we can go further. With our model selected press Shift + A. Hover to Block Tools and click on Pixelate Object. This will make our objects shape being represented by small cubes like in Stormworks.
With that done we have to clear up our scene a bit. In the Outliner (red box on the picture) is all kind kind of data organized as a list. We are interested in deleting all data we don’t need for further processing. So we don’t get confused later. The one data-block which should be left is called dup. The rest can be deleted by right clicking on it opening the Outliner Object Operation menu where you can click on delete to delete the data-block. Data-blocks which can’t be deleted are kept.
Tidying up is still not complete. Now we have to get rid of the little cubes we see, because they are not needed for the further process. We are still in the Outliner with our mouse. To delete the little cubes click on the plus sign before the data-block called dup to show up its data content. Then delete the item Cube.


Now we are left with points representing the position of the cubes. Since every block is placed 0.25 units from the other, which doesn’t fit the way how the blocks are saved in Stormworks we have to scale our object up. Because blocks in Stormworks refer to coordinates in whole numbers, we scale our object up by the factor of four. Now the distance between the points representing the block position is one.
With our object having proper scale we can export it. To do that go to file > Export > Wavefront (.obj). Here you can name it and choose the location you want it to be saved. I called my file Suzanne.obj. From now on we can close Blender since we don’t need it anymore.


Preparing the Wavefront .obj file for further process
With exporting our model as Wavefront .obj file Blender has also created a .mtl file. A file where the materials used in the model are saved. Since we are not interested in this information, we can delete it.
Now open the .obj file with Notepad++. The only information we are looking for is a list containing the points representing the position of the generated cubes. Because we deleted all unimportant stuff before exporting as a Wavefront .obj, we don’t have to search for a specific part. We just select the first four lines and delete them.
Then we need to replace some characters. Go to search>Replace… First we have to get rid of the v’s. Proceed as shown in the picture and replace them all.
Depending on your language settings you also need to change all periods into commas to make the spreadsheet software recognizing the pasted information as numbers.
Changing such things in Notepad++ is crucial since the spreadsheet software can’t handle that when it has to change e.g. several million characters.
With our information prepared we select everything with Ctrl + A and copy that with Ctrl + C.


Working with the spreadsheet software
Open your spreadsheet software of your choice. We select cell A2 and press Ctrl + V to paste the data we have copied from Notepad++. When pasting we get asked how the software should treat the data. We tick under Separator Options “Separated by” “Space” as shown in the picture. Then we hit OK.
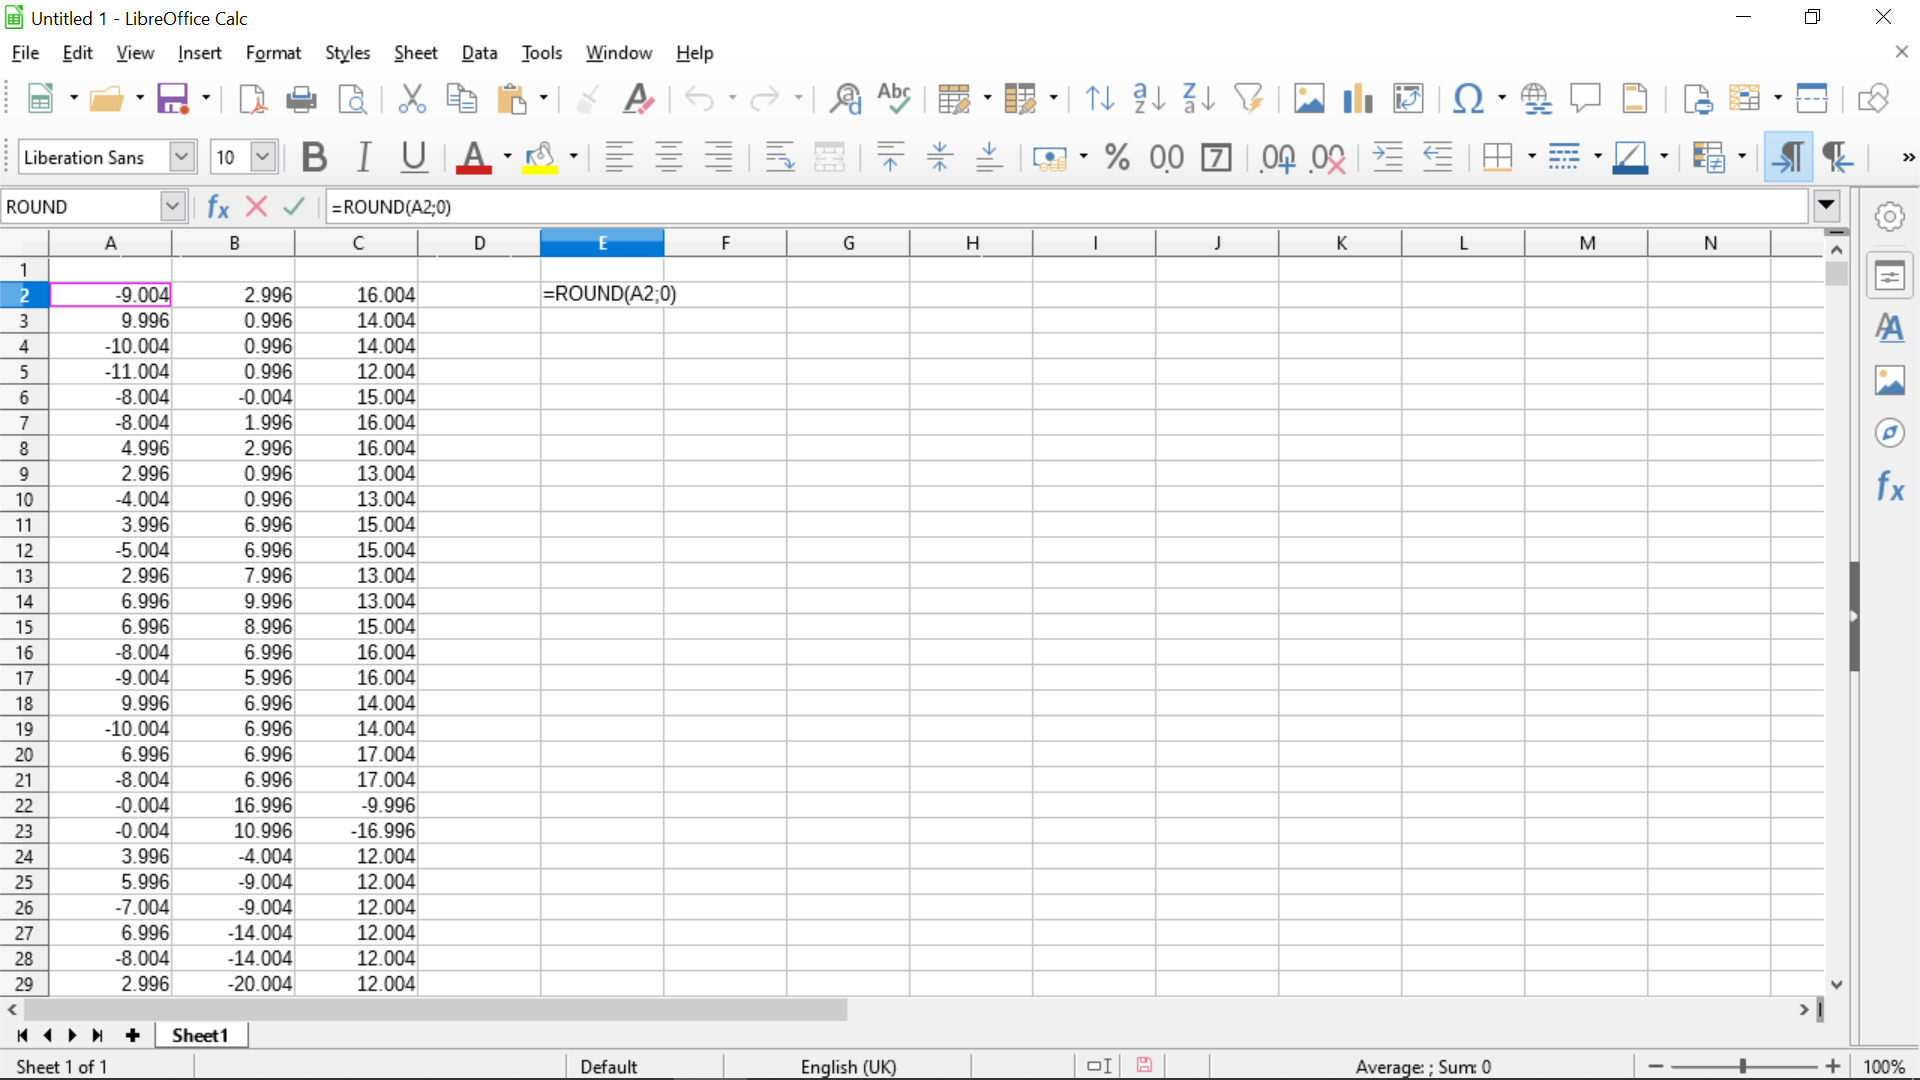
Next we add some formulas. First we have to round our number since Stormworks only knows hole numbers. In cell E2 we type in =ROUND(A2;0).
After we copy this cell.
Then we select the area we want our formula to take action. To do that enter information in the box marked with the red box around. E2 is the first corner of the area we select and G5718 is the last. 5718 is the last row containing data. We can figure that out by just pressing Ctrl + End. This takes us to the endmost cell.
Once selected we hit Ctrl + V to paste our formula into the cells.
After that we enter another formula just above our prior pasted ones. With e.g. MAX(E2:E5718) we can find out the largest number of the column E. We use this information just for us to make clear no number is bigger than +/-255.
Afterwards we paste some text in some cells.
In J1
<c d=”01_block” t=”0″><o r=”1,0,0,0,1,0,0,0,1″ bc=”FFFFFFFF” ac=”FFFFFFFF” sc=”6″><vp x=”
In K1
” y=”
In L1
” z=”
In M1
“/></o></c>
In cell J2 you enter
=CONCAT($J$1,E2,$K$1,F2,$L$1,G2,$M$1)


Now we create a copy cell. This cell will contain all the information we need for further procedure.
Type in that cell simply:
=CONCAT(J2:J5718)
Now we can move to the last steps. Don’t close the spreadsheet. We will need it later.

Last Steps
We open Notepad++. We go to File>New to create a new file. Now we paste the following text:
<?xml version=”1.0″ encoding=”UTF-8″?><vehicle data_version=”2″ is_advanced=”true” is_static=”false” bodies_id=”2″><editor_placement_offset x=”0″ y=”0″ z=”0″/><authors/><bodies><body unique_id=”2″><initial_local_transform 00=”1″ 01=”0″ 02=”0″ 03=”0″ 10=”0″ 11=”1″ 12=”0″ 13=”0″ 20=”0″ 21=”0″ 22=”1″ 23=”0″ 30=”0″ 31=”0″ 32=”0″ 33=”1″/><local_transform 00=”1″ 01=”0″ 02=”0″ 03=”0″ 10=”0″ 11=”1″ 12=”0″ 13=”0″ 20=”0″ 21=”0″ 22=”1″ 23=”0″ 30=”0″ 31=”0″ 32=”0″ 33=”1″/><components>
Then we go back to the spreadsheet and copy the copy cell. We return to Notepad++ and paste it at the end.
After we paste the following:


</components></body></bodies><logic_node_links/></vehicle>
We are not finished yet. Last thing we have to do is to save our file. Go to File>Save As… Give the file a name and save it as .xml.
To make our file appear in the game save it in the following path:
C:Users…AppDataRoamingStormworksdatavehicles


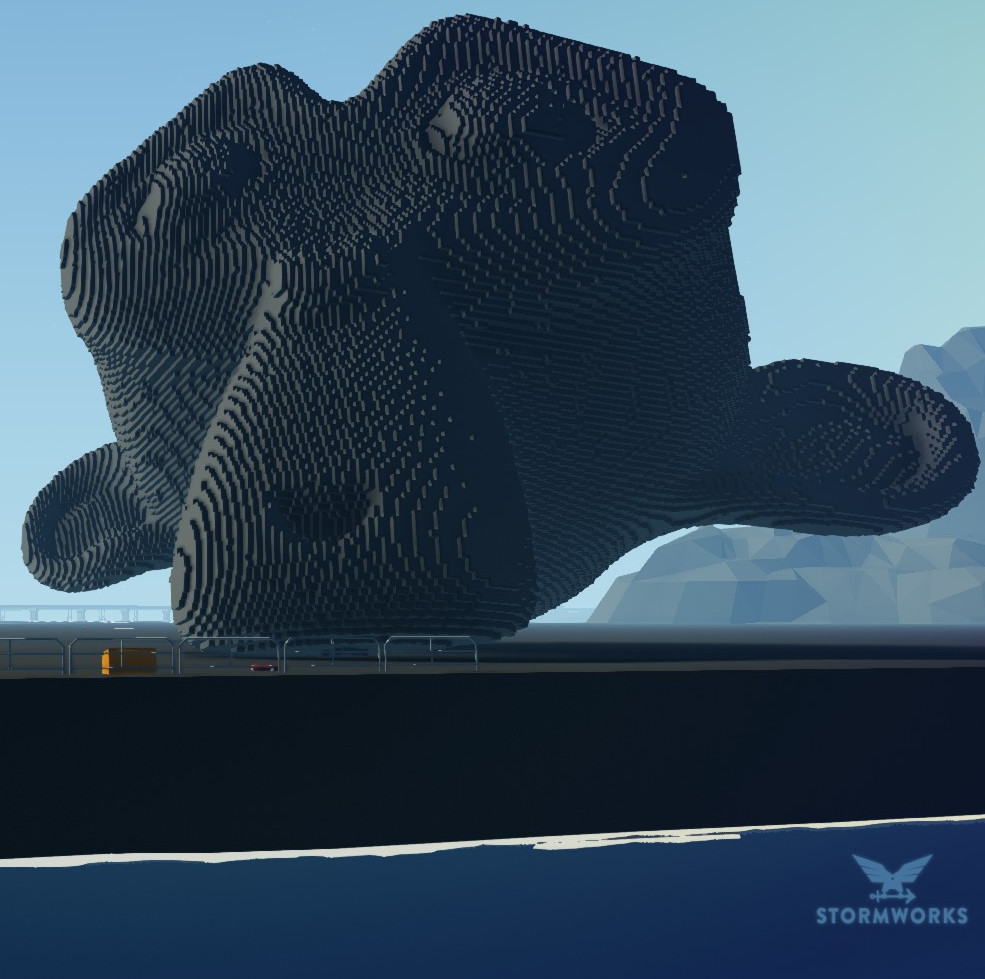
Now we are done. We have successfully turned a 3D model into a stormworks vehicle.
Conclusion
It’s far from being easy to turn a 3D model into a stormworks vehicle, but it is not impossible. If I would rate the effort it takes to turn a 3D model into a stormworks vehicle towards of making it by hand I would say it just makes sens to use my method as preparatory work for the bow or stern of a big ship or for a sculpture or plants etc. otherwise it is too time consuming.
Thank you for reading. Feel free to ask, criticize or improve.