Overview
This guide covers how to add additional screenshots to a Workshop upload after uploading the itemIt covers using the Steam Client although doing it in a web browser is very similar.In the images I am using my workshop and one of my workshop items as an example.I have used black boxes to indicate what is to be selected.I’ve made the guide for Planet Coaster although it can be used for virtually any game that supports the Workshop.If you are not using F12 you will need to refer to wherever you store your screenshots when adding the images and Stage 1 may not apply to you.
Stage 1 – Preparing to upload screenshots
To start with you will need to find where your images are stored.
To do this in the Steam Client:
1. Click View then Screenshots.
2. If you can’t see your images then click the dropdown box then select Planet Coaster.
3. Click Show on Disk.
A folder will appear – at the top underneath the icons will be a long bar with a folder reference. Right click this bar and click Copy Address as Text. You will need this for a later stage.
Stage 2 – Locating the workshop item you want to add screenshots to
1.Hover your mouse over your username at the top.

3. Click Workshop Items.

You are now ready to add screenshots.
Stage 3 – Adding the screenshots
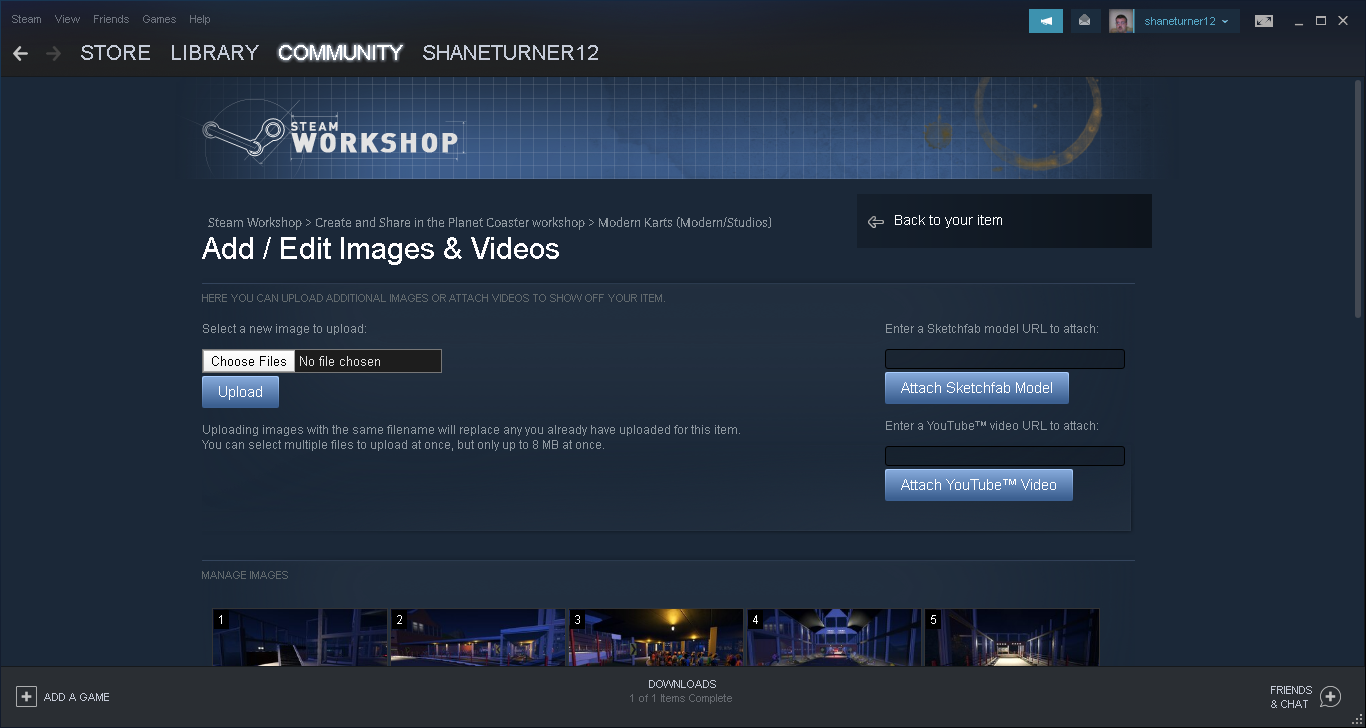
1. Scroll down the page a bit until you see options on the right hand side – click Add/edit images and videos.
2.When the next page appears, click Choose Files.
3. When the next box appears, you will need to navigate to the folder where your screenshots are. If you have followed stage 1 you can right click in the bar above the Open button and click Paste then click the Open button to view the folder.
You now need to click the first image you want to upload then click Open. Avoid the screenshots in the Thumbnail folder if possible as these are smaller versions.
Note that the image you select will be different to what I selected and possibly in a different position.
4. Click the Upload button.
5. Scroll down a bit down the page to check the image has been added.
6. If you have further screenshots to add scroll back up the page then repeat steps 3,4 and 5 until you have added your images. Be aware that there is a file size limit so you may have to repeat the whole stage more than once if you get an error.
7. Scroll down a bit further then click Save and Continue.


