Overview
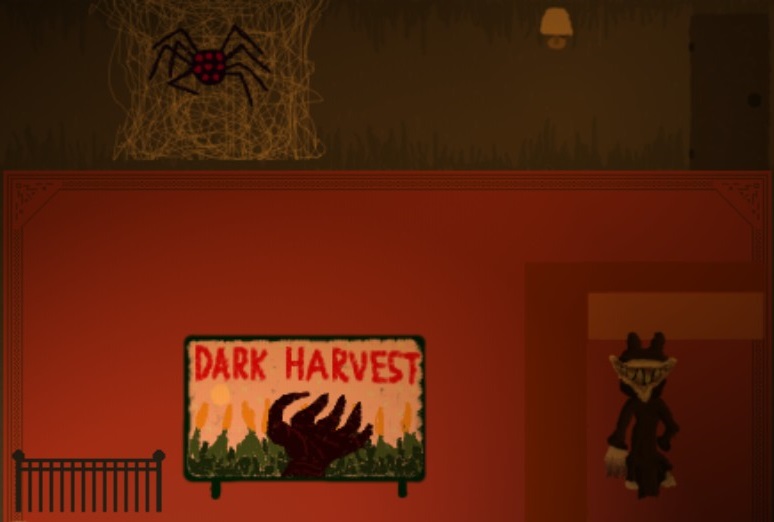
A step-by-step guide that should help you through the Halloween event known as “Dark Harvest” as well as help you locate and collect all 8 special outfits in the event!The event is only available until 11/5/2018, so hurry! I’ll leave this guide up after the event has ended though just in case it happens to come around again in the future.The Dark Harvest event is back! This guide is useful again! The event will last until November 5th, 2019. (11/5/19) Hurry and get your tricks and treats!
Room 0: Getting Started
To start the event, you have to play the main game until you find the door that leads to it. It’s just after the West Halls that have the Laughing Custodian in them.

It’s recommended to SAVE your game at this time at the barrel, to avoid having to come back here if/when you die during the event.
For outfits: Before going on with the event, make sure you have the STRANGE KEY before you continue. You get this key from the drawer in room “007” located in the previous hallway.


You should now be ready for the event!
Room 1: Orange Door

Normal room
Room 2: Enter… IF YOU DARE!
The person behind the counter will explain the rules of the event and future location of the outfits you can unlock.

This event can be a bit tedious since a lot of enemies take patients to get past, and if you die you have to repeat multiple sections again. Remember not to give up though! Even if it gets frustrating at times, this event is beatable. Here’s some motivational music to hopefully keep you going. (Although it completely ruins the scares of the game so please only use to prevent giving up or if you’ve already beaten the event and just want the outfits.)
Room 3: Spooooky Tale

The Ghost Host can tell you a spooky tale if you wish to hear it.
Room 4: Breadcrumb Notes

Some notes for spooks and lore.
Room 5: Field of Dreams [DANGER]

This is the first area with an enemy, a ghastly girl who will INSTANTLY KILL you on contact. She wonders around aimlessly and usually toward you. She is very slow however and easy to avoid by simply walking. Just be careful.

Your objective here is to find a key for the exit gate. The easiest way to do this is to walk left or right until you see the side gate, then walk up until you reach the key, then keep going up and over left or right (the opposite direction of what you chose before) until you see the locked exit gate.


Room 6: Building Entrance
A note for lore and nothing more.

Room 7: This is it, Don’t Get Scared

Normal room
Room 8: Roommate

Normal room
Room 9: Further Down (1st Outfit Door Location)
This is just another normal room, but it can lead to your first outfit.

For outfits: Go to the door on the left. It should unlock for you with your STRANGE KEY, assuming you followed the “Getting Started” information.

Outfit 1: Hooker
Just examine the outfit to add it to you collection.

Outfits 1/8
Room 10: Red Maze [DANGER]
This room can be a little intimidating at first, with its huge size and creepy sounds and creatures. However it’s fairly simple to navigate and the creatures are for once not an instant death.
They CAN KILL you though if you take too many hits from them. The enemies look like weird clown trolls. They move sporadically but will move faster and towards you if they see you. There are quite a few of these things in here all over the place, but you can out run them easily and can out maneuver them if they get too close. just try not to corner yourself, and avoid them when possible


The easiest way to navigate this room is to follow the north wall to the left. Just keep moving left and stay towards the top, avoiding the clown creatures when needed.
For Outfits: There is a door at the top to the far left, you should pass it while navigating this are. Enter it for a KEY.
Room 10.5
After you pass that door, keep heading left and following the wall down. There will be more clown creatures around so be careful. Eventually after fallowing the left wall all the way down you should see a doorway, enter it.


This big maze area has no other items for outfits or for progressing the event, but it does have a few extra rooms with notes for lore you can read. Go for them at your own risk of clown creature attack.
Room 11: It’s Curtains For You

A note for lore and nothing more.
Room 12: Real Fake Doors

Normal room.
Room 13: Crowded Hallway [DANGER]
This room is filled with a bunch of surprised looking people who move around aimlessly. They don’t seem to move in any rhyme or reason. If you bump into one of them it will NOT HARM you directly. However it will make the screen blink blackness for a moment and allow the movement of a creature that will INSTANTLY KILL you. So avoid touching them! The creature is one from the main game and will only move when the screen turns black, so as long as you don’t touch him directly or bump into the people, you should be fine.
(Creature in upper left of photo)
This room may look overwhelming but it’s not so bad if you’re patient and wait for the right time to move. Try to never have a creepy person next to you, to avoid them moving into you. Then just wait for an opening and rush past them. They can sometimes completely block your exit.
Just be patient and idle until you can get by.


Room 14: One-way Hallway
This hallway has two paths. The right path is useless though so move downwards. There should be a staircase on your left that will lead to the next area of the event.

For Outfits: Keeping going downwards into the next room.
The next few parts of this guide is only for those who want to collect Outfits and/or see everything this event has to offer. If you don’t care for that, skip to “Room 15?: A Void”.
Room 14b: Clock Block [DANGER]
This is one of the harder rooms as it has a very fast creature that will INSTANTLY KILL you on contact. You can “hide” behind the clocks in the room to help avoid him.
This creature will rush at you if you’re in its line of sight too close to it. So stay as far away as possible at all times to avoid death.
Hide behind clocks and work your way down to the doorway at the bottom of the screen. This can be easier said than done as the Time Eater loves to hang out by this door way. Just be very patient and wait for him to be far away and preferably behind some clocks before rushing that door! This room just has a set of keys needed to get to the next section.
Room 14b.5
Once you have the BASEMENT KEY go back to the clock room and avoid the Time Eater again. This time go to the right side of the room through another doorway. (This door is unlocked by the newly acquired BASEMENT KEY)


Room 14c: Key to Victory (2nd Outfit Door Location)
This is a hallway with mostly useless doors. Follow it around the corner to the two doors that actually work.
The Doorway to the right leads to another Outfit room. It’s locked and needs another STRANGE PINK KEY. If you skipped the first outfit during this run you can use the key that’s still in your inventory. If you need another STRANGE PINK KEY you can enter the door on your left.


Room 14d: Junk and Juke [DANGER]
This is a messy room with the Laughing Janitor in it. He works just like he does in the main game, but will result in an INSTANT KILL on contact. Use the trash piles and other items in the room to hide from and avoid him.
Navigate to the left far side of the room along the bottom. There should be another STRANGE PINK KEY on the table here.
Get the key and get out of there.


Now use that key to get your Outfit across the hall if you haven’t already. Otherwise keep the key for additional Outfits later in the event.
After all that you’re ready to return to “Room 14: One-way Hallway” and continue the event.
Outfit 2: Translucent Dress
Just examine the outfit to add it to you collection.

Outfits 2/8
Room 15?: A Void
A note for lore and nothing more.

Room ???: The Darkness
This room is pitch black and is seen in first person mode. This can be a little hard to tell at first due to the darkness. If you haven’t moved since jumping down here yet, just look right or left twice. You should see the face. Move towards it and interact with it to continue.

Room 15: A Void No Longer
Normal room…now

Room 16: Red Return
This room splits into two paths. The bottom door is locked for now and the forked shaped key to unlock, so go up for now.

Room 17: Shadow Stalker (3rd & 4th Outfit Door Locations)
This room has two doors that lead to Outfits, one door that leads to a PINK STRANGE KEY, and one door that leads to the fork shaped key needed to advance in the event.
The first thing you may notice though is the Shadow Man who rushes to you. Looks like you’ve made a friend! This guy will constantly follow you while you’re in this room. As far as I can tell, he will not harm you. But he will block your path sometimes as he follows you, so be aware of your position to his.

There is also a supply box on the wall to the left that may give you adrenaline. It can’t be used in this event though, and I am not sure if it actually counts towards the main game.

For Outfits: Go left to the door on the wall. This door is locked and requires a PINK STRANGE KEY.

For Outfits: Go up and to the right to the door labeled, “AG.” This door is locked and requires the AG KEY found back in, “Room 10: Red Maze.”

For Outfits: Go to the doorway located at the bottom right. In here is another PINK STRANGE KEY. (See Room 17b: Bed Time)

Next head to the doorway on the right.
Room 17b: Bed Time [DANGER]
This is a simple room with a few beds to walk around and another Shadow Man. However this Shadow Man will INSTANTLY KILL you on contact, so avoid him!
He walks slow but will speed up a little at times. Try to always keep a bed between you and him so he doesn’t come into contact with you. Walk to the bottom left bed for another PINK STRANGE KEY, then get out of here.


Outfit 3: Zombie
Just examine the outfit to add it to you collection.

Outfits 3/8
Outfit 4: Auntie G
Just examine the outfit to add it to you collection.
Outfits 4/8

Room 18: Pink Haze [DANGER]
This room is identical to the meat locker room from the main game, except with a pink fog. There are lots of hooks and shelves to get in your way, but it shouldn’t be too hard to navigate. Do be careful though as there is a Shadow Man in here who will INSTANTLY KILL you on contact.
He acts just like he does in “Room 17b: Bed Time.” He walks slowly towards you, picking up speed every so often. Try to keep your distance and if possible keep an object, such as a hook or shelf, between you and him.
The goal of this room is to get to the upper right corner of the room to find the forked shaped key. (Called the COOK’S KEY in the main game.)
Once you pick up the forked shaped key, get out of the room as soon as possible. Make sure to avoid the Shadow Man on your way out as well. Return to “Room 16: Red Return.” You can now use your newly acquired key to unlock the bottom doorway.


Room 19: Spoopy Halls [DANGER] (5th Outfit Door Location)
This is a semi-copy of the halls from the main game. (The ones that lead to the Halloween event start location.) However some doors are missing.
This hallway has one of the fastest enemies in the game, It’s the scuba diver with the bright light and buzzing noise from the main game. He runs VERY fast and will INSTANTLY KILL you on contact. Scuba Steve will be constantly roaming these halls at random, so always be ready to run!
To avoid him, you need to listen for his loud buzzing noise and look out for his torch light to figure out where he is. Be patient and wait for him to be far away from your location before you start heading to your next destination. If he heads towards your direction while you’re waiting, you can simply go back through the door you just entered from and re-enter the Spoopy Halls to reset Scuba Steve’s position. You can also hide from him behind some objects. If he does see you, he will pause for a moment before giving chase, giving you an extra opportunity to escape through a door.
After you enter the Spoopy Halls, make sure Scuba Steve is completely gone or at least to the far left of the area. Then head to the right and down. Turn left and there are some trash bags you can hide behind and rest at for now.


For Outfit: Once Scuba Steve is completely gone or at least to the far left of the area again, head to the right and down and go to the doorway labeled, “007.” It’s locked and needs a STRANGE PINK KEY to open. When you leave this room, return to the garbage bags once it’s safe to do so.

From the garbage bag hiding spot, wait for Scuba Steve to be completely gone or at least to the bottom or bottom left of the area before making a run to the left. You should see a doorway labeled, “004.” Some fans have nicknamed this location, “The Library.” You can enter here to avoid Scuba Steve if needed.
For Outfits: Inside room 004 is two keys for Outfits. One is obvious while the other is VERY much hidden. Enter this room if you would like the keys for either of these outfits. (See Room 19b: Library)


From room 004, wait for Scuba Steve to be completely gone again or at least to the bottom or far right of the area. Then head left and up. Take the door on your left leading to the room labeled, “001.”

In here is a table with the EAST WING EXIT KEY. Grab it and head back.
Room 19.5

Then wait for Scuba Steve to be to the far right of the area before heading down. You can run to room 004 if needed, or hide behind some trash on the way down.

Go to the doorway at the very bottom. You can unlock this door now with the EAST WING EXIT KEY and be done with Scuba Steve!

Room 19b: Library [DANGER]
This room has a bunch of book shelves and coat racks, as well as a Zombie Clone that will INSTANTLY KILL you on contact.
The Zombie Clone stands still at all times. Once you take a step however, the screen will blink blackness and the Zombie Clone may have moved a few steps. It seems to move randomly, but at times seems to be moving towards you. Just use caution and don’t advance too close to it.
The obvious key in this room is a Yellow Strange Key on a table at the far end of the room. Just take your time and keep walking towards the back of the room. Take back steps if necessary to make the Zombie Clone move to (hopefully) a further away position.


The second key in here is extremely tricky. For those who wish to try and find it on their own, I will put a spoiler warning on the information relating to it.
When walking near the center coat rack, the screen will not blink and the Zombie Clone will not move. Interacting with the coat rack should give you the GIRL’S RESTROOM KEY.
I have heard a rumor that this key can be acquired by interacting with the Zombie Clone. I have not been able to confirm this however, so again interact with it at your OWN RISK.

Once you have the key(s), leave the room with caution.
Outfit 5: Skull
Just examine the outfit to add it to you collection.

Outfits 5/8
Room 20: Vary Tales
A note for lore and nothing more.

Room 21: To The Moon (6th Outfit Door Location)
This level looks like the basement area of the main game but with a moon reskin.
Theres a note for lore as well.


For Outfit: There is a locked door at the top of the center room. It needs a Strange Key to unlock.

Outfit 6: Pinkie
Just examine the outfit to add it to you collection.
Outfits 6/8

Room 22: Gotta Go (7th Outfit Door Location)

A note for lore and maybe more.
For Outfit: If you got the GIRL’S RESTROOM KEY from “Room19b: Library,” you can use it here.
Outfit 7: Kawaii Mask
Just examine the outfit to add it to you collection.

Outfits 7/8
Room 23: Field of Nightmares [DANGER]
This are is very similar to, “Room 5: Field of Dreams.” The main differences are that it’s fairly darker, the exit gate is at the bottom of the screen instead of the top, and there are three keys to find instead of just one. There is still a Ghastly Girl who will INSTANTLY KILL you on contact, so be careful.


The Ghastly Girl acts almost exactly the same as before. She still wonders around aimlessly and usually towards you. She is still very slow and easy to avoid by simply walking. However that changes when you pick up keys now. After you pick up the second key, the music will change slightly and she will move faster now, at about the same speed as your normal walk. Then after you have all three keys, the music intensifies and she will move even faster! At about the speed of your run. This means picking up keys before you know where the next one is can easily result in your death. To avoid this, take the time to find all three keys BEFORE picking them up. Once you have a mental layout of where they are in relation to each other, wait until the Ghastly Girl is away from you and get all the keys as quickly as possible before getting to the exit gate as quickly as possible.

Remember:
- 1 Key(s) Picked Up – Ghastly Girl’s Speed < Your Walk Speed
- 2 Key(s) Picked Up – Ghastly Girl’s Speed = Your Walk Speed
- 3 Key(s) Picked Up – Ghastly Girl’s Speed > Your Walk Speed
After this, the first enemy of this event now becomes the last enemy. There should be no more threats from here on out!
Room 24: Creepy Whisper (8th Outfit Door Location)

Normal room
Room 25: The End
This room has a bunch of graves scattered around. You’re almost there!

For Outfit: Walk forward until you reach the bottom right of the level. There you will find the final outfit of the event. (You do not need any keys to acquire it)
Just walk to the upper right part of the level to complete the Dark Harvest event. Congratulations on making it to the end!

Outfit 8: Retro Look
Just examine the outfit to add it to you collection.

Outfits 8/8
Outfit Completion Checklist
Once you have received at least 5 endings in the main game, you can enter the closet located in room “207” at the start of a new game to change Rockette’s outfit. If you followed this guide your collection should look like this:

Remember to get them all before November 5th!
Ending Note
I hope this guide gets to help someone, as I’d hate for a fan of the game to miss out on the experience or the outfits! If you have any questions about any part please let me know.
Thanks to Iarumas for the unofficial names of some creatures and locations!
And thank you to AestheticGamer and everyone else who helped create this awesome game and this epic event!

