Overview
This is my 2021 Mod List, it’s a Stable Mod List thats been checked in XEdit and all mods play very well together, I currently have 469 mod files installed, the majority of the list is texture replacers used to make Skyrim look like a 2021 game, Pick out what you want or install it all, I give step by step instructions for installing and managing each mod, This is an all in one guide, it contains all the information you need to set your game up in a stable fashion, it contains a Beginners Tutorial for how to use Vortex, how to install Skyrim Script Extender, how to install Enbs it contains multiple videos on how to use Xedit for making patches, checking for errors, and conflicts, and how to use Dyndolod
Don’t Forget to Rate The Guide
If you want to thank me for all the time I put into making this guide and keeping it up to date Please Rate it with a thumbs up, Bookmark it to your Favorites,and recommend it to others, a good rating will help it show up on the first pages of the Guide sections, so it does not get buried and others will find it easily
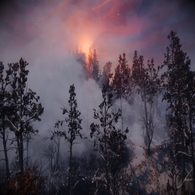
Gameplay Video of the New Tree setup I added at the bottom of the Guide
Gameplay Video
My Discord Server
People that use my guides have ask me a lot to make a discord server, so I finally got around to doing it [link] Link is only good for 7 days, I will come back and replace them, if someone posts in the comment section, it is not working, so if you need help, have questions, or just wanna be apart of a modding server and hang out with like minded people that adore these Bethesda games and modding, come join
Friend Requests
I get so many friend requests because of my guides, it is impossible for me to accept all of them, my steam friend list has a limit and as time goes on I would get confused as to who everybody is, so I just don’t accept any, it’s nothing personal against anybody, if you have questions or need help use the comment section of the guide, or join my Discord to reach me faster
Read Me
About the Mod List
I know this seems like a lot of mods, it’s really not, I am not sure how many total mods it comes to, I have 463 mod files installed, but you will get multiple files from one mod page and patches, the fact is you just can’t cover all the textures without them, they are great overhauls that touch a lot of the textures like Noble Skyrim and Skyrim Realistic Overhaul, but they do not cover everything, so you will have half modded textures and half vanilla textures, for me that breaks immersion and it looks ugly, my mod list remasters Skyrim and covers just about all the textures in the game, I didn’t add lots of things that didn’t exist in Skyrim, I just covered whats already there and I have made it very easy for people to get this installed
Skyrim reuses its texture assets in many different locations, an example would be the Dwemer Ruin Nchuand-Zel, it uses textures from your mines and caves, once you get past the spiders and you enter the ruin, you can see big patches in the floor that look out of place, these come from the caves, then once you get through the door and you are on the big walkway, look all around at the back walls that look like a black cave wall, this texture comes from the mines, another example is Orc Strongholds, the outside of the Orc houses is the same texture as the outside of Nordic Ruins, all the wood textures are from your Farm Houses, Skyrim does this all over the place, so I kept that in mind as I built this mod list, I tried to get a consistent look everywhere that blends good together, thats Lore Friendly, Realistic, and a Stable Mod List that everyone can enjoy for hundreds and hundreds of hours, it’s so stable because more then 90% of it is all texture replacers, I don’t add crazy stuff into my mod list, just because a mod looks real cool, doesn’t mean it is, and it want be very cool when it breaks your game, so watch out if you add mods to this mod list that are not in my guide, check them in Xedit for conflicts and errors
First Things You Need To Do
A Clean Install
I recommend everyone do this, it will minimize any problems you may or may not have, skyrim special edition is a 12gb download, that should not take very long to download, just take the time to do it right from the start and when modding Skyrim you don’t want the game in your program files directory, if you have never modded Skyrim before and you have the game in your Program Directory, just do the Clean Install
Before you start you need to delete all previous skyrim folders, especially if you have ever used mods before, they can be left over files you are unaware of that can cause serious hiccups, first open file explorer and go to what ever drive you have your game installed on, go to steam/steamapps/common and delete the Skyrim Special Edition folder.
Now go to Users/?Your User Name?/Documents/My Games and delete the Skyrim Speacial Edition folder, Now go to Users/?Your User Name?/AppData/Local and delete the Skyrim Special Edition folder, Now go to Steam and under your game library right click Skyrim Special Edition, go to manage, then Uninstall
Now reinstall Skyrim Special Edition and DO NOT put it in your Program Files Directory, once installed, boot the game one time and close it out, make sure and do this, you have to boot the game one time to establish the .ini files for the game
Do Not put the game in the Programs File Directory
When you are modding games you can not have those games installed into the Programs Files directory, when the game is installed here it will be under the control of the Windows User Account and Windows will block any outside programs from making any changes to any program in the Program Files Directory, so when you install a mod or any file that makes changes to the game.exe or any other file in that game, Windows will not allows this, some files might work fine, others will not work at all, it’s Modding 101, you don’t put your games here.
If you do not know how to set up another Steam Game Library Folder outside of Program Files Directory
Click Steam top left corner, then scroll down and click downloads, then at the top you will see Steam Library Folders, click it, then click Add Library Folder, add your Library Folder to another drive, then redownload Skyrim and direct it there, or right click Skyrim in your game library on the left, select properties, then Local Files, then Move install folder and direct it to your new game library folder
If you must use an ssd
if you are going to put it on your ssd then you must do the following to get Steam, out of the Program Files directory, Steam only allows one game folder per drive, so as long as Steam is installed in the Program Files Directory, you can not simply make another folder on your C Drive outside of Program Files you must move Steam out, and this is how.
First you have to exit Steam, not just close it out, Exit out from the top left corner, then go to
C-Drive/Program Files (x86)/Steam and Delete all of the files and folders except the SteamApps & Userdata folders and Steam.exe, now move that main Steam folder to your C-Drive, once it is done, boot Steam from the Steam.exe in the new folder, your desktop icons or start menu icons for steam will no longer be any good, you can make new ones, all so all of your desktop icons for games will disappear, to fix this before you delete all the old steam files out, save a folder inside titled steam/games, inside it you will see all of your desktop icons, back it up and drag it in afterwards, if not you will have to verify the contents of the games in order to get the desktop icon back, and if any of those games are modded you do not want to verify them, after you boot from the exe, let Steam update and then login in and you are good to go, to make a new desktop icon just go to that steam folder and right click the Steam.exe and select create shortcut then drag the shortcut to your desktop, while steam is open, right click it on your taskbar and select pin
[link]
Update your Drivers
Makesure all your drivers are up to date, I run a Nvidia/Intel sytem so i use these for my drivers For Intel- [link]
For Nvidia- use Nvidia’s App called GeForce Experience
For my audio drivers and other drivers I use device manager, just type in Device manager in the windows serach box
If you use AMD hardware and do not know how to update your drivers just google it
To keep your mods from possibly breaking in the future
Now open Steam, go to your game library and right click Skyrim Special Edition and select Properties, open the Updates tab, under the Automatic updates tab change it to Only update this game when I launch it and close the window, Now Steam will only update the game when you launch it from Steam or the main game executable file, and you will be launching the game from the script extender from here on out, so the game will not update and break your mods.
Now go make a new folder and name it Modding Tools and do not put it in your Program Files Directory, I have mine in a stand alone folder on my D/Drive
Now open the Skyrim Special Edition game folder, and copy/paste the two game executable files titled SkyrimSE.exe and SkyrimSELauncher.exe, in the Modding Tools folder we just created, now if somehow the game does update all you have to do to revert it back to the way it was is copy these two files back into the game folder and click replace
How to Use Vortex Mod Manager
Making a Nexus Mods account
Go here [link] and use your email to make an account, a Nexus account is free, just do not select any of the pay options when you make your account, just select create account, if you decide to pay on Nexus then you will get uncapped download speeds and no ads, its about $4 a month, for free accounts you only get to use capped slow downloads
Setting Up Vortex
Vortex Mod Manager- [link]
Download the first main file titled Vortex, click the Manual Download
After it is downloaded go to your downloads folder and double click the Vortex executable and let it run, then launch Vortex,at the top right corner click the account circle and then click log in on Website, then Authorize Vortex, now you can download mods. For Vortex to find a game you have to have it installed and booted the game at least one time, in Vortex open the Games tab on the left, at the top click scan and do a full scan, let the scan complete, your game should now be in the Unmanaged section, click on it to manage and after it is done you should get a notification in the top right corner on the bell icon, that mods can’t be deployed, select fix, select next, then select apply fix, then its going to bring you to the settings page at the mods tab, at the mod staging folder select suggest, then select apply. By default your mods archive folder will be on your C Drive where Vortex is installed, if you want to change this then in Vortex, open up settings, select the downloads tab at the top, under Download Folder select the folder icon and place it on another drive and create and name a new folder, I keep everything, Mod Archive Folder, Mod Staging Folder, Modding Tools Folder, and My Games on my D/Drive
this is a video showing you how to do everything i just told you, it might help you more to watch someone, in the video the games tab will look a little different don’t be alarmed, that is because the video is a year old and Vortex has been updated since
IF YOU DO NOT KNOW HOW TO USE VORTEX THEN TAKE THE TIME TO WATCH THESE THREE VIDEOS
How to install a mod
This is a link to Gopher’s Beginners guide to Vortex tutorial
This is a link to the GamerPoets How to mod Skyrim playlist
Tools and Cleaning Mods
File Archiver
You are going to need a program to help you extract compressed files, i have used several and in my opinion this is the best one and it is free called Any Zip
[link]
Just go to the microsoft app store and type in Any Zip
If you want to use another or already use a diffrent one that is fine my second choice would be [link] 64bit
XEdit is an important tool, if you learn how to use it, it can solve a lot of problems for you, a good example from me was when I was building this mod list, I ran into an issue with the Cities of the North mods, I had some whacky stuff going on, floating deer horns, entire walkways were blocking door ways and out of place, so I booted xedit and applied the check for conflicts filter on The Cities of the North mods and it was the new version better Dynamic Snow doing it, who would had thought of that, the point of me telling you this, is just because there not conflict rules in the mod manager, does not mean theres not conflicts between mods and you will never know, if you do not know how to use Xedit, you can also make patches and do all sorts of great things with it, if you want to get into modding The Elder Scrolls and Fallout games, it is a very essential tool to know how to use.
Here is the link to the manual, read up on it
[link]
XEdit
SSEEdit- [link]
Manual Download it, create a folder named Xedit, extract the download to that folder and after place that folder in your Modding Tools folder we created earlier
On Vortex with Skyrim SE activated, go to Dashboard and click add a tool, we are going to add both xedit exe here. the first one under Name put SSE Edit, then under target, click the file icon far right and go find the SSEEdit.exe, where ever you placed it, once you have it selected, click open, bottom right corner and the click Save on Vortex, now it is added to the dashboard. Do the same with the SSEEditQuickAutoClean.exe and name it SSEEditQAC so you know which is which on the dashboard.
Cleaning the DLC’s
The first thing you have to do is clean the offical dlc’s, doing this will create a stable foundation for you to mod on, I have provided detailed instructions on how, its very simple and fast process, you will have to do one manual edit and I have linked a short video below from Gamer Poet, watch it first, he shows you everything, and I also recommend subscribing to his channel he makes some awesome content that will help you on your journey to modding
Now that the game is freshly installed and Vortex has detected it, go to the plugins page, underneath Flags hover your mouse, you will notice on all the dlc, the far right icon says Requires Cleaning (LOOT)
From the dashboard on Vortex, run SSEEditQAC, agree to the pop up window, wait a few secs and close the next window, now select one dlc at a time, so check box it, select ok at the bottom and wait for it to finish, you will get a message at the bottom of the screen saying Background Loader: finished, then close it out, go back to Vortex to the plugings page and select sort now, and as you do you will notice the icon underneath Flags will disappear, now repeat the process for all the dlc .esm’s, one at a time, after on the plugins page in Vortex, LOOT will have a message for you on Dawnguard, click it and click the link and it will open a web browser page with a detail picture and instructions on what to do, however I suggest you just watch the video below and it along with gamer poet that way you know you are not making a mistake
BethINI– [link]
Download the main file and extract it and place it where ever you want to put it, I keep all my modding tools together on the same drive and never put them in your program files directory.
Now watch these two videos on what it exactly does and why you need it.
Guide:SSE SkyrimPrefs INI– [link]
Guide:Skyrim INI– [link]
SSE NIF Optimizer– [link]
Download the main file with a manual download, then extract the download and place the executable in your Modding Tools folder, this program is used to convert Skyrim mods to Skyrim Special Edition
Helpful Xedit Videos
There is a lot of material out there on Xedit, learn to use it, if you plan to run big load orders and mod a lot, I have listed a few videos, you can find many more out there, just type it in on youtube
-WARNING- READ ME
Make Sure you have completed the sections above and if you are new to modding watch those videos I linked above before continuing, I linked those videos for a reason and they will teach you what you need to know to continue
Modding Saved Games
You can only mod a saved game if it is a Vanilla save, or you are adding mods to it,if you have had mods on that save and removed then, it is not a good idea to put new mods on to the save or continue to play that save, When you remove mods from a save file, you always want to revert back to a previous save file that was made before you added the particular mod you are removing, if you do not listen it can cause some serious problems with the play through, those plugins are baked into the save and even removing it does not remove it from the save file and in most cases you may not notice any thing immediately and think you got away with it, but what you did was make your play through unstable, and you will see the effects much later, or you will see the effects immediately CTD or the save will be corrupt and not load at all, You can however safely remove mesh and texture replacement mods all you want, But never remove scripted mods from a play through without reverting back to a previous save file made before the removed mod was installed
Always use the manual save method, never use quick saves, and always make lots of saves all through your play through, and always make a save before you add a new mod
Before downloading any Mods
The first thing you need to do when you reach a mod page is read the description and the requirements for the mod, all so check out the comments, most of the time authors will pin instructions in the comment sections and sometime if users are having issues they will comment, but be careful, in more cases then none those comments are by incompetent users, I don’t know how many times I have seen newbies on there saying a mod is broke, when I know for 100% fact it works because I use it.
Always know exactly what the mod does that you add and never add a bunch of mods at one time, only add a few at a time and play for a while to see if any problems occur, what ever the mods change you added, go check that out specifically, it may take longer to get your game modded, but this is the safest way to insure nothing goes wrong
Updating Mods
If you have already started your play through with a load order, don’t update any of the mods if an update becomes available, if its a mesh or texture replacer then it will be fine, but if it is a scripted mod, then don’t update it, it could break your save depending on whats in the update
How to know if a mod has scripts
While on the mod page in Vortex. click the gear clog, this represents settings, it is located in the top right corner beside Actions, once clicked check mark Content, now a new tab will show up on your mods page, underneath it, you will see icons out from your mods, hover your mouse over the different icons, it will tell you what they mean, if you see one that says scripts, then the mod has scripts in it and you can not remove this mod from your save, if you uninstall it you have to revert back to a previous save file made before the removed mod was installed or start a new game
Clarification On My Instructions Listed After Every Mod
This mod list was intended to be installed in the order I have listed and when I say for the rules, place it after everything it asks, that does not mean go down the rules and put after for everything, it means go find the mod you just installed and make sure the name is on the left and put it after the mods it asks on the right then all the other blank rules will be filled automatically. If you want your game to look right then you do the rules for each mod right after the install, do not let them pile up
When i say a mod manager download, what i mean is follow the mod link I have listed and click the files tab on the mod page and on the file I say to download, click mod manager download.
Manage Rules
Take your time, double check your rules, make sure they match up with what I wrote, i have provided all the conflict rules, all you have to do is do what I wrote, If you mess them up, your game will not look like mine, you might see Vortex notifications like mod rule cycle, or this mod is redundant, if you do, then you did something wrong, and will have to go back and find it, so take your time the first time and read what I say, double check you have it right before you move on to the next mod
How to view conflict rules in Vortex
While on the mod page in Vortex. click the gear clog, this represents settings, it is located in the top right corner beside Actions, once clicked check mark dependencies, now a new tab will show up on Vortex and mods that have conflict rules in place will have a lighting bolt beside them in this new tab, you can click the lighting bolt to view all conflict rules for that mod, make sure your rules for each mod match up with what I wrote for each mod, or you will have problems and your game will not look right
For Picking Mods out from my List
If you do not want the whole list, just pick out what you want, this is my list that i play with, you don’t have to install the whole list, just make sure and read description and the requirements for the mods you choose
Do not let your rules pile up, do each rule right after you install the mod, one mod at a time and come back and double check your rules match up with what I wrote
Once in game make sure and pause click settings and open the MCM and adjust those mods to your liking, also the audio mods, some have audio sliders in the normal audio settings
after you deploy mods always check your plugins page, make sure the plugins are enabled and see if you have any LOOT messages
when installing mods, sometimes it might give you a notification something is redundant, once you set the rules for what mod you installed and deploy your mods that will go away, if it doesn’t then you overwrote a mod and need to fix it
Clean vanilla save for Skyrim Special Edition– [link]
You can use this save file to test out all the textures and environment stuff, this save will give you access to everywhere in Skyrim
Alternate Start – Live Another Life – SSE- [link]
Use this one for fast New game starts to test mods that require that
After Testing
After you are finishing testing and getting the game modded, once you start your play through do not forget to setup all the mods that show up on the MCM, once you set them up and make a save they will remain that way unless you change them
DO NOT DOWNLOAD A BUNCH OF MODS AT ONE TIME, only install a few mods at a time and boot your game and test them out
And watch this quick video on 5 Modding Tips for Beginners
Performance Tips
I play on a Nvidia RTX 2070 Super and an Intel i7-9700f with 16gb ram on a 1080p monitor
You will notice I went with a lot of 2k stuff instead of 4k on all the outside overhauls, I suggest you do the same, in all honesty you can’t really tell much of a difference, it might look just a little sharper, but your Vram will tell a difference, on little small objects it want matter much or interiors
You may not be able to run this whole list, it is not a performance friendly list, it was built for the visual experience, you will have to do your testing and determine what your system can handle, if you are playing in a higher resolution then 1080p, then it will be a lot more taxing.
The most taxing part of this mod list is the trees, grass, landscape, enb, and Dyndolod
It is always best to turn off all overlays and kill all background processes not essential to running the game
First try Prefer Maximum Performance and Cap your frames at 59, and see how that works out, if performance is still not great turn on V-sync and Triple Buffering, if you are still struggling then you can cap your frames at a lower number like 50 or 45 to make an occasional micro-stutter more subtle
Nvidia Users
Open up Nvidia Control Panel, and select manage 3d settings, on the right side of the screen select the Program Settings Tab, then select the Add button, Then select skyrim, and scroll down and enable the following
Max Frame Rate- 59fps
Power management mode- Prefer Maximum Performance
Triple Buffering- On
Vertical Sync- On
After make sure and select Apply at the bottom
Before You Download Anything
These mods listed in my guide should be Endorsed, they all deserve it and an Endorsement shows some appreciation for all the hard work the Authors put in for FREE so we can play Skyrim looking Beautiful, so please hit that ENDORSE button, it cost you nothing, just a click of the mouse
If you choose not to use my mod list
If you just wanted to use the guide to learn how to set your game to be modded and for the Vortex Mod Manager Tutorial, and want to build your own mod list or are just picking out mods from my list then i still recommend you grab these, you will need them
Skyrim Script Extender (SKSE)– [link]
Refer to the next section of the guide to get this installed
1.Unofficial Skyrim Special Edition Patch–
[link]
Download the main file with a mod manager download, in Vortex install and enable
2.Address Library for SKSE Plugins–
[link]
Download the Main file All in one with a Mod Manager Download, in Vortex install and enable.
3.SSE Engine Fixes (skse64 plugin)–
[link]
Download Part 1 with a mod manager download, and download Part 2 with a manual download,
first take Part 2 and extract it in to a new folder, then copy/paste the contents into your game
folder under Steam/steamapps/common/Skyrim Special Edition, then in Vortex install and
enable Part 1 Engine Fixes.
Visual Studio 2015, 2017 and 2019– [link]
Scroll down underneath Visual Studio 2015, 2017 and 2019 and click the file titled x64: vc_redist.x64.exe , then run it and follow the prompts, You more then likely already have this, you can open up Control Panel, go to Uninstall a Program and scroll down and see if you have it, if you do you will see it as Microsoft Visual C++ 2015-2019 Redistributable (x64), if you don’t install it and reboot your PC afterwards
4.SkyUI– [link]
Download the main file with a mod manager download, in Vortex install and enable
Script Extender SKSE64
To manually download Skse64
Skyrim Script Extender (SKSE)- [link]
Once there look for Current SE build and click on the 7z archive out from it to download, make sure you are on the SE build not the classic or the VR build, the most up to date version at this time is 2.0.19, I am currently still using version 2.0.17
They are multiple ways to install skse64, whichever way you choose, here is how you check to see if it is working, once you boot the game from the skse64 loader, press the Tilde Key and type getskseversion press enter if it tells you your version then it is working
First way
I used this way for the first time when I did a clean wipe to install this mod list and yes, it really is that simple now
Second Way
Download skse64 and extract the the download, then copy/paste the following 3 files into your game folder Steam/steamapps/common/Skyrim Special Edition, Don’t put it into any folders inside of your game folder, just put it in the main game folder
skse64_1_5_97.dll
skse64_loader.exe
skse64_steam_loader.dll
Then take the data folder in the skse64 download and compress it with your archive tool, then rename it skse64 data and your version number, and drag and drop it into Vortex, into the box at the bottom titled Drop files, and install and enable it like a mod
Back into the skyrim game folder, look for skse64_loader.exe, right click it and select create a shortcut and drag that shortcut to your desktop and for now on click this shortcut to boot your game, you will have to boot your game this way for now on
The way i have done it for years
[link]
Download skse64 and extract the the download, then copy/paste the following 3 files into your game folder Steam/steamapps/common/Skyrim Special Edition, Don’t put it into any folders inside of your game folder, just put it in the main game folder
Data Folder
skse64_1_5_97.dll
skse64_loader.exe
skse64_steam_loader.dll
While your game folder is open one of the files you just pasted in there titled (skse64_loader.exe) , right click it and select create a shortcut and drag that shortcut to your desktop and for now on click this shortcut to boot your game, you have to boot your game this way for now on or lots of your mods will not work, to test to see if it is working, once you boot the game from the skse64 loader, press the Tilde Key and type getskseversion press enter if it tells you your version then it is working
The New Rudy ENB
This is added instructions for the newest Updated version of Rudy Enb, its what I use, its the Enb
in my video above, If you use this Enb section you don’t install Smooth Sky mesh – SSE later on in the guide Ill list it there to, in the next section they are instructions for the old Rudy Enb and several enb suggestions, if you do not want to use this enb, or if you prefer Obsidian Weather , then just skip this
1.Skyrim particle patch for ENB– [link]
Scroll down to Special Edition then click Google Drive, then click the Arrow in the top Right of screen, then click download anyway, Drag the zip into Vortex, drop it in the box at the bottom of the screen titled Drop Files, install and enable, then on the plugins page disable the esp, for rules this file will always be before anything it asks, if you mess up and put if after some of these mods on this list it will break the mod, a good example is Embers XD
2.ENB Binary– [link]
Click the latest build, scroll down and click the download arrow, create a folder, name it ENB Binary and extract the download to that folder, open it up and select Wrapper version Folder and copy/paste 2 files from here titled (d3d11.dll) and (d3compiler_46e.dll) into your Skyrim folder
3.4. ENB Helper SE– [link]
Download Main file with a mod manager download and in Vortex install and enable.
4.Cathedral Weathers and Seasons– [link]
Download the main top file with a mod manager download, in Vortex install and enable
5.Guide to Weather Creation and Realtime Snow Cover– [link]
Under Main files download the third one titled Weather Maker with a mod manager download, in
Vortex install and enable
This mod allows you to assign a power called weather helper and whenever you cast it, it allows
you to change the weather to whatever you want
6.Dynamic Volumetric Lighting and Sun Shadows– [link]
Download the main file and the Optional file titled DVLaSS Skyrim Underside, both with mod manager downloads, in Vortex install and enable both
Rudy ENB SE for Cathedral Weathers– [link]
Downlaod the top 2 main files part 1 and part 2 with mod manager downloads, in Vortex install and enable both, for the rules you will put Part 1 after Catherdal Weathers, Now download the third main file with a manual download, extract the download and open it up, open the folder titled ! Catherdral Weathers Version, then open the next folder titled [ Skyrim SE folder ], then copy/paste all the contents of that folder into your Skyrim game folder, now that is done go back to the enb folder and go to the Addons folder, pick out whatever DOF you want, i went with Default, open the DOF folder and copy the enbdepthoffield.fx.ini and paste it in the enbseries folder we just put in your game folder and select Replace.
Rudys Addon Folder
For all these add on files, you just drag them into Vortex at the bottom into the box titled Drop Files and install and enable them, on a few of them, they have conflict rules for mods that you have not installed yet, if you are new to the guide and installing this straight from the start, Ill have these rules listed after the appropriate mods
-Rudy ENB DVLaSS ini, for the rules place it after Dynamic Volumetric Lighting and Sun Shadows
-Rudy ENB SE Fix for Blinding Fogs.rar, for the rules place it after the particle patch
-Rudy ENB Hawks and Solstheim Birds FIX, for the rules this will go after Bellyaches Animal and Creature pack and after SMIM
-Rudy ENB Night Sky
-Rudy_ENB__Snow_by_lazy4466
-Rudy ENB Vanilla Clouds 2k or 4k only use one
-Rudy ENB Wonders of Weather FIX, for the rules this will go after the Wonders of Weathers mod
If you want different rain drop textures then go into a folder titled Optional rain drops textures inside the ADDONS folder and pick which one you want, I like the one titled drop, you go in its folder and you copy/paste the enbraindrops.png into the enbseries folder inside your game folder, same way we did depth of field
Now boot your normal Skyrim game launcher and turn off these settings
go to options, advanced and turn off Screen Space
Ambient Occlusion, Snow Shader, Lens Flare
Anytime you change anything on the enb menu you have to click save configuration or you will have to make these changes again every time you boot your game. Once in game hold Enter and Shift to pull up the enb menu, on the right side you will see ENBPOSTPASS.FX, click it to open it up, scroll down until you see Enable Letterbox bars and uncheck it and click Save Configuration in the top left corner of the enb menu, the rest of this stuff I recommend leaving alone, they are set the way Rudy set it for a reason
A few important things:
– You need to use in-game volumetric rays. Many fog effects and “DVLaSS” mod requires them, make sure that in SkyrimPrefs.ini, “bVolumetricLightingEnable” is set to “1”
– You need in-game DoF, “ENB underwater” effect requires it, even if game DoF disabled in the enblocal.ini file.
– Make sure that in SkyrimPrefs.ini, these lines look exactly like this:
bSAO_CS_Enable=0
bSAOEnable=0
bEnableImprovedSnow=0
bVolumetricLightingEnable=1
bUse64bitsHDRRenderTarget=1
bDrawLandShadows=1
fGamma=1.0000
bDoDepthOfField=1
A Fixed version of Enb Light is at the bottom of the guide in section titled New Environment and LOD, just install it last, it has textures in the mod folder for mods in this guide
Enb and Weather
They are tons of good Enb’s out there, you can use any weather and enb combo you want with this mod list, however the lighting may be different, I choose Windows Shadows with the Rudy Cathedral Enhancer for my interior and my exterior is Tamerial Master Lights if you are a ELFX user then you will need patches on lots of the mods we install in the guide, on the install windows of lots of the mods it has availble patches that you will have to select, and you will have to do your own research on what else you may or may or may not need, this list is compatibility with ELE, so I will list some great Enb suggestions, and you will have to read there descriptions and see what weather and lighting they support and then i’ll give install instructions for the one I am using at this time
I’m sure they are lots of great Enb’s out there, but I only use Enb’s from Rudy and Firemanaf, here they are below
Some of the Best enb’s can be found here on this Authors file page
FIREMANAF– https://www.nexusmods.com/skyrimspecialedition/users/7030278?tab=user+files
Touch Of Natural Tamriel (TNT) ENB– [link]
Semirealis ENB– [link]
SkyrimSE Re-Engaged ENB– [link]
Ominous ENB– [link]
Intrigued ENB– [link]
Rudy ENB SE for Obsidian Weathers – [link]
Which ever one you choose make sure it is what you want before you start your playthrough, you can’t remove a weather mod mid game, so if you pick Cathedral Weathers you can switch to any catherdral enb at any time, but you can’t just decide to switch to Obsidian Weathers mid game
During Mod Testing, you can pull up the in game enb menu by select enter and shift at the same time, and toggle the enb on and off to get a better look at textures, keep in mind an enb will not look it’s best until you get there recommended lighting mods installed, and when you are trying out enb’s always remove the previous one by deleting it’s files, you don’t overwrite and replace or the previous enb can leave left over settings that the new one does not have to overwrite and replace because it does not include them and the new want look as intended because of this.
1.Skyrim particle patch for ENB– [link]
Scroll down to Special Edition then click Google Drive, then click the Arrow in the top Right of screen, then click download anyway, Drag the zip into Vortex, drop it in the box at the bottom of the screen titled Drop Files, install and enable, then on the plugins page disable the esp, for rules this file will always be before anything it asks, if you mess up and put if after some of these mods on this list it will break the mod, a good example is Embers XD
2.ENB Binary– [link]
Click the latest build, scroll down and click the download arrow, create a folder, name it ENB Binary and extract the download to that folder, open it up and select Wrapper version Folder and copy/paste 2 files from here titled (d3d11.dll) and (d3compiler_46e.dll) into your Skyrim folder
To install an enb, after you download and extract it open it up and copy/paste the enbseries folder, enblocal.ini, amd enbseries.ini into your main game folder, some of them have multiple versions in the folder or different presets, you just have to read the descriptions and know whats in there, if you ever need help just post a comment on the guide
3. ENB Helper SE– [link]
Download Main file with a mod manager download and in Vortex install and enable.
4.Cathedral Weathers and Seasons– [link]
Download the main top file with a mod manager download, in Vortex install and enable
Guide to Weather Creation and Realtime Snow Cover– [link]
Under Main files download the third one titled Weather Maker with a mod manager download, in
Vortex install and enable
This mod allows you to assign a power called weather helper and whenever you cast it, it allows
you to change the weather to whatever you want
Rudy ENB SE for Cathedral Weathers– [link]
Download the old file titled Rudy ENB SE for Cathedral Weathers v2.0 with a manual download, extract the folder and open it up, open the folder titled ! Catherdral Weathers Version, then open the next folder titled [ Skyrim SE folder ], then copy/paste all the contents of that folder into your Skyrim game folder, now that is done go back to the enb folder and go to the Addons folder, pick out whatever DOF you want, i went with Default, open the DOF folder and copy the enbdepthoffield.fx.ini and paste it in the enbseries folder we just put in your game folder and select Replace.
In Rudy enb folder, there is a folder titled Addons, grab the file titled Rudy ENB SE Fix for Blinding Fogs.rar and drop it into Vortex in the box at the bottom titled Drop Files, then install and enable it, for the rules place it after the particle patch
In Rudys Enb folder, in the Addons folder grab the file titled Rudy_ENB__Snow_by_lazy4466.rar and drop it into Vortex in the box at the bottom titled Drop Files, then install and enable it
In Rudys Enb folder, in the Addons folder grab the file titled Rudy ENB Night Sky.rar and drop it into Vortex in the box at the bottom titled Drop Files, then install and enable it
Now boot your normal Skyrim game launcher and turn off these settings
go to options, advanced and turn off Screen Space
Ambient Occlusion, Snow Shader, Lens Flare
Anytime you change anything on the enb menu you have to click save configuration or you will have to make these changes again every time you boot your game. Once in game hold Enter and Shift to pull up the enb menu, on the right side you will see ENBPOSTPASS.FX, click it to open it up, scroll down until you see Enable Letterbox bars and uncheck it and click Save Configuration in the top left corner of the enb menu, the rest of this stuff I recommend leaving alone, they are set the way Rudy set it for a reason
Rudy’s Instructions
A few important things:
– You need to use in-game volumetric rays. Many fog effects requires them, make sure that in SkyrimPrefs.ini, “bVolumetricLightingEnable” is set to “1”
– You need in-game DoF, “ENB underwater” effect requires it, even if the game’s DoF is disabled in the enblocal.ini file.
– Make sure that in SkyrimPrefs.ini, these lines look exactly like this:
bSAO_CS_Enable=0
bSAOEnable=0
bEnableImprovedSnow=0
bVolumetricLightingEnable=1
bUse64bitsHDRRenderTarget=1
bDrawLandShadows=1
fGamma=1.0000
bDoDepthOfField=1
A Fixed version of Enb Light is at the bottom of the guide in section titled New Environment and LOD, just install it last, it has textures in the mod folder for mods in this guide
Fixes and Quality of life changes
1.Unofficial Skyrim Special Edition Patch–
[link]
Download the main file with a mod manager download, in Vortex install and enable
2.Address Library for SKSE Plugins–
[link]
Download the Main file All in one with a Mod Manager Download, in Vortex install and enable.
3.SSE Engine Fixes (skse64 plugin)–
[link]
Download Part 1 with a mod manager download, and download Part 2 with a manual download,
first take Part 2 and extract it in to a new folder, then copy/paste the contents into your game
folder under Steam/steamapps/common/Skyrim Special Edition, then in Vortex install and
enable Part 1 Engine Fixes.
Visual Studio 2015, 2017 and 2019– [link]
Scroll down underneath Visual Studio 2015, 2017 and 2019 and click the file titled x64: vc_redist.x64.exe , then run it and follow the prompts, You more then likely already have this, you can open up Control Panel, go to Uninstall a Program and scroll down and see if you have it, if you do you will see it as Microsoft Visual C++ 2015-2019 Redistributable (x64), if you don’t install it and reboot your PC afterwards
4.PapyrusUtil SE – Modders Scripting Utility Functions-
[link]
Download the main file with a mod manager download, in Vortex install and enable
5.powerofthree’s Papyrus Extender for SSE –
[link]
Download the old file titled Papyrus Extender SSE – 4.3 with a mod manager download, in Vortex install and enable
6.SkyUI– [link]
Download the main file with a mod manager download, in Vortex install and enable
7.A Quality World Map– [link]
Download the main file titled A Quality World Map – Classic with All Roads with a mod
manager download, in Vortex install and enable
8.Immersive HUD – iHUD Special Edition–
[link]
Download the main file with a mod manager download, in Vortex install and enable
9.Stones of Barenziah Quest Markers–
[link]
Download the main file with a mod manager download, in Vortex install and enable
10.Rich Skyrim Merchants–
[link]
Download the main file with a mod manager download, in Vortex install and enable
On the install window pick how much gold you want them to have and I select No on the Perk
Changes
11.The Paarthurnax Dilemma–
[link]
Download the main file with a mod manager download, in Vortex install and enable
12.Oblivionesque Category Icons For SkyUI SE– [link]
Download the main file with a mod manager download, in Vortex install and enable
13.Skyrim SE Main Font Replacer (Oblivion)– [link]
Download the main file with a mod manager download, in Vortex install and enable
14.Oblivionesque Active Effects For SkyUI SE– [link]
Download the main file with a mod manager download, in Vortex install and enable
15.Crimson Nirnroot Satchel– [link]
Only download if you do not want to search all over Blackreach for Crimson Nirnroots
Download either main file with a mod manager download, in Vortex install and enable
16.SkyUI SE – Flashing Savegames Fix– [link]
Download the main file with a mod manager download, in Vortex install and enable
17.Blacksmith Forge Water Fix – Special Edition– [link]
Download the second main file titled Blacksmith Forge Water Fix SE – USSEP with a mod manager download, in Vortex install and enable
18.NPC AI Process Position Fix – SSE– [link]
Download the main file with a mod manager download, in Vortex install and enable
19.No Killmoves – No Killcams – No Killbites SE– [link]
Download the main file with a mod manager download, in Vortex install and enable
20.No Spinning Death Animation– [link]
Download the second file titled No Spinning Death Animation MERGED with a mod manager download, in Vortex install and enable
21.Better Jumping SE– [link]
Download the main file with a mod manager download, in Vortex install and enable
Base Textures and Mesh Fix Mods
1.Skyrim Landscape and Water Fixes– [link]
Download the main file with a mod manager download, in Vortex install and enable, on the install window select Landscape Fixes for Grass Mods Patch, Walkway Wall Fix SMIM and then nothing else
2.Assorted mesh fixes– [link]
Download the main file with a mod manager download, in Vortex install and enable, for the rules place this after Landscape and water fixes
3.Project Clarity – Clutter Textures Redone– [link]
This will Upscale some things that they are no texture mods for, the majority of this is gonna be overwritten, this mod will always come Before everything it conflicts with on conflict rules, Remember that, because some of the texture replacers on down the guide had no conflicts, they replaced pure vanilla items, so now they will conflict with this mod, and I have not went through the guide to type that after every mod this conflicts with, so remember this mod will always be before anything it asks
Download the second main file titled Project Clarity – Clutter Half Res with a mod manager download, in Vortex install and enable
4.Skyrim Realistic Overhaul– [link]
When you get here scroll down untill you get to the files box, We will be downloading all 3 parts
and the update, right click all 4 files and open them in another window, then go to there windows
and you will see a box that says Download Now, click it on all 4 files and get them downloaded.
Part 1
Once downloaded we are going to drag the zip files into Vortex one at a time and set the rules. From your File Explorer grab Part one and drag it into Vortex and drop it into the big box at the bottom titled Drop Files, then install and enable it, then it will show up as Texture 1 in Vortex.
Part 2
Do the same for Part 2, it will now show up as Texture 2
Part 3
Do the same for Part 3, it will now show up as Texture 3
Update
Do the same for the Update, it will now show up as Texture 4, for the rules place Texture 4 after everything that it asks
5.Static Mesh Improvement Mod – SMIM–
[link]
Download the main file with a mod manager download, in Vortex install and enable, on the install
window select Skyrim 2016 Special Edition: Everything, for the rules place SMIM after everything
it asks
6.Unofficial Material Fix– [link]
Download the main file with a mod manager download, in Vortex install and enable, for the rules place this after anything it asks
7.Ruins Clutter Improved– [link]
Download the first main file titled Ruins_Clutter_Improved SE with a mod manager download, in
Vortex install and enable, for the rules place Ruins Clutter Improved after everything it asks
8.Ruins Clutter Improved – Fixes–
[link]
Download the main file with a mod manager download, in Vortex install and enable, for the rules
place it after Ruins Clutter Improved
9.High Poly Project– [link]
Download the main file with a mod manager download, in Vortex install and enable, for the install window select install everything, next window for patches don’t select anything, for the rules place this after everything it asks
10.Unofficial Material Fix High Poly Patch– [link]
Download the Optional file titled Unofficial Material Fix – High Poly Project patch with a mod manager download, in Vortex install and enable for the rules place this after everything it asks
11.Noble Skyrim Mod HD-2K–
[link]
Download the main file full pack 2k with a mod manager download, in Vortex install and enable,
for the rules place Noble Skyrim after everything it ask
-Go back to the mod page and download SMIM Patch under Update Files with a mod
manager download, in Vortex install and enable, for the rules place the Noble Skyrim SMIM Patch
after everything it asks.
12.Dlizzio’s Mesh Fixes– [link]
Download the main file and the optional file titled HD LODs Textures SE Mesh Fix with mod manager downloads, in Vortex install and ebnable both files, for the rules place the main file after anything it asks
13.Whiterun Mesh Fixes– [link]
Download the main file with a mod manager downlolad, in Vortex install and enable, for the rules place this after SMIM
14.Mesh Patch for Various Mods– [link]
Download these 3 files with mod manager downloads, in Vortex install and enable all 3, for the rules place each after everything it asks
Dlizzio’s Mesh Fixes – Assorted Mesh Fixes Patch
SMIM – Assorted Mesh Fixes Patch
Unofficial Material Fix – Assorted Mesh Fixes Patch
Environment
1.Tamrielic Textures SE 1 – Landscapes– [link]
Choose what resolution you want, I went with Tamrielic Textures SE 1 Landscapes 2K, download with a mod manager download, on the install window select Projected Snow Maps, in Vortex install and enable, for the rules place this after everything it asks
2.Folkvangr – Grass and Landscape Overhaul– [link]
Download the main file with a mod manager download, in Vortex install and enable, for the rules place this after anything it asks
-OR-
Tamrielic Grass– [link]
Download the main file with a mod manager download, in Vortex install and enable, for the install window I went with, uncheck ESLyfied ESP, Green Tundra Grass, and Autumn Rift Grass
3.Landscape Fixes For Grass Mods– [link]
Download the main file with a mod manager download, in Vortex install and enable
4.Skyrim 3D Trees and Plants– [link]
Download the main file with a mod manager download, in Vortex install and enable, for the rules place this after anything it asks
Snow textures for 3d Trees– [link]
If you want 3d trees to use the snow texture from Tamerlic Landscape mod, download this and extract it, then steamapps/common/Skyrim Special Edition/Data/textures/landscape/S3DTrees_and_Plants, inside there delete 2 textures s3dtrees_snow_01.dds and s3dtrees_snow_01_n.dds and copy/paste the 2 I provided and go Deploy your mods in Vortex and select Confirm to use newer files
5.Skyrim 3D Landscapes– [link]
Download the top main file only titled Skyrim 3D Landscapes, with a mod manager download, in Vortex install and enable
6.Aspens Ablaze– [link]
Download the main file titled Aspens Ablaze 2.0 with a mod manager download, in Vortex install and enable, for the install window select what leaf color you want, they all look good, I am using Summer for now, but that may change, then select Install for Lod Assets
7.Aspens Ablaze 3D Trees Patch– [link]
Download the main file with a mod manager download, in Vortex install and enable
8.TREES ADDON SE– [link]
Download the main file with a mod manager download, in Vortex install and enable, for the rules place it after everything it asks, then go back to the mod page and download the 2 Optional file titled Desaturated Kings Tree Leaves and Kings Trees Mesh fix plus Updated Ultralod with a mod manager download, in Vortex install and enable both, for the rules place them both after anything it asks
9.Leafeater’s Whiterun Tree Overhaul SE– [link]
Download the top main file titled Leafeater’s Whiterun Tree Overhaul with a mod manager download, in Vortex install and enable
10.Morthal Tree Overhaul– [link]
Download the main file with a mod manager download, in Vortex install and enable
11.Whiterun Forest Borealis– [link]
This will take some performance away, read the description and test it out first
Download the main file with a mod manager download, in Vortex install and enable
12.Water for ENB– [link]
Download the main file with a mod manager download, in Vortex install and enable, on the install window pick what you want, I went with 4k, Nordic Blue, 4k, for the rules place this after anything it asks
13.Bright Waterfall Fix for ENB– [link]
Download the second main file titled Water for ENB Particle Patch, in Vortex install and enable, for the rules place this after anything it asks except Rudy’s Snow texture, place it before that
14.Better Dirt Cliffs and Alphas– [link]
Choose which resolution you want, I went with the main file 4k, download with a mod manager download, in Vortex install and enable, for the rules place this after everything it asks
15.Better Dynamic Snow SE– [link]
Download the top main file with a mod manager download, in Vortex install and enable, on the install window select Vanilla Replacement, then select None, for the rules place this mod After smim and Before Tamrielic Landscapes
projecteddiffuse snow textures– [link]
Download this and extract it, then go to steamapps/common/Skyrim Special Edition/Data/textures/effects
in that effects folder delete all the projecteddiffuse.dds, projectednoise.dds, projectednormaldetail.dds textures, so they will be nothing titled projected in there, after copy/paste the textures I provided in there, and go deploy your mods in Vortex and select Confirm to use newer files
16.Mushroom Retextures Revamped– [link]
Pick between 2k or 4k, I went with 4k, and download that and the optional file titled S3D Trees and Plants patch with a mod manager download, in Vortex install and enable the main file, for the rules place it after High Poly Project, then install and enable the optional file 3d trees patch
17.Unique Flowers and Plants SSE– [link]
This is a Edited version of Unique Flowers and Plants SSE by Wizkid, it goes very well with this setup
Click the Download arrow in the top right corner, after drag the download into Vortex and drop it into the box at the bottom titled Drop Files, then install and enable
18.Deathbell by Mari– [link]
To get this file to work we have to delete the deathbell from 3d trees using xedit, its real easy, i’ll walk you through it
Download the main file with a mod manager download, in Vortex install and enable, on the install window pick what you want, I went with 4k, Purple, and Blue Foliage, Don’t select the Addon
On the dashboard launch SSE Edit, on the first window click ok, the next window is all your plugins you have enabled, all there boxes should already be Xed, if not just right click and select all and click ok, next box click ok, then scroll down until you see S3DTrees NextGenerationForests.esp, then click the box with the plus in it to expand, then go down to Tree, click the box to expand, and look for these 2 lines, they both say Deathbell out to the far right under the Name tab, 000BB94B-TreeFloraDeathBell01-Deathbell and the one directly below it will say Deathbell, now remove them both one at a time, by right clicking on it and select Remove, then select Yes and make sure and do them both, now select the X at the top right corner to close it out, then select Ok to Save the changes, now back in Vortex on the Mods tab, deploy your mods and select Confirm to use the newer file
If you ever want to revert back to the 3d trees deathbell, then just uninstall Deathbell by Mari on Vortex, and the go to skyrim 3d trees and plants and right click and select reinstall, after deploy your mods, and that wipes the changes we made in xedit
Environment 2
19.Swamp fungal pod by Mari– [link]
Download the main file with a mod manager download, in Vortex install and enable, on the install window pick your resolution, I went with 4k
20.Rudy HQ – Hay SE– [link]
Downlaod the main file with a mod manager download, in Vortex install and enable, on the install window select which one you want, I went with 2k Vesion03, I recommend you do the same, it looks great, for the rules place this after everything it asks
21.Glowing Mushrooms by Mari– [link]
Download which main file you want I went with Blue, with a mod manager download, in Vortex install and enable, on the install window pick your resolution, I went with 4k, for the rules place this after anything it asks
22.Rally’s Hanging Moss– [link]
Pick which one you want, I went with Desaturated, download with a mod manager download, in Vortex install and enable, for the rules place this after everything it asks
23.4K HQ Puddles– [link]
Download which ever file you want, I went with 4K Puddle No Ripples, with a mod manager download, in Vortex install and enable
24.HD Stone Quarry and Clay Deposit SE– [link]
Pick what resolution you want, I went with 4k, download with a mod manager download, in Vortex install and enable
25.CC’s Enhanced Ore Veins SSE Edition– [link]
Pick what resolution you want, I went with 4k, download it and the Update file titled Enhanced Ore Veins – 8.0.1 – Patch with a mod manager download, in Vortex install and enable both files
26.4K Tendril Vines– [link]
Download the main file with a mod manager download, in Vortex install and enable, for the rules place this after Project Clarity Clutter
-Sky
1.Smooth Sky mesh – SSE– [link]
Download the main file, with a mod manager download, in Vortex install and enable
If you are using the new Rudy Enb, you don’t download this, this is for old Rudy Enb users and users of any other Enb
2.Wonders of Weather– [link]
Download the main file with a mod manager download, in Vortex install and enable, for the install
window, I selected Less Opaque Splashes
3.Storm Lightning for SSE and VR (Minty Lightning 2019)–
[link]
Download the main file with a mod manager download, in Vortex install and enable, for the install
window select Skyrim Special Edition, for SSE Version 1.5.97, for plugin select ESP, for all Halo I
went with Halo Off
3.Obsidian Mountain Fogs– [link]
Only install this if you are using Cathedral Weathers, it is already included in Obsidian Weathers
Download the main file with a mod manager download, in Vortex install and enable
4.Better Moons– [link]
Download the main file with a mod manager download, in Vortex install and enable
If using Rudy Enb like me, don’t forget his awesome night sky listed in the Enb section
Main Architecture Texture Overhauls
1.Illustrious Whiterun SE– [link]
Choose what resolution you want, I went with 2k from the Optional files, download with a mod manager download, in Vortex install and enable, for the rules place this mod after everything it asks
Side Note- You do not need the landscape mods that are listed as requirements for this mod, they are not requirements, but recommendations from the mod author and you can not use SSE Parallax Shader Fix with Better Dynamic Snow SE v3.3 the version listed in my guide, just disregard those requirements, I have listed everything you need in my guide
2.Skyland – Solitude– [link]
Download the main file with a mod manager download, in Vortex install and enable, for the rules place this mod after everything it asks
3.Skyland Riften– [link]
Download the top main file with a mod manager download, in Vortex install and enable, for the rules place this mod after everything it asks
4.Frankly HD Markarth – The White City Redux- [link]
Choose what resolution you want, I went with 4k on this one, 2k did not look near as sharp and 4k has no noticeable performance impact for me, download with a mod manager download, in Vortex install and enable, on the install window check both Options for Exterior and Interior and Dwemer Ruins, for the rules place this mod after everything it asks
5.Northfire’s Windhelm– [link]
Download the main file with a mod manager download, in Vortex install and enable, for the rules place this mod after everything it asks
6.Farmhouses and Farm Towns by CleverCharff 4K 2K– [link]
Choose what resolution you want, I went with 2k, download with a mod manager download, in Vortex install and enable, for the install window pick what you want, I went with Normal wood, Wood floor fix and Ceramic, for the rules place this mod after everything it asks
7.Farmhouse Chimneys SE– [link]
Download the main file with a mod manager download, in Vortex install and enable, on the install window I passed on the Clay Chimney Stacks, if you like them select them, but pass on all the other stuff, those are patches for mods not on my mod list
8.College of Winterhold HD SE– [link]
Pick what resolution you want, I went with 4k, download with a mod manager download, in Vortex install and enable, for the install window select College textures, Crystal and Orbs Enblight and Doors, for the rules place this after everything it asks
9.Skyland – High Hrothgar– [link]
Download the main file with a mod manager download, in Vortex install and enable, for the rules place this mod after everything it asks
10.Sovngarde HD– [link]
Pick which resolution you want, I went with 4k, download with a mod manager download, in Vortex install and enable, for the rules place this after Texture 1
11.Underground – a dungeon texture overhaul– [link]
Download the top main file with a mod manager download, in Vortex install and enable, on the install window select Custom installation, then Caves and Mines only, for the rules place this after everything it asks except Better Dirt Cliffs and Alphas, it needs to be placed before that mod
12.Skyland – Imperial Forts and Dungeons– [link]
Download the main file with a mod manager download, in Vortex install and enable, for the rules place this mod after everything it asks
13.Rudy HQ – Nordic Ruins SE– [link]
Download all 6 files here with a mod manager download, in Vortex install and enable the main file first, for the rules place it after everything it asks, then install and enable Chests addon place it after everything it asks, then install and enable the 4k textures add on for the rules place it after everything it asks, then install and enable the other 3 files and for there rules place them after everything it asks
14.Skyrim 3D StoneWalls– [link]
Download the main file with a mod manager download, in Vortex install and enable, for the rules place this after everything it asks
15.RUSTIC WINDOWS – Special Edition– [link]
Download the second main file with a mod manager download. in Vortex install and enable, for the rules place this after everything it asks except Northfires Windhelm, place it before this mod, and then for College of Winterhold HD SE, you should test, place it before and go look at the windows, then place it after and go look at the windows, you decide which ones you like better
16.High Poly Blackreach Mushrooms– [link]
Download the main file with a mod manager download, in Vortex install and enable, for the rules place this after the particle patch and smim
17.Blackreach Tentacle Mesh Fix– [link]
Download the main file with a mod manager download, in Vortex install and enable
18.Better Blackreach Clutter– [link]
Download all 4 of the main files with a mod manager download, in Vortex install and enable, for the rules place them after anything it asks
19.Ice Cave Parallax Improved– [link]
Download the main file with a mod manager download, in Vortex install and enable, for the rules place this after smim
Now we have the Cities of The North mods, you may or may not want them, I use them and love them, they completely redo Dawnstar, Winterhold, and Morthal, giving them a unique identity instead of just plain old farm houses, you will be able to tell them apart now, and they look awesome, and fit right into the Skyrim world, but we have to install these mods first for compatibility issues, so they can be patched from the install windows, if you decide to skip them, make sure and get all the lightning stuff listed above them.
Main Architecture Texture Overhauls 2
– All the Lighting and AI Overhaul
1.Window Shadows by HHaleyy– [link]
Click the download arrow in the top right corner, then drag the download into Vortex and drop it in the box at the bottom title Drop Files, in Vortex install and enable, on the install window under Enhancer it comes down to what weather and enb you are using, if you went with Rudy enb with Cathedral weathers then you pick Enhancer for Rudy Cathedral, for all other weathers and enb’s just pick Enhancer or just base windows shadows, no enhancer it’s up to what you like, I went with enhancer for Rudy and none of the extra stuff, for patches make sure all 3 of the cities of the north are selected, if you plan to use those from this guide, this is the interior lighting mod for this mod list, for the rules place it after the particle patch
2.Smoking Torches and Candles – [link]
Download the main file with a mod manager download, in Vortex install and enable, on the install window select (Subtle), if you don’t then it will not work on the horncandles mod that comes later, then select Max Quality, then ESP for the rules place this after everything it asks, except Rudy HQ Nordic Ruins stuff, it needs to be Before those
3.Embers XD– [link]
Download the main file with a mod manager download, in Vortex install and enable, on the install window select High quality, here I recommend Orange/Red it looks better with enb, then select ESP (EmbersHD.esp), then install all the following add ons, then make sure and check box Smoking Torches And Candles boxes for Compatibility Patches, for the rules place this after everything it asks
4.Lanterns Of Skyrim II– [link]
Download the main file with a mod manager download, in Vortex install and enable, on the install window select LoS II- Tamriel Master Lights (No Cities) Addon and select the SMIM patch, for the rules place this after the particle patch and high poly project, then go back to the mod page and download the Update file titled LoS II – Tamriel Master Lights Standard Version update with a mod manager download, in Vortex install and enable, for the rules place this after the main mod, if you go there and that update file is not there, then that means he updated the main file and this has been added, so let me know in the comment section
5.WiZkiD Signs– [link]
Download the main file with a mod manager download, in Vortex install and enable, on the install window select WiZkiD Signs for Lanterns of Skyrim II users, for the rules place this after everything it asks
6.SD’s Horn Candles SE– [link]
Pick your resolution, I went with 4k, download it and the optional file titled SD’s Horn Candles SE – STAC Patch (subtle version) with a mod manager download, in Vortex install and enable the main file, for the rules place it after everything it asks, then install and enable the optional file STAC Patch, for the rules place it after everything it asks
Afterwards run Bethini on Skyrim Special Edition, and go over to the Detail tab, on the left side for Particles, change it to 7500, then go back to the Basic tab and Save and Exit.
7.AI Overhaul SSE– [link]
Download the main file with a mod manager download, in Vortex install and enable
-Cities of the North
Better Dynamic Snow SE v3.3 the one I use, conflicts with this mod, not the rules in Vortex, you have to run xedit and apply conflict filter to see it, but it caused some wacky stuff to happy, so we need to make sure these plugins Cities of the North plugins load after Better Dynamic Snow SE plugin, i’ll list the solution down below, and on the install window it lists a patch for better dynamic snow, but don’t select it, it is a patch for v2.11.0, not the version used by me, all so the mod author recommends only installing this on a new save, I tested it out on a vanilla save, before starting a new game and it worked completely fine, on the patch collection installers, if you choose to skip some of the mods that we patch then don’t select the patch for it
1.Cities of the North – Dawnstar– [link]
Download the main file with a mod manager download, in Vortex install and enable, then go to the plugins page and at the top select Manage Rules and create this rule, after select Add, then close the box and click Sort Now at the top
cotn-dawnstar.esp / needs to load after/ better dynamic snow se.esp
2.Cities of the North – Dawnstar Patch Collection– [link]
Download the main file with a mod manager download, in Vortex install and enable, on the install window, first page select nothing, next page select AI Overhaul, Better Dynamic Snow v3, Guards Armor Replacer, then scroll down a bit until you see Lanterns of Skyrim II, and select Lanterns of Skyrim II, then under Embers XD select Embers HD.esp
3.Cities of the North – Morthal– [link]
Download the main file with a mod manager download, in Vortex install and enable, then go to the plugins page and at the top select Manage Rules and create this rule, after select Add, then close the box and click Sort Now at the top
cotn-morthal.esp / needs to load after/ better dynamic snow se.esp
4.Cities of the North – Morthal Patch Collection– [link]
Download the main file with a mod manager download, in Vortex install and enable, on the install window, first page select nothing, next page select Al Overhaul, Lanterns of Skyrim II, Morthal Tree Overhaul, then scroll down a bit until you see Embers XD and select Embers HD.esp and under Better Dynamic Snow select Version 3
5.Cities of the North – Winterhold– [link]
Download the main file with a mod manager download, in Vortex install and enable, then go to the plugins page and at the top select Manage Rules and create this rule, after select Add, then close the box and click Sort Now at the top
cotn-winterhold.esp / needs to load after/ better dynamic snow se.esp
6.Cities of the North – Winterhold Patch Collection– [link]
Download the main file with a mod manager download, in Vortex install and enable, on the install window select AI Overhaul, Embers XD, LoS II Tamriel Master Lights, scroll down a little until you see Landscape and Water Fixes and select Non-JK, Lanterns of Skyrim II and select Non-JK, under Better Dynamic Snow select Version 3, under Embers XD select Embers HD.esp
DLC Texture Overhauls
1.Castle Volkihar HD – SE– [link]
Download which main file you want with a mod manager download, in Vortex install and enable, for the rules place this after everything it asks
2.Fort Dawnguard HD – SE– [link]
Download whichever main file you want and the Optional File titled Fort Dawnguard Doors collision material fix with mod manager downloads, in Vortex first install and enable the main file, on the install window select Main Files and Doors ESP, for the rules place this after everything it asks, then install and enable the optional file and for the rules place it after the main file
3.Arri’s Snow Elf Ruins Retexture Special Edition– [link]
Download the main file with a mod manager download, in Vortex install and enable, for the rules place this after everything it asks
4.Rally’s Raven Rock– [link]
Download the main file with a mod manager download, in Vortex install and enable, on the install window pick 2k or 4k and what LOD you want, for the rules place this after everything it asks
5.Rally’s Tel Mithryn– [link]
Pick your resolution, I went with 4k, download with a mod manager download, in Vortex install and enable, for the rules place this after everything it asks
6.Rally’s Riekling Outposts– [link]
Pick your resolution, I went with 4k, download with a mod manager download, in Vortex install and enable
7.Rally’s Solstheim Landscapes– [link]
Pick your resolution, I went with 4k, download with a mod manager download, in Vortex install and enable, for the rules place this after everything it asks
8.Rally’s Solstheim Plants– [link]
Pick your resolution, I went with 4k, download with a mod manager download, in Vortex install and enable, for the rules place this after everything it asks
9.ElSopa HD – Realistic Dark Elf Urns SE– [link]
Pick your resolution, I went with 4k, download with a mod manager download, in Vortex install and enable, place this after anything it asks
10.Remiros’ Dragonborn Alcohol HD– [link]
Pick your resolution, I went with 4k, download with a mod manager download, in Vortex install and enable
11.CleverCharff’s Apocrypha 4K 2K– [link]
Pick your resolution, I went with 4k, download with a mod manager download, in Vortex install and enable, place this after anything it asks
12.Soul Cairn HD– [link]
Pick your resolution, I went with 4k, download it with a mod manager download, in Vortex install and enable, for the rules place this after anything it asks
13.Rally’s Solstheim Shrines– [link]
Download the main file with a mod manager download, in Vortex install and enable, for the install window pick what you want
14.High Poly Soul Husks– [link]
Download the optional file titled High Poly Soul Husks for cunny1975’s textures with a mod manager download, in Vortex install and enable
15.Soul Husk Retexture– [link]
Pick your resolution, but download one of the files titled Soul Husk for wSkeever High Poly Soul Husks, with a mod manager download, in Vortex install and enable
16.Rally’s Lava– [link]
Download the main file with a mod manager download, in Vortex install and enable
Effects
1.DUST By Ramccoid– [link]
download the second main file titled DUST v6 x2048 with a mod manager download, in Vortex install and enable, for the rules place this after the particle patch
2.DANDELION SEEDS by Ramccoid– [link]
Download the main file titled DANDELION SEEDS v5 x2048 with a mod manager download, in Vortex install and enable
3.DROPS By Ramccoid– [link]
download the main file titled DROPS v3 x2048 with a mod manager download, in Vortex install and enable, for the rules place this after the particle patch
4.ELECTRIFY S.E.– [link]
Download the second main file titled ELECTRIFY SEv4 x2048 with a mod manager download, in Vortex install and enable, for the rules place it after everything it asks
5.Arctic – Frost Effects Redux– [link]
Download the main file with a mod manager download, in Vortex install and enable, for the install window I went with Ultra, then Realistic Hue, then Standard, then Frost Meshes Patch (ESL-Tagged),for the rules place it after everything it asks
6.Frozen Electrocuted Combustion– [link]
Test this mod out make sure you want it, it can cause frame drops in combat and it is a scripted mod, if you choose to skip it, you can uninstall it’s requirement mod powerofthree’s Papyrus Extender from the first section, if you have issues with every kill turning intop ash then adjust this mod in the MCM
Download the old file titled Frozen Electrocuted Combustion – 4.8 with a mod manager download, in Vortex install and enable
7.Deadly Spell Impacts– [link]
Download the main file with a mod manager download, in Vortex install and enable, for the install window select Default
8.Improved Weapon Impact EFFECTS Correct Metal SE– [link]
Download the main file with a mod manager download, in Vortex install and enable
9.Enhanced Blood Textures SE– [link] download the first main file with a mod manager download, in Vortex install and enable, for the install window I left everything the way it was, next window, I went with High Res/ Default Color, next window don’t select anything, depending on what enb you are using you may see a grey box around bodies when you kill them, you can turn off your enb and see the box disappears, if this happens grab the Miscellaneous file on this mod page it may or may not fix it for your enb, its an alpha testing file, if not you will just have to deal with it, it very rarely happens, and seems to happen in the snowy areas, if you can’t deal with it then you can’t uninstall this mod mid game, it has scripts in it and will break your save if you remove it and continue to play, so make a choice if you wanna use it before you start a play through
10.ElSopa HD – Dirt Blast SE– [link]
Pick your resolution, I went with 4k, download with a mod manager download, in Vortex install and enable, for the rules place this after DUST By Ramccoid
11.Improved Sparks– [link]
Download the main file titled Grindstones – 10X Sparks with a mod manager download, in Vortex install and enable
On the same mod page download the main file titled Impact Effects – 2X Sparks with a mod manager download, in Vortex install and enable
12.Rally’s Candlelight and Magelight Fix SE– [link]
Download the main file with a mod manager download, in Vortex install and enable, on the install window select 60% Reduced Glow on Both, for the rules place this after the particle patch
13.CleverCharff’s Photorealistic Ash Pile– [link]
Download the topm main file with a mod manager download, in Vortex install and enable, for the rules place this after anything it asks
14.Holy Wards – a retexture– [link]
Download the main file with a mod managher download, in Vortex install and enable
15.SOUL by Ramccoid– [link]
Download the main file titled SOUL v2 x2048 with a mod manager download, in Vortex install and enable,
16.TB’s Improved Smoke (Beta)– [link]
Download the Update file titled TB’s Improved Smoke – 4K (Patched) with a mod manager download, in Vortex install and enable, for the rules place this after anything it asks
17.Realistic Ragdolls and Force– [link]
Download the main file with a mod manager download, in Vortex install and enable, on tghe install window pick what you want, I went with realistic on Everybody
18.R.A.S.S. Rain Ash And Snow Shaders– [link]
I do not know how this mod will look with other enb’s, I have only ever used it with Rudy Enb
Download the main file with a mod manager download, in Vortex install and enable, on the install window select Esp
Rudy ENB R.A.S.S. FIX– this is in the Rudy Enb download, you will find it in the ADDONS folder, just drag the file into Vortex and drop it in the box at the bottom titled Drop Files and install and enable
-IMPORTANT- once in game after the MCM detects this mod, pull it up, on the top menu titled Character and NPC Visual Effects change Wetness to Raindrops only, Enb is not compatible with the full effect, then under the second menu titled Camera Visual Effects, I turn everything off, you can all so check to remove the config book from your inventory, you want need it.
Other Texture Replacers
1.Helgen UV Tweaks– [link]
Download whichever version you want with a mod manager download, in Vortex install and enable, place this after Texture 2
2.Ancient Dwemer Metal– [link]
Pick your resolution, I went with 4k, then download both main files titled Ancient Dwemer Metal 4K with a manual download, then extract the download then go download this
SSE NIF Optimizer– [link]
Download the main file with a manual download, then extract the download and run the exe, direct it to the meshes folder of the extracted download, and select Optimize at the bottom, after recompress them with 7zip or whatever archive tool you use, and drag and drop the file into Vortex, on the mods tab in the big box at the bottom titled Drop Files, then install and enable, for the rules place this after anything it asks
3.CC’s HD Dwemer Automatons – Remastered– [link]
Pick your resolution, I went with 4k, download with a mod manager download, in Vortex install and enable
4.Dwemer Ichor Barrel 2K– [link]
Download the main file with a mod manager download, in Vortex install and enable
5.Ruins Canopic Jars– [link]
Download the main file with a mod manager download, in Vortex install and enable
6.Skyrim 3D Cooking– [link]
Download the main file with a mod manager download, in Vortex install and enable, for the rules place this Before embers xd, the after everything else it asks
7.Realistic HD Food Remastered– [link]
Download the main file with a mod manager download, in Vortex install and enable, for the rules place after everything it asks
8.Medieval Spirits– [link]
download the main file with a mod manager download, in Vortex install and enable, for the rules place this after everything it asks
9.Rudy HQ – Miscellaneous SE– [link]
Download the main file with a mod manager download, in Vortex install and enable, for the install window, under the second option for the smoking torches and candles mod select Rudy HQ Silverware Rudy 102 Version, on the next page under the second option for the smoking torches and candles mod select Rudy HQ Imperial Candles only, on the next page under the second option for the smoking torches and candles mod select what kind of pottery you want I went with Classic Brown 4k, on the next page
select none, next page select all 3 Additions, last page select nothing, unless you want your candles downgraded to 1k, for the rules place this mod after everything it asks
10.Rudy HQ – Standing Stones SE– [link]
Download the main file and the optional file with a mod manager download, in Vortex install and enable the main file, for the rules place it after everything it asks, then install and enable the optional file, for the rules place it after everything it asks
11.Skyland HD Road Signs– [link]
Download the main file with a mod manager download in Vortex install and enable, for the rules place this after everything it asks
12.Basic Dining Set Replacer– [link]
Pick your resolution, I went with 4k, Download with a mod manager download, in Vortex install and enable, for the rules place after everything it asks
13.Skyrim 3D Furniture– [link]
Download the main file with a mod manager download, in Vortex install and enable, for the rules place this after everything it asks
On the same mod page download the Miscellaneous file titled Skyrim 3D Furniture SMIM patch with a mod manager download, in Vortex install and enable, for the rules place this after everything it asks
14.Skyrim 3D Blacksmith– [link]
Download the main file with a mod manager download, in Vortex install and enable, for the rules place this after everything it asks, except Embers XD, it has to go before Embers XD
15.Skyrim 3D Misc– [link]
We are going to download 9 files from this page, most of them have no conflict rules because the stuff its changing is left vanilla, for the few that have rules, place them after everything it asks, download these files with a mod manager download and place them after anything it asks, Barrels, Buckets, Butterchurn, Chopping Block and Axe, Giant Mortar and Pestle, Mammoth Cheese, Markarth Cage, Tanning Rack, Traps
16.DK’s Realistic Nord Ships SSE– [link]
Download the main file with a mod manager download, in Vortex install and enable, then go to the plugins page and select Manage Rules at the top and create these rules
realisticnordships2.0.esp / needs to load after/ cotn-dawnstar.esp
realisticnordships2.0.esp / needs to load after/ cotn-morthal.esp
17.PELTAPALOOZA – Special Edition– [link]
Downlaod top main file titled PELTAPALOOZA Special Edition – FULL with a mod manager download, in Vortex install and enable, for the rules place this after everything it asks
18.RUGNAROK – Special Edition– [link]
Pick your quality, I went with straight 2k, download with a mod manager download, in Vortex install and enable, for this rules place this after everything it asks, except Northfires Windhelm, its needs to be before if you wanna see Northfires rug in game
19.Ennead Banners– [link]
Pick your resolution, I went with 4k, download with a mod manager download, in Vortex install and enable, for the rules place after everything it asks
20.HD Reworked Baskets– [link]
Download the main file with a mod manager download, in Vortex install and enable
21.Ancient Pottery– [link]
Download the main file with a mod manager download, in Vortex install and enable, for the rules place this after everything it asks, except Rudy stuff, place before all Rudy stuff
22.XxAwesome_PotionsxX SSE– [link]
Download the main file with a mod manager download, in Vortex install and enable
Other Texture Replacers 2
23.Small DLC and Misc Patch for XxAwesome_PotionsxX SSE– [link]
Download the main file with a mod manager download, in Vortex install and enable
24.BB – Big Books– [link]
Download the main file titled BB_4x_Full with a mod manager download, in Vortex install and enable
25.WiZkiD Carriages– [link]
Pick your resolution, I went with 4k, download with a mod manager download, in Vortex install and enable, for the rules place this after everything it asks
26.4K Carts– [link]
Pick which version you want, you dont need the carriage seat, I went with 4K Carts Clean, download with a mod manager download, in Vortex install and enable
27.SD’s Farmhouse Fences SE– [link]
Select what version and resolution you want, I went with 2k Farmhouse Fences SE Version 2, and the optional file to make the wood desaturated, for me this would be 2k Slightly Desaturated Version 2 Deffuse, download with a mod manager download, in Vortex install and enable, for the rules place after anything it asks, if you want the desaturated wood, like me, just install and enable after the main file and place it after the main file
28.Sepolcri – A complete Burial Sites overhaul- [link]
Download the main file with a mod manager download, in Vortex install and enable
29.Iconic Statues– [link]
Pick what resolution you want, I went with 2k, download with a mod manager download, in Vortex install and enable, for the install window Install all statues except Auriel, Shalidor, and Sovngarde Watcher, those 3 are already covered with our Architecture Overhauls, and don’t select the (SSos Version) on any of the statues, thats patches for another statue mod, for the rules place this mod after High Poly Project, after Texture1 and Texture 2
30.HD Reworked Falmer Architecture 4K– [link]
Download the main file with a mod manager download in Vortex install and enable, for the rules place this after anything it asks
31.NORDIC TENT 4K RETEXTURE– [link]
Pick your resolution, I went with 4k, download with a mod manager download, in Vortex install
and enable, for the rules place after anything it asks
32.Nordic Tent upgrade by Pfuscher– [link]
Download the main file with a mod manager download in Vortex install and enable, for the rules place this after anything it asks
33.4K Imperial Tents Retexture– [link]
Download the main file with a mod manager download, in Vortex install and enable, for the rules place this after anything it asks
34.HD Better Instruments 4K– [link]
Download the main file with a mod manager download, in Vortex install and enable, for the rules place this after anything it asks
35.Training Dummies Retexture 4k and 2k– [link]
Pick what resolution you want i went with 4k, download it and the Optional file titled Rain Barrel Fix and Retexture with a mod manager download, in Vortex install and enable both and place it after anything it asks
36.Archery Target Retexture 2k and 4k added– [link]
Pick what resolution you want from the optional files, the main files want work because of smim, download with a mod manager download, in Vortex install and enable, for the rules place this after anything it asks
37.Realistic HD Ingots Remastered– [link]
Download the main file with a mod manager download, in Vortex install and enable, for the rules place this after anything it asks
38.Realistic HD Ores Remastered– [link]
Download the main file with a mod manager download, in Vortex install and enable
39.RUSTIC SOULGEMS – Special Edition– [link]
Download the last main file titled RUSTIC SOULGEMS – Special Edition – FOMOD – English Only with a mod manager download, in Vortex install and enable, for the install window I went with 2k Textures, Unsorted, for the rules place it after everything it ask
40.Rudy HQ – More Lights for ENB SE – Soul Gems– [link]
Under Optional files download Rudy HQ – More Lights for ENB SE – Patch for Rustic Soulgems with a mod manager download, in Vortex install and enable, for the rules place this after Rustic Soulgems
41.JS Purses and Septims SE– [link]
Download the main file with a mod manager download, in Vortex install and enable, for the install window select your resolution and type of coin you want, on the next page select vanilla overwrite, for the rules place after SMIM
42.JS Dragon Claws SE– [link]
Choose your resolution, I went with 4k, download with a mod manager download, in Vortex install and enable, for the rules place it after Ruins Clutter Improved
43.JS Dragon Claws – Patches–
[link]
Download the main file titled JS Dragon Claws – Amethyst Patch with a mod manager download, in Vortex install and enable, for the rules place this after ruins clutter
44.JS Shrines of the Divines SE– [link]
Choose your resolution, I went with 4k, download with a mod manager download,in Vortex install and enable, for the rules, place after everything it asks
45.JS Barenziah SE– [link]
Pick your resolution, I went with 4k, download with a mod manager download, in Vortex install and enable
46.JS Lockpicking UI SE– [link]
Pick your resolution, I went with 4k, download with a mod manager download, in Vortex install and enable
47.Pretty Gemstones SSE– [link]
Download the top main file with a mod manager download in Vortex install and enable
48.Spider Webs and Particles for ENB– [link]
Download the main file with a mod manager download, in Vortex install and enable
49.SavrenX Gore– [link]
Download the main file with a mod manager download, in Vortex install and enable, for the rules place after everything it asks
50.ElSopa – HD Better Bloody Rags SE– [link]
Pick your resolution, I went with 4k, download with a mod manager download, in Vortex install and enable
51.Ray’s UHD Folded Rag SE– [link]
Pick your resolution, I went with 4k, download with a mod manager download, in Vortex install and enable
52.4K Satchel– [link]
Pick your resolution, I went with 4k, download with a mod manager download, in Vortex install and enable
Other Texture Replacers 3
53.Strongbox Replacer– [link]
Download the second main file titled Strongbox Replacer SE 2K with a mod manager download, in Vortex install and enable
54.HD Saw dust– [link]
Download the main file with a mod manager download, in Vortex install and enable
55.OIL by Ramccoid– [link]
Download the second main file OIL v2 x2048 and the optional file titled OIL v2 x2048 Oily Water with a mod manager download, in Vortex install and enable the main file first, then install and enable the optional file oily and for the rules place it after the main file
56.Oil Lamp Trap Retexture– [link]
Pick your resolution, download with a mod manager download, in Vortex install and enable, for the rules place this after anything it asks
57.Rally’s Honey Pot– [link]
Download the top main file with a mod manager download, in Vortex install and enable
58.Unreal 4K-8K Mammoth Skeleton ReTexture– [link]
Pick your resolution, I went with 4k, download with a mod manager download, in Vortex install and enable
59.Troll Skull Retexture– [link]
Pick your resolution, I went with 4k, download with a mod manager download, in Vortex install and enable
60.Ingredients– [link]
Download the main file with a mod manager download, in Vortex install and enable, for the rules place this after everything it asks
-This mod has SSE Parallax Shader Fix (BETA) listed as a requirement, it is not required for this mod to work, and this mod list is not compatible with it because of Better Dynamic Snow SE v3.3
61.Skeever Tail 4K (Hairless)– [link]
Download whichever version you want, I went with the Skeever Tail 4k Dark Gray Version with a mod manager download, in Vortex install and enable
62.ElSopa – Creep Cluster SE– [link]
Pick your resolution, I went with 2k, download with a mod manager download, in Vortex install and enable
63.Creepy Chaurus Eggs SE– [link]
Download the main file with a mod manager download, in Vortex install and enable
64.Spider Egg and Sacs Retexture– [link]
Download the main file with a mod manager download, in Vortex install and enable, for the rules place this after anything it asks
65.Weathered Dragonstone Retexture (4K-2K)– [link]
Download the main file with a mod manager download, in Vortex install and enable
66.Falmer Eye Gem Retexture 2K-4K– [link]
Download the main file with a mod manager download, in Vortex install and enable
67.Azura’s Star Dungeon Retexture– [link]
Download the main file with a mod manager download, in Vortex install and enable, on the install window pick how you want it, you want need the windows shadows add on plugin if you installed that mod from this list, for the rules place it after smim
68.Iconic’s Remastered Paragon Gems Retexture– [link]
Download the main file with a mod manager download, in Vortex install and enable, on the install window pick what you want
69.Organic Riften Leaves– [link]
Choose your quality, download with a mod manager download, in Vortex install and enable. for the rules place this after everything it asks
70.Retexture for The Scroll SE– [link]
Download the main file with a mod manager download, in Vortex install and enable, for the install window pick what you want, I went with Mixed Set, next page Mixed Set
71.ElSopa – Papers HD SE– [link]
Download the second main file titled ElSopa – Paper HD with a mod manager download, in Vortex install and enable, for the rules place this mod after Big books mod
72.ElSopa – HD Keys Redone SE– [link]
Download which ever main file you want with a mod manager download, in Vortex install and enable
73.Deer Skull and Antlers Retexture– [link]
Download either 4k or 2k of the Deer Skull and Antlers files, then download the optional file title 2K Mounted Antlers, both with mod manager downloads, in Vortex install and enable both files, for the rules place Deer Skull and Antlers after high poly project
74.Ruins Tools Retexture– [link]
Download the main file with a mod manager download, in Vortex install and enable
75.Wolfskull Altar Redone– [link]
Pick 4k or 2k version, download with a mod manager download, in Vortex install and enable
76.Ruined and Burned Books Retexture– [link]
Download the main file with a mod manager download, in Vortex install and enable, for the rules place this after Big Books mod
77.ElSopa HD – Meridias Beacon SE– [link]
Pick your resolution, download with a mod manager download, in Vortex install and enable
80.Retextured Pulsing Daedra Heart– [link]
Download the main file with a mod manager download, in Vortex install and enable, for the rules place this after anything it asks
81.RUSTIC ELDERSCROLL– [link]
Download one of the main files and one of the optional files, I went with 4k main and 2k optional, in Vortex install and enable both
82.RUSTIC MAPS– [link]
Download which main file you want, I went with 4k, download with a mod manager download, in Vortex install and enable, for the rules place this after Texture 2
83.RUSTIC RELIEFS– [link]
Download the main file with a mod manager download, in Vortex install and enable, for the rules place this after Noble Skyrim, Texture 2, and Ruins Clutter Improved, then place it Before Northfires Windhelm, Rudy’s Nordic Ruins, and Rudy’s Standing Stones
84.RUSTIC AZURA’S STAR– [link]
Download which main file you want with a mod manager download, in Vortex install and enable
85.4K Torture Rack– [link]
Pick which main file you want, download with a mod manager download, in Vortex install and enable, for the rules place this after anything it asks, then download the optional file same resolution as you picked on the main file with a mod manager download, in Vortex install and enable, for the rules place it after the main mod
86.Stockades of Skyrim 3D– [link]
Download the main file with a mod manager download, in Vortex install and enable
Other Texture Replacers 4
87.Rally’s Hooks and Saws– [link]
Download the main file titled Rallys Hooks and Saws – ENV with a mod manager download, in Vortex install and enable, on the install window I went with Rusty
88.Rally’s Werewolf Totems– [link]
Pick which main file you want, Download with a mod manager download, in Vortex install and enable
89.Dark Brotherhood Tenets– [link]
Download which main file you want with a mod manager download, in Vortex install and enable
90.Much Better Night Mother– [link]
Download the main file with a mod manager download, in Vortex install and enable
91.Human Heart Retexture– [link]
Download the main file with a mod manager download, in Vortex install and enable
92.WiZkiD Candleflame– [link]
Click the Download arrow in the top right corner, after drag the download into Vortex and drop it into the box at the bottom titled Drop Files, then install and enable, for the rules place this after anything it asks
93.Nocturnal’s Portal HD– [link]
Download the main file with a mod manager download, in Vortex instyall and enable, for the rules place this after Project Clarity Clutter
94.Dragon Bones and Scales– [link]
Download the main file with a mod manager download, in Vortex install and enable, for the rules place this after everything it asks
Creatures
1.Bellyaches Animal and Creature Pack SSE– [link]
Download the main file with a mod manager download, in Vortex install and enable, for the install window, I went with Bellyache’s Choice, for the rules place it before anything it asks
2.SavrenX Solstheim Creatures– [link]
Download both main files with a mod manager download, in vortex install and enable,for the rules place after anything it asks
3.Ashes and Flames – Spawn and Guardian Retex SE– [link]
Download the main file titled Ash Spawn Retexture with a mod manager download, in Vortex install and enable
4.HD Reworked Dragons Collection 4K– [link]
Download the main file with a mod manager download, in Vortex install and enable
5.Deiform Alduin– [link]
Download both main files with a mod manager downloads, in Vortex install and enable, for the rules place them both HD Reworked Dragon
6.HD Reworked Horses– [link]
Download the main file with a mod manager download, in Vortex install and enable,for the rules place after anything it asks
7.Light Horses of Skyrim (Realistic body and fur)– [link]
Light Horses of Skyrim (Realistic body and fur)- [link]
Download the top main file with a mod manager download, in Vortex install and enable, for the install window pick what you want I left there colors the way they were, what ever yopu pick for shadowmere will determine which file you download on the next mod, select ESP, for the rules place this after HD Reworked Horses
8.High Fantasy Deer and Elk– [link]
Download the main file with a mod manager download, in Vortex install and enable, for the install window pick what you want, I went with Wood (Default) and 4k Normals,for the rules place after anything it asks
9.GOAT HD by Pfuscher– [link]
Download the main file with a mod manager download, in Vortex install and enable, for the rules place after anything it asks
10.Holy Cows – Improved HD Textures– [link]
Pick what resolution you want, I went with the top main file Holy Cows – 4K, download with a mod manager download, in Vortex install and enable, for the rules place after anything it asks
11.Bears of the North– [link]
Download the main file and the optional file COTN Winterhold Add-On if you did not skip the cities of the north mods in the guide, I all so download the 4k Textures, download all three with mod manager
12.Horker by Pfuscher– [link]
Download the main file with a mod manager download, in Vortex install and enable, for the rules place after anything it asks
13.Superior Mudcrab – 4k Retexture– [link]
Download the main file with a mod manager download, in Vortex install and enable, on the install window pick what you want, i went with both 4k, for the rules place after anything it asks
14.HD Skeever– [link]
Download the main file with a mod manager download, in Vortex install and enable, for the rules place after anything it asks
15.High poly HD Rabbit by Pfuscher– [link]
Download the main file with a mod manager download, in Vortex install and enable, for the rules place after anything it asks
16.Photoreal Foxes 2K HD Retexture– [link]
Download the main file with a mod manager download, in Vortex install and enable, for the rules place after anything it asks
17.ElSopa HD – Strider And Netches SE – [link]
Pick what resolution you want, I went with 4k, download with a mod manager download, in Vortex install and enable, for the rules place after anything it asks
18.Vampire Lord Retexture– [link]
Download the main file with a mod manager download, in Vortex install and enable
19.Apex Werewolf Replacer– [link]
Pick which main file you want, download with a mod manager download, in Vortex install and enable
20.Heart of the Beast – Werewolf Sound and Texture Overhaul– [link]
This mod is for oldrim, but the audio files will work perfectly fine with special edition, and they sound awesome, watch the videos on the mod page to pick which audio file you want from the main files section, and download with a manual download, then drag the download into Vortex, in the Drop Files box at the bottom and install and enable, I went with Alpha werewolf sounds – VERY VICIOUS AND AGGRESSIVE
21.True Wolves Of Skyrim– [link]
This is an oldrim mod, the author has provide a sse meshes done the same way we did dwemer metal, download the top main file titled True Wolves of Skyrim and the optional file at the bottom titled True Wolves of Skyrim – SSE, download both with a manual download, and drag both downloads into Vortex, drop them in the box at the bottom titled Drop Files, then install and enable the main file first, on the install window, pick out what you want, for the rules place it after anything it asks, then install and enable the sse meshes, for the rules place it after anything it asks
22.HAGRAVEN– [link]
Download the main file with a mod manager download, in Vortex install and enable, for the rules place after SMIM
23.GIANT– [link]
Pick your resolution, I went with 4k, download with a mod manager download, in Vortex install and enable
24.TROLL– [link]
Pick your resolution, I went with 4k, download with a mod manager download, in Vortex install and enable
25.MAMMOTH– [link]
Pick your resolution, I went with 4k, download with a mod manager download, in Vortex install and enable, for the rules place after Bellyaches Animal and Creature Pack
26.SABRECAT– [link]
Pick your resolution, I went with 4k, download with a mod manager download, in Vortex install and enable, for the install window select both options, for the rules place after Bellyaches Animal and Creature Pack
27.SKELETON– [link]
Pick your resolution, I went with 4k, download with a mod manager download, in Vortex install and enable, for the install window select Skin,clutter and sounds, for the rules place this after everything it asks
28.DRAUGR– [link]
Pick your resolution, I went with 4k, download with a mod manager download, in Vortex install and enable, for the rules place after SavrenX Solstheim Creatures
Creatures 2
29.DRAGON PRIEST– [link]
Pick your resolution, I went with 4k, download with a mod manager download, in Vortex install and enable, for the install window select full verison recommended
30.FALMER– [link]
Pick your resolution, I went with 4k, download with a mod manager download, in Vortex install and enable
31.WISPMOTHER– [link]
Pick your resolution, I went with 4x2k, download with a mod manager download, in Vortex install and enable, for the install window select full Version recommended
32.Ice Wraiths Retexture 2k– [link]
Download the main file with a mod manager download, in Vortex install and enable
33.RUSTIC DAEDRA – Special Edition– [link]
Pick your resolution, I went with 4k, download with a mod manager download, in Vortex install and enable, for the rules place it after SavrenX Solstheim
34.RUSTIC DEATH HOUND and GARGOYLE – Special Edition– [link]
Pick your resolution, I went with 4k, download with a mod manager download, in Vortex install and enable, for the rules place it after Noble Skyrim and after Texture 3, and Before Castle Volkihar HD
35.RUSTIC FROSTBITE SPIDER – Special Edition– [link]
Pick your resolution, I went with 4k, download with a mod manager download, in Vortex install and enable, for the rules place this after Bellyaches Animal and Creature Pack
36.RUSTIC SPRIGGAN – Special Edition– [link]
Pick your resolution, I went with 4k, download it and the optional file titled RUSTIC SPRIGGAN EFFECTS with a mod manager download, in Vortex install and enable both files
37.ElSopa HD – Ants SE– [link]
Download the second main file titled ElSopa HD – Ants 2K with a mod manager download, in Vortex install and enable
38.High-Res Dartwing (Dragonfly) Texture– [link]
Download the main file with a mod manager download, in Vortex install and enable, for the rules place this after bellyaches creature pack
39.Rally’s Butterflies Moths and Torchbugs– [link]
Download the main file with a mod manager download, in Vortex install and enable
40.HD Pondfish– [link]
Download the main file with a mod manager download, in Vortex install and enable
41.OH GOD BEES SE – More Bees-More Hives-HD Textures– [link]
Download the top main file with a mod manager download, in Vortex install wnd enable, on the install window pick what quality you want
42.Serpentine Dragon Retexture– [link]
Download the main file with a mod manager download, in Vortex install and enable, for the rules place this after HD Reworked Dragons mod
43.DSL Demonic Shadowmere– [link]
With this mod Shadowmere’s name will not show up in game when you click you to ride him, it shows up a line of blocks for the name, it can easily be fixed in Xedit, I didn’t fix it cause it doesn’t bother me, all so the first time I rode him, after he came out of the pool, my character would not set on him properly, I had to rid him up the road and get off and back on him in third person, then I switched back to first person and got off and back on to make sure it was working in first person since that one time, I have no issues out of it, its a great replacer mod
Download which ever file for which option you choose for Shadowmere above, for me I went without feathering, download with a mod manager download, in Vortex install and enable
44.Simple Horse SE– [link]
Downlaod the Optional File titled Simple Horse Sprint SE with a mod manager download, in Vortex install and enable
45.Butterflies Land True– [link]
Download the main file with a mod manager download, in Vortex install and enable
46.Butterflies Unchained– [link]
Download the top main file titled Butterflies Unchained with a mod manager download, in Vortex install and enable
47.Flying Crows SSE– [link]
Download the top main file title FlyingCrowsSSE – ESL with a mod manager download, in Vortex install and enable
48.Birds of Skyrim SSE Edition (Shader flags NIFs fixes)– [link]
This is a fix version of the Birds of Skyrim by Wizkid
Click the Download arrow in the top right corner, after drag the download into Vortex and drop it into the box at the bottom titled Drop Files, then install and enable
NPC’s
1.AI Overhaul SSE– [link]
A quick note on this, if it gets updated, it will break the npc patches and you will get black face or you can’t use it with the npc overhauls, you will have to wait on the patches to get updated, use the old version, don’t use it at all, or you can always make your own patch with Xedit, you just forward the changes that AI overhaul makes to the npc overhauls
If you did not install this earlier before Cities of the North
Download the main file with a mod manager download, in Vortex install and enable
2.Realistic AI Detection SE (better sneaking)– [link]
Pick one of the main files, I went with Realistic AI Detection 2 SE – Lite Download the main file with a mod manager download, in Vortex install and enable
3.Run For Your Lives– [link]
Download the main file with a mod manager download, in Vortex install and enable
4.Relationship Dialogue Overhaul – RDO SE– [link]
Download the Main File and the Optional File titled RDO – CRF and USSEP Patches Final with mod manager downloads, install and enable both files, on the patch file you only need one plugin enabled RDO-USSEP Patch.esp, the other plugin for cutting room floor needs to be disabled, I deleted mine, steamapps/common/Skyrim Special Edition/Data and delete that RDO- CRF + USSEP Patch.esp
5.Realistic Conversations– [link]
Download the main file with a mod manager download, in Vortex install and enable
6.Guard Dialogue Overhaul SE– [link]
Download the main file with a mod manager download, in Vortex install and enable
7.RaceMenu– [link]
Download the main file with a mod manager download, in Vortex install and enable
8.Expressive Facegen Morphs SE– [link]
Download the main file with a mod manager download, in Vortex install and enable
9.Expressive Facial Animation -Female Edition– [link]
Download the main file with a mod manager download, in Vortex install and enable
10.Expressive Facial Animation -Male Edition– [link]
Download the main file with a mod manager download, in Vortex install and enable
11.Nordic Faces – Immersive Characters Overhaul– [link]
Download the main file with a mod manager download, in Vortex install and enable, for the rules place this after anything it asks
12.High Poly Head– [link]
Click the download arrow in the top right corner, then click download anyway, after grab the downloaded zip file and drag it into Vortex, drop it in the box at the bottom, titled Drop files, install and enable, for the install window select special edition, expressive face gen morphs, checkbox both Facial Animations, Checkbox high poly hair and bsa only
13.High Poly Expressive NPCs– [link] Download the main file titled High Poly Expressive NPCs – Nordic Faces with a mod manager download, in Vortex install and enable, for the rules place this after Nordic Faces
On the same mod page download the Miscellaneous file titled AI Overhaul Patch with a mod manager download, in Vortex install and enable
14.High Poly Vanilla Hair– [link]
Download the main file with a mod manager download, in Vortex install and enable, for the rules place this after High Poly Head
15.KS Hairdos SSE– [link]
Download the top main file titled KS Hairdos SSE with a mod manager download, in Vortex install and enable
16.Salt and Wind – Rough Hair for KS Hairdos SE– [link]
Download the top main file titled Salt and Wind – KS Hairdo’s Retexture with a mod manager download, in Vortex install and enable, for the rules place this after KS Hairdos
These Northbourne Npc overhauls are the very best looking ones I have ever seen, they are amazing, however they do not cover every npc yet, its a work in progress, when you test them out, do it on a new game from alternate start mod, if you do it on an existing clean save file some of them may appear naked
17.Northbourne NPCs of Whiterun Hold– [link]
Download version 2.0 from old files section with a mod manager download, in Vortex install and enable, for the rules place this after everything it asks
18.Northbourne NPCs of Falkreath Hold– [link]
Download the main file with a mod manager download, in Vortex install and enable, for the rules place this after everything it asks
19.Northbourne NPCs of the Rift– [link]
Download the main file with a mod manager download, in Vortex install and enable, for the rules place this after everything it asks
20.Northbourne NPCs of Winterhold– [link]
Download the main file with a mod manager download, in Vortex install and enable, for the rules place this after everything it asks
21.Northbourne AI Overhaul Patches– [link]
Select the download arrow in the top right corner, after drag and drop the download into Vortex and drop it in thye box at the bottom titled Drop Files, then install and enable, on the install window select Northbourne AI Overhaul Patch Merged only, dont select anything else
22.Northbourne NPCs of Haafingar– [link]
Download the main file with a mod manager download, in Vortex install and enable, for the rules place this after everything it asks
23.Northbourne NPCs of Haafingar AI Overhaul Patch– [link]
Download the main file with a mod manager download, in Vortex install and enable
24.Caliente’s Beautiful Bodies Enhancer -CBBE.– [link]
Download the main file with a mod manager download, in Vortex install and enable, for the install window select however you want it, i left face pack check marked, next page i did not select anything, i do not mess with race menu morphs, for the rules place it after everything it asks
25.Bijin Skin UNP and CBBE SE– [link]
Download the main file for CBBE with a mod manager download, in Vortex install and enable, for the install window I went with 4k then for the Body Normal Maps I went with Default Curvy, because when I installed CBBE Body Mod I went with the Curvy body, then for the next 2 pages I went with 4k Realistic and then for the Head Normal Maps I picked Keep Default, for Specular Maps 4k-Default, the next few pages Default, Default, Pretty, for the rules place it after anything it asks
NPC’s 2
26.Tempered Skins for Males – Vanilla and SOS versions3.- [link]
Pick one of the top two main files, the bottom two are for a mod not hosted on nexus anymore, download with a mod manager download, in Vortex install and enable, for the install window, pick what ever you want in your game, for the rules place it after everything it asks
27.Beards– [link]
Download the main file with a mod manager download, in Vortex install and enable, for the install window select full install, then choose your resolution, I went with Ultra:4096, for the rules place this after anything it asks
28.Brows– [link]
Download the main file with a mod manger download, in vortex install and enable, for the rules place this after anything it asks
29.Authentic Eyes– [link]
Download the main file with a mod manager download, in Vortex install and enable, for the rules place this after anything it asks
30.RS Children Overhaul– [link]
Download the main file with a mod manager download, in Vortex install and enable, for the install window, select USSEP under Main Patches, next page Extra Options select 2k Aventus and Wanderer Outfit and Facial animations, for the rules place this after Nordic Faces and High Poly Expressive NPCs
After you deploy the mods and go to the plugin page you will notice that you will have to Auto Clean RsChildren.esp, so go open upSSEEDIT QAC from the dashboard, chechmark RSChildren.esp and run it, let it finish and close it out, now go back to plugins and click Sort Now at the top and the cleaning icon will go away, then go deploy your mods again and a screen should pop up to use the new file click confirm
31.Realistic RS Children Overhaul– [link]
Download the main file with a mod manager download, in Vortex install and enable, for the rules place this after everything it asks
On the same mod page download the Miscellaneous file titled RRSC – AI Overhaul Patch with a mod manager download, in Vortex install and enable
32.INIGO– [link]
Download the main file with a mod manager download, in Vortex install and enable
33.Inigo the Suave – High-Poly Replacer or Racemenu Preset– [link]
Download the main file with a mod manager download, and don’t worry about all the Requirement Mods,those are for a race menu preset, I am just replacing Inigo, in Vortex install and enable, for the install window, choose how you want Inigo to look, for the rules place this after High Poly Head
34.Serana Re-Imagined SE– [link]
Download the second main file titled Serana Re-Imagined SE with a mod manager download, in Vortex install and enable, on the install window select what version of CBBE you want, for the rules place this after anything it ask
35.Serana’s Invisible Hood– [link]
Download the main file with a mod manager download, in Vortex install and enable
36.Orc Overhaul SE – Orc body morphs height and Berserker strength– [link]
Download the second main file titled Orc Overhaul Extreme with a mod manager download, in Vortex install and enable
Player Character Creation- Known Issues
When you create your player character, go over to Head, then go down to Face Parts and make sure it is on Skyrim.esm and not High Poly Head, this will fix the hair clipping, for the eye brows and beards clipping, make surte and do not use the high poly head ones, use only beards.esp and skyrim.esm and for brows only crows.esp and skyrim.esm, this will fix the beard and eye brow clipping
Clothing, Weapons, and Armor
1.Project Clarity – Vanilla Armor Textures Redone– [link]
Pick your resolution, i went with the top file Armor Full Resolution, download with a mod manager download, in Vortex install and enable
2.Project Clarity – Vanilla Weapon Textures Redone– [link]
Pick your resolution, i went with 4k, download with a mod manager download, in Vortex install and enable, for the rules place this after everything it asks, except Iconic Statues, place it before Iconic Statues
3.RUSTIC CLOTHING – Special Edition– [link]
Pick your resolution, i went with 4k, download with a mod manager download, in Vortex install and enable, for the rules place this after everything it asks
4.RUSTIC AMULETS – Special Edition– [link]
download the main file with a mod manager download, in Vortex install and enable
5.ElSopa – Glorious HD Amulets SE– [link]
Pick which file you want, I went with Quality, download with a mod manager download, in Vortex install and enable
6.JS Circlet Replacer– [link]
Download the main file with a mod manager download, in Vortex install and enable
7.Circlet USSEP Fixes– [link]
Download the second main file titled JS Circlet Replacer USSEP Fix with a mod manager download
8.RUSTIC ARMOR and WEAPONS SE– [link]
Download which main version you want with a mod manager download, in Vortex install and enable, for the rules place this after both project Clarity mods
9.aMidianBorn Book of Silence SE– [link]
Here we will download 4 of the Optional files, all with mod manager downloads
aMidianBorn Book of Silence SE — ARMORS– on the install window select custom install, and don’t select Dwarven or Iron, select all the other armors and select the versions you want, for the rules place this after everything it asks
aMidianBorn Book of Silence SE — DRAGONBORN– on the install window select custom install anhd only select what version of Nordic carved armor you want, for the rules place this after Project Clarity Armors
aMidianBorn Book of Silence SE — UNIQUE ITEMS– on the install window select custom install, and pick everything and select the versions you want, for the rules place this after everything it asks
aMidianBorn Book of Silence SE — WEAPONS– on the install window select custom install, don’t select Dwarven, install everything else, for the rules place this after Project Clarity Weapons
10.Frankly HD Nightingale Armor and Weapons– [link]
Download the main file, in Vortex install and enable, for the install window I went with 4k and Less Saturated Weathering, for the rules place this after anything it asks
On the same mod page download the Optional file titled Frankly HD Nightingale Armor CBBE SE with a mod manager download, for the rules place this after anything it asks
11.Frankly HD Shrouded Armor– [link]
Download the main file with a mod manager download, in Vortex install and enable, for the install window pick your resolution, I went with 4K, for the rules place this after anything it asks
12.Frankly HD Thieves Guild Armors– [link]
Download the main file with a mod manager download, in Vortex install and enable, for the install window pick your resolution, I went with 4K, for the rules place this after anything it asks
13.Frankly HD Dragonbone and Dragonscale – Armor and Weapons– [link]
Pick your resolution, I went with 4k, download it and update file mesh patch with a mod manager download, in Vortex install and enable, for the rules place this after both Project Clarity mods, place the mesh patch after the main file
14.Frankly HD Dawnguard Armor and Weapons– [link]
Download the main file with a mod manager download, in Vortex install and enable, for the install window pick your resolution, I went with 4k, for the rules place this after everything it asks
On the same mod page download the Optional file titled Frankly HD Dawnguard Armor CBBE SE with a mod manager download, in Vortex install and enable, for the rules place this after anything it asks
15.Frankly HD Miraak– [link]
Download the main file with a mod manager download, in Vortex install and enable, pick your resolution,I went with 4k, select nothing on the next page, for the rules place this after anything it asks
On the same mod page download the Update file titled Frankly HD Miraak HOTFIX 1.11 with a mod manager download, in Vortex install and enable, for the rules place this after anything it asks
On the same mod page download the Optional file titled Frankly HD Miraak – CBBE SE with a mod manager download, in Vortex install and enable, for the rules place this after the main mod Frankly HD Miraak and CBBE and before the Hotfix
16.Frankly HD Imperial Armor and Weapons– [link]
Pick your resolution, I went with 4k, download with a mod manager download, in Vortex install and enable, for the rules place this after everything it asks, then download the optional file titled Frankly HD Imperial Armor And Weapons – Sleeves and Pants with a mod manager download, in Vortex install and enable, for the rules place this after anything it asks
17.CC’s HD Daedric Weapons and Armor– [link]
Pick your resolution, I went with 4k, download with a mod manager download, in Vortex install and enable, for the rules place this after everything it asks
18.CC’s HD Dwemer Weapons and Armor– [link]
Pick your resolution, I went with 4k, download with a mod manager download, in Vortex install and enable, for the rules place this after everything it asks
19.CC’s UHD Stalhrim Weapons and Armor– [link]
Pick your resolution, I went with 4k, download with a mod manager download, in Vortex install and enable, for the rules place this after everything it asks
20.HD Reworked Armors – Iron– [link]
Download the main file with a mod manager download, in Vortex install and enable, for the rules place this after everything it asks
21.Elven Weapons for Silence SE– [link]
Download which optional file you want, I went with Leanwolf Elven – Default Silver, with a mod manager download, in Vortex install and enable, for the rules place this after Project Clarity
Clothing, Weapons, and Armor Part 2
22.Ebony Weapons 2017 Retexture– [link]
Download the main file with a Manual Download, then create a new folder, name it Ebony Textures, and extract the download to it, then go to your Modding Tools folder and run the SSE NIF Optimizer.exe, when its open select Browse at the top and direct it to that new Ebony Textures folder and select the meshes folder, once meshes is highlighted, click select folder at the bottom right corner, back in NIF Optimizer select Optimize at the bottom, after its done it will say Ready, then go to that new Ebony Textures folder and repack it with whatever archiver you are using, after drag it into Vortex and drop it into the box at the bottom titled Drop Files and install and enable, for the rules place this after Project Clarity
23.LeanWolf’s Better-Shaped Weapons SE– [link]
Download the main file with a mod manager download, in Vortex install and enable, for the install
window, select install everything, check both sheaths, next page check Frank Family HD Imperial, for the rest select none, for the rules, place it after everything it asks
24.The Revamped Quiver– [link]
Pick your resolution, I went with the first main file 4k, download with a mod manager download, in Vortex install and enable, for the install window, pick which arrows you want done, I picked one for each arrow type in the game, for the rules place this after everything it asks
25.Believable weapons– [link]
Download the main file with a mod manager download,in Vortex install and enable, for the install window, select Full and check Greatsword scabbards, next page Checkmark both Frankly Dawnguard and Frankly Imperial and aMidianBorn Skyforge weapons
for the rules place this after everything it asks
26.Shields of the Holds– [link]
Download the main file with a mod manager download, in Vortex install and enable
27.Realistic HD Pickaxe Remastered– [link]
Download the main file with a mod manager download, in Vortex install and enable
28.HD Reworked Shellbug– [link]
Download the main file with a mod manager download, in Vortex install and enable, for the rules place this after everything it asks except, HD Reworked Falmer Architecture 4, it needs to go before this
29.4K Nordic Pickaxe– [link]
Pick 4k or 2k, download with a mod manager download, in Vortex install and enable, for the rules place this after anything it asks
30.4K Bonemold Retexture– [link]
Pick which resolution you want, download with a mod manager download, in Vortex install and enable, for the rules place this after Project Clarity
31.Ancient Falmer Armor Redone– [link]
Download the main file with a mod manager download, in Vortex install and enable, for the rules place this after Project Clarity
32.Frankly HD Masque of Clavicus Vile– [link]
Download which main file you want with a mod manager download, in Vortex install and enable, for the rules place this after anything it asks
33.Remiros’ Chitin Armor HD– [link]
Pick which main file you want, I went with 4k, download with a mod manager download, in Vortex install and enable, for the rules place this after Project Clarity Armor
34.Remiros’ Ebony Blade HD– [link]
Download which main file you want, I went with Remiros’ Ebony Blade HD 4k, download with a mod manager download, in Vortex install and enable, for the rules place this after Project Clarity Weapons
35.Sheathed Ebony Blade– [link]
Download the second main file titled Sheathed Ebony Blade – Remiros’ Ebony Blade HD with a mod manager download, in Vortex install and enable, for the rules place this after Remiros’ Ebony Blade HD
36.Remiros’ Scimitar HD– [link]
Pick which main file you want, I went with 4k, download with a mod manager download, in Vortex install and enable, for the rules place this after Project Clarity Weapons
37.Remiros’ Dawnbreaker HD– [link]
Download the top main file titled Remiros’ Dawnbreaker HD with a mod manager download, in Vortex install and enable, for the rules place this after Project Clarity Weapons and Before Leanwolfs Better Shaped Weapons
38.Matching Blades Sword And Scabbard– [link]
Download the main file with a mod manager download, in Vortex install and enable, for the rules place this after Project Clarity Weapons, then download the optional file More Reflective Blade with a mod manager download, in Vortex install and enable, for the rules place this after the main file and Project Clarity Weapons
39.Guards Armor Replacer SSE– [link]
You will have to uninstall Simply Realistic Guards and Stormcloaks from the guide first
Download the main file with a mod manager download, in Vortex install and enable, for the rules place it after Rallys Hooks and Saws
40.Guards Armor Replacer Patch for Goonz Mod List– [link]
This is a Patch I made to fix black face and it forwards the npc replacers to the guards
Click the Download arrow in the top right corner, after drag the download into Vortex and drop it into the box at the bottom titled Drop Files, then install and enable
41.New Legion– [link]
First Download the main file titled Base with a mod manager download, in Vortex install and enable, then download the main filetitled Textures HD with a mod manager download, in Vortex install and enable, for the rules place it after anything it asks
42.New Legion Patch for Goonz Mod List– [link]
This is a Patch I made to fix black face and it forwards the npc replacers to the legion
Click the Download arrow in the top right corner, after drag the download into Vortex and drop it into the box at the bottom titled Drop Files, then install and enable
43.NPC Cloth Redone– [link]
This mod made by Wizkid swaps and replaces with new NPC Clothes, it gives Skyrim a fresh Lore Friendly Look
Click the Download arrow in the top right corner, after the download into Vortex and drop it into the box at the bottom titled Drop Files, then install and enable, on the install window do not select anything, I had to patch this mod for my NPC Replacers, so I patched it for AI Overhaul as well all in one plugin, for the rules place this after everything it asks, then go to the plugins page and select Manage Rules at the top and create these rules
npc clothes redone.esp / Must Load After / northbourne npcs of haafingar.esp
npc clothes redone.esp / Must Load After / ai overhaul patch for northbourne npcs of haafingar.esp
npc clothes redone.esp / Must Load After / northbourne ai overhaul patch merged.esp
Then select Add after each rule then Close and select Sort Now at the top
Clothing, Weapons, and Armor Part 3
44.NPC Clothes Redone Patch for Goonz Mod List– [link]
This is a Patch I made to fix black face and it forwards the npc replacers to the clothes and fowards the AI Overhaul
Click the Download arrow in the top right corner, after drag the download into Vortex and drop it into the box at the bottom titled Drop Files, then install and enable
45.Realistic Armor– [link]
Download both files here the Main Archive and the HD Textures with mod manager downloads, in Vortex install and enable the Main Archive first, for the rules place it after anything it asks, after install and enable the HD Textures, for the rules place it after anything it asks
46.Realistic Armor Patch for Goonz Mod List– [link]
This is a Patch I made to fix black face and it forwards the npc replacers to Realistic Armor
Click the Download arrow in the top right corner, after drag the download into Vortex and drop it into the box at the bottom titled Drop Files, then install and enable
Enb Light
Enb Light – [link]
This is a Edited version of Enb Light by Wizkid that works very well with this mod list, it has other mods and textures in it and it conflicts with a lot of mods on this list, it actually has the sd horn candle mod in it, I’m not sure what resolution was used, that is why it is placed here in the guide in its own section and needs to be installed after a lot of those mods, so no one gets confused and messes up the conflict rules
Click the Download arrow in the top right corner, select download anyway, after drag the download into Vortex and drop it into the box at the bottom titled Drop Files, then install and enable, for the rules place this Before ,SD Horn Candles, SD Horn Candles STAC Patch, Glowing Mushrooms, and Rallys Candlelight Fix, then place it After everything else it asks
Audio
1.Unofficial High Definition Audio Project- [link]
Download all three main files with a mod manager download, in Vortex install and enable
2.Sounds of Skyrim Complete SE– [link]
Download the main file with a mod manager download, in Vortex install and enable, then Download the Update file titled SoS_Cathedral_Patch with a mod manager download, in Vortex install and enable, on this mod you have to disable all the sounds from the MCM in game that you do not want
3.Immersive Sounds – Compendium– [link]
Download the main file with a mod manager download, in Vortex install and enable, for the install window, IS Default (Extra Bloody), Smooth Equip,Realistic Twangy,IS Default,High Fantasy, I checked all three of the Extra Weaponary Options, then for Magic Options I left it how it was, check all 3 of the Creature Options, Nimroot I put on Silent, the Misc Options I only checked the top three and Silent Weapon Enchants and Silent Sneak Attack
4.Immersive Sounds Compendium – PATCHES– [link]
Download the top main file titled ISC Enhanced Blood Textures Patch with a mod manager download, in Vortex install and enable
5.Falmer Sounds – the Betrayal Legacy Edition -SSE– [link]
Download the main file with a mod manager download, in Vortex install and enable
6.Thundering Shouts– [link]
Download the main file with a mod manager download, in Vortex install and enable
Combat and Animation Mods
Nemesis Engine– [link]
Here is a short youtube video on how to install nemesis through Vortex if watching someone do it is easier then my instructions
Scroll down and download the file titled- Nemesis.Unlimited.Behavior.Engine.v0.84-beta.rar , take that file and drag it into the drop files box on Vortex at the bottom, then install and enable.
Now click the Dashboard tab on Vortex, its on the top left above downloads, then click Add Tool, Name, name it Nemesis Engine, then click Target, go to your Skyrim Special Edition folder/ Data/ Nemesis_Engine/ then find Nemesis Unlimited Behavior Engine.exe and select open, then click Save.
Now you will see nemesis on the dashboard, click the little play icon on it, and the Nemesis menu will come up, click Update Engine and wait, it will tell you when you are done. Then you select any patched that you need and then press Launch Nemesis Behavior Engine and wait for the Behavior generation complete message and close Nemesis and then go back to mods and click deploy mods and your done.
If you end up adding more Nemesis mods in the future, you have to go back and run Nemesis from the dashboard, update the engine, then select the new patch and select launch nemesis behavior engine , just like we did above, you do this everytime you add a new mod, or they will not work
1.Combat Gameplay Overhaul SE– [link]
Download the main file with a mod manager download, in Vortex install and enable, then go back to the dashboard and launch the Nemesis Engine, select Update Engine, then find Combat Gameplay Overhaul and check the box beside it and select Launch Nemesis Behavior Engine, let it finish and close it out
2.Archery Gameplay Overhaul SE– [link]
Download the main file with a mod manager download, and download the Nemesis Patch from the Optional files section, in Vortex install and enable both of them, For the rules place this after Comabat Gameplay Overhaul, then go back to the dashboard and launch the Nemesis Engine, select Update Engine,then find Archery Gameplay Overhaul and check the box beside it and select Launch Nemesis Behavior Engine, let it finish and close it out
3.Dynamic Animation Replacer– [link]
Download the main file with a mod manager download, in Vortex install and enable
4.Retimed Hit Frames– [link]
you do not have to download this mod, it comes with nemesis, go back to the dashboard and launch the Nemesis Engine, select Update Engine, then find Retimes Hitframes and check the box beside it and select Launch Nemesis Behavior Engine, let it finish and close it out
5.EVG Animation Variance– [link]
download the main file with a mod manager download, in Vortex install and enable, on the install window select full install, then select thank you
6.Relaxed Sneak Animations– [link]
Download the main file with a mod manager download, in Vortex install and enable
7.ABT SE – Arrows and Bolts Tweaks Special Edition– [link]
Download the main file with a mod manager download, in Vortex install and enable, for the install window go with Customize and pick out what you want, I went with Vanilla names +50% Increased Dmg, +50% Faster, Recover Ammo +50%, +50% More Loot, +50% More Stock, for the rules place it after anything it asks
8.Enhanced Enemy AI SE– [link]
download the main file with a mod manager download, in Vortex install and enable
Now that you are done with this section, go ahead and go back to the dashboard and launch the Nemesis Engine, select Update Engine, then Launch Nemesis Behavior Engine, let it finish, then close it out
New Combat Section
This is the new combat setup I am currently using, I left the old one in the guide because people love it so much, I prefer this one, but with some of these it will make Skyrim combat a little bit more challenging
If you use this section uninstall Combat Gameplay Overhaul SE, Archery Gameplay Overhaul SE, Enhanced Enemy AI SE and the Archery Nemesis Patch, then run Nemesis and update the engine, makesure these mods are not checkmarked anymore,launch behavior and close it out
Animal Tweaks– [link]
Download the main file with a mod manager download, in Vortex install and enable
Wildcat – Combat of Skyrim– [link]
Download the main file with a mod manager download, in Vortex install and enable, then go to the plugins page and select Manage Rules at the top and create these rules
wildcat- combat of skyrim.esp / Must Load After / animal tweaks.esp
wildcat- combat of skyrim.esp / Must Load After / dd- enhanced blood main.esp
Then select Add after each rule then Close and select Sort Now at the top
Ultimate Combat SE– [link]
Download the main file with a mod manager download, in Vortex install and enable, after your mods deploy go here steamapps/common/Skyrim Special Edition/Data/Sound/fx/ultimatecombat and delete the audio file title perfectblockimpact.wav, for some reason it plays sometimes when you shoot someone with a arrow and it is annoying
Ultimate Combat and Creatures Behaviour compatibility for Nemesis– [link]
Download the main file with a mod manager download, in Vortex install and enable
Stagger Direction Fix – SSE– [link]
Download the main file with a mod manager download, in Vortex install and enable
From the Vortex Dashboard launch Nemesis, select Update Engine then checkbox Mazsu Stagger Direction Fix, Retimed Hit Frames, Ultimate Combat / TK Dodge, Ultimate Combat Creature Compatibility, then click Launch Nemesis Behavior Engine, when it’s done close it out
TK Recoil SE– [link]
Download the main file with a mod manager download, in Vortex install and enable
Mortal Enemies SE– [link]
Download the top main file titled Mortal Enemies SE with a mod manager download, in Vortex install and enable, then go to the plugins page and double click Mortal Enemies underneath Group and change it from Early Loaders to Default and then select Manage Rules at the top and create this rule
mortal enemies.esp / Must Load After / wildcat- combat of skyrim.esp
Then select Add then Close and select Sort Now at the top
On the plugins page makesure these plugins are loaded before one another, if by chance one of them is out of order then create a rule on the plugins page to get them in order
1.Animal Tweaks
2.Wildcat Combat
3.Mortal Enemies
4.Ultimate Combat
Camera Mods
When you start a new game with these, it will be buggy in the intro once Alduin shows up, I think it is because your hands are bound, once you get inside the keep and get your hands unbound it starts working normally, or you can disable the custom ini until you get through the intro and then renable it after
This Improved Camera Custom.ini can cause the occasional flickering light while in exterior cells, it happens real fast and when you use the menu while setting on a horse, your view turns sideways while the menu pulls up, nothing game breaking, and only happens when you pull up the menu, after you come out it is fine, but I still want to warn you it causes the occasional anomaly and when I have time I am going to go through all the settings and get to the bottom of it, its a great first person mod tho and I highly recommend using improved camera, I am a first person player and have had a blast using this mod
1.Improved Camera (Beta 3)–
Once there click the link for Link: Improved Camera 1.0 (Beta 4), after click the download arrow at the top right to download, after drag the download into Vortex and drop it into the box at the bottom titled Drop Files, install and enable, for the install window I went with 360 Animations 1st Person Hands
2.Improved Camera Custom .ini– [link]
Download the main file with a mod manager download, in Vortex install and enable, for the install window I went with Head-Bob 360 version, you may or may not like Head-Bob, test it out, either way make sure and select 360 version to ensure better compatibility with the animation mods on my mod list, for the rules place this after the main mod
If you do not want to use the preconfigured ini, to configure the settings for the camera yourself go here steamapps/common/Skyrim Special Edition/Data/SKSE/Plugins and open up ImprovedCamera.ini
and go through the settings to suite your personal preference, a 0 means Off and a 1 means On, after you make changes make sure and click File in the top left corner and select Save.
Conflict Resolution
Launch Xedit from the Vortex dashboard, first window click ok, next window click ok, it will auto detect all your enabled plugins, so just click ok, on the left side, right click and select apply filter to show conflicts, once it loads in look to the left, there is all your plugins that have conflicts, the ones in Red are conflict losers, which means what ever conflict they are losing, you lose the changes that mod makes, in most cases this does not mean anything bad, remember we set a lot of conflict rules in Vortex, so we overwrote mods and thats ok, it’s the conflicts that do not have conflict rules in Vortex that you usually got to worry about, thats why its extremely important that you read all of the descriptions of mods and understand what it makes changes to, you can look at everything it does in Xedit, as you build a load order, constantly launch Xedit and check the mods you add for conflicts and errors, in most cases you don’t have to do anything, if you are aware of whats in your load order and you made them intentionally by overwriting a mod, in some cases you have to adjust the load order to resolve a conflict, and sometimes you may have to make a decision between to mods and uninstall and drop one of them, sometimes theres absolutely nothing you can do on here to make 2 mods get along, then theres times when you can make your own patch and forward changes from a conflict loser to a new plugin and load it after both mods to resolve the conflict
My Mod List
You don’t need to do anything, every single conflict is an intentional mod overwrite, we have all the appropriate patches for things that need it, I have made several patches for this mod list
Don’t use Wrye Bash to make a bash patch
First off there is no need for it on my modlist, secondly Wrye Bash is a automated program that will attempt to solve things it sees as a conflict, but actually it is an intentional overwrite, where you might have installed a mod then overwrote it with another mod, in most cases there will be a conflict you would actually have to take action with and resolve and Wrye Bash would completely miss it, thats why its best to solve your own conflicts and do this this stuff yourself in Xedit, on top of that there is no reason to ever merge things unless you are trying to get under the 255 plugin limit and if you have to, then you use Xedit to make a merged plugin, you don’t use a Bash Patch to do it, a Bash Patch will have to load last in your plugins and you could undo changes another plugin makes because of this
The Jedi Trees
[bThe Jedi Trees Mod was a discord mod that never made it to nexus, the discord server was deleted and the mod appears to be abandon, I have heard no news about it and I wish the author would come back and update it, or at least make some 3d lod resources, if you want to use or try this mod out, you need to know it is beautiful but not finished, and needed some updates, the author said it was for screenshots only, not meant to be used in a normal play through, I can not seem to get a 3d lod with the main pine tree model past Lod Level 4, but the mod is very enjoyable, I started a new play through with it and played 72 hours, and loved it, its here at the bottom of the guide for people to try out if they want to[/b]
Uninstall These Mods
Skyrim 3D Trees
-Aspens Ablaze
-Aspens Ablaze 3D Tree Patch
-All Trees Addon Files
Tree Lod Files
The Jedi Trees– [link]
Click the Download arrow in the top right corner, select download anyway, after extract the download and inside the folder will be 2 compressed files, drag them both into Vortex one at a time and drop them into the box at the bottom title Drop Files, then install and enable The Jedi Trees first, for the rules place this ( Before ) Mushroom Textures Revamped, ENB Light, Glowing Mushrooms, Deathbell by Mari, Cathedral 3D Mountain Flowers, HD Lod Textures, and Skyrim 3D Trees and Plants, then place it After everything else it asks
Origins Of Forest – 3D Forest Grass– [link]
This mod was made to be used with The Jedi Trees mod
Download the top main file titled Origins Of Forest – 3D Forest Grass with a mod manager download, in Vortex install and enable, for the rules place this after anything it asks
DynDOLOD
To add Dyndolod to your game you need to be in an interior cell, so Start your playthrough as normal and as soon as you get to Riverwood, go inside somewhere to an interior space and make a save, after you do all this, you wait inside until you get the MCM notification in the top corner of the screen, then open up the MCM and you will see Dyndolod, if it says it is active, then it is save to go outside.
To remove the DynDOLOD from your game or to generate another one, you need to go inside and make a save, then close the game, in Vortex right click both TexGen Output and DynDOLOD Output and select remove and delete archive, then reload that last save that was in doors and make a brand new save in doors, and close the game out, now you can generate another lod safely by repeating this whole process, or if you do not want it anymore remove all the stuff we install above and load your last save before you added any of it and continue your playthrough
Dynamic Distant Objects LOD – DynDOLOD– [link]
Download Dyndolod version 3.Alpha-33 from the Miscellaneous files with a manual download, then download the DynDOLOD Resources SE 3.00 with a mod manager download, in Vortex install and enable, on the install window select all the Visual Options, then select Desync Birds of Prey, for the rules place this after anything it asks, except Tamerlic Textures
Extract the first file we downloaded manually, and place it in your modding tools folder we created for Xedit and Bethini.
Open the dashboard tab in Vortex and click add a tool, name it DynDOLODx64, for the command line put -sse ,for target click the folder icon and go to your modding tools folder, DynDOLOD folder and click the DynDOLODx64.exe and click open on the bottom right corner then click save on Vortex.
Open the dashboard tab in Vortex and click add a tool, name it TexGenx64, for the command line put -sse ,for target click the folder icon and go to your modding tools folder, DynDOLOD folder and click the TexGenx64.exe and click open on the bottom right corner then click save on Vortex
Better Dyndolod Red Mountain Plume– [link]
Download the main file with a mod manager download, in Vortex install and enable, for the rules place this after dyndolod Resources
HD LODs Textures SE– [link]
Download the top main file titled HD Lods Textures SE 1K V9.3 – DynDOLOD version with a mod manager download, in Vortex install and enable, for the rules place this after everything it asks, except Tamerlic Textures and Aspens Ablaze, place it Before those mods
HD LODs Textures SE Mesh Fix– [link]
Download the Optional File titled HD LODs Textures SE Mesh Fix with a mod manager download, in Vortex install and enable
Terrain LOD redone– [link]
Download the main file with a mod manager download, in Vortex install and enable
Cathedral – Improved Mountain LOD and Z Fight Patch (WIP)– [link]
Download the main file with a mod manager download, in Vortex install and enable
Skyrim 3D Trees and Plants– [link]
Download the Optional file titled Skyrim3DTrees and Plants 3dLOD Resources with a mod manager download, in Vortex install and enable
Aspens Ablaze Add-On – DynDOLOD 3– [link]
Download which ever file corresponds to the version of the mod you installed from the install window, with a mod manager download, in Vortex install and enable, for the rules place this after everything it asks
Uninstall DVLaSS Skyrim Underside, Dyndolod 3.0 comes with this mesh
Visual Studio 2015, 2017 and 2019– [link]
You already have this from Engine Fixes at the beginning of the Guide, However it is a requirement for Dyndolod to run, so I am listing here anyway so you know, don’t download and run it again
For more information on DynDOLOD 3.00 Alpha 33
[link]
DynDOLOD Instructions
There is various sizes you can generate with, so this is something you may need to do a few times to find a good middle ground between performance and quality, I used 1024, you may want to try out 512 for better performance, Lanuch TexGenx64 from the Vortex dashboard, for Select Output Path, it should already be directed to your Modding Tools/DynDOLOD/TexGen_Output if for some reason it is not then close it out and go make 2 new folders inside your DynDOLOD folder titled TexGen_Output and DynDOLOD_Output and launch TexGenx64 and direct it to your new TexGen_Output folder, set it up for what texture size is good for you, i use 1024, if you are hurting on performance try 512 and disable grass lods, after let it run, here is a screenshot below of the settings I used for TexGen.
After TexGen is done, exit out and go to Modding Tools/DynDOLOD/TexGen_Output and inside will be a new textures folder, with what ever Archive tool you use compress that textures folder and name it TexGen output and drag it into Vortex in the Drop Files Box at the bottom and install and enable, for the rules place this after everything it asks, Then go back into your modding tools folder, inside the TexGen_Output folder, you can delete the new textures folder, now deploy your mods again to be on the safe side so the next part does not waste your time
Launch DynDOLODx64 from the Vortex dashboard, on the first pop up window select Advanced, makesure all the worldspaces are checkmarked in the top left corner, I select High, make sure the output is directed to the folder you created, makesure Ultra is checkmarked for 3d Lod and Generate tree LOD is not checked,I all so checkmark Glow windows, Fake lights child world, and Upgrade NearGrid large references, you may want to go with 512 for better performance, here is a picture of the settings I use.
After Dyndolod is done, click save and exit and go to Modding Tools/DynDOLOD/DynDOLOD_Output folder, inside will be 3 new folders Meshes,skse, and Textures, and 2 plugins DynDOLOD.esm and DynDOLOD.esp, with what ever Archive tool you use compress all 5 of these into one Archive and name it Dyndolod Output, and drag it into Vortex in the Drop Files Box at the bottom and install and enable, for the rules place this after everything it asks, Then go back into your modding tools folder, inside the DynDOLOD_Output folder and you can delete all the contents


Dyndolod assigning different Lod Levels
To get a better Lod for trees
While in Dyndolod, before running it, you can scroll down to trees, and double click it, and assign how you want the lod generated for each Lod Level, once you double click that row a menu will pop up, I will share 2 screenshots below, you can play with these settings to really get what you want, but it will cost performance and a lot of time, considering you have to run Dyndolod each time you want to test a setting out, then test it in game


Changelogs
This section is a very requested section by many users, so I will post all changes I make to the guide here as well to the appropriate sections to the guide, it’s a general rule of mine to not update any mods mid play through, unless its a pure meshes and texture replacer, otherwise you risk breaking your save, so I recommend anyone using the guide to not update mods that receive updates that I place here, you are free to add the new mods, this section will continue to grow and may become confusing and hard to manage and thats one of the reasons I have been hesitant to create it and I am open to suggestions on the best way to manage it
3/1/2021
-Updated instructions for Trees Addon in Environment 1
-Removed the Trees addon Billboards from Dyndolod
-Updated instructions Lanterns Of Skyrim II in Main Architecture Texture Overhauls 2
-Added new mod to Main Architecture Texture Overhauls
College of Winterhold HD SE
-Added new mod to DLC Texture Overhauls
Rally’s Solstheim Shrines
-Added new mod to Other Texture Replacers
Iconic’s Remastered Paragon Gems Retexture
-Added new mod to Clothing, Weapons, and Armor
4K Nordic Pickaxe
3/6/2021
-Updated instructions for Aspens Ablaze
-Added instructions for the New Rudy Enb
3/7/2021
-Updated College of Winterhold HD SE instructions
-Updated instructions for Rustic Windows
3/11/2021
-Updated instructions on High Poly Project
-Added Organic Riften Leaves, a mod I use and thought was in the guide all along, must had left it out somehow
-3/20/21
-Added new grass mod Tamrielic Grass
-Added Retexture for The Scroll SE
-Removed HD Werewolf Retexture and Added Apex Werewolf Replacer
-Added new section to the guide titled Camera Mods
4/9/21
-Added ElSopa – HD Keys Redone
-Added ElSopa – Papers HD
-Added High Poly Soul Husks and Updated instructions for Soul Husk Retexture
-Added Simply Realistic Guards and Stormcloaks
-Added Serpentine Dragon Retexture
-Added Ancient Falmer Armor Redone
-Added 4K Bonemold Retexture
-Removed Skyrim Remastered Troll Skull and -Added Troll Skull Retexture
-Added Deer Skull and Antlers Retexture
-Added Ruins Tools Retexture
-Added Wolfskull Altar Redone
-Added Ruined and Burned Books Retexture
-Added ElSopa HD – Meridias Beacon SE
-Added Retextured Pulsing Daedra Heart
-Added Bijin Skin UNP and CBBE SE back to the guide
-Added Authentic Eyes back to the guide
-Added Crimson Nirnroot Satchel
4/10/21
-Added Sovngarde HD
-Added HD Lava for Dawnguard
-Added RUSTIC ELDERSCROLL
-Added RUSTIC MAPS
-Added RUSTIC RELIEFS
-Added RUSTIC ARMOR and WEAPONS SE
-Added RUSTIC AZURA’S STAR
4/11/21
-Removed Project Clarity Statues and -Added Iconic Statues
-Added 4K Torture Rack
-Added Stockades of Skyrim 3D
-Added Frankly HD Masque of Clavicus Vile
-Added some of the optional files of aMidianBorn Book of Silence SE back to the guide
-Added Elven Weapons for Silence SE
-Added Ebony Weapons 2017 Retexture
-Added SkyUI SE – Flashing Savegames Fix
-Updated install window instructions of Believable weapons
4/12/21
-Added R.A.S.S. Rain Ash And Snow Shaders back to the guide
-Added Glowing Mushrooms by Mari
-Removed HD Lava for Dawnguard and -Added Rally’s Lava
-Added Rally’s Hooks and Saws
-Added Rally’s Werewolf Totems
-Added Dark Brotherhood Tenets
-Added Much Better Night Mother
-Removed 1st Person Candlelight Fix and -Added Rally’s Candlelight and Magelight Fix SE
4/17/21
-Added Northbourne NPCs of Haafingar
-Added Northbourne NPCs of Haafingar AI Overhaul Patch
4/29/21
-Added Human Heart Retexture
-Removed Silky Spider Eggs SE and -Added Spider Egg and Sacs Retexture
-Removed Realistic RS Children KS Hairdos Pack
-Added KS Hairdos SSE back to the guide
-Added Salt and Wind – Rough Hair for KS Hairdos SE back to the guide
-Added Immersive KS Hairdos back to the guide
-Updated instructions for powerofthree’s Papyrus Extender and Frozen Electrocuted Combustion
5/6/21
-Updated the address link for Windows Shadows, until I test the new version, version 7.4 is what the guide will be using
-Added Serana Re-Imagined SE
-Added Serana’s Invisible Hood
5/11/21
-Changed the link address for High Poly Head 1.4
5/13/21
-Removed CleverCharff’s Soul Cairn and -Added Soul Cairn HD
5/14/21
-Added 3 new sections of mods around 40 mods to the guide that I will be using in a new play through very soon, all of them except the last section I will add into the guide to there appropriate sections, the New Trees and Lod I will add as a 2nd option for trees, instead of removing the trees I have in here now, the last section will remain at the bottom until I finish a play through with them, I still believe they are going to work out just fine and I recommend them for a better experience
5/15/21
-Fix an issue with Idgrod the Younger in the NPC Clothes Redone Patch for Goonz Mod List, she had Black face were I accidentally left a vanilla head part in the patch, so if you already had my patch downloaded you need to delete it and download the new one
-Updated instructions in the New Trees and Environment section to get a better result with BDS snow shader and Projecteddiffuse
5/16/21
-Added Realistic Armor and made a Patch so it works with my mod list, you will find it in the New Mods Sections at the bottom of the guide
-Added a Fixed version of Birds of Skyrim SSE Edition to the new mods sections
5/25/21
-Removed the Update File Mesh Tangent Space Fixes from the Majestic Mountains Mod Page
-Added Skyrim – A Mountainous Experience
-Removed Cathedral – 3D Mountain Flowers
-Added Velvet ReShade at the top of the New Environment Section
5/26/21
-Added the following mods to The Base Textures and Mesh Fixes Section
Skyrim Landscape and Water Fixes, Assorted mesh fixes, Unofficial Material Fix,
Dlizzio’s Mesh Fixes, Whiterun Mesh Fixes, Mesh Patch for Various Mods
5/27/21
-Removed Immersive KS Hairdos
-Removed WiZkiD Hagraven Clutter and Bones from the New Mods section at the bottom
-Removed Enhanced Blood Textures (Fixed version) from the New Mods section at the bottom
5/29/21
-Added Project Clarity – Clutter Textures Redone to the Base Textures and Mesh Fix Mods Section
5/30/21
-Added the following mods to Clothing, Weapons, and Armor Part 2 Section
Remiros’ Chitin Armor HD, Remiros’ Ebony Blade HD, Sheathed Ebony Blade, Remiros’ Scimitar HD, Remiros’ Dawnbreaker HD, Matching Blades Sword And Scabbard
-Added 4K Tendril Vines to the Environment 2 Section
6/10/21
-Placed the majority of the new stuff at the bottom of the guide into the appropriate sections were they belong
7/7/21
-Removed CC’s Castle Volkihar Reborn, CC’s Fort Dawnguard Reborn, Blubbos Trees in Whiterun
-Added Castle Volkihar HD – SE, Fort Dawnguard HD – SE, Nocturnal’s Portal HD, Dragon Bones and Scales
7/8/21
Removed Majestic Mountains and its lod files, Skyrim 3D Rocks, Skyrim – A Mountainous Experience
7/9/21
-Added projecteddiffuse snow textures and Snow textures for 3d Trees to the environment section
My Other Modding Guides
Will be doing Fallout 3 eventually
[link]
[link]
[link]
[link]
[link]
[link]