Overview
In this guide, you will be making an amnesia CS with the language C++. I have made many Custom Stories and i hope to make more! You will need SOME experience with how this all works. This will make you have AMAZING experience with C++. This also works with mods. Just a few tweaks, and you’re all set for a mod
Part 0.1: How to program
What the hell am i doing, and how do i make a custom story
First off, you should really grasp the language that the HPL scripting language AngelScript is based off of. That language is C++.
This stuff is pretty low level so im going to be breaking this into chunks because this is going to be alot of information.
Getting started
You will need a compiler if you would like to follow along with this custom story:
On windows the only compiler is sadly Visual Studio, whether it is the build tools or the actual IDE itself.
EDIT: USE MINGW (windows port of gcc) IT IS A GODSEND
For the Unix-Like users (OS X and Linux), you will need to use either gcc or g++ (i believe this is also called gpp).
In windows the visual studio ide will compile for you and run the program, but, you will need to define a preprocessor variable at the top of the document, it should look like this.
It will tell you to define it without it. Pretty much, this just tells the compiler for windows that the c-standard library is safe to use (With some exceptions, ill get to that later). This is NOT needed on unix.
Lets create a main function. The main function tells the compiler what happens when we run the executable. This can be changed, but for now lets keep it at main.
In c++ this looks like this:
This pretty much just runs a program and says it was successful. The void type as a parameter can be a little confusing to some, what void means in c++ is that it has no type and therefore has no defined memory size. It isnt needed but it is good practice to use it for portability.
Everything inside the main function will be executed.
Part 0.2: How to program
Now that you know what the basic idea of the main function is, it is time to grasp the simple task of printing to the console.
As said before, you will need to define a preprocessor variable on windows but on unix-like systems, this is natively supported.
the print method is contained inside the stdio.h header, which is short for standard input/output, and, in my honest opinion, is the cleanest print function incorporated into any language ever.
Before we can use this method we need to add this under our preprocessor definition
All this does is tell the compiler to add whatever text is in the file stdio.h to whatever file this is included in.
The method is named printf and is defined like so:
The format argument is something not seen before in many beginner level languages. It has an unusual type. What is a const char*?
A const char* is a low level definition of a string (fancy word for character array). In fact it isnt even an array, it is a pointer. The const is short for constant which means the string has to be defined literally (the argument wont take a variable unless it is constant).
The ellipsis (…) is the way of telling a compiler it can take an infinite number of parameters. This is where the variables can go and they can be any type, as long as they are in the same order as the format.
lets look at an example of this…
This prints out “Hello World!” and a newline. The %s means that it will place a string in that position of the format. Ultimately, the format is a set of instructions.
There are other format types, for example:
%i is for integers
%s is for strings
%c is for characters
%f is for floating point numbers (decimals)
adding the printf function inside of our main method will print out whatever we feed it:
This will print out “Hello World! 1000”
Part 0.3: How to program
Now that the basic idea of printing to a console has been grasped, why not make things a little more challenging? File IO seems like a step in the right direction considering they are relatively the same.
Why are they the same? you might be asking… Well, printing to a file is the same as printing to a console. They are both buffers in fact, the printf method on windows defaults to printing out to a file instead of the console.
There is no additional header needed as stdio has everything needed.
to create a file buffer you need to initialize it using the method fopen which is defined like so:
The directory parameter is the directory of the file we want to open. Keep in mind that the c standard library is defined in c not c++, so it doesnt have exception handling instead it has realtime error checking which is treading into a more complex region of this lession. Generally, avoiding this will involve giving a directory to a file not a ‘folder’.
Now, fopen returns a FILE* type which is essentially a pointer to an initialized instance of the type FILE.
To actually create and use a file, that will look something like this:
This creates a file buffer in write mode.
This is where the file io and the printf function share similarities. printing to a file uses a method called fprintf. It is the same as printf, although it has an additional parameter that takes a file pointer.
The definition looks like this:
If we were to print the same thing we did in Part 0.2 into a file it would look like this:
It is the same thing, just with a file as the first parameter.
Part 0.4: Really starting to program…
Lets start method creation. Method creation in c and c++ are both the same, but they are different from other languages in the sense that the order they are defined in matters.
Let me explain that last part better:
This one above works while the one below does not:
The reason behind that is the fault of monolithic compiling (running through each line in a ‘linear’ motion).
Example 1 has method1() defined before method2(), therefore method2() can use method1().
Example 2 has method2() defined after method1(), therefore method1() has no idea method2() even exists.
Think of it as a group of people and they are all facing to the left. Each person can describe the person infront of them but not the person behind them.
The way of fixing this is by prototyping. Think of prototyping as a mirror so every person can see eachother in the reflection.
If we were to reformat Example 2 so that it works we simply put this at the top of the file:
We pretty much created an undefined method. Now, any method can be used within the file. Another great way to look at this from a compiler’s point of view is that the prototyped methods are telling the compiler that they exist SOMEWHERE within the file.
Prototyping is actually what headers are mainly used for. It reduces the overhead by telling the compiler that the methods exist and that they will be compiled/defined in some other file. In other words, when you include stdio.h you arent including the 4000+ line file that is just solid definitions, youre including the 400 line file that includes declarations.
So i can have two files now:
Header.h
And
File.cpp
It is also worth noting:
an include with “” (quotations) is going to be relative to either a special user defined location within the compiler or the relative location of the file it is written in.
an include with <> is going to be a system defined include path.
a project with user-made headers is most likely going to use quotations.
Parameter names in prototyped method declarations do not have to be the same in their definitions.
To reduce clutter even more from headers a good practice is by creating preprocessor namespaces like so:
Header.h
The compiler may see multiple occurances of header includes but will only compile the one that comes first in line. This can drastically improve compile times.
Part 0.5: Memory management
The reason that this seciton is being taught after everything above is mainly because memory management is more complex in c and c++ than it is in other languages. The memory isnt dynamic and needs to be managed dynamically. You will also notice that strings and objects have quite a bit in common when it comes to memory allocation.
C and C++ lack what is called a garbage collector. A garbage collector is essentially a program that runs in unison with the user-written program. It constantly scans calls and the main scope and checks whether instances of objects are being used at all. If they are not, they are freed from memory.
Enough of that, lets go over how C/C++ manages memory. The C standard library by default has this as the language would be pretty useless without it. The header we need to include is stdlib.h which includes all of the general methods needed for memory and the works.
Inside of the header there are 4 specific memory functions that are used more than others. These are malloc, realloc, calloc and free as well as a native language method sizeof. Let me explain what each does:
malloc is the general memory allocation function. It takes a size_t parameter which tells malloc how many bytes are needed. When paired with sizeof it can be used to allocate memory for arrays and pointers. It returns the pointer to the newly allocated memory.
Example:
Same as malloc really. The only difference is the additional paramter which is the buffer needed to be resized. It returns the reallocated memory pointer.
Example:
The exact same thing as malloc except it initializes all the values as full bytes (11111111). The only difference is that it takes two parameters, len and size. Essentially written like so:
Example:
free is the opposite of malloc in the sense that it “destroys” pointers in memory. General rule of thumb is that for every memory allocation in the program, a free should be used.
Example:
this takes a parameter that is a type and returns the size in bytes that the type needs to store one unit of that data type.
Example:
Recently, i’ve taken a fond liking of using sizeof on the dereferenced pointer (*var). The reasoning behind this is that sizeof can recognize the types of variables, for example:
This way is generally easier in the sense that incase variable i’s type ever needs to be changed, the parameter of sizeof will always change, making the programming and the program itself, much safer than before.
When using any memory allocation function, you will always need to cast the pointer. This is so the compiler knows how many bytes to move when indexing. For anybody that doesnt know what a cast is, it is essentially changing what type the variable being used is and looks like this:
Memory leaks happen when a non-used pointer is lingering in memory, which can degrade performance dramatically.
An example of a memory leak is:
The fix for this is simply adding a free before the memory is allocated like so:
Part 0.6: Structures and intro to OOP in C/C++
Structures
For anyone who has programmed in C# before knows that C# contains structs. Structs in C are MUCH more efficient than structs in C#, the reason behind that is structs in C are not an actual type like they are in C#, it is just a fancy pointer.
Think of structs as arrays that can consist of many different types. They can contain multiple variables and can be allocated like a normal variable. The size of a struct is essentially the sum of all the sizes of the variables inside.
Visually this looks like:
You might be asking “why am i using structs instead of classes? does C++ even contain classes?” The answer to the first question is:
structs are the simplified version of classes so i thought it would be more appropriate to teach first instead of classes
and to the second question:
Yes C++ does contain classes, but there is one huge difference between structs and classes and that is methods
Methods in structures
Methods are technically not supported for use with structs. But, since void is a variable type in C/C++, they can be pointed to from within a struct.
If you remember previously, i used the term dereferencing pointer which is stepping down a level in terms of pointer reference. Dereferencing an int* makes it an int. So, if we can do that to an int, which is a variable, we can do it to a void, which is also a variable. The dereferenced version of a void* is a regular void.
By doing this:
We created two instances of method1, except in this case, myMethod can be any method as long as it has two parameters that are ints.
The basic formatting for this notation is:
It is written almost entirely the same, except we are telling the compiler that the method variable needs dereferencing and not the type itself.
Why not put this into a struct? It is essentially the same concept and is useful for when methods need to be interchanged. The threading library (pthread.h) on unix machines utilizes this feature.
Fun fact: voids do not have sizes, therefore, using a void pointer (void*) inside of a struct is the same as using any other variable pointer (int*, float*, double*, etc). This makes structs more efficient than classes.
Anywho, here is an example:
Rewritting the this function from other oop languages is essentially:
for return methods just change void to an actual type:
Enough of this abstraction, lets move onto some more oop…
Part 0.65: Bitfields and structs
Bitfields
Bitfields can really make a program more efficient. Bitfields are little declarations that tell a structure how many bits of a byte or bytes it should use for one variable. Writting a struct that is a nyble (4 bit number) would look like this:
This isnt the best example, and i will get to one soon, but essentially, you can allocate how many bits are used for any variable type.
The best example of this is using many booleans. C lacks a boolean type but the concept is the same. booleans are the same as ints fyi.
see this for example:
Using sizeof on this struct would show that it is 32 bytes! And for only 8 1-bit values. That is crazy! What if we were to use bit fields? Would that decrease the size of the struct?
The answer is yes, it can.
Rewritting the struct as so:
And retrieving the size would show that the struct is only 4 bytes now! How neat is that? we went from 32 bytes to 4.
Using unsigned char instead of unsigned int would decrease the size to 1.
That is pretty much the basic of bit fields. A simple concept.
THIS CAN ONLY BE USED ON REGULAR RESERVED TYPES (int, float, double, long, etc.)
Part 0.7: Classes
Classes
Classes exist in only C++ and the reasoning behind that is C lacks the native memory safety to handle classes. C++ was also designed to be more user friendly. They are almost the same as classes in other languages, such as java and C#, but there are two major differences, and those are syntax and prototyping. In C++, classes can utilize the prototyping feature similar to what methods have.
Writing a class
Prototyping a class is a very good practice. Definitions of classes are very different and they contain a new operator and a new type. Those are :: and this.
::
:: is a static referencer, using a :: like so:
would set the static variable, member, to a value of 20. This is actually how class definitions are written.
Lets learn how to prototype a class before actually defining one.
Lets say we have two files, class.h and class.cpp. We would need to write the class like we would in any other language. For people who are experienced in java, the class name and the filename do not need to be the same. In fact, you can declare multiple classes in one header. Lets create a class named myClass that contains two ints, x and y and one method that returns and int to calculate distance:
That looks easy enough right? well, it would be unusable for anything but itself right now. Class members in c++ have a default member inheritance of private, which means only the class can access those members.
There are different types of class member inheritance that effect all sorts of parameters, but since classes and OOP are such a massive topic, im only going to focus on public and private.
Introduction: Syntax and Basic code structure
Angel script is directly influenced by C++, which is C but with a little more features, such as OOP (Object Oriented Programming).
Since it is influenced by C++, i should give you the basic reserved types for AS:
You will most likely only use:
special types such as:
will be use by:
There are 2 types of methods, Void and Return
Void methods are used to represent logical functions that do not return a value, hense the name Void.
Void methods look like this:
Return methods are used for math and logic. while a void method can do this as well, this eliminates the use of a variable needing to be defined for the value.
Return methods look like this:
You might have noticed i put in a dynamic type (T). This is not supported by angelscript i am using it as an identifier for a type.
The difference between the two can be shown below:
LOOPS COMING NEXT
Part 1: Setting up the Custom Story
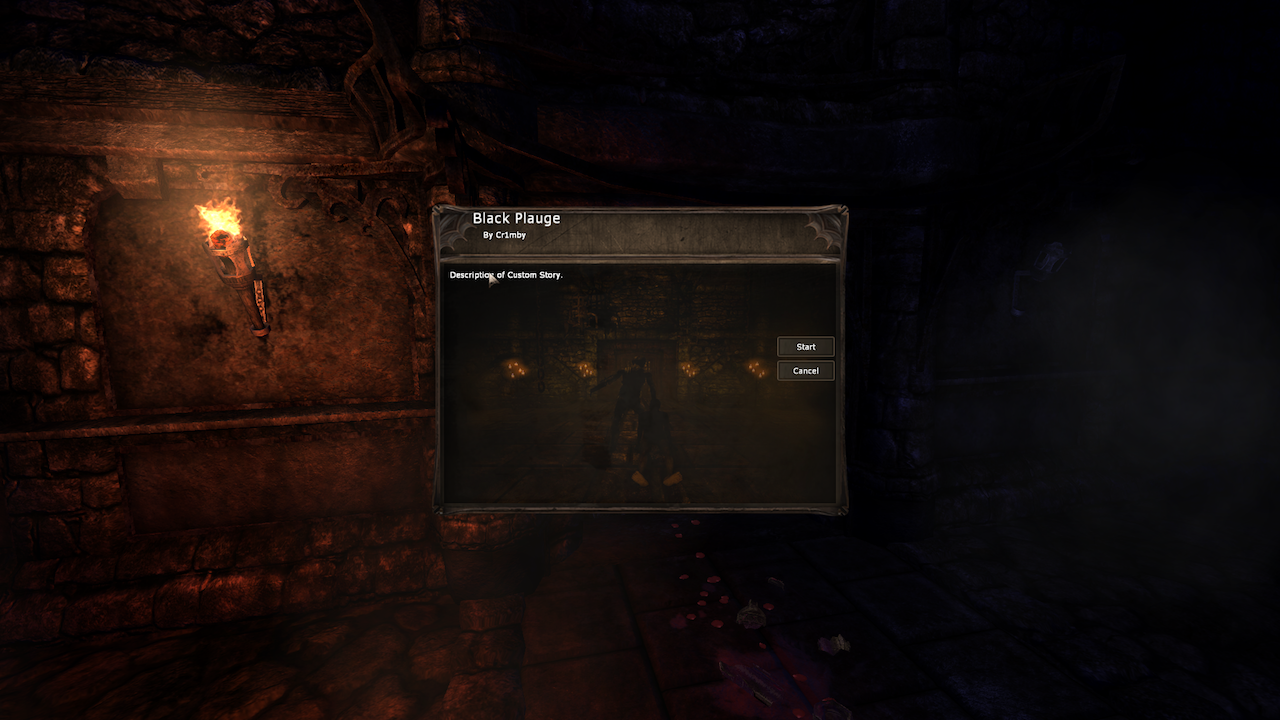
FIRST AND MOST IMPORTANT! Make you CS folder, i’ve named mine Black Plauge.
Now open a text editor, i use Text Wrangler for mac, windows users should use notepad ++, it keeps your coding files organized. Linux users can use whatever, im not sure what they use.

Take a look in the guts of the amnesia file folder. All you’ll need is a few folders. DON’T COPY THEM! you can use them in your CS without them being in the CS folder.
Now you’ll need to make a few folders (for custom monsters, sounds, walls, floors, etc.)inside the CS folder.
These are the folders you’ll need:
- A folder named “maps”
- A folder named “entities”
- A folder named “sounds”
- A folder named “Textures”
- A folder named “Music”
Make a file in your text editor called custom_story_settings.cfg
Inside, put the following code:
Just change your start map to whatever your first map is, the author to your name, and the CS name.
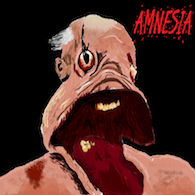
Next, we will choose a picture for the start menu.
You’ll need a certain program that allows picture editing, i use photoshop, GIMP is an alternative aswell. Once you saved it, make the size, 588 x 455
This is mine:

You’re all done setting up the roots for the startup and info! Next is the .lang, or, language file.
The .lang file, or language file.
You know how when you pick up a lantern in-game, it says “picked up lantern”? Well that’s the lang file being shown as a message. The description of your CS is also the lang file. Open a text editor and copy this code:
feel free to play around with it.
See that category at the top?
It looks like this:
That’s the decription! Change that, and you’ll get this:
Just keep the Category names the same, some items need certain categories. Change the item names to the name of the items. Ex: Study Room Key would be named key_study_1
Map Editing
To make a map, you’ll need the Editor Suite[wiki.frictionalgames.com]
Install it.
Now, on the start up screen, you’ll see the editor suite tab. Click that and click ‘Level Editor’
This should pop up:

See the perspective box? Hover your mouse over that, and press the space bar
Now, the tabs in ORDER!:
Select
Lights
Billboards
Particle Systems
Sounds
Static Objects
Entities
Areas
Primitives
Decals
Fog
Combine
To make a simple room, open the static objects tab, and choose your category of choice
Make a square box with the walls, and use welders to connect them and make it look nice and pretty.
Enitities are AWESOME! They consist of keys, objects, ladders, and monsters.
They can all be enabled, so that they cannot be seen (Used with poofers).
Use primitives for floors and ceilings.
Areas consist of many types. Here they all are.
Script: Trigger’s a script when the player looks at it, collides with it or interacts with it.
PosNode: This is used in combination with Rope areas, to show where the rope ends.
Flashback: Trigger’s a flashback sequence.
Sign: Displays text when the user looks at it.
SlimeDamage: A damage area for the red slime (The Shadow).
Examine: This gives an area a description when it is examined. Also allows for different
descriptions depending on the player’s sanity.
Insanity: It can trigger sanity events repeatedly depending on your current sanity level (Note: this
area doesn’t have any callback functions, so if you need to do a complex sanity event use the script area). These sanity events include bugs crawling the screen, flies flying around, and insanity sounds. Check “redist > misc > main_sanity_events.cfg” for more information.
Ladder: This area defines where a ladder is (Note: This is not the actual ladder players will see in the game, but just the area that lets them climb. Make sure you add a ladder model or the players will be climbing on air).
Liquid: This area defines where water is (Note: Just like the ladder this doesn’t have the actual water effect associated with it).
Sticky: A sticky area is used to make entities “stick”. When an entity is in contact with the area, it will automatically snap to the center of the area. There are several options for tweaking the behavior.
Rope: Create’s a rope. For more information on what this does see How to Make a Rope.
PathNode: Guide’s enemy monsters around the map.
PlayerStart: Tell’s the game where to start the player (maps uses PlayerStartArea_1 as the default starting place).
Now, once you’ve created your basic map, it’s time for the script!
Scripting
There are many tabs within scripting called Engine Scripts[wiki.frictionalgames.com]
Start off in your text editor with this code:
Save it as (mapname).hps
This declares what will happen on the first time we start a level in a game. If Start is pressed for a new game, then this starts all over again.
This is good for playing music, sounds, and intros!
Intros sounds cool doesn’t it?
To make an introduction. We will need to use timers.
In the void OnStart() we will put the code:
YES! you can control the player!
Repeat this as many times as you’d like, but change T1 to T2, ect. List it. and make the 2.0f bigger each time.
Make 2 areas randomly around the player’s 360 FOV
Next, we will need a function!
Copy this code:
What will happen:
In 2 seconds, the player will sigh, and blink.
In 4 seconds, the player will breath and look at the target
In 6 seconds, the player will look at another target.
In 8 seconds, breath
In 10 seconds, the player will stand up and be able to control, and a message will pop up.
Here’s a video on making an intro, and using the texture editor:
To make an enemy walk, we will need patrol nodes.
To make patrol nodes, we will need to add ANOTHER code to void onstart, or, the function called when an entity is activated.
The code is:
asName – internal name of the enemy
asNodeName – path node
afWaitTime – time in seconds that the enemy waits at the path node before continuing
asAnimation – the animation the enemy uses when reaching the path node
NOTE: YOU DON’T NEED TO ADD ALL PATROL NODES! ONLY WHEN THERE IS A TURN IN THE PATH, OR THE ENDING!
DISREGARD THIS IF THE ENEMY SHOULD GO BACK AND FORTH, OR A LOOP!
At the end of the path node, make an area the size of a door frame, find the internal name of it, and add this function code:
For a loop in path nodes:
Instead of:
we’ll put:
This would be a square loop where it would go around 4 corners continuously.
Originally posted by Yourcomputer:It is possible to make the monster to follow a set of patrol nodes and never stop repeating them until the monster is disabled manually by SetEntityActive or until the player is out of the monster’s activation distance. By default, monsters will automatically loop through the path nodes assigned to them, but there are many factors that would cause them to auto-disable before then. Before the release of Justine, people had relied on continuously adding path nodes to the monster while having increased the monster’s activation distance to a large amount, therefore the monster never reaches the final path node in its memory and so never given a chance to auto-disable and the player is always within its activation distance. Since the release of Justine, we’ve had the option to disable “auto-disable on final path node” for the monster. By default, the enemy suitors Basile and Malo have auto-disable disabled for them. In order to do the same for other monsters, you need to manually edit the ENT file for the monster.
Open the monster ENT in a plain text editor and add the following line under the UserDefinedVariables element:<Var Name=”AutoRemoveAtPathEnd” Value=”false” />
For more information on tools, and stuff, go here.
Frictional Game Wiki[wiki.frictionalgames.com]
Scares and Other cool scripts
Scares in Amnesia are nothing too expert. Just a simple script and sometimes a PS (Particle System).
NOTE: These are all the ones I know
For a door slam.
Go into your map.hps, and on the void OnStart() put:
Place an area
Place an Area down that covers either a whole narrow passage way (Width=long Length=short) or infront of a door frame, and name it script_slam. Next we’ll need the function for the door to slam shut
Get the name internally of your door, replace door_1 with it, and put this script in map.hps:
This is what you’re probably expecting:
But that only makes the door slam with no motion, it’s first at a 90 degree angle, then it’s at a 0 degree angle, with none in between.
So, we will put instead:
Uploading your Custom Story
Now, once you’ve finished you’ll want to post this on the interwebs so others can play it. There is no official Amnesia CS database for custom stories so you’ll have to put it on ModDB. Take note; ModDB is for mods. Just putting a suggestion.
An Easier way to do this is through DropBox, and if you can, make a youtube account for amnesia CSes, and make little videos on them with links in the description. Also, use Bit.ly. You dont want people getting your other stuff.
Another way is to make a website or use a website. You can use Dreamweaver by Adobe for the HTML, OR you can use Google Drive. In conclusion, i’d use an actual website, because inorder to host a website, you need a super powerful computer with over 64GB RAM.
Other tutorials
I have been working on this guide for a long time now and it is kinda making me lag behind MY story. So here i give you the MOST HELPFUL tutorials on the internet
I present you,
In response to grunt torso gaming
Your code, based on method calls, for the most part is ok, i think you just misread the use of parameters.
AddEnemyPatrolNode(string& asName, string& asNodeName, float afWaitTime, string& walk.anim);
This parameter is the name of the entity inside the HPL level editor.
Example, if named Monster1 this parameter should be “Monster1” (With quotations).
This parameter is the name of the node within the HPL level editor. Do you see a pattern?
Example, if named Node1 this parameter should be “Node1” (With quotations).
These nodes should be added in order, as you are giving the engine a user-defined pathfinding route.
ALSO wherever you see string& in a parameter, use quotations (“”), because a string is a string of characters.
Float is short for floating decimal, this parameter tells the engine how long the monster should wait before moving to the next node. You do need to put a lowercase “f” at the end of the number to indicate that it is a float. “sec” is not needed.
Animation the engine should play. you got this one right, but, it wasnt in quotations.
I sadly cannot help you with this project as i would need access to the whole project. Watch some tutorials on the subject because you do need some prior knowledge in programming to work with this kind of stuff (Which is said in the overview).
The crashes are most likely happening because the engine has no clue what to do with your jumbled code.
Examples:
void OnStart AddEntityCollideCallback(“grunt”, “areacollide”, “node_5”, true, 1); (
this made my skin crawl when i saw this. Not only because it is poorly structured, just by how your first line of code is diabolical.
You start by doing void OnStart AddEntityCollideCallback which i assume is supposed to be the method AddEntityCollideCallback inside of the method OnStart
The last item i noticed was the opening parenthesis at the end. If you are trying to declare a method body, use the curly bracket ( { ) instead.
SetPlayerActive(false);){ }
Here is where that parenthesis ends, with a method body afterwards with no declaring method.
AddEnemyPatrolNode(string& asName, string& asNodeName, float 3.5, string& walk.anim);
AddEnemyPatrolNode(string& asName, string& asNodeName, float 3.5, string& walk.anim);
AddEnemyPatrolNode(string& asName, string& asNodeName, float 3.5, string& walk.anim);
AddEnemyPatrolNode(string& asName, string& asNodeName, float 3.5, string& walk.anim);
These are outside of a method, and are in what is called a field. Where methods and variables are declared. Fields are like global variables that are limited to one file. I’ll get into this another time.
Last note on this error is that you just have the declaring parameters where they should be logic types (int, float, bool, string, object, etc).
Please read more on basic scripting and strengthen your skills. I dont want to walk someone through this when they have the internet as a whole to look through.
This should fix the crashes, but they are still prone to happen.