Overview
Model modding seems to be like some form of dark magic among the NT crowd, so I decided to make this guide to help you through the painful process of modding a Source game.(seriously this engine is two decades old, so be ready)
Introduction
Hi, I’m John. I’ve been modding NT for around 3 years now, and I’ll be guiding you through the set up and modification of NT’s models.
So let’s jump right in, and I hope you’ll enjoy your modding endeavours.
Looking for a guide on texture modding? go here: [link]
(this is also my second guide, so any feedback or ideas is appreciated)
Model modding: what you’ll need
- Crowbar (great place for troubleshooting too)
- 3D modelling software of your choice (blender in the case of this guide)
- I’m using blender so I use this[steamreview.org] for import/export of decompiled models
If you’re using Maya have a look here and here.
For how to import and export decompiled models respectively.
If you’re using 3ds Max have a look here.[www.chaosincarnate.net] They might be outdated for the most recent version of Max and/or Source however. (good to know if you want to create mods for newer Source games)
I won’t be covering Maya or 3ds Max however.
If you encounter any issues with the abovementioned pieces of software, I’ll do my best to help you in the comments of this guide.
Model modding: decompiling
Let’s open Crowbar and take a look at the interface.

Just click “Browse…” or paste in the filepath of the file you want to decompile (v_jinrai_aa13 in this case) and where you want the decompiled files to be saved.
If you’re decompiling a whole folder of assets at once, I recommend ticking the “Folder for each model” checkbox. Be sure to also check “QC file”. (Group into QCI files is handy for long/complex QC files, it splits them up into manageable sections)
If you are decompiling an asset with animations, be sure to check “Bone animation SMD files”
(again, checking “Place in “anims” subfolder” is not required but handy for organization)
Now simply hit “Decompile” under the section of checkboxes and your model should be decompiled into .smd and .qc(i) files into the directory you specified earlier.
Model modding: editing the model
This section will be covered using Blender, check the links in “what you’ll need” if you’re using a different modelling package. This guide also assumes the user has basic knowledge of Blender and the following features: materials, vertex groups, rigs, etc.
First you’ll have to install the Blender Source Tools, this allows Blender to import and export .smd files easily. BST has many great features, but here we’ll just be covering the basics of editing an existing mesh, and then exporting it again. Check this link for more info and documentation. It also details how to install the addon.

and navigate to the folder where you saved the decompiled asset. Be sure to import the _reference.smd file first, before importing an animation for that model.

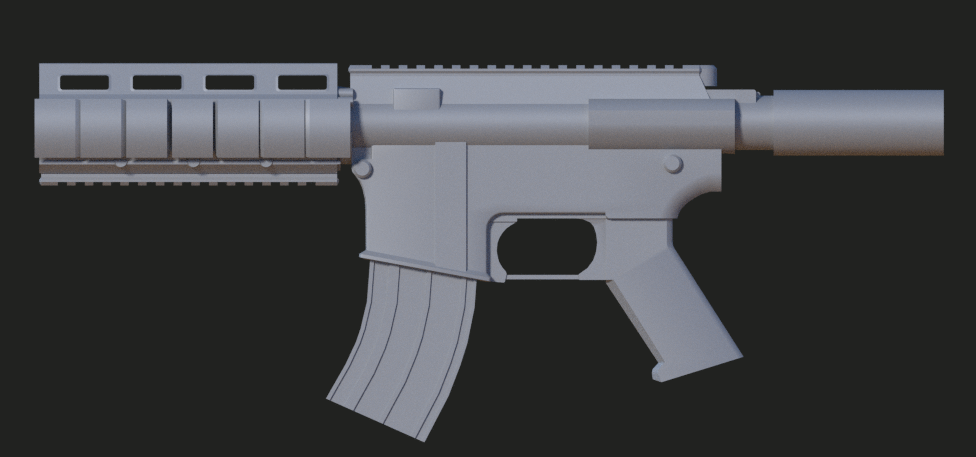
As you can see I’ve already modified this AA13 model with some parts I borrowed from other NT weapons.
Some things to be aware of:
- Do not change the names of models/materials unless you also modify this info in the .vmt’s and .qc(i) files.
- The name of the material in blender matches to the name of the .vmt file.
- Don’t seperate the model into multiple objects or change the vertex group names, etc. (unless you know what you’re doing)
- Be sure to assign any changes/additions you make to the correct vertex group. Else it will not animate. (not relevant for models that lack animations)
- Don’t forget to UV unwrap and assign a material to any new geometry.
After making your edits to the model, you’re ready to export it.
Model modding: preparing for export
Now that you have your modded model, it’s time to export it.

- The Export Path is where Blender will save the exported .smd files.
- Export Format should be set to .smd for NT.
- Target Up Axis should match the up direction in Blender (Z in this case)
BST also includes features for automatic compiling, but the manual way offers more control. In the case of this guide we won’t be doing any .qc modifying, so we can leave those settings alone.
The “Source Engine Exportables” section shows all the objects that you can export, animations will show up here too.
Tip: you can check if you forgot to assign any part of the mesh to the appropriate vertex group, by importing an animation now and checking for any issues. You can simply untick its checkbox before export.
Now hit export and you’re ready to recompile it using Crowbar.
Model modding: compiling
When done properly, compiling is as easy as decompiling. But there are some things you should be aware of.
Again “QC file or folder:” and “Full path” are the locations of your decompiled model, and the location of the recompiled model.

Note: Crowbar will override existing .mdl files with the same name, be mindful of this and keep backups.
- No P4: no perforce integration
- Verbose: more info in the window at the bottom during compile
Note: be sure to use Half-Life 2: Episode 1 (base HL2 one works too I think) to recompile the model.
NT does not have a studiomdl file. If you have set up your game for mapping, this might break Crowbar. (as you can see I have made a copy of my studio.mdl file so neither Hammer or Crowbar is broken. If you do not map for NT, this should not be an issue.)
Model modding: troubleshooting
My model isn’t showing up at all.
- Check Crowbar for any errors when compiling
- You might be using the wrong studiomdl for NT, make sure it’s HL2(:Ep1) not Src 2013.
- As mentioned earlier, could also be an issue with Hammer conflicting (for some reason), check the previous section for how to fix that.
My model has a black/pink checkered texture.
Most likely due to the material names in blender not matching up with the .vmt files.
Crowbar won’t compile my model.
There’s several reasons why this might be happening.
- Wrong filepaths, .qc file can’t find .smd files.
- Going over the vertex/triangle limit for the .smd format.
These are the ones I’ve run into personally, but the Crowbar steam group has a lot more info.