Overview
This guide will show you how to break a Mackerel class corvette into small pieces for debt repayment, while avoiding the mistakes that make things go boom.
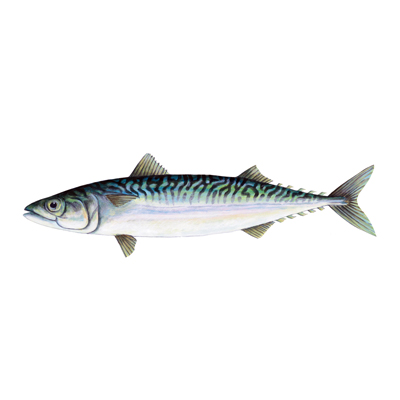
The Mackerel

According to LYNX’s brochures on the topic the Mackerel is a light Cargo and Transport corvette. Naturally this is largely irrelevant to us seeing as we’re dismantling the damn things, not using them. This is the simplest ship to break in the game, not counting the tutorial in careers mode. It will help you master the use of tethers, the grappling tool, and movement, seeing as you will need to be inside and outside the ship nonstop.
The ship is a mix of metals, nanocarbon panels, and assorted electronics and mechanics and cargo. It’s also quite tiny, and really not all that imposing after you see the Gecko or Javelin, and even less so once it’s cut apart.
With the latest update to the game, learning the Mackerel ingame is easier than ever, but it’s still useful to have a handy guide for all the pitfalls and traps along the way.
Where to start?
The first thing to do in every shipbreaking Op and in every fish dissection is to clean the outside and inside of the fish. The reason for this is twofold. First it affords you a clear working space inside and outside the ship; a clear working space means less waste and fewer collisions, making your breaking danger-free and smooth. The second reason is that you will get a good sense of where the important parts of the ship are located, such as thrusters and airlock.
So, now that you’ve cleared the outside, how do you get in?
Simple: turn on your scanner and look for the Airlock, it should be labelled AIRLK. To cycle the airlock activate the little panel just next to it.


As well as the AIRLK tag you’ll also see indicators for the different rooms of the ship. What is important to note here is the colour of the little square next to it. Green indicates a pressurised room, Red is depressurised, and Yellow is transitioning between one and the other. This will let you know, with a quick glance at the scanner, the contents and status of a room.
Once you are inside the ship you need to vent the ship in some way. For the Mackerel this can be done in one of two ways. The first is to use one of the Atmosphere Regulators within the ship. One is above the Airlock you just entered through, the other is on the left hand side of the cockpit. If both of these are broken (you don’t get a tooltip prompt) then you need to vent the other way. The other way is to open all the doors inside the ship to form a single large “room”, then you need to use your cutter or stinger on the outer airlock door. This will cause a controlled Explosive Decompression, all the air will rush out as well as any loose objects. This is naturally not the preferred option. Once this is done do another sweep to make sure that all areas of the ship are decompressed – look out for the crawlspace not being decompressed.
With the atmosphere out of the way you can focus on the second task: tidying. Scoop up all the consumables, doesn’t matter if you need them or not, it’s a quick breaking Op, not a long one like the Gecko. Move loose items out of the way in preparation for cutting the floor joints. And finally disconnect the Thruster and Fuel Tanks. With this done it’s time to start breaking!

The first Cut(s)
Now that the interior is tidy it’s time to start breaking. Make sure that the atmosphere is fully vented, otherwise things will get… exciting.
Your first cuts should be the floor cutpoints. This will open up the belly of the ship to allow you easy access to throw thing into the Barge. Remove all the three or four floor panels and tether them into the Processor. After this you can begin removing things from the ship. Chairs, interactive panels, and posters will come loose easily, electronics and scientific equipment take a little longer.
Among all these components may be the Reactor. This your paycheck on the Mackerel, it’s easily worth a quarter of ship’s total value.
Once the floor is gone and the ship emptied you should turn your attention to the roof: cut the cutpoints there and send the panels off to the Processor. Be careful though, sometimes one or two of panels need to be sent to the refinery instead.
Finally you can make one final sweep of the interior to make sure that the interior is clear.
Skinning and Filleting a Mackerel (Internals)
This section is in two parts: first removing the internals of the ship, and second removing the outer shell sections.
Internals
Each floor panel and each roof panel has two joints connecting it to the ship. Cut these and the panels will drift away from the ship a little. From there you can nudge them out of the way with a little tap from your Grapple, then send them towards the Processor. This will leave you with a nice open space to throw the internals of the ship down to the Barge. From here it is also possible to clean out the cockpit, though does require carefully maneuvering some of the larger pieces. Leave the Power Junction Boxes alone for now.
Ideally now you want to remove the whole of the floor of the Mackerel, and then get all of its guts into the barge.
If your ship is a cargo ship it might have barrels of coolant or fuel in hold, in that case be very careful when cutting near them, and be even more careful when moving them. Barrels like to explode at a moment’s notice.

The next step is to do the same thing to the roof: cut the joints and tether the panels into the barge. Here is one of the main differences between the Cargo variant and the Transport variant of the Mackerel. The Cargo variant has a cargo hatch. This is one of the roof “panels” and needs to be split into the door section and frame section before it can be salvaged. To do this cut the two yellow joint bits and tether them into the right places (barge for the door, processor for the frame).
In addition you may have panels of different materials which need to go in the furnace instead. Pay attention to the tooltips which show up at the bottom of your HUD to know where things go.
By now your fish should look something like this:

Skinning and Filleting a Mackerel (Externals)
Externals
The next step is getting that skin off. But to do that we need to take off the head and tail.
Inside your Mackerel you will see four connecting points at the front and rear. Be careful not to cut into the frame around the joints, as that can lead to a loss of profit! (and potentially loss of limb and/or life) For these particular cuts if you position yourself properly you can cut two joints in one; very useful if you’re working on a timer.


Unlike the roof and floor panels the head and tail won’t just drift away. They’re a fair bit heavier and will need tethers to get them out of the way. Tether them to a Jax, or the rear of the bay, or the Hub Jax and we’ll deal with them later.
As the rear moves away you may see it take a couple of orange tanks with it. These are the Fuel Tanks. Use the Flush Fuel Valve (the little handle) just above each tank to release the Tank. After this you can send it down to the Barge.
If you look down both sides of the ship now you should see a crawlspace with lots of joints and various gubbins inside. On one side your view will be blocked by the airlock. We’ll get to that problem later.
As well as the Nacelles, pipes, and cutpoints, you may see purple power cells, the Reactor, more Fuel or Coolant Tanks, and so on. Each of these represents a hazard of its own, which you can read more about later. As such you may need to be careful with you cutting or you’ll see your returns drop drastically.
Cut all of the joints. This will make the panels loose and moveable. Don’t send anything off to the processor yet, there’s still valuables there. As always be careful when cutting near fuel (and coolant).
The result of a bad cut:

For the Nacelles connected to these sections you need to cut the joint inside and for some ships cut the pipe too (after flushing the fuel). The Nacelles can then be tethered down to the Barge for a quick buck.

From here you can tether the pieces to the places they need to go. Nanocarbon and Titanium to the Processor, Aluminium to the Furnace, fuel and valves to the Barge.
Some of the ship classes have longer pipe sections which hold sections together. These have cut points at regular intervals, but you can also tether the whole straight into the processor instead.
By now your “ship” should look something like this:

If you have sharp eye you will notice that we can still salvage the Junction Box and Battery from this frame. Keep an eye out for this like this as you could end up throwing valuable components into the Furnace.
The Airlock requires a little accuracy. Cutting into the airlock won’t destroy the airlock, but it will make retrieving it take a little longer. It is far simpler to cut the cutpoints then send it down to the Barge.
Heads or Tails?
Tails?
The tail of the Mackerel is easy enough: cut the joints holding the engine cap in place (or the joints holding the X piece in place), then pull out the engine itself. The cap and the frame go into the processor, the engine into the barge. Be careful when cutting as the cap and engine can be damaged by the cutter.
If your engine isn’t coming free, then you need to pull the handle on the “inside” facing of the X piece. This will release the engine with minimum fuss.
The engine should then just slide out of its housing ready to be tethered into the Barge.

Heads!
First cut the cheeks away. As with the “skin” panels there are cutpoints inside to cut, be careful; there can often be coolant or a reactor here. If the cheeks are not coming away you may have a frame on the front of the ship you need to remove. This has six cut points and potentially also a fuel tank. You only need to the two outermost cutpoints to free the cheeks; the tank can be pulled loose using the grapple.
Next up is the cockpit proper.
If you’ve already emptied it, then it’s up to you if you want to fiddle around trying to separate the metals and Nanocarbon – there are eight bars connecting the walls to the titanium frame. I tend not to bother as there’s no quick and easy way to separate the two, so I usually just send the whole thing to the Processor.
The Glass window at the front of the ship is fairly valuable, so it’s worth taking a moment or two to make the four cuts neccessary to free it.
The Skeleton
Now all that is left is the skeleton of the Mackerel. I recommend cutting this into two sections lengthways (to make it lighter) and then sending each half into a furnace. Just make sure that nothing valuable is left on the skeleton.

Extras
Priorities
Your first priority is completing the work order. After that you want the most valuable things to pay off your debt, these are from most lucrative to least: Barge items, Processor items, Furnace items
Scanner
If ever you’re unsure of where something is or where to cut something or where to find a specific item, use the scanner. It has three modes and all are incredibly useful.
Lights
I typically don’t bother with removing the lights of a ship, they’re not usually worth enough to both, but if you like you can. They’re in the crawlspaces, the cockpit, and the main passage.
Tanks (fuel and coolant)
To pull them out safely just pull them using the grapple. Avoid rotating the camera otherwise you might knock the Tank into something else and cause some nastiness. Tanks are comparatively fragile.
Tethers
Your best friend, or at least your closest friend. They’re cheap, incredibly useful, and if ever you panic and put too many down you can cancel *all* active tethers by press your V key.
Oxygen
Your second best friend in career mode. When your oxygen drops to zero (whether by helmet accident or simple O2 mismanagement) you will start taking damage until you die. You can still use all your tools in this state, but all tooltips and HUD elements are disabled.
Personal thruster pack
Abuse you CTRL key to stabilise yourself. Do it every time you stop, want to grapple, or feel unsafe. Bear in mind that CTRL has no effect while grappling a more massive object.
Cutter
This lovely lady has two modes: stinger and splitsaw. Use the right one for the right job. The beam technically comes out of your face, but tend to ignite things just to your right. The splitsaw will only cut what is highlighted and along the dotted lines, so you can do some quite creative cutting to get what you want.
Demo Charges
These little bundles of fun are extremely dangerous and only really neccessary for a small nadful of situations. They will cut along the indicated plane and cause significant knockback to everything nearby, as well as damage to items with a damage meter.
MACKEREL MUTATIONS!!
There’s several different kinds of Mackerel. They are as follows (including details and major hazards):
Light Cargo
Typically empty of most things. The crawlspace on one side can usually be accessed through a secondary door.
Station Hopper
Full of Chairs, food packs, and bottles. It can be a little tricky to access the floor cutpoints, but the chairs are easily moved. Tends not to have any crawlspace access.
Heavy Cargo
Has a more open interior, sometimes with dividing panels – these go to the Processor instead of the Furnace. The reactor is usually in the nose of the ship. Sometimes comes fully decompressed.
Exolab
A tricksy, sneaky, son of a mother. It’s stuffed full of electrical equipment and large bulky science equipment. Sometimes it has beds too. The main hazards here are electrical. The crawlspaces are full of cables and batteries instead of pipes. On the outside you usually have giant antennae, sometimes these can only be fully removed using Demo Packs. By far the hardest Mackerel, and a challenge to get done in a single shift.