Overview
This guide will go through the basic steps of creating a simple Platformer game with 001 while teaching you various useful things about the engine which can be applied to pretty much any game. NOTE: Certain things done in this guide that have already been explained in the previous guide, will not be explained again. To keep up, make sure to read Creating a Simple RPG Game as well.
Preparations
First, we’ll create a new game like we did before. But this time we will choose the Platformer template.

Game Goal
In the previous tutorial we tied the game’s goal to some plot. This time, we will take a different approach by making it something like a platformer minigame.
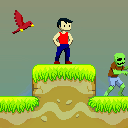
Again, to keep things simple, our game will consist of 3 levels which will contain passive enemies as well as certain items the player must acquire in order to proceed to the next level. Those items will be… Apples.
Adding a New Sprite
Let’s add an apple sprite. You rip the one found here[opengameart.org] and freely use it since it’s in Public Domain(CC0). Now to add the apple, click on the Sprites icon on the top toolbar and follow the visual instructions below.
Unless you cleaned the apple sprite yourself in an editor, the apple will have some pixels showing around it. You can sort of fix this by checking Smooth Scaling. Next, we must add a collision box around it in order to make it touchable in-game. By default a collision box should exist, though you’ll probably have to resize it to fit the apple’s design. You can do that by grabbing one of those four little squares located and every corner.


Designing the Levels
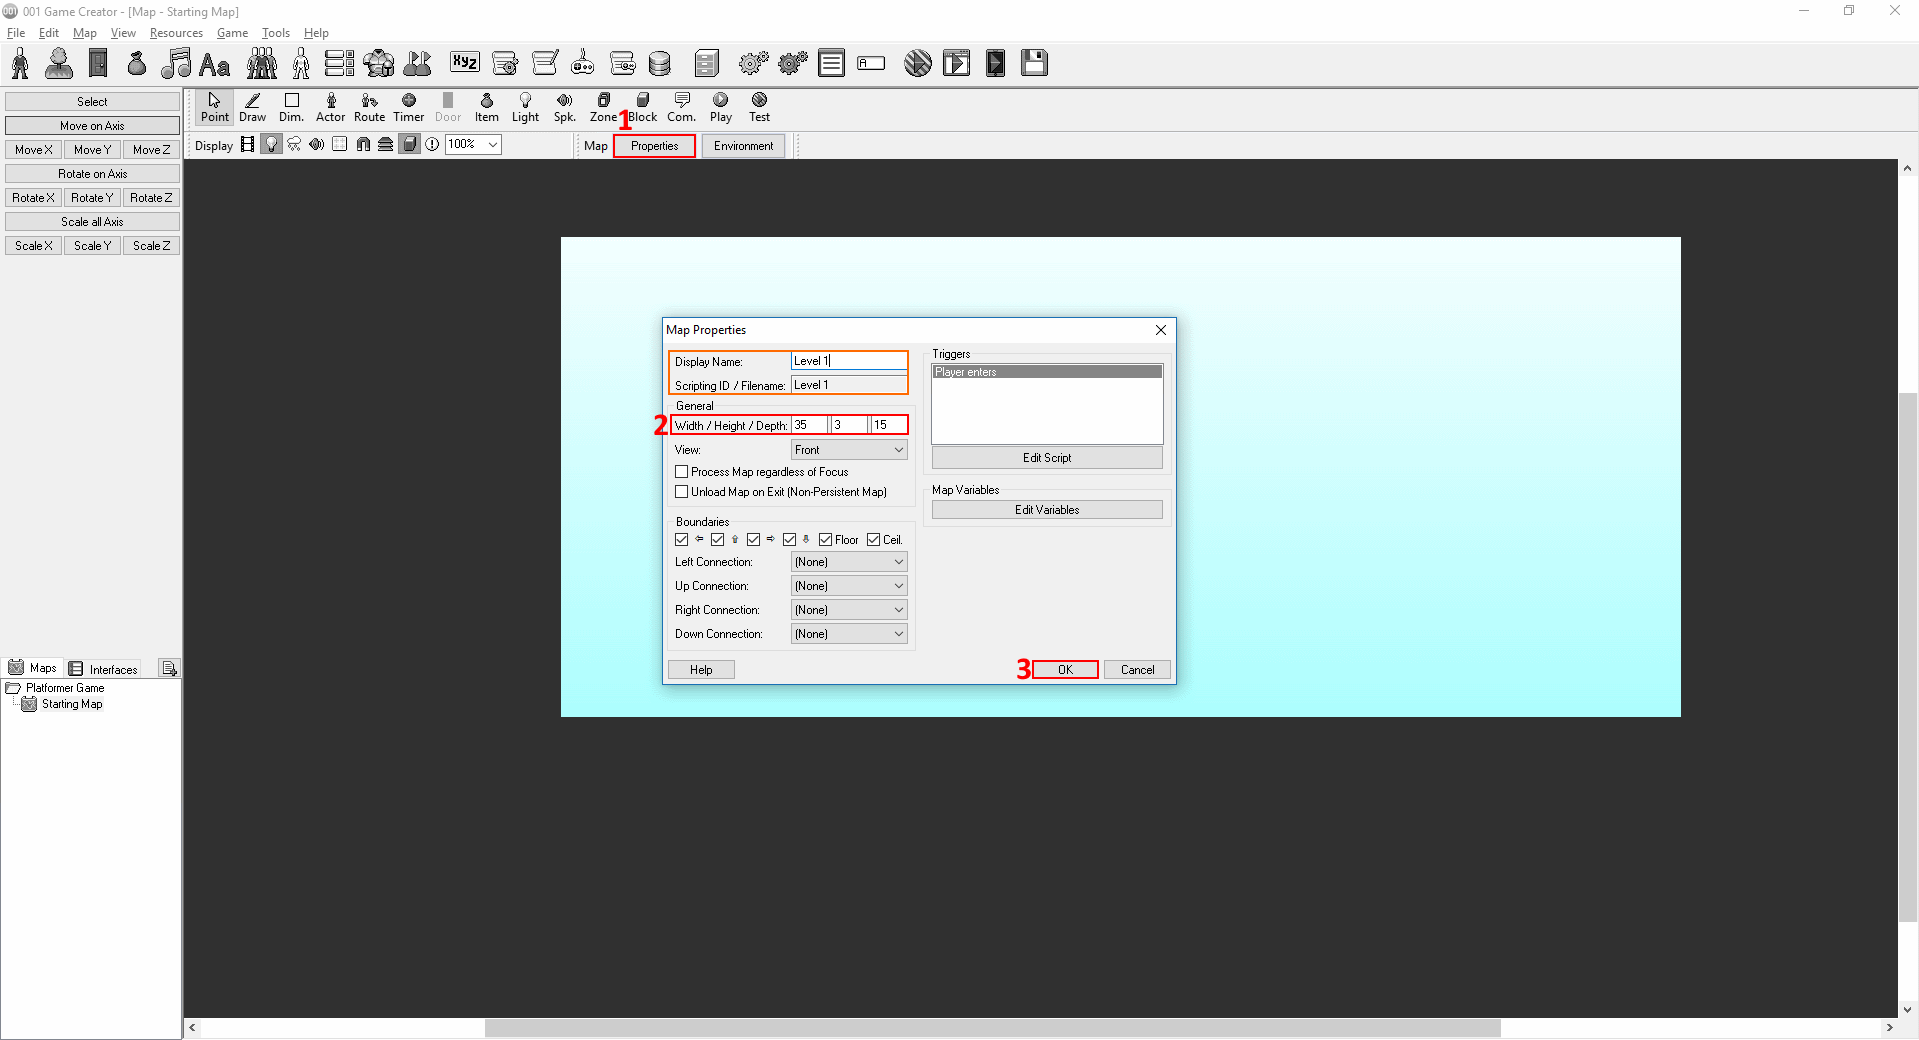
Since we have the apple, we’re pretty much ready to move on to creating the levels. You can edit the properties of the Starting Map and rename it to Level 1 then resize it.
NOTE: The dimensions(XYZ) for the platformer template do not work like in the previous guide’s 45 degree view map. The Width(X) box still refers to the left-right axis, the Height(Y) box now refers to the map’s depth layers while the Depth(Z) box refers to the up-down axis.
From now on, stuff like map design will mostly be left up to you to design as you like as long as they don’t stray too far from our game’s core intentions. The core elements this game’s level will need are: A clear starting & ending point, places that are easy/hard but not impossible for the player to go to to get an apple, valid places to spawn an electric ball as a hindrance.
Here’s my example:
After placing the apples and lighting blot(s) where you want, you’ll have to script them now to act as intended. Right click to edit an apple and follow the visual instructions below.
We will use the Score variable to keep track of how many apples our player has acquire and then determine if he can proceed to the next level.


It is then necessary that we make the apple disappear. Though are many ways to go about this, we will simply delete it using the Delete Actor event. (This) will always refer to the actor the script is located in. To make other apple actors function the same you may copy and paste the Collided with actor trigger. Now set up the Lightning bolt actor as shown below.
If you want to make the respawn look smoother, feel free to use the Fade Out and Fade In events like we used them in the previous tutorial. Now place a zone over where you want the level to end which will transport the player to the next. Of course, simply touching the zone should not position him on the next level. As mentioned above, a certain amount of apples need to be gathered in order for the player to be able to advance. This means, before a Position Actor event we will have to do a check using a Comparison Branch. All it needs to do is check whether the variable Score has reached(or surpassed, if you decide to include optional apples) the number you want. Then put a Variable Operation event to reset the Score variable back to 0 since the next level will begin.


The final script should look something like this:

Creating a Main Menu
A main menu is not very necessary for most games, but it can definitely give the player a bit more freedom on how to experience it. Our menu will be simple. It will have a Quit Game option and a Level Selection option.
You can choose to make this menu using solely GUI or you may have a map with the player and perhaps some apples/lightning balls.
Step 1: First thing you have to do is make it so that when the game boots it won’t load a map. Open the Game’s Settings by clicking the grey gears on the top toolbar and follow visual instructions below.
Step 2: To create the menu interface now switch from Maps to Interfaces, click the green plus icon and name the interface.
Step 3: To create the title, select the field option and place it anywhere you want within the grid, then follow instuctions below.
Now, proceed to create field like you did with the title but this time, make sure to check Selectable so that the player can interact with it and change its color when it is highlighted so that it will make a difference from the level selection one.
Before creating the level selection option, lets create a new interface where we will place the stages which player can choose to play. Follow the same instuctions on Step 2.


Follow the same instructions on Step 3 to create the Level Selec option and then follow visual instructions below.
NOTE: If you have more than 2 selectable fields in an interface you will have to give them the same X coordinate(if they are placed in a vertical axis) or Y coordinate(if they are placed in a horizontal axis) so that the cursor won’t mess up while the player navigates them.

Now you should have the all the knowledge you need to make the level selection fields. Try to do it yourself and if you have trouble, take a look here:
The Switch Exclusive Input Set event is used to change the set of controls so that the player can actually play when he is positioned on the map.


Did it without looking? Well then good job, though you might still want to look at what I’ve done because there are some things you’ll probably overlook. If you did even those without looking, you get quadruple points 😀
To do this you will follow the same process as the one above with the only exception being:
On step 1, instead of settings the Starting Map to none, set it to the one you want the player to be positioned in when the game starts up.
One final thing left to do is to make the menu appear when the game begins. You can do that by setting up a script inside the Introduction System Trigger.
The Switch Exclusive Input Set this time makes it so that you will be able to navigate the selectable fields on the interface since by default the input is set to Regular Game when the game boots. If we didn’t change and your menu choice was a map decorated one, our player would be moving instead of the interface cursor, something we obviously don’t want.

That’s it for this tutorial. Hope I managed to teach you a few more basic things about 001. Have fun editing this game to your liking or trying to make your own from scratch. If you have a small question about something I did here that you didn’t quite understand(or perhaps I just didn’t explain it very well) feel free to ask in the comments. Until next time 😀