Overview
This guide will walk you through the process of creating a functional Slider for your game’s menu interfaces.
Overview
Fields you will need to place on the interface:
- The slider bar background(Graph or Sprite)
- The actual slider(Graph or Sprite)
- The interaction field(Sprite)
- The value controlled by the slider(Field)
Background
The Background will serve the purpose of indicating the area where the slider will move.
Copy the Graph’s settings that are in red below.
Obviously you must change its shape to bar since a slider wouldn’t really work with a triangle or circle.

How you set its XY dimensions is mostly up to you but you will generally have to make it so it looks like a thin bar.
Setting its Initial Value/ Maximum 1 to 1 is very important to make the bar appear in its full size.
Also be sure to set its Alignment to Center.
Optionally you can change the graph’s color to your liking.
NOTE: If you decide to use a sprite then you’ll only need to change the dimensions(IF your sprite does not already meet your needs) and Alignment.
Slider
The Slider’s purpose is to indicate where the value it’s supposed to affect, currently stands at.
This field doesn’t require much work to set up as it’s pretty similar to the way you set up the previous field. Be sure to change the color so that it will be clear to distinguish from the background.
Do not forget to Center its Alignment!
Interaction Field
The Interaction Field gives the player the ability to manipulate the actual slider using the mouse. This is also where the scripting will be done.
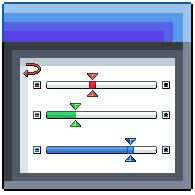
For starters, click on Sprite and place it close to where the Background is, Center its Alignment, leave Sprite to (None), check Selectable, then click OK. Resize it in the editor by grabbing its edges or corners so that it will at least cover the whole Background field. It could also be beneficial to have it overextend as this makes it easier for the player to manage since it will require less precision, especially if the background is small. Below is an example of what it should look like.

Scripting time!
All of the work will be done inside a Mouse Move trigger. Inside the Field’s settings click Add, double click Mouse Move and then click OK. First you’ll need to place a Control Branch that is set to Action. What this does is it checks whether the player is holding Left Click to move the Slider and change the value. By default, the Input Action should only have been assigned to the Enter key. To add the Left Click as well follow the steps below.
After that’s done, we can continue with our script. On the left branch place a Position Field event. We want this event to move our slider so select you Slider’s name. Set its Y coordinate to the background’s Y coordinate so that they will always be perfectly alligned. The X coordinate is a bit complicated. Essentially we want the slider to follow the mouse but we also want it to stay confined within the background. There’s a Use Value that can help with that called Clamp Number, located under the Math tab.
Set its Value to X Screen Position, located under the Cursor/Motion tab.
Set its Minimum value to X Position of the Background field and then subtract it from its X size divided by 2. This is now going to find the X coordinate of where the Background starts from. The reason we divided by 2 is because the set its Alignment to Center.
Set its Maximum value to X Position of the Background field and then add it to its X size divided by 2. This is now going to find the X coordinate of where the Background ends.
The final value should look like this: Math.Clamp(Cursor.X,Field(“SliderBar”).X – Field(“SliderBar”).SizeX / 2,Field(“SliderBar”).X + Field(“SliderBar”).SizeX / 2)

Value
The final step is adding a field to show with more precision what the slider’s value is. The only thing you have to do here is place a regular Field wherever you want. No need to configure anything.
Now to get it to display the Slider’s value we need to get back to our script to add one more event. That last event is going to be the Change Text/Value. Obviously you need it to change the value of the field you just palced so be sure to select that. Setting the value here is also a bit tricky. Set it to the Slider’s X Position and subtract it from the Absolute value of the X Position of the Slider as well as from the X Position of the Slider divided by 2(there is an Absolute Value Use Value under the Math tab). Then divide that whole relationship by the X Size of the Slider which is divided by whatever maximum value you want it to get. For example if you want it to get values between 0 and 100 then divide it by 100. The final value should look like this:
(Field(“Slider”).X – Math.Abs(Field(“SliderBar”).X – Field(“SliderBar”).SizeX / 2)) / (Field(“SliderBar”).SizeX / 100)
And that’s it, you’re done 😀