Overview
An explaination of Galilea’s basic mechanics, and some more advanced tactics.
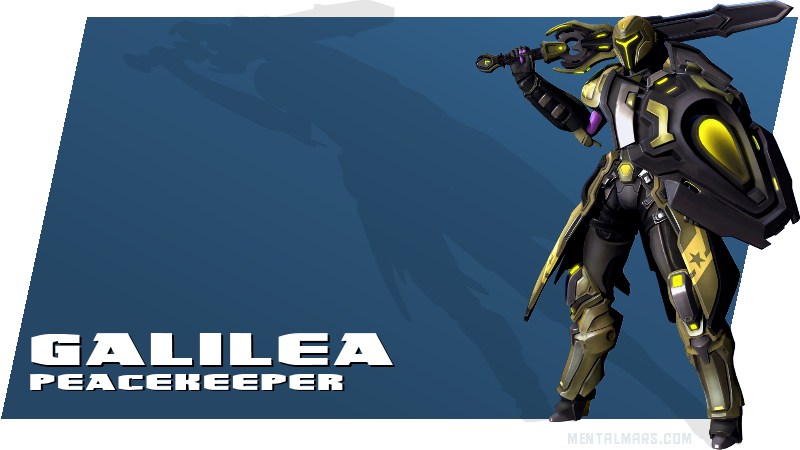
Galilea – Overview
If you’ve been playing Battleborn for very long, odds are good that you’ve run across a few Galileas while you’ve been running around trying to save the last star. Galilea is a great resource for a team, as she is a good controller, a great fighter, and (in the right circumstances) a decent tank.
In my opinion, Galilea is one of the best Battleborn in the entire game, as she has great CC, great DPS, decent tanking, and her primary attack is AoE, which is great for group battles. She’s an absolute shark, a predator who should see enemy Battleborn as a meal, not as an opponent.
Sharks usually only kill when they’re hungry, but Galilea is always hungry.
If that sounds good to you, then please continue reading.
If you’d prefer a less violent character, check out my guide for [color=#46ba1f]Miko[/color], the friendly mushroom healer.
For a healthy medium between friendly and murderous, check out [color=#24f0ed]Kleese[/color], the hair-brained master of science.
Abilities

Galilea throws her Greatshield, dealing 200 damage and stunning the target for 2 seconds.
This is a great ability for Galilea, as it allows her to initiate combat with a CC in order to immediately get the advantage on any single enemy. A skilled Galilea can also use this ability to finish off a low-health enemy from a distance.

Galilea explodes into dark energy, dealing 125 damage over 4 seconds. During this time, Galilea takes reduced damage and regenerates 250 health.
This is Galilea’s Ultimate Ability, and is a great tool for survivability and for keeping her DPS at full. We’ll talk more about this Ability later.

Galilea’s primary attack strings a series of attacks with her Greatsword and Greatshield into a swift combo.
Galilea’s Greatsword is her primary method of slaughter. Properly upgraded, this sword can push out insane amounts of damage in a very low amount of time, and its wide arc makes it a great tool against multiple foes.

Galilea’s secondary attack raises her Greatshield, absorbing up to 1000 damage at the cost of agility.
Galilea’s Greatshield is a great tool for combat, as it reduces the risk of many scenarios, allowing for more a more aggresive playstyle. Used in conjunction with Shield Throw, the Greatshield is a great asset for Galilea.

Galilea curses the ground beneath her feet, amplifying damage to enemies within the area for 8 seconds.
This ability allows Galilea to control a large area, as it’s foolish to challenge Galilea inside of her Desecrate radius. With upgrades, this ability can become a nightmare for any enemy unfortunate enough to draw Galilea’s attention.

Attacking and using skills accelerates Galilea’s Corruption, which deals up to 20 damage per second and steals health from nearby enemies.
At first glance, Galilea’s corruption is somewhat of an afterthought, but used properly, it easily determines the difference between a win or a lose in combat. I’ll explain this during the Helix portion of the guide.
Helix Upgrades – Table
When Shield Throw hits a target, Galilea’s Greatshield returns to her hand, and Shield Throw’s cooldown is slightly reduced. -5 Seconds Cooldown Time.
Enemies standing within a Desecrate field are wounded, reducing healing* for 5 seconds after the effect is applied. +5 Seconds Wound Duration.
When Desecrate is activated, enemies are pulled towards Galilea.
Shield Throw bounces to several nearby targets, dealing reduced damage with each consecutive hit.
Enemies hit by Shield Throw are wounded, reducing healing* for 5 seconds after the effect is applied. +5 Seconds Wound Duration.
Actively blocking incoming damage causes Galilea’s Corruption to increase.
While Galilea’s health is full, swinging her Greatsword unleashes a ranged blast of energy. +67 Damage.
Galilea’s offhand shield bash attack causes enemies to bleed on hit. +120 damage over 3 seconds.
Allies within Desecrate fields are healed over time. +30 Healing per second.
Desecrate deals damage to enemies inside its area of effect. +371 Damage over 8 seconds.
Desecrate field silence enemies inside the field.
Galilea regenerates health while Corruption is active. +4 Health Regeneration per second.
Galilea’s Corruption increases at a faster rate. +25% Faster Corruption.
Increases Galilea’s attack speed as her Corruption grows. Up to +16% Attack Speed.
Increases Desecrate’s duration. +3 seconds duration
Recovering Galilea’s Greatshield after throwing it increases her health regeneration. +105 Health Regeneration over 5 seconds.
Galilea’s Greatshield occasionally reflects projectiles. 35% Reflect Chance.
Galilea’s damage with her Greatsword is increased when she is without her Greatshield. +18% Damage.
Desecrate fields slow enemies. -30% Movement Speed.
Desecrate fields hasten Galilea. +30% Movement Speed.
Enlarges Desecrate’s area of effect. +50% Area of Effect Radius.
Increases the damage of Shield Throw. +15% Damage.
Hitting a target with Shield Throw briefly increases Galilea’s movement speed. +30% Movement Speed.
Increases Abyssal Form’s area of effect. +33% Area of Effect Radius.
Galilea becomes fully Corrupted during Abyssal Form.
* As of the last patch, Wound only reduces healing by 60%, not by 100%
Helix Upgrades – Build
[color=#81cc52]Vortex[/color]
This upgrade is insane, and you get it right off the bat. It gives you amazing control abilities. There’s few things more satisfying than pulling in a weak enemy for a final, killing blow.
Using this upgraded ability in conjunction with Shield Throw means you can close almost any distance before the enemy can do anything about it. We’ll talk more about how to use this later.
If you don’t have the Morph, go ahead and grab [color=#b779bf]Calamity.[/color]
[color=#b779bf]Mark of the Feeble[/color]
While Skilled Throw looks like would be great to use with Herald’s Return, it’s really not good for PvP. It won’t increase your killing abilities much, and you’re almost garunteed to lose your shield every time you throw it near a group of enemies. Being able to keep track of your shield after a throw is vital to your long-term survival.
Mark of the Feeble is good for taking down those pesky healers, as well as any Battleborn with a pocket healer. If you’re fighting and they’re healing too fast for your taste, just use Shield Throw and not only are they helpless for 2 seconds, but they only get 40% healing for another few seconds.
[color=#b779bf]It’s Dangerous to Go Alone[/color]
This is the ability that makes Galilea absolutely nuts in combat. Her regular sword swings get an added 67 ranged (or melee, if you aim) damage, and the last hit in her combo shoots 3 of these. Against a large enemy, that’ll be over 300 damage in that last hit alone, plus the damage bonus of Desecrate, if you use it.
While Gashing Bash might seem like a cool upgrade, the consistant 40 DPS isn’t worth the tradeoff of having the crazy DPS that It’s Dangerous to Go Alone gives you, even if it’s only situational.
[color=#81cc52]Bleak Quiet[/color]
This ability, used in conjunction with Vortex, is a nightmare for any enemy Battleborn. It disables all abilities of any enemy who is within your Desecrate AoE. With even a small amount of skill, this turns any 1v1 you initiate into a slaughter.
Forsaken Grounds may seem like it’s worth it, but if you do the math, you only get an extra 45 DPS. It’s way more valuable to keep the enemy from using any abilities while you hack into them.
If you don’t have the Morph, grab [color=#b779bf]Forsaken Grounds.[/color]
[color=#81cc52]Antihero[/color]
This basically increases Galilea’s DPS by 13% in any fight that lasts longer than a second or two. I don’t think I have to explain to you why this is amazing, especially in conjunction with It’s Dangerous to Go Alone.
It might be tempting to go with the extra 4 Healing/second from Last Light, but that only lasts in combat, and it won’t be worth it in the long run.
If you don’t have the Morph, grab [color=#4db1ba]Last Light.[/color]
[color=#b779bf]Forsaking Others[/color] or [color=#4db1ba]Dark Age[/color]
Since it’s vital to Galilea’s overall DPS that she stay at full health, I try to get healing wherever I can get it, as long as it doesn’t take away from Gal’s DPS.
That being said, you may want to go for Dark Age for an extra 3 seconds of no enemy abilities and increased damage. In my opinion, if a 1v1 lasts longer than the 8 seconds Desecrate already gives you, you’re in trouble anyways.
[color=#b779bf]Duelist[/color]
Being without your shield as Galilea sucks, but this ability helps compensate. Instead of being able to soak up damage at will, you get the ability to annihilate your opponent 16% faster.
[color=#81cc52]Blight Town[/color]
All 3 of these Upgrades are pretty good, but I always get Blight Town. If you have Vortex, then this will increase not only the AoE for your silence and damage boost, but also the range at which you can suck enemies into range of your Greatsword.
That being said, a 30% slow on enemies is pretty nice to keep enemies from escaping. The same thing can be said for your +30% movement speed, as it’ll allow you a quick boost to catch up to any BB who are speedier than you. However, if you have Vortex and Blight Town, you’re probably better off just sucking them to you instead of taking the party elsewhere or slowing the enemy down.
If you don’t have the Morph, grab [color=#4db1ba]Inescapable Fate.[/color]
[color=#b779bf]Tideturner[/color]
This is a great upgrade for closing distance, as you can stun an enemy from out of range, and you have two seconds with +30% speed to close the distance. This is also a great escape option if getting overwhelmed by sheer numbers. You can turn to the enemy, stun one from a distance, and continue your escape with increased speed.
The +15% damage you get for Shield Throw from Defender’s Dare only gives you an extra 30 damage. It’s hardly every worthwhile, as Shield Throw is primarily used for CC, and the 200 damage is a nice bonus.
[color=#b779bf]Pitch Black[/color]
Being able to be fully Corrupted during your Ultimate ability is a great asset, as it basically adds 20 DPS to your Ult, plus stealing health from all enemies in range, plus the 250 health you get from the Ult anyways. Plus when you come up out of the ground, you’ll have the extra 16% attack speed to continue your slaughter.
For a quick reference, here’s what the helix should look like (if you have all the mutations).

I honestly didn’t realize how terrible Song of the Bulwark was until I looked at this picture.
Tactics
The primary goal for a Galilea early-game is to get her level 3 Upgrade, It’s Dangerous to Go Alone. Once she gets that, her combat capabilities go way up. So at the beginning of the game, don’t get too crazy with running after enemies. It’s okay to play it safe right at the start.
Like I said earlier, Galilea is capable of being incredibly aggresive. Depending on the scenario, she may use one of several tactics.
If the enemy is at a distance, you may want to use Shield Throw to keep them from escaping, then run up to them until they are withing range of Desecrate, use Desecrate (with Vortex upgrade) to pull them to you, and then hack away at them with your primary attack. This is not ideal, however, as it leaves you relatively vulnerable without your abilities, since you spent both of them just getting within range of your target. It’s sometimes worth it for a weakened enemy who is running away, but this tactic is not an ideal way to begin an engagement. Also keep in mind that pulling with Desecrate cancels the stun effect of Shield Throw, so your target will always be un-stunned if you pull them.
If the enemy is at close range, but still not in your primary’s range, using either Shield Throw or Desecrate w/ pull is a good way to either bring the enemy to you, or allow you to close the distance before the enemy can react. If you have the Vortex mutation, I would definitely recommend using Desecrate, as it’s more reliable than Shield Throw. If you desire, you can use Desecrate and immediately Shield Throw before the enemy has a chance to move. Galilea is versatile, so you have a lot of options when engaging in battle.
Obviously if the enemy is within range of your primary attack, you’ll want to use your primary attack. If the enemy tries to flee, use one of the above tactics. If you begin to lose the fight for whatever reason, you will most likely want to raise your shield (your secondary “attack” button) and back away. Your primary goals when doing this are to give your allies an opportunity to come and help you, and also to give your skills, mainly Shield Throw or Abyssal Form, a chance to cooldown. If you get Shield Throw ready to use, you have a few choices. You can attempt to stun your attacker, giving you a chance to either run away or turn the tables on them. If you get Abyssal Form, you can sink into the ground and get to a more advantageous position while you gain health and the enemy loses health. Abyssal Form does take about 1 second to activate, so be careful when using it at low health.
Galilea has excellent Control abilities, but knowing how to maneuver properly can make her an absolute nightmare. Here we get into a little bit of psychology. When the average enemy is attacked aggressively and stunned, they will almost certainly run for the safety of their allies (or just away from the enemy). You can exploit this by putting yourself in between them and their allies after a stun, keeping them in place long enough to finish them off. The way to do this is to stun them and, while attacking, move around them so that you are directly between them and the closest escape route. At the very least, this will make it so that they have to travel a greater distance in order to escape from your attacks. Against large or predictable enemies, you can repeatedly block them with your body, preventing them from getting away at all. Keeping yourself between the enemy and their safety, if done properly, can be the difference between a savage kill and disappointment as you watch your prey escape your grasp.
Of course, keep your surroundings in mind. If playing Incursion, you don’t want to put your back in line of sight of the Sentry, and if fighting more than one player, you don’t want to give either of them your back for very long either.
As with all Melee Battleborn, you idealy only engage with an enemy on your terms, being melee distance. Prefer a longer route with tight spaces than a shorter route with wide open spaces. Of course, if your enemy is already in a wide open space, you can go and engage them.
One of Galilea’s most useful roles in Team-Play (at least in Incursion) is as a pusher. What’s a pusher? I’m glad you asked. In active combat between teams, there’s often a line that forms between the two teams, a line that cannot be passed without being attacked by the enemy. A pusher is somebody who is exceptionally skilled at pushing this line further towards their objective.
For example, say you’re playing a game of Incursion on Overgrowth, and the “line” is just before the line of sight of your sentry (which is where it usually forms in such a scenario). There are enemies taking peeking in and out of the corner where they can get in a bit of damage to your or your Sentry, but then retreating before they can take any real damage. As Galilea, you are capable of attacking aggressively and causing the enemy to retreat back to their friendly sentry. There are two ways of doing this.
1). You crash into the enemy, causing a ton of damage all at once, causing them to run away in fear as you bathe in their blood. (Most fun method)
2). Put up your shield and slowly push the line back. If your allies follow you, your enemies probably won’t risk getting between you and them, as it would almost certainly result in their death. (Most reliable method, if your teammates cooperate)
This is a situation where your Greatshield really comes in handy. If you attempt an aggressive push and it goes poorly, you can put up your shield and back away into the relative safety around your sentry/allies.
You can also apply this to other situations, but it’s most useful for Incursion matches.
Gear and Groups
As with all Battleborn, you need gear to maximize their potential. Having a group that works well together is also a vital component for success.
The best types of gear for Galilea are +Attack Damage, +Attack Speed, and +Health Regeneration. She can also use -Cooldown Time, but it’s generally not as good at the other 3 I listed.
This is my Gear Build for Galilea:
This is basically a +8.4% DPS boost. It increases Galilea’s attack speed, which in conjunction with the +16% you can get from upgrades, makes her crazy fast. It also gives a boost after you’ve killed a player or major enemy, so it makes fighting multiple enemies that much easier. It also rewards you for kills, which is always a bonus.

Straight up 8.29% DPS + another 4.59% DPS while hitting people (which is basically how you do all your damage as Galilea). For the ridiculously low price of 650 shards, this may be my current favorite gear piece in the entire game. It’s Jennerit, so if you really want this one, try some Jennerit Loot Packs.

This is Galilea’s Legendary Gear, and it is truly legendary. Not only does it give you a good +6 Health Regeneration and +4.32% Attack Speed, but gives your primary attack 50% life steal against stunned enemies. That means that half of the damage done to the stunned enemy is given to Galilea as health. That is crazy good, as Galilea can be fighting normally, take a little health damage, stun the enemy, grab a few hits, and be back to full health and DPS in under 2 seconds.

These may not be the best versions of these items, but these are the best I’ve seen so far. They give Galilea a good deal of increased DPS and survivability.
As far as I know, Jennerit gear is some of the best for really aggresive characters (like Galilea can be), so try grabbing some of their loot packs if you’d like some gear similar to the ones I use.

Rath – Like Galilea, Rath has sweeping/AoE primary attacks. He also has some decent control abilities, so when Galilea and Rath come at you, it takes a lot to stop them.
Ghalt – Can pull enemies from a great distance and also stun them, making co-op kills a breeze.
Phoebe – Her ability to slow enemies is a great advantage. Used in conjunction with Desecrate, the combined DPS of Phoebe and Galilea is a force to be reckoned.
Pendles – With all eyes on you in combat, putting up your shield while Pendles attacks from behind will leave enemies confused as to what’s happening. Oh, they’ll also be dead.
Miko <3 – Can get you back to full health (AKA, max DPS) in a jiffy after an engagement, making it so you’re always at your most deadly. Check out my Miko Guide for more details.
Basically everybody else – Galilea works decently with any team, as she can push and cause enough carnage by herself to make it work. Galilea can be the primary engager while the others support you with healing or with extra DPS.
See above.
Montana – He actually takes so long to kill that it’s not uncommon to lose some of your health (and precious DPS) while fighting a skilled Montana-user.
Alani – While they’ve nerfed her Geyser, it’s still basically a death sentence to be “bubbled” by it in a team battle. Galilea’s not terribly fast, so keep a sharp eye out for this AoE so you can get out of the way in time.
Marquis – Because of how slowly you move with your shield up, a decent Marquis can reliably get hits on you when you’re defending, destroying your Greatshield’s HP in just a few seconds. Try to be aggressive against him to avoid this.
This is what it looks like when you get good with Galilea and you have a good team:
This is my group, not all of which are level 100, beating a group of 5 100’s. I hope the people in the comments are happy now.

Lore/Challenges
Complete 3 matches while on the same team as Ambra.
Since Ambra’s a pretty good healer, odds are that you’ll get this one without even trying. If you get desperate, just have a friend play a few matches as Ambra with you.
Participate in killing Ambra 5 times.
Again, Ambra’s pretty popular, so this one should be pretty easy. When it says “Participate in killing Ambra…” it means that a kill and an assist both count towards this challenge.
Regenerate 10,000 damage with Abyssal Form.
This one should also be pretty easy. Since Abyssal Form heals you for 250 health, you can get this challenge with as few as 40 uses of Abyssal Form.
Block 25,000 damage with the Sentinel’s Greatshield.
This one is also relatively easy. Since your Greatshield blocks up to 1000 damage at a time, you only have to completely drop its HP 25 times.
Kill 100 Jennerit enemies while Galilea is corrupted.
Again, a super easy challenge. Just solo a few story missions and you’ll be good. Doing The Heliophage will get you this one in just a few minutes, as there’s tons of Jennerit enemies there.
Overall, Galilea is now pretty easy to lore out, and the reward is well worth it:
The End
My current overall K/D with Galilea is about 1.6 .
Most life drained in a single match: 7,668.
Most corruption damage dealt in a single match: 56,697.
Largest Killing Spree as Galilea: 16.
Most Kills in a single match as Galilea: 32.
I’ve also solo’d The Heliophage on Advanced as Galilea, so she can do pretty much anything, PvE-wise.
I hope you enjoyed my guide for Galilea. May it help you slay many enemies, and bring your team many victories.
If you have any suggestions or requests for this guide, please leave a comment. I’ll do my best to answer you directly and change the guide if necessary.
If you enjoyed this guide, please consider giving it a Thumbs-Up and a Favorite, as it really helps.
Also check out my guide for [color=#46ba1f]Miko[/color], as well at the [color=#24f0ed]Kleese[/color] guide I worked so hard on.