Overview
I thought I’d share what I learn about DG architect while I learn how to use it here. Instead of just putting the notes on my PC. I’ll keep updating this as I learn.
Using the editor
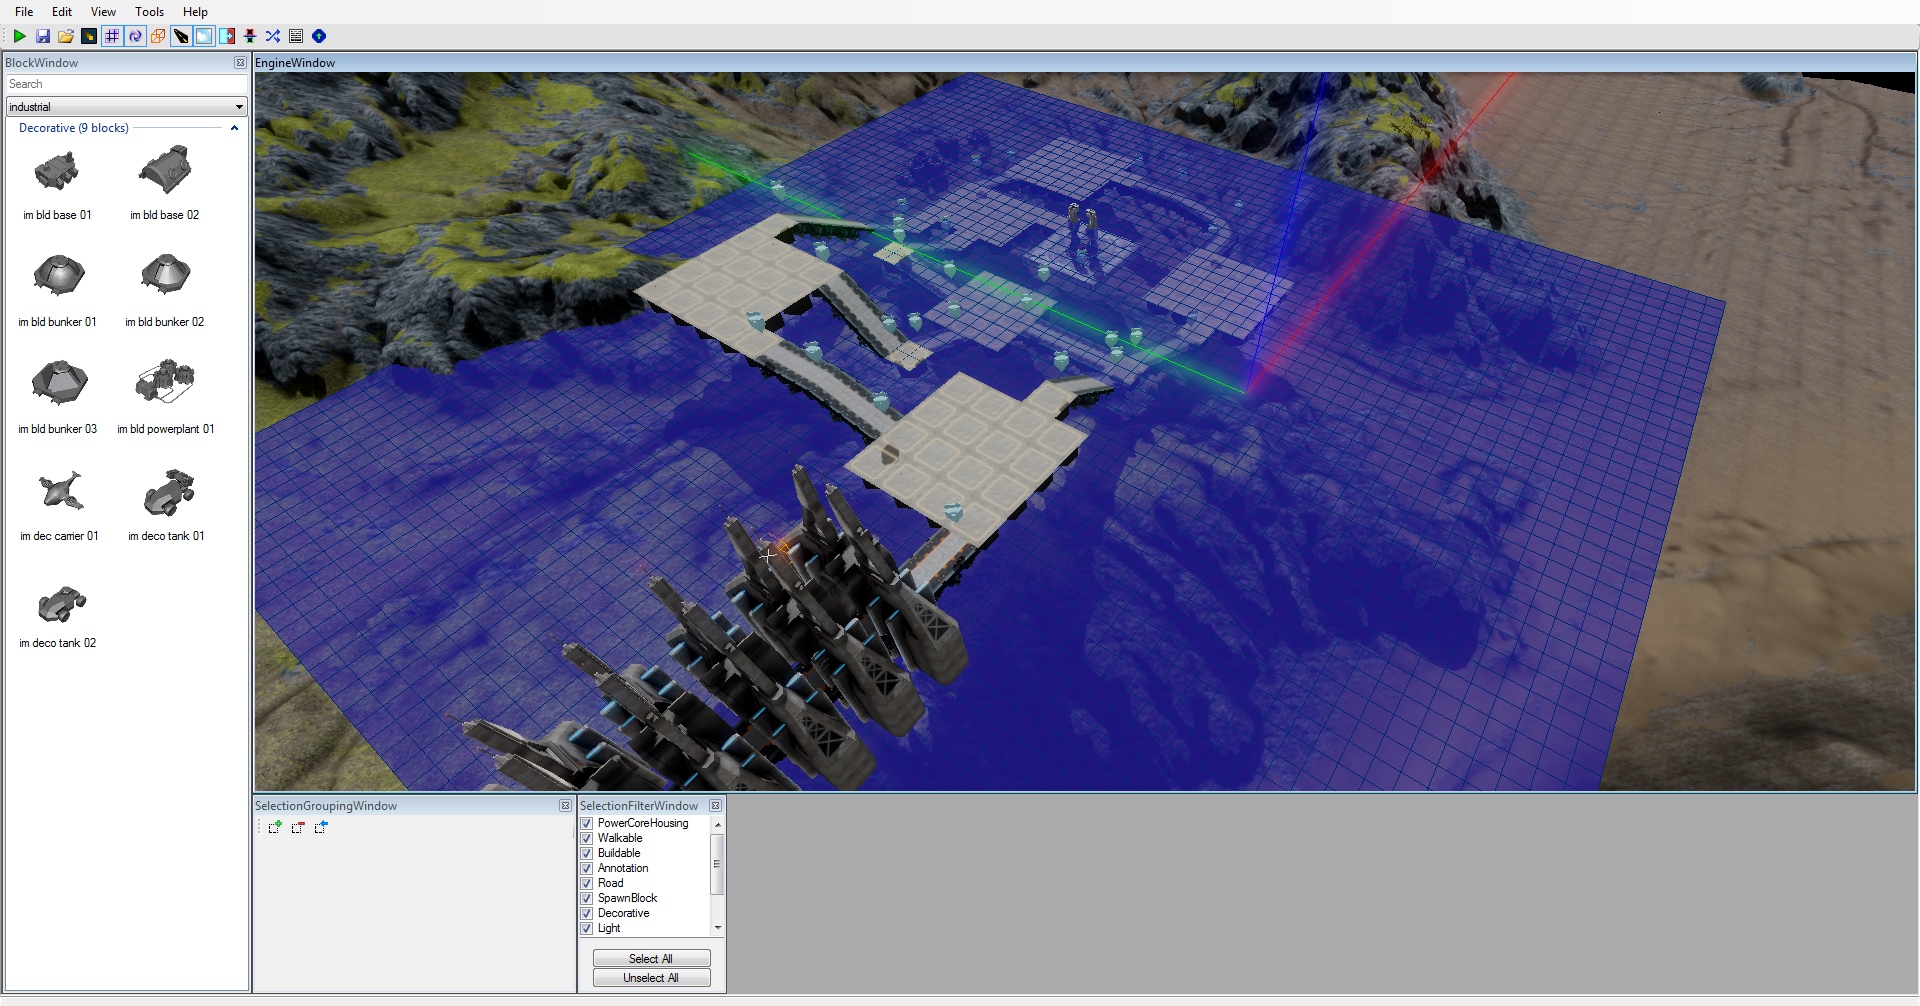
The BlockWindow has everything you can place on the map. Left click on something in there, then you can click inside the EngineWindow to place it.
The EngineWindow is a render/preview of the level, where you can place, view and manipulate your objects.
Use wsad to pan the screen in the xy plane and qe to pan up/down the z axis.
Right mouse click and mouse move to rotate the view
Scroll wheel to zoom (you can also use the q and e keys to get closer to the map.
Esc key to cancel selection.
Ctrl key and left click to select multiple items
Shift key and left click to box select multiple items (adds to already selected).
Alt key and left click to box de-select multiple items (removes from current selection).
f key to focus on the currently selected item.
[ ] keys to increase/decrease grid resolution (smaller/bigger squares)
Ctrl+c to copy your selection, you can then paste it repeatedly by clicking. Useful in combination with selecting big areas and duplicating them across the map.
Ctrl+z to undo
The most important objects are the Power Core Housing, road nodes, tower door squares and spawn node(s). Pretty much everything else is optional.
The property window shows properties about the currently selected object or the entire level if nothing is selected (you may also need to click on the menu bar area if it won’t show the level properties and you want it to).
Positioned objects have Grid Coordinates, translation and rotation properties.Grid coordinates must be integers, others can be decimals. The translation widget will display at the centre of the grid coordinates, but the object will be rendered at the grid coordinates + the translation vector (offset).
1 x or y grid coordinate is equivelent to an object translation of 30 (with default grid size, the same as a tower square).
1 z grid coordinate is equivelent to a translation of 30.
1 x, y or z grid coordinate is equivelent to a terrain offset of 30 with the default grid size.
You can move selected objects by clicking and dragging on the red/green/blue arrows (I’ll call it the translation widget) to move them along that axis or just clicking and dragging on the object, but this seems to reset the Z grid coordinate to 0, so I use the translation widget most of the time.
Place roads by placing Road nodes from the BlockWindow, then press esc to stop adding road nodes, click one road node you have placed, ctrl+click on a second node, then press the r key to make a road between them.
Unfortunately you have to join them up in pairs, you can’t select more than 2 and join them all.
You can move the road nodes around after joining them together, but I think if they become too far apart (usually by large height differance in a small xy distance) they will unjoin.
Selecting a joined road node and pressing ctrl+c seems to unjoin the nodes too, so I generally don’t copy road nodes.
Road nodes which join to other platforms (including core housings) should be placed in the middle of the edge of the platform. If you are having trouble getting the road node to land in the middle of the edge of a tower tile, then try reducing the grid square-size by one, by using the left square bracket key.
Once you’ve joined two road nodes you’ll probably want to change how they look, you can do this by selecting something else, then a certain one of the nodes and picking a road description name in the PropertyWindow (near the top). It seems that only one of the two nodes will change the texture, I haven’t figured out which yet, if it doesn’t work I try the other one.
It’s easiest to keep the map centred around the origin (where the big red/green/blue arrows start from, so that the camera will be in a good position by default.
To set up a background you need to change the Biome Description property in the PropertyWindow.
Many of the terrains seem to be based around a high z coordinate, so you’ll have to modify the properties for min and max camera heights to take this into account. If you hit the play button and just see blackness with your cursor, you probably need to raise the camera height property.
It seems that if the aliens cannot find a walkable path between the spawn point and the core housing they’ll just walk in a straight line from the spawn point to the core housing. It’s a good idea to save often and try out your level frequently to check that you haven’t broken the pathing, I’ve had a lot of trouble trying to fix it retrospectively, much easier to just undo what you last did and have it work again.
Compiling, building, previewing and playing your level
You should be saving as you go along, but you’ll need to save before you can build your level. Use the save icon or ctrl+s or the file menu.
The icon on the far right of the toolbar, has an up arrow in a hexagon. Click it to bring up the compile window.
You’ll have to enter a folder name, you should verify spawns by clicking the button at least after you’ve placed or moved spawns and before you compile, but I don’t think you need to do it every time.
Pick an ambient sound if you want, then click submit. You should see a progress bar then a status bar message saying where the level was compiled to.
Clicking the play button just under the file menu will give you a preview of the level, where you can click on tower placeable squares, but can’t build anything. This is good for quickly checking how the looks from the limited camera angles in game.
I think you need to close DG Architect before you can play your level in Defense Grid 2. I haven’t found a way around it. You can open both at the same time if you run DG Architect direct from the .exe file, but I then couldn’t get DG Architect to work.
Once you’ve run Defense Grid 2 you can click on custom levels and scroll through the windows until you find one with the name that you saved your level as. Then you can play it as any other level.
External links
[link]
IGN single page guide to the editor
Hidden Path Basic map tutorial
Hidden Path map design tutorial
[link]
Using the architect Steam thread
[link]
Hidden Path DG Architect forum