
Overview
This is a guide for installing the RCBot2 add-on to convert Day of Defeat: Source multiplayer into a single player game.This guide is my way to install the recently updated package in February 2019. Other operating systems and RCBot2 versions may be different, links are provided for the correct files.
The required files
The install for any add on bot to make a multiplayer game into a singleplayer game is often confusing. The files have recently changed in 2019, please download again if you have an old set.
Note this is the recommended install method from RCBot2.
It is long and complicated as RCBot2 is for three Source games, Day of Defeat:Source, Half-Life 2: Deathmatch and Team Fortress 2.
I strongly urge you to stop here and use another method in the link below. Please use my installer from my website dodbits as it is a lot quicker than this complicated guide…
Link to an easy install method (DoD:S only)…
Day of Defeat Source RCBot2 installer by INsane[www.dodbits.com]
You can still post here if you have issues with that alternate install. I will try and answer.
Follow the guide below….
Important: I assume you have Day of Defeat: Source installed and you have run it at least once, set up the video, sound and keyboard settings, run a map and closed it down.
If not, do that now as your game files may not be 100% set up.
Important: I assume your game is installed in your “C” drive, if it isn’t adjust the file addresses I mention in the guide.
The installer required, download the RCBot2 installer from here.[rcbot.bots-united.com]
Next you need information from your game files. This is where most installs go wrong, be sure you prepare and know your files system addresses.
The steps below assume you know where your “common” folder in your steam install is so the installer places the files correctly.
You may have installed in a D: drive and you forgot where that is, try the following…
To find the “common” folder using Day of Defeat: Source as the mod:
- Go to your Steam Library entry in the left side menu “Day of Defeat: Source”
- Right click on it – select “Properties” to bring up the “Day of Defeat: Source – Properties” box
- Click on the “LOCAL FILES” tab
- Click on the “BROWSE LOCAL FILES” button
- It opens in the “Your DRIVE:Your FOLDERSteamsteamappscommonDay of Defeat Source”, your “common” folder is key.
Copy that address in windows explorer and place that in the installer.
- Make sure you take off “Day of Defeat Source” in the address.
- Remember, we are after the last folder “common” in the address, if that is the last folder then its correct!

The installation of the RCBot2 program
Place the downloaded file in a desktop folder. Use the right click menu “Extract All…” then press the “Extract” button in the next popup screen.

Open the “RCBot2Installer” folder and run the “setup” Application.

You will likely get a warning, select “More info” link then the “Run anyway” button.

The Licence screen is next, select the “I agree” radio button and press the “Next>” Button.

The next screen has a warning telling you to select your Steamapps /common folder (for the next screen) and make sure you are online (internet connected PC) Press the “Next>” button

In the “Select Installation Folder” screen my steam folder was automatically found but check it anyway, if your steam is on the C drive it should look like…
For 64bit – C:Program Files (x86)Steamsteamappscommon
For 32bit – C:Program Files Steamsteamappscommon
Just make sure you find your “steamappscommon folder!
Browse for yours if the last folder isn’t “….common”
Press the “Next>” button…

In the “Modification” screen select the “Day of Defeat: Source” radio button then select “Next>”…

In the next screen just select “Next>” to start the install.

The next screen may be interrupted by win 10’s “User Account Control” nag box, just press “Yes”.

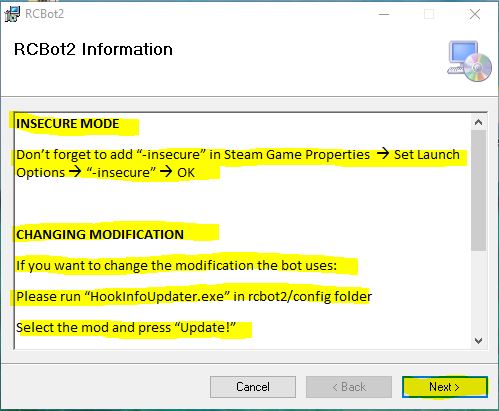
After the “Installing RCBot2” screen finishes there is the “RCBot2 Information screen.”
The “Insecure mode” will be covered later in step 13.
The Changing Modification info’ only relates to persons who may use the other two games supported “Half-life Deathmatch” or “Team Fortress 2”.
We have selected “Day of Defeat: Source” and you do not need to do anything more if you don’t play those games. Read the info’ and press the “Next>” button.
On the last screen press “Close” this part of the setup is completed.

Set the Launch Options in the Game Library
In step 11 it talks of the need to place an “insecure” command in “Launch Options” or as the have in the information screen “Set Launch Options”.
Setting the launch options in steam changed when RCBot2 was written and released.
This is important and I will show you my preferred method, it expands on the instructions you see in the installer in step 11 “Insecure mode” as Steam have changed their method after the latest RCBot2 release.
Open Steam and go to your Library.
Right click on “Day of Defeat: Source” and select “Properties”.

In the “Day of Defeat: Source – Properties” screen, the “LAUNCH OPTIONS” can be adjusted in the default viewing tab (section) called “GENERAL”.
The input box is at the bottom of the “GENERAL” tab and has to be edited.
Your “LAUNCH OPTIONS” input box is likely empty right now.
We are going to add two commands in step 15 as shown in the image below beside the Green arrow.

In the “LAUNCH OPTIONS” input box type two commands.
-novid –insecure
Press “X” in the top right to close the pop-up “Day of Defeat: Source – Properties” screen.
Here is what the commands do…
-novid
This is just a normal command most players put in, it will stop the Valve intro’ screen (annoying short video) from running and skip directly to the game. It’s optional and does not affect the RCBot2 files at all.
I included it because most new players don’t know about it and really like it… may as well put it in now if you are new to this game.
-insecure
This is a command to start the server without Valve Anti-Cheat. This command is critical for the RCBot2 files to start and run.
So now your Day of Defeat:Source can start the RCBot2 files you are good to go for a local single player mode.
If you play online as well you may want to complete some extra steps below.
If not, go to Step 16.
If you intend playing on both secure servers (VAC enabled) and use RCBot2 on a LAN (insecure server via the -insecure in your launch options), I recommend these further steps below to ensure RCBot2 works AND you have access to secure (VAC) servers.
What happens if you try and join a VAC enabled server with “-insecure” in your launch options?
1. You will NOT get a VAC ban.
2. You will NOT be able to join a VAC enabled server.
3. You CAN join a VAC disabled server.
What will happen is you will get an error message telling your game is in insecure mode.
If you see the message below, take “-insecure” out of your launch options and you will be able to join a VAC enabled server.

So now you can connect to an online server again, but next time you play the bots offline… they will fail to load.
The reason is, the “-insecure” command isn’t in the Launch Options anymore.
Making a special desktop shortcut with “-insecure” in it solves that issue.
Create a desktop shortcut by Right-clicking the game icon in your Library, select “Manage” then click “Add desktop shortcut”. See the image below.

Now return to “Launch Options – Day of Defeat:Source” screen and remove ” –insecure”
Leave “-novid’ if you like.

You will note your new desktop shortcut has the commands in the “URL” input box.
Right click on the new desktop icon and select “Properties” to view that area, see the below image…
steam://rungameid/300 -novid -insecure

Result…
- To play RCBot2 offline use your desktop shortcut.
- For an internet VAC secure server use the “Play” button in your Steam library.
These extra steps are to make RCBot2 work as a single player game and allow access to VAC secure servers, also avoiding a VAC error message and having to continually edit the Launch Options input box.
- If you use the desktop shortcut with “-insecure” you simply cannot join VAC secure servers.
- If you use the Play button in your steam library… RCBot2 will not load without “-insecure”, you can now join a VAC enabled server.
Just use one or the other depending on what server you are making/joining.
Find out more on Command-line parameters on this page.
The game files are almost set up now, there is more to do to make the bots load automatically and its worth doing so stick with me!
Configure the bot files.
Right now you could run the game and the program would load, you can add bots with the command “rcbot addbot” in the console.
If you are new to the game read about how to enable that “console” here by YouTubber https://www.youtube.com/channel/UCQhRHEKN8MD6rxPoT0h87LQ
…
I prefer to edit some files and have them load with my favourite server amount – 16 players. I find it better to use the launcher for RCBot2 and adjust the skill and number of the bots based on how I feel.
Here’s what that program screen looks like…

To use the Launcher you need to find it.
Remember that file address of the steamapps/common folder? It’s in a subfolder of that, navigate to this folder…
C:Program Files (x86)Steamsteamappscommonrcbot2launcher
Now open (double click) the “RCBotProfiles” application…

Check both addresses, especially the “RCBot2 Folder” and make sure its pointing to…
C:Program Files (x86)Steamsteamappscommonrcbot2

Now make sure the dropdown box has “Day of Defeat: Source” selected…

Select the skill and sensitivity of the Bots, leaving it is fine but… if you are just starting out maybe drop it down a bit…

Now make sure in the “Adding bots” you have the “Add bots automatically” tick box selected and place in the “Maximum Number of Bots” number you want (mine is 16).
Then press the “Save Config & Exit” button, another box pops up, close it.

You are now ready to play, your bots will automatically join just after you and reach a server of 16 players…

Final items to be aware of – Maps and waypoints.
There are other items to cover for RCBot2, it depends how far you want to go.
Exploring the other tabs in the RCBot2 Profiles application you will notice there are all sorts of settings in other tabs (see item 18).
There is also the ability to waypoint maps.
That is, place in the paths that alter the bots behaviour and give them the ability to carry out a planned attack on that map.
You can read all about those in this folder…
C:Program Files (x86)Steamsteamappscommonrcbot2manual

A final word… on waypoints, just because you have a bot system now and can play most maps it does not mean you can play all maps, especially a lot of custom maps.
You not only need the map but also the waypoint files for that map.
The location of the waypoint files are in…
C:Program Files (x86)Steamsteamappscommonrcbot2waypointsDay of Defeat Sourcedod

That’s also a good list to use and find the other custom maps you may enjoy in a single player mode beside the standard maps.
There are a few map download sites you can use, most of those will be on the more popular fan sites like mine (dodbits[www.dodbits.com]) or Gamebanana[gamebanana.com]
This game isn’t dead… not with bots.
Thanks to Cheeseh who created and maintains RCBot2.
Visit the forums and say thanks[rcbot.bots-united.com], use it to ask questions if you are thinking of waypointing a map.
INsane – [link]