Overview
In this guide,I will show you how to create custom castle mapand explain practical functions of TEd with many screenshots so that you can easily follow.I won’t explain everything of TEd in this guide and I too don’t know them all.if you want more detailed info, you can find it here. https://wiki.totalwar.com/w/Ted_Documentation.htmlthe purpose of this guide is not arrange every detailed functions of TEd but to make you get the feel of it.then, you won’t be confused and panicked when you open TEd, comfortably and with confidence, you will try to search and use additional information and functions by yourself if necessary.btw I’m South Korean and my English writing could be horrible. please understand that.
I. Preparations
1. install TEd
you can install TEd in library >>> tools >>> Total War : shogun 2 – TEd
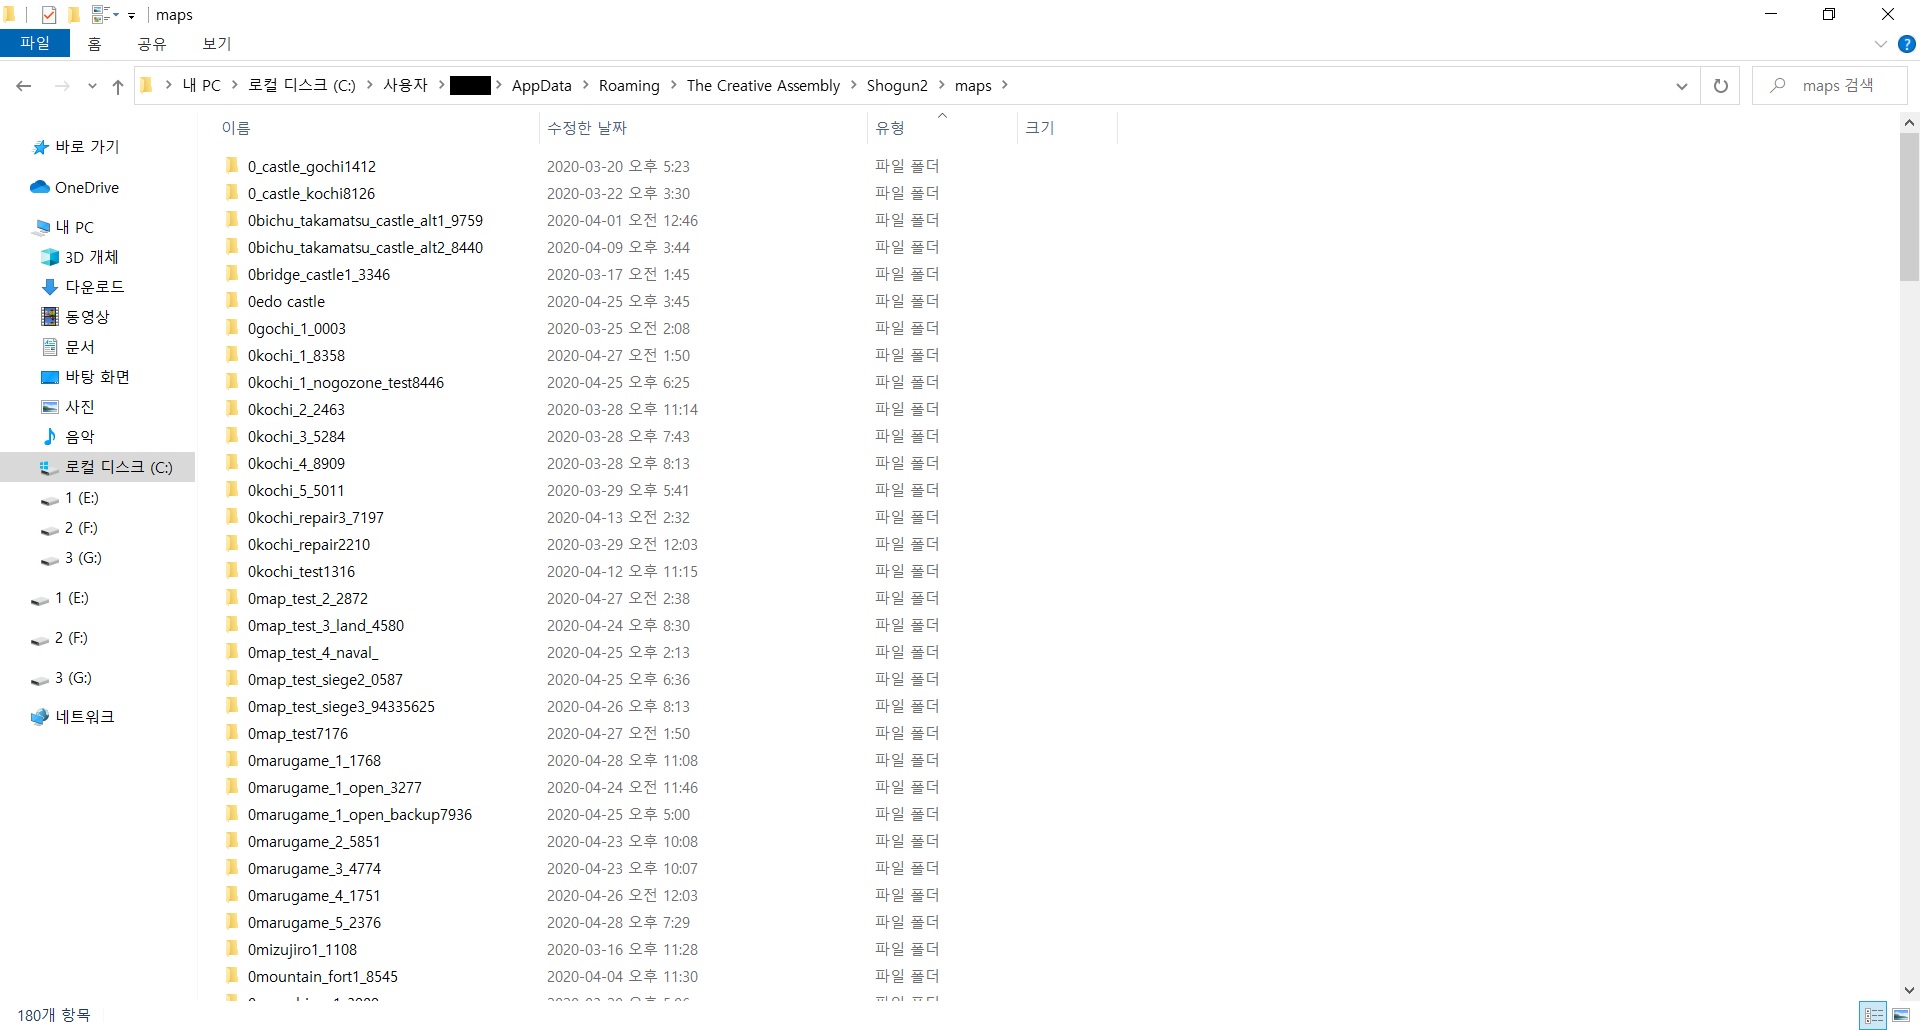
2. Create shortcut of maps folder
userAppDataRoamingThe Creative AssemblyShogun2maps
Creating shortcut of this folder will make it easy to find your custom map folders and edit
deployment_areas.xml
map_info.xml
icon.tga
steam_workshop.jpg
that are needed when you upload your map on steam workshop.

3. load background terrain
Before you arrange castle walls you need background terrain.
you can open a new map and create your own background from empty flat map,
but for beginner,
I recommend you to load default campaign siege maps or multiplayer maps that shogun 2 provides and use it as a background terrain.
because creating background terrain by yourself from flat map takes quite a lot of time and effort(even for skilled map makers)
so beginners could lost their interest about creating a map even before they complete their first map.
– how can I load those maps? –
1) download pack file manager(PFM)
[link]
2) open PFM and set the game directory
3) open terrain.pack file in shogun 2 data folder and extract battleterrain-presets (extract selected)
4) save, move or copy extracted folders in maps folder
then you can load those maps in TEd.


PFM is also needed to make your castle maps playable in campaign siege battles.
ill explain it in the last chapter.
II. Creating castle
1. Controls
this is basic controls
i made this as a picture so that you can easily find these keys from keyboard.

2. Grid, Angle, Freeform
Grid, Angle and freeform are very important functions.
arranging castle walls and various objects will be a lot easier with this functions.
1) activate Grid and Angle
check these two when you need to arrange objects in more neat way,
uncheck these if you need to do irregular work like drawing blend brush

others(edges ~ playable bounds) have no functions so don’t check.
2) set grid and angle intervals
You can adjust intervals in Tools – Settings – Drawing Settings

– grid spacing : intervals of grid. default is 10. I recommend 1, 5, 10
– angle snap tolerance : intervals of angle. default is 90. you can change this to 10, 30, 45 etc
you can also adjust grid in layers – Base layer – Grid

3) FreeForm
default of surface mod is Landscape : Above.
objects will be right on earth
but if earth height is irregular, object will be placed irregularly too.
if you set surface mod of building or entire map as freeform,
you can place object on any height you want.

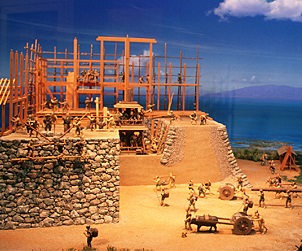
3. Arrange castle walls

1) there are 3 types of castle walls (castle_01, castle_02, castle_03)
2) fmv buildings have no actual functions but only for looks. units could walk through it.
if you want to add stone towers that has no archers, use fmv towers.
3) turning object
Alt + left click and move mouse (if angle checked, it will turn 90 degree in default setting)
4) hot keys for arranging objects
Ctrl + C : copy object
Ctrl + V : paste
Ctrl + G : Grouping objects as a one object (temporal)
Ctrl + U : Ungroup objects
Ctrl + B : Use selected object as Instance Brush
Ctrl + Z : Undo – I recommend not to use this hotkey. TEd is unstable software so this hot key sometimes cause TEd shut down(at least for my case)
5) arranging castle walls using grid and angle is like this

6) if there is any open place other than castle gate, units will not be able to climb castle walls.
(you can use this mechanism on purpose as I did in my custom maps – creating open gates using towers)
7) you can also make walls climbable by surrounding some parts of the castle with no-go zones(red line area) instead of castle wall buildings. ill explain what no-go zone is in later chapter.

4. filling earth in castle
these are some tips for filling castle earth
1) entire height of one castle wall is 23m
2) from gate(or selected height) to garrisonable floor, the height is 7m and earth behind it is 6.9m
so, if you build walls on 30m, earth behind walls should be 36.9m
and if you want to make walls highest,
earth in front of castle walls should be 30m(castle wall height number) – 16m = 14m

3) select Paint and Paint Channel : Height
set 7m scale absolute brush with castle height + 6.9m height
this setting will make it easy to fill earth behind walls(except angle wall)
If you look these pictures, you’ll get it


5. set capture locations and zones


1) Capture Locations
castle gates and towers need capture locations(those round things) near them.
and central capture location is necessary for siege battle. you can place this near the castle keep.(but you can place it elsewhere too)
2) Zones
white lines around the castle walls are zones
this makes units garrisonable on the wall(EFLines are embedded in castle wall and zones are activate it)
you have to surround this line by left clicks (I recommend you to set grid as 1 when you do this)
3) EFLines
you can use this if you want to make garrisonable place that is not castle wall(compound wooden fence, bamboo wall, etc)
you have to surround this with zones(white lines) to activate EFLines.

6. set go and no-go-regions
1) Go-zones : surrounded by Green line
Units can go even cliff and deep underwater if go-zones surround that area
go-zones should surround castle in siege map.
(if you look other shogun 2 maps, you will know)
I recommend you not to make multiple go-zones
because multiple go-zones may cause lag when you play(not all the time though)
2) no-go-zones : surrounded by Red line
Units can’t go there if no go zones surround that area
multiple no-go-zones are completely OK

7. decorate your map
1) decorate your map with trees and buildings
2) paint – paint channel : blend
low pressure (such as 0.1) can be used when you draw soft and natural mud road, grass, forest land color.

8. set deployment areas and AI polygones
1) deployment areas : alliance id 0(red) and 1(blue). You should draw both deployment areas
More detailed information about creating 4 vs 4 deployment areas is here
[link]
2) AI polygons
– defensive hill (surround)
: surround this polygones on the place where you want AI units have defensive formation.
this polygon used in land battle rather than siege battle.

– suitable ground bombardment (short line)
: place this polygon where AI siege weapons should be placed.

– approach fort (long line)
: if you place polygon, AI units will approach to fortress from here.

9. check list for map uploading
1) You must back up deployment_areas.xml (1 vs 1 ~ 4 vs 4) you created
because if you save your map again or save as other name after you completed creating deployment areas(1v1 ~ 4v4), the 4v4 part will be removed from deployment_areas.xml.
if you have back up file, you can easily rewrite your bugged deployment_areas.xml
Create deployment back up folder in maps folder,
put your map name folders in deployment back up folder,
and put your deployment_areas.xml back up files in each of your map name folders.
then, you will not be confused about which map’s deployment file you need to rewrite.

or save your deployment_areas.xml back up files as your map name.
but in this case, you have to remove bugged file and rename back up file as deployement_areas.xml. it took more time.
2) editing map_info.xml

3) creating icon.tga file : icon.tga is the picture that appears on custom battle list.
– Download proper picture that describes your map (jpg, png) from website.
– Search ‘jpg to tga’ or ‘convert to tga’ in Google
– Convert your picture to tga file by using proper free convert websites.
– Download converted file, place that tga file in your map folder and rename it as ‘icon’
(remove default icon.tga)
4) creating steam_workshop.jpg
Download proper picture(jpg format), place it in your map folder,
and rename it as ‘steam_workshop.jpg’

5) add or update your map
if you prepared all of this,
open TEd, load your map
and select ‘Add battlefield to steam workshop‘ if this is your first upload of this map,
or if not, select ‘Update battlefield on steam workshop‘

III. Appendix
1. Replacing campaign siege maps
1) types of campaign siege maps
– Shogun 2 original (Sengoku era) : 7 types(5 of each) + Kyoto(1) = 36 maps
coastal
hilly coastal
plane
hilly plane
mountain
mountain 2
mountain 3
Kyoto
each type has level 1 ~ 5 castle (fort, stronghold, fortress, castle, citadel)
except Kyoto : Kyoto has 1 map(citadel)

————————————————————————————————
– rise of the samurai (Genpei) : 4 types(4 of each) = 16 maps
fs coastal
fs hilly plane
fs plane
fs mountain
each type has level 1 ~ 4 castle

————————————————————————————————
– fall of the samurai (Boshin)
shogun 2 original maps(36maps) + level 6 of each types and Kyoto (star fort) (8maps) = 44maps

————————————————————————————————
you can get these folders by extracting terrain.pack in shogun 2 data folder.
(I told this in previous chapter, but just in case)
open terrain.pack with pack file manager
and extract battleterrain – presets

or you can create empty folders and give them exact same names of those folders.
————————————————————————————————
2) copy & paste these files of your custom castle map to campaign siege map folder you want to replace.

————————————————————————————————
btw you don’t need to replace every folder.
if you want to play shogun 2 original, then replace those folders. you don’t have to replace rots(genpei) or fots(boshin) folders in this case.
————————————————————————————————
after you replace every folders you want,
(1) open pack file manager
(2) create new mod pack
(3) add directory
(4) select folders you replaced(split these because steam workshop has upload size limit)
(5) add it under battleterrain – presets(you’d better make these upper folders(battleterrain, presets) for easy add in PFM)
(6) save it as your mod pack file(rename it as you want)
(7) prepare proper pictures(jpg format) and give it an exact same name with your mod pack file
(8) move or copy those files(pack file and jpg picture) to data folder in shogun 2 install directory
(9) play shogun 2, double click your mod when mod manager appears and upload your map to steam workshop.(if there is no picture or picture name is not exactly same with pack file, your mod will not be uploaded)


