Overview
[Spoilers] A comprehensive guide to all the awesome parts and deadly foes in Octogeddon!
Parts
Tentacle
Price: N/A
Damage rating: Low
Damage per hit: 0.5
Best against: Basic Subs
Weak against: pretty much anything that has more than one heath, or comes in swarms
The default weapon for Octogeddon, the basic tentacle deals continuous damage to any enemy touching it. Though better than claws for hitting basic enemies, the tentacle’s lack of dps and range quickly leave it lacking.
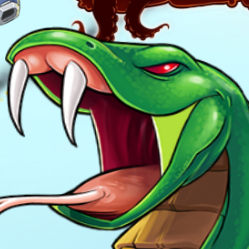
Snake
Price: 50
Damage rating: Low
Damage per hit: 1
Cobra
Price: 450
Damage rating: Medium
Damage per hit: 1
King Cobra
Price: 2,000
Damage rating: High
Damage per hit: 1
Black Mamba
Price: 8,000
Damage rating: Very High
Damage per hit: 1
Best against: Fast Enemies
Weak against: Evasive Enemies
The workhorse DNA options, the snake line offers good ranged dps for a cheap price, at the cost of range. While the snake, cobra and king cobra are good options for their price class, the black mamba is generally too expensive to justify the 33% increased fire rate over the king cobra.
Crab
Price: 75
Damage rating: High
Damage per hit: 6
Lobster
Price: 500
Damage rating: Very High
Damage per hit: 8
T-Rex
Price: 2,400
Damage rating: Extreme
Damage per hit: 12
Best against: Armored Enemies
Weak against: Fast Enemies
With high damage, the claws are excellent against big slow enemies, buildings, and land bosses. However, their sluggish fire rate makes them unreliable against normal enemies, and pretty hopeless against fast enemies. They also work decently against swarms.
Penguin
Price: 50
Damage rating: N/A
Damage per hit: N/A
Best against: Fast Enemies
Weak against: Bosses
The penguin slows enemies down to a fraction of their speed, and has a fast fire rate, making it good for crowd control. The lack of damage means it falls off pretty quick in the late game.
Bee
Price: 225
Damage rating: Very Low
Damage per hit: 2 1
Queen Bee
Price: 1,725
Damage rating: Low
Damage per hit: 2 1
Best against: Evasive Enemies
Weak against: Swarms of Enemies
The games first nerf, bees now only deal one damage. This makes them a very poor choice for dealing with larger enemies, but the combination of homing and full screen range means they remain a fine choice for dealing with small enemies.
Chicken
Price: 150
Damage rating: Low
Damage per hit: 2
Rooster
Price: 2,200
Damage rating: Medium
Damage per hit: 2
Best against: Swarms of Enemies
Weak against: Fast Enemies
Eggs deal splash damage, travel slowly, and have maximum range. As such, they can almost be thought of as mine launchers, effective on orbiting enemies and swarming enemies. They scale well into the late game, dealing with hordes, and filling the screen with eggs before the enemies even arrive.
Frog
Price: 800
Damage rating: Very High
Damage per hit: Unlimited to a single enemy
Best against: Massive Armored Enemies, Swarms
Weak against: Buildings, Most bosses
The frog allows you to tongue an enemy, then swing it around at others. Excellent for dealing with Armored enemies then smashing swarms around them. The frog’s main weakness is that it is nearly useless against bosses, with only the Megapede being vulnerable.
Turtle
Price: 75
Damage rating: N/A
Damage per hit: N/A
Best against: Bullets and Missiles
Weak against: Everything else
The turtle blocks bullets, and does literally nothing else. Generally not worth a tentacle. Either use a snapping turtle, or learn to dodge.
Angler
Price: 150
Damage rating: N/A
Damage per hit: N/A
Best against: Stealth Enemies
Weak against: Everything else
While generally useless if stealth is not present, it is by far the best anti-stealth tentacle, making it better than the firefly for late game hordes.
Elephant
Price: 50
Damage rating: N/A
Damage per hit: N/A
Best against: Jellyfish
Weak against: Fast Enemies
The elephant pushes back enemies, but the stream it shoots is thin, and is generally not worth using.
Porcupine
Price: 1350
Damage rating: High
Damage per hit: 1
Best against: Swarms, Large Enemies
Weak against: Massive Hordes
Very well rounded, the porcupine is pretty much always good, right up until the end of hard mode, where it becomes a bit less useful.
Sawshark
Price: 3,000
Damage rating: Very High
Damage per hit: 1
Best against: Swarms
Weak against: Precise dodging
A powerful melee weapon, the sawshark deals continuous damage to all enemies it touches, as long as Octogeddon is spinning. Hard to use while also dodging, or when cornered between two enemies.
Narwhal
Price: 10,000
Damage rating: Very High
Damage per hit: 8
Best against: Hordes of Large Enemies
Weak against: Fast and Evasive Enemies
Arguably the best tentacle in the game (particularly for endgame hardmode), the narwhal hits as hard and fast as a lobster, has the range of a snake, and even pushes enemies back, making large enemies cake, and even deflecting jellyfish for you.
Pelican
Price: 700
Damage rating: Very High
Damage per hit: Unlimited
Best against: Armored Enemies, Swarms
Weak against: Fast and Evasive Enemies
The pelican can eat enemies and spit them out at other enemies. It is similar to the frog, but trades grab range for small aoe grabbing. Can be useful lategame, but generally the frog is more useful, especially underwater.
Dragon
Price: 9,000
Damage rating: MAX
Damage per hit: 2
Best against: Hordes of Massive Enemies, Buildings, Bosses
Weak against: Evasive Enemies
When you hold still, the dragon emits a column of fire, burning and decloaking all in its path. For its massive power, the dragon has two problems. Despite revealing cloaked, it is not effective at this job. It also makes manuvering difficult, as you can’t dodge and realign without disrupting the flame. A powerful lategame tentacle.
Dolphin
Price: 50
Damage rating: N/A
Damage per hit: N/A
Best against: N/A
Weak against: Dodging
The dolphin makes you spin faster. This generally isn’t too useful, as it makes precise movement and aiming very difficult. Can be fun with sawsharks.
Goldfish
Price: 50
Damage rating: N/A
Damage per hit: N/A
Best against: Poverty
Weak against: Enemies
Exceptionally useful early in a run, the goldfish spits out a coin every enemy wave. If you have a tentacle you arn’t using, put a goldfish on. Drops off in usefulness pretty quick after New York, but really helps you get started.
Firefly
Price: 600
Damage rating: Medium
Damage per hit: 1
Best against: Stealth
Weak against: Hordes of Stealth
The Firefly is basicly a cobra with an added stealth dispelling aura on the bullets. Great for the early game for role compression, but falls off later as it struggles against masses of stealth the angler can dispell in one sweep.
Parts, Continued
Snapping Turtle
Price: 800
Damage rating: Medium
Damage per hit: 3
Best against: Bullets, Swarms
Weak against: Fast and Evasive Enemies
The snapping turtle deals half the damage of a crab, but snaps nearly twice as fast, making it more reliable. It retracts into its shell when bullets approach, allowing you to block them. Very useful for defending against bullets, while still having a useful damaging tentacle.
Snail
Price: 300
Toughness: 1
Coral
Price: 800
Toughness: 2
Scallop
Price: 2,000
Toughness: 3
Conch
Price: 5,000
Toughness: 4
Horseshoe Crab
Price: 10,000
Toughness: 5
At the start of a run, only the snail helmet will show up. To upgrade your helmet, you need to have the previous one. Your helmet regenerates each time you lose a life. Generally not cost effective in normal mode, they are worth their weight in gold in hard mode and endless ocean.
Spike the Pufferfish
Price: 500 if first pet, 2,500 if second pet, 5,000 if third pet, 10,000 if fourth pet
Effect: Hits all enemies around him for massive damage.
Best against: Swarms, Hordes
Weak against: Fast Enemies
Spike is a simple, but useful panic button. His main weakness is his tendancy to wander back and forth, making using him a bit imprecise.
Wu the Starfish
Price: 500 if first pet, 2,500 if second pet, 5,000 if third pet, 10,000 if fourth pet
Effect: Hits the closest 5 enemies for massive damage.
Best against: Armored Enemies
Weak against: Swarms, Hordes
Wu’s pathfinding can be iffy, but his range is better than spike.
Volt the Electric Eel
Price: 500 if first pet, 2,500 if second pet, 5,000 if third pet, 10,000 if fourth pet
Effect: Stuns and Unstealths all enemies, destroys all bullets and missiles on screen.
Best against: Bullets, Stealth
Weak against: Bosses
If you have a good setup, Volt is amazing at giving you the few extra seconds you need to get out of a bad situation.
Ursula the Urchin
Price: 500 if first pet, 2,500 if second pet, 5,000 if third pet, 10,000 if fourth pet
Effect: Fires a barrage of spikes in 8 directions.
Best against: Bosses
Weak against: Panic situations
Ursula is questionable for normal use, but if you let her drift onto a boss’s weak point and set her off, she can deal amazing damage to it.
Enemies
Submarine/Plane
Toughness: 1
Speed: Normal
Weak against: Everything
Strong against: Tentacles that don’t deal damage
While basic, they become quite numerous quite quickly.
Speedy Sub/Plane
Toughness: 1
Speed: Fast
Weak against: Penguin, Snakes
Strong against: Claws
Seemingly simple, they are dangerous lategame when they come out in hordes.
Armored Sub/Plane
Toughness: 5
Speed: Very Slow
Weak against: Claws
Strong against: Basic Tentacles
Dangerous early game, they fall off quickly as their slow speed renders them easy to kill.
Nuclear Sub/Balloon
Toughness: 1
Speed: Very Slow
Weak against: Ranged Tentacles
Strong against: Melee Tentacles
The occasional nuclear wave adds several of these. Far from dangerous, they mostly end up blowing up their allies.
Nuclear Tanker
Toughness: 5
Speed: Very Slow
Weak against: Everything
Strong against: Basic Tentacles
Not too dangerous, they blow up after a short delay. Totally trivial in groups, as they blow each other up.
Shark
Toughness: 1.5
Speed: Very Fast, Orbiting
Weak against: Bees
Strong against: Snakes
Dangerous in the early game, Sharks quickly become less dangerous when you have dozens of projectiles flying around, as they cover a lot of area, running into stuff.
Swarm
Toughness: 1 x 5
Speed: Slow
Weak against: Chicken, Sawshark
Strong against: Bees
Consistently dangerous, swarms can quickly threaten with just overwhelming numbers.
Missile Tank
Toughness: 5
Speed: Very Slow
Weak against: Turtles
Strong against: N/A
While pretty harmless at first, they become exponentially more dangerous in multiples.
Mega Sub/Plane
Toughness: 15
Speed: Slow
Weak against: Frog, Pelican
Strong against: Snakes
Rather nasty, but frogs make short work of them, otherwise you just need sufficient dps.
Shooter Sub/Plane
Toughness: 1
Speed: Slow
Weak against: Turtles
Strong against: N/A
The bullets they fire can either be blocked with a turtle, or dodged by letting them pass under your chin.
Piranha/Raptor
Toughness: 1
Speed: Very Fast
Weak against: Bees
Strong against: Claws
They zig-zag in, pause, then dive in for the kill. High priority targets.
Centipede
Toughness: 1 x 5
Speed: Normal – Very Fast
Weak against: Chickens
Strong against: Bees, Claws
Composed of five segments, centipedes get fast as they lose segments. Don’t let them get anywhere near you, as single pieces can be very hard to hit.
Tank
Toughness: 15
Speed: Very Slow
Weak against: Turtle
Strong against: N/A
Dangerous and tough, tanks can quickly and efficiently limit your room to manuver.
Invisible Sub/Plane
Toughness: 1
Speed: Normal
Weak against: Angler, Firefly
Strong against: Everything else
They only decloak when hit with an angler of firefly, or if they get in melee range. Very dangerous, and one of the aformentioned tentacles should be equiped at all times, unless you reach DC and see no stealth.
Mega Shark
Toughness: 15
Speed: Very Fast
Weak against: Frog, Porcupine
Strong against: N/A
Less dangerous variant of the mega sub/plane, these sharks are huge, and like to fly right into all sorts of projectiles.
Invisible Armored Sub/Plane
Toughness: 1
Speed: Very Slow
Weak against: Angler, FireFly, Claws
Strong against: Everything else
Less dangerous than the normal invisible enemies, they give you more time to react.
Giga Tank
Toughness: 30
Speed: Very Slow
Weak against: Frog, Pelican
Strong against: Low dps
Dangerous barriers in city stages, giga tanks serve as walls and disruptors.
JellyFish
Toughness: Invulnerable
Speed: Very Slow
Weak against: Elephant, Narwhal
Strong against: Everything Else
These invulnerable enemies stun you if they hit you. Either push them away, or dodge them like bullets.
ScatterSwarm
Toughness: 1 x 5
Speed: Slow
Weak against: Chickens, Sawshark
Strong against: Snakes
When one dies, they scatter. Pretty much just a slightly more dangerous swarm.
Laser Drone
Toughness: 15
Speed: Normal
Weak against: Frog, Pelican
Strong against: Turtles
Just keep moving, or kill them so quick they can’t shoot.
Giga Sub/Plane
Toughness: 30
Speed: Very Slow
Weak against: Frog, Pelican
Strong against: Low dps
Huge and fearsome, the giga punishes low dps builds.
Medic Sub/Plane
Toughness: 1
Speed: Very Fast
Weak against: Everything
Strong against: N/A
The most precious spawn, make killing them your top priority!
Treasure Sub/Plane
Toughness: 15
Speed: Slightly Fast
Weak against: Everything
Strong against: Beginner builds
Even if you can’t kill it, just shooting it will drop easy money.
Double Shielded Sub/Plane
Toughness: 1
Speed: Normal
Weak against: Chickens, Melee
Strong against: Bees, Bad Aimers
Not too hard to hit, but they become nasty in hordes.
Double Shooter Sub/Plane
Toughness: 1
Speed: Slow
Weak against: Turtles
Strong against: N/A
They shoot twice as fast, and their bullets are twice as quick. Very nasty.
Force Field Manta
Toughness: 1
Speed: Normal
Weak against: Chickens
Strong against: Snakes
Tough to hit normally, splash damage makes quick work of them.
Super Speedy Sub/Plane
Toughness: 1
Speed: Very Fast
Weak against: ???
Strong against: Everything
Evil spawn of Posidon himself, these holy lances strike fast and true. You just need so many projectiles, that you just accidentally kill any that come your way.
Bosses
Big Boss Bass
Toughness: 60
Normal: Big Boss Bass is a very simple boss. He orbits you, and sometimes shoots spawn at you.
Hard: Much more dangerous, can shoot whole waves of spawn. A chicken greatly helps. Very nasty as a DC enemy.
The Butcher
Toughness: 90
Normal: Another simple boss. Hit him when the mallet is up, and run when its about to drop.
Hard: Starts out with more butcher knife projectiles, and eventually starts spawning armored planes.
MegaPede
Toughness: 4 per segment
Normal: One of the nastiest bosses, Megapede gets faster as you destroy it, cumulating with a lightning fast final segment that is very hard to hit.
Hard: No real noticable changes thankfully.
Kongaroo
Toughness: 250
Normal: Agile and unpredictable, his boomarangs can be hard to dodge. Don’t let his Joe-E minions catch you off guard! Be sure to stand back.
Hard: Starts throwing the boomarang immediately, has airplane support, and spawns Joe-E much faster.
Big Boss Shooter Bass
Toughness: 180
Normal: Do you have a turtle/are decent at dodging? Then this boss is easy. Can be nasty as a DC enemy.
Hard: Not much harder. Gets extra submarine support, but otherwise a cakewalk.
Stomp-A-Tron X
Toughness: 300
Normal: Get under him to hit him, get out when he is about to shoot his eye blast. Missiles and planes distract, but are not too dangerous.
Hard: Starts with missiles right away, and they are amped up to 11. They almost never let up, and when he gets low, Mega Planes start showing up. Very hard to get under when dodging so many missiles.
Mecha-Octogeddon
Toughness: 225
Normal: Shoots bullets, shoots stealthed spawn, not too dangerous until the final phase. When the chainsaws come out, hit him with everything you have to push him back.
Hard: Gets submarine support, otherwise the same.
Giganto-Mine
Toughness: 225
Normal: Shoot it in the face! Does nothing at first, then spawns stealthed planes and shoots stun walls. When the bagette comes out, run!
Hard: Summons stealthed armored planes too, and uses the bagette much more frequently.
Giant Pillbug
Toughness: 300
Normal: Pretty tame for the DC ocean. Kill his minions, dodge the jellyfish and shots, and you’re good.
Hard: Spawns subs when he is curled, but honestly a nice break after the frantic DC ocean.
Mech Force One
Toughness: 1,000
Normal: Starts out with three attacks. The nuclear balls are by far the most dangerous, so stay up against the mech to not have to worry about them. Dodge the bell when needed, but stay as close as possible! When the white house detaches, finish off the mech so it stops attacking, then just dodge grenades to victory.
Hard: Super scary with the lower health, he starts spawning planes early, and eventually summons mega planes. Otherwise, the same stratagy of keeping close works well.