Overview
This guide will give you the location of the all the collectables scattered throughout the game. This includes, item upgrades, armor upgrades, detective cases, Batsuits and the Penguin, Black Mask & Joker collectable locations.
Item Upgrades
Batman will collect a variety of gadgets and upgrades. There are six main gadgets and weapons in the game.
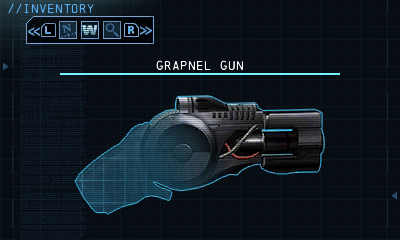
Grapnel Gun
The Grapnel Gun is an essential part of your navigation equipment. Once a valid point is hit with the Grapnel Gun, you will be pulled to that location.
This item is available from the very start of the game.
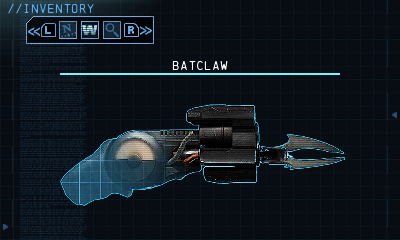
Batclaw
Fire a claw-like projectile that interacts with out of reach objects and pulls them towards you.
The Batclaw item can be found in the Administration zone.
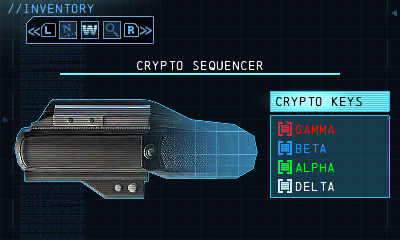
Crypto Sequencer
The Crypto Sequencer is used to hack into security consoles throughout Blackgate. Some panels require special clearance keys found in the prison.
There are four keys to collect in all:
- Delta: Available from the start.
- Gamma: Found after defeating the last of the three main bosses.
- Beta: Found in the Administration zone.
- Alpha: Found in the Industrial zone.
Line Launcher
When using the Line Launcher, climb onto the cable to use it as a tightrope.
The Line Launcher is found in the Administration zone, while the Tightrope upgrade is found in the secret entrance area within the Industrial zone.
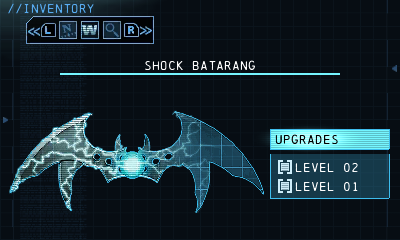
Batarang
Batarang charged with electricity used to power or short devices. Electricity will ark between shock Batarangs, causing devices to turn on or short out.
The normal Batarang is available from the start, but the Shock upgrade can be found in the Administration zone.
Gel Launcher
The pneumatic gun fires canisters of explosive gel, which can be remotely detonated. Up to 3 charges can be placed at any given time.
There are three upgrades to collect:
- Explosive: Found in the Industrial zone.
- Glue: Found in the Cell Blocks zone.
- Proximity: Found in the Industrial zone. This upgrade is optional. You can find them by heading towards the bottom of the map where there is a long vertical room. Use the Tightrope to get to a vent on the right.
Armor Upgrades
Collect Armor upgrades to help increase your health bar. Collecting four gives you a new chunk of health. There are eight upgrades to collect in all.
Armor Upgrade #1
Industrial: Once you drop into the sewer, immediately analyze the roof to find another weak spot to the right of the original hole. Blast through, then grapple into the newly made hole. This will bring you back to the room with the machine. Head to the left and return to the area where you fought the thug with knives. Grapple to the ledge in the back of the room, then use an explosive to blast through the wall. Enter the next room and crawl into the vent. Drop into the next room and open the crate to find the item.
Armor Upgrade #2
Cell Blocks: As soon as you obtain the Batclaw, pull down the crate on the left and enter the hole to find a room with the item.
Armor Upgrade #3
Cell Blocks: In the vent you are forced to go into becuase the hallway is blockedwith large crates, look up at the ceiling to find a small weak spot. Blast it with an explosive, then grapple up to find the item in another room.
Armor Upgrade #4
Administration: Once you have the Line Launcher, return to the area where you rescued the first two guards. Grapple up to the highest point, then use the Line Luancher to get to the crate on the left.
Armor Upgrade #5
Administration: As you are climbing through the vent, notice a second vent up above. Use the Batclaw to take off the grate.
Armor Upgrade #6
Industrial: In the room to the right of the garage, use the Shock Batarang to open the gate on the right, revealing a crate with this item inside.
Armor Upgrade #7
Industrial: In the area right before the secret entrance area with the giant water pipe, use your Gel Glue to plug the water pipe, then blast down the wall to find the crate.
Armor Upgrade #8
Administration: In the first room of the building where The Joker hung all those guards, use the Shock Batarang to open the vent in the middle of the room. Crawl through to the right to find the crate on the other side.
Heavy Gauntlets
Each upgrade increases combat damage. 25% Increase for the first upgrade, 50% increase for the second upgrade, and 100% increase for the third upgrade.
There are three upgrades to collect.
Heavy Gauntlet Upgrade #1
Cell Blocks: Right before the door to the Lighthouse, exit the elevator and scan the back wall to find a weak spot. Blast through the wall with an explosive, then open the crate to find the item.
Heavy Gauntlet Upgrade #2
Administration: In the room to the right of the main hall with the staircase, use the Tightrope to follow the cable that connects to the fans pumping out poisonous gas. At the top, turn off the gas and enter the vent on the bottom floor on the right. Here you’ll find the crate.
Heavy Gauntlet Upgrade #3
Industrial: There is an area where an old fan can be seen in the background. Enter the vent to the left and crawl behind the fan. Stop the fan with your Shock Batarang and enter the fan to find the crate on the other side.
Rush Upgrades
Defeating enemies with full health will charge a rush bar. More damage is dealt per rush. Taking damage will empty a rush bar.
There are three rush upgrades to collect.
Rush Upgrade #1
Industrial: In the room below the room where you originally found the hey card, use the Line Launcher to cross the barbed wire fence. The crate with the item inside can be found here.
Rush Upgrade #2
Cell Blocks: In the main cells area with the five floors, stay on the bottom floor and head for the left exit. Do not enter the door. Instead, open the vent with your Batclaw and crawl through. Follow the path to the crate.
Rush Upgrade #3
Industrial: In the room with the electric tiles, enter the pipe on the left to drop down to the floor below. Use your Batclaw to break through the gate, then open the crate to find the upgrade.
Batsuits
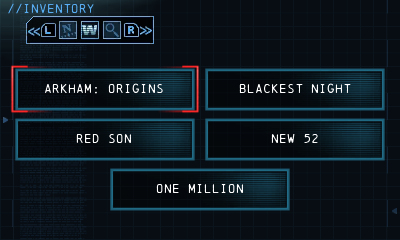
Each suit requires you to find a Cowl, Chest, Gloves, Boots, and Belt before use.
There are five suits to collect in the game.
Arkham Origins Batsuit
The basic Batsuit providing minimal protection and offensive capabilities.
All the parts to this Batsuit are available from the start of the game.
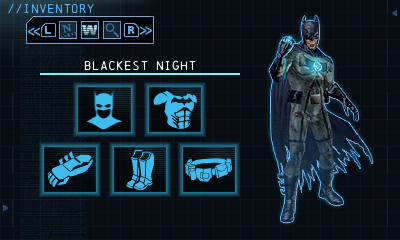
Blackest Night Batsuit
Batman’s suit when he returns from the grave. Makes you impervious to damage.
There are five pieces to collect:
- Cowl
Administration
In the basement area where The Joker locks the door, grapple up to the ledge just before the door on the right. Use the Tightrope to get to the area above. - Chest
Cell Blocks
In the room with the main elevator that The Penguin used, grapple up to the highest ledge on the right. From there, use the Line Launcher to cross over to the crate on the left. - Gloves
Industrial
Enter the vent to the right of the big “13” on the wall. In the next room, head all the way to the right, then use a an explosive to clear a hole through the pipe. Use the new space to grapple up to another platform where a crate with the item rests. - Boots
Administration
After you cross the gap with the Line Launcher, place explosives on the two vents to stop the gas. Drop down and hack the terminal to access the room on the left. The item is inside a crate. - Belt
Arkham Wing
In the Arkham Wing, climb into the shaft behind the fan that you stopped. Inside, use the Line Launcher to get to the other side.
Red Son Batsuit
Batman’s Red Son outfit.
There are five pieces to collect:
- Cowl
Administration
After obtaining the Line Launcher, use it to cross over the gap and the electricity. In this room, grapple up the ledge, then enter the vent. In the next room, use the Lien Launcher to cross the next gap over to the crate with this item inside. - Chest
Industrial
In the area outside the room where you found the key, drop down on the left side to find a terminal that requires the Gamma update. Open up the door to find the crate inside. - Gloves
Industrial
In the second to last room before the back entrance and exit, grapple up the highest point, then enter the vent on the left with your Batclaw. The crate will be in the next room. - Boots
Industrial
In the room above the room with the pressure valves where you previously fought two thugs, pull of a section of the wall off with your Batclaw, then use your Shock Batarang on the switch to open the door on the left. - Belt
Administration
This part is given to you by Catwoman when you find the last Joker present. You can only get this part if you defeated the Joker last.
New 52 Batsuit
Batman’s costume from the New 52 Universe. (No images yet)
There are five pieces to collect:
- Cowl
Administration
Head to the hallway with the torn down wall that leads to an outside area. Go through, then use the Line Launcher to cross the gap. The crate with the item will be on the other side. - Chest
Cell Blocks
In the area where you burst two pipes to take out two thugs, climb up to the walkway and open the vent on the right. Enter to find a crate in another room. - Gloves
Cell Blocks
After defeating the thugs, head to the left and analyze the wall to find a weak spot. Blast through with an explosive and find the item on the other side. - Boots
Industrial
Enter the secret entrance area and head for the area with the long vertical room up above. Use the Tightrope to access a ledge you can grapple to. The crate will be up here. - Belt
This part is given to you by Catwoman when you find the last hostage. You can only get this part if you defeated The Penguin last.
One Million Batsuit
Batman’s One Million Batsuit. (No images yet)
There are five pieces to collect:
- Cowl
Administration
Once you enter back into the main hall from the left entrance on the second floor, use the Line Launcher to zip line to the other side. Here you will find the item in a crate. - Chest
Administration
Exit the The Joker clown game room and ride the elevator. Ride it up and return to the clown room by going through the hatch once again. Drop down the elevator shaft to find the crate. - Gloves
Industrial
In the area where you freed the hostage, scan the entrance area to find a generator that can be hit with a Shock Batarang. Enter the now opened vent and cross over the electricity to get to the crate. - Boots
Cell Blocks
As soon as you grapple across the room, drop down from hanging and you’ll land on a lower platform. There is a small crate with the item inside in the corner. - Belt
This part is given to you by Catwoman when you find the last junction box. You can only get this part if you defeated Black Mask last.
Detective Cases
Within the world of Blackgate, hidden pieces of evidence are scattered about for different detective cases. When you find all the pieces of evidence for a single detective case, Concept Art is unlocked. There are a total of fourteen Detective Cases.
Ground Zero – Detective Case #1
Ground Zero is the first of fourteen Detective Cases. This case contains three items to find.
- Needle-Nose Pliers
Cell Blocks: In the area with the broken elevator shaft, jump over the gap on the bottom floor. Use your Batclaw to to get through the gate. The pliers will be in the next room. - Chunk of Curved Metal
Cell Blocks: Drop down the hole and analyze the floor to find the metal bracelet. This is right before you enter the main cell block room with all the floors. - Rubble Fragments
Cell Blocks: In the main cell blocks area with the five floors, enter the vent on the bottom floor near the left entrance. As you are crawling, scan the inside of the vent just before you exit.
The Joker is Wild – Detective Case #2
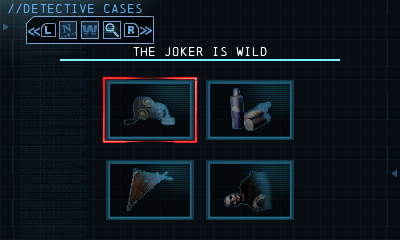
The Joker is Wild is the second of fourteen Detective Cases. This case contains four items to find.
- Gas Mask
Administration: Enter the room where The Joker left a present that had to be opened by popping the surrounding balloons. Enter the vent in the middle of the room. Exit the vent, then scan the floor on the left to find the gas mask. - Empty Cans
Administration: After The Joker locks you in the sewers down below the Administration rooms, use an eplosive on the wall where a pipe can be seen in the next room. Run to the right and shimmy over to another walkway. Walk to the left, then use your Line Launcher to cross over to the pipe where the empty cans rest. - Metal Pipes
Administration: In the hallway that leads to the area where you fought The Joker, grapple up to the next floor through the hole, then bomb the wall on the right. The metal pipes can be found on a couple of boxes in the next room. - Dead Guard
Administration: In the very first room you enter in the entire zone, find the dead guard in the corner of the hallway.
Kidnapped – Detective Case #3
Kidnapped is the third of fourteen Detective Cases. This case contains four items to find.
- Assistant Warden
Administration: After you pass the first switch, the deceased assistant warden can found in the next room. - Hand Drawn Map
Administration: In the attic like room, just after the Deadshot fight. It will be on the left side of the room. - Class Ring
Administration: After crossing over the the poisonous gas, enter a room with an opening in the ceiling. You can find the class ring on the box on the right. - Glass Eye
Administration: After you move the bookshelf, scan the area above the vent to find a glass eye.
Sixty Feet Under – Detective Case #4
Sixty Feet Under is the fourth of fourteen Detective Cases. This case contains three items to find.
- Skeletal Remains
Industrial: As you are using the secret entrance, enter the area with all the gates. Enter the bottom right gate and Drop off the walkway. Use the Line Launcher to get to the other side. The pile of bones can be found in the corner. - Plant Matter
Industrial: Enter the vent that takes you to the start of the secret entrance. As you are crawling down the stairs, scan the moss to find this piece of evidence. - Circus Flyer
Industrial: In the area where you fought Solomon Grundy, run all the way to the right to find the flyer in the debris.
Bird of Prey – Detective Case #5
Bird of Prey is the fifth of fourteen Detective Cases. This case contains four items to find.
- Maintenance Torch
Cell Blocks: As you fall down the hole you made with the heavy beam, grapple to the vent on the right. This will take you to a small room with the Acetylene torch. - Damaged Keypad
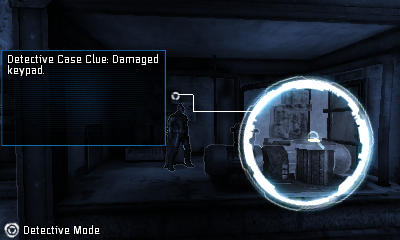
Cell Blocks: Before calling down the elevator, drop down the elevator shaft to find a small vent on the right. Enter it and find the damaged keyboard in the next room. - Prison Clipboard
Cell Blocks: As soon as you start the entire Administration zone, grapple up to the ledge and then to the one on the right. Drop down to the ground below to find the clipboard on the right. - Small Spade
Cell Blocks: In the area where you blew up the two pipes to take out two thugs on the floor above you, enter the vent on the left and scan the room for the spade when you can stand up.
Breakout Break-In – Detective Case #6
Breakout Break-In is the sixth of fourteen Detective Cases. This case contains three items to find.
- Hydraulic Fluid Hose
Industrial: In the room where you fought the thug with the electric rod for the first time, drop down to the walkway below. There should be a red vent you can enter where they hose can be found. - Small Handmade Device
Industrial: Near the door that requires the Glue Gel to open. After the small chat with Catwoman, enter the next room to find the the piece of evidence on the battered desk. - Scuffed Crowbar
Industrial: In the area that proceeds that Solomon Grundy boss fight, use an explosive on a sewage pipe that can be seen in the distance through some metal bars. Scan the bars to find the crowbar.
No Laughing Matter – Detective Case #7
No Laughing Matter is the seventh of fourteen Detective Cases. This case contains three items to find.
- Blackgate Map
Administration: In the main area with the destroyed staircase, scan the chair on the left of the room to find the map. - Cylindar Cap
Administration: Pass throught the library and into the vent. In the next room just above the thugs is a closed vent. Use your Batclaw to break through, then crawl into the next room to find the Cylinder cap. - Ventilation Manual
Administration: In one of the hallways is a torn down wall that leads to an outside area. Scan the debris on the left to find the manual.
Cell Block Bird Cage – Detective Case #8
Cell Block Bird Cage is the eighth of fourteen Detective Cases. This case contains three items to find.
- Broken Security Camera
Cell Blocks: As soon as you enter the main cell blocks area, scan the floor on the right to find a broken security camera. - Shell Casings
Cell Blocks: Enter the vent above the gaping hole. Crawl until you can stand, then scan the area for the mirror. - Electrical Wiring
Cell Blocks: As soon as you enter the building, the electrical wiring can be found to the right of the entrance, right in front of the gate.
Final Stand – Detective Case #9
Final Stand is the ninth of fourteen Detective Cases. This case contains three items to find.
- Cell Phone
Industrial: Return to the area where you fought two thugs under several pressure pipes. There is a weak spot in the ceiling high above. Blast through, then grapple up to find the cell phone in the room above. - Shell Casings
Industrial: As you are heading towards the second exit, enter the second to last room and use the Line Launcher to cross over the gap. You can find the shell casings in this small room. - Severed Thumb
Industrial: Cross the empty gap with a Line Launcher to reach the other side where the thumb can be found. This room can be found in one of the rooms on the bottom of the map.
The Bidding War – Detective Case #10
The Bidding War is the tenth of fourteen Detective Cases. This case contains four items to find.
- Bearer Bonds
Cell Blocks: In the room where you fought The Penguin, climb down the right ladder to the room below. Find the bearer bonds on a box on the right. - Gold Coins
Industrial: In the room where you fought Black Mask, scan the area on the right to find the coins. - Handwritten I.O.U.
Administration: As soon as you exit the room where you fought The Joker, scan the wall to find the paper. - Homemade Paper Target
Administration: In the area where you fought Deadshot, scan the walls to find this paper.
Doctor’s Orders – Detective Case #11
Doctor’s Orders is the eleventh of fourteen Detective Cases. This case contains three items to find.
- Personal Journal
Administration: In the second room of the library, find the journal laying on the second floor. - Personnel File
Administration: In the room with the final switch, search the nearby table for the Personnel file. - Tiny Key
Administration: After you cross the gap with the Line Launcher, scan the area on the left to find the Tiny key.
A Life on the Line – Detective Case #12
A Life on the Line is the twelfth of fourteen Detective Cases. This case contains five items to find.
- Noose
Cell Blocks: When you reach the hallway with the large crates, enter the vent, then walk a little to the left before entering another vent. Once on the other side of the crates, run all the way to the right. Scan the floor to find the noose. - Guards Uniform
Cell Blocks: As soon as you grapple across the room, climb up from hanging and walk to the left. Jump, then grapple to the next ledge when you get close enough. Drop to the lower platform to find the piece of evidence. - Damaged Door
Cell Blocks: In the main cell blocks area, grapple up to the highest floor after taking out the metal with your Batclaw. The damaged door can be found right before the entrance to the next room. - Prisoner’s Slipper
Cell Blocks: Once you drop down the hole you made with the heavy beam, scan the area to find the Prisoner’s slipper. - Cut Pipe
Cell Blocks: In the area before the giant open area with all the different walkways, stop before you drop down the two story hole. Blast through the weak spot in the ceiling and find the pipe in the room above.
Power Play – Detective Case #13
Power Play is the thirteenth of fourteen Detective Cases. This case contains four items to find.
- Tablet Computer
Industrial: In the garage at the very start of the zone, use the Batclaw to bring down a grate from a vent. Grapple up and crawl through. Scan when you notice a square on the wall. - Photo
Industrial: Instead of jumping over the gap right before the exit, drop down to the lower floor. Break down the gate on the left, then enter the vent on the other side. Crawl all the way to the right to access a secret area where you can find the new piece of evidence to the left of a set of computers. - Dental Instruments
Industrial: As you are going through the secret entrance, defeat the thugs after crossing the walkway, then find the Dental tools on a few cabinets on the left. - Crumbled Papers
Industrial: In the area where you can call two different elevators, grapple up to the top of the one on the left, then use an explosive on the fan on the left. Use a Line Launcher to enter the room behind the fan. Follow the path on the right until you reach the end where the papers can be found.
Information Gathering – Detective Case #14
Information Gathering is the fourteenth and final of the fourteen Detective Cases. This case contains four items to find.
- Thumb Drive
Administration: When you make outside just before seeing the Warden, pull off the grate from the vent on the left wall. Enter the vent to find yourself in another room. Scan the room for the thumb drive. - DVD
Administration: After you grapple into the next room from the area that the Joker locked you in, find the Recordable DVD on top of some fallen cabinets. - Burned Paper
Administration: Starting in the main hall with the staircase, grapple to the left ledge and enter the door. Continue on left until you reach a terminal. Hack the door open to find the paper inside. - Business Card
Administration: In the long vertical vent area near the Warden’s office, grapple up tot he very top ledge, then use the Line Launcher to get over to the right side where the card rests.
Black Mask Locations – Industrial Zone
The Black Masks are found hidden in areas throughout the Industrial Zone. Use Detective Mode to easily spot the location and throw your Batarang at it. There are a total of 20 Black Masks.
Black Mask #1
In the garage at the entrance, find the mask in the back of the room on the right side of the room.
Black Mask #2
After you blast a hole in the wall, run through the room with spikes on the ground, scan the back wall to find a mask on top of some of the cabinets.
Black Mask #3
After defeating Solomon Grundy, enter the next room and find the mask under the ledge you must grapple to.
Black Mask #4
In the room where you fight the thugs after breaking through the weak wall, find the mask under the bulletin board.
Black Mask #5
In the room where you must destory the weak spot in the floor, snag the mask from the bookshelf in the back.
Black Mask #6
After you drop from the vent, enter the next room to find the mask on a box to the right of the door.
Black Mask #7
After you free the hostage, enter the room behind the glass and find the mask on top of the storage lockers.
Black Mask #8
Before you enter the darkened area, find this mask on a storage shelf.
Black Mask #9
In the area where you crawl under the thugs in the vent, find the mask on top of a box in the left corner of the room.
Black Mask #10
In the room before the area with the spotlight, find the mask all the way on the right side of the room where you blasted the hole in the ground.
Black Mask #11
After you hack the terminal in the room with the spotlight, drop down and find the mask on a control box on the left.
Black Mask #12
Just before you blast a hole in the roof of the room where the guard with the key card lays, scan the wall in the back to find the mask.
Black Mask #13
Near the area where you found the key card, run to the left and find the mask on top of a cabinet in the corner.
Black Mask #14
Head to the room with the two thugs and the the pressure pipes. While standing on top of the locker cage, go right and drop into the vents below. Crawl under the locker cage and exit the vents inside. The mask will be on a small cabinet to your right.
Black Mask #15
Drop down from the higher platform and under the platform instead of going into the doors on the left. You’ll find the mask on a barrel in the corner.
Black Mask #16
After you defeat the thug with the electric rods, find the mask in the left corner in the same room.
Black Mask #17
As you turn the corner, stop and snag the the mask that sits on the pipe overhead!
Black Mask #18
After you use the Glue Gel on the timed door in the room with the electric panels, find the mask on top of the storage shelves.
Black Mask #19
Enter the secret entrance area. After you crawl down the stairs, drop down to the small area where the water flows off the edge. The mask will be on a pipe in the top right corner.
Black Mask #20
After making the long drop in the secret entrance area, immediately find the mask in the left corner of the small area.
Penguin Cage Locations – Cell Blocks
Penguin Cages can be found throughout the Cell Blocks zone. Simply use Detective Mode to spot them in the environment, then use your Batarang to grab them. There are a total of 20 Penguin Cages.
Penguin Cage #1 and #2
Two can be found hanging in front of the locked door that leads to the entrance of the Cell Blocks. Bring them down with your Batarang or else they will come crashing down and cause damage.
Penguin Cage #3
After you grapple through the hole in the ceiling, look to the left to find a single cage hanging from the ceiling.
Penguin Cage #4 and #5
Before you glide to the lower floor, turn around and you’ll see a new ledge to grapple to. Do so and you’ll find two cages.
Penguin Cage #6 and #7
After you glide over the fire and run into the room on the right, start grappling up the floors. These two cages can’t be missed.
Penguin Cage #8
Just before the door that leads to the vault core. You can’t miss it!
Penguin Cage #9 and #10
Two can be found hanging in the room with the broken elevator shaft. One is to the left of the broken elevator and the other is above the area where you grapple to the higher ledge.
Penguin Cage #11, #12 and #13
Three cages can be found within the room right before finding the Batclaw. Use Detective Mode to easily find them and to avoid walking under them.
Penguin Cage #14 and #15
As you are running through the fifth floor of the main cell blocks area, two will be found hanging in the middle of the room.
Penguin Cage #16
A single penguin cage can be found in the room with the weak floorboards on the far left side of the room.
Penguin Cage #17
This one can be tough! As you fall down the hole you made with the heavy beam, glide to the left to have the hanging cage drop. You can always restart the checkpoint if you miss it, or you can come back to the area later.
Penguin Cage #18, #19 and #20
Exit the room with the electrified water. Now in the room on the right, slowly start walking towards the corner of the hallway. Three cages can be found in the corner.
Joker Teeth Locations – Administration Zone
Joker Teeth can be found throughout the Administration zone. Simply use Detective Mode to spot them in the environment, then use your Batarang to have them explode. There are a total of 20 Joker Teeth.
Note: Some of the images for the Joker Teeth would not load in large format so for now they are just thumbnail size, I will update this later.
Joker Teeth #1 and #2
Find the first set of teeth in the room with the hanging guards. Use a Batarang to destroy it or it will explode when you run over it.
Joker Teeth #3
In the room where the staircase was destroyed, head to the right to find a set of teeth on the bottom floor.
Joker Teeth #4
Just before you get the Line Launcher, crawl through the vent to get to the other side, a pair of teeth can be found on the right.
Joker Teeth #5 and #6
Before you enter the vent on the right, use your Batarang to take out the two sets of teeth in the pit with the poisonous gas.
Joker Teeth #7 and #8
In the room to the right of the main hall, find the two sets of teeth in the gap with the poisonous gas.
Joker Teeth #9, #10 and #11
Once you enter the vent near the Warden’s office, you’ll find three sets of teeth in the next room.
Joker Teeth #12, #13 and #14
Enter the vent from the room that looks like an attic and exit in the next room. Three sets of teeth can be found here.
Joker Teeth #15 and #16
After the Joker locks the door behind you, find two sets of teeth in the next room when you walk all the way to the right.
Joker Teeth #17, #18 and #19
In the long vertical vent near the Warden’s office, three of these chattering fellows can be found on the floor.
Joker Teeth #20
After you defeat The Joker, exit the room on the left and turn off the lasers. Walk through and the last set of teeth can be found right around the corner.
Credit
All credit for the images and the descriptions go to IGN.com


