
Overview
This guide is for all players (new and old), but is geared towards those who are just starting the game. It will cover a number of the “tips you wish you would have known” when starting the game, as well as some explanations on how to use crew members, artifacts, and more.
Introduction
Welcome to the galaxy, fellow space travelers! This guide is intended to help give all levels of players a better understanding of the game, it’s many different mechanics, and features that are sometimes missed or overlooked.
The contents are as follows:
- Screen Layout
- Controls
- Flux
- Leveling
- Troons
- Missions
- Space Junk, Resources, Crates, and Data Chip Usage
- Artifacts, Buffs, and Debuffs
- Crew Members, Exploration, and Artifact Upgrading
- Enemy Aura
- Bosses and Minibosses
- Damage Calculation (Resistances vs. Armor)
- Weapons and Recommendations
- Ships and Recommendations
- TL;DR Version (Too Long; Didn’t Read)
- Conclusion
This is not a complete guide, but I’m hoping to update it with more information as time goes on. If there is a topic you would like to see, feel free to leave a comment or send me a message. Additionally, if you notice misinformation (a mistake, or a game update changes something, etc.), please feel free to let me know.
Let’s get started.
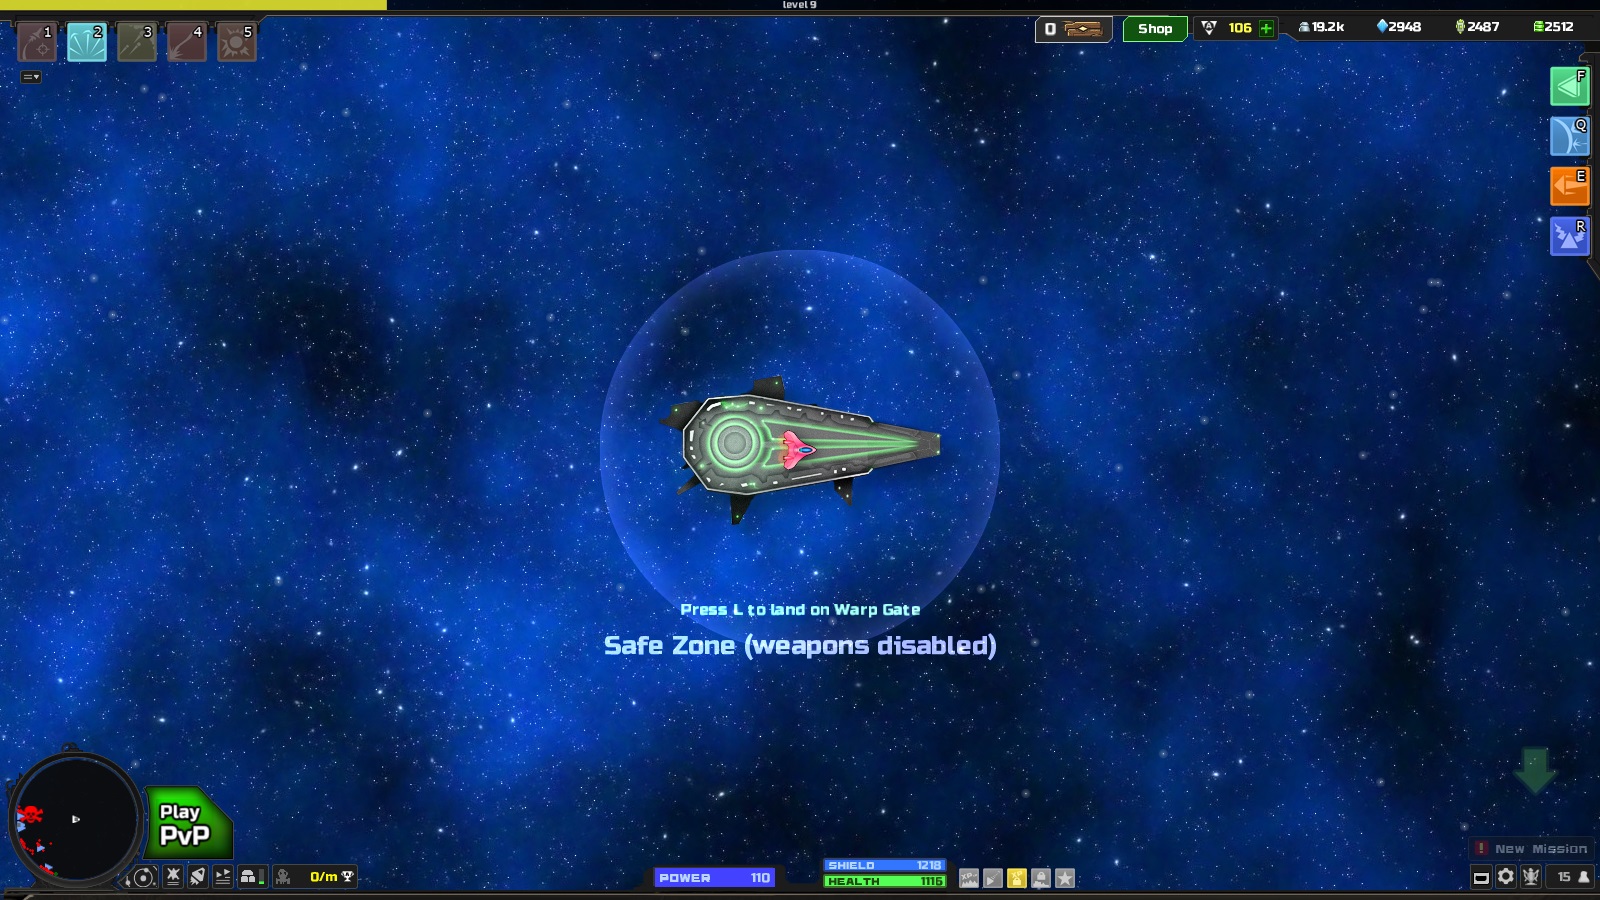
Screen Layout
The first thing you’ll want to get a grasp of is the layout of the screen. (A lot of this is self explanatory. If you would rather know how to access these through button commands, jump to the Controls section.)
Starting from the left:
- XP Bar:
The top of your screen is an XP meter, which tells you how close you are to reaching a new level via a yellow bar that fills from left to right.
- Weapon slots:
Right beneath the XP Bar is your weapon slots and icons. You are given 2 slots to start with, and the option to purchase more using Steel (Hit “X” and click on the locked slots to purchase). Weapon slots are a one-time purchase, so any slots you buy on your starter ship will transfer to your other ships. NOTE: Though the slots transfer, the actual weapons do not. In order to transfer weapons, you must go to the Pir.ate Bay (That phrase is censored by Steam, but we’re talking about an actual location. Therefore, I’m bypassing the filter with a period.) in Hozar and spend 250,000 Steel + 50 Advanced Data Chips. (99% of the time, farming for the weapon will be easier. Use the Pir.ate Bay only for extremely rare or unique weapons.)
- Chat Log: Chatting is done by hitting the Enter button. The button at the top can be used to extend or contract the logs. There are multiple different kinds of chat: Local, which can only be seen by people in your system; Global, which can be seen by everyone on your server; Clan, which can only be seen by your clanmates, Group, which can only be seen by people in your party, and Private, which is a direct message to another player. Check the “Controls” section to see how to use each type of chat function.
- Pod Menu:
The first icon on the top right corner of the screen is the Pods menu. This menu shows you how many pods you own, and the option to open them.
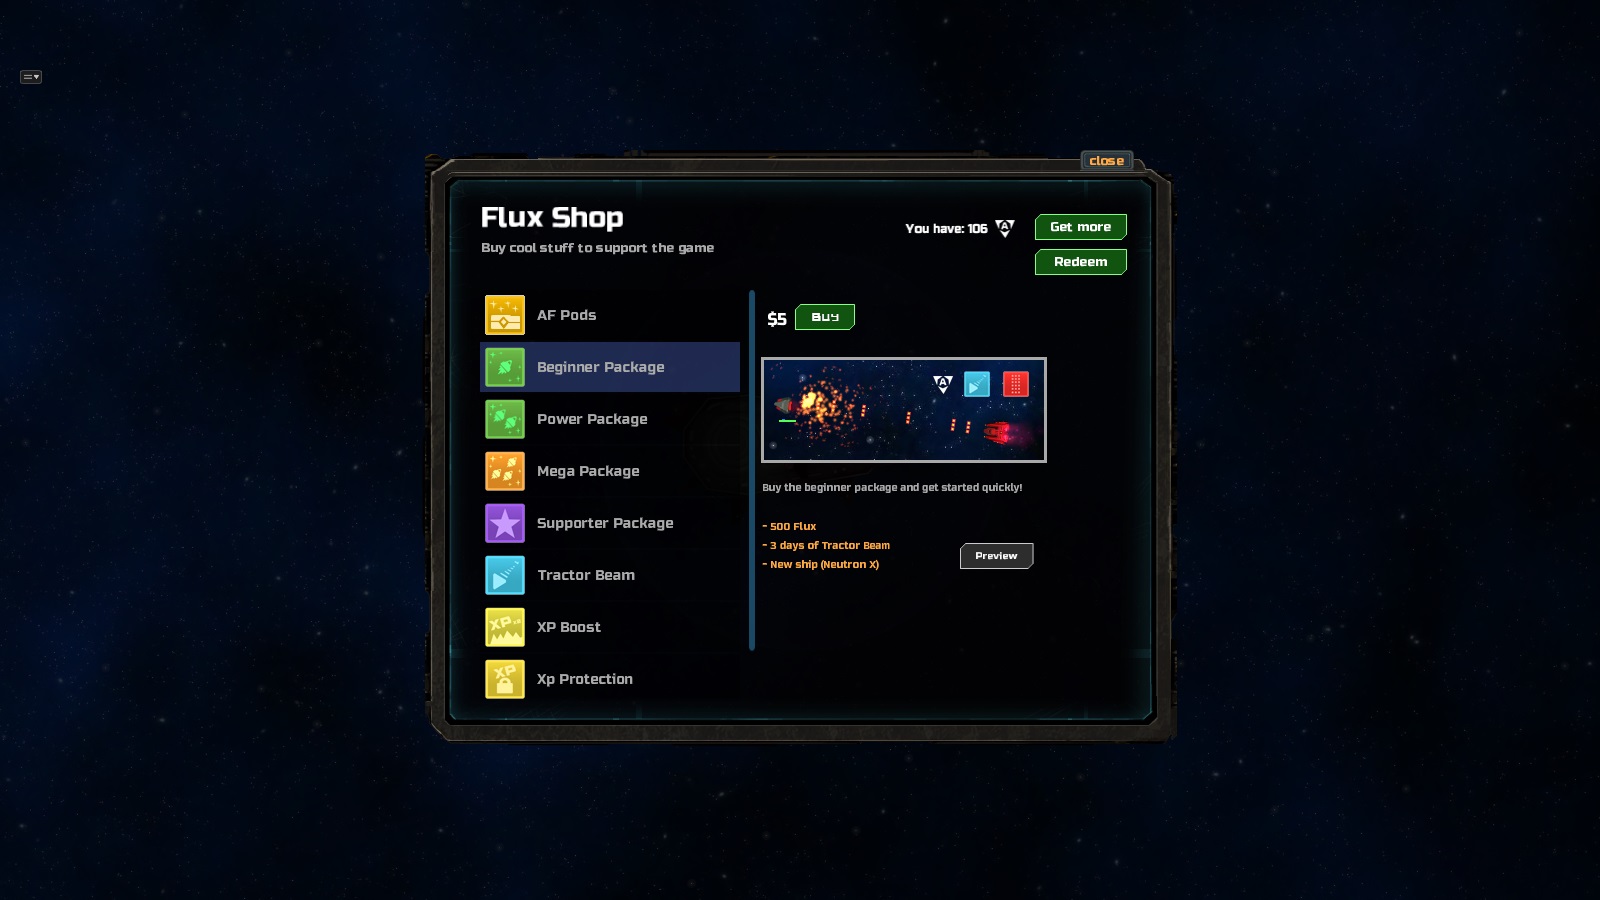
- The Shop Menu:
The second icon in the upper right corner, where you purchase Flux (in game currency), packages, and the supporter bonus.
- Current Flux:
The third icon in the upper right corner, which shows you how much Flux you own.
- Resource Count:
The last bar in the upper right contains your resources: Steel, Hydrogen, Plasma Fluids, and Iridium. These are gained from recycling junk, completing missions, and exploring planets. While space junk is dropped when you die, all resources are safe from destruction.
- Abilities Bar:
This bar contains your ship abilities (Repair, Overload, Speed Boost, and Harden Shields). Once used, they will turn grey and show a recharge bar.
Starting from the left:
- Radar:
Shows friendly players in the group (green triangles), friendly players not in your group (blue triangles), enemy players (red triangles), friendly ships (blue dots), enemy ships (red dots), bosses (skull icon), and space stations (grey dots).
- Play PvP:
Farily self explanatory. There are a couple different types of PvP modes, which are explained by hovering over the “Play PvP” icon. When clicked, you will be put into a waiting queue to play in the next match. (Note: it might take a while.) In the mean time, you can fly around and play the game.
- Solar System Map:
Below the “Play PvP” button is the map, which shows you your surroundings, as well as other players and locations. Click a location to get a marker to show you where to go.
- Artifacts:
To the left of the Solar System Map is the artifacts button, which lets you see your equipped artifacts, as well as the others you have collected. You can sort, recycle, and view new artifacts here. (Note: You must be in a safe zone to change artifacts.)
- Ship:
Shows you a central menu where you can do everything from change your player name (which costs flux), change weapons, view artifiacts, view ship stats, view crew, and more.
- Alien Encounters:
Shows you what enemies you have encountered, as well as information about their level and heath.
- Cargo Bay:
Allows you to see what you’re carrying, and the option to eject if you wish to.
- Clan/Troons:
Shows you how many Troons you have, as well as your clan affiliation. (See the Troons section to learn more about them.)
- Power Bar:
In the center of the bottom is the Power Bar, which shows you how much energy you are consuming to fire weapons. Once this drops into the red zone, power regeneration slows down significantly. Try to avoid dropping into the red zone unless it’s an emergency.
- Sheilds/Health:
Shows your current shields/health, as well as info about how they function (mouse over to see details).
- Bonus Indicators:
Shows whether bonuses are active or not (XP Bonus, Tractor Beam, XP Protection, Cargo Protection, Supporter status).
- Mission Button:
On the bottom right side we have the mission bar, which opens a menu to view the Timed, Daily, and Story missions.
- Full Screen:
Below the missions is the full screen icon, which lets you toggle between full and window mode.
- Settings:
Contains options for graphical enhancements, volume control, turning speed, and more.
- Leaderboard:
Shows the top clans, PvP players, and more.
- Players:
Shows players currently in the system, and another menu of friends that are currently online.
Controls and Chat Commands
Your specific control setup can be found under Settings > Key Bindings. Use the Gear icon in the lower right corner of your screen or the “H” key to open the Settings menu. This guide will list the default settings for a Windows machine:
- Forward: W, UP
- Auto Cruise: TAB
- Stop/Brakes: S, DOWN
- Turn Left: A, LEFT
- Turn Right: D, RIGHT
- Harden Shield: Q
- Boost: E
- Overcharge: R
- Repair: F
- Fire: Space, Mouse1
- Weapons: 1, 2, 3, 4, 5
- Land: L
- Map: M
- Ship Menu: X
- Flux Shop: V
- Artifacts: Z
- Cargo: C
- Player List: P
- PvP Screen: G
- Encounters: O
- Missions: I
- Settings: H
- Clan Screen: B
Chat can be done two ways: by hitting “Enter” and clicking on which group you want to talk with, or by typing the specific command. For example, typing “/l ” will direct the message you type to Local chat, no matter which tab you have selected.
Examples will be given at the end.
- Send Group Invite: /i, /inv, /invite
- Leave Group: /leave
- Send Local Message: /l, /local
- Send Clan Message: /c, /clan
- Send Group Message: /g, /grp, /group
- Send Private Message: /w, /whisper, /m, /t, /tell, /private
- Reply to Private Message: /r, /reply
- List All Players In System: /list
- Mute Global Channel: /mute, /mute_global
- Unmute Global Channel: /unmute
- Ignore Player (Does not block Private Messages): /ignore
- Remove Player From Ignore List: /unignore
- List All Commnads: /help
- Decrease FPS: /lowerfps
- System Stats: /stats
- Show Player ID: /myid
A player wants to send the message “Have some free cargo!” to a player with the username “TotallyCool”. To do so, they would type the following into the chat bar:
If your recipient’s name has strange letters/characters, or if you can’t remember how to spell the player’s name, you can send PM’s through the chat menu. Expand the chat menu, find a message sent by the player, and click on it. Two options should appear: Mute and PM. Clicking PM will automatically format a Private Message in the chat bar for you.
A player wants to send the message: “Anyone want to kill the boss?” to ONLY their group members. To do so, they would type the following into the chat bar:
Flux
Flux is the in-game currency of Astroflux, obtainable through a few different methods: landing on new planets, fully exploring planets, completing story missions, completing daily missions, daily rewards, unboxing through pods, and purchasing through the Flux store. The main use of Flux is to buy more powerful ships, or to buy ships to copy weapons from.
Because of how difficult it is to obtain large quantities of Flux without purchasing some from the store, players should NOT use Flux for unencessary teleports, paint jobs, or other purchases.
Recommendations are as follows:
- Never buy a ship unless it’s on sale. Every Friday through Sunday, 3 randomly chosen ships will be 30% off. For highly expensive ships, this could save you over 1000 Flux, so patience is key. In addition, Weekend Sales allow players to buy ships that are only available in certain hangars (that may be above their level).
- Land on planets to get the Discovery Reward, but DO NOT explore the planet until you understand how to properly level your crew. Please see the two crew training guide links (listed later) for more information.
- As Story Missions are a one-time event, Timed Missions will eventually become your primary source of Flux. The Astroflux Wiki has a detailed page covering missions, rewards, and locations.[astroflux.org]
- The most powerful ships cost around 5000 Flux (3800 for the Nexar Blade[astroflux.org], 5600 for the Nexar Shadow[astroflux.org], and 5600 for the Nexar Vindicator[astroflux.org]). Try to save your Flux for one of these three ships. If you ABSOLUTELY MUST have a mid-tier ship before them, buy the Eagle Eye[astroflux.org] (1000 Flux) or the Skeletor[astroflux.org] (800 Flux). Both ships have good stats for their price, and have desirable weapons that can be transferred to an end-game ship once you make such a purchase. (Remember: Don’t buy it if it’s not on sale!)
Pods
Pods are a unique, chance-based way to get in-game resources. There are three types: Common, Rare, and Legendary. The contents of pods can be any of the following:
- Refined resources (scales with player level)
- Artifacts (scales with player level)
- Weapons (only ones that are NOT already installed on your ship; repeats are not possible)
- Ships
Rare and Legendary Pods grant MUCH higher quantities, or better quality versions of those rewards. (For example, you may only get a starter ship from Common Pods, but can get a Nexar Shadow from Legendary Pods.)
If you receive a ship that you already own, the ship is automatically converted into 70% of it’s Flux value. Therefore, getting an Eagle Eye out of a pod (1000 Flux) after already obtaining one would simply add 700 Flux to your account.
You can obtain pods through the following methods:
- Complete 5 Daily missions
- Complete 12 Daily Missions
- Complete 20 Daily Missions
- Buy 1 for 45 flux
- Buy 10 for 450 flux
- Upon Day 4 Daily Login Reward, you will receive one pod
- Upon Day 5 Daily Login Reward, you will receive one pod and 16 flux
Leveling
Leveling in Astroflux is fairly straightforward: reach the required XP count in the meter in order to gain a level. Every time you gain a level, you get a small boost to your stats (+8% for most of them).
- Every 5 levels grants you 1 free Pod to open.
- The first time you kill an enemy grants you a First Encounter bonus. If the first enemy of that type has an Aura[astroflux.org] around it, the First Encounter bonus is multiplied based on the Aura (up to 10x bonus for a Gold Aura).
- Daily Missions are the best way to consistently get XP. Level 30-80 players can see 1/2 to 1 whole level gain every day if they complete all XP related missions.
- The amount of XP required rises sharply when you hit level 100. The jump from 140 to 150 is approximately the same as the jump from 1 to 140 combined.
Troons
Troons are a form of player activity rewards that is obtained through completing missions and by capturing/holding planets for your clan in PvP zones. There are two main uses for Troons: purchasing the “Smart” weapons from the Cynapsian Weapon Factory, and obtaining small boosts to stats.
Smart Weapons:
Every 20,000 Troons gathered counts as 1/10th of a level’s worth of stat boosts (+0.8% Heatlh, Shield, and Damage, +0.1% Power Regen). In other words, collecting 200,000 Troons (20,000 * 10) will give you 1 whole level’s worth of bonuses.
Troons are reset at the end of each month.
Missions
There are 3 different kinds of missions:

- Timed Missions[astroflux.org] unlock once you reach certain levels. They are a good source of Flux, resources, and XP.
- Daily Missions[astroflux.org] are also unlocked once you reach certain levels. They provide large quantities of XP, and players in the 30-80 level zone can potentially get anywhere between 1/2 to a whole level every day from daily challenges (mileage may vary).
- Story Missions[astroflux.org] are one-time missions, unlocked by landing on certain locations with a “?” symbol floating above them. Story missions can provide large quantities of resources, with one providing 128 Flux upon completion.
WARNING: If you are progressing through The Unknown Threat[astroflux.org] mission chain, and are ready to complete Part 37, DO NOT LAND ON AFIS HQ WITHOUT CALLING FOR SUPPORT FROM HIGH LEVEL PLAYERS. Landing on AFIS HQ spawns in a level 94 Aureus Judicator[astroflux.org] miniboss, as well as numerous Aureous Warrior[astroflux.org] and Aureus Monachus[astroflux.org] fighters. Because there is no Safe Zone to retreat to, it is recommended that at least 3 level 100+ players are present (preferrably with Aureus Energy Orbs[astroflux.org] to distract the Judicator). Call for help on global chat and explain which mission you are completing – usually a few players will answer your call.
Space Junk and Resources

After killing an enemy in the game, you will see it drop a few different items that will disappear after a minute or so. These are collectively known as “Space Junk”, and their purpose varies. Most of the time you’ll want to head to the nearest Recycle Station in order to converit it to Resources (explained later on in this section).
Some missions require you to collect or recycle specific kinds of space junk, such as Bug Legs, Medium Data Chips, etc. Note: If you have a mission to recycle a certain amount of space junk, you must recycle the entire amount AT THE SAME TIME. Failing to do so will cause your mission counter to reset.
Space junk is also used to upgrade your cargo capacity and to unlock new systems.
Resources, like Flux, are a form of in-game currency. Unlike Flux, which is mainly used for ships and emergency teleports, resources are used to purchase upgrades, new systems, and weapons. Resources cannot be dropped or stolen in any way, so it is advisable that you recycle your space junk often.
The 4 kinds of resources are as follows:
- Steel, which is the most common resource. It is used for almost every standard purchase in the game. A good place to farm Steel is to refresh farm Dr. Drak in Hozar, or for more experienced players, the Dread Queen in the Mitrillion left Elite Zone.
- Hydrogen Crystals, which are used for level 4 upgrades, as well as unlocking early systems. They are refined from Hydrogen Spills, which are easily found in the Kapello, Arrenius, and Mitrilion Elite Zones. (Note: Once you get past ~Vibrilian, Hydrogen Crystals aren’t really used much.)
- Plasma Fluids, which are used to purchase level 5 upgrades, as well as unlocking early/mid-game systems. Toxic Waste is an inefficient (yields ~0.4 plasma fluids per Toxic Waste) but common form of space junk that contains Plasma Fluids, so killing enemies in Kritillian and beyond should yield some. A more efficient, but harder to obtain item is Bug Legs (yields ~5.5 plasma fluids per Bug Leg), which are farmed from Hozar. (Note: Once you get past ~Vibrilian, Plasma Fluids aren’t really used much.)
- Iridium, which is one of the most valuable resources. It is used to buy end-game systems, level 6 upgrades, as well as being heavily used for Elite Tech upgrades. Radiated Junk is the most common source of Iridium, yielding around ~2 Iridium per Radiated Junk. Good places to farm are the Experiemental Macrophages in Sarkinon, as well as the Gold Crates dropped from Mother Brain in Neurona.
Crates and Data Chip Usage
Ocassionally you may see a rectangular box drop from an enemy. These boxes are known as Crates, and their contents vary depending on the color:


Data Chips are used in various missions, as well in purchasing new systems and copying weapons. Their uses/locations are as follows:
- Small Data Chips are used to unlock early systems, as well as to fulfill timed missions. Collect from early bosses, or by killing the enemies above Arborea in Kritillian.
- Medium Data Chips are used to unlock early and mid-game systems, as well as to fulfill timed missions. Collect from early-mid game bosses.
- Advanced Data Chips are used to purchase end-game systems (such as Fulzar and Vorsan), as well as to copy weapons at tha Pir.ate Bay in Hozar (50 Advanced Data Chips + 250,000 Steel per weapon). Collect from end-game bosses, enemies in the upper-left corner of Cynapsian, and enemies in Fulzar.
Artifacts, Buffs, and Debuffs

The maximum artifact level a player can use is calculated as follows:
Therefore, a level 30 could use:
- The “Level” is the enemy level that dropped the artifact. “strength” is the current level of the artifact. Note that a higher strength artifact DOES NOT mean that it is better than a lower strength artifact. An artifact can have it’s strength boosted by having a crew member upgrade it (up to 10 times).
- The text color indicates the number of lines that an artifact has. Grey is 1 line, blue is 2 lines, green is 3 lines, purple is 4 lines, and yellow is 5 lines. Generally speaking, the more lines an artifact has, the less powerful each line becomes. (You get more modifiers, at the cost of lower power per modifier.)
- In addition to normal artifacts, there is a 4-8% chance that an artifact will be a Superior Artifact, and a 1% chance that it will drop as an Exceptional Artifact. Both Superior and Exceptional Artifacts have a significant boost in power applied to the first line of the artifact stats. NOTE: An artifact will only say “Superior” or “Exceptional” if the FIRST line was chosen to be modified. However, the game CAN apply a Superior or Exceptional bonus to lines 2 through 5, but in these cases it will NOT be listed in the title. Make sure to read the lines carefully for an abnormally high bonus.
Artifact Types:
You can sort your artifacts in the menu by clicking on their name. It seems a bit confusing at first, but clicking on the name does NOT give you every artifact with that name first, but instead sorts by modifier. Examples will follow.
There are two different kinds of modifiers: flat and percentage. Flat artifacts add the number to whatever your original number was. Percentage artifacts take a portion of your current value, and add it on top.
Sorting types:
- Structural Hardener: sorts by +% HP
- Structural Stabilizer: sorts by +flat HP
- Oversized Structural Hardener: sorts by -% Shield to 150% HP
- Armor Hardener: sorts by +% Armor
- Armor Plating: sorts by +flat Armor
- Shield Battery: sorts by +% Shield
- Shield Generator: sorts by +flat Shield
- Sheild Recharger: sorts by +% Shield Regen
- Oversized Shield Battery: sorts by -% HP to 150% Shield
- Power Capacitor: sorts by +% Maximum Power
- Power Generator: sorts by +% Power Regen
- Omni Amplifier: sorts by +% All Damage
- Omni Dampener: sorts by +% All Resist
- Omni Enhancer: sorts by +flat All Damage
- Impact Dampener: sorts by +% Kinetic Resist
- Projectile Accellerator: sorts by +% Kinetic Damage
- Projectile Hardener: sorts by +flat Kinetic Damage
- Energy Amplifier: sorts by +flat Energy Damage
- Energy Booster: sorts by +% Energy Damage
- Energy Suppressor: sorts by +% Energy Resist
- Acidious Injector: sorts by +flat Corrosive Damage
- Chemical Neutralizer: sorts by +% Corrosive Resist
- Corrosive Inducer: sorts by +% Corrosive Damage
- Engine Booster: sorts by +% Speed
- Weapon Hypercharger: sorts by +% Attack Speed [Note: increases energy use]
- System Optimizer: sorts by +% Reduced Cooldown [Note: A visual bug causes Superior/Exceptional System Optimizers to have the Weapon Hypercharger icon.]
Note: Resistances are limited to 75%. Rate of Fire is limited to +225%. Reduced Cooldown is limited to +40%.
Examples of Artifact UseMost artifacts are straightforward, but a few can be confusing. I’ll cover a few of those here.
Example 1: Resistances
Resistances are limited to 75%. Therefore, your first objective should be to get as close to 75% resistances in Energy, Kinetic, and Corrosive damage as possible. However, there are enemies with resistance debuffs, meaning that they take away some of your resistance.
Let’s say we have a ship with 40% Kinetic resistance. If it is hit with a 1000 damage Kinetic attack, the damage will be lowered by 40%, meaning that it will do only 600 damge.
Now let’s say that the same ship is hit with an Infested Missile (-35% Kinetic Resist Debuff). That ship now has 5% Kinetic resistance, which is almost nothing. If it is hit by the same 1000 damage Kinetic attack, it will do 950 points of damage.
Finally, let’s say we have a ship with 80% Kinetic resist. When attacked normally, only 75% of the resistance counts, so a 1000 damage attack will do 250 points of damage, instead of only 200. However, if it is hit by an Infested Missile (-35% Kinetic Resist Debuff), the first 5% of that debuff will be taken from the unused part of our ship’s 80% Kinetic Resist Stat. After that, the other -30% is taken out of our normal resistance. Therefore, a 1000 damage attack would do 600 points of damage. This seems obvious, but remember: the Infested Missile only really gave us a -30% Kinetic Debuff, because we couldn’t use that last 5% anyways! We had 80% Kinetic Resistance, but we weren’t using all of it to begin with. Therefore, part of the enemy’s attack was wasted on something we weren’t even using in the first place.
Example 2: Oversized Structural Hardeners/Shield Batteries
Oversized Structural Stabilizers and Ovesized Shield Batteries take a certain percentage of your health, multiply it by 1.5, and add it to the opposite stat.
Say we put an Oversized Structural Hardener with a value of:
-50% Shield to 150% HPon a ship with
1000 Shield 1000 HP (2000 total health stats).
The artifact would take 50% of the shields away (-500 Shield), then add 150% of that to HP (+750HP). The end result would be a ship with the following stats:
500 Shield 1750 HP (2250 total health stats)Therefore, it’s best to use large shield generators when converting to healh, or use lots of HP boosts when converting them to shields.
Example 3: System Optimizers
System Optimizers have a very unique function: they reduce recharge time on 6 different abilities:
- Repair
- Overcharge
- Engine Boost
- Harden Shields
- Teleport weapon (Includes regular Teleport, Bionic Teleport, and Vindicator Teleport)
- Cloaking Device (Includes both Assassin-T29 and Nexar Shadow ships)
Let’s use Harden Shields as an example. At a level 6 upgrade with no Elite Techs, Harden Shields lasts for 2 seconds, with a 5 second cooldown. At first, we can shield ourselves for two seconds, and have 3 seconds of vulnerability before we can raise our shields again.
Now let’s say we add a System Optimizer with a +10% Cooldown Reduction. The math would be as follows:
5 sec – 5*10% sec = 5 seconds – 0.5 sec = 4.5 secondsNow we only have 2.5 seconds of vulnerability before raising shields again. The maximum cooldown allowed is +40% cooldown. Therefore, if we were to upgrade our Cooldown Elite Tech to level 100 (+20% cooldown), it would only take another 20% to reach the maximum cooldown. (Ships may also have built-in cooldown reductions, further lessening the need for a System Optimizer.)
Note that Cloaking Devices have a strange math behind them (cooldown stacks in a strange way). Long story short: For a Shadow with max Cloaking Cooldown Elite Techs, it would require +29.9% Cooldown Reduction to achieve a neverending cloak (dubbed the infamous “Perma-Cloak”). For a Assassin-T29 with a built-in 10% cooldown reduction, this value is reduced to +19.9%. This is also doable with Rate of Fire upgrades as well.
Crew Members, Exploration, and Artifact Upgrading
Your crew will be responsible for two big things: exploring planets and upgrading artifacts. To get the best possible upgrades out of artifacts, you need to have 800 total upgrade points (500 of which should be devoted to one stat).

There is a problem though: to get your crew more points, you can either have them explore, or train. However, if you explore all of the planets first, you’ll run out of places to gain easy stat points. The only other option is training, and training gets longer and longer each time you make them do it (taking 24 hours or so later on). Therefore, it is best to NOT explore until you have thoroughly trained your crew.
For a full walkthrough of how to train crew members see these two forum posts:
dmat3889’s “Crew Training Guide v1.0”[forum.astroflux.org]
AbBaNd0n’s “Upgrading Arts and Training Crew Guide”[forum.astroflux.org]
To summarize: train your crew until it seems unreasonably long between upgrades, but DON’T spend the points that you earn. Once you save up a few hundred upgrade points, start exploring. Always try to explore zones that are 6 levels above your crew member’s level. If you are out of low level zones and need to explore a more difficult area, you may spend just enough points to get within 6 levels of that zone. The reason is that being under-leveled gives you 8-10 points for exploration, but being over-experienced only grants 1 or 2 upgrade points from the mission.
Enemy Aura
Enemies may be seen with a colored Aura around their vessel. This indicates that they have higher than normal stats. These ships will be harder to kill, but give more Artifacts, higher level Artifacts, and more XP.
- Blue Aura:
300% Shield 300% HP +1 Artifact Drop +1 Artifact Level x2 XP Bonus
- Red Aura:
200% Damage +1 Artifact Drop +1 Artifact Level x2 XP Bonus
- Orange Aura:
250% Speed +1 Artifact Drop +1 Artifact Level x2 XP Bonus
- Green Aura:
300% Shield 300% HP 200% Damage 250% Speed +3 Artifact Drop +3 Artifact Level x3 XP Bonus
- Gold Aura:
1000% Shield 1000% HP 600% Damage 250% Speed +6 Artifact Drop +10 Artifact Level x10 XP Bonus
Bosses and Minibosses
There are lots of enemies to destroy in the game, and many ways that they fight back. There are 4 kinds of enemies:

- Standard enemies
- Minibosses
- Bosses
- Space Stations
Standard enemies and Space Stations are fairly self explanatory, so we’re going to skip those. The important ones are the Minibosses and Bosses. Bosses are denoted by a red Skull and Crossbones on the map, while Minibosses appear as a standard red dot (so beware!) Bosses tend to spawn outside of the main gameplay area and fly around the center of the system, while Minibosses tend to stay in a specific area.
Vorsan has an unusually high number of minibosses, almost all of whom reside in the inner 3 rings of the galaxy (Elite Zone). There are two kinds, unranked minibosses, and ranked minibosses. One unranked miniboss will be randomly selected for each spawner in the innermost 3 rings of Vorsan (except for the Mysterious Wanderer). Ranked minibosses have unique positions they defend, and a permanent Aura to boost their stats.
- Nexar Elite Blade
- Nexar Elite Phaser
- Nexar Elite Edge
- Nexar Elite Vindicator (Innermost 2 rings)
- Nexar Elite Shadow (Innermost ring)
- Mysterious Wanderer (Large, slow orbit, usually passes by the Elite Hangar every 10-15 minutes. Will not attack player unless attacked first.)
For more information, visit the Wiki page for Vorsan.[astroflux.org]
Damage Calculation (Resistances vs. Armor)
Now that we’ve learned a bit about the game, let’s go through the full math of an attack! But first, we must learn about the differences between shield damage reduction, resistance damage reduction, and armor damage reduction.
- Resistances are a % reduction from the damage that you recieve, and it covers both your shields AND your health bar.
- Your shields are your second line of defense (after your resistances) – a squishy pillow that absorbs incoming attacks, and regenerates automatically over time. Your shields naturally reduce incoming damage by 35%.
- Armor, is a FLAT number that is subtracted from incoming damage, and it ONLY applies to your health.
Now let’s do some math! The order in which damage is passed along is Resistance Artifacts –> Shield Resist –> Shield –> Armor –> Health.
This example is taken from the Astroflux Wiki[astroflux.org].
Weapons and Recommendations
There are a myriad of weapons to use in the game, and at first it may be hard to tell which ones are worth upgrading for the long haul. These are my recommendations for new players:
- Acid Blaster (400 Steel, Hyperion Weapon Factory). The Acid Blaster has stacking DoT (Damage over Time) which lasts 7 seconds. If you can hit an enemy again before the 7 seconds are up, the damage increases, and the counter resets. This is great for big enemies with lots of health – at first it may not seem like much, but after a minute or two of constant firing, the stacking damage will be so large that shield regeneration won’t be able to keep up.
- Plasma Gun (400 Steel, Kapello Weapon Factory). This is your go-to, close range, brute force weapon. It has a high DPS and one of the strongest DoT components of the game.
- Nuke Launcher (3000 Steel, Arrenius Weapon Factory). The Nuke Launcher has a number of functions: it has high damage, a large blast radius, a burn over time, and most importantly, it destroys missiles and mines. This is handy if missiles are starting to home in on you – just fire a nuke, wait a second or two, and detonate it when the missiles get too close.
There are also 3 different kinds of drones to find in the beginning of the game: the X-32 Zlatte, the X-42 Triad, and the X-73 Guardian. All three of these drones provide excellent distractions up until around level 70 or 80, when the Orbs become the best pets. To find them, kill Zlattes and Triads in the Hyperion Elite Zone, and Guardians in the Kapello Elite Zone. (They don’t even need upgrades to be useful.)
Ships and Recommendations
There are a whole ton of ships in this game, that cost anywhere between 30 Flux and 10,000+ Flux. Your end goal is to obtain an end-game ship, usually a Nexar Blade, a Nexar Shadow, or a Nexar Vindicator. Each have their own unique pro’s and con’s, but at the time of writing, they are considered to be the best ships of the game. (And no: the Judicator Prototype, Bionic Queen, and Eldorado are NOT the best ships, despite being more expensive. The Nexar ships have more firepower than all of them.)
You will start in one of three ships: the Pixi, Transmitter, or Aerodeck. The differences between them aren’t huge, but it’s still important to pick the one that fits your playstyle.
Some players get tired of the starter ships, and want to move on to bigger and better machines. I personally recommend NOT buying anything until you can afford your end game ship. You might be able to buy something now, but you’ll just end up replacing it later anyways. If you ABSOLUTELY MUST have a ship in between, get the Eagle Eye (1000 Flux normally, 700 Flux on sale) or the Skeletor (800 Flux normally, 680 Flux on sale.) Both have excellent stats for their price, and highly prized weapons that are worth copying to end game ships (Eagle Needles can go on the Blade and Shadow, Corrosive Lightning can go on the Vindicator).
There are many, many other ships you’ll see flying around, but those are the ones you want to focus on. Other ships, such as the Portal, are bought because they have a valuable weapon (like the Teleport Device), not because of their stats. These kinds of ships are worth considering after you own your end-game vessel.
TL;DR Version (Too Long; Didn’t Read)
Was this too long? Do you want a condensed version of this guide? Look no further. Here’s a crash course – “Astroflux 101”, if you will.
- Read the Wiki[astroflux.org] before asking questions on global chat.
- Buy the Acid Blaster, Plasma Gun, and Nuke Launcher as your starting weapons.
- Try to get as close to 75% Resistance in all three damage types (Energy, Kinetic, and Corrosve). Anything above that doesn’t count.
- Recycle often, especially if you plan on playing in PvP systems. You’ll be a flying piniata if you don’t.
- Don’t explore planets until you know how to properly level your crew (see the Crew Training Guide[forum.astroflux.org]).
- Save your Flux for an end-game ship. Don’t use it on anything else (except teleports, if you’re collecting a rare or hard to obtain type of Space Junk.)
Conclusion
Well, that just about sums it up for this guide. I hope that this has helped to smoothe out the learning curve a bit, and will help optimize your gameplay.
As I mentioned in the beginning, if you have a topic you would like me to add, or if you see an error in this guide, please feel free to message me or leave a comment.
Until next time.
JudgeJudi