
Overview
how to complete each individual mission task in mgs5
starting tips
a few things to keep in mind when reading this guide:
many of these tasks can make missions harder. some will help you get S ranks in missions, but a lot don’t. this guide isn’t for getting S ranks. because your goal is task completion, you should consider using various assistance items which reduce your mission rank like stealth camo or support bombardments.
completing all the main mission objectives gives you the option to travel out of the hot zone by land, which reduces the mission border. some of the remaining tasks might be outside this border, so be sure to complete the tasks you want before finishing the final objective.
even if you are aiming for S ranks, don’t be afraid to restart a checkpoint if you missed a chance at a task, you will still likely get an S rank if you complete the mission quickly enough.
some of these tasks are very tricky, such as the “listen to full conversation” tasks. hopefully my advice will help you figure these out, but if they don’t work let me know in the comments section.
oh yea, and
the task and mission descriptions will naturally spoil the game. I don’t make much attempt to hide spoilers, because they’re spoiled in the task descriptions themselves (most tasks in the game aren’t revealed until you complete a mission once).
above all, this guide is a work in progress. the game allows for multiple solutions to accomplish goals, so if you’re having trouble with something go ahead and post a comment and I will see about figuring out another solution to a task.
0 – prologue: awakening
1. completed the mission without triggering reflex mode
as simple as it sounds. most likely, reflex mode will be triggered in the front lobby of the hospital, so avoiding the enemies here gives you a better chance to complete this task.
2. completed the mission without allowing the man on fire to attack even once after meeting up with ocelot
during the horse ride, you can interrupt the man on fire’s attacks by blasting him just before he launches fire at you. it can be tricky to know when he’s about to attack, but ocelot will usually tell you.
in particular, this task involves making sure he doesn’t damage you. he will constantly throw fire, but all you need to be aware of is whether or not he hits you.
1 – phantom limbs
1. pinpointed kazuhira miller’s whereabouts
there’s an intel file in the optional village.
2. extracted kazuhira miller
you will complete this by default when the mission is done.
3. extracted the commander from the wakh sind barracks
find the commander, most likely wearing a red beret, and extract him via fulton or by helicopter.
4. completed the mission without being discovered by the skulls
after you find kaz, an extraction chopper will be called automatically. go into your idroid and redirect the landing site away from the original location.
normally, the skulls show up after you bring kaz to the standard LZ, so selecting a new LZ avoids the skulls completely.
5. secure the rough diamonds hidden in spugmay keep
you start the mission in spugmay keep. the diamonds are on a cliff overlooking the spugmay keep ruins.

6. extracted the transport truck driver
if you see a transport truck driver, that’s the one needed for this task. he usually drives his truck around all the various enemy locations. remember: you need to extract the driver, not the truck. a shot to the truck body should distract him long enough to force him out of the vehicle, if he’s already driving.
2 – diamond dogs
just a simple tutorial mission for how to run the motherbase.
3 – a hero’s way
1. eliminated the spetsnaz commander
required for the mission. you can kill him or fulton him.
2. neutralized the commander from long distance (100m or more)
just snipe him, or use a rocket launcher. the tranq sniper counts, if you want to extract him.
3. extracted the commander
if you want to complete the mission non-lethally, this is how you would do it. either fulton him or throw him in your evac chopper.
4. pick a haoma in the desert between shago village and spugmay keep
there are actually three haomas in the AO, but only one of them count. bringing d-dog will help you find it, but I should also take a screenshot of the exact location.
if you complete the main objective, the haoma will be cut off behind the hot zone border.
5. secured the processed materials hidden in shago village
interrogating the guards will help you find this. might as well get a screenshot too.
4 – c2w
1. identified comms equipment at eastern comms post
the mission is to destroy the comms equipment, but in order to do this task you need to mark the three devices. it can be a little tricky with the scope, because the range needed to actually mark them is a bit exact. getting close and using a short zoom works well.
the comms equipment are basically little satellite dishes next to large electrical boxes with a little blue light on them. two are in the middle of the base, on top of structures, and the third is way on the back set up on top of it’s own platform.
2. destroyed comms equipment at eastern comms post
a requirement for the mission, unless you just destroy the transmitter.
3. secured rough diamonds at eastern comms post
in a space between the cliffs overlooking the rear of the camp.


4. destroyed the transmitter at eastern comms post
doing this will technically complete the mission too. it’s inside one of the buildings. (it just looks like a stack of radio equipment, set on a shelf)
5. extracted 2 prisoners at wialo village
there’s a couple of prisoners in different buildings. I should get screenshots of their exact location.
6. extracted materials container from eastern comms post
there’s two materials containers, but only one counts for this task. you want the common metals container in the middle of the camp.
5 – over the fence
1. extracted the captive engineer
this is required for the mission. he’s in a locked jail cell at the bottom of the unfinished concrete building.
2. extracted the engineer through the hole in the basement ceiling
pretty much what it sounds like. carry him to the hole in the ceiling (in the main room) and fulton him out. you can tell if it will succeed based on the percentage, so 0% means there isn’t a clear path to the sky from where he’s positioned.
3. extracted the prisoner plotting to escape from wakh sind
another prisoner is sitting on top of the massive main gate, between the AA guns.
4. extracted the 4 wheel drive patrolling between outposts
there’s a guy driving a car between the various guard posts and the main mission area. the task wants the car, not the driver.
5. secured the blueprint at wakh sind
inside one of the portables (the tiny one room buildings).


6 – where do the bees sleep?
1. secured the honey bee
the main mission objective is to collect the honey bee (a stinger missile launcher). it’s in the bottom most area of the carved out mountain area, in one of the left most rooms in the open cave area.
2. eliminated the skulls
make sure to bring some powerful lethal weapons if you haven’t attempted this yet. I preferred the double barrel shotgun.
the skulls in this mission hold the rare mist parasite. fulton them for the opportunity to shroud the battlefield in an obsuring mist.
3. secured the honey bee with it’s ammunition intact
you have the option of using the honey bee to fight the skulls, but you get a bonus (and complete this task) if you don’t.
4. extracted the prisoner who cannot speak
the guards at the mountain relay base have a prisoner with them, who they will eventually drive to da smasei laman in an attempt to find the honey bee. as long as you extract him at any time, you can complete this task, but he does eventually lead them to the honey bee.
5. extracted two snipers at the mountain relay
had a hard time finding them, but they’re both at one of the extreme ends of the base.
6. eliminated the gunship
there’s a helicopter gunship patrolling around the area between da smasei and the mountain relay base. if you manage to damage it but don’t finish it off, it will fly off, so make sure to hammer it hard and fast. it’s not impervious to regular bullets, so a machine gun can be just as effective as a rocket launcher.
7 – red brass
1. eliminate the commander of wialo
requirement of the mission. the other commanders travel to wialo for their meeting, where you can take them out all at once.
the exact location of their meeting is shown here:
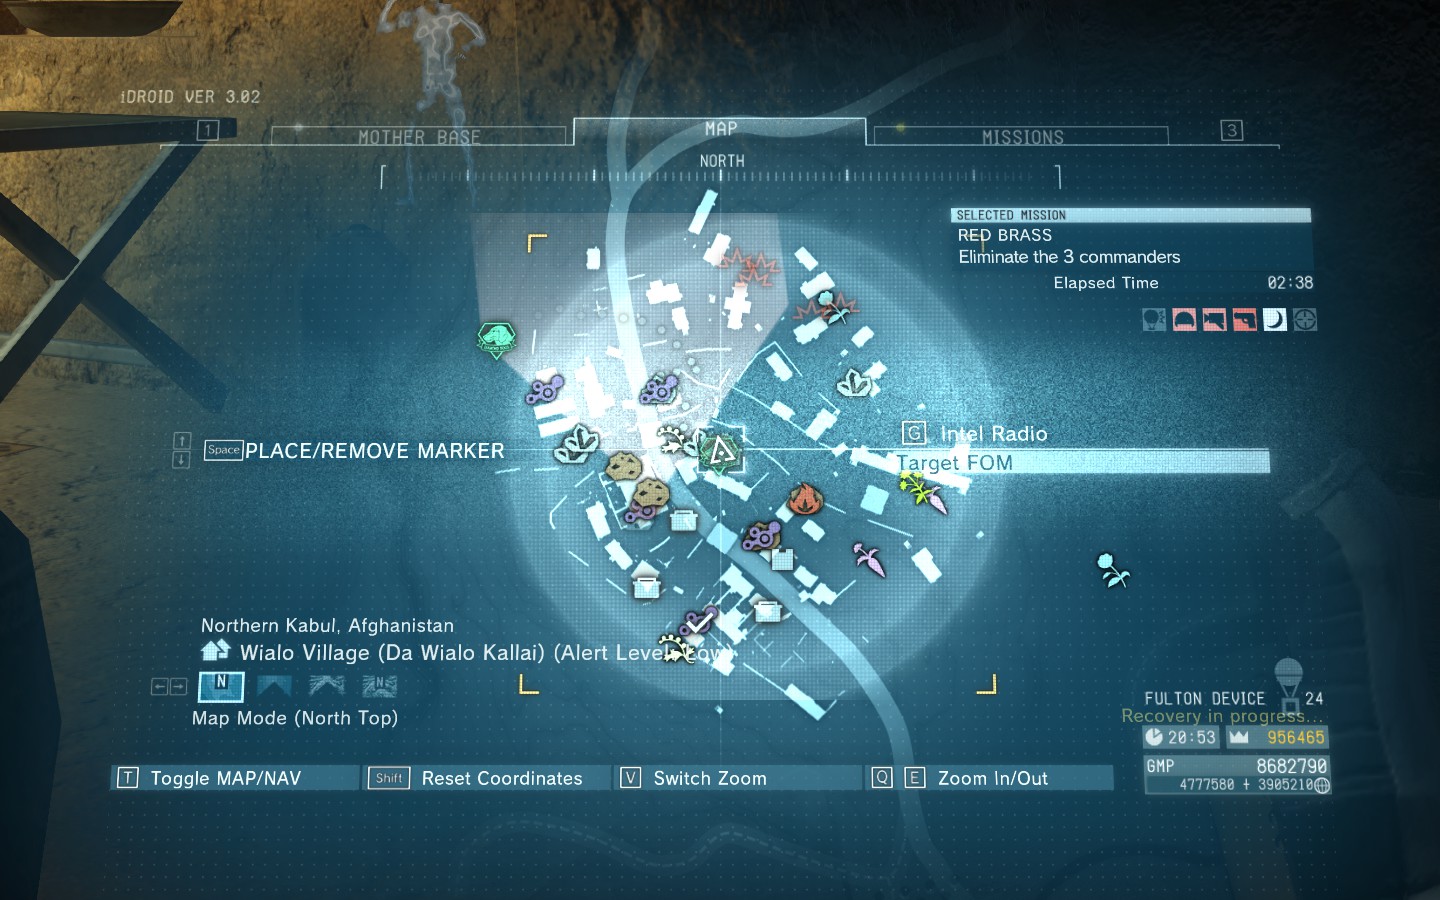
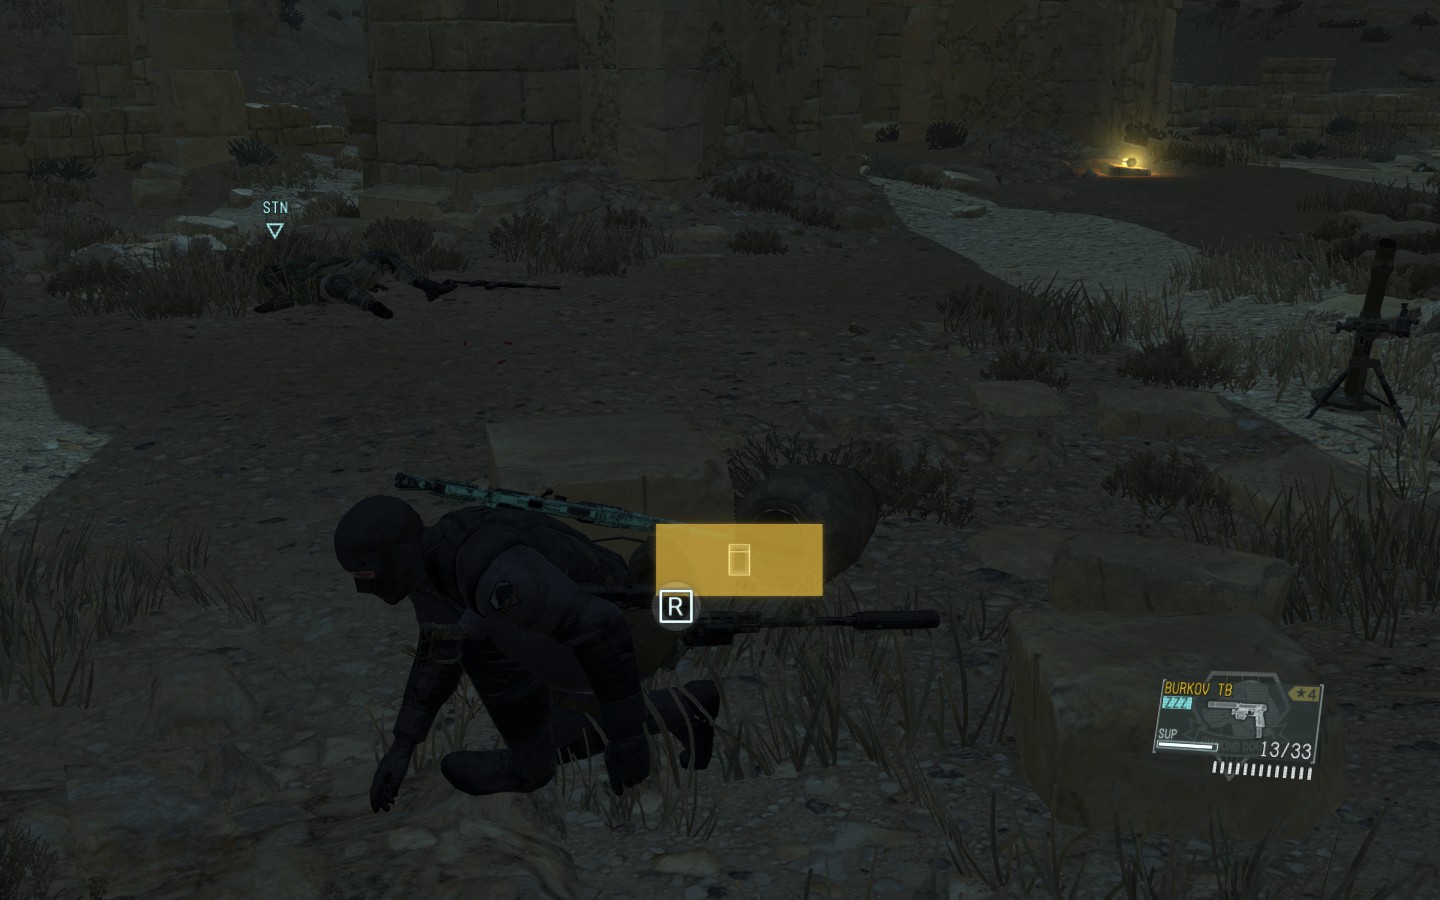
here’s the room you will find them in. the commander shown here is the wialo commander, waiting for the other two.

2. eliminate the commander of shago
travels along the road from shago kallai to wialo village for the meeting of the three commanders.
3. eliminate the commander of wakh sind
same as before but traveling from wakh sind to wialo.
keep in mind, the tasks to eliminate the commanders can be done lethally or non lethally. the tasks to extract them require non lethal means, and a fulton or extraction helicopter.
4. extract the commander and the soldiers riding in his vehicle (4 total)
this commander can be found traveling from da shago kallai to wialo in a car with three normal soldiers. they can be extracted at any time during the mission, but they will be easier to pick out before they reach the base. iirc they drive up from the south east road.
5. extracted the three commanders
what it sounds like. if you take all three commanders out non-lethally, you can fulton extract them.
6. listened to the end of the three commanders conversation
these kinds of tasks can take awhile, and require some very specific actions. you need to be within about 75 yards, and if the soldiers go on alert at any time they will not have a conversation, so you need to be especially stealthy for this task.
the town where they hold their meeting does have a lot of hiding places where you can eavesdrop without being spotted, and if you’re careful you can take out a few nearby guards so that you can stay close to their building to hear them without being caught. your binoculars also have a directional microphone, so you can overhear the conversation from a distance, but you need to make sure to listen to the entire conversation to the end for this task.
7. extracted two prisoners at ghwandi town
pretty much what it sounds like. bring d-dog to find the prisoners or interrogate some guards, until I can post a few screencaps of their locations.
8 – occupation forces
1. secured the deployment plans
there is an intel file inside one of the buildings at sakhra ee. scanning the intel file initiates the next stage of the mission, where the tank convoy arrives.
2. eliminated the colonel
main objective of the mission, and shouldn’t require explanation. he’s inside the truck traveling between the two other tanks.
3. eliminated all tanks
what it sounds like. blow them up, or fulton them.
4. extracted the colonel
the ability to fulton vehicles will be a requirement.
5. eliminated the colonel and all the tanks before they reached smasei fort
the convoy travels the road past the village where you find the intel file, so you should have a good chance to take out all the vehicles before they get to smasei. even then, the road to smasei is fairly long, but the vehicles will tend to keep driving even if they see you.
the best method for interfering with the convoy’s journey is to park a vehicle in the middle of the road so they can’t pass. if you haven’t been discovered, they will actually stop for awhile, giving you a perfect chance to take out all the vehicles by sneaking up on them.
6. extracted the prisoner being held at sakhra ee village
inside another building, where you will also find a communications transmitter.
7. extracted all tanks
the best method for doing this would be to park a vechile in the road, and lie in wait for the chance to quickly fulton all the vehicles from behind. a few extra decoys or claymores along the road will give you a good chance to keep the convoy locked down, but usually just one parked jeep keeps them all hung up for more than enough time.
9 – backup, back down
1. eliminated an armored vehicle
a requirement for completing the mission is to destroy at least one enemy armored vehicle, so you can’t get this task without completing the mission.
2. eliminated multiple fighting vehicles or gunships
I assume this just means destroying or extracting at least two armored vehicles.
3. eliminated all armored vehicles without receiving a resupply or fire support
not as hard as it sounds. there’s a rocket ammo box in front of the supply outpost by the parked truck, and a cargo truck carrying an extremely powerful rocket launcher arrives from the north after awhile.
4. secured the weapon the transport truck was carrying
after a certain amount of time/certain amount of vehicles knocked out, a truck carrying a super rocket launcher will begin driving southbound from the top of the mission area. all you need to do is pick up the weapon from the truck bed.
5. extracted an armored vehicle
use the upgraded fulton to capture an armored vehicle. specifically, armored vehicles are the gun toting APCs/IFVs with the smallish turret on top that fires exploding rounds.
6. extracted four soldiers searching for the escaped prisoner
can be kinda tricky, especially if you’re going for a high score or a lot of vehicle kills.
starting from the safe LZ next to lamar khaate palace, find the nearby goat path leading towards wakh sind. at the foot of the path will be four russian soldiers heading up into the mountains. make sure you don’t kill any of them.
7. extracted 6 prisoners
tricky in general. three will be wandering around the map, so their locations may change depending on how much time has progressed in the mission.
again, starting from the safe LZ next to lamar khaate, one will be right next to you, wandering towards the sand dunes. another is the one being persued by four soldiers up the goat path leading to wakh sind. another prisoner is wandering along the shallow river near yakho oboo, which eventually leads to a dead end. if you can’t find him, make sure you search the south western most part of the river.
one prisoner each is being held in lamar khaate and wakh sind.
finally, one prisoner will be transported across the map in a jeep after a certain amount of progress in the mission. you will be informed when they arrive in the AO, and his position will be clearly marked on your map and your HUD.
8. extracted 3 tanks
if you manage to destroy every enemy combat vehicle in the mission, without a single one escaping, then you will have the opportunity to end the mission right about the time that three tanks and a gunship are sent to the area. the gunship can be destroyed, but this task requires you to extract all three tanks intact.
there won’t be a time limit at this point in the mission, so take your time to carefully capture each tank. they won’t stay on the roads, so be sure not to get caught in front of any of them. also keep in mind that you should be working towards finishing goals seperately of gaining S ranks, so feel free to bring stealth camo if you are having trouble sneaking up on all three tanks.
10 – angel with broken wings
1. extracted the mujahideen prisoner called malak
main mission objective.
2. extracted the escort vehicle (armored vehicle)
starting at lamar khaate, malak will be transported with an APC escorting behind the car carrying him. if you move quickly, you can fulton the APC before it starts moving, but this will probably get you noticed.
malak’s jeep will make other stops along the way, giving you other chances to follow the convoy from behind. parking a vehicle along the path or throwing a decoy in the road might give you a better chance to sneak up on the APC and extract it without being noticed, in case you want to try and complete some of the other tasks along with this one.
3. extracted three prisoners held at lamar khaate palace
pretty sure they’re all inside the small buildings next to the palace ruins. iirc the russians will execute the prisoners if you don’t rescue them fast enough, so you will need to set aside the other tasks if you want to do this.
4. extracted two prisoners at yakho oboo supply outpost
malak will eventually be delivered here. the prisoners are being held in a corner cell in the other half of the facility.
5. listened to the last conversation between the transport driver and malak
in order to hear this conversation, you need to make sure none of the enemies in the map have raised a combat alert. the final conversation takes place in the interrogation room malak is delivered to. the transport driver is wearing a hood, and gives malak some encouraging words before departing.
11 – cloaked in silence
1. eliminated quiet
required for mission completion.
2. determined what to do with quiet
also required for mission completion.
3. neutralized quiet without hitting her with lethal weapons
as long as you don’t use any lethal weapons, shouldn’t be a problem. I hadn’t researched the tranquilizing sniper rifle at this point, but the stun assault rifle worked.
4. neutralized quiet with non firearm attacks
drop supply crates from the sky on her. if you look directly at her with your int-scope and press the trigger, you will mark her exact location with a nav point. then just go into your idroid and drop a supply crate there.
keep in mind: grenades count as firearm attacks. however, this task only requires you to neutralize her with the very last hit being a non firearm attack. you can either make the last hit a supply crate, or move in close and punch her while she’s not paying attention (like if you call a fire support request for rain, but personally this didn’t have much effect for me).
12 – hellbound
1. made contact with dr. emmerich
a requirement for the mission. just follow the marker.
2. extracted dr. emmerich
a requirement for the mission.
3. extracted three walker gears from central base camp
the first time you see walker gears will be this mission. they’re small, single pilot vehicles with legs. hitting the pilots from the front can be very tricky unless you’re far above them. preferably, you can take them out from the sides. the task does not require the pilots, just the walker gears.
since some of the higher level combat deployments require walker gears, this is a good place to pick some up. remember that you will need the upgraded fulton to extract these.
4. extracted dr. emmerich without him taking damage
a bit tricky. your best bet is to use his prototype walker gear with manipulator arm, and carry him to the extraction point as quickly and quietly as possible. be patient, the enemy sensor pods scattered around the map can end up revealing your location if you don’t destroy them all. sahelanthropus will also open fire on you almost immediately, so you need to get moving immediately.
5. secured the glamor model (vertical) poster at central base camp
inside the mechanic shed between the large structures. the poster is next to one of the doors.

6. secured the blueprint at central base camp
there’s 3 large structures in the base camp. one is in ruins, another is where you can find huey. the third holds some resources, as well as a blueprint. check the shelves.
13 – pitch dark
1. shut down the oil transfer pump
required for the mission. the oil pump switch is in a room on the top floor of the central building.
2. destroy the oily water seperator tank
required for the mission. it’s in the back of the oilfield by the river. you will need c4.
3. extracted four child soldiers being trained at masa village
there’s a few adults around, putting the kids through training. you will need the upgraded fulton, or some time to throw all the kids in a helicopter.
killing any of the kids instantly fails the mission. if the outpost goes on combat alert, the kids will just run off (their AKs are fake, in this mission), so be sure not to get spotted or be ready to run after the children. you can CQC combo them all pretty easily.
4. exfiltrated the hot zone before mfinda oilfield was sealed off
after you destroy the oily water seperator tank, extra enemy forces will be sent in to keep you from escaping, including walker gears.
first, make sure to destroy the oily water tank after you are done with everything else. second, have a car parked by the east gate, ready for your escape. don’t start driving anywhere until the oily water tank is destroyed, a cutscene will play which will deposit you outside your car and inside the base again.
from there, hop in and gun it for the hot zone exit border as fast as possible. don’t bother waiting to call a helicopter.
5. extract the lappet faced vulture that wandered into the burned down village
it’s between the road and the river, on the ground. careful not to kill it or scare it off. shooting it with a tranq from the road is pretty easy.
6. extracted four walker gears sealing off mfinda oilfield
when the oily water tank is toast, a pair of walker gears will move to the front gate, and another pair will be sent to the road south of the oilfield. the task only needs the walker gears.
this task will be impossible to complete while doing task 4, and vice versa.
14 – lingua franca
1. identified the afrikaans interpreter
near the start of the mission, you should see some soldiers travelling next to a prisoner. the interpreter will break off from the prisoner, but as long as you spot them all then you will ultimately complete this task.
2. identified the viscount
the last prisoner to be interrogated. he’s being held under a kind of shack roof, north-ish of the camp.
3. extracted the viscount
the main mission objective.
4. pinpointed the locations of four prisoners from an intel file
when the interrogator and interpreter reach kiziba, the largest building next to the prisoners holds an intel file, as well as a transmitter.
5. extracted three prisoners being held at kiziba camp
there’s a lot of guards here, so you will need to be extra sneaky to avoid wrecking your chance to finish the other tasks with this one. if that’s your goal, make sure to stay totally hidden while each prisoner is interrogated in sequence. after the interrogation, move in to fulton them out before they are executed. if you are caught, the other interrogations will be cancelled, and you will lose your chance to complete some of the other tasks.
6. extracted a material container at kiziba camp
basically, a huge shipping container full of resources you can use to develop stuff at mother base. if you see any, go fulton them with the upgraded fulton. careful not to let anyone see or hear you when you activate the fulton.
people have reported a lot of problems with this task. apparently the best method is to make sure you fulton all 4 containers in the area, and if you do not get the task pause the game and select the menu option to restart the mission so you can try again.
7. listened to all four prisoner interrogations
this one takes some patience and skill. you have to be within about 75 meters for the conversation to occur, and they won’t take place if the outpost goes on alert for any reason. I would recommend not killing or knocking out a single guard for the whole mission. this might take more than one full replay, due to the fact that the guards eventually kill the prisoners.
each interrogation can be listened to with the directional mic in your int scope, or if you manage to hide somewhere within 20 meters of the conversation. follow the interpreter to each location, and be ready to run around when he travels by car. don’t worry, he doesn’t travel very far, and there’s plenty of time to catch up to him on foot between each interrogation.
15 – footprints of phantoms
1. eliminated all walker gears
required for the mission. there’s four, and they’re at the highest part of the village, tucked behind the tents.
2. extracted two prisoners being held at ditadi abandoned village
one is being held in a ruined building, unguarded unless you count the patrols. I think the other is inside one of the tents.
3. extracted all walker gears
fulton all four walker gears. they start off unmanned, so if you can avoid being detected this is pretty easy.
4. picked a digitalis (lutea) at ditadi
it’s on the other side of the mountain from the enemy camp. they look like the other purple digitalis, a tall narrow plant with little bell shaped flowers, but yellow.
5. extracted a truck at ditadi
parked next to the road, at the foot of the village. you might be able to extract this truck by driving it out of the hot zone after the walker gears are taken care of. otherwise, fulton it.
16 – traitors’ caravan
1. identified escort unit (armored vehicle)
there’s a couple of APCs which travel to nova braga airport to escort the objective. you can find them after you pick up the intel file by following their route, or just travel to one of the guard posts between kiziba and ditadi.
2. identified transport truck
use the int scope or normal zoom to spot the objective truck at nova braga, by the southern wall.
3. extracted transport truck
main objective of the mission. see other task descriptions for tips.
4. eliminated the skulls
keep in mind, this is not a main objective. however, you get something fairly valuable for fultoning them.
most important advice is to bring an LMG or explosives, but don’t use these near the objective truck or you might destroy it on accident. in fact, you shouldn’t fight near the truck at all, and should fulton it before the skulls start throwing huge exploding rocks around.
don’t bother with non lethal weapons. extracting the skulls alive does not provide any extra benefit. after a certain amount of time, the skulls will coat themselves in a layer of strong armor, which will need to be broken before they take regular damage. all weapon types will do at least some damage to this armor, but the best choice is the LMG (light machine gun). full blast at close range will chew through their armor and their health. a rocket launcher will also do a lot of damage, but they have far less ammo and are more easily dodged by the skulls.
5. extracted the transport truck driver
you will need to wait for the driver to reach one of the outposts and have a conversation before extracting him counts for the task. a bit annoying, but if you’re doing other tasks you might as well wait.
6. pinpointed the escort unit’s estimated route from an intel file
at the start of the mission with the only safe LZ, the nearby guard post will have an intel file inside one of the tents. remember, you can’t read the intel file at all if there’s a combat alert, so either avoid detection completely or kill everyone in the outpost immediately.
7. listened to all conversations between the transport truck driver and outpost/guard post soldiers
this is one of the harder tasks in the game. as with the other “listen to conversation” tasks, you have to be within 75 meters for the conversation to activate, and you cannot be detected or have any outpost go on alert. you also very likely cannot miss a single instant of the conversation, tho I’m not absolutely sure.
this is where cheating with stealth camo comes in handy. each conversation area also tends to have a nearby hiding place where you can listen in without the int scope and not be detected. the first conversation is right next to the truck as it’s parked at nova braga. when the escort APCs arrive, the driver will radio HQ and then talk to a nearby soldier before departing. the next conversation is in a guard post along the way to kiziba, where you can hide behind a tiny shack next to the road and overhear the conversation without being seen (you might need to peek out with the int scope to hear both people). the last part of the conversation is in the middle of kiziba, next to a convenient portapotty you can hide in.
8. extracted three zero risk security soldiers
there’s a lot of these guys around the objective. the airport has a few, and there’s a jeep with four of them on the road between nova braga and kiziba, waiting to join the main objective convoy.
17 – rescue the intel agents
1. extracted the intel team member escaping thru the forest north of the camp
well, this task makes it clear what you need to do. the intel team member here is already surrounded by a lot of enemies, including some wearing riot suits.
2. extracted intel team member held at kiziba camp
held in a ditch by the bamboo cages at the edge of the camp.
3. extracted two CFA officials
two guys with balaclavas who go to kill the prisoner in kiziba. they wander around a lot, so you will have to hunt them down, but you will be more likely to find them after you rescue the first two intel agents.
4. extracted prisoner held at kiziba
after you rescue the two intel agents, you are given an objective to rescue the third, so this will be required for the mission.
5. extracted four search team reinforcements
the escaped intel team member will be surrounded by enemies. if he gets caught, they escort the team member back to kiziba, so it’s possible they call for reinforcements when they catch him.
otherwise, just fulton everyone. the riot suit enemies cannot be tranquilized by any means, and will need to be knocked out with cqc or multiple headshots with stun weapons… or perhaps d-walker’s stun gun.
6. extracted the transport truck driver
the task wants the driver, not the truck, so be sure not to kill him. he drives into kiziba a short while after the mission starts.
18 – blood runs deep
1. eliminated the former rebel mbele soldier
there’s a guy wearing a white t shirt in bampeve plantation. kill him or extract him.
2. eliminated five prisoners being held at kungenga mine
main objective.
3. extracted child prisoner
also a main objective, but only revealed after you reach the prisoners in the mine.
4. extracted the former rebel mbele soldier
same guy from the first task. make sure not to kill him.
5. completed the mission by extracting five child soldiers without the enemy discovering their escape
typically, patrolling guards will check to see if any prisoner in any mission is missing.
so, kill all the guards in the area to avoid them noticing the missing prisoners. you will also have to make sure none of the soldiers along the escape route detect the children.
6. eliminated the gunship
there’s a gunship somewhere.
7. extracted five snipers from areas near kungenga mine, NE and SW guard posts
this task can be a pain, because the snipers are laid out far from all the civilized areas. I would highly advise bringing d-dog and driving far off the beaten paths. the majority of the snipers are along the eastern edge of the mission area.
here’s a picture
8. extracted three armored vehicles

there are three APCs patrolling the roads in the south eastern section of the map. be careful not to destroy them, or to be killed by them. one of my other preferred methods to stopping an enemy vehicle without being detected is to throw a smoke grenade in it’s path, but you have to be pretty far ahead of it for this to work, and it doesn’t always stop them.
19 – on the trail
1. identified the subordinate of the PF commander, the major
use spotting, with your int scope or zoom, to tag the major’s subordinate. he can be found patrolling some of the outposts on his way to meeting the major.
2. identified the major
use spotting to tag the major. the subordinate will be making his way to the major, so follow him or otherwise search the small valley in the north east corner of the mission area, directly north of outpost 16.
3. eliminated the major
kill or extract the major. he will be surrounded by guards, so either sneak up carefully or snipe him if you want him dead.
4. extracted the major
fulton or evacuate the major by heli. you will probably have to deal with several of his guards before you can get close enough to capture him alive.
5. extracted the subordinate of the major
see above. they have to be subdued nonlethally, and they both always have guards surrounding them, so be careful or be ready for a bloodbath.
6. extracted prisoner being held at munoko ya nioka station, NE guard post
keep in mind, it’s the NE guard post, not actually munoko ya nioka. otherwise known as the 16 on your map.
7. listened to the conversation between the PF commander (the major) and his subordinate
when the subordinate meets with the major, they will have a conversation, surrounded by both of their guards. sneaking in isn’t too hard, if you don’t mind crawling the whole way.
20 – voices
1. extracted shabani
main mission objective.
2. sucessfully hit the floating boy with an attack
if you manage to cool the man on fire with enough water, the floating boy will show up to revive him.
each time you attempt to shoot him, he teleports away, but after about 20 shots he will take a hit and vanish for the rest of the mission.
3. fought off the man on fire
when you complete the above task, you will complete this one too.
4. pinpointed route to ngumba industrial zone, west guard post from an intel file
the truck driver traveling to your mission destination will enter a tent in ngumba sw post (map point 20) with the intel file to confirm his route.
5. extract an african wild dog near ngumba industrial zone west guard post
d-dog makes it easy to find wild animals. otherwise, I remember this dog being a ♥♥♥♥♥ to find. (lol?)
6. listened to the conversation about the “bodies near munoko ya nioka station”
the truck driver traveling to your destination will have a conversation with another guard, at the end of the journey. the same rules as the other conversations apply: be within 75 yards, do not alert anyone.
21 – the war economy
1. identified the arms dealer
the arms dealer is the guy wearing the suit who arrives via helicopter gunship. tag him with your int scope.
2. identified the CFA official
the guy wearing the massive suit of riot armor, inside the airport on the second floor is the CFA official.
3. eliminated the CFA official
extract or kill the CFA official. extraction counts for two tasks, so it’s easily worth it.
4. extracted the CFA official
non lethally capture him via fulton or by helicopter.
5. extracted the arms dealer
see above. be careful not to kill him. he will spend almost all of the mission either in the gunship where you can’t get him, or next to the CFA official. a quick CQC throw will easily knock them both out so they can be easily fultoned.
6. listened to all conversations between the arms dealer and CFA official
the conversation rules still apply, and using stealth camo makes this task very easy. otherwise, find good hiding places. most of their conversations take place surrounded by guards on walker gears, being watched by snipers. the snipers cannot be taken out until after the arms dealer and his helicopter leave the landing pad, and the walker gears really can’t be attacked from the front by any means, so use caution.
7. secured the bluepring the gunship was carrying
shoot down the gunship and then check the area it crashes into for a blueprint.
8. extracted the materials container inside the nova braga airport hanger
this task requires the wormhole extraction device, which won’t be available until after you beat the final boss (the final boss is not the last mission, fyi).
the cargo containers are in the second hangar the two objectives visit. they’re filled with precious metals, so keep them in mind when you need this rare substance for R&D or high level equipment.
22 – retake the platform
1. eliminated the enemy commander
main mission objective, and the only task. he’s on top of the primary platform.
23 – the white mamba
1. extracted the white mamba
main mission objective.
2. extracted the prisoner held at masa village
the prisoner is inside one of the houses.
3. extracted the white mamba without giving him the chance to resist
snipe him in the face with a tranquilizer rifle. you might need to get far back to see him from the deck he resides in. I think I made the shot from the end of the small dock.
4. secured the rough diamonds hidden near masa village


5. extracted twenty child soldiers
you need the upgraded fulton. you will also need to extract every soldier in the map, because they are all child soldiers. they can be pretty spread out across the area, and the white mamba does not count as one.
24 – close contact
1. extracted the male engineer
when you approach the post, the male prisoner actually makes an attempt to run off. catch up to him as fast as you can.
2. extracted the female engineer
inside one of the tents.
3. extracted six nubians near ngumba industrial sw guard post
nubians are like goats. the guard post in question is number 20 on your map.
4. extracted two 4wds
four wheel drives, or as I call them: jeeps.
5. extracted two materials containers
you can find materials containers at almost any guard post or base. if you don’t find any, you might have already captured them in free roam, in which case they will be restored after 5 total missions.
6. picked an african peach near munoko ya nioka
it’s near one of the gates.
7. extracted a martial eagle near munoko ya nioka
there’s a few birds flying around this outpost.
25 – aim true ye vengeful
1. extracted the militants’ xo
this is the only adult in the area. he’s being held prisoner in the middle of town, out in the open.
2. extracted the child soldiers’ commander
near the militants’ xo, one of the child soldiers is wearing a red beret. that’s the commander.
3. extracted the prisoner who escaped munoko ya nioka
along the road, south west of the mission area. he’s being chased by predatory animals as we speak, and they do one shot kills to prisoners.
4. extracted twelve child soldiers
just be sure you have the upgraded fulton.
5. used a vehicle to extract the child soldiers’ commander and militants’ xo
load both objectives into a car and drive it out of the mission boundary. you could also fulton the car, but the targets might tumble out when it leans too far.
6. picked a digitalis purpurea at munoko NE guard post
there are a bundle specifically on top of a plateau near the guard post. you will need to find a path that leads to the top in order to find the plants. check the center of the south west plateau, by the trees.
26 – hunting down
1. pinpointed trafficker’s escape route from an intel file
the file is in ditadi, next to the transmitter between some of the tents at the top of the camp.
the path shown leads from outpost 14 to kiziba.
2. eliminated the trafficker
main objective. he starts the mission behind outpost 14 and walks across the savannah to kiziba.
3. eliminated the trafficker before he reached kiziba camp
kinda says everything right there. get to him while he’s out in the wilderness.
he is surrounded by a lot of guards, but there’s kind of a lot of space between them, so that they might not notice if you sniped him, but be ready for his snipers to look your way after the shot.
4. extracted the trafficker and five escort soldiers
not much to say about this one. you’ll see his escort soldiers long before you see him.
5. extracted four prisoners held at ditadi
ditadi isn’t a big place. they are a bit spread out, and there are guards near each prisoner.
6. extracted a side striped jackal near kiziba
kiziba, compared to ditadi, is a massive area. there’s a few jackals in the area between kiziba, outpost 12, and ditadi. bring d-dog, or keep your NVG equipped.
27 – root cause
1. extracted intel team member
main mission objective. he can be found at outpost 7.
2. extracted team member before he could have an accident
just about the time you’re arriving at the outpost the intel team member is being held at, he will hop into an enemy truck and drive off. if he manages to get in the truck, you will have to find a way to force him out of the truck before he crashes it.
personally, I just tranqed him while he was making his move towards the truck.
3. exfiltrated hot zone with intel team member by land
load him into a car and drive out of the mission boundary.
or I suppose you could carry him on your back the whole way. 🙁
28 – code talker
1. made contact with code talker
main mission objective. he’s in the basement of the mansion. if you enter the mansion from the back door, the path to the basement will be right next to you.
2. extracted code talker
main mission objective. you will probably have to carry him on foot to an LZ. you can head to the western LZ, but the path will be swarming with guards. there is also a southern LZ, but it’s got just as many guards around it as well as a hostile helicopter.
3. extracted code talker without him taking damage
troublesome, because there will be a lot of guards in the area after you get to him.
if you didn’t beat the skulls before finding code talker, the skulls will have moved next to the mansion and possessed all the enemies in the area. if you did beat the skulls, you will have to deal with about 20 guards searching the area for you.
also, ignore miller when he complains about you leaving code talker behind. it’s more important to keep him out of the danger for this task.
4. eliminated the skulls
somehow I managed to get this task just by taking out one of the skulls.
anyway, the best way to beat them is either with sniper rifles, or just drive a tank up and blast them.
5. extracted the skulls
you don’t need to take them down non-lethally to extract them, it will let you fulton their corpses.
6. extracted the armored vehicle sealing off lufwa valley
the western path to the LZ has an APC waiting for you on the stone bridge after you find code talker. it will have a few guards around it, so be extra careful when attempting to extract the vehicle.
fairly certain this vehicle won’t be present if you did not take out all 4 of the skulls before reaching code talker.
29 – metallic archaea
1. eliminated the skulls
similar to traitors’ caravan, you will be fighting armored skulls. bring heavy weapons.
2. extracted code talker
main objective. you will have to take down all four skulls. their most dangerous attacks are their machetes and the exploding rocks they summon under your feet.
3. completed the mission without being grabbed by a puppet soldier
there will be about 10 soldiers possessed by the skulls in the area. kill them or avoid them.
4. extracted the skulls
after you take out all the skulls, they will jump away within seconds and vanish from the area. try to make sure you fulton out their bodies before beating the last one.
30 – skull face
1. made contact with skull face
main mission objective. he’s at the very end of okb zero.
2. got information from skull face
you will get this after you meet up with skull face.
3. extracted four walker gears
there’s walker gears spread out across okb zero. the task only wants the walker gears, not their pilots.
4. obtained cassette tape from okb zero
after the stairs leading up to skull face, there’s a small area to explore. look by a nonfunctional elevator typing looking space thingy for the tape.

yea.
5. extracted seven red containers from okb zero
there’s a lot of materials containers in the area. just fulton them all, but the task only wants red ones.
6. extracted three tanks from okb zero
all the tanks in the mission are empty, thankfully. they are parked out in the open, in different sections of okb zero. you cannot fulton a destroyed tank, so be careful.
31 – sahelanthropus
1. destroyed sahelanthropus
main mission objective. bring all the explosive weapons you can. keep in mind, all 3 weapon slots can carry an explosives launcher, even the pistol.
2. destroyed sahelanthropus’s head
there are segments of sahelanthropus that can be destroyed or damaged individually, such as the tubes on it’s back or the railgun. this includes the head.
there are a few short opportunities where it will open it’s mouth to roar for whatever reason. you don’t need to fire anything into it’s mouth to destroy it, but you deal more damage when it’s open.
3. successfully hit the floating boy with an attack
at close range, facing straight at you, sahelanthropus will sometimes make a lunging jump which triggers reflex mode. when this happens, you will see the floating boy right in front of sahe’s head. any shot directed towards the floating boy here will be guaranteed to strike.
32 – to know too much
1. extracted CIA agent
main objective. he’s wedged between the rocks and the desert, south of lamar khaate.
2. extracted CIA agent before his discovery by the search team
there will be a pack of walker gears heading directly towards the agent when you start the mission. they move slowly, but they all converge on the agent within a minute.
3. extracted four search team soldiers
again, these guys are using walker gears, so you will need to take them all out non-lethally. start with the one closest to the agent, and attack them from behind.
4. extracted driver of transport vehicle
this one requires the search team to find the agent. a jeep will be sent to collect the agent and drive him back to lamar khaate. tranq the driver of the jeep at any point after he starts driving.
5. extracted two prisoners being held at shago and lamar khaate
there’s a collection of makeshift jail cells outside the ruins of lamar khaate, where the prisoner can be found. the prisoner in shago village can be found in the large building.
6. extracted soviet soldier planning to assassinate the CIA agent
when the agent is caught and delivered back to lamar khaate, one of the guards will talk about killing the agent. extract that guard.
33 – [subsistence] c2w
see mission 4. aside from the difficulty setting, nothing else needs to be known to complete these tasks.
that said, there’s a pack of grenades by the transmitter which can help you take out the objectives more easily and without exiting cover. the heavy infantry also carry LMGs, which will make combat much less painful.
subsistence difficulty prevents you from bringing any equipment, so c4 or your own grenades and weapons are not available.
34 – [extreme] backup, back down
see mission 9 for info.
extreme difficulty disables reflex mode and the chicken hat, which have no effect on completing tasks.
35 – cursed legacy
1. extracted two containers
main mission objective. they’re both in the forest south of the mansion.
2. completed the mission by riding a fulton extracted container out of the hot zone
did you know you can do this? climb on top of a materials container and fulton it, then stand in the center and keep an eye out for the extra prompt (you will need to hold the button down). this will allow you to ride the container out of the mission area.
make sure not to do this on the first container tho, because you will technically escape the mission while it’s incomplete.
3. completed mission without the enemy discovering the container extraction
knock out or kill everyone around the containers before extracting them. not sure if raising the combat alert will count as “discovering the container extraction” but a lot of the guards will be wearing riot suits preventing tranquilizer rounds from working.
4. pinpointed the soldier’s location from an intel file
you will need two intel files for this task.
the tent on the other side of the bridge leading away from the mansion holds an intel file. the other is inside the mansion, by one of the doors.
5. extracted the commander of ZRF guarding the mansion
well he’s inside the mansion. look for a guy in a red beret.
6. recovered the rough diamonds snatched by the common raven near lufwa valley NW guard post
off to the side of the outpost, you can see a massive flock of ravens circling a bluff. the diamond is actually at the same elevation as the guard post, so don’t worry about climbing up there.
36 – [total stealth] footprints of phantoms
total stealth difficulty ends the mission if the enemy post goes into combat alert. this is not as difficult as it sounds. as long as you are not spotted directly, you can rain grenades, mortar shells, chain gun fire, or rockets all over the base and not fail.
see mission 15 for task list. I would specifically advise using long range weapons to snipe everyone.
also, there’s no rule saying you can’t do a small handful of tasks, complete the mission, and come back to do other tasks. they stay completed, as long as your game is checkpointed.
37 – [extreme] traitors’ caravan
see mission 16 for task list.
on extreme, the skulls are exceptionally more difficult than before, and I would advise ignoring them and focusing on completing the main objective of securing the truck. also keep in mind that getting within about 25 meters of the truck will summon the skulls automatically.
if you really want to capture armor parasites, do it in a mission where a stray shot won’t force you to reload a checkpoint.
38 – extraordinary
1. secured film canister
I’ve done this mission 4 times and only seen 2 places the film canister might be. one is along the edge of the ruins, wedged between a stone block and an overturned vase. the other location is ensconced in one of the walls.
2. captured spugmay keep
take out all of the guards in the area. there’s quite a few, and two extra packs of guards will arrive by vehicle from two different directions.
3. secured film canister before reinforcements arrived
kinda tricky. I would suggest blowing the money on a sleeping gas bombardment on spugmay, laying a few mines along the nearest road, and then running towards the suspected locations of the film canister. the sleeping gas won’t get all the enemies, and some of them are wearing riot suits, so be careful.
4. extracted prisoner being held at spugmay keep east guard post
east guard post, aka point #24 on your map. doing this will forfit some of the other tasks, and cannot be done after finding the film canister.
5. extracted a griffon vulture near spugmay keep
there’s a few griffon vultures in the area. just be sure to knock it out in an area you can reach.
39 – [total stealth] over the fence
again, total stealth missions will be failed if the enemy goes into combat alert, which will only happen if they see you directly and call for help. bringing long range sniper weapons helps tremendously.
see mission 5 for task list.
40 – [extreme] cloaked in silence
see mission 11 for task list.
in addition to taking and dealing more damage, quiet will actually be capable of avoiding supply drop crates.
the only method I could come up with to complete the task of defeating her with non firearm attacks on extreme difficulty was to start by getting close and lobbing sleeping gas grenades at a very high arc (so they would pop before hitting the ground) until she was nearly KOed, and then calling a supply drop on her head while constantly popping out of cover to hold her attention. she will eventually take a hit from the crate, but you need to keep her attention up to the very last instant it drops. you will know she’s focused on you because she will be shooting at you, so make sure you’re locked to cover.
there is also the chance you can defeat her without firearm based attacks by destroying the support structures around the ruins while she’s next to them, causing her to take damage. however, I haven’t tried this because there probably aren’t enough.
41 – proxy war without end
1. eliminated the gunship
starts flying in from the north west, heading to nova braga.
2. eliminated two tanks
all the vehicles in this mission eventually head to nova braga, but you can catch the vehicles on the road.
3. eliminated two armored vehicles
as with the tanks, these will follow the roads, passing through a few guard posts on their way to nova braga. the map will show you their travel path.
4. extracted two tanks and two armored vehicles
I shared a few tips for capturing enemy vehicles in motion in one of the above missions. you can do that, or you can just wait for all the vehicles to arrive at nova braga, where they line up facing away from each other.
5. extracted the armored column’s commander
this guy is riding in the gunship, and exits after reaching nova braga. if you want to do a bunch of these tasks all at once, I would suggest waiting by the south wall, smoking a cigar until they all arrive at the base, and then starting with the commander while he’s in one of the buildings by himself.
6. secured the rough diamond hidden by the commander
the diamonds will be in the same room he’s loafing in, by the door on one of the shelves hidden behind some stuff.
7. secured the blueprint the gunship was carrying
gotta shoot down the gunship and then search the area it crashes in. gunships can’t be extracted, so there’s nothing else to do with them anyway.
42 – [extreme] metallic archaea
see mission 29 for task list.
same advice I gave in the easier version of this mission: use an LMG. hopefully you will have one with a few good upgrades, as well as the battle dress. quiet using the anti-material rifle does a lot of damage to these guys.
barring quiet, d-walker with a minigun will chew them up. give him the intercept head as well.
43 – shining lights, even in death
there are no optional tasks in this mission.
44 – [total stealth] pitch dark
see mission 13 for task list.
45 – a quiet exit
1. made contact with quiet
required for mission completion.
2. eliminated the soviet mechanized unit
required for mission completion.
3. obtained quiet’s cassette tape
required for mission completion. it’s up the hill, hanging from the tree overlooking your extraction chopper.
4. extracted seven tanks and seven armored vehicles
I probably had the most trouble with this task in the whole game.
first off: make sure quiet is set to cease fire. if she destroys a single vehicle, this task cannot be completed.
the best method I discovered was to bring the skull suit and armor parasites. you will probably also want some supply grenades. if quiet drops some supplies nearby, make sure to pick them up.
don’t ignore the soldiers, you can still take damage with parasite armor active, and they will call the attention of the vehicles if they spot you.
you will probably want to bring stealth camo, but it will only work up until an enemy spots you, and they all seem to have thermal vision so you can be sure they will spot you after awhile.
5. completed the mission without quiet taking damage
basically, just get the the enemy’s attention by firing rockets everywhere. I completed this task on accident on my first try.
quiet might get their attention when she starts firing, but as long as you work fast they won’t get a chance to shoot at her.
the tricky enemies are the APCs with rocket racks. they will usually spray a volley directly at quiet to start with, so kill them fast.
46 – truth: the man who sold the world
1. eliminated six soldiers at the hospital entrance
pretty much what it sounds like. 😀
2. land twenty or more shots on the man on fire
this one I didn’t get until after I completed the horse ride, even after pumping about 150 rounds into him at the hospital.
47 – [total stealth] the war economy
see mission 21 for tasks.
48 – [extreme] code talker
see mission 28 for tasks.
49 – [subsistence] occupation forces
see mission 8 for tasks.
50 – [extreme] sahelanthropus
see mission 31 for task list.