
Overview
This guide teaches you how to play MGS V with the configuration that I made and published for the PS4 controller. This configuration completely utilizes the Dualshock 4’s lightbar, along with its trackpad for navigating the iDroid map, gyroscope (motion controls; sixaxis) for aiming, and even remembers if you turned your flashlight on while aiming your weapon.
Introduction

This guide is to teach you how to use the MGS V PS4 Deluxe Light & Accuracy Configuration that I made and published. So if you own a PS4 controller go grab the configuration now or by the end of this guide. To do so, start Steam Big Picture Mode, access Metal Gear Solid V: The Phantom Pain, click on settings and then controller configuration, then look at the community configs and you will find this there.
You can also use the configuration with a Steam Controller, but this was made with Dualshock 4 in mind.
If you plan on playing this game with a PS4 controller, I highly recommend you also go download the texture pack found here.[www.nexusmods.com]

Features Overview
- Lightbar utilization with near all functions you can do in the game including: firing weapons, driving, using the iDroid, walking, crouching/crawling, summoning onscreen menus for changing weapons or giving commands, a light corresponding with your flashlight being on or off.
- Uses gyroscope (motion controls;sixaxis) for aiming
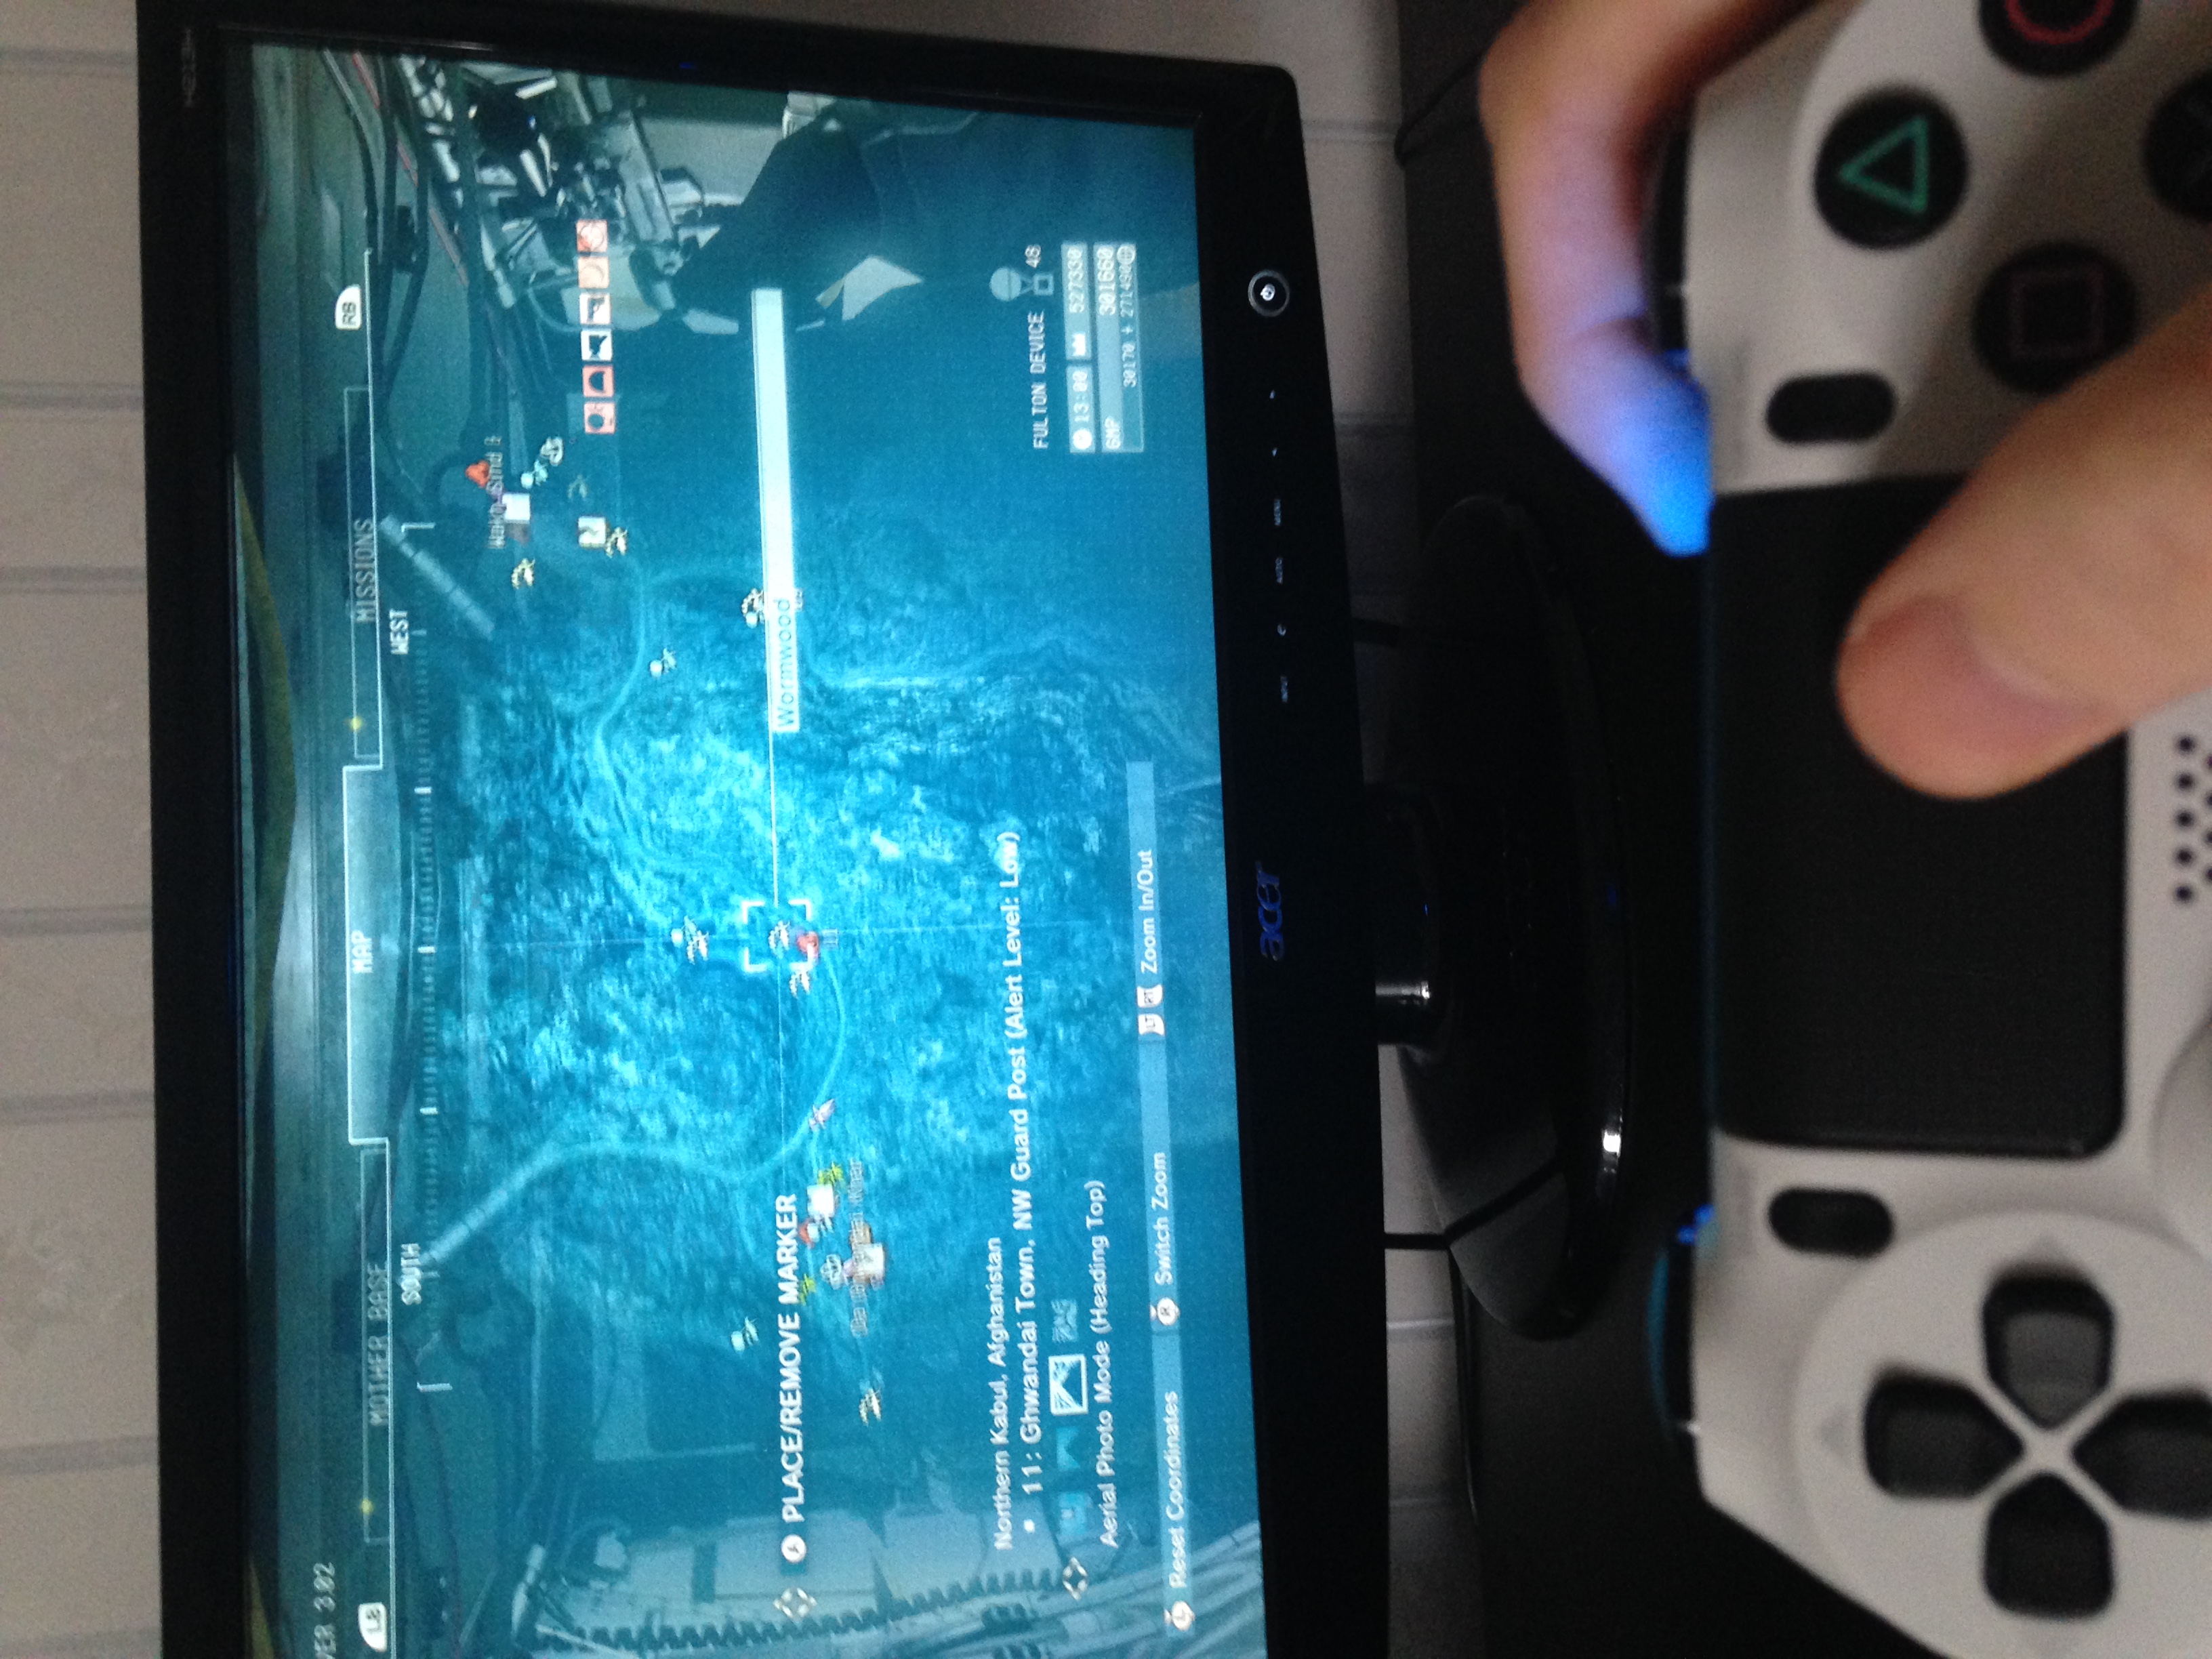
- Uses the touchpad for navigating the iDroid’s map which can be simultaneously used with the right analog stick
- Uses long-pressing of the left stick to send Triangle or Y input, so you can climb over obstacles with your thumbs in places where you’re more productive.
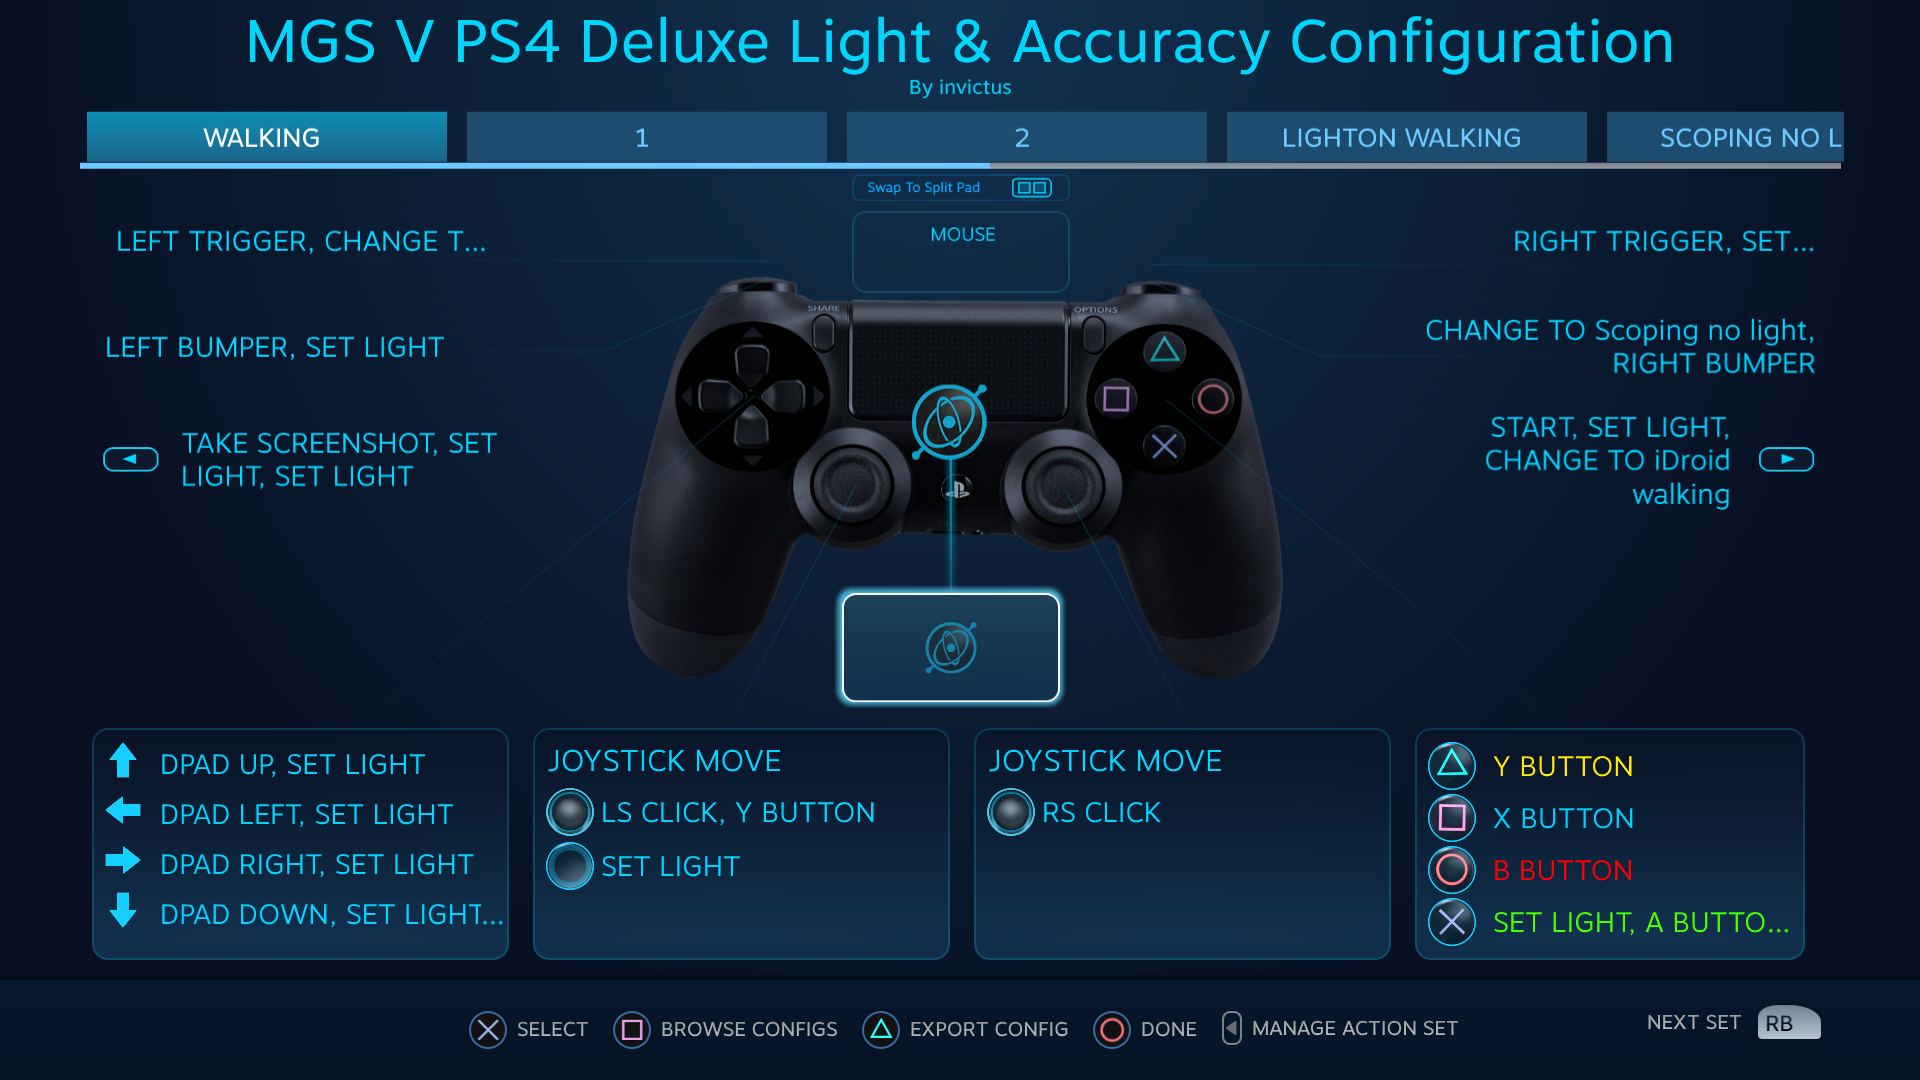
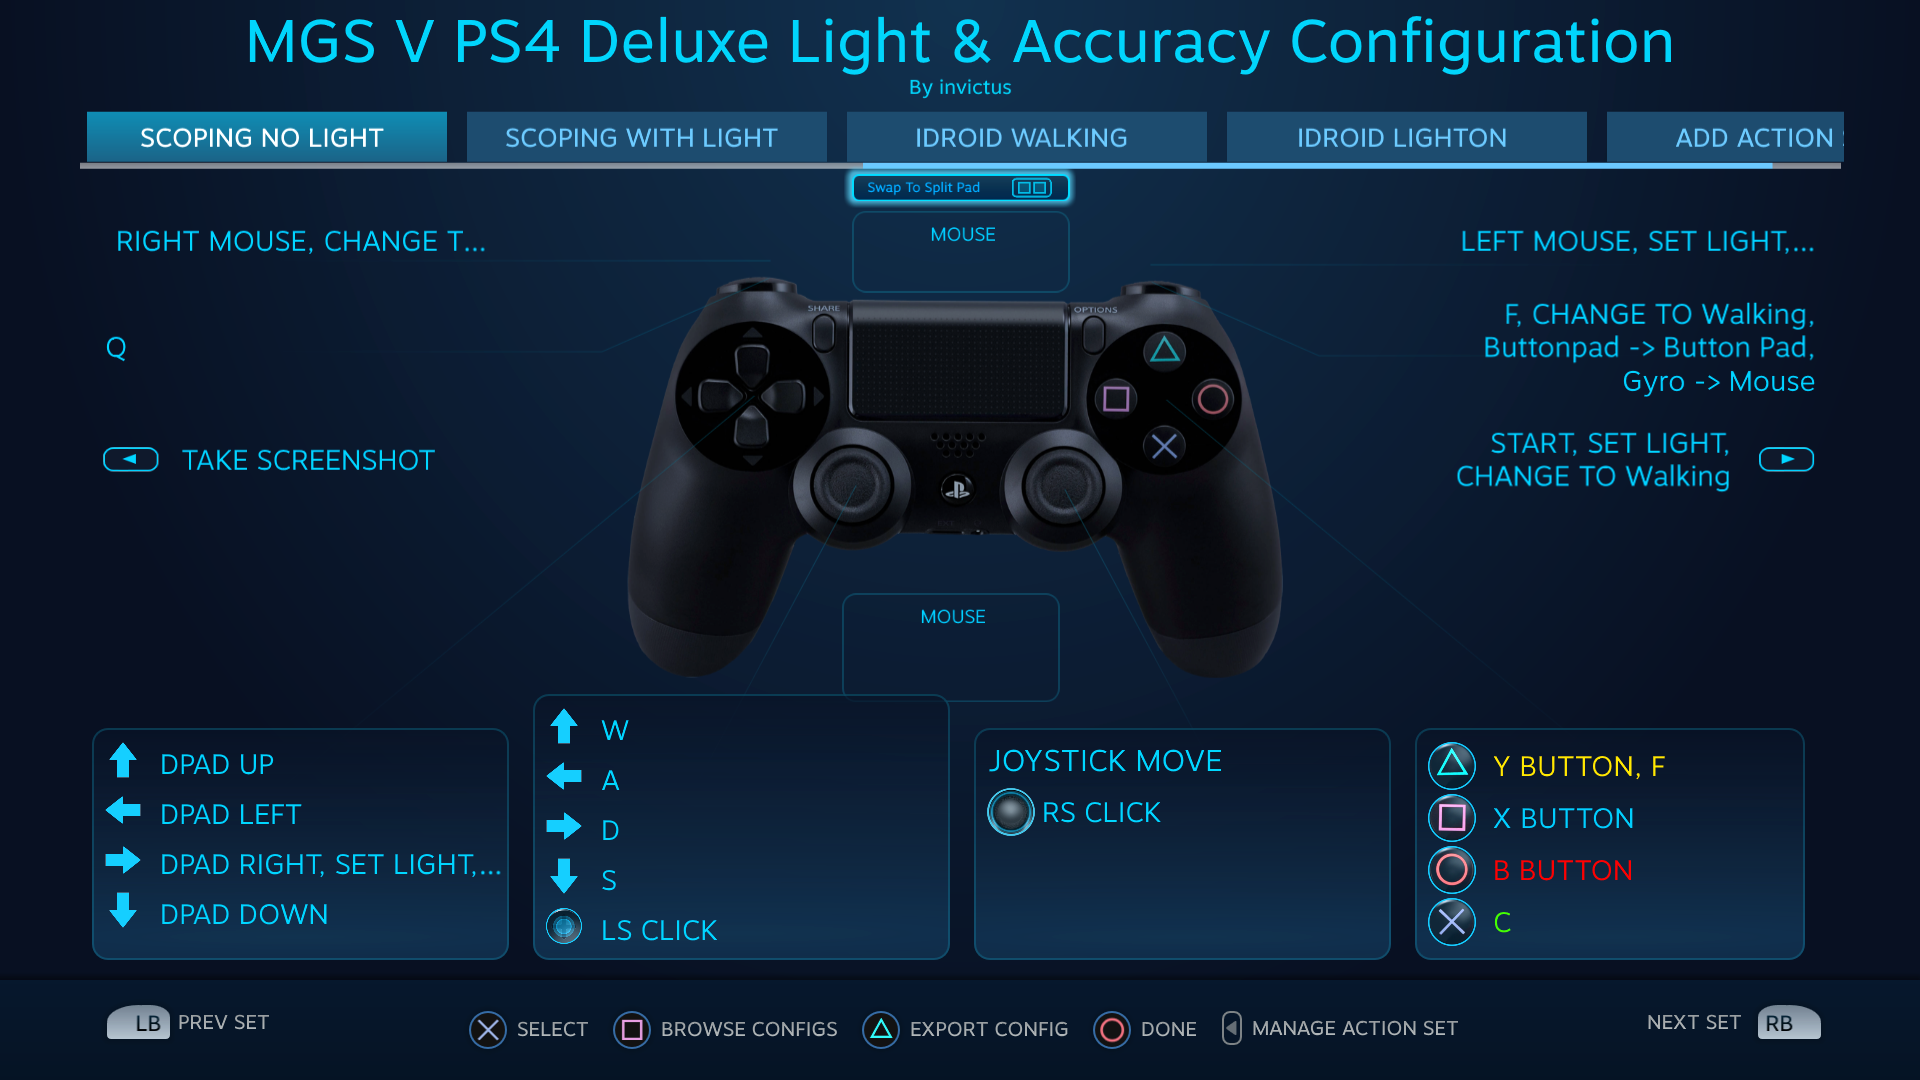
Action Sets
Every input is as you are used to with normal gamepad controls for this game, only exception is that left stick button hold inputs Triangle/Y button, and when you hold L2 it gives you motion aiming.
L1 changes your lightbar to blue to correspond with the color of the commands menu. Likewise all of the Dpad inputs do the same thing.

Share takes a screenshot of the game in Steam and gives yellow light to signify photography flashing.
R2 changes your lightbar to yellow to represent combat or when you’re driving.

R1 hold lets you use the binoculars with motion controls in the Scoping no light Action Set.
The touchpad Pauses the game (Xinput select button)
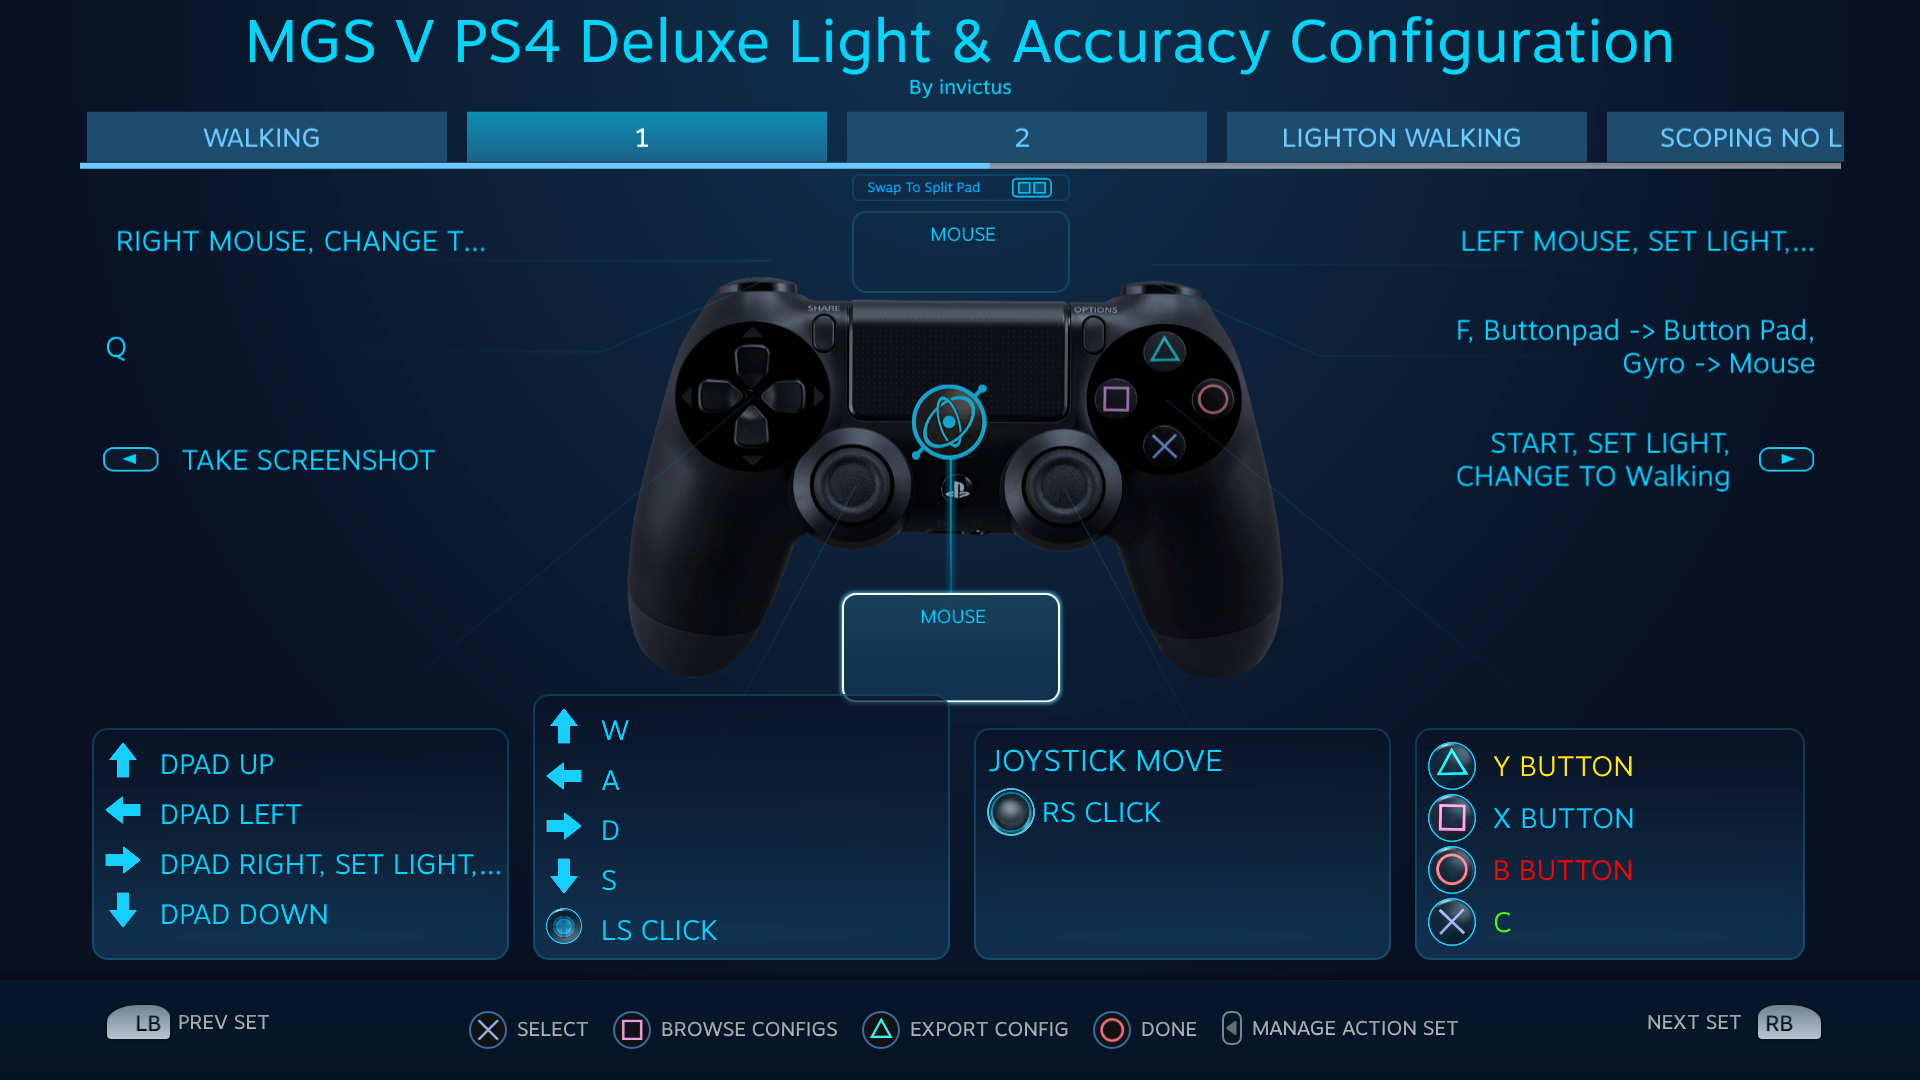
This Action Set is for when you aim with no flashlight on, which is also the only way to access this. You will be using motion to aim, which is a more accurate solution than relying on the right stick. When you let go of L2 you will automatically go back to the previous Action Set with no indication and no alert, it will feel like a completely seamless transition.
Changing your light here when you aim will change you to the 2 Action Set.

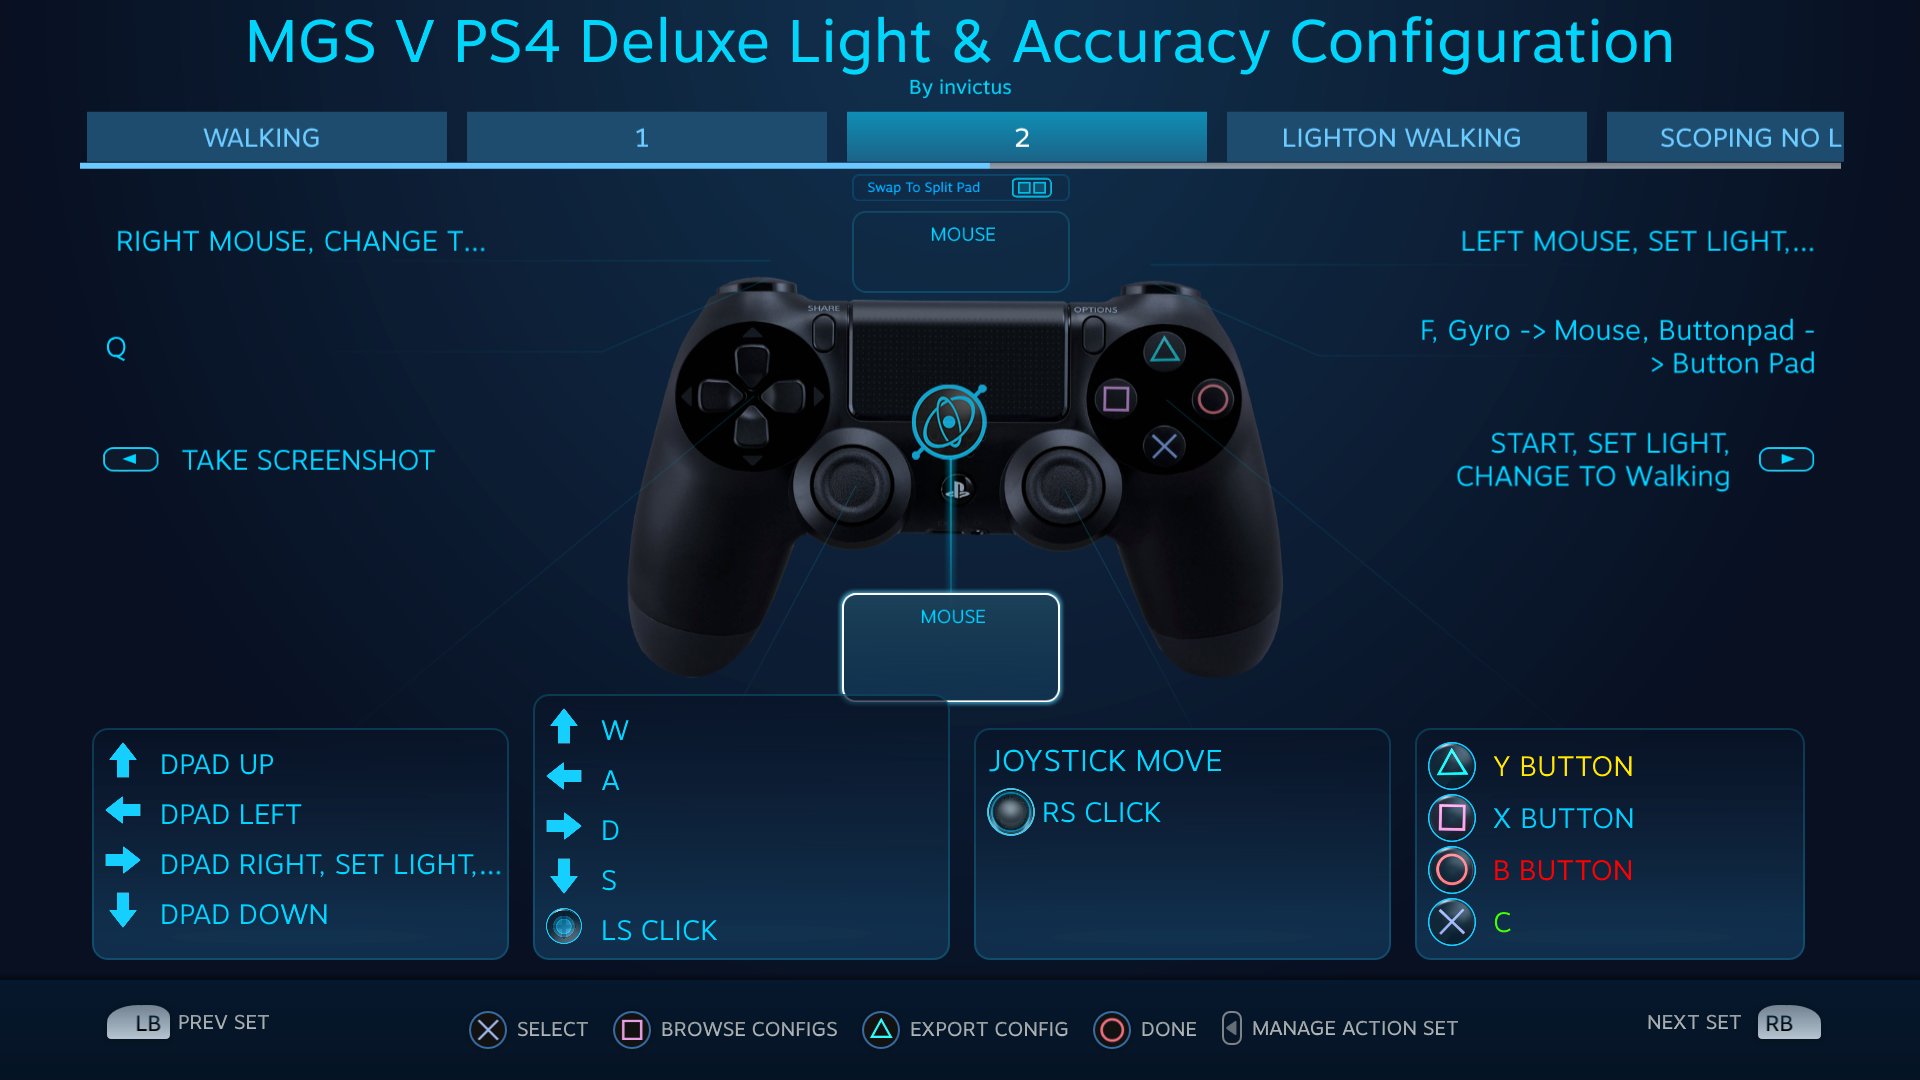
This Action Set is for when you aim with the flashlight on, and just as the 1 Action Set it is also the only way to access this. Everything is the same as 1 only the lightbar is yellow during access of this Action Set to make you feel more immersed into the game. You can turn the flashlight on or off as many times as you like which will switch between 1 and 2 Action Sets. You won’t notice this as there are no onscreen notifications or noises or any indicators, it all feels seamless and like the game was made this way.

The only purpose for this Action Set is to help ‘memorize’ if you had your flashlight on for your weapon when you go to aim.
Just like the 1 and 2 Action Sets this is meant to work with if the lightbar/flashlight are off when you press R1 while aiming your weapon.


Same description as above for Scoping No Light Action Set, only for when the lightbar and flashlight are set to on.
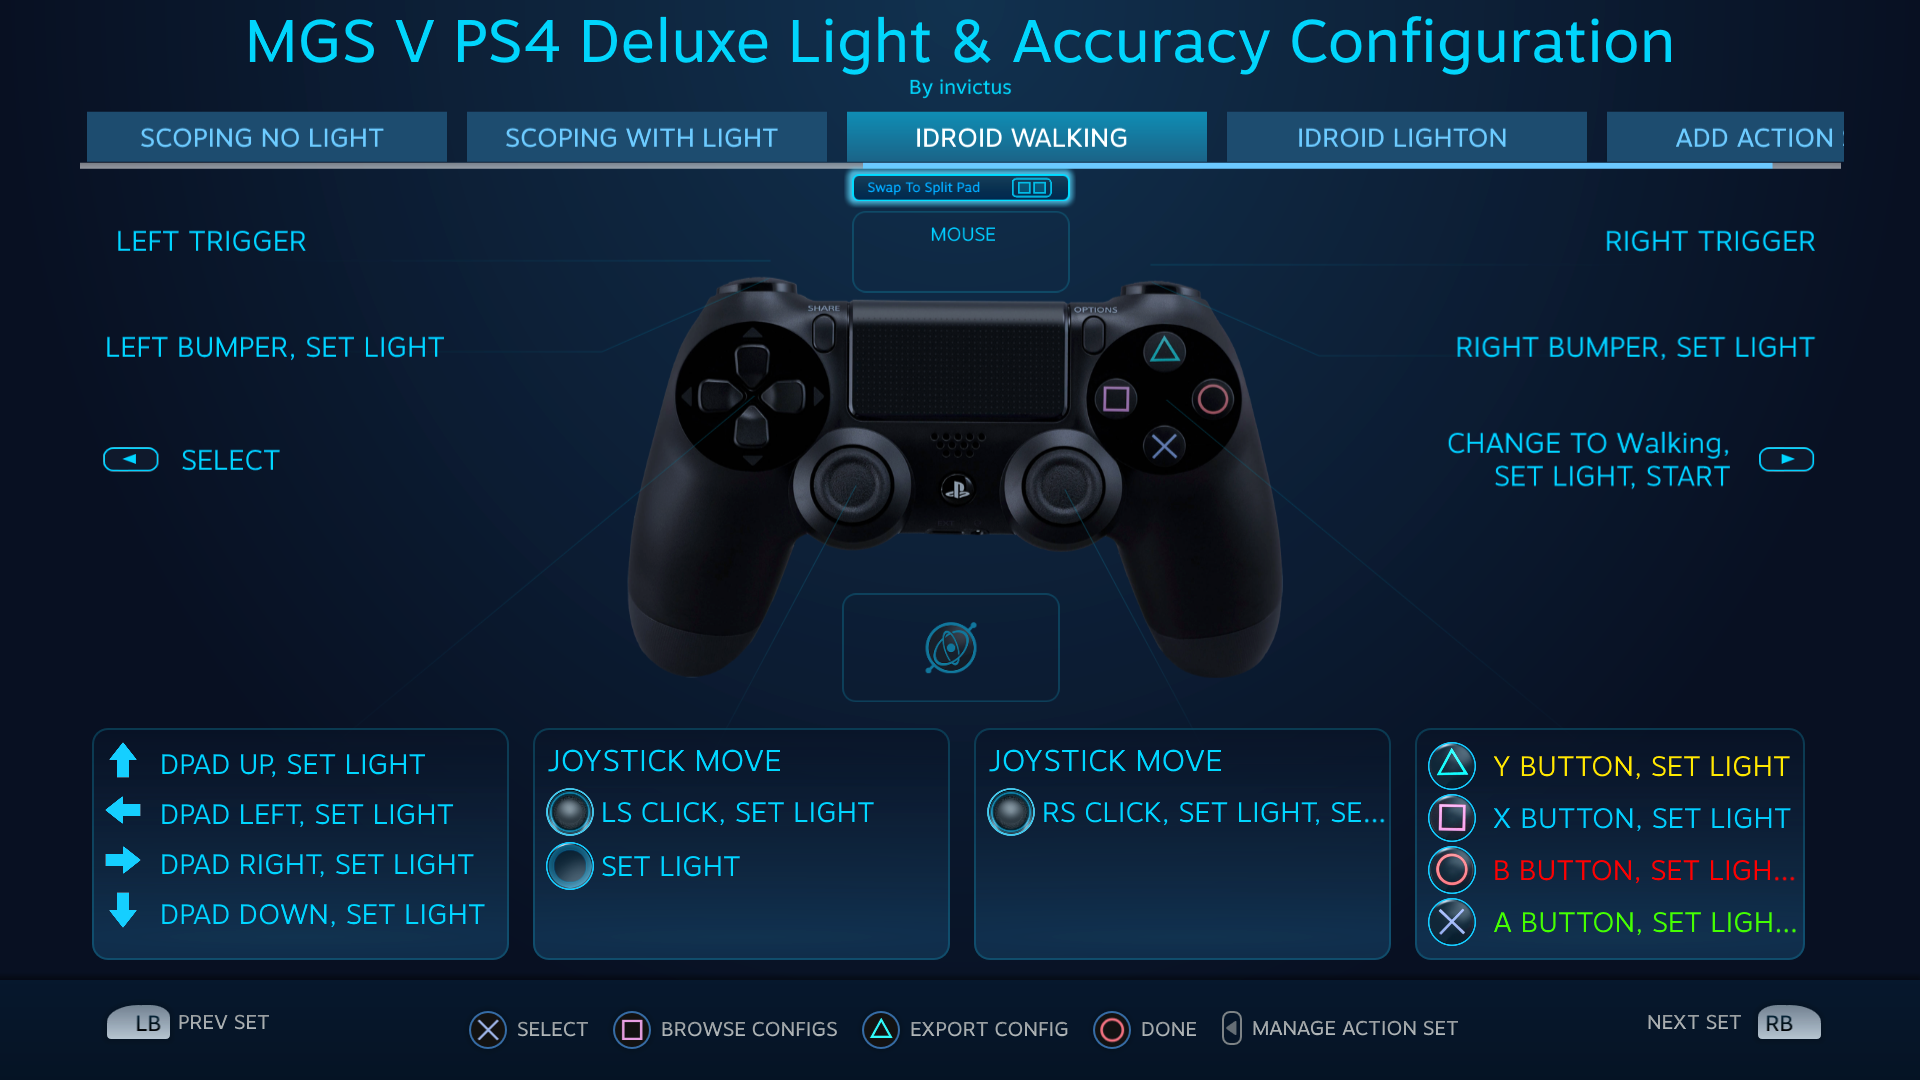
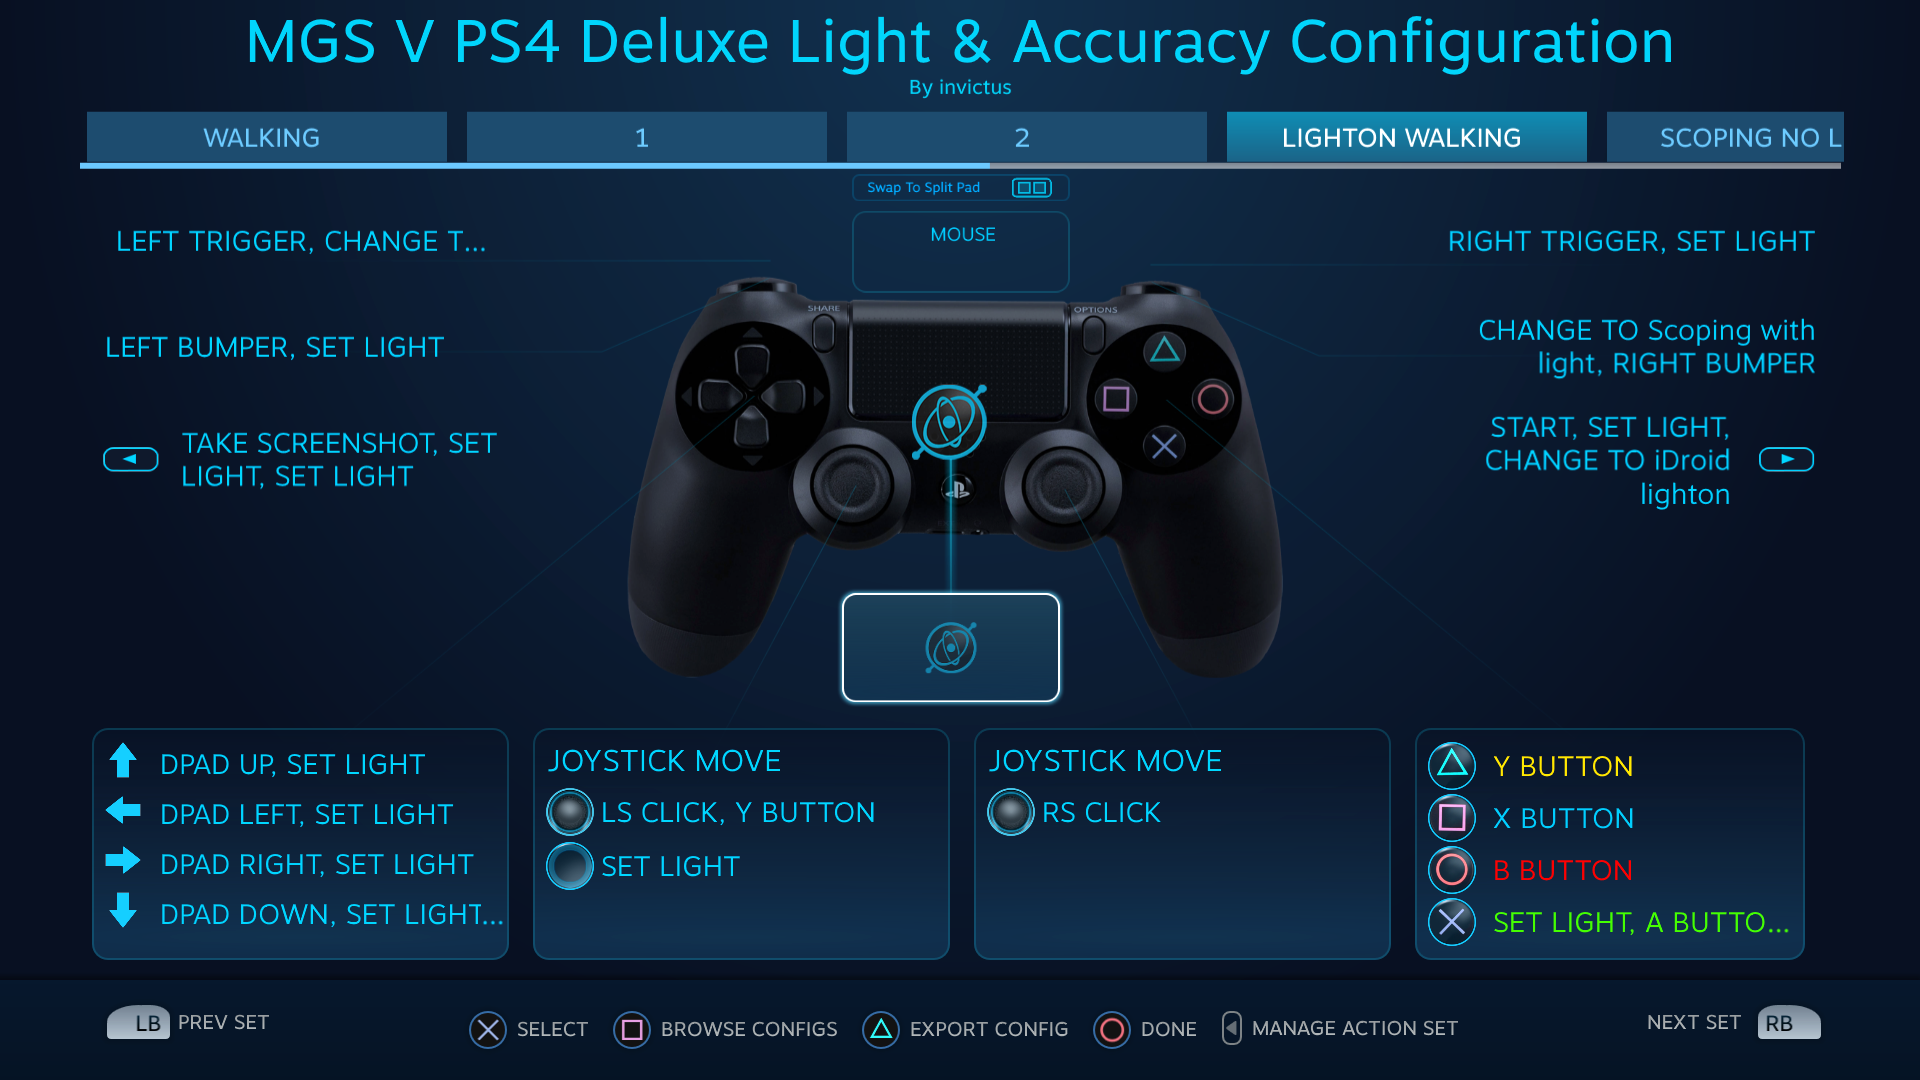
This Action Set is for when you press the Start button while in the Walking Action Set. You will notice the lightbar changes to turquoise while accessing this Action Set.
This is to correspond and as well help you feel immersed with the game. Touching the touchpad changes the light as well, and you can acces another color of light by clicking it too.

The Touchpad functions as the Mouse would here, so you can move it around as fast as you’d like with complete precision, making you feel like you actually have an iDroid in your hands. Every button you press during this Action Set dims the light for a moment to correspond with your navigation.


This Action Set functions the same exact way as iDroid Walking Action Set, only it’s for when you have turned your flashlight on while aiming your weapon.

If you are still in the iDroid Action Sets but not in the iDroid
Press Start, then O to back out and you will be in the correct Action Set.
This error happens because there is no way to detect if when you press O while in the iDroid Action Set if you are going back into combat or navigating the menus of the iDroid and wanted to go back a page/section.
If your lightbar is set to the wrong flashlight setting when aiming your weapon
Press Up on the Dpad to select the right setting for your flashlight to resolve this issue.

This error occurs if you press Right on the Dpad while aiming a weapon that doesn’t have a flashlight on it.
Enjoy!
I hope this guide did a great job at teaching you how to play with this configuration. Feel free to give input, and change the configuration to your own liking!

Now go enjoy it!
