Overview
Some things I have observed so far in the game that should help towards surviving longer and killing more hellspawn. Not a perfect guide, but hopefully at least somewhat helpful to players.
General Tips
Tips For Enemies & Fighting
-Always keep moving as much as you can. Be careful not to fall off the edges of the arena, and try your best to move vie strafing as much as you can as well. Moving makes the enemies have a harder time of running into you obviously, but you also have to make sure not to run into other enemies while trying to avoid some. Switching directions suddenly can help slow down large groups if done well enough.
-Spray Firing (Holding down mouse click) is good for sniping far off enemies and leading mobile enemies into the stream of daggers. Fairly weak to start off, with a small slow stream of daggers. As the run continues it should get stronger and quicker the more crystals you collect from enemies.
-Shot Firing (Clicking the mouse button quickly) is very helpful for taking out enemies closely trailing behind, or trying to get the last shot on an escaping enemy. It is not very accurate as the daggers have a large spread, but up close it will take out Greater Skulls and take out Spawner or Spider weak-points easier. Shot Firing also has the extra trick of Dagger Jumping, very similar to rocket jumping. It is tricky to get it right, but looking directly below you and shooting just as you jump seems to work best.

-Keep an ear out for certain sounds. You can very much hear what kinds of enemies are around you if you listen hard enough and try to realise which enemies make which noises. The closer enemies are behind you or around you, the louder their respective noises are. You can also tell when an enemy is dangerously close by how brightly orange they are glowing.
Tips For Collecting Power Crystals & Getting Stronger
-Shooting in any form stops Power Crystals from attracting to you, but using the Shot attack will actively push them away from you. Always be mindful of when you are shooting and when there are crystals scattered about, because accidentally blasting all crystals away from you can ruin your run.
-Greater Spider enemies seem to pull in and take other crystals away from you, so whenever you have the chance to take down the Greater Spiders, you should do it.
Enemies
This section will contain tips I have observed to help defend against some of the various enemies the game has.

Common Skulls:
-These very common enemies flood together in large groups when spawned by the tentacled spawners.
-They only seem to take 1-3 hit to destroy them, but due to them usually being small and elusive or large in numbers, they can be more dangerous than they appear.
-You can be aware of them nearing you, or following closely behind you, by being able to hear soft clackings and bumpings of the skulls bashing together.
-They do not drop anything.
Greater Skulls 1:
-These common enemies are singularly spawned by the lesser tentacled spawners along with the large groups of common skulls. The further you get and the longer you survive, more aggressive and far more dangerous Greater Skulls will spawn from the stronger tentacled spawners.
-They take around 3-6 hits it seems, but can usually be hidden in groups of Common Skulls, or floating at a distance somewhat minding their own buiseness. Make sure to keep your distance unless you are sure you can take them out, as their unpredictable movement can take you out.
-You can be aware of them nearing you, or following closely behind you, by being able to hear a sort of hissing or almost screaming noise. When things aren’t as quiet as they can be, make sure to check behind you and take a quick blast to make sure no Greater Skulls aren’t about to dismember you.
-These enemies drop regular power crystals, so at times it may even be suitable to farm them (Leave spawners alive) to help get crystals faster.
Greater Skulls 2 & Up:
-The bigger siblings to the level one Greater Skulls, with an attitude to match.These are spawned from the tentacled spawners with 2 weakpoints instead of one, along with many common skulls as well.
-These enemies seem to also take many more hits than usual, making them take even more precious time to defeat them. My guess on their health would be 8-12 hits, but I don’t really know. They will follow you closely once they notice you, and because of this you will have to take them out quickly. They will not give up chasing right behind you until you are dead.
-You can be aware of them nearing you, or following closely behind you, by being able to hear a sort of hissing or almost screaming noise. When things aren’t as quiet as they can be, make sure to check behind you and take a quick blast to make sure no Greater Skulls aren’t about to dismember you.
-These enemies drop regular power crystals, so at times it may even be suitable to farm them (Leave spawners alive) to help get crystals faster.
Greater Spiders:
-These large and distant enemies appear to be fairly non-threatening despite their hideous appearance, but do your best to take these down quickly because having them around only prohibits your ability further.
-They take very many hits, and also shield occasionally to avoid attacks. They will show up at the edges of the arena and stay there, but will shoot egg sacs eventually that over time spawn many smaller and faster moving spiderlings. Always make sure to destroy egg sacs, and to take out the source as well.
-You can be aware of them spawning in the arena by a sort of spidery clacking/crackling. Their spawning egg sacs may also make a noise, but I am not sure.
-They also seem to slow down and pull in other regualar power crystals as well, so do not leave them alive for too long or they will take other power crystals from you.
Spiderlings:
-The small green glowing skull-spiders spawned from the Greater Spiders egg sacs. They are barely a threat individually, but they come in decent sized groups, and only add to the chaos of enemies later on. Make sure to destroy the egg sacs before they even hatch.
-They only take 1 hit each, but there are usually many of them. They are also fast and move erratically, making it hard to predict how to avoid them with everything else out for your blood.
-The Spiderlings are easily noticeable from their bright green glow and their skittering across the arena towards you. You can hear them hatching when the egg sac bursts open.
Centipedes:
-A more uncommon enemy that only shows up farther into your runs. Not the most threatening of enemies, but the dust they kick up from spawning through the ground obscures possible enemies behind it, and it has many individual hitpoints that need to be destroyed before it is taken down.
-As said before, this enemy has very many individual hitpoints that need to be destroyed before the enemy will die away. It has many red hit-points on one side of its long body, and it is best to try and find the time to stand under them and spray at their underside if the opportunity arises.
-I’m not sure of any noises they make when near, but their large stature and exploding from the ground should be enough to know when one is around. It seems it is possible to go through/in between their limbs if need be, but always be cautious as to how close its main body is to you.
-Each weakpoint you destroy on them drops power crystals, these enemies are a great help to leveling up your weapon.
Tentacled Spawners:
-A farily simple type of ‘enemy’ that will spawn large groups of common skulls with a singular greater skull amidst them. It spawns one group of skulls almost immediately after it itself spawns, so keep that in mind.
-The spawners will show up around the edges of the arena to begin with, but as things get more heated larger spawners with more and more hitpoints arrive in various random areas of the arena. The larger spawners with more weakpoints will spawn much deadlier enemies along with them, so keep that in mind. They will have large red weak-spots just under where the tentacles are, and if the spawner has more than one weak-spot then *all* weak-spots need to be destroyed before it will die and stop spawning skulls.
-Spawners drop regular power crystals after being destroyed.
Hellish ‘Colloseums’ – Or Bosses – Or Whatever They Are…
-A very large sort of cage-like enemy that spawns very late in runs. It’s arrival will be accompanied with lots of background noise and an entire change in the sky, altering the black nothingness into a more terrifying animated swirl. It places itself in the middle of the arena, taking up a lot of space and being very intimidating. This thing seems to spawn other spawners and enemies, though not many survive long enough to observe it for long…
-It’s health is fairly large. It seems to have mutliple weakpoints near the top of its design, with each one taking multiple hits before being destroyed. It seems that all of the weak-points need to be destroyed before this thing goes down.
-After defeating it, you seem to get a small break to allow you to gain your bearings. Once it is gone, the sky goes black again, and the hellish enslaught ensues.
For now, these are all of the enemies that I can really describe and give tips on. Many of the different enemies seem to have different levels of difficulty the farther the run lasts.
Items & Weapon Levels
Power Crystal-
Just a regular crystal dropped by various enemies upon defeat. Adds to a ‘high score’ after your run to see how many you collected. When you get enough, you ‘level up’ your hand and get a very short slow-mo effect along with improved attack speed and strength. You can tell what level your daggers are by how many fingers your hand has outstretched.
-2 Fingers is what you start with. Fairly weak and slow daggers are what you cast.
-3 Fingers is the next step. Improving speed, strenght, and number of daggers cast is greatly needed to keep up with the hordes, though it hardly makes the challenge easier.
-4 Fingers makes your weapon scream with strength. Very fast, powerful, and with many daggers screaming out of your hand.
-Glowing Hand. When your hand glows, this is when you know you can finally cast homing daggers with your right-click. It seems to be the same strength as a level 4 hand, but with the added homing dagger ability.
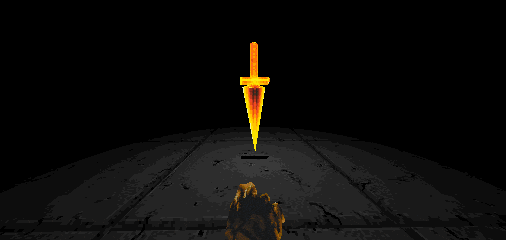
The Starting Dagger-
The sharp thingy you pick up to begin your fight. Occasionally changes color from a silver dagger to an orange dagger for unknown reasons. Perhaps it has to do with your level of progression, or your high-score, but it isn’t currently known.
I think that’s it really. The game isn’t a rougue-like.
Closing
So in closing, I very much like the game so far. I look forward to trying to improve muh skillz and get as far as I can.
Everything I have written is mostly from the observations I made whilst playing the game, with a few observations from watching some of the better runners as well.
I’m not too great at it yet, but I hope that at least some of my tips are able to help somebody enjoy the game more.
This is quite the gem of a game compared to a lot of the other things Steam is letting onto their storefront. I hope that it can continue get a stronger player base, and maybe even more content/sequels/level editors/maybe even eventually an open source version of the engine!
Can’t wait to see what secrets are uncovered in this game, and I can’t wait to see what more the devs can do in the future.